line View - Baby monitors Lionelo - Free user manual and instructions
Find the device manual for free line View Lionelo in PDF.

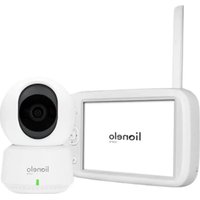
| Product type | Video baby monitor with rotating camera |
| Brand | Lionelo |
| Model | line View |
| Power supply | 5 V / 1 A adapter (included), USB-C cable (2.5 m) |
| Connectivity | Wi-Fi 2.4 GHz (5 GHz networks not supported) |
| Storage | microSD card (FAT32, up to 128 GB) or smartphone storage |
| Night vision | Yes, up to 8 meters |
| Motion tracking | Yes, camera automatically follows movements |
| Two-way audio | Yes, allows speaking to the child via the app |
| Motion and sound detection | Yes, notifications via the app |
| Sensors | Temperature and humidity (accuracy ±1-2°C) |
| Screen rotation | Video stream rotation by 180° |
| Lullabies | Play lullabies via the app |
| LED indicator | Solid red: no connection; Flashing red: waiting for Wi-Fi; Solid green: normal operation; Flashing green: waiting for pairing |
| Reset button | Yes, press for 5 seconds to restore factory settings |
| Mounting | Wall mount (kit included) or on optional stand (thread at base) |
| Kit contents | Camera, USB-C cable, 5V/1A adapter, silicone case, wall mounting kit |
| Operating temperature | From -20 °C to 50 °C |
| Safety | Do not let children play with it; keep cords out of reach; do not use outdoors |
| Maintenance and cleaning | Clean with a soft, dry cloth. Do not use abrasive products. |
| Spare parts and repairability | Adapter and USB-C cable available; contact customer service |
Frequently Asked Questions - line View Lionelo
User questions about line View Lionelo
0 question about this device. Answer the ones you know or ask your own.
Ask a new question about this device
Download the instructions for your Baby monitors in PDF format for free! Find your manual line View - Lionelo and take your electronic device back in hand. On this page are published all the documents necessary for the use of your device. line View by Lionelo.
USER MANUAL line View Lionelo
natural_image
Illustration of a lionelo robot with green and white facial features (no text or symbols on the robot body)Apple Store:

Google Play:

EN
Dear Customer!
In case of any questions or comments on the purchased product, please contact us: help@lionelo.com
Producer:
BrandLine Group Sp. z o. o.
RF output power: 18.61 dBm (2.4 GHz WiFi), 6.59 dBm (Bluetooth).
Card format: FAT32
Maximum capacity of microSD card: 128 GB
Operating temperature range: -20°C - 50°C
IMPORTANT INFORMATION
- This product is not a toy. Do not let children play with it.
-
This product is only suitable for use in dry places. Do not use it outside or on a wet surface.
-
Do not touch the product with wet hands.
- If the product does not work as it should or has been dropped or flooded, contact the manufacturer's service department.
- Use only the power adapter included in the package.
- Do not place the product near a stove or other heat sources.
- Installation must be undertaken by an adult only. Keep smaller parts of the set away from the child.
- The electronic nanny is not a substitute for proper parental care and attention.
- Do not place the product and its cables in the playpen or within reach of the child. Place them at least 1m away.
- Do not place the product near water or a fire source.
- Do not touch the plug contacts with sharp or metal objects.
- Stay at least 20 cm from the device.
Attention! Plug on the power supply cord is used as the disconnect device for the camera- during installation, ensure that the socket-outlet is easily accessible.
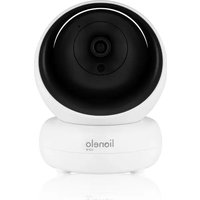
THE SET
-
Rotating camera
-
USB-C cable (2.5 m)
- Adapter 5V / 1A
- Silicone case (two parts)
- Wall installation set (installation element + 2 studs + 2 screws)
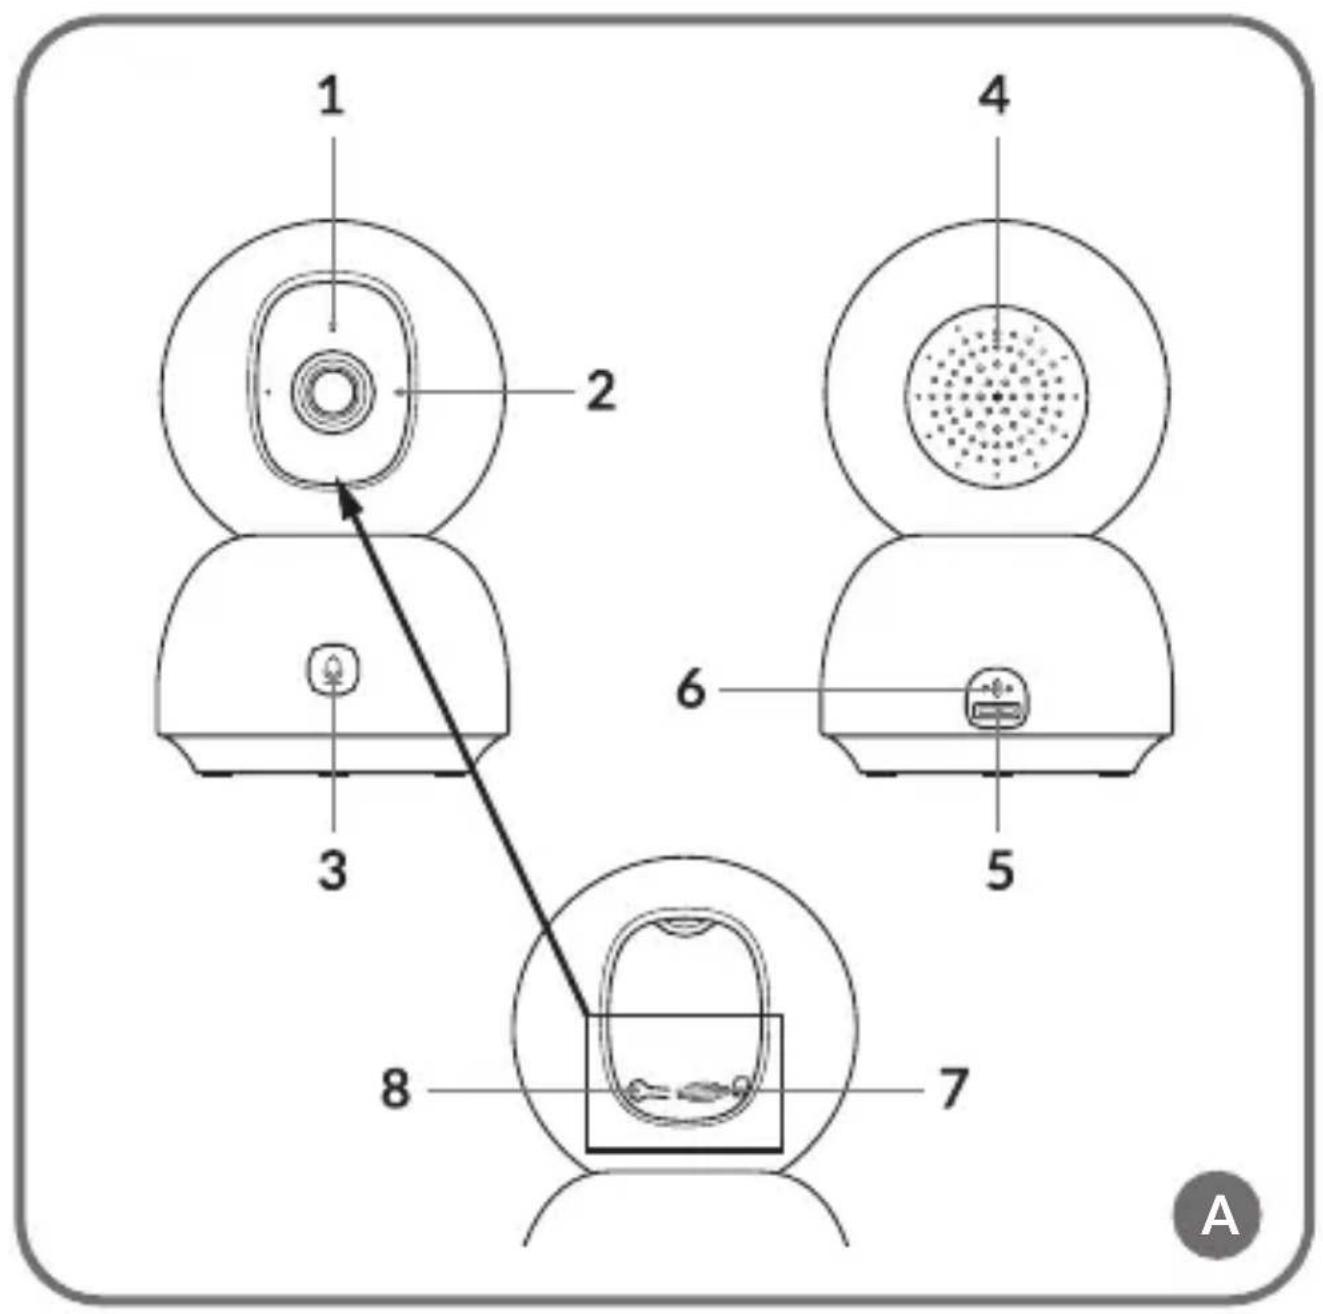
PART DESCRIPTION (FIG. A)
- Indicator light
- Microphone
- Connection button
- Speaker
- USB-C port
- Temperature and moisture sensor
- MicroSD card slot
- Reset button
LAUNCHING THE CAMERA AND APP
Search for and download the Lionelo Smart app from the iOS Store / Google Play, or scan the QR code at the beginning of the instruction manual.
Note! Only 2.4 GHz Wi-Fi networks are supported. 5 GHz networks are not supported.
Note! The camera can only be added to one account in the
app. To add a camera to another account, it must be removed from the previous one.
- Register with the app using your email address. Accept the terms of use.
- Choose a username and password, then click “Con rm.” Enter the code sent to your email address.
- During setup, posi on the camera as close as possible to the router's Wi-Fi to speed up the pairing process.
- Connect the camera to the power supply and USB cable. Press the connec on bu on (3, g. A).
- In the app, select the “Add new device” op on.
- Reset the camera by pressing and holding the reset button (8, g. A) for 5 seconds.
- Select the Wi-Fi network you want to connect to and enter the password.
- The app will display a QR code. Place your phone at a distance of about 20 cm from the camera. Wait for the camera to beep. The setup should complete in about 30 seconds.
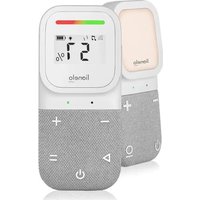
INDICATOR LIGHT
- The lamp lights steadily in red – no connec on.
- The lamp blinks red – the camera is wai ng for a Wi-Fi
connection.
- The lamp lights steadily in green – the camera is working properly.
- The lamp blinks green – the camera is waiting for a connection to the app.
DEVICE FUNCTIONS
The device is controlled by an app.
- The app allows the nanny to play a selected melody.
- Video recordings and photos are saved on the user's phone, or on a microSD card if inserted into the camera.
- The app allows two-way audio communication with the child.
- On-screen video rotation – rotate the video stream 180^ at any time.
- Motion and sound sensors will notify you when motion or sound is detected in the room.
- The temperature and humidity sensor (6, fig. A) will notify you if the temperature reading or ambient humidity level exceeds the values set in the app. Note! The temperature reading may be overestimated by about 1-2 degrees because the camera emits heat.
- Day / Night – this function provides up to 8m visibility at night.
- Motion tracking – the camera follows the movements of a
person or moving objects.
A full description of the app's functions can be found on Lionelo's website.
RESET BUTTON
Press and hold the reset button (8, fig. A) for 5 seconds to reset the camera and restore factory settings.
INSTALLATION
- Mark the place on the wall where you want to insert the wall studs. If necessary, use an installation piece.
- Drill a hole with a tool suitable for the selected surface, then insert the wall studs. Tighten the installation element with screws.
- Place the camera on the wall and position it to get the best viewing angle.
Note! The thread in the base of the camera also allows you to install it on a special mounting bracket (sold separately).
TROUBLESHOOTING
| Problem/question Possible solution | |
| The camera is not visible in the app. | Check Wi-Fi signal strength or place the camera close to the router during setup. Reset the camera and add it again. |
| The camera is still in the list of devices in the app after a reset. | Resetting only changes the camera's settings. The camera must also be deleted in the app. |
| How do I change the Wi-Fi network the camera is connected to? | Remove the camera from the device list in the app, then reconfigure it by connecting to a different network. |
| The camera does not identify the microSD card. | It is recommended to insert a microSD card when the camera is off. Make sure the card is available and has FAT32 format and a maximum capacity of 128 GB. Check the Internet connection. |
| No notifications in the app. | Check that the app is working properly and notifications have been enabled. Check the notification settings on your phone. |
| The camera does not want to connect to the app. A message is displayed, according to which the camera was previously paired. | The camera can only be added to one account in the app. To add a camera to another account, it must be removed from the previous one. |
Photos are for reference only, the actual appearance of the products may differ from that shown in the photos.
PL
Drogi Kliencie!
INFORMATIE OVER HET APPARAAT
Frequentie: 2.412 - 2.472 GHz (2.4 GHz Wi-Fi),
2.402 - 2.480 GHz (Bluetooth).
EN: The product complies with the requirements of European Union directives. In accordance with Directive 2012/19/EU, this product is subject to separate collection. The product should not be disposed of with municipal waste as it may pose a risk to the environment and human health. Return the used product to the recycling centre for electrical and electronic equipment.
EN: Simplified EU declaration of conformity
BrandLine Group Sp. z o. o. hereby declares that the “BABYLINE VIEW” product complies with the directive: 2014/53/EU - RED Directive, 2011/65/EU - RoHS Directive. Full content of EU declaration of conformity is available on the following website: