PBC17-13475 - Pets PETSAFE - Free user manual and instructions
Find the device manual for free PBC17-13475 PETSAFE in PDF.

| Product Type | Ultrasonic outdoor bark control system |
| Brand | PetSafe |
| Model | PBC17-13475 |
| Power Supply | 1 alkaline 9V battery (not included) |
| Battery Life | Approximately 2 months depending on use and number of barks |
| Detection Range | Up to 15 meters |
| Technology Used | Ultrasonic emission (inaudible to humans) |
| Built-in Timers | 2 programmable (On/Off) per 24-hour period |
| Display | LCD screen |
| Indicator Light | Tri-color LED: green (battery OK), red (low battery), orange (timer active) |
| Weather Resistance | Yes (rain resistant, do not immerse) |
| Use | Outdoor only |
| Mounting | Integrated metal hook for hanging |
| Compatibility | Dogs only (do not use on aggressive or deaf dogs) |
| Dimensions (estimated) | 12 x 8 x 4 cm |
| Weight (estimated) | 180 g (battery included) |
| Maintenance | Clean with a damp cloth, no solvents. Remove battery before cleaning. |
| Safety | Do not use on aggressive dogs; keep out of reach of children; do not expose to water or fire. |
| Warranty | 3-year limited (non-transferable) |
| Certifications | CE, IC, ACMA |
Frequently Asked Questions - PBC17-13475 PETSAFE
User questions about PBC17-13475 PETSAFE
0 question about this device. Answer the ones you know or ask your own.
Ask a new question about this device
Download the instructions for your Pets in PDF format for free! Find your manual PBC17-13475 - PETSAFE and take your electronic device back in hand. On this page are published all the documents necessary for the use of your device. PBC17-13475 by PETSAFE.
USER MANUAL PBC17-13475 PETSAFE
protect. teach. love.
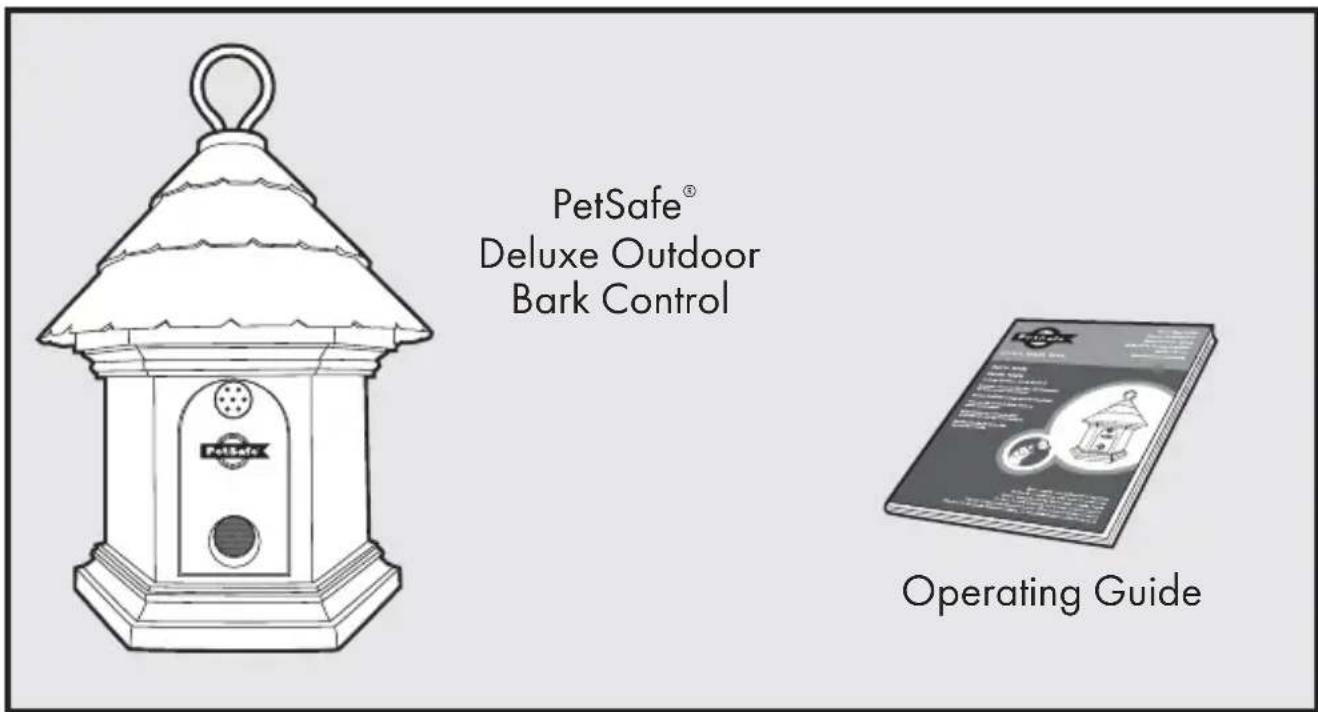
Operating Guide
Deluxe Outdoor Bark Control
Please read this entire guide before beginning
IMPORTANT SAFETY INFORMATION
Explanation of Attention Words and Symbols Used in this Guide

This is the safety alert symbol. It is used to alert you to potential personal injury hazards. Obey all safety messages that follow this symbol to avoid possible injury or death.
⚠ WARNING
WARNING indicates a hazardous situation which, if not avoided, could result in death or serious injury.
CAUTION
CAUTION, used with the safety alert symbol, indicates a hazardous situation which, if not avoided, could result in minor or moderate injury.
CAUTION
CAUTION, used without the safety alert symbol, indicates a hazardous situation which, if not avoided, could result in harm to your pet.
WARNING
- Risk of explosion. Do not short circuit, mix old and new batteries, dispose of in fire, or expose to water. When batteries are stored or disposed, they must be protected from shorting. Dispose of spent batteries properly.
- Not for use with aggressive dogs. Do not use this Product if your dog is aggressive, or if your dog is prone to aggressive behaviour. Aggressive dogs can cause severe injury and even death to their owner and others. If you are unsure whether this product is appropriate for your dog, please consult your veterinarian or certified.
CAUTION
- Humans cannot hear the ultrasonic sound; however, precautions should be taken when preparing the Deluxe Outdoor Bark Control for use.
- Keep at arms length away from the human ear to avoid hearing damage if a dog begins barking while you are setting up, mounting, or hanging the Outdoor Bark Control.
- Humans should avoid standing very close to the Deluxe Outdoor Bark Control when it is turned on.
- This device is intended for use only with dogs. Never attempt to use it for any purpose not described in this manual.
- For outdoor use only. Please visit our website or contact the Customer Care Centre for information on PetSafe® Bark Control products appropriate for indoor use.
- The Deluxe Outdoor Bark Control is not a toy. Keep it out of the reach of children. Use it only for its bark control purpose.
Thank you for choosing the PetSafe® brand. You and your pet deserve a companionship that includes memorable moments and a shared understanding together. Our products and training tools promote a lifestyle of protection, teaching, and love - essentials that influence memories for a lifetime. If you have any questions about our products or training your pet, please visit our website at www.petsafe.net or contact our Customer Care Centre. For a listing of Customer Care Centre telephone numbers in your area, visit our website at www.petsafe.net.
To get the most protection out of your warranty, please register your product within 30 days at www.petsafe.net. By registering and keeping your receipt you will enjoy the product's full warranty and, should you ever need to call the Customer Care Centre, we will be able to help you faster. Most importantly, your valuable information will never be given or sold to anyone. Complete warranty information is available online at www.petsafe.net.
Table of Contents
Components....4
Features. 4
Possible Uses for the Deluxe Outdoor Bark Control 4
How the System Works 5
Key Definitions 5
Installation and Setup 6
To Insert and Remove the Battery 6
Three Colour LED 7
Operating the Clock/Timers....7
LCD Display 7
Set the Time Format 8
Set the Clock....8
Set Timer 1 OFF/ON 9
Set Timer 2 OFF/ON 9
Reset the Clock and Timers 10
Test the Deluxe Outdoor Bark Control 10
What to Expect During Use of the Deluxe Outdoor Bark Control 11
Regular Maintenance ....11
Frequently Asked Questions....11
Troubleshooting....12
Compliance 12
Battery Disposal.... 12
Terms of Use and Limitation of Liability.... 13
Warranty....14
Components
Features
• Built in timer for two OFF/ON presets
• Uses ultrasonic sound to disrupt nuisance barking
• Detects barking up to 15 m away
• Durable and weatherproof
- Three colour LED shows good or low battery, is an indicator for the Timer 1 and Timer 2 OFF, and indicates ultrasonic stimulations
Possible Uses for the Deluxe Outdoor Bark Control
- Stop your barking dog
- Stop your neighbours' barking dogs
- Stop barking at specific times of day
- Train puppies not to bark
• Deter barking dogs on camping trips
How the System Works
When the PetSafe® Deluxe Outdoor Bark Control is within range of a barking dog, an internal microphone picks up the sound and the unit is automatically activated. The Deluxe Outdoor Bark Control emits an ultrasonic sound. The ultrasonic sound can be heard by dogs but is silent to most humans. Startled by the high-pitched sound that is safe and effective, the dog should stop barking as it will associate its bark with this unpleasant noise. When the dog stops barking the ultrasonic sound also stops. Programmable timers let you curb barking at certain times of day, for example, after school as children pass by. Setting the timer(s) also helps conserve battery life. The Deluxe Outdoor Bark Control includes a timer for two OFF/ON presets. It is effective up to 15 m. Note: If the dog is deaf or hearing impaired, he may not react to the Deluxe Outdoor Bark Control.
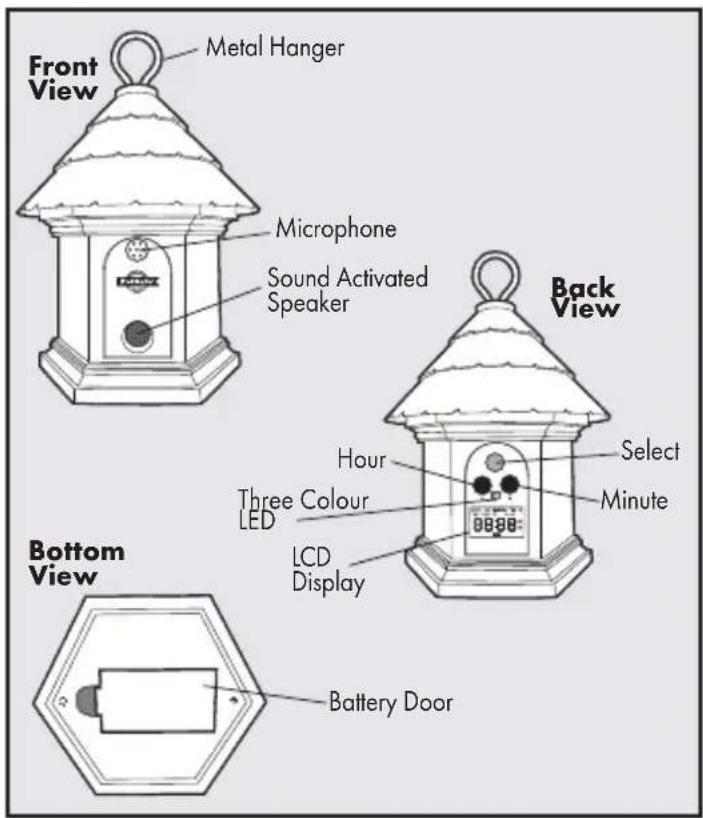
Key Definitions
Front
Metal Hanger: For hanging the Deluxe Outdoor Bark Control.
Microphone: Used to detect barking.
Sound Activated Speaker: Produces the ultrasonic sound.
Back
Select Button: Used to rotate through and select a menu item.
Hour Button: Used to set the time format, clock, Timer 1, and Timer 2 hour(s).
Minute Button: Used to set the time format, clock, Timer 1, and Timer 2 minute(s).
Three Colour LED: Shows good or low battery, is an indicator for the Timer 1 and Timer 2 OFF, and indicates ultrasonic stimulations.
LCD Display: Used to show the time format, clock, timers, test, and reset functions.
Bottom
Battery Door: Used to enclose the Battery.
Installation and Setup
The Deluxe Outdoor Bark Control should be placed facing the dog and within range of the dog. The unit is designed with provisions for hanging or it can also stand alone and should be positioned at a height of no more than 1.5 m. It can be placed in a tree, hanging from a pole, on a fence post, etc. For best results, the area between the Deluxe Outdoor Bark Control and the dog should be free of any large obstacles.
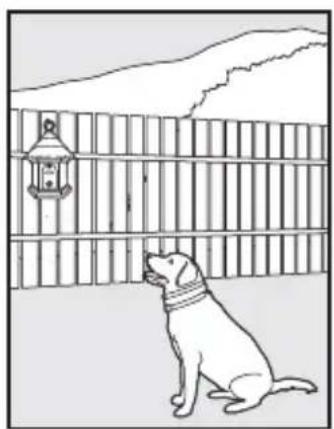
natural_image
Line drawing of a dog sitting near a wooden fence with a lantern in the background (no text or symbols)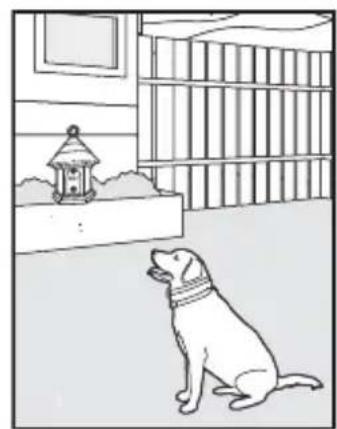
natural_image
Line drawing of a dog sitting in a room with a lantern and bookshelf (no text or symbols)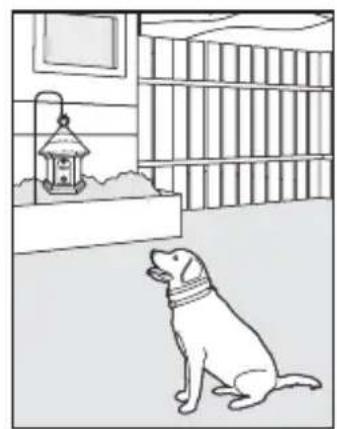
natural_image
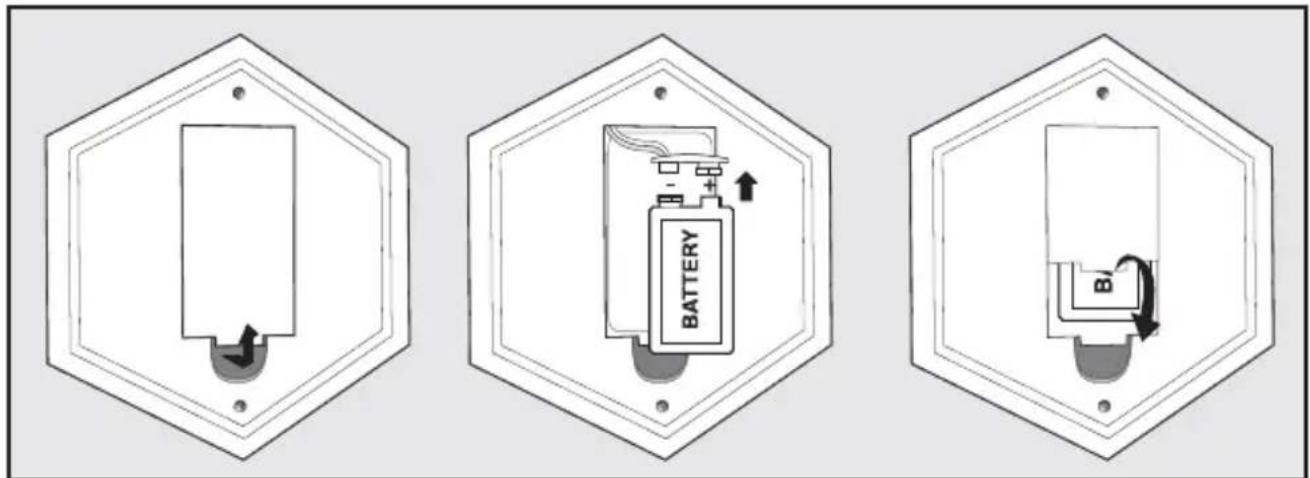
Line drawing of a dog sitting in a room with a lantern and bookshelf (no text or symbols)To Insert and Remove the Battery
Important: When inserting or removing battery, setting the clock, or programming the timer(s), no dog(s) should be within range of the unit to ensure they don't receive a stimulation during set-up.
- The Deluxe Outdoor Bark Control utilizes a replaceable 9-volt battery (not included). The battery door is located on the bottom of the unit. Pull the battery door open.
- Insert the 9-volt battery with the positive side oriented as shown.
- To replace the battery door, position the top edge and then snap the bottom of battery door into place.
- After installing the battery, the Deluxe Outdoor Bark Control will be ON and will begin to detect and correct barking. The LCD display will be blank with the exception of the battery indicator until the clock and timers are set.
Note: Ensure a working 9-volt battery is installed in the battery compartment.
Battery Life
We recommend using the built in timers to conserve battery life. Depending on how often the dog barks and whether the timers are used, average battery life can be up to 2 months.
⚠ WARNING
Do not attempt to cut into or pry open the battery. Be sure to discard the spent battery properly.
Three Colour LED
The three colour LED indicator shows good or low battery and indicates when a timer is in use but OFF. Good battery equals 1 fl ash every 5 seconds with the green LED. Low battery equals 3 fl ashes every 5 seconds with the red LED. The orange LED indicates Timer 1 and/or Timer 2 is set and the unit is OFF. When in test mode, the red LED will fl ash.
Operating the Clock/ Timers
The Deluxe Outdoor Bark Control includes a timer with two OFF/ON settings per 24 hour period. Using the timer extends battery life and also helps prevent dogs from becoming desensitized to the ultrasonic sound.
Note: Before using the automatic timer the clock must be set. Once the battery is installed, the Deluxe Outdoor Bark Control is always ON unless a timer is set or the battery is removed.
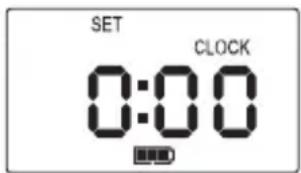
LCD Display
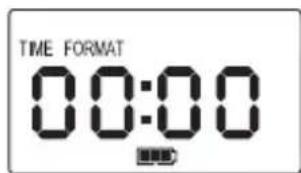
Use the LCD display to set the time format, clock, and timers for the Deluxe Outdoor Bark Control. Each press of the Select button cycles the LCD display through the available menu options, in the below order. The LCD display also shows battery life.
Time Format: Set clock to 12 hour or 24 hour time format
Set Clock: Set clock hour and minute using the H and M buttons
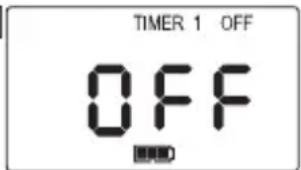
Timer 1: Set Timer 1 OFF or ON
Timer 2: Set Timer 2 OFF or ON
Reset (rSt): Reset the clock and timer(s)
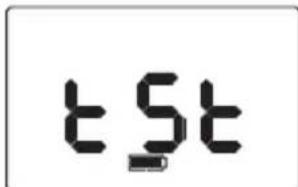
Test (tSt): Test the unit
Note: After 1 minute of no push-button activity, the LCD display will appear blank. Press any button for the clock to display or to review menu options.
Set the Time Format
- To begin TIME FORMAT mode, press and release the Select button once.
- Press and release the H button for 12 hour time format or the M button for 24 hour time format.
-
Press the Select button to confirm the time format setting.
-
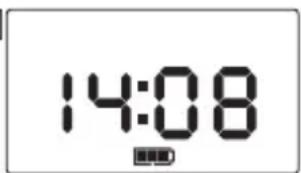
After confi rming the TIME FORMAT, the Deluxe Outdoor Bark Control will automatically switch to SET CLOCK mode in the LCD display menu (1) and you can begin to adjust the time.
Set the Clock
After you have set the time format, you are ready to set the clock time.
-
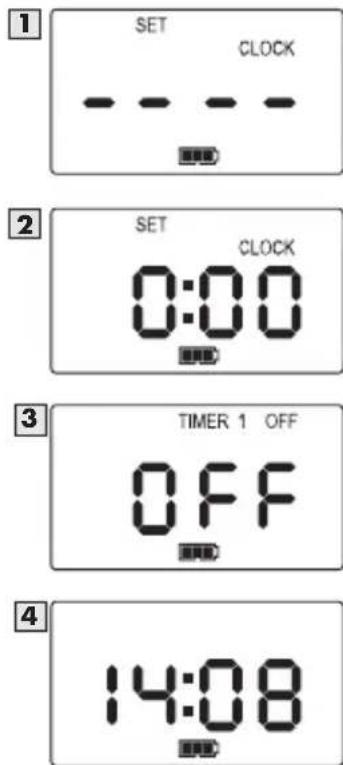
Press and release the Select button until SET CLOCK appears in the LCD display (1). Note: After setting the time format, the menu will automatically default to SET CLOCK.
Once you have pressed either the H button or M button, the LCD display will change (2) and you can begin to adjust the time. -
Press and release the H button to the correct hour (if in 12 hour time format, be sure to note the correct AM/PM setting).
-
Press and release the M button to the correct minutes. Note: Pressing and holding the H or M button will advance the digits faster.
-
Press and release the Select button to confirm the time.
-
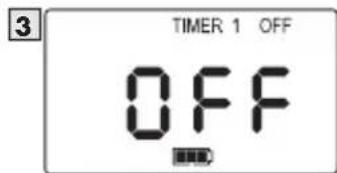
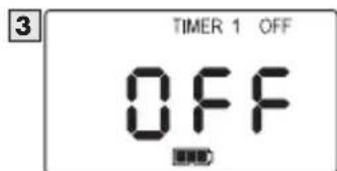
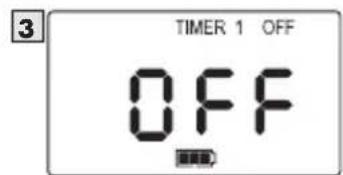
After confi rming the time, the Deluxe Outdoor Bark Control will automatically switch to TIMER 1 OFF mode in the LCD display menu (3).
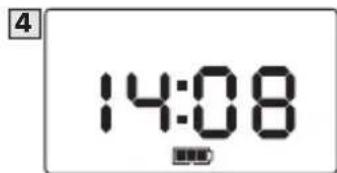
-
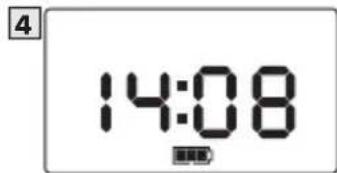
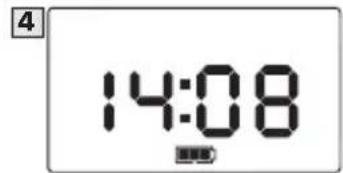
If you choose not to set Timer 1 after setting the clock, press and release the Select button until the LCD display returns to the clock (4).
-
If you choose to use Timer 1 see the "Set Timer 1 OFF/ON" section. When using Timer 1 (and Timer 2 if desired) the OFF/ON settings will repeat daily. Note: The clock and timers must be reprogrammed when the battery is replaced.
Set Timer 1 OFF/ON
After you have set the clock you are ready to program timed events.
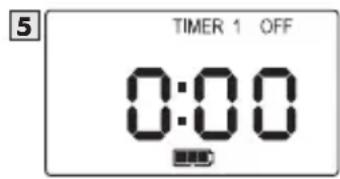
- Press the Select button until TIMER 1 OFF (3) appears in the LCD display. Note: After setting the clock, the LCD display menu will default to TIMER 1 OFF mode.
- Press and release the H button once and "0:00" will flash (5). Note: In 12 hour time format "12:00AM" will flash.
- Press and release the H button to the correct hour (if in 12 hour time format, be sure to note the AM/PM setting).
- Press and release the M button to the correct minutes.
- Press and release the Select button to confirm the TIMER 1 OFF time.
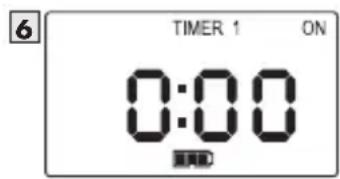
- After setting the TIMER 1 OFF time, the LCD display menu will automatically default to TIMER 1 ON mode. This step must be completed for the Timer 1 sequence to be set.
- Press and release the H button once and "0:00" will flash (6). Note: In 12 hour time format "12:00AM" will flash.
- Press and release the H button to the correct hour (if in 12 hour time format, be sure to note the AM/PM setting).
- Press and release the M button to the correct minutes.
- Press and release the Select button to confirm the TIMER 1 ON time.
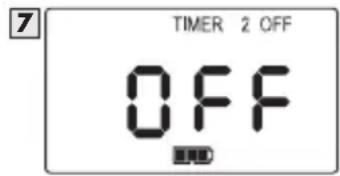
- After confi rming the time, the Deluxe Outdoor Bark Control will automatically switch to TIMER 2 OFF mode in the LCD display menu (7). If you choose not to set Timer 2 after setting Timer 1, press and release the Select button until the LCD display returns to the clock (4).
- If you choose to use Timer 2 see the "Set Timer 2 OFF/ON" section. Note: If you have scheduled Timer 1, the Deluxe Outdoor Bark Control will continue to turn OFF/ON daily until the time is reset or the battery is replaced.
Set Timer 2 OFF/ON
- Press the Select button until TIMER 2 OFF (7) appears in the LCD display. Note: After setting Timer 1, the LCD display menu will default to TIMER 2 OFF mode.
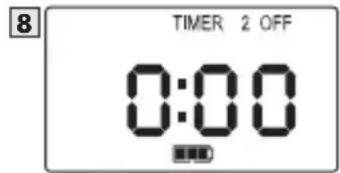
- Press and release the H button once and "0:00" (8) will flash. Note: In 12 hour time format "12:00AM" will flash.
- Press and release the H button to the correct hour (if in 12 hour time format, be sure to note the AM/PM setting).
- Press and release the M button to the correct minutes.
- Press and release the Select button to confirm the TIMER 2 OFF time.
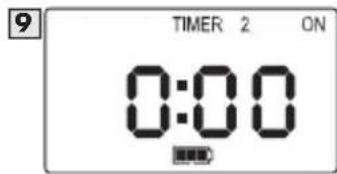
- After setting the TIMER 2 OFF time, the LCD display menu will automatically default to TIMER
2 ON mode. This step must be completed for the Timer 2 sequence to be set.
-
Press and release the H button once and "0:00" will flash (9). Note: In 12 hour time format "12:00AM" will flash.
-
Press and release the H button to the correct hour (if in 12 hour time format, be sure to note the AM/PM setting).
-
Press and release the M button to the correct minutes.
-
Press and release the Select button to confirm the TIMER 2 ON time.
-
After confi rming the time, the Deluxe Outdoor Bark Control will automatically switch to RESET mode in the LCD display menu. Continue to press and release the Select button until the LCD display returns to the clock (3). If you have scheduled Timer 2 it will continue to turn OFF/ON daily until the time is reset or the battery is replaced.
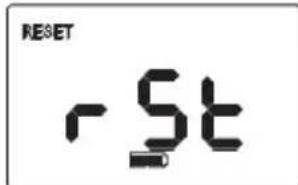
Reset the Clock and Timers
-
Press and release the Select button until "rSt" fl ashes in the LCD display.
-
Press and hold the H button for 5 seconds. Continue to hold the H button and then press and release the M button.
-
All times are now reset.
Note: To keep the clock time and reset only the Timer 1 and/or Timer 2 times, you do not have to reset all times. Press and release the Select button to scroll through the LCD display menu options until you arrive at the timer you wish to reset. Press the H or M buttons to change the time. Press the Select button to confirm the updated time. Press and release the Select button until the LCD display menu returns to the clock.
Test the Deluxe Outdoor Bark Control
Important: When testing the Deluxe Outdoor Bark Control no dog(s) should be within range of the unit to ensure they don't receive a stimulation while testing.
-
Press and hold the H and M buttons simultaneously for 3 seconds.
-
The Deluxe Outdoor Bark Control will display "tSt" to indicate it is in Test Mode.
-
Say the word "Bark" loudly or blow into the microphone located on the top front of the unit.
-
The Deluxe Outdoor Bark Control will detect this sound and emit 3 short beeps and flash the red LED to show it is working.
-
You may repeat steps 3 - 4 if necessary to ensure the unit is working.
-
After 30 seconds the Test Mode will automatically time-out and the unit will return to normal operation. You may also press and release the Select button to end the Test Mode.
Precautions should be taken when testing the Deluxe Outdoor Bark Control. Avoid repeating the Test Mode for long periods of time. See Important Safety Information on page 2 for more details.
What to Expect During Use of the Deluxe Outdoor Bark Control
Place the Deluxe Outdoor Bark Control within range of the dog with the unit turned ON. Most dogs will understand very quickly that the Deluxe Outdoor Bark Control is disrupting their urge to bark and will relax and stop barking.
You should notice a reduction in the dog's barking within the first two weeks that the Deluxe Outdoor Bark Control is in use. Please note this product may not work on deaf or hearing impaired dogs.
Excessive barking can cause a real strain on your relationship with your pet, as well as cause disruptions in your neighbourhood. Please visit our website to view other customized solutions to the problem of too much barking.
Regular Maintenance
- Remove the battery before cleaning.
- Clean the Deluxe Outdoor Bark Control with a damp cloth.
- Do no use any kind of spray chemicals or solvent to clean.
- Do not immerse in water or any other liquid.
Note: The Deluxe Outdoor Bark Control is weatherproof. However, if water enters into the microphone it may disrupt the unit's operation. After the microphone is dry the unit will resume working properly.
What is the range for the Deluxe Outdoor Bark Control?
The Deluxe Outdoor Bark Control detects barking and sends the ultrasonic sound up to 15 m.
Can I use the Deluxe Outdoor Bark Control indoors?
No, we do not recommend using the product indoors. The PetSafe ^® Indoor Bark Control is an ultrasonic product that is safe for indoor use. For product information, please visit our website at www.petsafe.net or call our Customer Care Centre.
Can a dog become desensitized to the ultrasonic sound?
There are some situations where dogs become desensitized. To avoid this, use the timers to turn the Deluxe Outdoor Bark Control ON during periods of unwanted barking (i.e. leave the unit off when you are away).
Troubleshooting
The green LED light stopped fl ashing and there is no red light.
- Ensure that the battery is properly installed.
- Replace the battery.
- If the green LED light is still not flashing, contact the Customer Care Centre.
Compliance
CE
This equipment has been tested and found to comply with the EU Electromagnetic Compatibility and Low Voltage Directive. Unauthorized changes or modifications to the equipment that are not approved by Radio Systems Corporation could void the user's authority to operate the equipment, and void the warranty.
This product is in compliance with the provisions of the EMC and LV directives. The Declaration of Conformity can be found at: www.petsafe.net/customercare/eu_docs.php
IC
This device complies with Industry Canada licence-exempt RSS standard(s). Operation is subject to the following two conditions: (1) this device may not cause interference, and (2) this device must accept any interference, including interference that may cause undesired operation of the device.
ACMA
This device complies with the applicable EMC requirements specified by the ACMA (Australian Communications and Media Authority).

Battery Disposal
Separate collection of spent batteries is required in many regions; check the regulations in your area before discarding spent batteries. Please see page 6 for instructions on how to remove the battery for separate disposal. This unit operates on one (1) 9V alkaline battery; replace only with equivalent battery. At the end of the product life, please contact our Customer Care Centre to receive instructions on proper disposal of the unit. Please do not dispose of the unit in household or municipal waste. For a listing of Customer Care Centre telephone numbers in your area, visit our website at www.petsafe.net.

Important Recycling Advice
Please respect the Waste Electrical and Electronic Equipment regulations in your country. This equipment must be recycled. If you no longer require this equipment, do not place it in the normal municipal waste system. Please return it to where it was purchased in order that it can be placed in our recycling system. If this is not possible, please contact the Customer Care Centre for further information. For a listing of Customer Care Centre telephone numbers, visit our website at www.petsafe.net.
Terms of Use and Limitation of Liability
1. Terms of Use
Use of this Product is subject to your acceptance without modification of the terms, conditions and notices contained herein. Use of this Product implies acceptance of all such terms, conditions and notices. If you do not wish to accept these terms, conditions and notices, please return the Product, unused, in its original packaging and at your own cost and risk to the relevant customer care centre together with proof of purchase for a full refund.
2. Proper Use
This Product is designed for use with pets where training is desired. The specific temperament or size/weight of your pet may not be suitable for this Product (please refer to "How the System Works" in this Operating Guide). Radio Systems Corporation recommends that this Product is not used if your pet is aggressive and accepts no liability for determining suitability in individual cases. If you are unsure whether this Product is appropriate for your pet, please consult your veterinarian or certified trainer prior to use. Proper use includes, without limitation, reviewing the entire Operating Guide and any specific Caution statements.
3. No Unlawful or Prohibited Use
This Product is designed for use with pets only. This pet training device is not intended to harm, injure or provoke. Using this Product in a way that is not intended could result in violation of Federal, State or local laws.
4. Limitation of Liability
In no event shall Radio Systems Corporation or any of its associated companies be liable for (i) any indirect, punitive, incidental, special or consequential damage and/or (ii) any loss or damages whatsoever arising out of or connected with the misuse of this Product. The Purchaser assumes all risks and liability from the use of this Product to the fullest extent permissible by law. For the avoidance of doubt, nothing in this clause 4 shall limit Radio Systems Corporation's liability for human death or personal injury or fraud or fraudulent misrepresentation.
5. Modification of Terms and Conditions
Radio Systems Corporation reserves the right to change the terms, conditions and notices governing this Product from time to time. If such changes have been notified to you prior to your use of this Product, they shall be binding on you as if incorporated herein.
Warranty
Three Year Non-Transferrable Limited Warranty
This Product has the benefit of a limited manufacturer's warranty. Complete details of the warranty applicable to this Product and its terms can be found at www.petsafe.net and/or are available by sending a stamped addressed envelope to Radio Systems PetSafe Europe Ltd, 2nd Floor, Elgee Building, Market Square, Dundalk, Ireland.
Australia/New Zealand – In compliance with the Australian Consumer Law, Warranties Against Defects, effective January 1, 2012, warranty details of this Product are as follows:
Three Year Non-Transferrable Limited Warranty
What is covered: Radio Systems Australia Pty Ltd (hereinafter referred to as "Radio Systems") warrants to the original retail purchaser, and not any other purchaser or subsequent owner, that its Product, when subject to normal and proper residential use, will be free from defects in material or workmanship for a period of three (3) years from the purchase date. An "original retail consumer purchaser" is a person or entity who originally purchases the Product, or a gift recipient of a new Product that is unopened and in its original packaging. When serviced by Radio Systems Customer Service, Radio Systems covers labor and parts for the first three years of ownership; after the first three years, a service or upgrade charge will apply relative to replacement of the product with new or refurbished items at Radio Systems' sole discretion.
The limited warranty is non-transferrable and shall automatically terminate if the original retail consumer purchaser resells the Radio Systems product or transfers the property on which the Radio Systems product is installed. This Limited Warranty excludes accidental damage due to dog chews; lightning damage; or neglect, alteration, and misuse. Consumers who purchase products outside of Australia, New Zealand, or from an unauthorized dealer will need to return the Product to the original place of purchase for any warranty issues.
Please note that Radio Systems does not provide refunds, replacements, or upgrades for change of mind, or for any other reason outside of these Warranty terms.
Claims Procedure
Any claim made under this Warranty should be made directly to Radio Systems Australia Pty Ltd Customer Care Centre at:
Radio Systems Australia Pty Ltd
PO Box 765, Mudgeeraba QLD 4213
Australia Residents: 1800 786 608
New Zealand Residents: 0800 543 054
Email: info@petsafeaustralia.com.au
To file a claim, a proof of purchase must be provided. Without a proof of purchase, Radio Systems will not repair or replace faulty components. Radio Systems requests the Consumer to contact the Radio Systems Customer Care Centre to obtain a Warranty Return number, prior to sending the Product. Failure to do so may delay in the repair or replacement of the Product.
If the Product is deemed to be faulty within 30 days from date of original purchase, Radio Systems will organise for a replacement to be sent in advance of returning the faulty Product. A Post Bag will be included with the replacement Product for the return of the faulty Product. The
Product must be returned within 7 days of receiving the replacement. If the Product is deemed to be faulty after 30 days from the date of original purchase, the consumer will be required to return the Product to Radio Systems at the consumer's own expense. Radio Systems will test and replace the faulty unit or its components and return to the consumer free of charge, provided the Product is within its said warranty period. This warranty is in addition to other rights and remedies available to you under the law. Radio Systems goods come with guarantees that cannot be excluded under the Australia Consumer Law. You are entitled to a replacement or refund for a major failure and for compensation for any other reasonably foreseeable loss or damage. You are also entitled to have the goods repaired or replaced if the goods fail to be of acceptable quality and the failure does not amount to a major failure.
Should you have any queries or require any further information, please contact our Customer Care Centre on 1800 786 608 (Australia) or 0800 543 054 (New Zealand).
Protected by US Patent 6,724,919
CONSIGNES DE SÉCURITÉ IMPORTANTES
natural_image
Line drawing of a dog sitting on a bench near a wooden fence with a lantern (no text or symbols)
natural_image
Line drawing of a dog sitting on the ground near a window with a birdcage (no text or symbols)
natural_image
Line drawing of a dog sitting in a room with a lantern and bookshelf in the background (no text or symbols)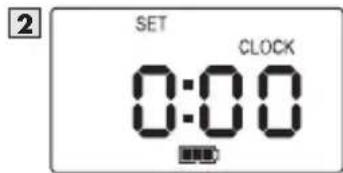
natural_image
Line drawing of a dog sitting near a wooden fence with a lantern (no text or symbols)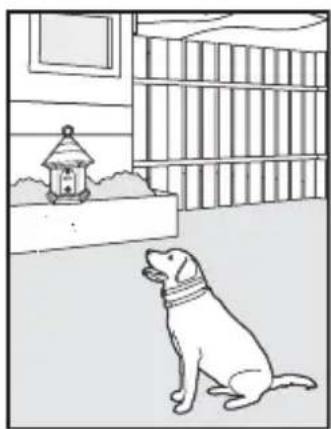
natural_image
Illustration of a dog sitting in a room near a small house with a birdhouse, no text or symbols present.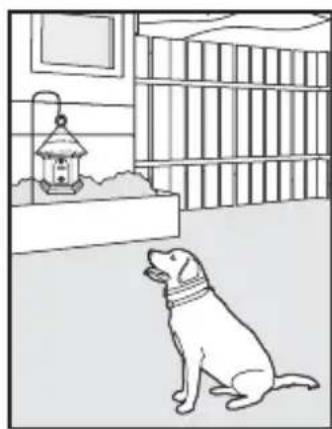
natural_image
Line drawing of a dog sitting in a room near a hanging lantern (no text or symbols)2
3
4
Schakel Timer 1 UIT/AAN
natural_image
Line drawing of a dog sitting near a wooden fence with a lantern in the background (no text or symbols)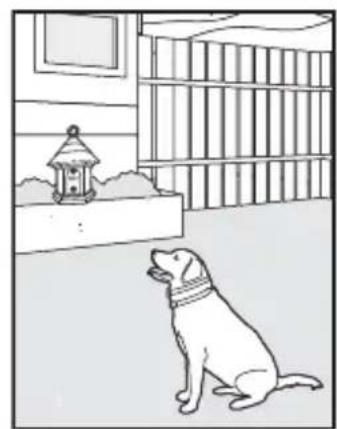
natural_image
Line drawing of a dog sitting in a room near a window and bookshelf (no text or symbols)
natural_image
Line drawing of a dog sitting in a room with a lantern and bookshelf (no text or symbols)Duración de la pila

natural_image
Line drawing of a dog sitting on a bench near a wooden fence with a lantern (no text or symbols)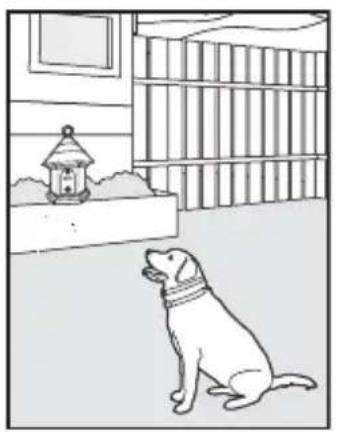
natural_image
Illustration of a dog sitting in a room near a birdhouse and bookshelf (no text or symbols)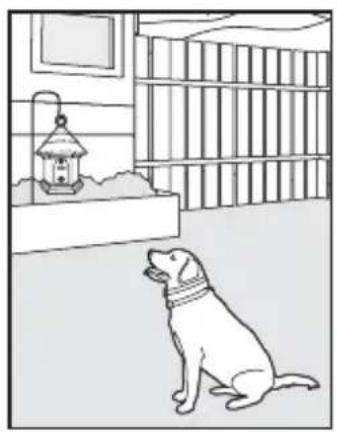
natural_image
Line drawing of a dog sitting in a room near a hanging lantern (no text or symbols)natural_image
Line drawing of a dog sitting on a bench near a wooden fence with a lantern (no text or symbols)
natural_image
Line drawing of a dog sitting near a window with a lantern, next to a bookshelf (no text or symbols)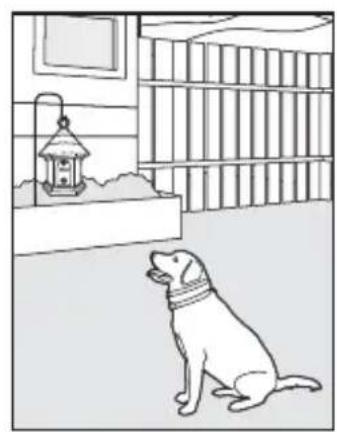
natural_image
Line drawing of a dog sitting in a room with bookshelves and a lantern (no text or symbols)Batterielebensdauer

Radio Systems Corporation
10427 PetSafe Way
Knoxville, TN 37932
865-777-5404
www.petsafe.net
400-1619-19