
HO6 UF3T1HTX - Oven HOOVER - Free user manual and instructions
Find the device manual for free HO6 UF3T1HTX HOOVER in PDF.

| Product type | Built-in oven |
| Brand | Hoover |
| Model | HO6 UF3T1HTX |
| Power supply | 220-240 V ~ 50/60 Hz |
| Cooking functions | Pyrolysis, Steam cooking, Delayed cooking, Wireless temperature probe Preci Probe |
| Cleaning | Automatic pyrolysis, Removable side racks |
| Safety | Door lock during pyrolysis, Child safety, Automatic shut-off |
| Included accessories | Metal grid, Drip tray, Preci Probe, Side racks |
| Interior lighting | LED energy efficiency class G |
| Repairability | Spare parts available: bulbs, probe, racks, drip tray |
| General information | User manual in English (44 pages), Manufacturer warranty |
Frequently Asked Questions - HO6 UF3T1HTX HOOVER
User questions about HO6 UF3T1HTX HOOVER
0 question about this device. Answer the ones you know or ask your own.
Ask a new question about this device
Download the instructions for your Oven in PDF format for free! Find your manual HO6 UF3T1HTX - HOOVER and take your electronic device back in hand. On this page are published all the documents necessary for the use of your device. HO6 UF3T1HTX by HOOVER.
USER MANUAL HO6 UF3T1HTX HOOVER
natural_image
Simple line drawing of a rectangular frame containing rectangles and circles (no text or symbols)
natural_image
Simple line drawing of a microwave oven with a blank lid (no text or symbols)
natural_image
Simple line drawing of a kitchen oven with handles and a double-line grille (no text or symbols)(EN) Quick guide (FR) Guide rapide (IT) Guida veloce
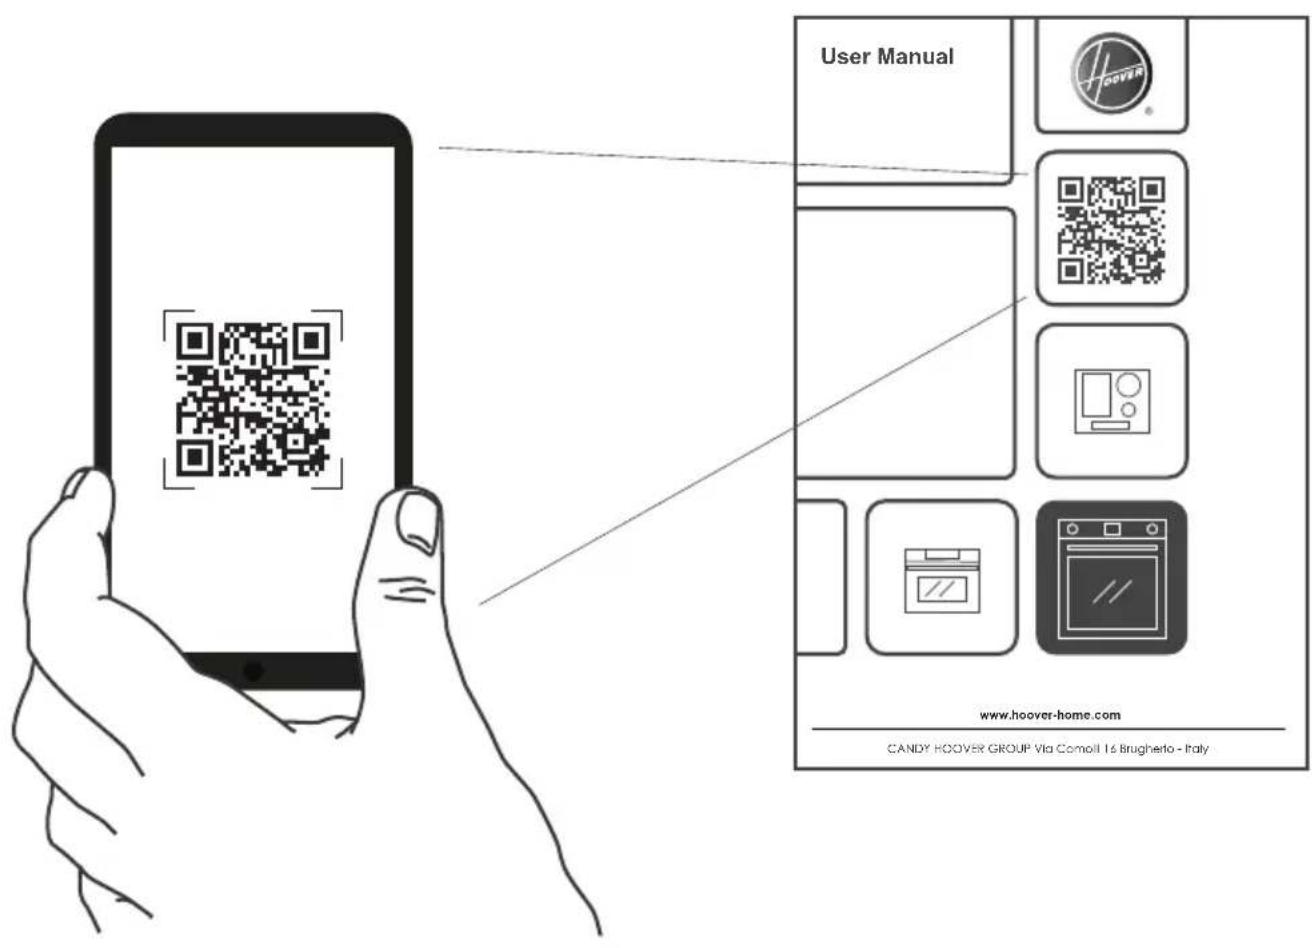
www.hoover-home.com
DISCOVER THE FULL USER MANUAL
(FR) DÉCOUVREZ LE MANUEL D'UTILISATION COMPLET (IT) SCOPRI IL MANUALE UTENTE COMPLETO

| User Instructions | EN | 4 |
| OVENS | ||
| Mode d'emploi | FR | 13 |
| OVENS | ||
| Istruzioni per l'uso | IT | 23 |
| OVENS |
5 Safety Instructions
12 Environmental Protection and Disposal
33 Product Description
36 Cleaning and Maintenance
39 Troubleshooting
40 Installation
WELCOME
Thank you for choosing our product. To ensure your safety and get the best results, please read this manual carefully, including the safety instructions, and keep it for future reference. Before installing the oven, make a note of the serial number, which you might need for repairs. Check for any damage during transportation and consult a technician if you're unsure before using it. Keep packaging materials away from children.
NOTE: Please note that the oven's features and accessories may vary depending on the model you purchased.
GENERAL WARNINGS
- Do not use a steam cleaner for cleaning operations.
- During use the appliance become hot. Care should be taken to avoid touching heating elements inside the oven.
Use in accordance with the intended use
- Only use the oven for its intended purpose, that is only for the cooking of foods: any other use, for example as a heat source, is considered improper and therefore dangerous. The manufacturer cannot be held responsible for any damage resulting from improper, incorrect or unreasonable usage.
Use limitations
- The appliance can be used by children aged from 8 years and above and persons with reduced physical, sensory or mental capabilities or lack of experience and knowledge if they have been given supervision or instruction concerning use of the appliance in a safe way and understand the hazards involved.
Children shall not play with the appliance.
Cleaning and maintenance shall not be made by children without supervision.
- This appliance is not intended to be used by persons (including children) with reduced physical, sensory or mental capabilities, or lack of experience and knowledge, unless they have been given supervision or instruction concerning use of the appliance by a person responsible for their safety.
Children should be supervised to ensure that they do not play with the appliance.
- WARNING: the appliance and its accessible parts become hot during use. Care should be taken to avoid touching heating elements Children less than 8 years of age shall be kept at away unless continuously supervised.
- WARNING: Accessible parts may become hot during use. Young children should be kept away.
INSTALLATION WARNINGS
- The oven can be located high in a column or under a worktop. Before fixing, you must ensure good ventilation in the oven space to allow proper circulation of the fresh air required for cooling and protecting the internal parts. Make the openings specified on the illustrations according to the type of fitting. Always fix the oven to the furniture with screws provided with the appliance.
- No additional operation/setting is required in order to operate the appliance at the rated frequencies.
- The appliance must not be installed behind a decorative door in order to avoid overheating.
- During installation the oven should be disconnected from the mains electricity supply.
- If the assistance of the manufacturer is required to rectify faults arising from incorrect installation, this assistance is not covered by the guarantee. The installation instructions for professionally qualified personnel must be followed.
- Incorrect installation may cause harm or injury to people, animals or belongings. The manufacturer cannot be held responsible for such harm or injury.
- Installation must be carried on by a qualified technician who must know and respect the laws in force in the country of installation and the manufacturer's instruction.
- After unboxing the appliance, always check it is not damaged, in case of issue contact the customer service before installing and do not connect to the power supply.
- Remove the packaging material before operating the appliance.
- During installation do not use the oven door's handle to lift and move the oven.
- The installation furniture and the adjacent ones must withstand temperatures of 95^ C .
- It is recommended to wear protective gloves during installation to avoid cut injuries.
- Do not install the product in open environments exposed to atmospheric agents.
- This appliance is designed to be used at altitude lower than 2000m.
ELECTRICAL WARNINGS
- The socket must be suitable for the load indicated on the tag and must have ground contact connected and in operation. The earth conductor is yellow-green in colour. This operation should be carried out by a suitably qualified professional.
Connection to the power source can be made by plug or by fixed wiring placing an omnipolar breaker, with contact separation compliant to the requirements for overvoltage category III, between the appliance and the power source that can bear the maximum connected load and that is in line with current legislation.
In case of incompatibility between the socket and the appliance plug, ask a qualified electrician to substitute the socket with another suitable type. The plug and the socket must be conformed to the current norms of the installation country.
The yellow-green earth cable should not be interrupted by the breaker. The socket or omnipolar breaker used for the connection should be easily accessible when the appliance is installed.
- If the supply cord is damaged, it must be replaced by the manufacturer, its service agent or similarly qualified persons in order to avoid a hazard.
- For any repairs, refer only to the Customer Care Department and request the use of original spare parts.
- Disconnect the appliance from the mains electricity supply
before carrying out any work or maintenance on it.
- WARNING: ensure that the appliance is switched off before replacing the bulb, to avoid the possibility of electric shocks.
- The oven must be switched off before removing the removable parts. After cleaning, reassemble them according the instructions.
- The use of any electrical appliance implies the observance of some fundamental rules:
- Do not pull on the power cable to disconnect the appliance from the power source;
- Do not touch the appliance with wet or damp hands or feet;
-In general the use of adaptors, multiple sockets and extension cables is not recommended.
-In case of malfunction and /or poor operation, switch off the appliance and do not tamper with it.
- NOTE: as the oven could require maintenance work, it is advisable to keep another wall socket available so that the oven can be connected to this if it is removed from the space in which it is installed.
- Any repair, installation and maintenance not carried out correctly can seriously endanger the user.
- The manufacturing company hereby states that it does not assume any responsibility for direct or indirect damages caused by incorrect installation, maintenance, or repair work. Furthermore, it is not liable for damages caused by the absence or interruption of the grounding system (e.g., electric shock).
- CAUTION: in order to avoid a hazard due to inadvertent resetting of the thermal cut-out, this appliance must not be supplier through an external switching device, such as a timer, or connected to a circuit that is regularly switched on and off by the utility. The appliance is not designed to be activated by an external timer or separate remote control system.
USE & MANTEINANCE
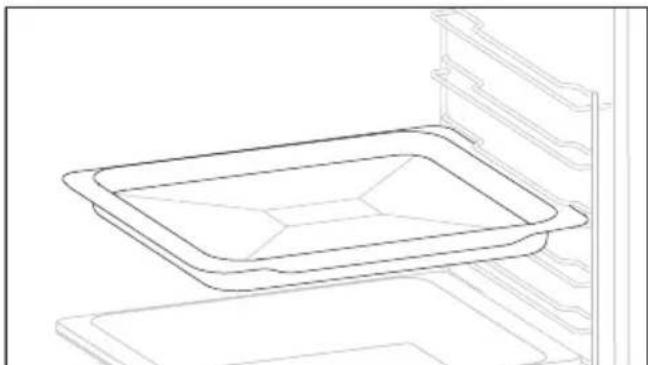
- The dripping pan collects the residues that drip during cooking.
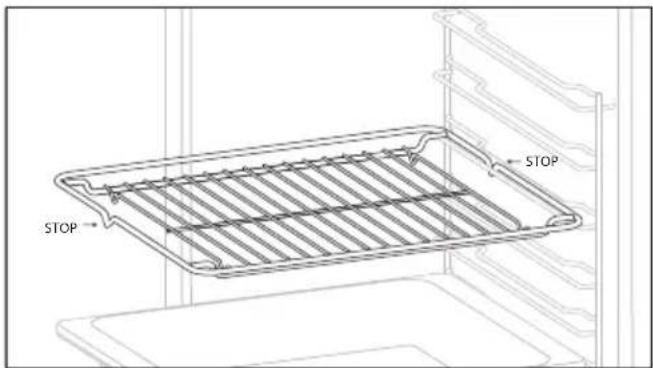
- When you place the grid on the side racks, make sure that the shorter section of the side (between the stop and the extremity) is directed towards the interior of the oven. If the grid has a decorative metal bar, pay attention to position it on the exterior of the oven so that the brand logo can be visible and readable. For the correct positioning refer also to the image in the Accessories section of this user manual.
- Do not use harsh abrasive cleaners or sharp metal scrapers to clean the oven door glasses, since they can scratch the surface, which may result in shattering of the glass.
- Only use the temperature probe recommended for this oven.
- During cooking, moisture may condense inside the oven cavity or on the glass of the door. This is a normal condition. To reduce this effect, wait 10-15 minutes after turning on the power before putting food inside the oven. In any case, the condensation disappears when the oven reaches the cooking temperature.
- Cook the vegetables in a container with a lid instead of an open tray.
- Avoid leaving food inside the oven after cooking for more than 15/20 minutes.
- A long power supply failure during an occurring cooking phase may cause a malfunction of the monitor. In this case contact customer service.
- WARNING: Do not line the oven walls with aluminium foil or single-use protection available from stores. Aluminium foil or any other protection, in direct contact with the hot enamel, risk melting and deteriorating the enamel of the insides.
- WARNING: Never remove the oven door seal.
- CAUTION: Do not refill the cavity bottom with water during cooking or when the oven is hot.
- Oven trays and grids are not suitable for direct contact with food. Please use suitable cookware or baking paper.
- Wash all accessories before first use with a solution of hot water and washing up liquid.
WARNINGS (\*FOR PYRO OVENS)
- Excess spillage must be removed before cleaning.
- WARNING: before initiating the automatic cleaning cycle:
-Clean the oven door;
- Remove large or coarse food residues from the inside of the oven using a damp sponge. Do not use detergents;
-Remove all accessories and the sliding rack kit (where present);
- Do not place tea towels.
- In ovens with meat probe it is necessary, before making the cleaning cycle, close the hole with the nut provided. Always close the hole with the nut when the meat probe is not used.
- During the pyrolytic cleaning process (if available), the surfaces may get hotter than usual and children should be kept away.
- If a hob has been fitted above the oven, never use the hob while the Pyrolizer is working, this will prevent the hob from overheating.
WARNINGS (\*FOR EASY STEAM)
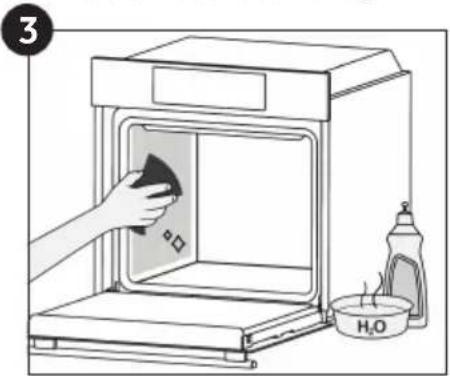
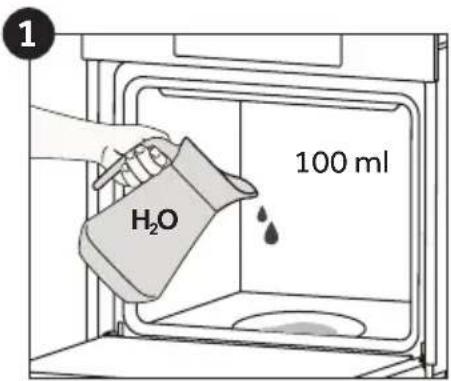
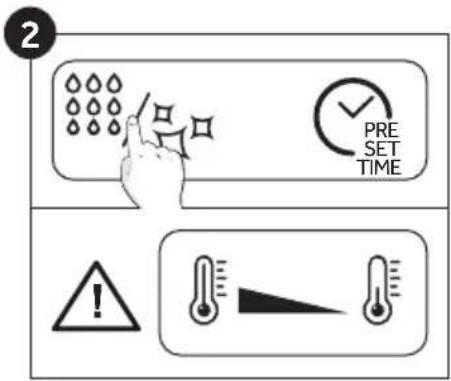
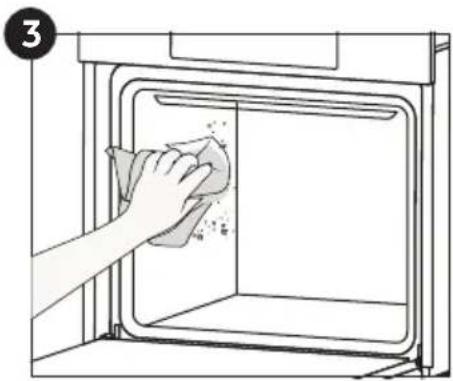
- WARNING: Risk of burn and damage to the appliance: using the steam function the released steam can cause burns: Open the door carefully to avoid injury after using a cooking function with steam.
- Use only drinking water to fill in the cavity bottom during the steam function.
WARNINGS WIRELESS TEMPERATURE PROBE\*
- This product is exclusive for oven appliances. It should only be used as described in this User Manual.
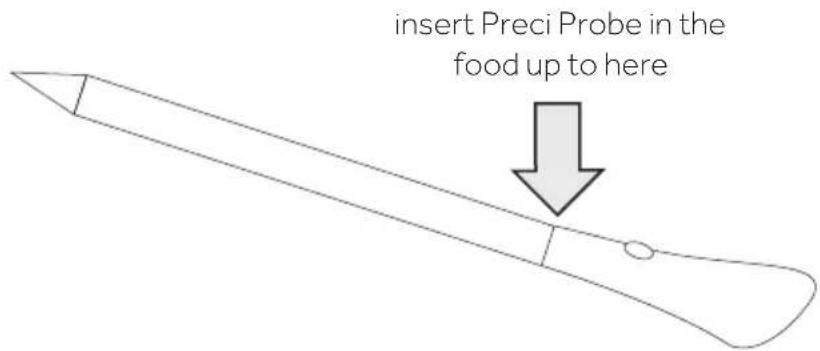
• DO NOT TOUCH Preci Probe WITH BARE HANDS JUST AFTER COOKING. Always wear oven gloves to remove Preci Probe from the food after cooking. - It is required to FULLY INSERT Preci Probe metal bar properly into the food until the BLACK ceramic EDGE of it during cooking.
- Do not expose the metal part of Preci Probe to the heat generated by oven directly. Do not expose the metal part of Preci Probe to the heat generated by the appliance.
- Do not use Preci Probe in another appliance except for the built-in oven.
- Do not use Preci Probe in a microwave oven.
- Preci Probe can be cleaned and washed but do not immerse it long in water.
- This product is not intended for use by persons with ages 12 and under.
- The supplier will not be liable for any damage of Preci Probe due to misuse of the device.
- Clean the Preci Probe before the use.
- Probe can work in this range of temperature: 10^ C to an internal maximum temperature of 100^ C of the metal part. Ceramic part can reach 350^ C .
- If the Preci Probe temperature exceeds 100°C, cooking will stop and the Preci Probe must be removed from the oven as soon as possible, wearing gloves, to avoid damage to the probe.
SAVING AND RESPECTING THE ENVIRONMENT
Where possible, avoid pre-heating the oven and always try to fill it. Open the oven door as infrequently as possible, because heat from the cavity disperses every time it is opened. For a significant energy saving, switch off the oven between 5 and 10 minutes before the planned end of the cooking time, and use the residual heat that the oven continues to generate. Keep the seals clean and in order, to avoid any heat dispersal outside of the cavity. If you have an electric contract with an hourly tariff, the "delayed cooking" programme makes energy saving more simple, moving the cooking process to start at the reduced tariff time slot.
WASTE MANAGEMENT AND ENVIRONMENTAL PROTECTION
This appliance is labelled in accordance with European Directive 2012/19/EU regarding electric and electronic appliances (WEEE). The WEEE contain both polluting substances (that can have a negative effect on the environment) and base elements (that can be reused).

natural_image
Symbol of a trash bin crossed with a diagonal line and a solid black rectangle below (no text or labels)It is important that the WEEE undergo specific treatments to correctly remove and dispose of the pollutants and recover all the materials. Individuals can play an important role in ensuring that the WEEE do not become an environmental problem; it is essential to follow a few basic rules:
- The WEEE should not be treated as domestic waste;
- The WEEE should be taken to dedicated collection areas managed by the town council or a registered company.
In many countries, domestic collections may be available for large WEEEs. When you buy a new appliance, the old one can be returned to the vendor who must accept it free of charge as a one-off, as long as the appliance is of an equiv - alent type and has the same functions as the purchased appliance.
natural_image
Simple line drawing of a trash bin with crossed lines indicating no waste or restriction (no text or symbols)natural_image
Symbol of a trash bin crossed with a diagonal line and a horizontal bar below (no text or labels)FRIT
natural_image
Empty white rectangle with a thin black border (no text or symbols)- Control panel
- Shelf positions (lateral wire grid if included)
- Metal grids
- Tray
- Fan cover
- Oven door
- Lateral wire grids (if present: only for flat cavity)
- Serial number & QR Code
natural_image
Empty white rectangle with a thin black border (no text or symbols)Write here your serial number for future reference.
natural_image
Empty white rectangle with a thin black border (no text or symbols)(FR) ACCESSOIRES (IT) ACCESSORI
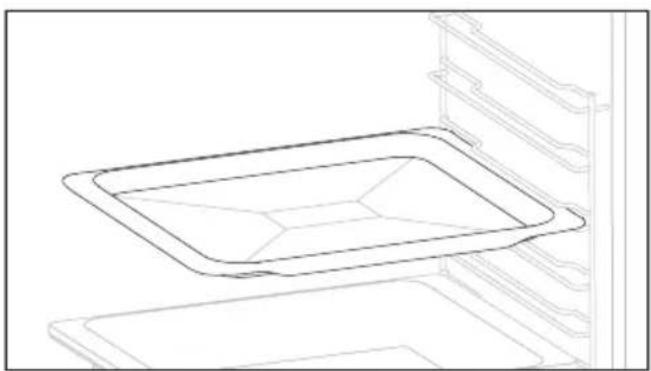
Metal Grid Deeper tray
natural_image
Line drawing of a rectangular kitchen appliance with a lid, placed on a shelf (no text or symbols)Catalytic Panels (only if present*)
Dual Tray - BBQ Mode (only if present*)

natural_image
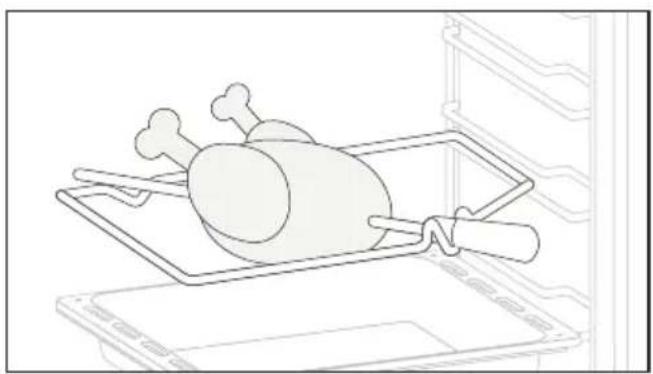
Line drawing of a rectangular appliance with a grating inside, placed on an open shelf (no text or symbols)Turnspit (only if present*)
natural_image
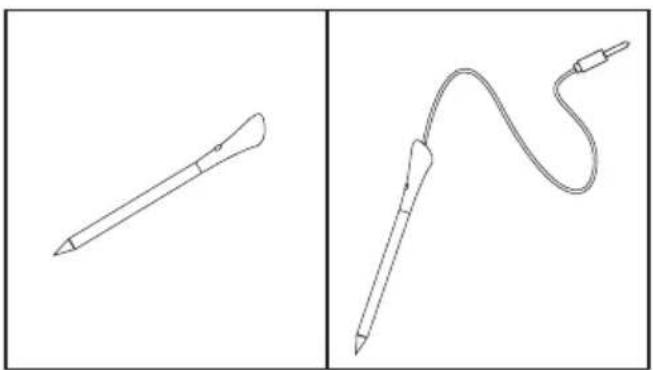
Line drawing of a roasted chicken on a cutting board inside an oven (no text or symbols)Wireless/Wired Probe (only if present*)
natural_image
Two line drawings of pen tips: one with a pointed tip and the other with a curved, looped tip (no text or symbols)Softclose/Softopen Hinges (only if present*)
natural_image
Line drawing of a bookshelf with a circular diagram showing a fan or pointer (no text or symbols)Dual Tray - STEAM Mode (only if present*)

natural_image
Line drawing of a rectangular tray with internal grating, placed inside an oven (no text or symbols)Baking Tray (only if present*)
natural_image
Line drawing of a rectangular kitchen appliance with a tray and side shelves (no text or symbols)Telescopic Guides (only if present*)
natural_image
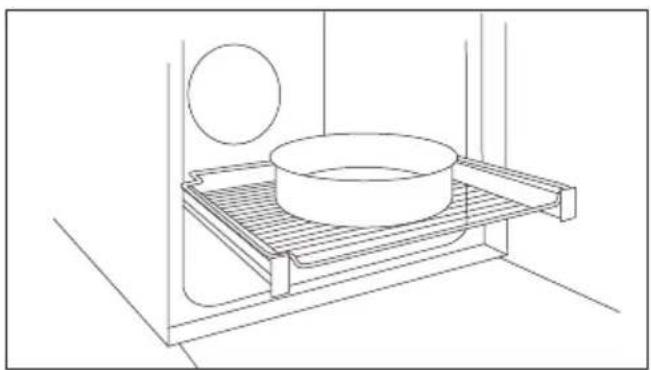
Line drawing of a minimalist kitchen sink with a round pan, no text or symbols present(only if present*) / (seulement si présent*) / (solo se presente*)
Lateral Wire Grids (only if present*)
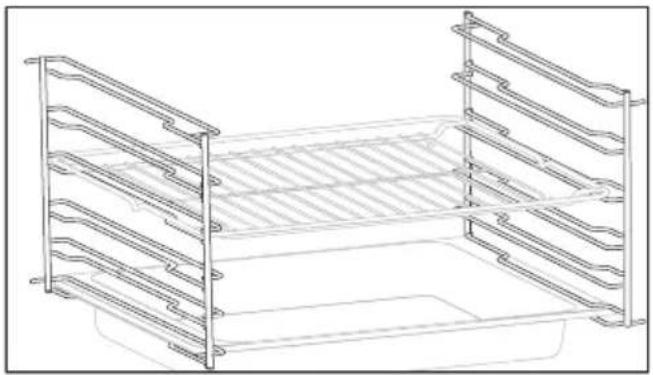
natural_image
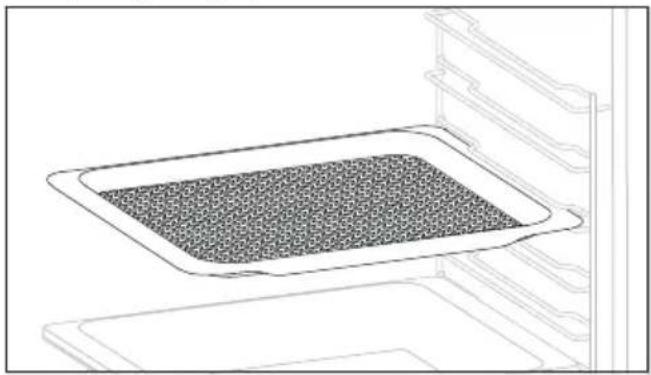
Line drawing of a multi-tiered storage rack unit (no text or symbols)Airfry Tray (only if present*)
natural_image
Line drawing of a tray with a mesh pattern inside, placed on an oven (no text or symbols)EN: Oven trays and grids are not suitable for direct contact with food. Please use suitable cookware or baking paper.
CLEANING AND MAINTENANCE
(FR) NETTOYAGE ET ENTRETIEN (IT) PULIZIA E MANUTENZIONE
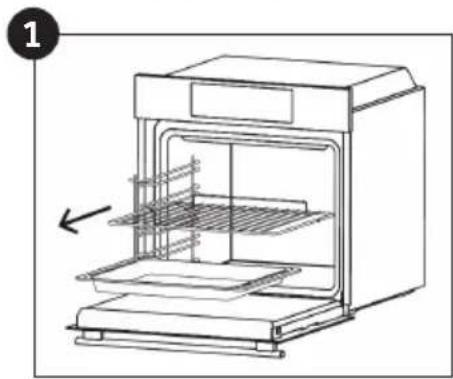
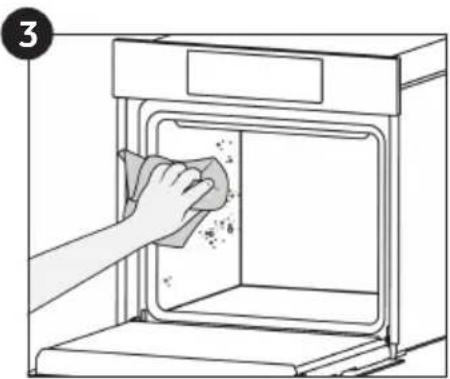
First use: preliminary cleaning
natural_image
Line drawing of a cabinet with decorative swirls on top (no text or symbols)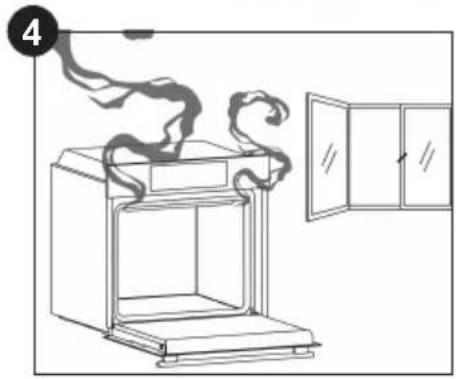
natural_image
Line drawing of a steam rising from a box to a door, with no text or symbols present.Pyrolytic Cleaning (depending on the oven model)
(FR)Nettoyage par pyrolyse (selon le modèle de four) (IT)Pulizia pirolitica(a seconda del modello del forno)
natural_image
Line drawing of an oven with a rack and side panel, showing internal structure (no text or symbols)
natural_image
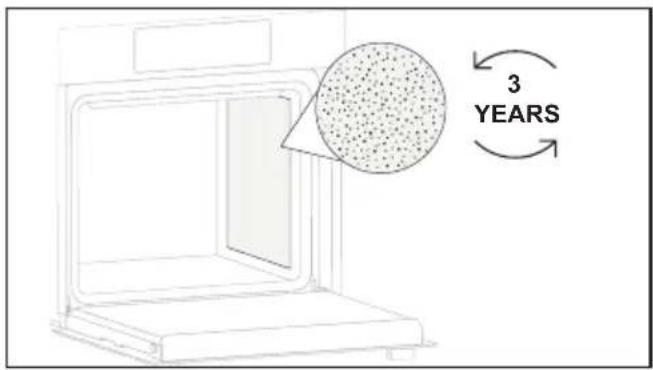
Line drawing of a hand cleaning a kitchen oven with a cloth (no text or symbols)Catalytic Cleaning (depending on the oven model)
(FR)Nettoyage par catalyse (selon le modèle de four) (IT)Pulizia catalitica(a seconda del modello del forno)

natural_image
Line drawing of an oven with internal tray and vent, showing no text or symbols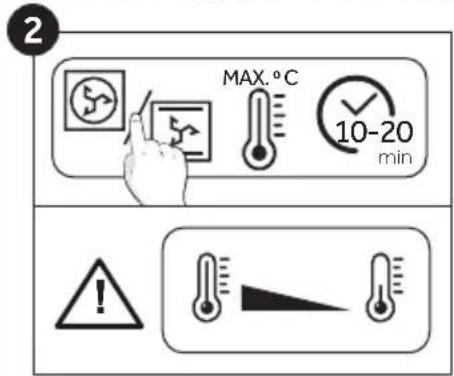
natural_image
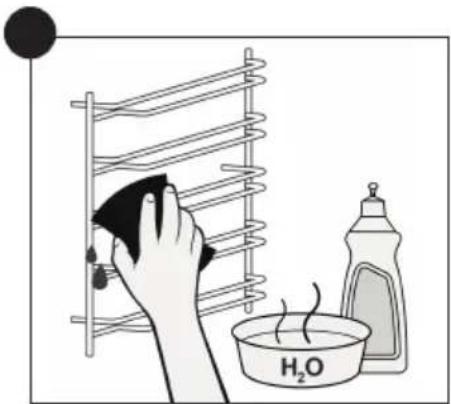
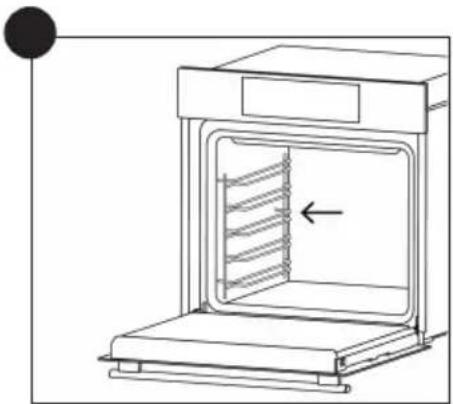
Illustration of a hand cleaning a kitchen appliance with a cloth (no text or symbols)Side Racks Cleaning
natural_image
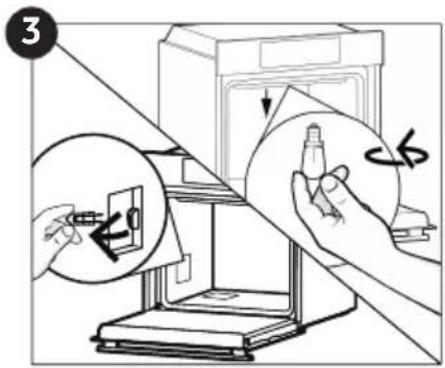
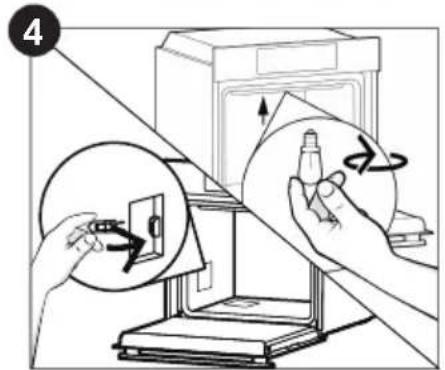
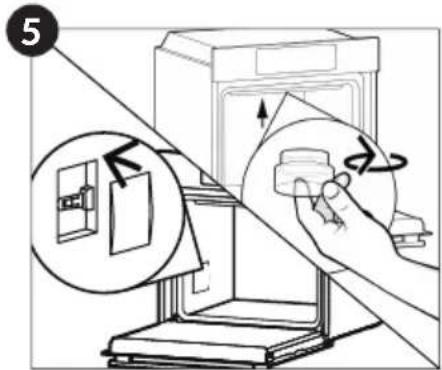
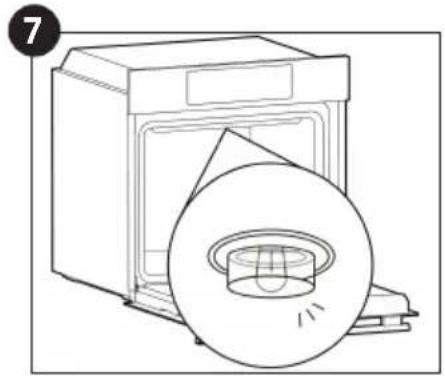
Line drawing of an oven with a rack inside, showing internal structure and airflow direction (no text or symbols)Removal and Cleaning of the Glass Door

natural_image
Line drawing of a kitchen appliance with a circular disc and lid (no text or symbols)(EN) This product contains one or more light sources of energy efficiency class G (Lamp)
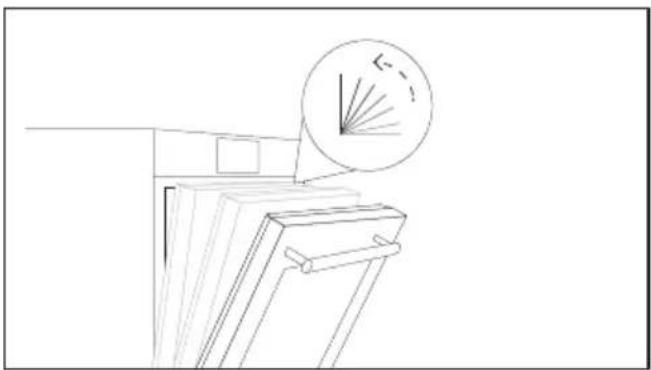
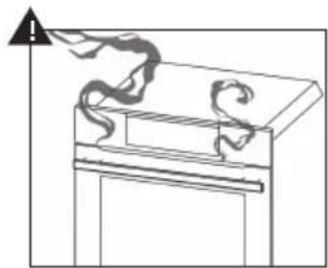
Troubleshooting: smoke
natural_image
Simple line drawing of a cabinet with a scroll and warning symbol (no text or labels)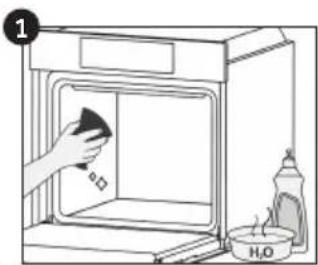
(EN) For more information refer to Full User manual.
EN If the furniture is covered with a bottom at the back part, provide an opening for the power supply cable.
- DISCOVER THE FULL USER MANUAL
- WELCOME
- GENERAL WARNINGS
- Use in accordance with the intended use
- Use limitations
- INSTALLATION WARNINGS
- ELECTRICAL WARNINGS
- USE & MANTEINANCE
- WARNINGS (\*FOR PYRO OVENS)
- WARNINGS (\*FOR EASY STEAM)
- WARNINGS WIRELESS TEMPERATURE PROBE\*
- SAVING AND RESPECTING THE ENVIRONMENT
- WASTE MANAGEMENT AND ENVIRONMENTAL PROTECTION
- FRIT
- CLEANING AND MAINTENANCE
- First use: preliminary cleaning
- Pyrolytic Cleaning (depending on the oven model)
- Catalytic Cleaning (depending on the oven model)
- Side Racks Cleaning
- Removal and Cleaning of the Glass Door
- Troubleshooting: smoke
Brand : HOOVER
Model : HO6 UF3T1HTX
Category : Oven