GH-ET-10000 - Heating MSW - Free user manual and instructions
Find the device manual for free GH-ET-10000 MSW in PDF.

| Product Type | Portable LPG fan heater |
| Fuel | LPG (propane/butane) |
| Nominal Heating Power | 15 kW |
| Efficiency (NCV) | 100% |
| Electricity Consumption at Nominal Heat | 0.4 kW |
| Power Supply | 230 V AC |
| Ignition Type | Automatic (piezo) and manual |
| Controls | Power switch, gas valve button, ignition button, temperature control knob, reset button |
| Safety Features | Flame failure device, overheat protection, tip-over switch (if equipped) |
| Air Circulation | Integrated fan |
| Minimum Safe Distances | 3.5 m from outlet, 2.5 m from inlet, 2 m from other sides |
| Room Size Recommendation | 100 W per m³ of space |
| Operating Temperature Range | Up to 40 °C ambient |
| Humidity Limit | ≤85% RH |
| Maintenance | Annual inspection by qualified technician |
| Cleaning | Non-corrosive cleaners; do not immerse in water |
| Housing Material | Metal with protective grille |
| Disposal | WEEE compliant - recycle at designated collection point |
Frequently Asked Questions - GH-ET-10000 MSW
User questions about GH-ET-10000 MSW
0 question about this device. Answer the ones you know or ask your own.
Ask a new question about this device
Download the instructions for your Heating in PDF format for free! Find your manual GH-ET-10000 - MSW and take your electronic device back in hand. On this page are published all the documents necessary for the use of your device. GH-ET-10000 by MSW.
USER MANUAL GH-ET-10000 MSW
natural_image
Line drawing of a portable gas cylinder connected to a cylindrical fan (no text or symbols)Information requirements for electric local space heaters:
| Model identifier (s):MSW-GH-ET-10000 / MSW-GH-ET-15000 | ||||||||
| Indirect heating function: no | ||||||||
| Direct heating power: 15 kW | ||||||||
| Indirect heating power: - kW | ||||||||
| Fuel | Emissions from local space heaters | |||||||
| NOx(*) | ||||||||
| gas | LPG | 161.7 mg / kWh input (GCV) | ||||||
| Parameter | Designation | Value of the | Unit | Parameter | Symbol | Value of the | Unit | |
| Heating power | Net Calorific Value (NCV) | |||||||
| Nominal heating power | Pnom 15 kW | Efficiency at nominal heat output | _th,nom | 100 | % | |||
| Minimum heating | Pmin - kW | Efficiency at | _th,nom | - | % | |||
| power(indicative) | minimum heating power(indicative) | |||||||
| Electricity consumption for own needs | Type of heat output / room temperature control | |||||||
| At nominal heat output | el_max 0.4 kW | single-stage heat output without room temperature control | yes | |||||
| At minimum heating power | el_min - kW | at least two manual levels without room temperature control | no | |||||
| In standby mode | el_SB - kW | mechanical regulation of room temperature with a thermostat | no | |||||
| electronic room temperature control | no | |||||||
| electronic room temperature control with a daily controller | no | |||||||
| electronic room temperature control with a weekly timer | no | |||||||
| Other adjustment options | ||||||||
| room temperature control with | no | |||||||
| presence recognition | ||||||||
| room temperature control with open window recognition | no | |||||||
| with distance adjustment | no | |||||||
| with adaptive start control | no | |||||||
| with reduced working time | no | |||||||
| with radiating heat sensor | no | |||||||
| Permanent pilot light energy demand | ||||||||
| Pilot flame light demand (if applicable) | P_pilot - kW | |||||||
| Contact details | expondo Polska sp. z o. o. sp. k.ul. Nowy Kisielin – Innowacyjna 7, 66-002 Zielona Góra | Poland, EU | |||||||
| (*) NOx = nitrogen oxides | ||||||||
| Model identifier (s):MSW-GH-ET-30000 / MSW-GH-BD-30000 | ||||||||
| Indirect heating function: no | ||||||||
| Direct heating power: 30 kW | ||||||||
| Indirect heating power: - kW | ||||||||
| Fuel | Emissions from local space heaters | |||||||
| NO x (*) | ||||||||
| gas | LPG | 151.2 mg / kWh input (GCV) | ||||||
| Parameter | Designation | Value of the | Unit | Parameter | Symbol | Value of the | Unit | |
| Heating power | Net Calorific Value (NCV) | |||||||
| Nominal heating power | P_nom 0.8 kW | Efficiency at nominal heat output | _th,nom | 100 | % | |||
| Minimum heating power (indicative) | P_min - kW | Efficiency at minimum heating power (indicative) | _th,nom | - | % | |||
| Electricity consumption for own needs | Type of heat output / room temperature control | |||||||
| At nominal heat output | el_max 80 kW | single-stage heat output without room temperature control | yes | |||||
| At minimum heating power | el_min - kW | at least two manual levels without room temperature control | no | |||||
| In standby mode | el_SB - kW | mechanical regulation of room temperature with a thermostat | no | |||||
| electronic room temperature control | no | |||||||
| electronic room temperature control with a daily controller | no | |||||||
| electronic room temperature control with a weekly timer | no | |||||||
| Other adjustment options | ||||||||
| room temperature control with presence recognition | no | |||||||
| room temperature control with open window recognition | no | |||||||
| with distance adjustment | no | |||||||
| with adaptive start control | no | |||||||
| with reduced working time | no | |||||||
| with radiating heat sensor | no | |||||||
| Permanent pilot light energy demand | ||||||||
| Pilot flame light demand (if applicable) | P_pilot - kW | |||||||
| Contact details | expondo Polska sp. z o. o. sp. k. | |||||||
| ul. Nowy Kisielin – Innowacyjna 7, 66-002 Zielona Góra | Poland, EU | ||||||||
| (*) NOx = nitrogen oxides | ||||||||
| Model identifier (s):MSW-GH-BD-50000 | ||||||||
| Indirect heating function: no | ||||||||
| Direct heating power: 50 kW | ||||||||
| Indirect heating power: - kW | ||||||||
| Fuel | Emissions from local space heaters | |||||||
| NOx(*) | ||||||||
| gas | LPG | 151.6 mg / kWh input (GCV) | ||||||
| Parameter | Designation | Value of the | Unit | Parameter | Symbol | Value of the | Unit | |
| Heating power | Net Calorific Value (NCV) | |||||||
| Nominal heating power | Pnom 50 kW | Efficiency at nominal heat output | η_th,nom | 100 | % | |||
| Minimum heating power (indicative) | Pmin - kW | Efficiency at minimum heating power (indicative) | η_th,nom | - | % | |||
| Electricity consumption for own needs | Type of heat output / room temperature control | |||||||
| At nominal heat output | elmax 0.8 kW | single-stage heat output without room temperature control | yes | |||||
| At minimum heating power | el_min - kW | at least two manual levels without room temperature control | no | |||||
| In standby mode | el_SB - kW | mechanical regulation of room temperature with a thermostat | no | |||||
| electronic room temperature control | no | |||||||
| electronic room temperature control with a daily controller | no | |||||||
| electronic room temperature control with a weekly timer | no | |||||||
| Other adjustment options | ||||||||
| room temperature control with presence recognition | no | |||||||
| room temperature control with open window recognition | no | |||||||
| with distance adjustment | no | |||||||
| with adaptive start control | no | |||||||
| with reduced working time | no | |||||||
| with radiating heat sensor | no | |||||||
| Permanent pilot light energy demand | ||||||||
| Pilot flame light demand (if applicable) | P_pilot - kW | |||||||
| Contact details | expondo Polska sp. z o. o. sp. k.ul. Nowy Kisielin – Innowacyjna 7, 66-002 Zielona Góra | Poland, EU | |||||||
| (*) NOx = nitrogen oxides | ||||||||
1. General Description
This manual is intended to assist you for safe and reliable use. The product is designed and manufactured strictly according to technical specifications using the latest technology and components and maintaining the highest quality standards.
PLEASE CAREFULLY READ AND UNDERSTAND THIS INSTRUCTION MANUAL BEFORE OPERATION,
To ensure long and reliable operation of the device, make sure to operate and maintain it properly in accordance with the guidelines in this instruction manual. The technical data and specifications in this manual are up-to-date. The manufacturer reserves the right to make changes in order to improve the quality. Taking the technical progress and the possibility of reducing noise into account, the unit is designed and built in such a way so that risks resulting from noise emissions are reduced to the lowest possible level.
Explanation of symbols
| CE | The product complies with applicable safety standards. |
EN
 | Read the manual before use. |
 | Recyclable product. |
 | CAUTION! or WARNING! or REMEMBER! describing a given situation (general warning sign). |
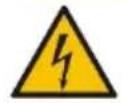 | CAUTION! Risk of electric shock! |
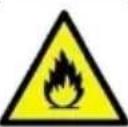 | CAUTION! Danger of fire - flammable material! |
 | Warning against poisoning by toxic substances! |
 | Caution! Hot surface can cause burns! |
 | Do not cover the screw with any materials or objects! |
 | Be gentle with the packaging. |
 | Do not step on the package. |

CAUTION! The figures in this manual are illustrative only and may vary in some details from the actual appearance of the product.
2. Safety of use

CAUTION! Read all safety warnings and instructions. Failure to follow the warnings instructions may result in electric shock, fire and/or serious injury or death.
The term "device" or "product" in the warnings and in the description of the manual refers to
LPG heater
2.1. Electrical safety
a) The plug of this device must fit into the outlet. Do not modify the plug in any way. Original plugs and matching outlets reduce the risk of electric shock.
b) Avoid touching grounded parts, such as pipes, heaters, ovens, and refrigerators. There is an increased risk of electric shock if your body is grounded and touches the device while exposed to direct rain, wet pavement, or while working in a damp environment. If water enters the device, there is an increased risk of damage to the unit and electric shock.
c) Do not touch the device with wet or damp hands.
d) Do not use the cord in an unintended manner. Never use it to carry the device or to pull the plug out of the socket. Keep the cord away from heat sources, oil, sharp edges or moving parts. Damaged or tangled cords increase the risk of electric shock.
e) When operating the product outdoors, use an extension cord designed for outdoor use. Using an extension cord designed for outdoor use reduces the risk of electric shock.
f) If you cannot avoid using the product in a wet environment, use a residual current device (RCD) to connect the product to electrical mains. Using an RCD reduces the risk of electric shock.
g) Do not use the device if the power cord is damaged or shows signs of wear. A damaged power cord should be replaced by a qualified electrician or the manufacturer's service department.
h) To avoid electric shock, do not immerse the cable, plug, or the device itself in water or other liquid. Do not use the appliance on wet surfaces.
i) CAUTION – DANGER TO LIFE! When cleaning or using the appliance, never immerse it in water or other liquids.
j) Do not allow the machine to get wet. Risk of electric shock!
2.2. Safety in the workplace
a) Keep the work area tidy and well lit. Disorder or poor lighting can lead to accidents. Be foresighted, watch what you are doing and use common sense when using the unit.
b) Do not use the unit in an explosive area, for example in the presence of flammable liquids, gases or dust. The unit produces sparks that can ignite dust or fumes.
c) If in doubt as to whether the product is working properly or found to be damaged, contact the manufacturer's technical service.
d) Only the manufacturer's service department may repair the appliance. Do not attempt to repair the product on your own!
e) In case of open flames or fire, use only dry powder or snow (CO2) fire extinguishers to extinguish the live equipment.
f) No children or unauthorized persons are allowed in the work area. (Inattention may result in loss of control of the unit.)
g) Use the unit in a well-ventilated area.
h) The gas hose should be connected and disconnected with the gas valve closed.
i) Check the condition of the safety stickers regularly. Replace them if they are illegible.
j) Keep these instructions for use for future reference. If the product is to be handed over to a third party, hand it over with this user manual.
k) Keep packaging components and small installation parts out of the reach of children.
I) Keep the device away from children and animals.
m) When using this product together with other devices, also follow the other instructions for use.
n) Never direct the airflow towards the gas cylinder!

Remember! Keep children and other bystanders safe while operating the equipment.
2.3. Personal safety
a) Do not operate this device if you are tired, ill or under the influence of alcohol, drugs or medication that could impair your ability to operate the device.
b) The unit may be operated by persons who are physically fit, capable of operating it and appropriately trained, and who have read this instruction manual and have been trained in occupational safety and health.
c) Use caution and common sense when operating this unit. A moment's inattention during operation may result in serious personal injury.
d) To prevent accidental start-up, make sure the switch is in the off position before connecting to a power source.
e) Do not wear loose clothing or jewelry. Keep hair, clothing, and gloves away from moving parts. Loose clothing, jewelry, or long hair can be caught in moving parts.
f) Before switching the unit on, remove any regulating tools or keys. Any tools or keys left in the rotating part of the unit may cause injury.
g) The product is not a toy. Children should be watched to ensure that they do not play with the product.
h) Do not place your hands or any objects inside the running device!
i) CAUTION: Some parts of the unit may become very hot - burn risk!
2.4. Safe use of the device
a) Do not use the device if the ON/OFF switch does not function properly (does not turn on and off). Units that cannot be controlled by the switch are unsafe, cannot operate, and must be repaired.
b) Disconnect the device from the power supply before adjusting, cleaning, or servicing. This precaution reduces the risk of accidental start-up.
c) Turn off the gas valve before making adjustments, changing accessories, and when finished working with the unit. This precaution reduces the risk of accidents.
d) Keep unused product out of the reach of children and anyone unfamiliar with the device or this manual. Products are dangerous when used by inexperienced users.
e) Keep the product in good working order. Check before each use for general damage or damage to moving parts (cracks in parts and components or any other condition that may affect the safe operation of the device). If damaged, have the device repaired before use.
f) Keep the product out of the reach of children.
g) Repairs and maintenance should be carried out by qualified personnel using only original spare parts. This will ensure the safety of use.
h) To ensure the designed operational integrity of the device, do not remove factory-installed covers or loosen screws.
i) When transporting or moving the unit from storage to the place of use, observe the health and safety rules for manual handling applicable in the country where the unit is used.
j) Do not move, shift, or rotate the machine while in operation.
k) Do not leave the device switched on unattended.
I) Clean the device regularly to prevent permanent dirt build-up.
m) Use LPG gas to power the appliance. The use of other gases is prohibited!
n) Before each use, make sure that the nozzle is properly mounted in the machine and that the hose is properly attached and undamaged.
o) If you notice a leak from the unit or hoses, or smell a specific gas scent, disconnect the gas supply immediately and consult an authorized person. Ventilate the room in which the gas has leaked.
p) Do not exceed the recommended supply pressure as this may damage the unit.
q) Do not obstruct the air inlet or outlet.
r) Do not twist or bend the gas hoses.
s) The product is not a toy. Cleaning and maintenance must not be performed by children without adult supervision.
t) Do not tamper with the device to alter its performance or design.
u) Keep the unit away from sources of fire and heat.
v) Do not overload the device.
w) The maximum permissible pressure of the gas supply to the appliance must not be exceeded! Use only a gas supply with a pressure regulator and suitable nozzles.
x) Do not block the ventilation openings of the unit!
y) This product is not intended for domestic use or use in campers or mobile homes. It is suitable for use in open spaces or well-ventilated areas, but must not be used below ground level (e.g. basements, garages or underground cells).
z) Make sure the fan is working properly before starting the burner.
aa) Maintain a minimum distance of 3.5 m from the hot air outlet, 2.5 m from the air inlet and 2 m from the other sides of the unit.
bb) When using the screw, use the conversion factor of 100W power per 1 m^3 of space - do not use the screw in smaller spaces resulting from this ratio.
cc) Do not use open fire near the screw or gas cylinder!
dd) The working surface should be even, dry and resistant to heat.

CAUTION! Although the product has been designed to be safe and has adequate safeguards and despite the additional safety features provided to the user, there is still a slight risk of accident or injury when handling the product. Caution and common sense are advised when using the product.
3. Instructions for use
The device is designed to heat the air in rooms. The device is not intended for home use.
DO NOT USE FOR HOUSEHOLD HEATING. FOR PUBLIC BUILDINGS, READ LOCAL REGULATIONS BEFORE USE.
The user is responsible for any damage resulting from misuse.
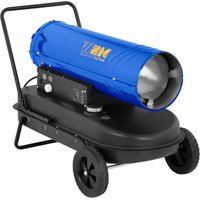
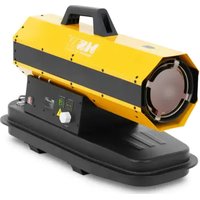
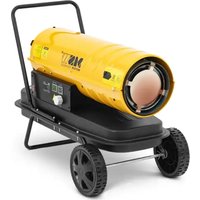
3.1. Product overview
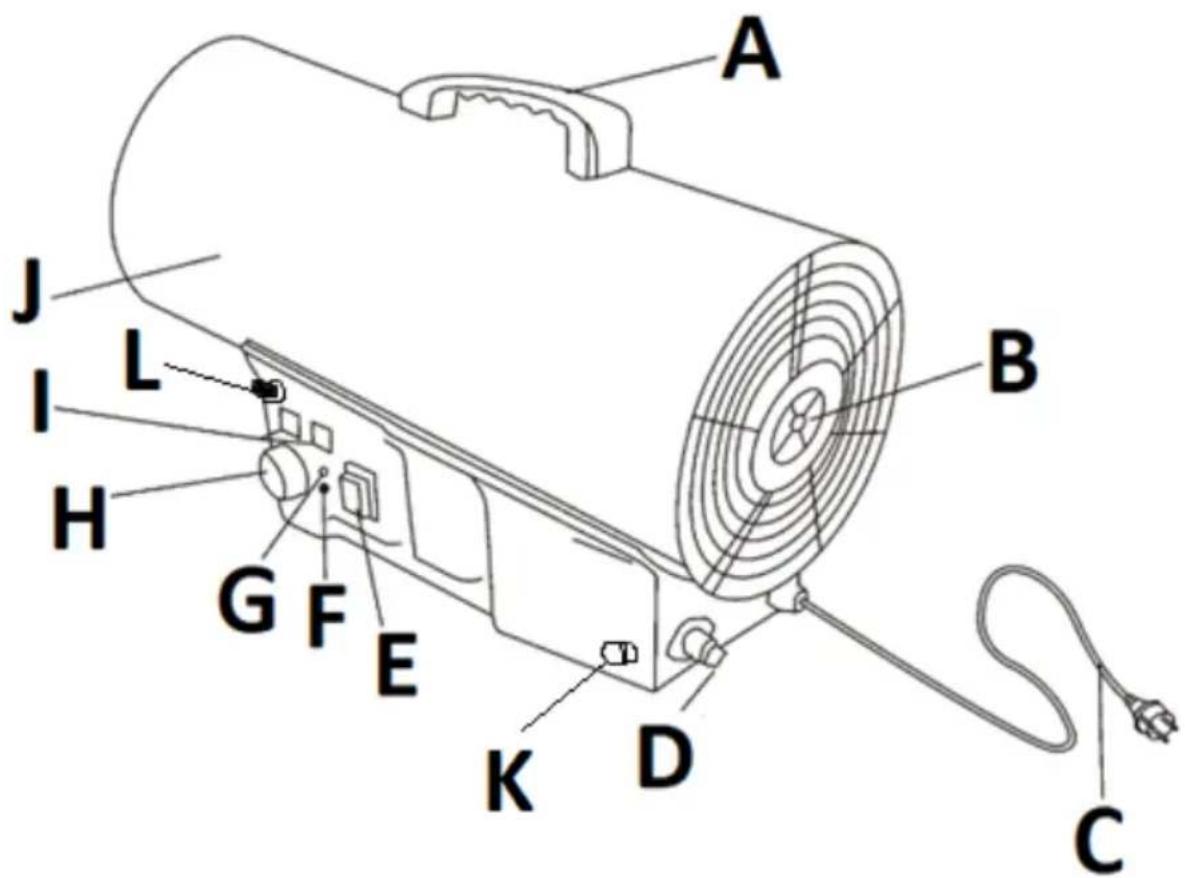
A. Transport handle
B. Protective grille with access to the engine
C. Power cord with plug
D. Gas connection
E. Power switch
F. Reset button (selected models only)
G. Reset light (selected models only)
H. Temperature control knob
I. Displays - left set temperature, right ambient temperature; (selected models only)
J. Casing
K. Gas valve button
L. Ignition button
3.2. Preparation for operation
POSITIONING OF THE UNIT
The ambient temperature must not exceed 40^ C and ambient humidity should not exceed 85%. Place the unit in a way that ensures good air circulation. Make sure to keep the minimum safe distance from each side of the device (see more in the section "Safe use of the device"). Keep the unit away from any hot surfaces, including direct sunlight. Always operate the unit on a level, stable, clean, fireproof and dry surface and out of the reach of children and persons of impaired mental, sensory and intellectual functions. Place the unit in such a way that the mains plug can be reached at any time. Ensure that the power supply to the unit corresponds to that specified on the identification plate!
ASSEMBLY OF THE UNIT
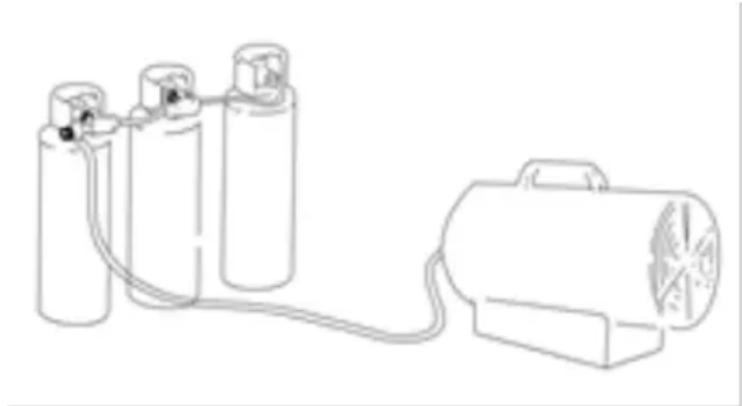
IMPORTANT: the unit requires a gas hose connection along with a regulator and a cylinder - please contact your local gas supplier for more details.
- First check the unit for any transport damage. Connect the power cord to the power source.
- Ground the unit.
- Connect the gas tank to the device via the connection (D) - a pressure regulator should be installed on the connection.
- Open the gas valve of the tank and check for possible rupture/leaks - the use of a special gas leak detection device is recommended.
NOTE: in the event of frequent, long-term use of the device at full power, frost may form on the gas tank - this is normal. To prevent or reduce this effect, use a tank with a larger capacity or connect 2 or more gas tanks simultaneously. Under no circumstances should the tank itself be heated!
natural_image
Line drawing of a portable gas cylinder connected to a cylindrical fan (no text or symbols)3.3. Working with the device
3.3.1 Turning on
With the valve in the gas tank open.
a) Automatic ignition:
- Set the power switch (E) to the "I" position and the electric motor will start, i.e. the fan will start to rotate and the display on the right will show the ambient temperature.
- Press the gas valve (K) and set the power switch (E) to the "II" position. The display on the left will show the current temperature set on the device and the device will automatically start the ignition if this temperature is higher than the ambient temperature. If the ambient temperature is higher than the set temperature, the device will not start, unless the temperature control knob (H) is set to a higher temperature.
- Adjust the gas flow from the tank according to your needs - by turning the regulator knob counterclockwise to increase it, and the other way to reduce it.
- If ignition occurs, but the heater is blocked after a few seconds, the reset indicator (G) will illuminate. Wait a minute and then press the reset button (F) and repeat the above startup procedure from the beginning.
b) Manual ignition:
- Set the power switch (E) to the "I" position and the electric motor will start - the fan will start to rotate.
- Press and hold the gas valve (K) and press the ignition button (L) until the fire ignites. After the fire appears, keep pressing the gas valve button for about 10 seconds.
- In the event that after lowering the gas valve button (K) the unit stops working, wait 1 minute and repeat the above start-up procedure. However, after ignition, hold down the gas valve button (K) a little longer.
- Adjust the gas flow from the tank according to your needs - by turning the regulator knob counterclockwise to increase it, and the other way to reduce it.
NOTE: in the event of difficult or irregular ignition, make sure that nothing is blocking the fan and that it rotates freely.
3.3.2 Switching off
- Close the gas valve at the tank, but allow the fan to work until the flame is extinguished, i.e. do not turn off the device itself.
- When the flame goes out, set the power switch (E) to the "O" position.
IMPORTANT: never leave the appliance idle with the gas valve open!
3.3.3 Room ventilation function
Alternatively, the device can be used to ventilate the room. To do this, first turn off the gas supply. Then, after connecting the plug (C) to the power socket, set the power switch to the "I" position, and the fan will be triggered and start to move the air in the room.
3.4. Cleaning and maintenance
a) Pull the mains plug and let the unit cool down completely before cleaning, adjusting or replacing accessories and when the unit is not in use.
- Wait until the rotating parts stop.
b) Use only non-corrosive cleaning agents for cleaning the surfaces.
c) After each cleaning, all the parts should be dried well before the unit is used again.
d) Store the unit in a dry and cool place protected from moisture and direct sunlight.
e) Do not spray the unit with a stream of water or immerse it in water.
f) Make sure that no water enters through the ventilation openings in the casing.
g) Clean the ventilation openings with a brush and compressed air.
h) Perform regular inspections of the unit checking technical fitness and any damages.
i) Use a soft cloth for cleaning.
j) Do not use sharp and/or metal objects (e.g. wire brush or metal spatula) for cleaning as they may damage the surface of the appliance material.
k) Once a year, the device should be checked by a qualified technician.
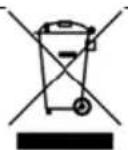
DISPOSAL OF WASTE APPLIANCES
At the end of its useful life, this product should not be disposed of with normal household waste but should be taken to a collection point for the recycling of electrical and electronic equipment. This is indicated by the symbol on the product, operating instructions or packaging. The materials used in this appliance are recyclable according to their marking. By reuse, recycling or applying other
forms of use of waste machines, you make a significant contribution to the protection of our environment.
Your local administration will provide you with information about the appropriate disposal point for used appliances.
TROUBLESHOOTING (for models with automatic ignition)
| Problem | Possible cause | Solution |
| The engine is not running. | No power supply | Check the control board with a meter. |
| Ambient temperature higher than that set on the device. | Set a higher temperature on the appliance. | |
| The safety thermostat has tuned off. | Wait a minute and press the reset button. | |
| The engine runs, but the burner does not ignite and after a few seconds the unit shuts down. | Gas valve closed. | Open the valve. |
| Empty gas tank. | Connect a filled tank. | |
| The gas nozzle is clogged. | Remove the nozzle and clean it. | |
| The gas solenoid valve is closed. | Check the gas solenoid valve for proper operation. | |
| No ignition spark. | Check the space between the ignition electrodes. | |
| The heater turns off during operation. | Too much gas. | Check the gas regulator and replace it if necessary. |
| Insufficient air flow. | Check the motor for proper operation. | |
| Insufficient gas flow due to frost on the tank. | Check and if necessary replace with a larger gas tank or connect two tanks simultaneously to supply the device. |
Dane techniczne
natural_image
Line drawing of a portable air conditioner connected to a cylindrical gas cylinder (no text or symbols)natural_image
Line drawing of a portable gas cylinder connected to a portable fan (no text or symbols)natural_image
Line drawing of a gas cylinder connected to a cylindrical fan with a coiled cable (no text or symbols)natural_image
Line drawing of a portable gas cylinder connected to a cylindrical fan (no text or symbols)natural_image
Line drawing of a portable gas cylinder connected to a portable fan (no text or symbols)APPARATETS PLACERING
natural_image
Line drawing of a portable gas cylinder connected to a portable fan (no text or symbols)natural_image
Line drawing of a portable gas cylinder connected to a cylindrical device via tubing (no text or symbols)natural_image
Line drawing of a portable gas cylinder connected to a cylindrical fan (no text or symbols)A. Transporthåndtak
natural_image
Line drawing of a gas cylinder connected to a portable fan (no text or symbols)PLACERING AV APPARATEN
natural_image
Line drawing of a gas cylinder connected to a cylindrical fan with a coiled cable (no text or symbols)natural_image
Line drawing of a portable gas cylinder connected to a cylindrical fan (no text or symbols)For the disposal of the device please consider and act according to the national and local rules and regulations.
CONTACT
expondo Polska sp. z o.o. sp. k.