Black800 5K - Camera BRAUN - Free user manual and instructions
Find the device manual for free Black800 5K BRAUN in PDF.

| Product type | Surveillance camera / Trail camera |
| Dimensions | 122 x 94 x 72 mm |
| Power supply | 6 AA 1.5V batteries (alkaline or lithium) or external 9V DC power |
| Maximum photo resolution | 48 MP |
| Maximum video resolution | 5K at 30 fps |
| Viewing angle | 102° |
| Infrared illumination range | 20 m |
| Trigger distance | 20 m |
| PIR detection angle | 90° |
| Trigger time | 0.6 s |
| Built-in screen | 2.0" color |
| External storage | microSD card up to 512 GB (class 10) |
| Waterproof rating | IP66 |
| Operating temperature | -20 °C to 60 °C |
| Standby battery life | Up to 12 months (with lithium batteries) |
| Operating modes | Photo, Video, Photo+Video, Time-lapse |
| Audio recording | Yes (on/off) |
| Security | Password protection (4 digits) |
| Maintenance and cleaning | Gently clean the PIR sensor by blowing; do not wipe to avoid scratches |
| Repairability | Repair only by authorized technician; do not disassemble the housing |
| Available languages | French, English, German, Spanish, Italian, Dutch, etc. (14 languages) |
Frequently Asked Questions - Black800 5K BRAUN
User questions about Black800 5K BRAUN
0 question about this device. Answer the ones you know or ask your own.
Ask a new question about this device
Download the instructions for your Camera in PDF format for free! Find your manual Black800 5K - BRAUN and take your electronic device back in hand. On this page are published all the documents necessary for the use of your device. Black800 5K by BRAUN.
USER MANUAL Black800 5K BRAUN
natural_image
Close-up of a camouflage-based video camera with visible lens and control buttons (no text or symbols)
natural_image
Red abstract curved shape with white line (no text or symbols)BRAUN®
GERMANY
Einleitung
natural_image
Close-up of a black electronic device with a red square marker and '10' label, no visible text or symbols on the device itself.natural_image
Black-and-white photo of six cylindrical batteries arranged in a row (no visible text or symbols)natural_image
Interior view of a printer's drawer showing internal components and a black cover (no visible text or symbols)natural_image
Close-up of a mechanical component with a red arrow pointing to a small part (no visible text or symbols)- Speicher- karte formatieren

natural_image
Digital display screen showing a blue screen with light effects and a red button, no visible text or symbols on the screen.natural_image
Isometric line drawing of a brick wall with a circular drainhole (no text or symbols)natural_image
Close-up of a brick wall corner with a black arrow pointing upward (no text or symbols)natural_image
Technical diagram of a mechanical device with a circular component and a cylindrical housing (no text or symbols visible)natural_image
Top-down schematic of a mechanical or electronic component with concentric circular patterns and a central connector (no text or symbols)natural_image
Technical line drawing of a mechanical component with internal channels and a curved duct (no text or symbols)natural_image
Diagram of a vehicle's internal components with a black cable inserted (no text or symbols)natural_image
Close-up of a camouflage-based video camera with visible lens and control buttons (no text or symbols)
natural_image
Red abstract curved shape with white line (no text or symbols)BRAUN®
GERMANY
Introduction
Congratulations on the purchase of your new device. You have selected a high-quality product. The operating instruction is one constituent of this product. It contains important information about safety, use and disposal.
Before using the product, familiarize yourself with all operating and safety instructions. Use this product only as described and only for the specified areas of application.
Intended Use
This device is intended only for recording digital photos and videos, particularly for observing wildlife.
If the camera is placed outdoors, the changes in the weather could lead to error record.
Safety
Please read below safety precautions carefully before using the camera.
- Do not try to disassemble the product case. Only authorized technician can repair the product.
- The camera will be hot after longtime used.
CAMERA OVERVIEW

SIMPLE TO USE
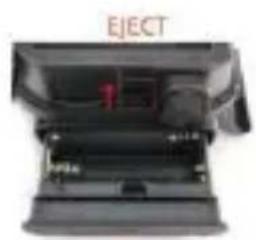
natural_image
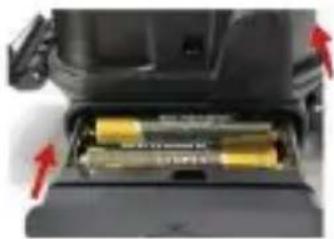
Exterior view of a mechanical device labeled 'EJECT' (no other text or symbols visible)- Pull EJECT Button to eject battery compartment
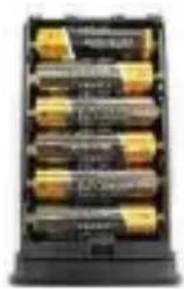
natural_image
Black rectangular container filled with yellow and black cylindrical objects, no visible text or symbols- Install 6PCS 1.5V AA batteries
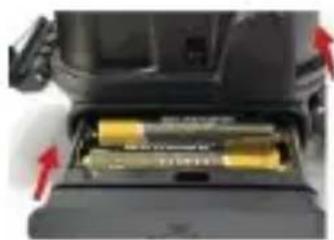
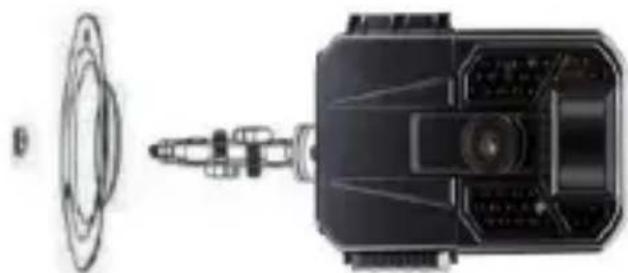
natural_image
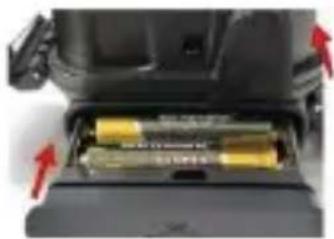
Close-up of a black electronic device with two batteries inserted, showing red arrows indicating direction (no text or symbols visible)- Insert battery compartment
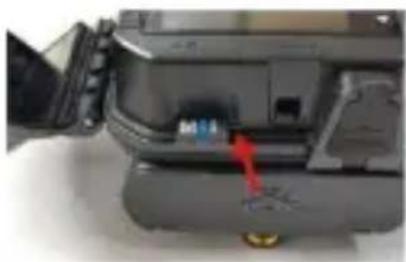
natural_image
Close-up of a mechanical device with a red arrow pointing to a component, no visible text or symbols- Insert Micro SD card
natural_image
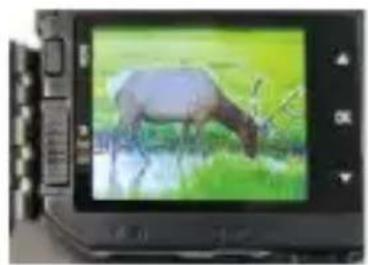
Digital camera display showing a deer grazing in a wetland (no visible text or symbols)5.Switch camera to TEST mode
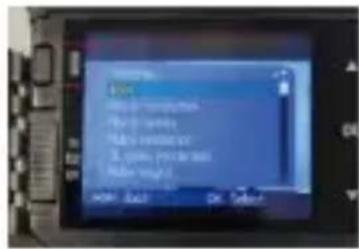
- Press MODE button to enter Menu
- Format memory card
- Reset Settings

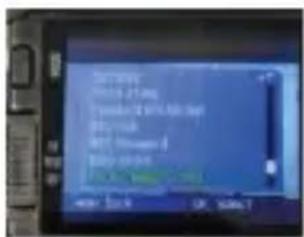
- Program settings
natural_image
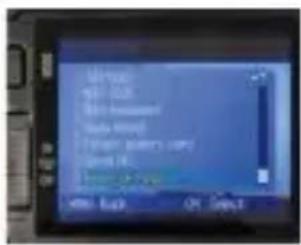
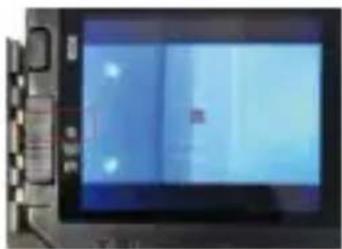
Digital display screen showing a blue screen with light effects, mounted on a dark surface (no visible text or symbols)10.Switch camera to ON mode to use
1. IMPORTANT NOTES
1.1. About Batteries
Requires 6PCS 1.5V AA Alkaline or Lithium batteries.
We recommend the use of Energizer AA Lithium batteries in this camera to obtain maximum battery life.
Do not mix old and new batteries.
Do not mix battery type.
Rechargeable NiMH AA batteries can be used, but are NOT recommended as the lower voltage (generally 1.2V) they produce can cause night recording issues, and you also may have to replace them frequently.
Remove batteries when the camera is NOT in use.
1.2. About Micro SD Card
Requires a standard-size micro SDXC/SDHC memory card (max capacity 512GB, Class 10).
Before use, please format the memory card in the camera in case the memory card may not work with your camera.
Please gently remove the protective films on the front of the camera to get the best
performance, especially the protective films attached to the PIR motion sensor may cause promotion detection performance, even no capture.
2. INTRODUCTION
- High quality pictures 48MP still photos
- Real 4K@30FPS video clips with audio, 5K@30FPS max.
-1080P slow motion videos
Clear night vision, flash range of 20m, the camera is equipped with 38pcs high performance infrared no glow 940nm LED that function as a flash (invisible to human and animal eyes)
- Wide view angle 102°
- Easy to use/program with well-designed operation buttons
- Built-in 2 inch color screen, easy to program, review pictures and videos on the screen.
- Two working modes: Infrared trigger and Time lapse target time recording
- Fast trigger time - approx. 0.6s, Fast recovery time - 0.2s
- Long trigger distance up to 20m, Detection Angle 90°
- Info strip on each capture: Date, Time, Temperature & Moon Phase, Cycle Storage, Time Lapse, Password Protection
- Built for any climate - IP66, Operation Temperature: -20\~60°C
- Support Micro SD/SDHC/SDXC memory card, max capacity 512GB
- Extremely long in-field battery life of up to 12 months in a stand-by state with 6 AA 1.5V batteries (batteries are not included)
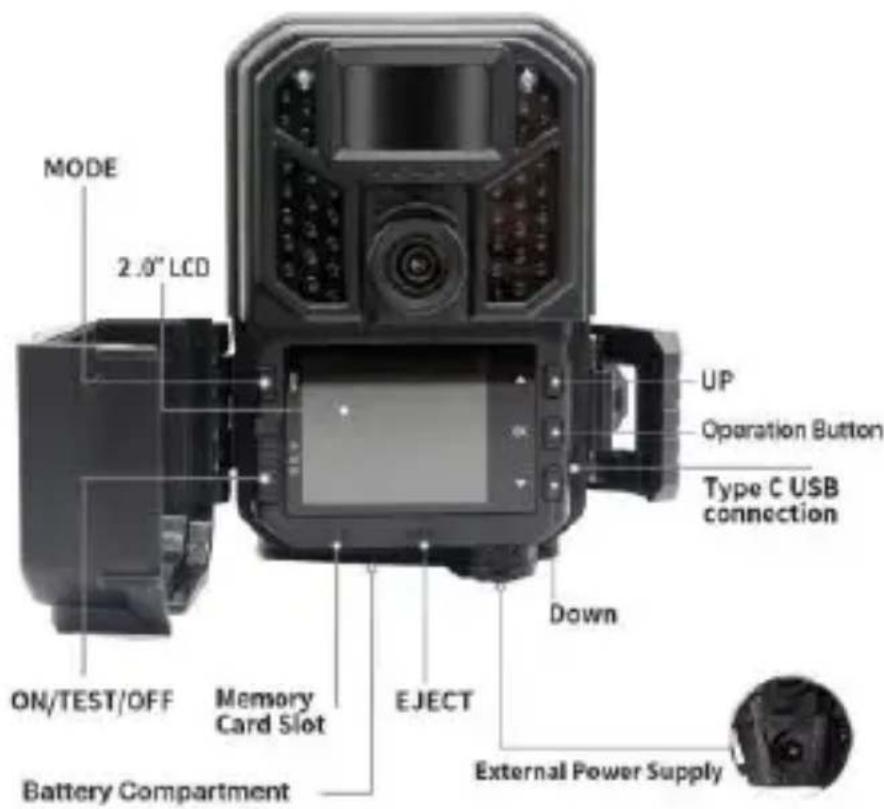
3. PARTS AND CONTROLS
The camera is equipped with 38pcs high-efficiency infrared LED, LED Indicator, Lens, and PIR Sensor.
TIP : During use, if the black PIR sensor cover is dirty, it does not affect the performance.
If you must clean it, please try to blow it off or pick out the dirt very lightly. Do not try to wipe it, which may cause more scratches. Due to the reliability design of the PIR sensor, scratches do not reduce the PIR detection performance.
4.CAMERA OPERATION
Power switch has 3 operational modes: "OFF", "ON", and "TEST".
| Power Switch | Functions |
| “OFF” Mode | 1. install/ replace the batteries2. insert a Micro SD card3. connect to an external device or a power source |
| “ON” Mode | 1. Display the working mode, count down 5 seconds and start working |
| “TEST” Mode | 1. Set up the camera2. Manual shooting-Press the UP key, then press OK to record videos and press OK to stop.-Press the DOWN key, then press SHOT to take photo.3. Playback, press Mode and select Playback and OK. |
5. ADVANCED SETTINGS
| Parameter | Settings(Bold =default) | Description |
| Playback | Playback photo or video on camera | Press OK twice to enter Playback, press Up/Down buttons to read files Under Playback mode, press menu to delete or write protect the photos or videos. |
| Mode | Photo + Video, Photo, Video | Select whether photos or video clips are taken.Photo + Video: camera will take a photo first, then start recording video. |
| Photo Resolution | 48MP, 30MP, 24MP, 16MP, 12MP, 8MP, 5MP | Select a desired resolution for photos. Higher resolution produces better quality photos but creates larger files that take more of the micro SD card capacity. Larger files require a longer time to write to the SD card, which will slightly slow the shutter speed. |
| Photo Series | 1, 2, 3 | Select the number of photos taken in sequence per trigger. |
| Video Resolution | 5K@30fps; 4K@30fps; 2.7K@30fps; 1080P@120fps; 1080P Slow Motion@30fps; 1080P@60fps; 1080P@30fps; | Select video resolution. Higher resolution produces better quality videos but creates larger files that take more of the micro SD card capacity. |
| Video Length | 5 seconds, 5-59 sec., 1-5 min., programmable | Select video recording length. Note: It is highly recommended to set the night video length to less than 30 seconds as the IR LEDs will consume more battery power for recordings during night. |
| Beep Sound | On/Off | Turn the sound when pressing a button On/Off. |
| Audio Recording | On/Off | Select On will record video with sound. |
| Stamp | On/Off | Date, time, moon phase will be printed on the photo or video. |
| IR Brightness | HighLight/Normal/Economics | IR LED brightness can be programmed. |
| PIR Sensitivity | High/Normal/Low | Select the sensitivity of the PIR sensor. Temperature affects sensitivity. The High setting is suitable when the ambient temperature is warm, or you want to capture distant objects or capture more. The Middle/Low setting is helpful in cold weather.Note: this option is invalid if the Mode is set as “Time Lapse” |
| PIR Interval | 5 seconds, 5-59 sec; 1-60 min programmable | Select the shortest length of time that the camera will wait until it responds to any subsequent triggers from the PIR sensor after an animal is first detected. During the selected interval, the camera will not take pictures/videos. This prevents the memory card from filling up with too many redundant images.Note: This option is invalid if the Mode is set as “Time Lapse”. |
| Time-Lapse | On/Off | Camera can be set with fixed trigger time, from 30--59 sec., 1-59 min., or 1-24 hrs., instead of PIR trigger. |
| Target recording time1/2 | On/Off | Target recording time can be programmed at any time from 00:00 to 23:59. |
| Password Protection | On/Off | Set up a 4-digit password to protect your camera from unauthorized users. |
| Temperature Unit | Celsius/Fahrenheit | Select whether the temperature is displayed in Celsius or Fahrenheit on the recordings. |
| FormatMemoryCard | On/Off | All files will be deleted after formatting the SD card. It's highly recommended that you format the SD card if it has been used previously on other devices.Caution: make sure the wanted files on the SD card have been backed up first! |
| ResetSettings | On/Off | Selecting Yes will return all your previous settings back to the manufacturer's default. |
| CycleStorage | On/Off | Selecting the On option will cause the oldest files to be overwritten with new captures when the SD card reaches its capacity. With the Off option selected, the camera will stop capturing images once the SD card is full. |
| Language | English, German, Danish, Finnish, Swedish, Spanish, French, Italian, Dutch, Japanese, Czech, Slovak, Polish | Multi languages available for customers to set the preferred using language. |
6. INSTALLATION
If you want to put the camera on the wall.
- Mark the installation position with the help of the metal plate and make holes in the wall.
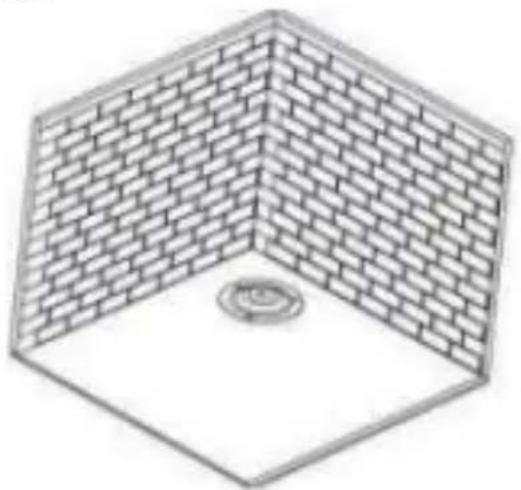
natural_image
Isometric view of a brick wall structure with a circular base (no text or symbols)- Put the white components in the holes.
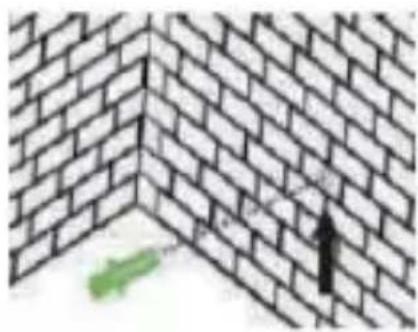
natural_image
Diagram of a brick wall corner with an arrow pointing to a green object (no text or symbols)Fix the Fixation Kit by following the picture.
natural_image
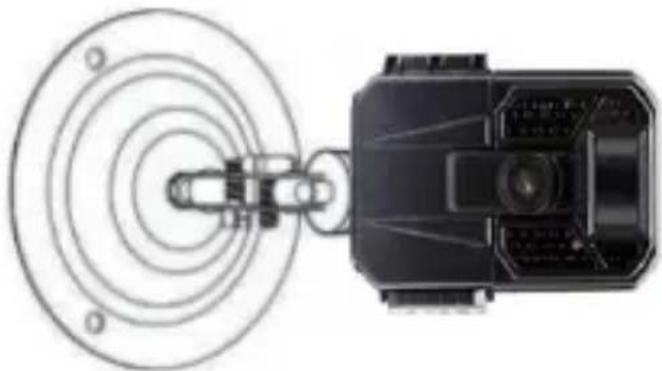
Technical diagram of a mechanical device with top and side views, no visible text or symbolsPut the camera at the position you have chosen and fix the camera with screws.
natural_image
Top-down schematic of a vehicle with sensor array and camera (no text or symbols)If you want to put the camera on a tree.
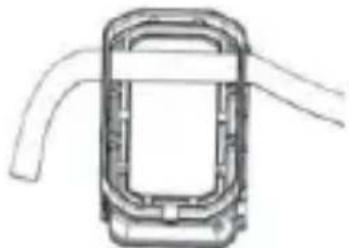
- Pass the Installation Belt through the support on the back of the camera.
natural_image
Technical line drawing of a mechanical component with no visible text or symbols-
Put the camera on the bottom of the tree.
-
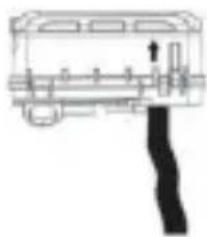
Go to the other side of the tree, pass the belt through the buckles by following the picture.
natural_image
Pure mechanical component diagram without any text, numbers, or symbols-
Adjust the position of the camera then tightens the belt.
-
If you're afraid that the camera might fall, you could also use the Fixation Kit and the Installation Belt together to make sure that the camera is sturdily fixed on the right position.
PRECAUTIONS FOR USE
Please read all safety notes and helpful tips before using the camera Safety Notes
-
The device is only designed for wildlife observation, hunting, and security monitoring. Do not use it for any other purpose.
-
Do not immerse the camera into water.
-
Do not disassemble the camera, please feel free to contact our customer service for help.
-
Do not use a different type of power source, it may result in fire or electric shock.
-
Always switch off the camera and remove the batteries after use.
-
Always disconnect the power supply during a thunderstorm/ a lightning.
-
Never subject the LCD display to heavy shocks, it may damage the screen and cause liquid leaking from inside. In case of contact with eyes or skin, rinse with plenty of water ASAP and seek immediate medical attention.
Helpful Tips
-
Place the device on an even surface or a stable stand. If you want to mount the camera on a tree trunk, install it using the premium-quality mounting hardware/strap designed for this camera.
-
Operate the camera in a well-ventilated area.
-
To prevent damage, never subject the camera to heavy shocks and do not shake or drop it.
-
The device is not intended for use by children. Keep out of the reach of children.
Note:
-
Switch off the camera before inserting or removing the Micro SD Card. Do not insert or remove the SD card when the power switch is in the "ON" position
-
Camera only operates after installing a Micro SD Card
FAQ
If your camera does not seem to be functioning properly or if you are having photo/video quality issues, please check if you are using the latest firmware, and check the Troubleshooting/FAQ section.
Q: Camera won't power up
Make sure that you have installed six 1.5V new batteries in the battery compartment, filling battery all spaces with no "gaps". Make sure that the batteries are installed correctly, observing proper polarity. Always place the negative (flat) end of each battery in contact with the spring side of its slot inside the camera. Or install the batteries again to check if the camera can power up.
We recommend using new 6 high-quality 1.5V Alkaline or Lithium AA batteries. In some cases, the new batteries might be defective, even would be no power, it would be quite good if you have meter to measure the batteries voltage to double check. Rechargeable AA batteries are NOT recommended as the lower voltage they produce can cause operational issues. The worst case is that the camera can't be powered up.
Q: The camera takes great daytime pictures, but nighttime pictures are all black.
Manually take pictures at low lighting place (such as a dark room indoors). Review the pictures on the camera screen or your computer, if they are still all black, send the version and the black pictures to our support email for further assistance.
Q: The camera takes continuous images of no subject
A camera has what is known as a "False Trigger" if the PIR sensor thinks that there is motion and heat in front of the camera lens when there is no subject in the image. These "False Triggers" are the result of placing the camera in an environment where there is motion associated with tree branches creating motion in front of the camera or an area where there is high heat in the foreground and any motion from wind could set off the camera. Setting a camera up over water is also a potential cause for this issue. To remedy this situation:
Try moving the camera to an area that does not have any of these issues or try changing the sensor level on the menu settings.
If the camera continues to take images when there is no subject in them, try placing the camera in an inside environment and aiming at a location where there is no motion.
If the camera continues to show issues, then there is probably an electronic component issue. If this is the case, please contact our customer service to send the camera back for repair.
Q: Battery life is shorter than expected
Battery life will vary with operating temperature and the number of images taken over time. Typically, the camera will be able to capture several thousand images before the batteries die.
Check to make sure you have used new batteries. We recommend using six good quality Lithium AA 1.5V batteries in all cameras to obtain maximum battery life.
Make sure that you are using a good quality name-brand SD card in your camera. Our experience indicates that poor-quality SD cards can sometimes reduce your camera battery life.
| Mode | Photo Video Photo+Video |
| Photo resolution | 48MP/30MP/24M/16MP/12MP/8MP/5MP |
| Video resolution | 5K@30fps; 4K@30fps; 2.7K@30fps; 1080P@120fps; 1080P Slow motion @30fps; 1080P@60fps; 1080P@30fps; |
| File format | JPG & MOV. |
| Photo Series | 1-3, programmable |
| Lens | Focal Length=4.9mm F/NO=1.6 View Angle=102° |
| Video Length | 5-59 sec, 1-5 min programmable |
| Audio Recording | On/Off |
| PIR Interval | 5-59 sec; 1-60 min programmable |
| PIR sensitivity | High/Normal/Low |
| IR Brightness | High/Normal/Eco |
| Serial No. | Off/On, 6 digit numbers or 26 alphabets |
| Date & Time | Year/Mon/Day; Hr/Min/Sec |
| Loop Recording | On/Off |
| Beep Sound | On/Off |
| Memory Card Format | No/Yes |
| Language | English, German, Danish, Finnish, Swedish, Spanish, French, Italian, Dutch, Japanese, Czech, Slovak, Polish |
| Password Protection | Off/On, 4 digit numbers or 26 alphabets |
| Factory Reset | No/Yes |
| Version Info | Support |
| External memory | Micro SD card up to 512GB |
| Range of IR flash | 20 m |
| Triggering distance | 20 m |
| Detection angle of PIR sensors | 90° |
| Triggering time | 0.6 seconds |
| Effective shooting distance | Daytime:1m-infinitive;Night time:1m-20m |
| Built-in Microphone | Yes |
| Built-in Speaker | Yes |
| Auto power off (when switch is in TEST position) | Auto power off in 1 minute while no keypad controlling |
| Interface | External: USB-C; Micro SD Card slot; 9V CC power jack |
| Power supply | Batteries: 6 x 1.5V AA batteriesExternal power supply 9V 1ADC jack 5.5*2.1mm |
| Standby time | Up to 12 months |
| Waterproof | IP66 |
| Operating temperature | -20°C to +60°C |
| Dimension | 122*94*72mm |
| Accessories list | USB-C cable, user manual, wall mount,screws, strap |
Privacy Policy
In every country, legal data protection rules apply. As these rules may vary per country, please contact the appropriate authorities to learn about the latest privacy policy in your country. In any case kindly note:
- Do not observe public areas such as sidewalks, roads, parking lots, etc.
- Never observe your staff.
- Respect the general right of privacy.
- Do not publish pictures showing individuals without having their permission. Do not publish pictures showing identifiable automobile license plates.
- Make aware of the observed areas with a sign and inform your neighbors and visitors if necessary.

CE MARKING
The CE marking complies with the European standards and indicates that the product meets the requirements of the applicable EU directives. The complete declaration of conformity can be found on our website www.braun-phototechnik.de directly on the product page.
natural_image
Close-up of a camouflage-based video camera with visible lens and control buttons (no text or symbols)
natural_image
Red curved banner icon with white outline (no text or symbols)BRAUN®
GERMANY
Introduction
natural_image
Black rectangular container with multiple cylindrical objects arranged in a row (no visible text or symbols)- Installez 6 batteries AA 1,5 V
natural_image
Interior view of a battery pack with red arrows indicating direction (no text or symbols visible)natural_image
Close-up of a device's internal components with a red arrow pointing to a blue component (no visible text or symbols)natural_image
Digital camera module displaying a deer photo on a grassy field (no visible text or symbols)natural_image
Isometric line drawing of a brick wall with a circular drainhole (no text or symbols)natural_image
Black arrow pointing upward on a brick wall corner, with a green tool nearby (no text or symbols)natural_image
Technical illustration of a mechanical device with circular components and a central hub (no visible text or symbols)natural_image
Top-down schematic of a camera with concentric circular components and a sensor or signal detection device (no text or symbols)natural_image
Technical line drawing of a mechanical component with no visible text or symbolsnatural_image
Pure electrical circuit lines without any symbolsMARQUAGE CONFORMITÉ EUROPÉENNE CE
natural_image
Close-up of a camouflage-based video camera with visible lens and control buttons (no text or symbols)
natural_image
Red curved banner icon with white outline (no text or symbols)BRAUN®
GERMANY
Introduzione
natural_image
Exterior view of a mechanical device labeled 'EJECT' (no other text or symbols visible)natural_image
Stacked cylindrical batteries in a black case (no visible text or symbols)natural_image
Close-up of a battery holder with red arrows indicating direction (no text or symbols visible)natural_image
Close-up of a mechanical device interior with a red arrow pointing to a component (no visible text or symbols)natural_image
Digital display screen showing a blue background with small light spots, next to a control panel (no visible text or symbols)- Video in slow motion a 1080P
natural_image
Isometric line drawing of a brick wall with a circular drainhole (no text or symbols)natural_image
Black arrow pointing upward on a brick wall corner, no text or symbols presentnatural_image
Technical diagram of a mechanical device with top and side views, no visible text or symbolsnatural_image
Top-down schematic of a mechanical or electronic device with concentric circular components and a central connector (no text or symbols visible)natural_image
Technical line drawing of a mechanical component with no visible text or symbolsnatural_image
Pure electrical circuit lines without any symbolsnatural_image
Close-up of a camouflaged video camera with camouflage pattern and digital display (no visible text or symbols)
natural_image
Red curved banner icon with white outline (no text or symbols)BRAUN®
GERMANY
Introducción
natural_image
Exterior view of a mechanical device labeled 'EJECT' (no other text or symbols visible)natural_image
Black rectangular object with multiple yellow cylindrical objects arranged in a grid (no visible text or symbols)- Instalar 6 pilas AA de 1,5 V
natural_image
Close-up of a battery holder with red arrows indicating direction (no text or symbols visible)natural_image
Close-up of a mechanical device showing a red arrow pointing to a component, with no visible text or symbols.natural_image
Digital camera display showing a deer grazing in water, no visible text or symbols on the image itself.- Restablecer ajustes

- Ajustes de programas