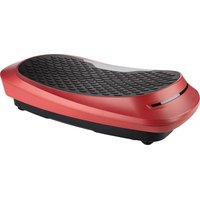
V2500 - Vibratory plate Skandika - Free user manual and instructions
Find the device manual for free V2500 Skandika in PDF.


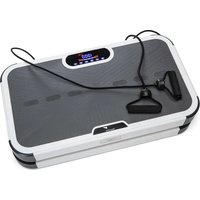
| Product type | Vibrating Plate |
| Brand | Skandika |
| Model | V2500 |
| Maximum user weight | 120 kg |
| Rated power | 150 W + 150 W + 40 W |
| Power supply | 220 V ~ 50/60 Hz |
| Net weight | Approx. 20 kg |
| Dimensions (L × W × H) | Approx. 780 × 440 × 150 mm |
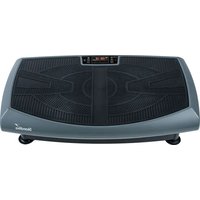
| Oscillation modes | Vertical, Horizontal, Vibration, Combined (5 modes total) |
| Preset programs | 3 programs (P1, P2, P3) with automatic cycles |
| Bluetooth connectivity | Yes, device name: ADVENOR |
| Remote control | Yes, CR2025 battery included |
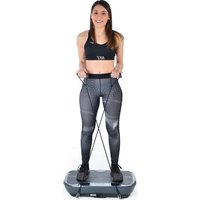
| Resistance bands | 1 pair included |
| Transport rollers | Yes, for easy moving |
| Auto shut-off | After 10 minutes by default (adjustable from 1 to 10 minutes) |
| Display screen | Yes, shows active mode and settings |
| Warranty | 24 months |
| Cleaning and maintenance | Slightly damp cloth, do not immerse, do not use harsh chemicals |
| Intended use | Domestic, one person at a time |
Frequently Asked Questions - V2500 Skandika
User questions about V2500 Skandika
0 question about this device. Answer the ones you know or ask your own.
Ask a new question about this device
Download the instructions for your Vibratory plate in PDF format for free! Find your manual V2500 - Skandika and take your electronic device back in hand. On this page are published all the documents necessary for the use of your device. V2500 by Skandika.
USER MANUAL V2500 Skandika
natural_image
Blue skandika fitness controller with digital display and hexagonal mesh pattern (no text or symbols on device)V 2500
Inhalt

skandika.com/service
natural_image
Line drawing of a woman sitting on a wheeled basket, viewed from the side (no text or symbols)natural_image
Illustration of a woman performing a seated exercise with a bowl containing food (no text or symbols)natural_image
Illustration of a woman performing a stretching exercise with a basket containing a bag (no text or symbols)natural_image
Illustration of a woman sitting on a chair using a resistance band machine (no text or symbols)natural_image
Line drawing of a hand holding a small object, possibly a tool or device, with no visible text or symbols.natural_image
Illustration of a woman standing on a resistance band using a walking stick, with a basket of weights and feet in the background (no text or symbols)natural_image
Illustration of a woman standing on a fitness equipment pod with a basket filled with weights (no text or symbols)natural_image
Illustration of a woman using a resistance band exercise machine (no text or symbols)15 Safety precautions
16 Explosion drawing
17Parts list
18Device features / Scope of delivery
19 Operating the control unit
20Operating the remote control / Bluetooth ^® connectivity
21Program training / Exercise instructions
23 Troubleshooting / Cleaning & care / Technical specifications
24Warm-Up and Cool-Down
25 Guarantee conditions

skandika.com/service
Please visit the Skandika Service portal on our website for setup & help videos, FAQs and downloadable instructions.
For more information about Skandika, simply visit our main page www.skandika.com

WARNING
To reduce risk of injury, read and understand this instruction manual before using the device! This machine is intended for home use only in accordance with the instructions provided in this manual. Read the instruction manual carefully before using this device and keep the instruction manual for future use.
SAFETY PRECAUTIONS
-
Keep children and pets away from the appliance. This device is suitable for adult use only. Do not leave children unattended in the same room with the machine.
-
Place the device on a solid and level and surface only. Use a floor protection to avoid traces through the device's feet. Never place the unit near heat sources.
-
The machine is designed to use indoor in dry environment without fl ammable gas or dust. It must be connected to a properly grounded electric outlet.
-
Before connecting the device to your power supply, please ensure that the device is switched off and the supply voltage stated is compatible with your mains supply.
-
Do not let the device run unattended.
-
If the user experiences dizziness, nausea, chest pain, or any other abnormal symptoms, stop the workout at once. Consult a physician immediately.
-
Use the machine only for its intended use as described in this manual. Do not use attachments not recommended by the manufacturer.
-
Never allow any parts of the body or objects to enter the openings or spaces of the unit. Risk of injury!
-
If you are a beginner or if you have health problems with the heart, the neurologic system, circulatory disturbances or orthopedic problems, first consult your doctor before use.
-
Remove jewellery, watches, etc. and put mobile phones, keys and other loose objects aside before exercising with the device. Do not use the machine at the same time with other equipment.
-
Never place heavy objects on the power cord, never twist, bend or squeeze it.
-
Remove the power cable after switching off - risk of injury! Do not use the unit if the power cord is defective and contact customer service.
-
Before using the machine to exercise, always do stretching exercises to properly warm up. Never exercise directly before or after meals.
-
Never operate the machine if the machine is not functioning properly. The safety level of the device can only be maintained if it is regularly checked for wear and damage.
-
After 10 minutes of use you should take a break of at least 20 minutes.
-
No liquid may penetrate the device! Do not use strong detergents to clean the unit.
-
Do not disassemble or modify the unit. In the event of malfunction or damage, contact the customer service.
-
To disconnect, turn all controls to the off position, then remove the plug from the outlet.
-
Excessive exposure to intensive vibration can cause a health hazard.
-
Only one person at a time should use the machine (max. load = 120 kg / 264 lb).
-
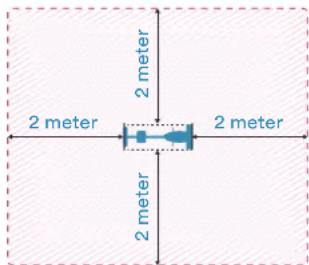
Please only exercise with a minimum clearance area of 2 meters around the device.
Be sure to consult a physician before you start any device program. He may give you proper hints and advice with respect to the individual intensity of stress for you, your workout and sensible eating habits. This is especially important for individuals over the age of 35 or persons with pre-existing health problems.
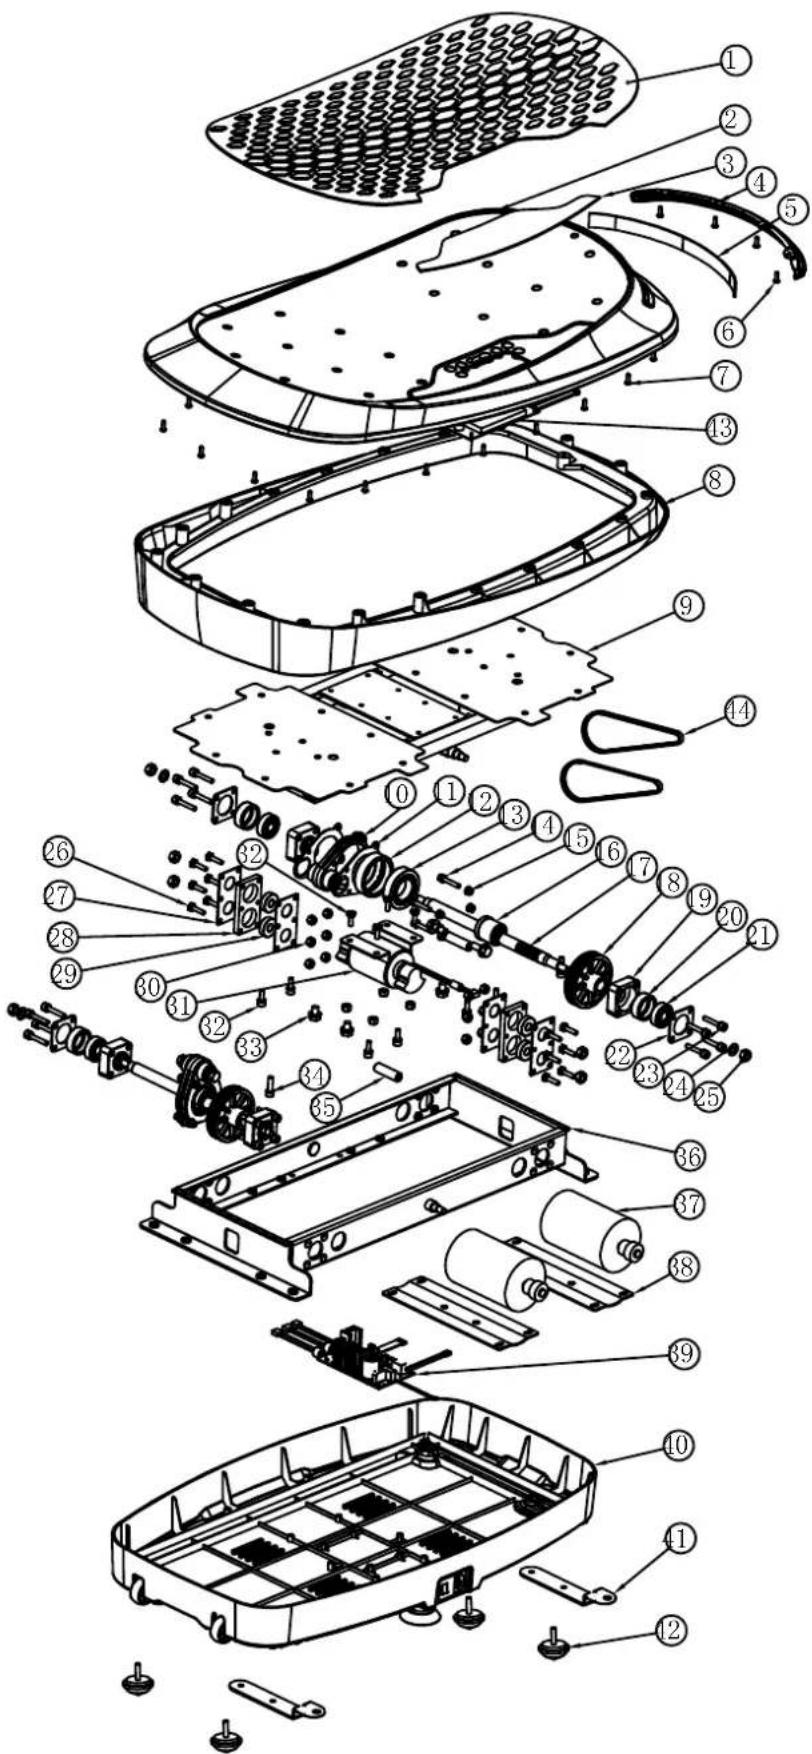
| Part No. | Description Specification | Material Q'ty | ||
| 1 Step rubber 631.7*354.3*3.7 TPR 1 | ||||
| 2 Upper cover 780*439.7*94 ABS 1 | ||||
| 3 Acrylic cover 338*70*1 Acryl 1 | ||||
| 4 Light cover 631.7*354.3*3.7 PC 1 | ||||
| 5 LED light strip, 3-color 330*10 | 1 | |||
| 6 | Cross round head tapping screw | ST3.0*8 | Zinc finished | 10 |
| 7 | Cross flat head tapping screw | ST4.0*14 | Zinc finished | 21 |
| 8 Middle cover 779.9*439.9*85.6 ABS 1 | ||||
| 9 Step board 609.8*326*76.5 Q235 1 | ||||
| 10 | “8” shape link | 94.9*41.7 | POM | 2 |
| 11 | Link gasket | 92*65*2.0 | Q235 | 4 |
| 12 | Bearing cover | ø58.1*16 | PU | 2 |
| 13 | Bearing | 6006 | Steel | 2 |
| 14 | Hexagon round head screw | M5*14 | Zinc finished | 8 |
| 15 | Nut of flange M5 | Zinc finished | 4 | |
| 16 | Eccentric block | ø32.3*ø15*30 | POM | 2 |
| 17 | Long axis | ø15*279.6*M8 | 40cr | 2 |
| 18 | Belt wheel | ø75*ø15*32 | POM | 2 |
| 19 | Bearing base | 43.5*43.5*19 | POM | 4 |
| 20 | Bearing cover | ø35*13.5 | PU | 2 |
| 21 | Bearing | 6201 | Steel | 2 |
| 22 | Cover of bearing base | 43*43*2.0 | Q235 | 4 |
| 23 | Hexagon round head screw | M5*30 | Zinc finished | 16 |
| 24 | Flat gasket | ø16*ø8*2.0 | Zinc finished | 8 |
| 25 | Nut | M8 | Zinc finished | 12 |
| 26 | Hexagon Screw | M5*20 | Zinc finished | 12 |
| 27 | Gasket of “8” shape link | 75*40*1.5 | Q235 | 4 |
| 28 | “8” shape link | 75*40*8 | POM | 2 |
| 29 | Bearing | 6000 | Steel | 4 |
| 30 | Hexagon nut | M5 | Zinc finished | 12 |
| 31 | 53 Motor | 180V 2600rpm | - | 2 |
| 32 | Hexagon screw | M5*14 | Zinc finished | 4 |
| 33 | Hexagon Screw | M8*12 | Zinc finished | 4 |
| 34 | Hexagon round head screw | M6*20 | Zinc finished | 2 |
| 35 | Lock axis | 40.5*12*m8 | 40Cr 2 | |
| 36 | Base frame | 576*295*63 | Q235 | 1 |
| 37 | Motor | 76 Motor | 180V 2200 rpm | 2 |
| 38 | Motor base | 220*75*5 | Q235 | 2 |
| 39 | Base PCB | 115*68*33 | PCB | 1 |
| 40 | Base shell | 669.7*388.7*71 | ABS 1 | |
| 41 | Hook for elastic rope | 164.5*30*18 | Q235 | 2 |
| 42 | Support cylinder | ø40*22M6 | Rubber | 4 |
| 43 | Upper PCB | 130*65*21 | PCB | 1 |
| 44 | Belt | 160, profile 3/4 | 2 | |
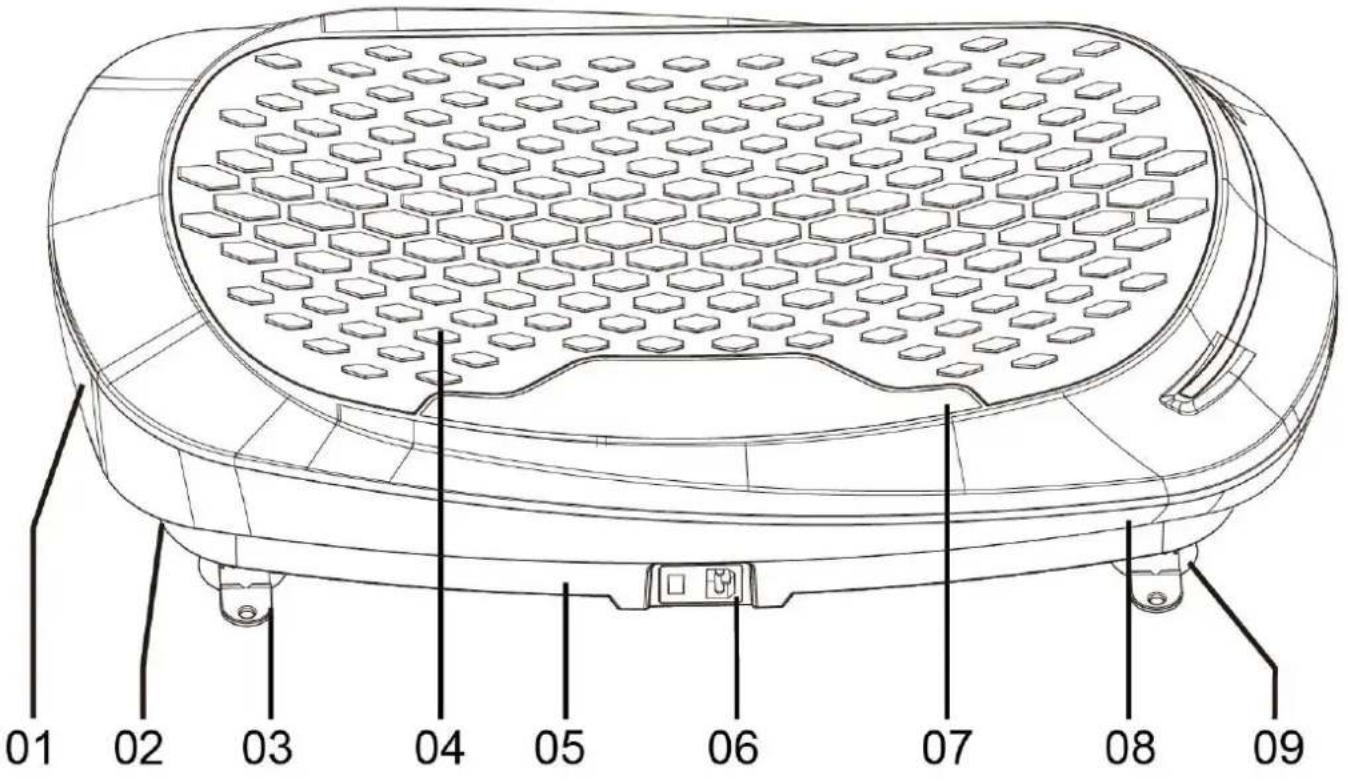
DEVICE FEATURES
01 Upper cover
04 Surface
07 Control unit
02 Rolls
05 Device base
08 Middle cover
03 Eyelets
06 Mains connection and main switch
09 Device feet
This unit has rolls that allow you to move it easily from place to place.
Disconnect it from the power supply before moving it.
SCOPE OF DELIVERY
• Vibration plate V2500
- Remote control
- 1 x Button cell battery CR 2025 for remote control
- Power cord
• 1 pair of resistance bands
- Instruction manual
SPEED Increase / Decrease speed
TIME Increase / Decrease time
M Mode key
Program key
⑩ Quick adjustment for speed, level 10 in manual mode
20 Quick adjustment for speed, level 20 in manual mode
30 Quick adjustment for speed, level 30 in manual mode
To start the unit, you must first switch on the main switch and then press the Power key - the unit is now in standby mode. Now you can start training in manual mode by pressing Start / Stop or you can select a programme (there are 3 programmes: P1, P2 and P3) by pressing the P-key.
The default time for a workout is 10 minutes, after which the workout ends automatically. To switch off the device, press the Power key (after the end of the training session) and then turn off the main switch.
Increase / Decrease time: You can preset the workout time in the range from 1 to 10 minutes by pressing the TIME keys. If you do not set any time, the device will run for 10 minutes.
Increase / Decrease speed: You may set the speed in 30 steps (level 1-30). The speed setting does not work in programmes (P1/P2/P3) because there is controlled automatically.
Mode key: The unit has various oscillation modes. In manual mode, you can select the oscillation mode with the mode key. After the first start in manual mode, the unit operates in vertical oscillation mode. If you now press the mode key once, the unit switches to vibration mode. If you press the mode key twice, the unit switches to vertical AND horizontal oscillation mode. If you press the key three times, the device switches to horizontal oscillation PLUS vibration mode, and if you press the key four times, the device switches to vertical oscillation PLUS vibration mode. Pressing five times activates all movement patterns (vertical plus horizontal oscillation plus vibration). Pressing the mode key again will switch the unit back to vertical oscillation mode. You can see in the computer display which modes are currently active.
Start/Stop: If you press this key, the device starts moving after a 3-second countdown. When pressed again, the unit stops moving.
Power key: If possible, always switch off the appliance with this key after the end of the training session. You can also switch it off with this key when it is in motion. The unit automatically switches to standby mode without any training or input. Press the power button to reactivate the computer.
Bluetooth ^® connectivity: While the appliance is switched on, search for „ADVENOR“ with your mobile device (e.g. smartphone or tablet, Bluetooth ^® should be activated) to initiate pairing. After successful connection, an acoustic signal sounds and the Bluetooth ^® symbol appears in the display.
THE 3 PROGRAMS
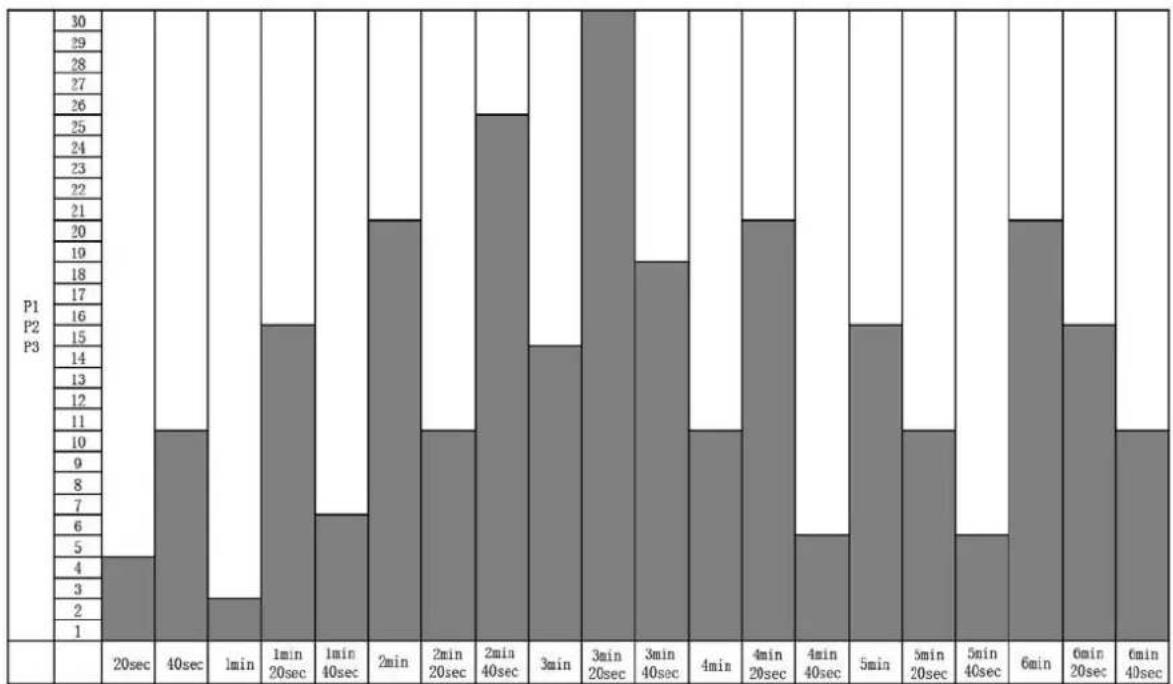
The programme modes P1, P2 or P3 (selectable with the Program key) always have a fixed running time of 6 minutes and 40 seconds. The speed steps (see above) are set automatically (each step takes 20 seconds). The difference between the programmes lies in the type of oscillation:
P1: Vertical oscillation
P2: Horizontal oscillation
P3: Vibration
EXERCISE INSTRUCTIONS
natural_image
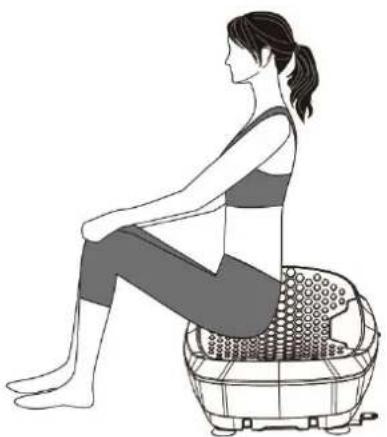
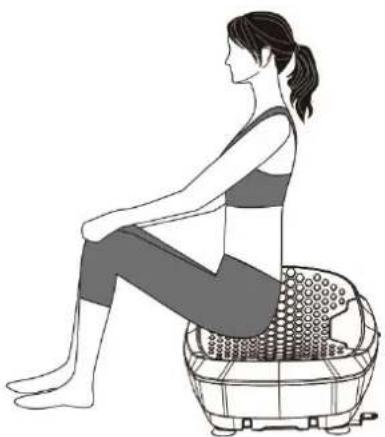
Line drawing of a woman sitting on a stationary exercise chair (no text or symbols)Sit on the surface with your back straight and put your hands on your knees. This exercise aims to relax the hips and buttocks.
natural_image
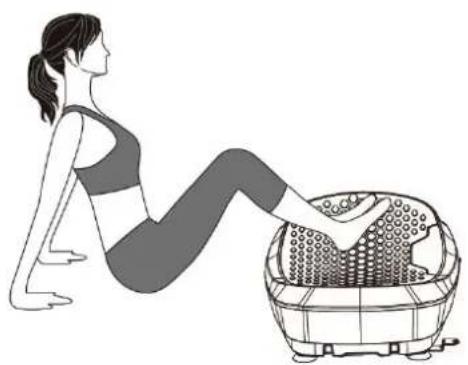
Illustration of a woman performing a seated exercise with a wooden basket containing food (no text or symbols)Sit in front of the device, keep your back straight and place your feet on the surface while supporting yourself with your hands at the sides. This exercise relaxes the leg muscles.
natural_image
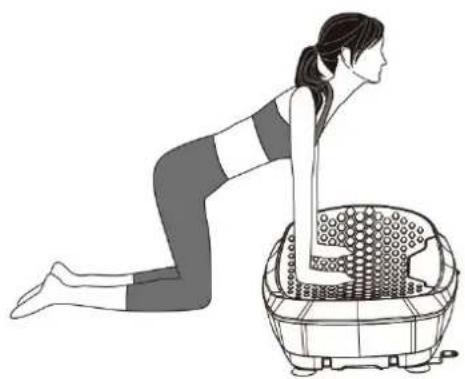
Illustration of a woman performing a stretching exercise with a basket containing a bag (no text or symbols)Exercise for shoulders and arms: Kneel on the floor and support yourself with your hands about shoulder width on the surface of the machine. The body should be leaned slightly forward.
natural_image
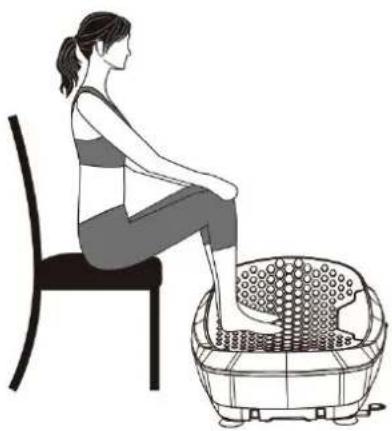
Illustration of a woman sitting on a chair using a resistance band machine (no text or symbols)Sit on a chair in front of the unit and place your feet on the surface for a relaxing vibration massage. This exercise is good for the lower and upper thighs.
EXERCISES WITH THE RESISTANCE BANDS
natural_image
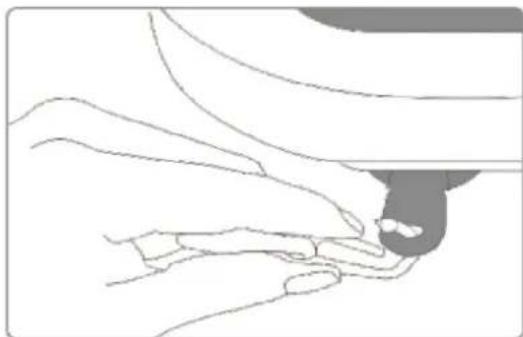
Line drawing of a hand holding a small object, possibly a tool or device, with no visible text or symbols.Attach the resistance bands on both sides by hooking them into the eyelets.
natural_image
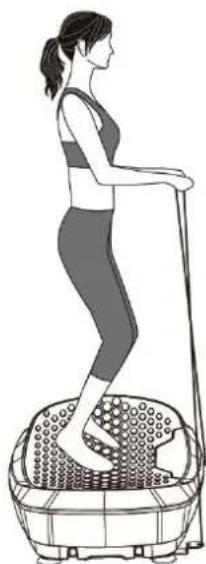
Illustration of a woman using a walking pusher on a basket (no text or symbols)Grasp the resistance straps and stand on the device with slightly bent knees and straight back. While oscillating, pull the resistance bands slowly and evenly upwards. Then slowly lower them again and repeat.
natural_image
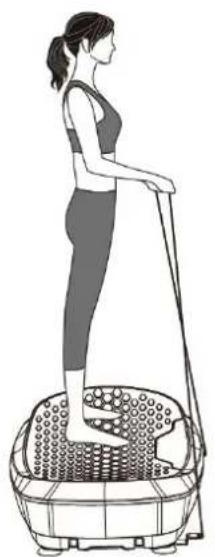
Illustration of a woman standing on a fitness equipment rack (no text or symbols)Grasp the resistance straps and stand up straight on the unit. While oscillating, pull the resistance bands slowly and evenly upwards. Then slowly lower them again and repeat.
natural_image
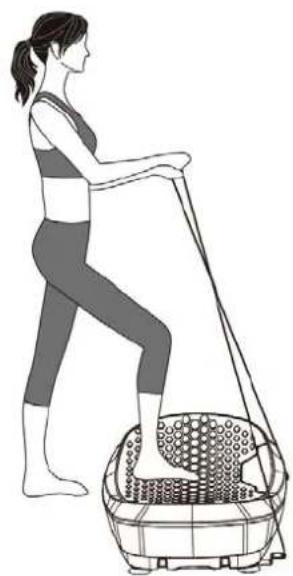
Illustration of a woman using a resistance band exercise machine (no text or symbols)Grasp the resistance straps and stand on the device with one leg with a slightly bent knee.
While oscillating, pull the resistance bands slowly and evenly upwards. Then slowly lower again, change leg and repeat.
TROUBLESHOOTING
• Device cannot be started:
Check plug (power connection) and if power switch is switched on.
- Remote control does not work:
Replace battery and check, if the distance between remote controller and device is less max. 2 meters.
• Other, abnormal behavior:
Disconnect the power supply, wait for 2 minutes and re-start the device.
Error codes: E01/E05: Signal error; E02: Vertical motor error; E04: Overvoltage protection triggered;
E06: Vibration motor error; E08: Horizontal motor error
If the problem cannot solved with above hints, contact the customer service.
CLEANING & CARE
- Before cleaning the appliance, make sure that the appliance is switched off and the plug is disconnected. Allow the unit to cool down.
- Clean the device with a slightly damp cloth only. Never use brushes, aggressive cleaning agents, petrol, thinners or alcohol. Rub the seat dry with a clean dry cloth.
- Never immerse the appliance in water to clean it and ensure water cannot get into the appliance.
- Wait until the device is completely dry before using it again.
• Take care when rolling up the mains lead to avoid damaging it.
- You should ideally store the device in its original packaging and keep it in a clean, dry place.
- You can also clean the remote control with a slightly moistened cloth. Remove the battery first - be careful not to swallow it and keep it in a safe place! Allow the remote control to dry completely before replacing the battery.
TECHNICAL SPECIFICATIONS
Max. user weight: 120 kg (264 lb.)
Rated power: 150 W + 150 W + 40 W
Power supply: 220V \~ 50/60 Hz
Net weight approx.: 20 kg
WARM-UP and COOL-DOWN
A successful exercise program consists of a warm-up, aerobic exercise and a cool-down. Exercise for at least two or preferably three times a week, resting for a day between workouts. After several months, you may increase the frequency to four or five times per week.
WARM-UP
This stage helps to improve the blood circulation and prepares the muscles for your workout. It additionally helps to reduce the risk of injury or cramps. It is recommended to do some stretching exercises as shown here below. Hold each stretching position for approximately 30 seconds. Never force or jerk yourself into a stretching position – if you feel pain, STOP immediately. Warm-up exercises may also include brisk walking, jogging, jumping jacks, jump rope exercises or running in place.
STRETCHING
Muscles can be stretched more easily when these are warm. This reduces the risk of injury. DO NOT BOUNCE.
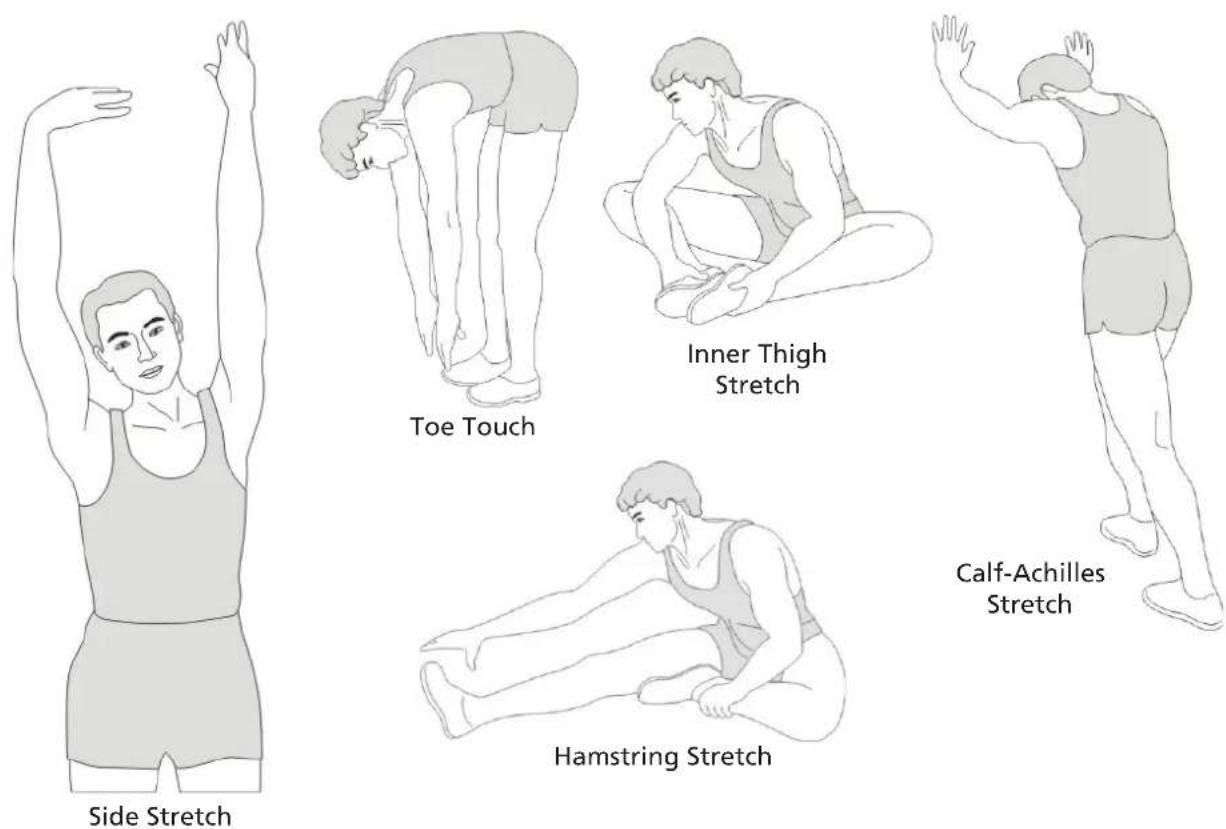
Remember always to check with your physician before starting any exercise program.
COOL-DOWN
This stage helps to soothe your muscles and your cardiovascular system after your workout. At the end of your workout, reduce the speed and exercise for approximately 5 minutes at this lower speed level. Afterwards, repeat the warm-up exercises as described above.
GUARANTEE CONDITIONS
For our devices we provide a warranty as defined below.
- In accordance with the following conditions (numbers 2-5) we repair defect or damage to the device free of charge, if the cause is a manufacturing defect. Therefore, these defects / damages need to be reported to us without delay after appearance and within the warranty period of 24 months after delivery to the end user. The warranty does not cover parts, which easily break (e.g. glass or plastic). The warranty does not cover slight deviations of the product, which are insignificant for usability and value of the device and damage caused by chemical or electrochemical effects and damages caused by penetration of water or generally force majeure damage.
- The warranty achievement is the replacement or repair of defective parts, depending on our decision. The cost of material and labor will be borne by us. Repairs at customer site cannot be demanded. The proof of purchase along with the date of purchase and / or delivery is required. Replaced parts become our property.
- The warranty is void if repairs or adjustments are made, which are not authorized by us or if our devices are
equipped with additional parts or accessories that are not adapted to our devices. Furthermore, the warranty is void if the device is damaged or destroyed by force majeure or due to environmental influences and in case of improper handling / maintenance (e.g. due to non-observance of the instruction manual) or mechanical damages. The customer service may authorize you to replace or repair defective parts after telephone consultation. In this case, the warranty is not void.
- Warranty services do not extend the warranty period nor do they initiate a new warranty period.
- Further demands, especially claims for damages which occurred outside the device, are excluded as long as a liability is not obligatory legal.
- Our warranty terms - which cover the requirements and scope of our warranty conditions - do not affect the contractual warranty obligations of the seller.
- Parts of wear and tear are not included in the warranty.
- The warranty is void if not used properly or if used in gyms, rehabilitation centers and hotels. Even if most of our units are suitable for a professional use, this requires a separate agreement.
ENVIRONMENTAL PROTECTION
At the end of its life cycle, this product must not be disposed of with household waste but must be taken to a collection unit for the recycling of electric and electronic equipment. The symbol on the product, the instructions for use or the packaging express mention of this. The basic materials can be recycled as specified on the labelling.
When recycling the materials and finding other utilisation for used equipment, you are making a significant contribution towards protecting our environment. Ask at your council about the respective local disposal sites.
In accordance with our policy of continual product improvement, we reserve the right to make technical and visual changes without notice.
For spare parts please contact: service@skandika.de
Service centre: MAX Trader GmbH, Wilhelm-Beckmann-Straße 19, 45307 Essen, Germany
Contenu

skandika.com/service
P1: Oscillation verticale
P2: Oscillation horizontale
P3: Vibrations
INSTRUCTIONS D'EXERCISES
natural_image
Line drawing of a woman sitting on a stationary exercise chair (no text or symbols)natural_image
Illustration of a woman performing a seated exercise with a wooden steamer basket (no text or symbols)natural_image
Illustration of a woman performing a stretching exercise with a basket containing a bag (no text or symbols)natural_image
Illustration of a woman sitting on a chair using a resistance band machine (no text or symbols)natural_image
Line drawing of a hand holding a small object, possibly a tool or device, with no visible text or symbols.natural_image
Illustration of a woman using a resistance band machine (no text or symbols)natural_image
Illustration of a woman standing on a fitness equipment rack with a basket filled with weights (no text or symbols)natural_image
Illustration of a woman using a resistance band exercise machine (no text or symbols)
- Inhalt
- WARNING
- SAFETY PRECAUTIONS
- DEVICE FEATURES
- SCOPE OF DELIVERY
- THE 3 PROGRAMS
- EXERCISE INSTRUCTIONS
- EXERCISES WITH THE RESISTANCE BANDS
- TROUBLESHOOTING
- CLEANING & CARE
- TECHNICAL SPECIFICATIONS
- WARM-UP and COOL-DOWN
- WARM-UP
- STRETCHING
- COOL-DOWN
- GUARANTEE CONDITIONS
- ENVIRONMENTAL PROTECTION
- Contenu
- INSTRUCTIONS D'EXERCISES
Brand : Skandika
Model : V2500
Category : Vibratory plate