Sensei - Deep fryer UFESA - Free user manual and instructions
Find the device manual for free Sensei UFESA in PDF.

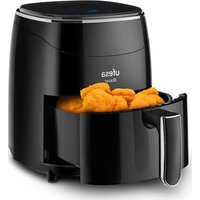
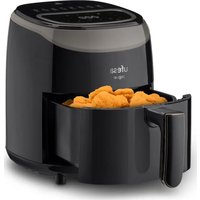
| Product type | Air fryer (oil-free) |
| Brand | Ufesa |
| Model | Sensei |
| Power supply | 220-240 V ~ 50/60 Hz (estimate) |
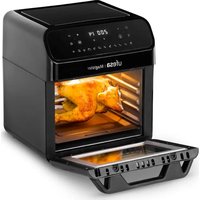
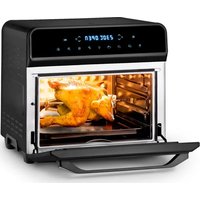
| Main functions | 10 preset programs, temperature adjustment (40-200°C) and timer, rotation, interior light, preheat, defrost |
| Capacity | Approximately 2 L (estimate) |
| Included accessories | 2 cooking racks, oil drip tray, rotating basket, barbecue forks, fixing screws, handling tongs |
| Care and cleaning | Basket and tray dishwasher safe (top rack), wipe exterior with damp cloth, do not immerse appliance |
| Safety | Do not immerse, keep 10 cm clearance around, do not cover, wear insulated gloves, use by children aged 8+ under supervision |
| Spare parts and repairability | Do not open the appliance, contact an authorized technical service for any repair |
| Warranty | Compliant with current legislation, warranty covering manufacturing defects |
| General information | Household use only, flat and heat-resistant surface, max altitude 2000 m |
Frequently Asked Questions - Sensei UFESA
User questions about Sensei UFESA
0 question about this device. Answer the ones you know or ask your own.
Ask a new question about this device
Download the instructions for your Deep fryer in PDF format for free! Find your manual Sensei - UFESA and take your electronic device back in hand. On this page are published all the documents necessary for the use of your device. Sensei by UFESA.
USER MANUAL Sensei UFESA
natural_image
Black UFSA air fryer with digital display and open lid (no visible text or symbols)natural_image
Illustration of a woven basket with mesh pattern (no text or symbols)natural_image
Simple line drawing of a rectangular tray with two concentric circles (no text or symbols)natural_image
Pure geometric pattern with repeating hexagonal and rectangular shapes (no text or symbols)natural_image
Pure line drawing of two connected curved lines without any text, numbers, or symbolsnatural_image
Line drawing of a portable food toaster with front panel and side panel (no text or symbols)A
natural_image
Line drawing of a toaster oven with lid and front panel (no text or symbols)B

ATENCIÓN
natural_image
Line drawing of an air fryer with internal components (no text or symbols)
natural_image
Technical line drawing of a mechanical assembly (no text or symbols)FLG.E-LEFT SIDE
natural_image
Line drawing of an air fryer with internal compartments and a magnified inset showing the right side view (no text or symbols on the device itself)CÓMO USAR EL PRODUCTO
natural_image
Illustration of a woven basket with mesh pattern (no text or symbols)natural_image
Pure diagram of a grid-patterned structure with no text, numbers, or symbolsnatural_image
Pure line drawing of a zigzag or bent pipe or wire (no text or symbols)natural_image
Line drawing of a portable food toaster with front panel and side panel (no text or symbols)A
natural_image
Line drawing of a toaster oven with lid and front panel (no text or symbols)B

AVISO
natural_image
Line drawing of an air fryer with internal components (no text or symbols)
natural_image
Technical line drawing of a mechanical assembly (no text or symbols)FLG.E-LEFT SIDE
natural_image
Line drawing of an air fryer with internal components and a magnified inset showing the right side view (no text or symbols on the device itself)INSTRUÇÕES DE SEGURANÇA
WE WOULD LIKE TO THANKS YOUR FOR CHOOSING UFESA, WE WISH THE PRODUCT PERFORMS TO YOUR SATISFACTION AND PLEASURE.
WARNING
PLEASE READ THE INSTRUCTIONS FOR USE CAREFULLY PRIOR TO USING THE PRODUCT. STORE THESE IN A SAFE PLACE FOR FUTURE REFERENCE.
DESCRIPTION
- Main unit
- Control panel
- Air inlet
- Hot air outlet
CONTROL PANEL DESCRIPTION
- Power switch
- Light,
- Rotation function
- Temperature +
- Temperature -
- temperature indicator
- Time +
- Time -
- Time indicator
- Temperature display light
- temperature unit display light (°C)
- Clock display light
- time unit display light (minutes)
- French fries
- Steak
- Fish
- Seafood
- Chicken leg
- Baking (cakes)
- Whole chicken
- Dried fruit
- Pre-heating
- Defrost
- Work indicator light
ACCESSORIES
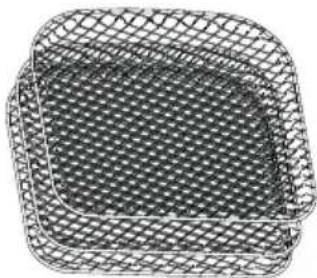
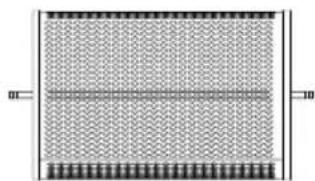
1. Crisper tray (x2)
natural_image
Illustration of a woven basket with mesh pattern (no text or symbols)Can be used for dehydration, and can also be used to make crispy snacks or reheat foods such as pizza.
2. Oil drip tray
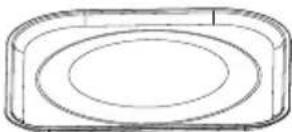
When cooking, put a drip pan for easy cleaning. Be sure to use a drip pan when cooking.
3. Rotating grid basket
natural_image
Pure diagram of a grid pattern with no text, numbers, or symbolsIs suitable for French fries, roasted nuts and other snacks. Put the basket into the oven with pliers and remove the basket from the oven after baking.
4. Barbecue fork
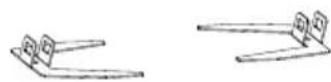
Are used for roast chicken and whole chicken. Put the meat shaft longitudinally through the center of the meat. Slide the fork from both ends onto the shaft, and then onto the meat. Lock in place with the set screw. There are dents on the shaft for fixing screws. You can adjust the screw closer to the center of the shaft, but never more than the indentation. Note: make sure the roast chicken or chicken rotates freely in the machine.
5. Screws
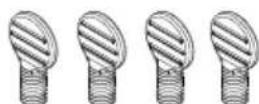
For fastening to the barbecue stick. It is used with rotating basket and barbecue fork.
6. Holding pliers
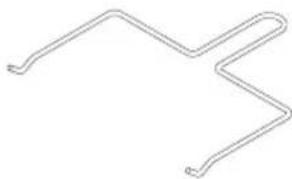
natural_image
Pure line drawing of a zigzag pipe or conduit without any text, numbers, or symbolsAre used to insert and remove food prepared on the Rotating grid basket or Barbecue fork. Place the pliers under the baking stick, lift the food from the left, and then take it out gently.
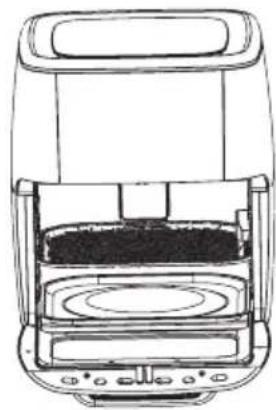
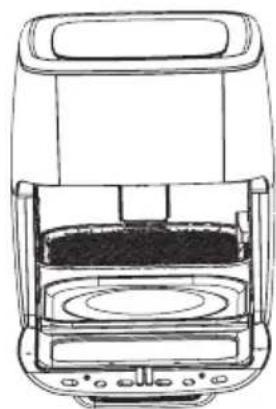
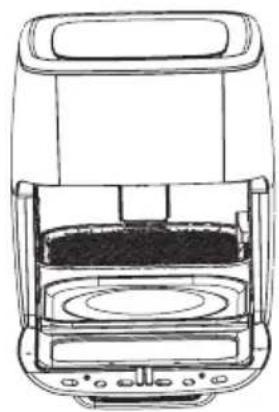
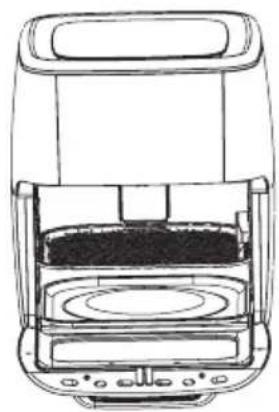
HOW TO PLACE TRAYS INTO THE AIR FRYER
natural_image
Line drawing of a portable food toaster with front panel and side panel (no text or symbols)A
natural_image
Line drawing of a toaster oven with lid and tray (no text or symbols)B

WARNING
Metal parts will become very hot during use, so great care should be taken to avoid personal injury. Wear oven protective gloves or gloves.
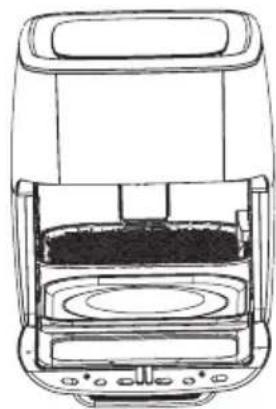
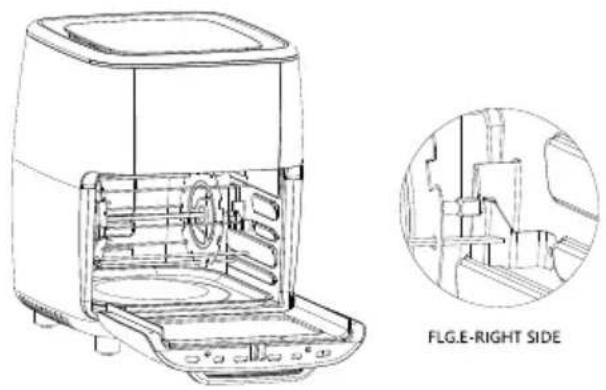
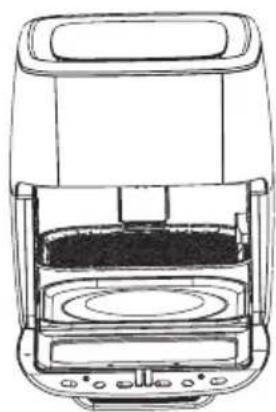
HOW TO ASSEMBLE ROTATING BASKET AND BARBECUE FORK
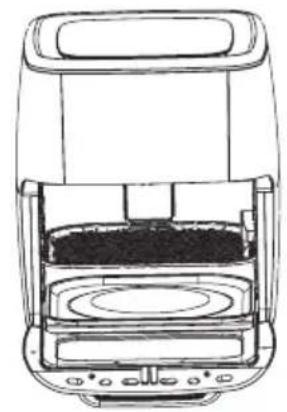
- First insert the left side of the assembled rotating basket or barbecue fork into the shaft socket. Make sure that the shaft is in position for rotation (Figure E).
natural_image
Line drawing of an air fryer with internal components (no text or symbols)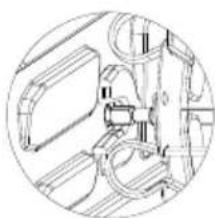
natural_image
Technical line drawing of a mechanical assembly (no text or symbols)FLG.E-LEFT SIDE
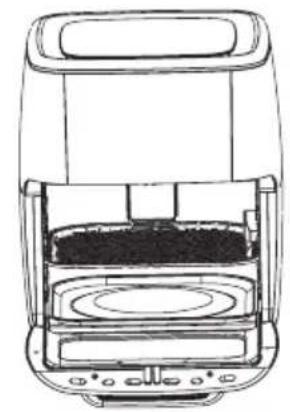
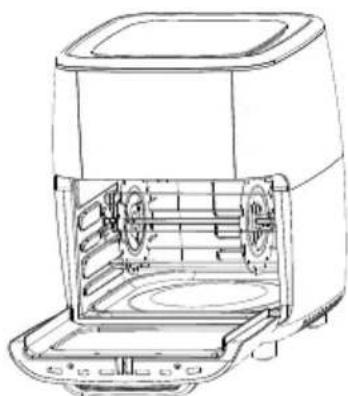
- Place the right side on the support frame (Figure F).
natural_image
Line drawing of an air fryer with internal compartments and a magnified inset showing interior layout (no text or symbols)SAFETY INSTRUCTIONS
If the supply cord is damaged it must be replaced by the manufacturer, its service agent or similarly qualified persons in order to avoid a hazard.
This appliance can be used by children aged from 8 years and above and persons with reduced physical, sensory or mental capabilities or lack of experience and knowledge if they have been given supervision or instruction concerning use of the appliance in a safe way and understand the hazards involved. Children shall not play with the appliance. Cleaning and user maintenance shall not be made by children unless they are older than 8 and supervised.
Keep the appliance and its cord out of reach of children less than 8 years.
Appliances are not intended to be operated by means of an external timer or separate remote-control system.
Disconnect the appliance when it is not in use and
before cleaning it. Let it cool before putting on, taking off parts and cleaning it
Do not submerge the appliance in water or any other liquid.
This appliance is intended for use at a maximum altitude of 2000m above sea level.
IMPORTANT WARNINGS
This appliance is designed exclusively for domestic use, in no case should be a commercial or industrial use.
Any incorrect use or improper handling of the product shall render the warranty null and void.
Prior to plugging in the product, check that your mains voltage is the same as the one indicated on the product label.
Place the appliance on a flat even surface
The mains connection cable must not be tangled or wrapped around the product during use.
Do not use the device, or connect and disconnect to the supply mains with the hands and/or feet wet. Do not pull on the connection cord in order to unplug it or use it as a handle
IMPORTANT. When operating this Air Fryer, keep at least ten centimeters of free space on all sides of the oven to allow for adequate air circulation.
DO NOT place your Air Fryer under cupboards, blinds or curtains. Risk of overheating / fire. Do not cover any part of the Fryer with a cloth or similar, it will cause overheating. Risk of fire.
This is an AIR FRYER. It requires very little oil to cook. Do not fill the pot with oil or fat as this may cause a fire hazard.
Do not use any accessories other than manufacturer recommended accessories in this Air Fryer. Always wear protective, insulated oven gloves when inserting or removing items from the hot Air Fryer.
The appliance must be used on a level, stable heat-resistant surface. The first time you use your Air Fryer there may be a slight odor or a small amount of smoke given off. This is normal and is just the manufacturing residues burning off.
Always place the ingredients to be fried in the basket to prevent it from coming into contact with the heating elements.
Unplug the product immediately from the mains in the event of any breakdown or damage and contact an official technical support service. In order to prevent any risk of danger, do not open the device. Only qualified technical personnel from the brand's Official technical support service may carry out repairs or procedures on the device.
B&B TRENDS SL. disclaims all liability for damages that may occur to people, animals or objects, for the non-observance of these warnings.
BEFORE ITS FIRST USE
- Remove all packing materials and stickers from the inside and outside of the Air Fryer. Gently wipe down exterior with a damp cloth or paper towel.
WARNING: Never immerse the Air Fryer or its plug in water or any other liquids. - Pull the basket handle to remove the basket from the Air Fryer. Use the tray handle, in the center of the tray, to remove the tray. Use a sponge and warm, soapy water to wash the inside and outside of the basket and tray. The basket and the tray are top-rack dishwasher safe.
- WARNING: Do not use abrasive cleaning agents or scouring pads.
- Dry thoroughly.
HOW TO USE
1) Connect the mains plug to an earthed wall socket.
2) Press the power switch (1) key and all lights will be on. Without selecting any function key, press the power supply 1 key again, and the machine enters the cooking mode process with the default temperature of 190^ for 15 minutes. In this mode, the lights from 1-13 and 24 are on, in which the (10 / 11) temperature light and (12 / 13) time light are on alternately. At the same time, the digital display also shows the corresponding rotation between temperature and time. During any cooking mode, press the power switch 1 key to turn it off.
3) Key 2 is an internal light. You can press key 2 at any time during machine operation. The internal light is on and key 2 flashes. When the door is opened, the light will also be on, and when the door is closed, the light will be off.
4) Key 3 is a rotation button. In any cooking mode, you can press key 3, and the internal rotating shaft / potato chip cage will rotate. In the working mode, the 3-key light flashes.
5) Key 4 is temperature +, key 5 is temperature -, during operation, press temperature + or temperature -, and the temperature can be set to increase or decrease.
6) The 7 key is time +, the 8 key is time -, each time you press, time + or -, you can set the cooking time.
LED DIGITAL DISPLAY
During operation, the LED number is displayed as switching between temperature and remaining time.
Key 24 is the working indicator light. In the working state, No. 24 light is always on.
Keys 14-23 are menu settings in various modes. Each mode can be adjusted through time + - and temperature + - for secondary setting.
Select your preferred mode and then press the power button to start the mode.
- French fries (200°C, 15 minutes)
- Steak (185°C, 25 minutes)
- Fish (200°C, 15 minutes)
- Seafood (160°C, 12 minutes)
- Chicken leg (190°C, 20 minutes)
- Baking (cakes) (175°C, 30 minutes)
-
Whole chicken (200°C, 30 minutes)
-
Dried fruit (80°C, 4 hours)
- Pre-heating (115°C, 12 minutes)
- Defrost (40°C, 1 hour)
NOTE: Keep in mind that these settings are indications. As ingredients differ in origin, size, shape as well as brand, we cannot guarantee the best setting for your ingredients
COOKING TIPS
- Almost any food that is traditionally cooked in the oven can be air fried.
- Foods cook best and most evenly when they are of similar size and thickness.
- Smaller pieces of food require less cooking time than larger pieces.
- For best results in the shortest amount of time, air fry food in small batches. Avoid stacking or layering when possible.
- Most prepackaged foods do not need to be tossed in oil before air frying. Most already contain oil and other ingredients that enhance browning and crispiness
- Frozen appetizers air fry very well. For best results, arrange them on the tray in a single layer.
- If layering foods, be sure to shake the basket halfway through (or flip food) to promote even cooking.
- Toss foods you are preparing from scratch, such as French fries or other vegetables, with a small amount of oil to promote browning and crispiness.
- When air frying fresh vegetables, make sure to pat them dry completely before tossing with oil and air frying to ensure maximum crispiness.
• Air fryers are great for reheating food, including pizza. To reheat your food, set the temperature to 150^ C for up to 10 minutes.
CLEANING AND MAINTENANCE
- Ensure the Air Fryer is unplugged and cool before cleaning.
- Once the Air Fryer and basket are cool, remove the basket from the Air Fryer (if it is not already removed). Use the tray handle to remove tray. Use a sponge and warm, soapy water to wash the inside and outside of the basket and tray.
Warning: Do not use abrasive cleaning agents or scouring pads.
- The basket and the tray are top-rack dishwasher safe.
- Gently wipe down exterior with a damp cloth or paper towel.
- Never immerse the Air Fryer or its plug in water or any other liquid.
- Dry all parts thoroughly before storage.
- Store the Air Fryer in a cool, dry place.
PRODUCT DISPOSAL

This product complies with European Directive 2012/19/EU on electrical and electronic devices, known as WEEE (Waste Electrical and Electronic Equipment), provides the legal framework applicable in the European Union for the disposal and reuse of waste electronic and electrical devices. Do not dispose of this product in the bin, instead going to the electrical and electronic waste collection center closest to your home.
FRANÇAIS
NOUS VOUS REMERCIONS D'AVOIR CHOISI UFESA, NOUS SOUHAITONS QUE CE PRODUIT VOUS APPORTE SATISFACTION ET VOUS FASSE PLAISIR.
AVERTISSEMENT
VEUILLEZ LIRE ATTENTIVEMENT LE MODE D'EMPLOI AVANT D'UTILISER LE PRODUIT. VEUILLEZ CONSERVER CE DOCUMENT DANS UN ENDROIT SÛR POUR UN USAGE ULTÉRIEUR.
DESCRIPTION
natural_image
Illustration of a woven basket with mesh pattern (no text or symbols)natural_image
Pure grid pattern with no text, numbers, or symbolsnatural_image
Pure line drawing of a zigzag or bent pipe without any text, numbers, or symbolsnatural_image
Line drawing of a toaster oven with control panel and display unit (no text or symbols)A
natural_image
Line drawing of a portable food oven with lid and control panel (no text or symbols)B

AVERTISSEMENT
natural_image
Line drawing of an air fryer with open lid and internal compartments (no text or symbols)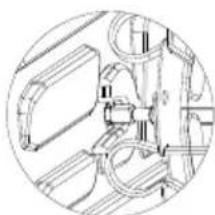
natural_image
Technical line drawing of a mechanical assembly (no text or symbols)FLG.E-LEFT SIDE
natural_image
Line drawing of an air fryer with internal compartments and a magnified inset showing interior layout (no text or symbols)CONSIGNES DE SÉCURITÉ
natural_image
Illustration of a woven basket with mesh pattern (no text or symbols)natural_image
Pure grid pattern with no text, numbers, or symbolsnatural_image
Pure electrical circuit lines without any symbolsnatural_image
Line drawing of a toaster oven with control panel and tray (no text or symbols)A
natural_image
Line drawing of a portable food oven with lid and control panel (no text or symbols)B

AVVISO
natural_image
Line drawing of an air fryer with open lid and internal compartments (no text or symbols)
natural_image
Technical line drawing of a mechanical assembly (no text or symbols)FLG.E-LEFT SIDE
natural_image
Line drawing of an air fryer with internal components and a magnified inset showing the right side view (no text or symbols on the diagram itself)DISPLAY DIGITALE LED
natural_image
Illustration of a woven basket with mesh pattern (no text or symbols)natural_image
Pure grid pattern with no text, numbers, or symbolsnatural_image
Pure electrical circuit lines without any symbolsnatural_image
Line drawing of a toaster oven with control panel and tray (no text or symbols)A
natural_image
Line drawing of a microwave oven with lid and control panel (no text or symbols)B

ERWÄRMUNG
natural_image
Line drawing of an air fryer with open doors and internal compartments (no text or symbols)
natural_image
Technical line drawing of a mechanical assembly (no text or symbols visible)FLG.E-LEFT SIDE
natural_image
Line drawing of an air fryer with internal components and a magnified inset showing the right side view (no text or symbols on the diagram itself)SICHERHEITSHINWEISE
natural_image
Illustration of a woven basket with mesh pattern (no text or symbols)natural_image
Pure grid pattern with no text, numbers, or symbolsnatural_image
Pure electrical circuit lines without any symbolsnatural_image
Line drawing of a toaster oven with control panel and tray (no text or symbols)A
natural_image
Line drawing of a microwave oven with lid and control panel (no text or symbols)B

ПРЕДУПРЕЖДЕНИЕ
natural_image
Line drawing of an air fryer with open doors and internal compartments (no text or symbols)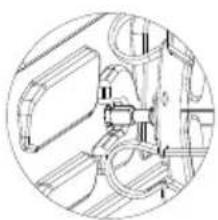
natural_image
Technical line drawing of a mechanical assembly (no text or symbols visible)FLG.E-LEFT SIDE
natural_image
Line drawing of an air fryer with internal components and a magnified inset showing the right side view (no text or symbols on the device itself)natural_image
Line drawing of an air fryer with internal components and a magnified inset showing internal wiring (no text or symbols)natural_image
Line drawing of an air fryer with internal components and a magnified inset showing the right side view (no text or symbols on the device itself)تعليمات السلام
natural_image
Line drawing of a portable food refrigerator interior with control panel and tray (no text or symbols)A
natural_image
Line drawing of a microwave oven with lid and control panel (no text or symbols)B
تحذیر ⚠️
natural_image
Illustration of a woven basket with mesh pattern (no text or symbols)natural_image
Simple line drawing of a rectangular tray with three concentric ovals (no text or symbols)natural_image
Pure diagram of a grid pattern with no text, numbers, or symbolsB&B TRENDS, SL. guarantees compliance of this product, for the use for which it is, during the period established by the legislation in force in the country of sale. In the case of breakdown during the term of this warranty, users are entitled to repair or else the replacement of the product at no charge if the former is unavailable, unless one of these options proves impossible to fulfil or is disproportionate. In this case, you can then opt for a reduction in price or cancellation of the sale, which must be dealt with directly with the sales vendor. This also covers replacement of spare parts provided that the product has been used according to the recommendations specified in this manual for both cases, and has not been tampered with by any third party that is not authorised by B & B TRENDS, SL. The warranty will not cover any parts subject to wear and tear. This warranty does not affect your rights as a consumer in accordance with the provisions in Directive 1999/44/EC for member states of the European Union.
USE OF WARRANTY
Customers must contact a B&B TRENDS, SL., authorised Technical Service for repair of the product. Since any tampering of the same by anyone not authorised by B&B TRENDS, SL., or the careless or improper use of the same shall render this warranty null and void.
You must keep the purchase invoice, receipt or delivery docket in order to exercise your warranty rights.
For technical service and after-sales care outside the Spanish territory, please submit your query to the point of sale where you purchased the item.
BON DE GARANTIE
Check out your nearest service station at https://sat.ufesa.com/
ufesa
B&B TRENDS, S.L. · C.I.F. B-86880473