
Amalfi - Barbecue BORETTI - Free user manual and instructions
Find the device manual for free Amalfi BORETTI in PDF.

| Product type | Outdoor gas pizza oven |
| Brand | Boretti |
| Model | Amalfi |
| Category | Barbecue |
| Fuel type | Butane gas (G30) or propane gas (G31), pressure according to country (28-30 mbar or 37 mbar) |
| Power | Not specified (single burner, injector diameter 1.50 mm) |
| Dimensions (approx.) | Height with chimney: approx. 80 cm; diameter: approx. 60 cm (estimate) |
| Weight | 55 kg |
| Recommended cooking temperature | 400 °C – 450 °C |
| Cooking surface | 3 refractory stones |
| Main material | Steel (body, chimney, top chimney, door) |
| Usage | Outdoor only, on stable and non-combustible surface |
| Ignition | Electronic (AA battery included) |
| Safety | Safety thermocouple, mandatory gas leak test, safety distance 3 m |
| Maintenance and cleaning | Clean stones with brush; body with warm water and soft sponge; annual burner inspection |
| Spare parts and repairability | Trolley BBA123, cover BBA122, utensil kit BBA116, drip tray SOLIDOGRILL35; gas hose replacement every 2 years |
| General information | CE marking, gas categories I3+ and I3B/P; warranty and contact via boretti.com |
Frequently Asked Questions - Amalfi BORETTI
User questions about Amalfi BORETTI
0 question about this device. Answer the ones you know or ask your own.
Ask a new question about this device
Download the instructions for your Barbecue in PDF format for free! Find your manual Amalfi - BORETTI and take your electronic device back in hand. On this page are published all the documents necessary for the use of your device. Amalfi by BORETTI.
USER MANUAL Amalfi BORETTI
natural_image
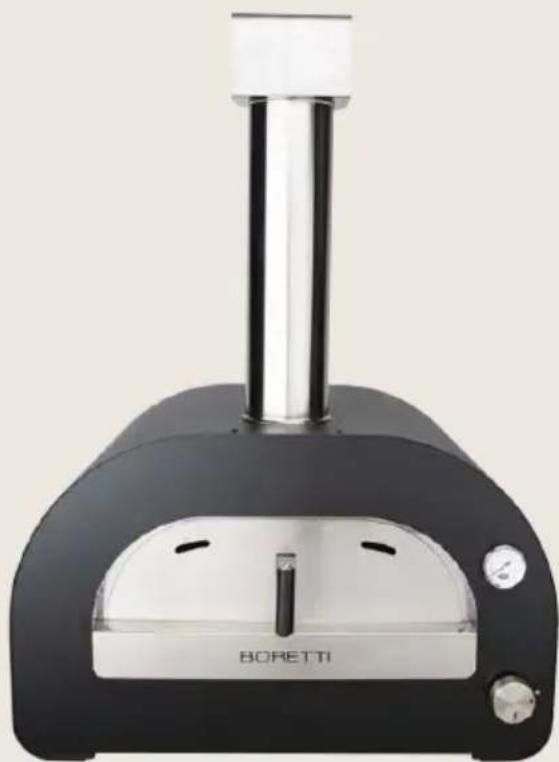
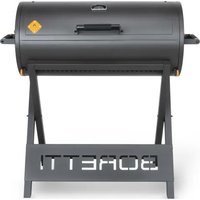
Black Boaetti pizza oven with a vertical metal stand and control panel (no visible text or symbols on the device body)AMALFIAMALFI
EN | USER MANUAL
natural_image
Black Boletti oven with stainless steel lid and control panel (no visible text or symbols)AMALFIAMALFI
EN | USER MANUAL
www.boretti.com
Introduction
Congratulations on the purchase of your new Boretti Amalfi pizza oven. We are convinced that you, with your passion for pizza and the outdoor lifestyle, will transform an average summer evening with family and friends into a buona serata in the comfort of your own garden.
Read this manual carefully and keep it safe!
This manual contains specific instructions for your safety, for the assembly, operation and the maintenance of your pizza oven. Use the oven only as directed in this manual. Common sense and caution during use are an absolute must!
Our tips on how to use the Amalfi oven:
* Make sure the oven is preheated to about 400°C -450°C to make the best pizza's within a matter of minutes.
* Preheating the oven and stones to 400°C -450°C will take about 20-25 minutes (depending on ambient temperature).
* An infrared thermometer is ideal to measure the temperature of the stone.
* We recommend using pizza tools to launch and turn the pizza and to clean the stone. The ideal choice is the BBA116 Pizzaiolo toolset from Boretti which includes a pizzapeel, pizzaturner and brush.
* Turn the pizza continuously to make sure every side is evenly baked.
* On the inspiration page on the Boretti website (www.boretti.com) you will find our recipe to make a real Neapolitan pizza.
* If you find it too complicated (or lack time) to make the dough yourself simply ask your local pizzeria if you can take some balls of dough.
* Make sure to clean the stone with a brush after every use.
* It is possible to also prepare meat or fish in the oven but for this we would always like to advise to use a (cast iron) grill or oven roaster to prevent any moisture dripping onto the stones. The cast iron grill dish from the Boretti Solido collection (SOLIDOGRILL35) is ideal for the Amalfi oven.
* If the oven is not covered we recommend to use the BBA122 Amalfi cover to keep the oven dry and clean.
* The Amalfi oven is a heavy, stationary product of about 55KG. Please make sure it is placed on a stable and well-supported table. Boretti has a specially designed trolley available for the Amalfi under code BBA123.
* A gasregulator and gashose are not included with the Amalfi, please read this manual thoroughly and contact your local hardware store for the right gasregulator and gas hose to be connected to the oven.
* If you have any further questions on how to use the oven please contact the Boretti Serviceteam.
Contents
* 1. General safety guidelines....6
* 2. Parts list ....8
* 3. Assembly drawings....9
* 4. Use of your oven....11
* 5. Maintenance of your oven....16
* 6. Certified gases / pressures....18
* 7. Environmental guide, Conditions of warranty & Contact info....19
Important safety information
Use outdoors only!
Read the instructions before using the appliance!
WARNING: accessible parts may be very hot. Keep young children away!
Do not move the appliance during use!
Turn off the gas supply at the gas cylinder after use!
1. General safety guidelines
* Before use, first carefully read all the information contained in this manual.
* Never let children and pets come in the vicinity of this oven.
* The appliance may never be used by children, people with mental impairments or people who are under the influence of mind-expanding substances, alcohol and/or medication.
* Always maintain as much distance as possible when lighting and operating this appliance.
* Change the gas cylinder far away from any source of ignition.
* Take care that the gashose does not fold during installation of the gasregulator.
* The appliance must be equipped with a pressure regulator in compliance with local/national standards and/or regulations. If a new gasregulator is installed, take care that is complies with the EN 16129. The gaspressure must be the same as stated on the ratinglabel on the appliance.
* Ensure that the gas valve on the gas bottle is within reach, so you can turn off the gas supply to the appliance.
* Extinguish all flames and DO NOT SMOKE while opening the gas valve and lighting the oven.
* This device will get extremely hot, extreme care and attention is required during its operation.
* If you smell gas, check if all fuel connections are tightened securely before use. If the gas smell persists, turn of the gas valve and contact your sales outlet directly.
* Keep flammable and/or inflammable substances, gasses, liquids and materials away from the oven at all times and never let them come into direct contact with the appliance.
* Omitting and/or incorrectly following the instructions, precautions, safety guidelines, warnings and dangers that are contained in this manual can lead to fire or explosions, to material damage and may also cause physical injury or death.
* Exclusively for household use and exclusively intended for the preparation of food.
* This device can be used with gas cylinders weighing no more than 10kg. The maximum size of the gas cylinder should be: Dia. 300mm, Height: 470 mm. Follow the technical information as stated in the instruction manual and check with your local gas supplier to have a suitable gas cylinder for your oven.
* Avoid twisting the flexible tube when the appliance is in use. The length of flexible hose shall not exceed 1.5m. In Finland, the length shall not exceed 1.2m. The hose should certified according to applicable EN Standard and comply with local code.
1.1 Assembly
* Assemble the oven according to the assembly drawing as contained in this manual.
* Incorrect assembly or not following the correct order of assembly, as demonstrated in the drawing, can lead to very serious situations.
* Always take care and be precise during assembly.
* All parts must be assembled as shown in the assembly drawing. If a part is missing and/or you doubt the correctness of the assembly, immediately contact your sales outlet.
* Never repair or replace parts of this equipment yourself unless this is expressly mentioned in this manual.
* Never connect a damaged gas hose to the equipment. This can lead to fire.
* DO NOT modify the appliance.
1.2 Place of use
* Only use the appliance out of doors (outside) and in a well-ventilated space. Never use the appliance inside or in any (partly) enclosed space. Toxic fumes may build up and these can cause serious physical injury or death.
* Never use the appliance on a flammable or inflammable surface.
* Only use the appliance on a hard, straight and stable surface that can take the weight.
* Keep a distance of at least 3 metres between the appliance and all flammable and/or inflammable materials (wood, plastic, foliage etc.), when the device is in use.
* Always keep the appliance away from petrol and/or other flammable or inflammable liquids, flammable gases, flammable fumes or areas where you suspect these may be present.
* Never use the appliance under strong wind conditions.
* The oven becomes extremely hot, never move it during or shortly after use.
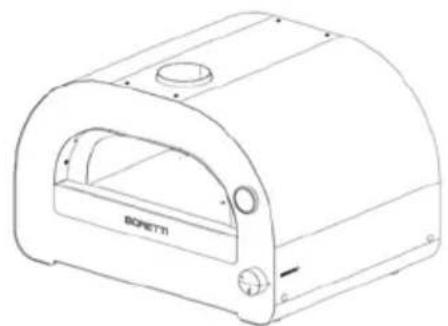
2. Parts list
- Oven 2. Chimney 3. Chimney top-part
natural_image
Line drawing of a modern oven or microwave oven device with no visible text or symbols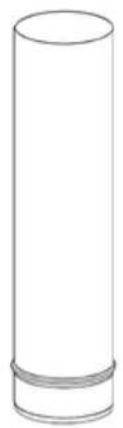
natural_image
Simple line drawing of a cylindrical object with a flanged base (no text or symbols)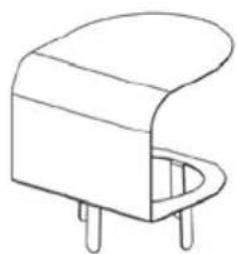
natural_image
Line drawing of a small electronic component with four pins (no text or symbols)- Door
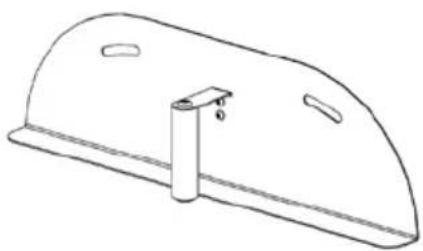
- Deflector 5. Stones (3pcs)
natural_image
Line drawing of a curved mechanical component with a cylindrical pin and two side holes (no text or symbols)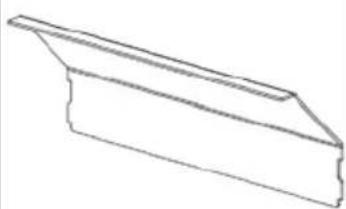
natural_image
Line drawing of a 3D rectangular block with a sloped top edge (no text or symbols)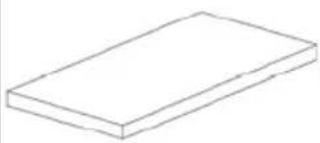
natural_image
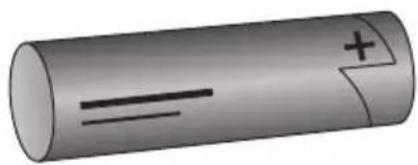
Simple line drawing of a rectangular block (no text or symbols)- AA-battery
natural_image
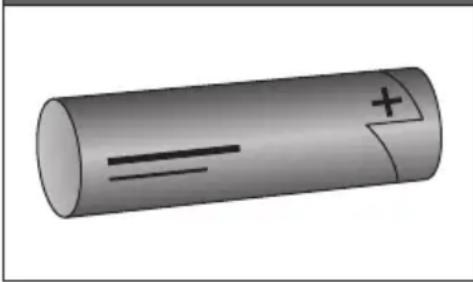
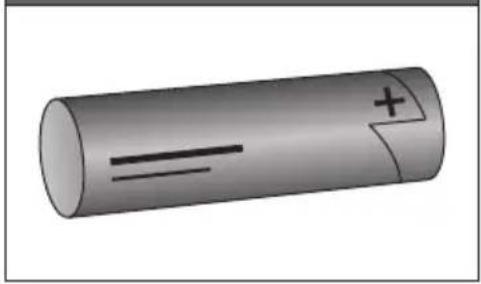
Illustration of a cylindrical battery with a segmented line and a positive charge symbol (no text or labels)3. Assembly drawings
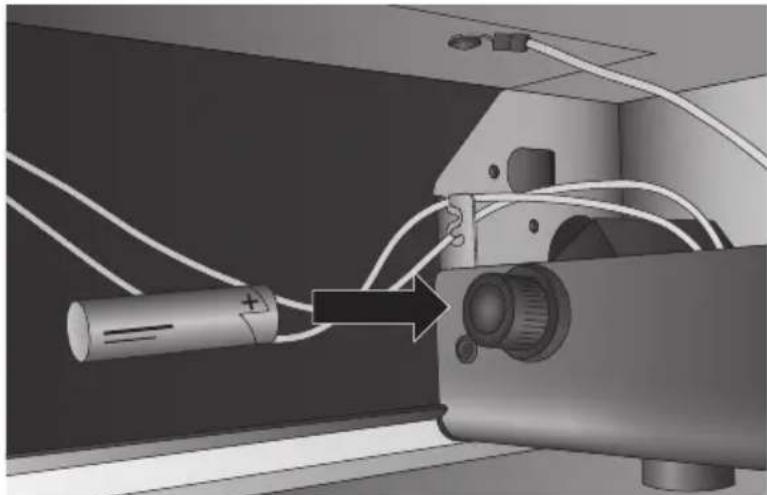
Step 1 – Insert the AA-battery
Insert the included AA-battery into the battery compartment underneath the device by unscrewing the battery cap. Make sure to insert the battery the right way (as indicated below) and close the battery cap again.
natural_image
Mechanical assembly diagram showing a battery connected to a control panel with wires (no text or symbols visible)Step 2 – Place the stones
Unpack and place the 3 stones into the oven carefully. Be careful when placing the stones into the device as they are fragile. Start with the left and right stone and then position the center stone.
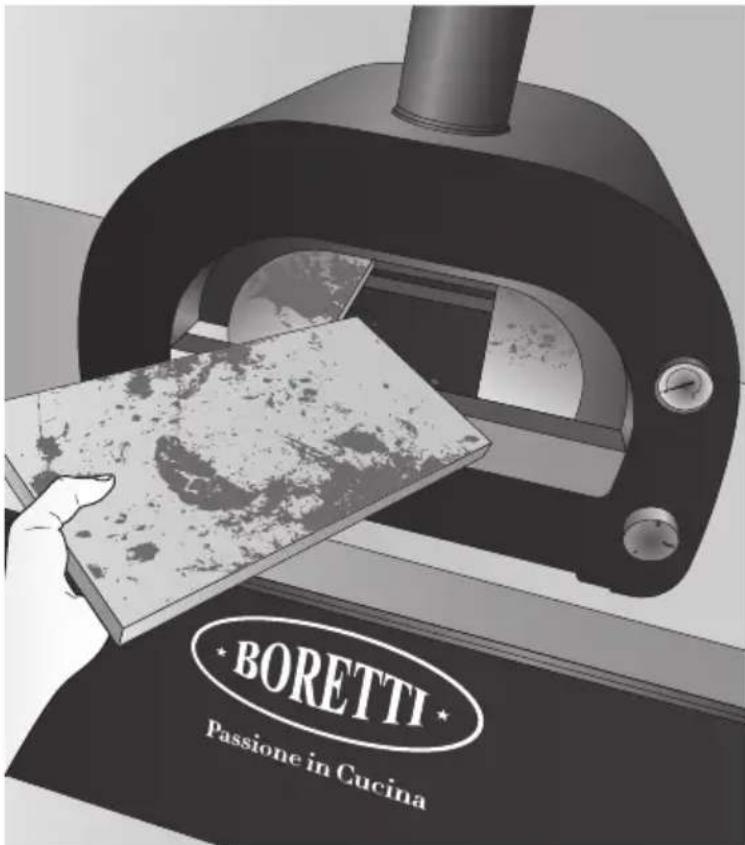
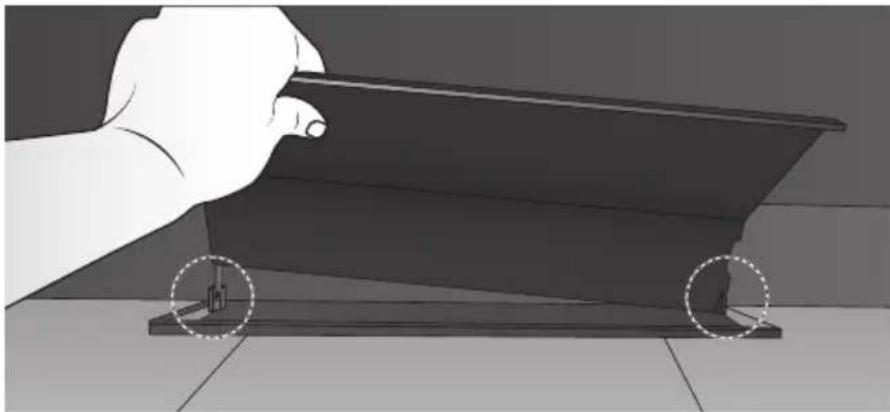
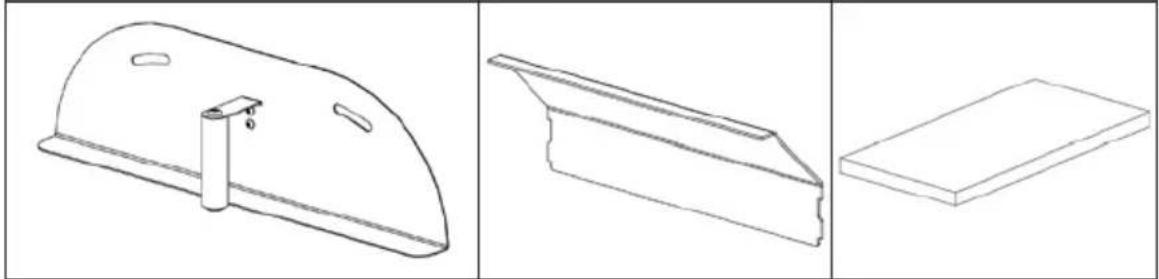
Step 3 - Placing the deflector plate
Place the steel deflector plate in the back of the oven (above the burner). The deflector plate has slots which match the support points in the oven (as indicated below). Make sure the top of the deflector plate points towards the door of the oven.
natural_image
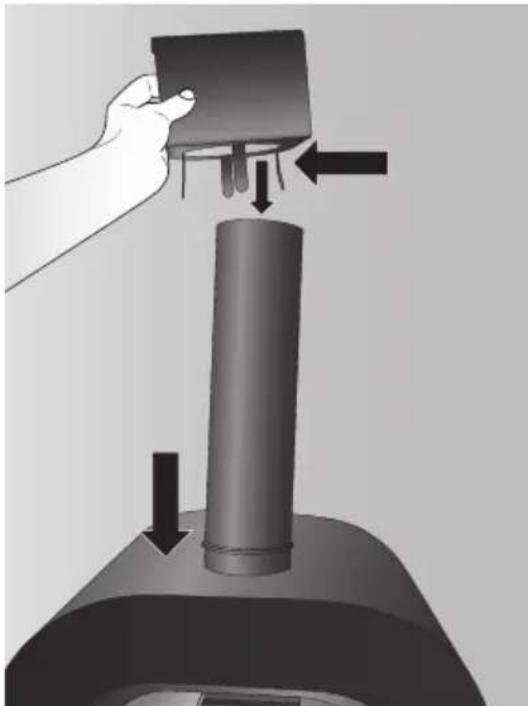
Illustration of a hand holding a flat object on a base, with two wheels and a small inset showing a small object (no text or symbols)Step 4 – Placing the chimney and the chimney top-part
First place the chimney into the opening at the top of the oven. Make sure the chimney connects properly with the oven frame. Then place the chimney top-part on top of the chimney (after bending the metal clamps downwards on the chimney top-part). The 4 metal clamps on the chimney top-part should be on the inside of the chimney and prevent the chimney top-part from falling off when it is windy.
natural_image
Illustration of a hand pressing down on a cylindrical object with arrows indicating motion (no text or symbols)Step 5 Connect the gas regulator and gas hose to the oven
Please continue reading; in chapter 4 of this manual you can find more information on how to connect the gas regulator and hose (not included) to the oven and to the gas cilinder. Make sure to follow all the warnings and tips in this manual.
4. Use of your oven
4.1 General information
Although all gas connections on the oven are tested for leakages before transport, a complete test must be carried out at the assembly site. During transport or assembly, parts of the oven may have been moved. It is also possible that the gas pressure on the equipment is too high. Regularly inspect the entire system for leaks and check the system immediately in the event that you smell gas.
4.2 Gas leak test
Always carry out a gas leak test before use of the oven and when the oven has not been used for some time.
* Extinguish any open fires (DO NOT SMOKE when testing for leaks).
* Never carry out this gas leak test near open flames.
* Make a soapy solution made up from equal parts of water and liquid soap or gentle washingup liquid
* Follow the steps below:
- Turn the control knobs of the burners to off.
- Open the gas bottle.
- Apply the soapy solution to all connections of the gas supply. If no soap bubbles are formed, there is no gas leak. If soap bubbles start to form on a connection, this indicates a leak. In the event that you detect a leak, turn the gas supply off immediately, tighten the leaking connections firmly, open the gas bottle again and repeat steps 1 through to 3.
- Turn the gas supply off.
- Turn the control knobs of the burners on for 10 seconds to let the pressure escape from the hose and then turn the control knobs to off again.
- Remove the soapy solution from the connections of the equipment with cold water and rub dry with a cloth. Check all gas supply connections before every use and do the same when the gas bottle is being connected to the gas pressure regulator.
It is recommended that you check the gas hose for leaks every year, even if the gas bottle has never been disconnected from the equipment.
Note:
Ensure that you test all loose connections and, if required, tighten them again when you are testing the equipment for leaks. Even a small leak in the system can result in a dangerous situation.
Note:
These days, most gas bottles are fitted with a mechanism that detects leaks inside the container. When the gas is being released too quickly, this mechanism cuts off the gas supply. A leak can severely restrict the gas supply which will make it difficult to light the oven.
Note:
If you are unable to close off a gas leak, then turn off the gas supply and contact your sales outlet. Even a small leak can cause a fire.
Note:
If, after several attempts, you are unable to light the oven then contact your sales outlet.
Note:
Ensure that the control knobs are in the "OFF" position when you are not using the equipment.
4.3 Before lighting the oven
* Check the general conditions of the burner. If you are in doubt about the condition of the burners, then contact your sales outlet.
* Ensure that the oven is placed on a level surface.
* This appliance must be kept away from flammable materials during use.
Keep the cooking area clean and free from petrol and/or other flammable and/or inflammable substances, flammable gasses or flammable fumes.
* Ensure that nothing is blocking the burner and ventilation.
* Ensure there is sufficient ventilation for the gas bottle.
Warning:
* Do not light the oven if you can smell gas!
* Check the gas hose for cracks or wear and tear (see: GAS LEAK TEST).
* Keep your face and body as far away from the oven as possible when lighting it.
* When the oven is switched on, the mouth of the oven must be open.
4.4 Connect the gas cylinder to the oven
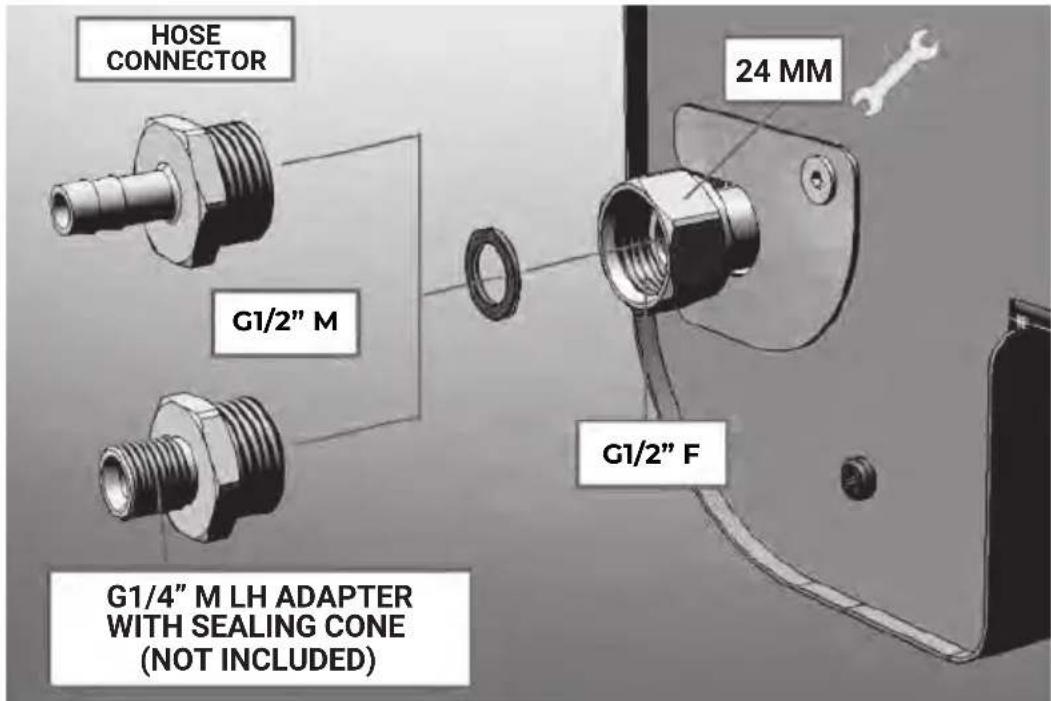
The cylinder, should always be equipped with the correct pressure regulator (not supplied) and must be connected to the oven via a flexible rubber tube (not supplied) suitable for use and between 60 and 150 cm in length. The oven inlet connection has a G1/2" F thread on which to attach a specific adapter to connect to the LPG cylinder according to the regulations of the destination country.
In the example, we see a hose connection (not universally applicable) where the hose must be tightened with a clamp in order to avoid accidental losses or disconnections. The cylinder must always be equipped with a fixed calibration pressure regulator (not supplied) for the type of gas used and depending on the country of destination. Avoid twisting, bending or crushing the hose. If there are obvious signs of wear or the date of use imprinted on the tube has expired, replace it immediately. Ensure the hoes does not contectany high temperature surfaces, or it may melt and leak causing a fire.
Pressure REGULATOR (not supplied):
This appliance must be equipped with a pressure regulator in compliance with local/national standards and/or regulations with a nominal pressure output of: CATEGORY I3+(28-30/37) Propane 37 mbar. Butane 28-30 mbar. CATEGORY I3B/P (30) Propane/Butane 30 mbar
Never use an unregulated gas source!
Always handle the cylinder with care. Never place it in a horizontal position as the valve may become damaged. This could cause serious safety issues. Always use the cylinder upright. If positioned horizontally, the cylinder could allow the combustible liquid to reach the pipes, creating damage with risk of explosion.
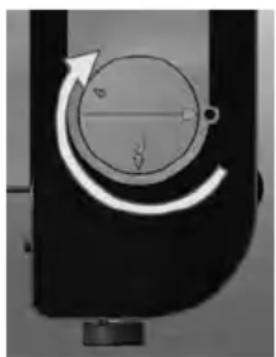
4.5 Lighting the oven with the electronic igniter
* After connecting the gas line to the oven, check the tightness of the connections and possibly resolve any leaks. With the knob in the off position, press and check if the igniter is working. If everything works, open the tap on the cylinder and proceed with the ignition as described below.
natural_image
Mechanical component with circular dial and curved arrow indicating rotation (no text or symbols)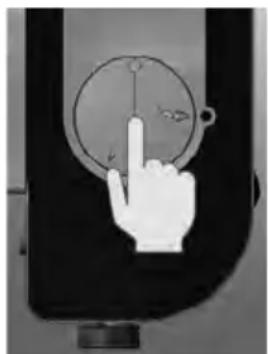
natural_image
Hand pointing at a circular diagram with a pointer (no text or symbols)* When the oven door is open, turn the knob to the maximum power position and press. The electronic igniter is connected to the knob and is activated when the knob is pressed. Press and hold the knob for a few seconds even after switching on so that the thermocouple can come into operation and keep the gas flow open on the valve.
* In the first phases after changing the cylinder and reopening the valve, it may not turn on immediately because the circuit is empty. Insist for a few seconds. If the ignition does not start after a couple of attempts, wait a few minutes to allow any unburned gas to disperse and then try the ignition again. Any accumulation of gas could give rise to flames and/or potentially dangerous detonations causing damage, burns or death in extreme cases.
* Once lit it is possible to adjust the flame by turning the knob between the min/max positions.
* CAUTION: CHECK FLAME AFTER IGNITION.
All burner holes should show a flame of about 2.5cm on max knob position. If you smell gas, if backfire occurs, if the burner makes small bursts, or the flames are uneven along the length of the burner there may be a problem with the venturi tube. In this case SWITCH THE OVEN OFF IMMEDIATELY and close the gas valve on the gas cylinder.
* Once the cooking is finished or at the end of use, correctly follow the shutdown procedure below. When the flame is still on, close the tap on the cylinder and wait for the burner to turn off, only after turning the knob to the "closed" position. This ensures the complete emptying of the circuit from the gas.
Note:
If, after several attempts, you are still not able to light the oven, please contact your sales outlet or the Boretti Service Team.
4.6 Safety advice on hot parts
* Some parts, indicated below, can become really hot and should not be touched when oven is on. The chimney, outer body parts, door and handle will all become hot when oven is in use.
* Wear heat-resistant gloves at all times TO AVOID ACCIDENTS AND BURNS.
* Even the door handle, despite being made of silicone, after prolonged use of the oven could become hot and we strongly recommend to use heat-resistant gloves at all times.
4.7 Storage
* After using your oven, close the gas supply and let the equipment cool down.
* After closing the gas valve; disconnect the gas bottle.
* Store the oven in a well-ventilated space and keep children away from the equipment.
* Do not place any easily flammable materials under the oven.
* If you are storing the oven outside, then use a cover to protect your oven from the elements. In the event of outside storage, remove the cover regularly to prevent excessive condensation from forming (which may lead to oxidation) on the metal components.
* Let the oven cool down completely before placing the cover over it or trying to move the appliance.
* Never store butane or propane gas cylinders (even if empty) in the house, cellar or basement. Propane gas is heavier than air, if there is a leak the gas will accumulate at the lowest level and become dangerous in the presence of a spark or flame. Store the cylinder outdoors in a well-ventilated area.
* Never store replacement or even empty Butane or Propane gas cylinders near the appliance in use "danger of fire and/or explosion".
* Moving the oven is allowed only if it is cold and after closing the cylinder valve if it is housed under a trolley. If the cylinder is outside the trolley, it is advisable to close the valve and disconnect it before moving the oven to avoid tipping over and/or damage to the cylinder that could compromise its use and functionality with the risk of causing fires and/or explosions.
4.8 Use
* The oven becomes extremely hot, use heat resistant gloves when using the oven. Do not touch the oven without the correct protection.
* Use suitable pizza tools to prepare food on the oven.
* Always place the cylinder in an accessible place to facilitate opening and closing in case of emergency.
* Never subject cylinders to heat. The internal pressure could increase and exceed its safety limits.
5. Maintenance of your oven
Important:
NEVER leave the oven outside without covering it. Rainwater could collect in the oven, the frame or on the stones.
Important:
Parts sealed by the manufacturer or his agent shall not be manipulated by the user; No modifications should be made to any part of this oven.
5.1 Cleaning
Do not use abrasive cleaning agents on the oven. These can scratch and damage the surface. Use lukewarm water in combination with a soft sponge or cloth to clean the outer metal parts of the oven body. Clean any food remnants on the stones with a pizza oven brush.
5.2 Ventilation
The burner can only function properly if the heat they produce can escape as well. If this is not possible, then the burner may not get enough oxygen, which may cause backfiring, especially if the burners are set to "HIGH". If this happens regularly, it may cause the burner to develop cracks. For this reason, there are ventilation openings around the oven. These allow the hot air to escape. Never cover the ventilation openings or chimney with aluminium foil or other materials that can impede the airflow.
5.3 Replacing the gas hose
The gas hose should be replaced every two years. Rubber gas hoses can dry out which may result in gas leaks.
5.4 Burner
The burner must periodically be removed for inspection and cleaning, in particular after a period of non-use/storage. The burner must be checked for its general condition and to ensure that the openings are not blocked. The burners can be cleaned with the use of a soft brush when oven is off and completely cooled down.
5.5 Spiders and insects
Spiders and insects can make their nest inside the burner of the oven, which may cause gas to flow from the front of the burner. This is a dangerous situation that can cause a fire behind the operation panel. This will damage the oven, which will then no longer be safe to use. Therefore, we recommend that you check the oven at least once a year for spiders, insects and nests (particularly after long storage periods). You can do this by dismantling the burner tubes and blowing through them or brushing them clean.
6. Certified gases / pressures
Appliance name: Gas oven
Model number: Amalfi
Category: I3+, I3B/P(30)
Q.: Total: 9 Kw (655g/h)
Injector size: 1,50MM

CAT GAS I3+ p (mbar) I3B/P
| CAT GAS G30 | G31 | |||||||
| I3+ p (mbar) | 28-30 37 | AL☐ | BE☐ | CY☐ | FR☐ | GR☐ | ||
| I3+ | p (mbar) | 28-30 | 37 | IE☐ | IT☐ | LT☐ | PT☐ | GB☐ |
| I3+ | p (mbar) | 28-30 | 37 | CZ☐ | MK☐ | SK☐ | SI☐ | ES☐ |
| I3+ | p (mbar) | 28-30 | 37 | CH☐ | TR☐ | |||
| I3B/P | p (mbar) | 30 | 30 | AL☐ | BG☐ | CY☐ | HR☐ | DK☐ |
| I3B/P | p (mbar) | 30 | 30 | EE☐ | FI☐ | GR☐ | IS☐ | LV☐ |
| I3B/P | p (mbar) | 30 | 30 | LT☐ | MT☐ | NO☐ | NL☐ | PT☐ |
| I3B/P | p (mbar) | 30 | 30 | MK☐ | RO☐ | SK☐ | SI☐ | SE☐ |
| I3B/P | p (mbar) | 30 | 30 | TR☐ | HU☐ | |||
| I3B/P | p (mbar) | 37 | 37 | PL☐ | ||||
Boretti BV
Abberdaan 114 | 1046 AA Amsterdam | The Netherlands
www.boretti.com

0051/22
PIN: 51DM5037
LPG (G30-G31)
CATEGORY I3+ (Butane G30, 28-30 mbar) injector ∅ 1.50mm
CATEGORY I3+ (Propane G31, 37 mbar ) injector ∅ 1.50mm
(BE, CH, CY, CZ, ES, FR, GB, GR, IE, IT, LT, PT, SI, SK)
CATEGORY I3 B/P (30 mbar) injector ∅ 1.50mm
28-30 mbar (butane G30, propane G31 or mixtures G30/G31)
(BG, CY, DK, EE, FI, GR, HU, IS, LT, LV, MT, NO, NL, RO, SE, SI)
Do not tamper with or modify regulator. Use only regulators which supply the pressure listed in the table above. For replacement, use only the regulator specified by the manufacturer.
7. Environmental guide, Conditions of warranty & Contact info
If, for whatever reason, you want to dispose of your gas oven, please take the following guidelines into account:
* Deliver the oven to the authorised local company for the collection of surplus household equipment. Contact your local council to find out where these collection points are located.
* This oven features the mark that complies with the European guidelines 2002/96EG relating to disposal of equipment. This guideline decides the standard for the collection and recycling of disposed equipment which apply to the whole European Union territory.
For pizza accessories, warranty, service conditions and other questions we refer you to
www.boretti.com
You can also send questions and suggestions to
info@boretti.com
Boretti BV
Abberdaan 114
1046 AA Amsterdam
The Netherlands

Passione in Cucina

natural_image
Exterior view of a black BORETTI portable kitchen appliance with a vertical cylindrical stand and control panel (no text or symbols on the device itself)AMALFIAMALFI
natural_image
Mechanical assembly diagram showing a battery connected to wires and a control panel (no text or symbols visible)natural_image
Illustration of a hand pressing down on a dark object with two circular markings, no text or symbols present.natural_image
Illustration of a hand pressing down a cylindrical object with arrows indicating motion (no text or symbols)natural_image
Mechanical component with curved arrow indicating rotation or motion (no text or symbols)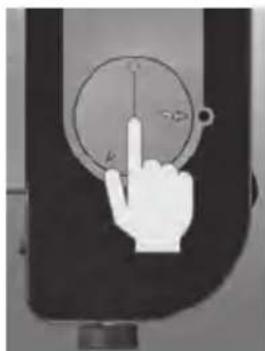
natural_image
Hand pointing at a circular diagram with arrows, no visible text or symbolsAbberdaan 114 | 1046 AA Amsterdam | The Netherlands
www.boretti.com

0051/22
PIN: 51DM5037
LPG (G30-G31)
CATEGORIE I3+ (butaan G30, 28-30 mbar) injector ∅ 1,50 mm
CATEGORIE I3+ (propaan G31, 37 mbar) injector ∅ 1,50 mm
(BE, CH, CY, CZ, ES, FR, GB, GR, IE, IT, LT, PT, SI, SK)
CATEGORIE I3 B/P (30 mbar) injector ∅ 1,50 mm
28-30 mbar (butaan G30, propaan G31 of mengsels G30/G31)
(BG, CY, DK, EE, FI, GR, HU, IS, LT, LV, MT, NO, NL, RO, SE, SI)
natural_image
Black and white photo of a BORETTI portable kitchen appliance with a vertical cylindrical tube and control knobs (no visible text or symbols on the device body)AMALFIAMALFI
DE | BENUTZERHANDBUCH
www.boretti.com
Einführung
natural_image
Technical line drawings of three electronic devices: a microwave oven, a cylindrical tube, and a multi-chamber device (no text or symbols present)natural_image
Three technical line drawings of a mechanical part: a curved housing, a flat plate, and a rectangular block (no text or symbols)- AA-Batterie
natural_image
Illustration of a cylindrical battery with a plus sign and internal line markings (no text or symbols)natural_image
Mechanical assembly diagram showing a battery connected to a control panel with wires (no text or symbols visible)natural_image
Illustration of a hand holding a flat object with two wheels, no text or symbols presentnatural_image
Illustration of a hand pressing down on a cylindrical object with arrows indicating force or movement (no text or symbols)natural_image
Mechanical component with circular dial and curved arrow indicating rotation (no text or symbols)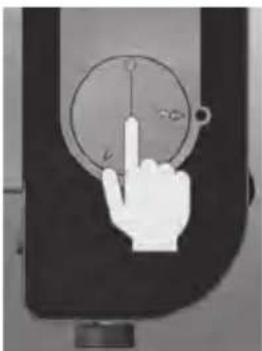
natural_image
Hand icon pointing at a circular diagram with a pointer (no text or symbols)Abberdaan 114 | 1046 AA Amsterdam | The Netherlands
www.boretti.com

0051/22
PIN: 51DM5037
LPG (G30-G31)
CATEGORY I3+ (Butan G30, 28-30 mbar) Injektor ∅ 1,50 mm
CATEGORY I3+ (Propan G31, 37 mbar) Injektor ∅ 1,50 mm
(BE, CH, CY, CZ, ES, FR, GB, GR, IE, IT, LT, PT, SI, SK)
CATEGORY I3+ B/P (30 mbar) Injektor ∅ 1,50 mm
natural_image
Black and white photo of a BORETTI pizza oven with a vertical metal stand and control panel (no visible text or symbols on the device body)AMALFIAMALFI
FR | MANUEL D'UTILISATION
www.boretti.com
Introduction
natural_image
Mechanical assembly diagram showing a battery connected to wires and a control panel (no text or symbols visible)Étape 2 – Placez les pierres
natural_image
Illustration of a hand pressing down on a dark panel with wheels, showing mechanical components (no text or symbols)natural_image
Illustration of a hand pressing down on a cylindrical object with arrows indicating motion (no text or symbols)natural_image
Mechanical component with circular dial and curved arrow indicating rotation (no text or symbols)
natural_image
Hand pointing at a circular diagram with arrows, no visible text or symbolsQ.: Total: 9 Kw (655 g/h)
Abberdaan 114 | 1046 AA Amsterdam | The Netherlands
www.boretti.com

0051/22
PIN: 51DM5037
GPL (G30-G31)
natural_image
Black BOARETT oven with a vertical metal stand and control panel (no visible text or symbols on the device body)AMALFIAMALFI
SV | BRUKSANVISNING
www.boretti.com
Inledning
natural_image
Technical line drawings of three electronic devices: a microwave oven, a cylindrical tube, and a multi-chamber device (no text or symbols present)- Dörr
- Deflektor 5. Stenar (3 st)
natural_image
Three technical line drawings of a mechanical part: a curved housing, a flat plate with a side outlet, and a rectangular base (no text or symbols)- AA-batteri
natural_image
3D illustration of a cylindrical battery with a plus sign and internal markings (no text or symbols)3. Monteringsritningar
natural_image
Mechanical assembly diagram showing a cylindrical component connected to a control panel with wires (no text or symbols visible)Steg 2 – Placera stenarna
natural_image
Illustration of a hand holding a flat object on a base, with two circular markings highlighting the bottom part (no text or symbols present)natural_image
Illustration of a hand pressing down on a cylindrical object with arrows indicating motion (no text or symbols)natural_image
Mechanical component with circular dial and curved arrow indicating rotation (no text or symbols)
natural_image
Hand pointing at a circular diagram with a pointer (no text or symbols)Abberdaan 114 | 1046 AA Amsterdam | The Netherlands
www.boretti.com

0051/22
PIN: 51DM5037
LPG (G30-G31)
KATEGORI I3+ (Butan G30, 28-30 mbar) injektor ∅ 1,50 mm
KATEGORI I3+ (Propan G31, 37 mbar) injektor ∅ 1,50 mm
(BE, CH, CY, CZ, ES, FR, GB, GR, IE, IT, LT, PT, SI, SK)
KATEGORI I3 B/P (30 mbar) injektor ∅ 1,50 mm
28-30 mbar (butan G30, propan G31 eller blandningar G30/G31)
(BG, CY, DK, EE, FI, GR, HU, IS, LT, LV, MT, NO, NL, RO, SE, SI)
- Introduction
- Read this manual carefully and keep it safe!
- Our tips on how to use the Amalfi oven:
- Contents
- Important safety information
- General safety guidelines
- Assembly
- Place of use
- Parts list
- Assembly drawings
- Step 1 – Insert the AA-battery
- Step 2 – Place the stones
- Step 3 - Placing the deflector plate
- Step 4 – Placing the chimney and the chimney top-part
- Step 5 Connect the gas regulator and gas hose to the oven
- Use of your oven
- General information
- Gas leak test
- Note:
- Before lighting the oven
- Warning:
- Connect the gas cylinder to the oven
- Pressure REGULATOR (not supplied):
- Never use an unregulated gas source!
- Lighting the oven with the electronic igniter
- Safety advice on hot parts
- Storage
- Use
- Maintenance of your oven
- Important:
- Cleaning
- Ventilation
- Replacing the gas hose
- Burner
- Spiders and insects
- Certified gases / pressures
- Boretti BV
- LPG (G30-G31)
- Environmental guide, Conditions of warranty & Contact info
- Einführung
- Étape 2 – Placez les pierres
- GPL (G30-G31)
- Inledning
- Monteringsritningar
- Steg 2 – Placera stenarna
Brand : BORETTI
Model : Amalfi
Category : Barbecue