Xenon - Iron UFESA - Free user manual and instructions
Find the device manual for free Xenon UFESA in PDF.

| Product Type | Iron |
| Brand | Ufesa |
| Model | Xenon |
| Power Supply | 230 V ~ 50 Hz |
| Main Functions | Steam ironing, dry ironing, steam burst, vertical ironing, spray |
| Anti-drip system | Yes, automatic for ironing delicate fabrics at low temperature |
| Anti-scale system | Yes, permanent resin filter (Zero-Calc) |
| Steam setting | Variable, from MIN to MAX |
| Temperature setting | Variable, with positions for synthetics, wool/silk, cotton/linen |
| Indicator light | Yes, indicates when temperature is reached |
| Cleaning button (self-cleaning) | Yes |
| Water tank capacity | Not specified, do not exceed max level |
| Recommended water type | Tap water; if hard, mix with distilled water (2:1 tap/distilled for hard water, 1:1 for semi-hard) |
| Care and cleaning | Clean soleplate with a damp cloth; self-cleaning every two weeks |
| Vertical ironing | Yes, at 10 cm distance, 5-second pauses between bursts |
| Safety | Do not leave unattended; keep out of reach of children under 8 years; use on a stable surface |
| Warranty | Not specified |
Frequently Asked Questions - Xenon UFESA
User questions about Xenon UFESA
0 question about this device. Answer the ones you know or ask your own.
Ask a new question about this device
Download the instructions for your Iron in PDF format for free! Find your manual Xenon - UFESA and take your electronic device back in hand. On this page are published all the documents necessary for the use of your device. Xenon by UFESA.
USER MANUAL Xenon UFESA
CÓMO USAR EL PRODUCTO
WE WOULD LIKE TO THANK YOU FOR CHOOSING UFESA. WE WISH THE PRODUCT PERFORMS TO YOUR SATISFACTION AND PLEASURE.
WARNING
PLEASE READ THE INSTRUCTIONS FOR USE CAREFULLY PRIOR TO USING THE PRODUCT. STORE THESE IN A SAFE PLACE FOR FUTURE REFERENCE.
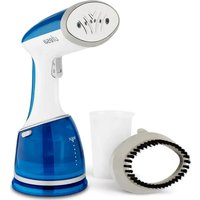
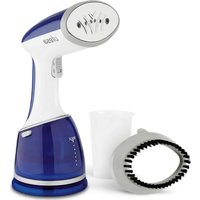
DESCRIPTION
1 Spray button
2 Shot of steam button
3 Steam regulator
4 Water inlet lid
5 Spray nozzle
6 Level mark for maximum filling
7 Temperature control
8 Clean button
9 Soleplate
10 Pilot light
11 Power cord
SAFETY INSTRUCTIONS
This appliance can be used by children aged from 8 years and above and persons with reduced physical, sensory or mental capabilities or lack of experience and knowledge if they have been given supervision or instruction concerning use of the appliance in a safe way and understand the hazards involved. Children shall not play with the appliance. Cleaning and user maintenance shall not be made by children without supervision.
If the supply cord is damaged it must be replaced by the manufacturer, its service agent or similarly qualified persons in order to avoid a hazard.
The iron must not be left unattended while it is connected to the supply mains.
The plug must be removed from the socket-outlet before water reservoir is filled with water.
The iron must be used and rested on a flat, stable surface.
When placing the iron on its stand, ensure that the surface on which the stand is placed is stable.
The iron is not to be used if it has been dropped, if there are visible signs of damage or if it is leaking.
Keep the iron and its cord out of reach of children less than 8 years of age when it is energized or cooling down.
This device is designed for use at a maximum altitude up to 2000m above sea level.
CAUTION. Hot surface.
Surface is liable to get hot during use.
IMPORTANT WARNINGS
This appliance is designed for home use and should never be used for commercial or industrial use under any circumstances. Any incorrect use or improper handling of the product shall render the guarantee null and void.
Before plugging in the appliance, check that your mains voltage is the same as indicated on its characteristics plate.
If it is absolutely necessary to use an extension cable, make sure that it is suitable for 16A and has a socket with an earth connection.
The mains connection cord must not be tangled or wrapped around the product during use.
Do not use the device, or connect and disconnect to supply mains with the hands and / or wet feet.
Do not pull on the connection cord in order to unplug it or use it as a handle.
Do not direct steam at people and animals.
The appliance must never be placed directly under the tap to fill the water tank. Never immerse the iron in water or any other fluid.
Unplug the appliance immediately from the mains in the event of any breakdown or damage, and contact and official technical support service. In order to prevent any risk of danger, do not open the appliance. Only qualified technical personnel from the brand's official technical support service may carry out repairs on the product.
Proceed according to maintenance and cleaning section of this manual for cleaning.
B&B TRENDS S.L. disclaims all liability for damages that may occur to people, animals or objects, for the non-observance of these warnings
BEFORE THE FIRST USE
Before using the iron, please ensure you read the user manual and understand all parts and features of the iron. Be sure to remove any packaging material and labels before using for the first time.
During its first use the iron may produce certain vapours and odours that will die away after a few minutes.
Do not spray for the first time on clothes, as there might be traces of dirt on the soleplate.
HOW TO USE
Always check whether a label with ironing instructions is attached to an article to be ironed. Follow these instructions in all cases.
Turn the temperature control (7) round to set the appropriate temperature indicated in ironing instructions or in fabric label.
| Marking | Type of textile |
| Do not iron this article | |
| ● (1 dot) | Synthetics, Nylon, Acrylics, Polyester, Rayon |
| ●● (2 dots) | Wool, Silk |
| ●●● (3 dots) / max | Cotton, Linen |
Insert the main plug into the wall socket. The pilot light (10) will turn on.
When the pilot light goes out you may start ironing.
If you set the temperature control to lower setting after ironing at a high temperature it is not recommended to iron before the pilot light switches on again.
WATER TANK FILLING
Unplug the iron from the mains before filling the water tank.
The iron has been designed to use normal tap water. If the tap water in your area is hard or semi-hard, mix tap water with distilled or demineralized water purchased in stores in the ratio 2:1 and 1:1 respectively (distilled water / tap water).
You can inquire about the water hardness with your local water supplier.
Never use 100% distilled or demineralized water, rain water, softened water, scented water, water from refrigerators and air conditioners, dryers or other types of home water preparation water.
- Open the water inlet lid (4).
- Slowly pour water through the water inlet.
- Never fill beyond the level mark for maximum filling (6), in order to avoid spilling out of water.
- Close the water inlet lid.
Important: The water tank should be emptied after each use.
SPRAYING
This can be used to remove stubborn wrinkles.
As long as there is enough water in the water tank, you may use the spray button at any temperature setting during steam or dry ironing.
Press the spray button (1) several times to activate the pump while you are ironing.
Do not use the spray function with silk!
STEAM IRONING
- Set the temperature control (7) to the desired position in accordance with the manufacturer's label. The pilot light (10) will turn on until the temperature is reached. Then the pilot light will turn off.
- Set the variable steam regulator (3) to the desired position.
| Recommended position of the steam regulator (3)Temperature | |
| MIN |  |
| MAX |  |
CAUTION: Avoid coming in contact with ejected steam.
DRY IRONING
The steam iron can be used on the dry setting with or without water in the water tank.
- Turn the steam regulator (3) to the minimum position.
- Select the setting on the temperature control (7) best suited for the fabric to be ironed.
SHOT OF STEAM
The shot of steam feature provides additional steam for removing stubborn wrinkles.
- Set the temperature control (7) to "MAX".
- Press the shot of steam button (2) to release the burst of steam.
NOTE: To prevent water leakage from the soleplate, do not keep the steam button pressed for more than 5 seconds.
VERTICAL IRONING
This can be used to remove creases from hanging clothes, curtains etc.
- Hang article of clothing on a clothes hanger.
- Set the temperature control (7) to "MAX".
- Operate the iron in a vertical position at a distance of 10 cm / 4 in, and press the shot of steam button (2) repeatedly with pauses of at least 5 seconds.
NOTE: To prevent water leakage from the soleplate, do not keep the steam button pressed for more than 5 seconds.
ANTI-DRIP SYSTEM
With the anti-drip system, you can perfectly iron even the most delicate fabrics.
Always iron these fabrics at low temperatures. The plate may cool down to the point where no more steam comes out, but rather drops of boiling water that can leave marks or stains. In these cases, the Anti-drip system automatically activates to prevent vaporization, so that you can iron the most delicate fabrics without risk of spoiling or staining them.
WHEN YOU FINISH IRONING
- Set the temperature control (7) to the minimum position.
- Remove the main plug from the wall socket.
- Empty the water tank.
- Stand the iron on heel rest.
MAINTENANCE AND CLEANING
Before cleaning the steam iron ensure it is unplugged from the power supply and has completely cooled down.
Do not use abrasive cleaners.
To clean exterior surfaces, use a damp soft cloth and wipe dry. Do not use any chemical solvents, as these will damage the surface.
To clean the soleplate, do not use scouring pads or harsh cleaners on the soleplate as these will damage the surface.
To remove burnt residue, iron over a damp cloth while iron is still hot. To clean the soleplate, simply wipe with soft damp cloth and wipe dry.
SELF-CLEANING
It is recommended to do the self-cleaning at least every two weeks.
- Fill the water tank.
- Set the temperature control (7) to its maximum position.
- Set the steam regulator (3) to the minimum position.
- Insert the main plug into the wall socket.
- Allow the iron to heat up until the indicator light (10) goes out.
- Unplug the steam iron (very important!)
-
Hold the iron horizontally over a sink
-
Press the clean button (8) and shake the iron until approximately one third of the water capacity of the tank is evaporated. Warning: boiling water and steam will be ejected from the holes in soleplate with impurities washed out.
-
Release the clean button, and gently shake the iron for some seconds.
-
Repeat steps 8 and 9 three times until the tank is empty.
-
Then plug the iron in and heat it up again until the remaining water has evaporated.
-
Push the clean button a few times more to clean the valve.
-
Unplug the iron and let the soleplate cool down.
-
Move the iron over an old (preferably) piece of cloth. This ensures that the soleplate will be dry during storage.
Do not use chemical additives, scented substances or decalcifiers. Failure to comply with the above-mentioned regulations leads to the loss of guarantee.
ANTI-CALC SYSTEM
A special resin filter inside the water reservoir softens the water and prevents scale build-up in the plate. The resin filter is permanent and does not need replacing.
Please note:
Use tap water only. Distilled and/demineralized water makes the "Zero-Calc", anti-calc system ineffective by altering its physicochemical characteristics.
TROUBLE SHOOTING
| Problem | Possible cause | Solution |
| Soleplate (9) is not heating even through iron is turned on. | Connection problem | Check main power supply cable plug and outlet. |
| Temperature control (7) is at “MIN” position | Turn to a higher position, if compatible with the fabric. | |
| Steam does not come out | Not enough water in the tank. | Fill the water tank. |
| Steam regulator (3) is selected in non-steam position. | Set the steam regulator between positions of minimum steam and maximum steam. | |
| Selected temperature is lower than that specified to use with steam. | Set to a higher temperature, if compatible with the fabric. | |
| Shot of steam / vertical ironing function does not work | Iron is not hot enough. | Set a suitable temperature and wait until the pilot light (10) goes out. |
| Selected temperature is lower than that specified to use with steam. | Set a higher temperature, if compatible with the fabric. | |
| Water drips out of the soleplate (9) together with steam | Temperature control (7) set to a low position. | Turn to a higher position (between “••” and “MAX”), if compatible with the fabric. |
| Steam regulator (3) is set too high in conjunction with a low temperature. | Set the steam regulator to a lower setting (see “Steam ironing” section). | |
| You have pressed the shot of steam button (2) repeatedly without waiting for 5 seconds between each press. | Wait 5 seconds between each press of the shot of steam button. | |
| Deposits come out through the holes of the soleplate (9) | Traces of lime scale are coming out of the steam chamber. | Carry out a self-cleaning process. |
| Spray function does not work | Not enough water in the tank. | Fill the water tank. |
| The clothes tend to stick | The temperature is too high. | Turn the temperature control (7) down and wait until the iron has cooled down. Set a suitable temperature for the cloth to be ironed. |
| The iron produces vapours and odours | This may be caused by the lubrication of some of the internal parts | This is completely normal and will stop after a short while |
PRODUCT DISPOSAL
This product complies with European Directive 2012/19/EU on electrical and electronic devices, known as WEEE (Waste Electrical and Electronic Equipment), provides the legal framework applicable in the European Union for the disposal and reuse of waste electronic and electrical devices. Do not dispose of this product in the bin, instead going to the electrical and electronic waste collection centre closest to your home.
We hope that you will be satisfied with this product.
FRANÇAIS
NOUS VOUS REMERCIONS D'AVOIR CHOISI UFESA. NOUS SOUHAITONS QUE CE PRODUIT VOUS APPORTE SATISFACTION ET QUE VOUS AYEZ PLAISIR À L'UTILISER.
AVERTISSEMENT
VEUILLEZ LIRE ATTENTIVEMENT LES INSTRUCTIONS D'UTILISATION AVANT D'UTILISER CE PRODUIT ET VEUILLEZ LES CONSERVER DANS UN ENDROIT SÛR AFIN DE POUVOIR VOUS Y RÉFÉRER ULTÉRIEUREMENT.