
CA4MWP9G6NQB - Microwave Oven CANDY - Free user manual and instructions
Find the device manual for free CA4MWP9G6NQB CANDY in PDF.

User questions about CA4MWP9G6NQB CANDY
0 question about this device. Answer the ones you know or ask your own.
Ask a new question about this device
Download the instructions for your Microwave Oven in PDF format for free! Find your manual CA4MWP9G6NQB - CANDY and take your electronic device back in hand. On this page are published all the documents necessary for the use of your device. CA4MWP9G6NQB by CANDY.
USER MANUAL CA4MWP9G6NQB CANDY
English
Français
Italiano
Deutsch
Español
Nederlands
Português
WELCOME
Thank you for choosing our product. To ensure your safety and get the best results, please read this manual carefully, including the safety instructions, and keep it for future reference.
Before installing the oven note the serial number, which you might need for repairs. Check for any damage during transportation and consult a technician if you're unsure before using it. Keep packaging materials away from children.
When you first turn on the oven, you might notice some smoke. Don't worry, just wait for the smoke to clear before using the oven.
NOTE: Please note that the oven's features and accessories may vary depending on the model you purchased.
SUMMARY
1.SAFETY INFORMATION
2.PRODUCT INTRODUCTION
2.1. Overview of the product
2.2. Accessories
2.3. Control panel
2.4. Connectivity
3. BEFORE STARTING
3.1. Information to start
3.2. Preliminary cleaning
4. OPERATION OF PRODUCT
4.1. How the product works
4.2. Cooking functions
5. COOKING GUIDELINES
5.1. Everyday cooking table
6.CARE AND CLEANING
6.1. General recommendations
6.2. Cleaning the oven
7.TROUBLE SHOOTING
8. ENVIRONMENTAL PROTECTION & DISPOSAL
8.1. Appliance disposal
8.2. Saving and respecting the environment
9.INSTALLATION
IMPORTANT SAFETY INSTRUCTIONS READ CAREFULLY AND KEEP FOR FUTURE REFERENCE
WARNING: To reduce the risk of fire, electrical shock, injury to persons or damage when using the appliance, follow the important safety instructions listed below. Read all the instructions before use. Use only for its intended purpose as described in these instructions.
General
- This product has been designed for use in a domestic (residential) environment. This product is not designed for any commercial use. Any commercial use by the customer will affect this product's manufacturer's warranty.
- This appliance is intended to be used in household and similar applications such as:
- staff kitchen areas in shops, offices and other working environments
- farm houses
- by clients in hotels, motels and other residential environments
-
bed and breakfast type environments
-
Household appliances are not intended to be played with by children.
- Do not leave children alone. Children should not be left alone or unattended in the area where the appliance is in use. They should never be allowed to sit or stand on any part of the appliance.
- HOT CONTENTS CAN CAUSE SEVERE BURNS. DO NOT ALLOW CHILDREN TO USE THE MICROWAVE. Use caution when removing hot items.
- When the appliance is operated in the combination mode, children should only use the oven under adult supervision due to the temperatures generated.
- Accessible parts may become hot during use. Young children should be kept away.
- Children of less than 8 years old must be kept away from the appliance unless continuously supervised. This appliance can be used by children aged from 8 years and above, and persons with reduced physical, sensory or mental capabilities or lack of experience and knowledge, if they have been given supervision or instruction concerning the use of the appliance in a safe way and they understand the hazards involved. Cleaning and user maintenance shall not be done by children without supervision.
- Do not place heavy objects on the oven door.
- Do not let aluminum foils and food probes touch the heating elements.
- Only use the temperature probe recommended for this oven.
- Do not operate your appliance by means of an external timer or separate remote control system.
- Placement of oven shelves: always position shelves in the desired location while the oven is cool (before preheating). If a shelf must be removed while the oven is hot, do not let the oven mitts or potholder contact hot heating elements in the oven or the base of the oven.
- The appliance and its accessible parts become hot during use. Care should be taken to avoid touching heating elements.
- Do not use rough or abrasive materials or sharp metal scrapers to clean the oven door glasses, as they can scratch the surface and cause the glass to shatter.
- Do not heat unopened food containers. They can build up pressure that may cause the container to burst and result in injury.
- Disconnect the appliance from the mains electricity supply before carrying out any work or maintenance on it.
Installation
- Ensure your appliance is properly installed and grounded by a qualified technician in accordance with the provided installation instructions.
• This appliance is intended to be built-in.
• Install or locate this appliance only in accordance with the provided
installation instructions.
- Do not install or operate the appliance if it is damaged or not working properly. If you receive a damaged product, contact your dealer or installer immediately.
- The appliance must not be installed behind a decorative door in order to avoid overheating.
- Do not mount this appliance over a sink.
- This oven is not approved or tested for marine use.
- Do not store this appliance outdoors. Do not use this near a swimming pool, near a sink or in similar locations.
- Do not immerse cord or plug in water. Do not let cord hang over edge of table or counter. Keep cord away from heated surfaces.
- The electrical installation of the oven should be equipped with an emergency switch, which switches off the whole appliance from the mains supply in an emergency. The distance between the contacts of the emergency switch must be at least 3mm.
- Do not cover or block any openings on the appliance.
- Take care – some edges are sharp.
Electrical warnings
- IF THE MICROWAVE OVEN IS PROVIDED BY THE MANUFACTURER WITHOUT PLUG: THE APPLIANCE MUST NOT BE CONNECTED TO THE POWER SOURCE USING PLUG OR SOCKETS, BUT MUST BE DIRECTLY CONNECTED TO THE SUPPLY MAINS. The connection to the power source must be carried out by a suitably qualified professional. In order to have an installation compliant to the current safety legislation the oven must be connected only placing an omnipolar breaker, with contact separation compliant to the requirements for overvoltage category III, between the appliance and the power source. The omnipolar breaker must bear the maximum connected load and must be in line with current legislation. The yellow-green earth cable should not be interrupted by the breaker. The omnipolar breaker used for the connection must be easily accessible when the appliance is installed. The connection to the power source must be carried out by a suitably qualified professional considering
the polarity of the microwave oven and of the power source. The disconnection must be achieved incorporating a switch in the fixed wiring in accordance with the wiring rules.
- IF THE MICROWAVE OVEN IS PROVIDED BY THE MANUFACTURER WITH PLUG:
- The socket must be suitable for the load indicated on the tag and must have ground contact connected and in operation. The earth conductor is yellow-green in color. This operation should be carried out by a suitably qualified professional. In case of incompatibility between the socket and the appliance plug, ask a qualified electrician to substitute the socket with another suitable type. The plug and the socket must be conformed to the current norms of the installation country. Connection to the power source can also be made by placing an omnipolar breaker, with contact separation compliant to the requirements for overvoltage category III, between the appliance and the power source that can bear the maximum connected load and that is in line with current legislation. The yellow-green earth cable should not be interrupted by the breaker. The socket or omnipolar breaker used for the connection should be easily accessible when the appliance is installed. The disconnection may be achieved by having the plug accessible or by incorporating a switch in the fixed wiring in accordance with the wiring rules.
- If the power cable is damaged, it should be substituted with a cable or special bundle available from the manufacturer or by contacting the customer service department.
- Failure to comply with the above can compromise the safety of the appliance and invalidate the guarantee.
- The microwave oven must be switched off before removing the removable parts. After cleaning, reassemble them according to instructions.
- The use of any electrical appliance implies the observance of some fundamental rules:
- do not pull on the power cable to disconnect the appliance from the power source;
- do not touch the appliance with wet or damp hands or feet;
- in general the use of adaptors, multiple sockets and extension cables is not recommended;
- in case of malfunction and /or poor operation, switch off the appliance and do not tamper with it.
- ENSURE THAT AN ELECTRICIAN OR QUALIFIED TECHNICIAN MAKES THE ELECTRICAL CONNECTIONS. The power supply to which the oven is connected must conform with the laws in force in the country of installation. The manufacturer accepts no responsibility for any damage caused by the failure to observe these instructions. The oven must be connected to an electrical supply with an earthed wall outlet or a disconnector with multiple poles, depending on the laws in force in the country of installation. The electrical supply should be protected with suitable fuses and the cables used must have a transverse section that can ensure correct supply to the oven.
- CONNECTION. The oven is supplied with a power cable that should only be connected to an electrical supply with 220-240 Vac power between the phases or between the phase and the neutral. Before the oven is connected to the electrical supply, it is important to check power voltage indicated on the gauge and the setting of the disconnector. The grounding wire connected to the oven's earth terminal must be connected to the earth terminal of the power supply.
- AWARNING : Before connecting the oven to the power supply, ask a qualified electrician to check the continuity of the power supply's earth terminal. The manufacturer accepts no responsibility for any accidents or other problems caused by failure to connect the oven to the earth terminal or by an earth connection that has defective continuity.
- Before carrying out any work on the electrical section of the appliance, it must be disconnected from the mains electricity supply.
- Connection to a good ground wiring system is absolutely essential and mandatory.
• Alterations to the domestic wiring system must only be made by a
qualified electrician.
NOTE: as the oven could require maintenance work, it is advisable to keep another wall socket available so that the oven can be connected to this if it is removed from the space in which it is installed. The power cable must only be substituted by technical service staff or by technicians with equivalent qualifications.
Servicing
- User servicing: do not repair or replace any part of the appliance unless specifically recommended in this guide. All other servicing should be done by a Haier trained and supported service technician.
- WARNING: If the door or door seals are damaged, the oven must not be operated until it has been repaired by a trained person.
- If the microwave oven light fails, contact a Haier trained and supported service technician or Customer Care.
Fire hazard
- Do not use adapters, reducers, or branching devices to connect this appliance to the mains power supply.
- The microwave oven is intended for heating food and beverages. Drying of food or clothing and heating or warming pads, slippers, sponges, damp cloths and similar may lead to risk of injury, ignition or fire.
- Do not overcook food. Carefully attend appliance when paper, plastic or other combustible materials are placed inside the microwave oven to facilitate cooking.
- Remove wire twist-ties from paper or plastic bags before placing in microwave.
- If materials inside the microwave oven should ignite, keep microwave oven door closed, turn microwave oven off and disconnect the power cord or shut off power at the fuse or circuit breaker panel.
- Do not use the cavity for storage purposes. Do not leave paper products, cooking utensils or food in the cavity when not in use.
- Utensils should be checked to ensure that they are suitable for use
in microwave ovens.
- When heating food in plastic or paper containers, check the oven frequently due to the possibility of ignition.
- If smoke is observed, switch off or unplug the appliance and keep the door closed in order to stifle any flames.
- During and after use, do not touch, or let clothing or other flammable materials contact any interior area of the oven; allow sufficient time for cooling first.
- In case of fire, smother the flame or use a dry chemical or foam type extinguisher.
- Use only dry oven mitts or potholders. Moist or damp potholders on hot surfaces could result in burns from steam. Do not let potholders touch hot areas or heating elements. Do not use a towel or a bulky cloth for a potholder. It could catch fire.
Food safety
- Safe food handling: leave food in the oven for as short a time as possible before and after cooking. This is to avoid contamination by organisms which may cause food poisoning. Take particular care during warm weather.
Cleaning
- The oven must be cleaned periodically and all food residues must be removed.
- Failure to keep the oven clean could cause deterioration of the surfaces that could reduce the life of the appliance and cause dangerous conditions.
- Do not use oven cleaners, harsh/abrasive cleaning agents, waxes, or polishes. No commercial oven cleaner, oven liner, or protective coating of any kind should be used in or around any part of the oven. Do not use harsh/abrasive cleaners, scourers or sharp metal scrapers to clean the oven door glass since they scratch the surface, which may result in the glass shattering.
- Avoid using products containing chlorine, acids or abrasives, especially for cleaning painted parts. In addition, avoid using acid or
alkaline substances.
- Do not spray water or use a steam cleaner to clean any part of the oven. Use only slightly damp cloths.
Microwave cooking
- Do not attempt to operate this microwave with the door open. This can result in harmful exposure to microwave energy. It is important not to damage or tamper with the safety interlocks.
- Do not place any object between the microwave oven and the door or allow soil or cleaner residue to accumulate on sealing surfaces.
- Do not operate the microwave oven if it is damaged. It is particularly important that the microwave oven door closes properly and that there is no damage to the: (1) door (bent), (2) hinges and latches (broken or loosened), (3) door seals and sealing surfaces.
- Do not repair or replace any part of the appliance unless specifically recommended in this guide. All other servicing should be done by a Haier trained and supported service technician.
- If the door seals are damaged, the oven must not be operated until it has been repaired by a competent person.
- It is hazardous for anyone other than a competent person to carry out any service or repair operation that involves the removal of a cover which gives protection against exposure to microwave energy.
- Do not operate microwave functions while the oven is empty.
- Eggs in their shells and whole hard-boiled eggs should not be heated in microwave ovens since they may explode, even after microwave heating has ended.
- The contents of feeding bottles and baby food jars are to be stirred or shaken and the temperature is to be checked before consumption, in order to avoid burns.
- Microwave heating of beverages can result in delayed eruptive boiling, therefore care has to be taken when handling the container.
- Liquids, such as water, coffee or tea are able to be overheated beyond the boiling point without appearing to be boiling. Visible bubbling or boiling when the container is removed from the microwave oven is not always present. THIS COULD RESULT IN VERY
HOT LIQUIDS SUDDENLY BOILING OVER WHEN A SPOON OR OTHER UTENSIL IS INSERTED INTO THE LIQUID.
- Do not overheat liquid. To avoid delayed boiling when heating liquids, always put a spoon in the container. Beverages containing spoons should be placed in the center of the oven. Metal components must stay at least 2 cm from the walls of the oven and the inside of the door. Sparks could damage the inside of the glass door. Stir the liquid both before and halfway through heating it.
- Do not use straight-sided containers with narrow necks. Use a wide-mouthed container.
- After heating, allow the container to stand in the microwave oven for at least 20 seconds before removing the container.
- Use extreme care when inserting a spoon or other utensil into the container.
- WARNING: Liquids and other foods must not be heated in sealed containers since they are liable to explode.
- Only use utensils that are suitable for use in microwave ovens.
Unsuitable dishware
- The baking tray must be removed when using the microwave mode. It can be used with convection functions and combined functions.
- Never turn on the microwave oven before you have put in the food. The only exception allowed is testing dishware.
- Only use plates and crockery that are microwave safe.
- Never heat food covered in tin foil.
- Use only bakeware approved for oven use. Follow the manufacturer's instructions.
- Metallic containers for food and beverage are not allowed during microwave cooking.
Pacemakers
- Most pacemakers are shielded from interference from electronic products, including microwaves. However, patients with pacemakers may wish to consult their physicians if they have concerns.
Arcing
- Arcing can occur during both speed cooking and microwave cooking. If you see arcing, press CANCEL/OFF and correct the problem. Arcing is the microwave term for sparks in the oven. Arcing is caused by:
• Metal or foil touching the side of the oven. - Metal cookware or the wire oven rack used during either speed cook or microwave cooking.
- Metal such as twist-ties, poultry pins, or gold rimmed dishes in the oven.
• Recycled paper towels containing small metal pieces being used in the oven.
Note:
- Microwave functions tend to generate water vapour - condensation of water on the door may occur. It is an expected behavior.
- All the functions require the door to be closed in order to operate. If the door is opened, the UI will ask you to close the door before restarting the cooking process.
- The household appliance is equipped with a temperature management system that can result in acoustic variations during and after use. These variations are an integral part of the cooling process and ensure the best product performance. The cooling process can be accelerated by opening the door after cooking is complete.
2.PRODUCT INTRODUCTION
2.1. Overview of the product

natural_image
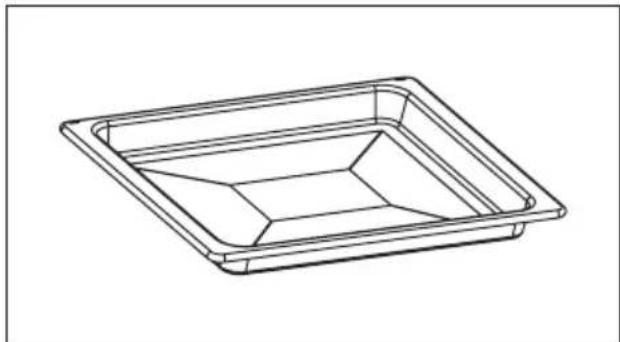
Line drawing of an oven with labeled components (no text or symbols present)2.2. Accessories
Tray Metal grid
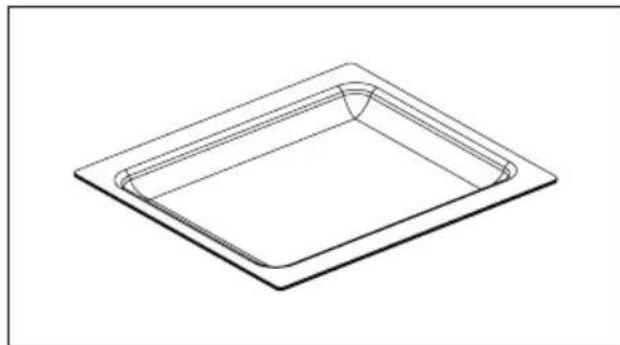
natural_image
Line drawing of a rectangular tray with internal compartments (no text or symbols)Collects residues that drip when cooking food on the grills.
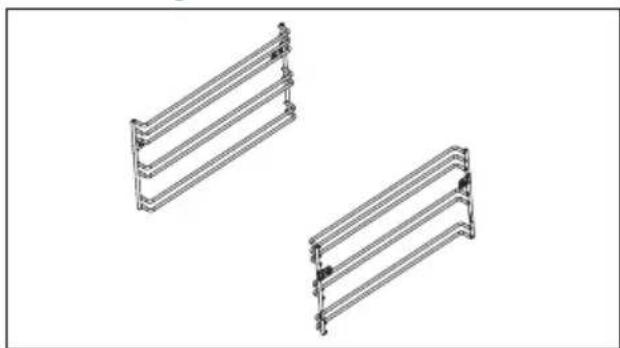
Lateral wire grids
natural_image
Two identical isometric metal frame structures with no text or symbolsLocated on both sides of the oven cavity, holds metal grills and drip pans.
- Control panel
- Lateral wire grids
- Metal grids
- Tray
- Oven door
- Serial number & QR Code

natural_image
Empty white rectangle with a thin black border (no text or symbols)Write here your serial number for future reference
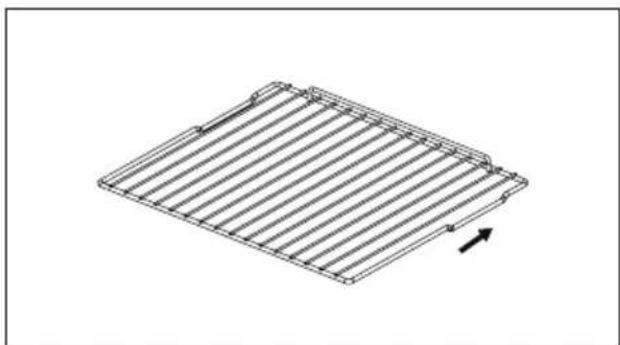
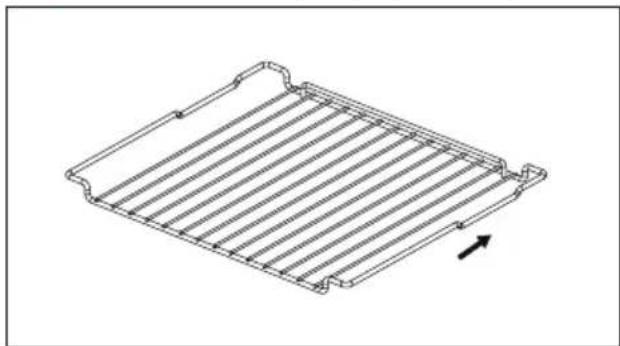
natural_image
Isometric line drawing of a rectangular metal grate or rack structure with a directional arrow indicating force or movement (no text or symbols)Holds baking trays and plates.
*Push into the oven as indicated by the arrow. Notch (a) should face downwards and it is the resting position to prevent the inadvertent withdrawal.
Soft close
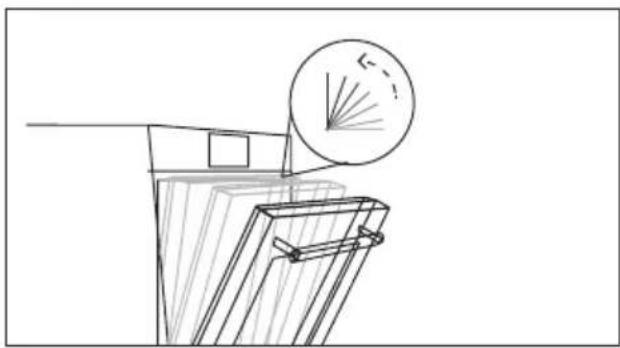
natural_image
Line drawing of a mechanical component with a circular inset showing a diffraction pattern (no text or symbols)Hinges which ensure an automatic soft and smooth movement during the closing phase of the oven door.
Step down wire shelf (only if present*)
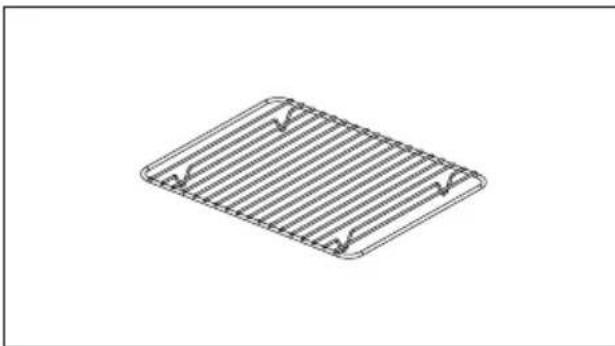
natural_image
Line drawing of a rectangular metal grate with horizontal slats and a directional arrow (no text or symbols)Holds the glass tray.
*Push into the oven as indicated by the arrow. Notch (a) should face downwards and it is the resting position to prevent the inadvertent withdrawal.
MW glass tray (only if present*)
natural_image
Isometric line drawing of a square frame with rounded corners and a small triangular cutout at the top center (no text or symbols)Holds baking trays and plates.
*Can be used in Microwave function.
Grill rack/Boil rack (only if present*)
natural_image
Isometric line drawing of a rectangular plate with horizontal slats and corner notches (no text or symbols)Holds baking trays and plates.
*Used together with glass tray.
Wired meat probe (only if present)
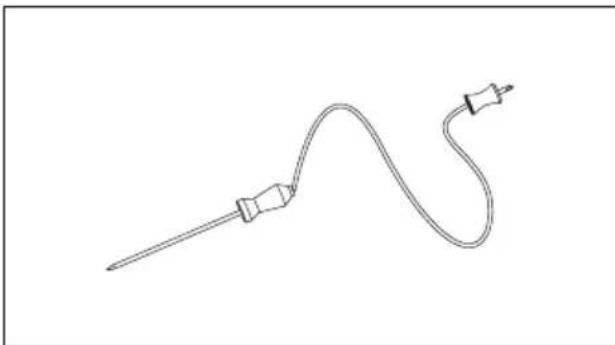
natural_image
Line drawing of a medical or laboratory probe with a curved tube and two connectors (no text or symbols)Measures the internal temperature of food during cooking.
WARNINGS:
- Do not preheat or start cooking before properly inserting the meat probe.
- Do not try to insert the meat probe in frozen food.
EN: Oven trays and grids are not suitable for direct contact with food. Please use suitable cookware or baking paper.
Wired Meat probe
How to use Probe:
- Plug the probe to the oven and insert the probe into the food.
- When the probe is plugged, only the dedicated functions are available.
- Tap □ and the arrow keys to select the desired function and Tap ⏱ to set the target temperature.
- Tap▶Ito confirm. From this moment, the oven will use the Probe's data to monitor the internal temperature of your food.
- Once the desired internal temperature is reached, the alarm sounds and the oven turns off. Carefully remove the Probe from the food.
NOTE: When the probe is not in use, please close the rubber cover of the probe hole to prevent unexpected materials from entering, affecting the probe's service life or causing misdetections.
Cooking tips
- The internal temperature of meat will continue to rise by a few degrees after you have removed it from the oven, so allow for this in your calculations. After cooking, cover and let the meat rest for 15 to 20 minutes.
- When cooking meat, insert the sensor horizontally into the center of the thickest part. The thicker the meat, the longer it will take to cook, so it is important that the tip of the sensor is measuring the temperature of the meat at its thickest point. Make sure the tip of the sensor is not protruding out of the meat, and does not touch bone, fat or gristle, as these will heat up more quickly than the lean meat.
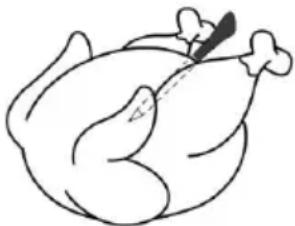
natural_image
Simple line drawing of a roasted chicken (no text or symbols)- The temperatures given onscreen are recommendations only. Results will depend on the quality and composition of the food.
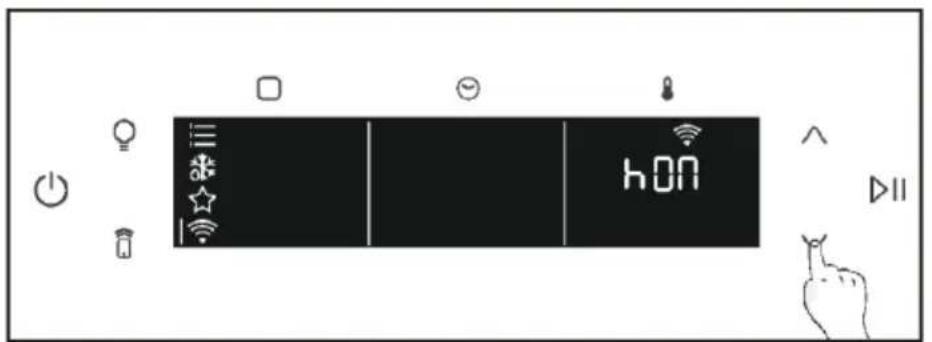
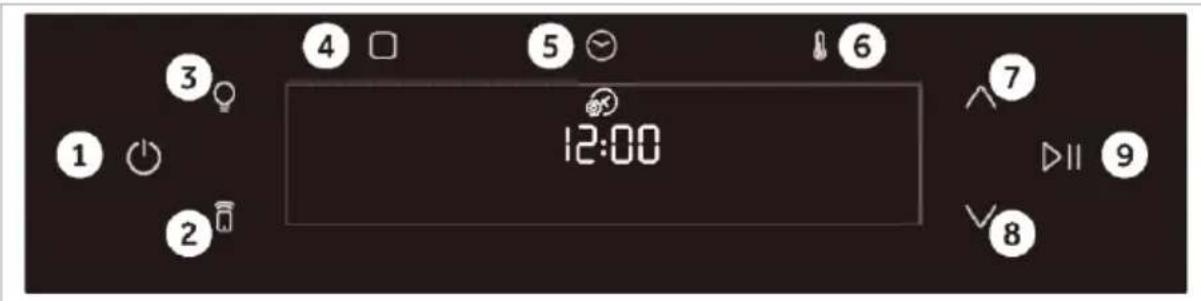
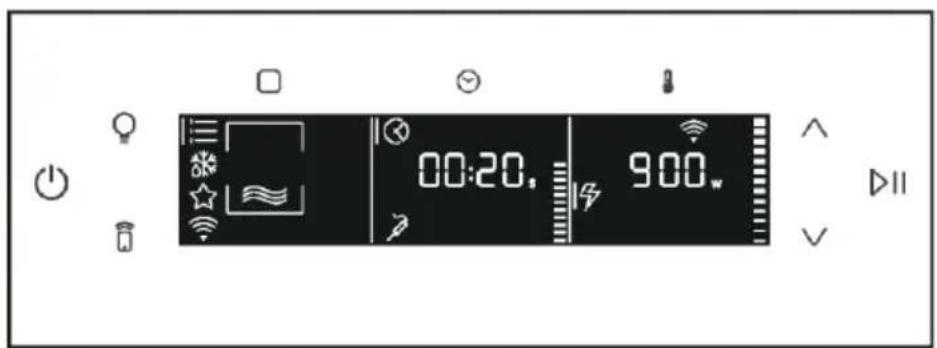
2.3. Control panel
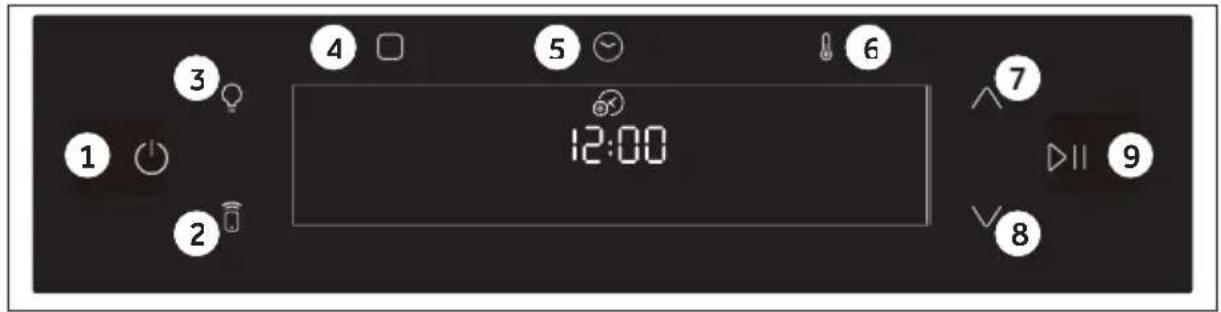
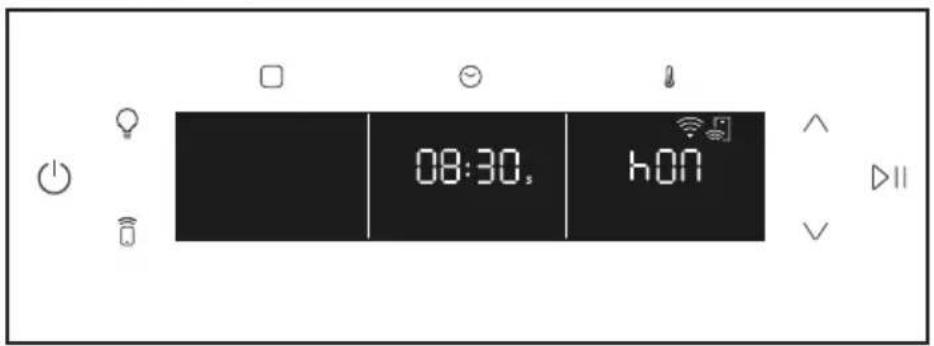
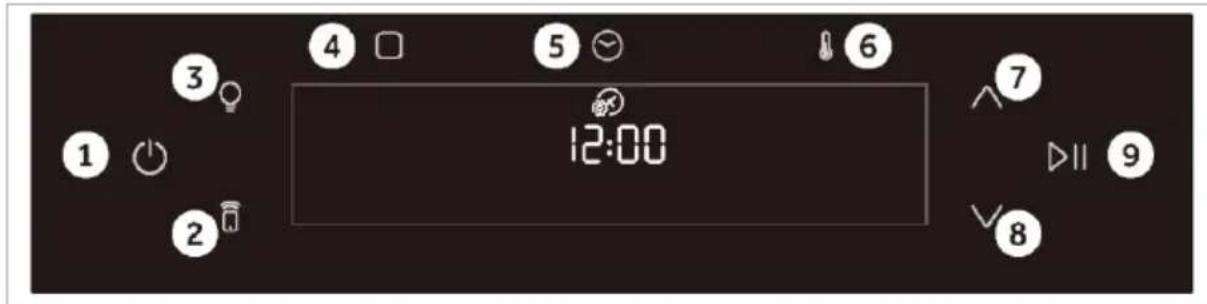
- On/Off
7.8. Navigation buttons
2.Remote control - Start/Pause
3.Light - Functions
5.Time
6.Temperature
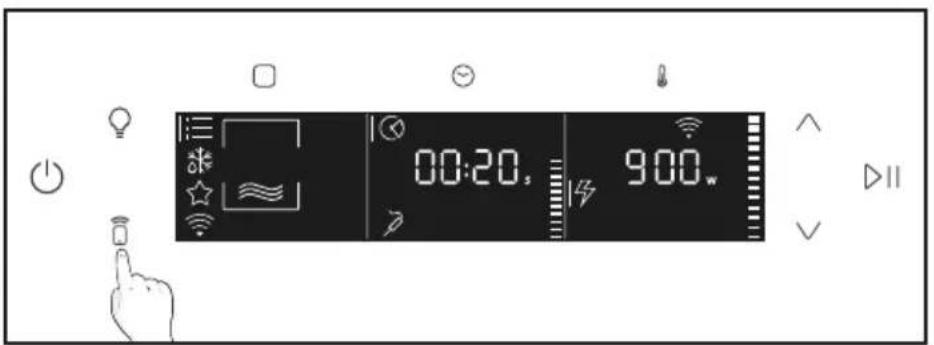
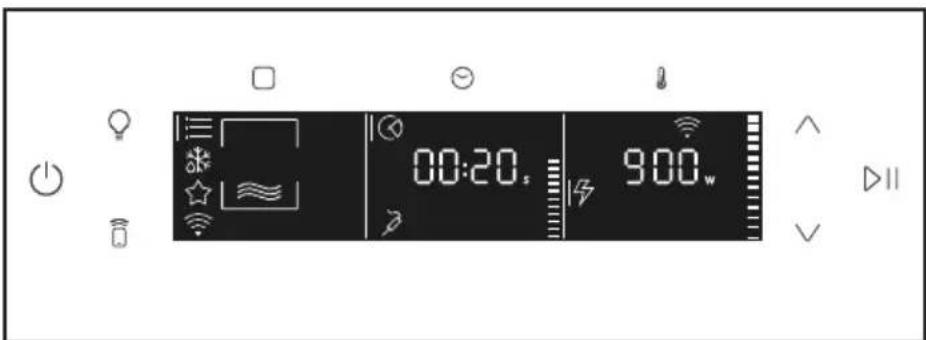
MAIN FUNCTIONS
| Symbol Function Description | ||
 | On/Off Turning the oven on and off. | |
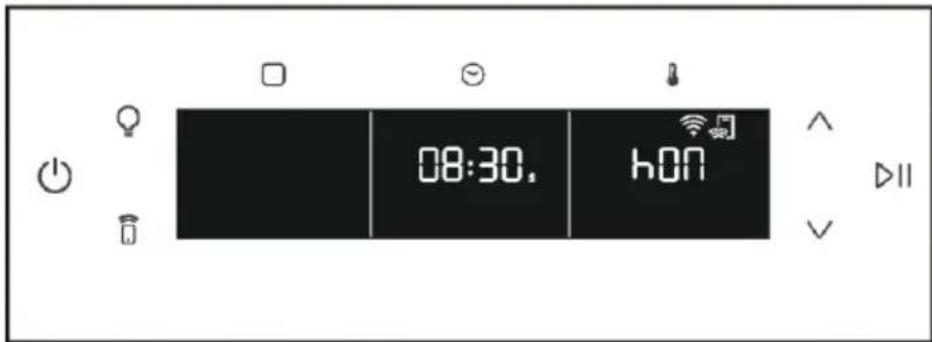
| [ZXXK] | Remote Control ON/OFF | The button on the display is used to switch on remote control; after the pairing with the hOn app, it can be pressed to activate remote control. |
 | Light | Turn on/off the oven cavity light.The appliance is provided with a bulb whose lighting efficiency class is G. |
 | Functions | Accessing Manual functions, Food cooking categories and WiFi menu. |
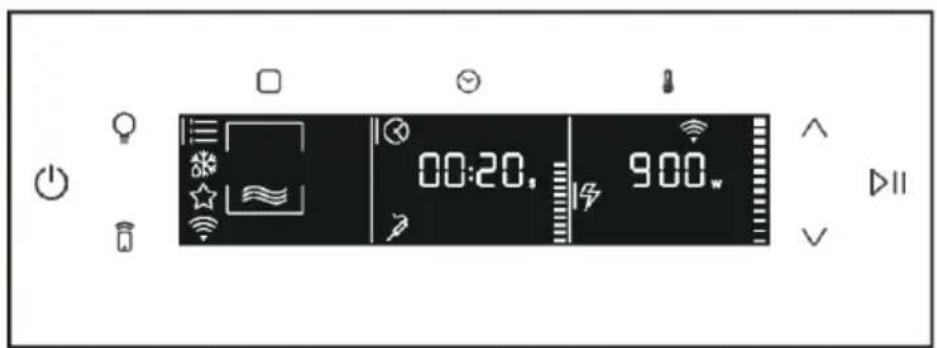
 | Time | Accessing time functions: Cooking duration, Kitchen timer (available also with the oven in stand by mode), Delay start and Time of day. |
| [CSGK] | Temperature | Accessing temperature setting and microwave power options. To activate/deactivate the screen lock hold the 🔊 key down for 5 seconds (effective only during preheating or cooking process). |
 | Navigation buttons | Navigation buttons for setting functions and parameters. |
 | Start/Pause Start/Pause of the cooking or confirm the functions. | |
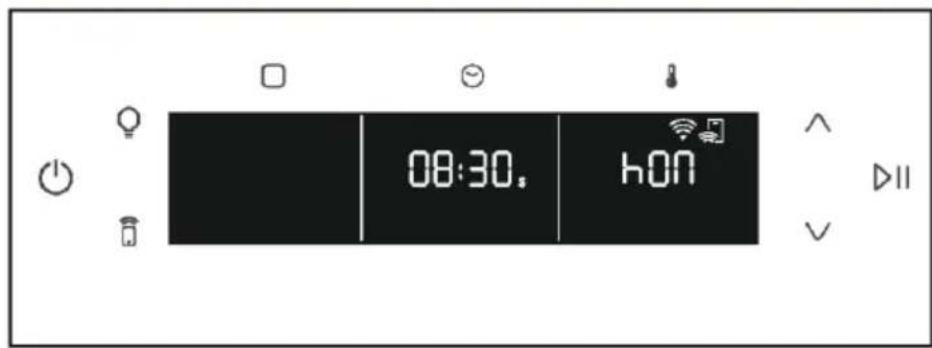
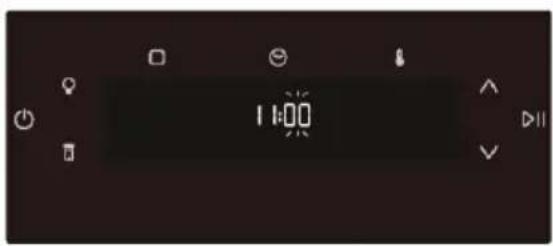
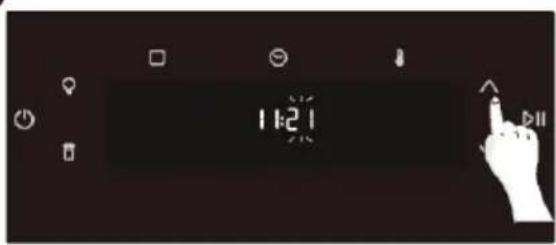
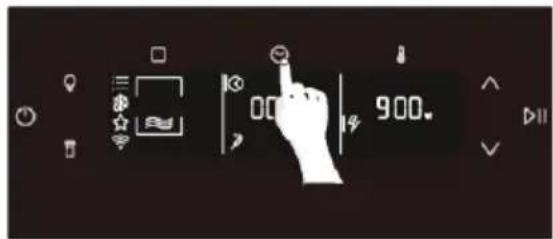
Set time
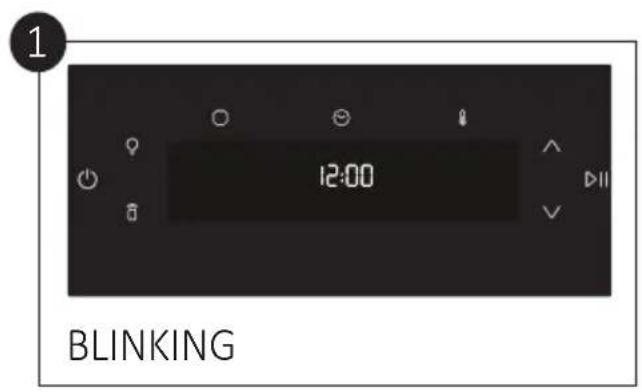
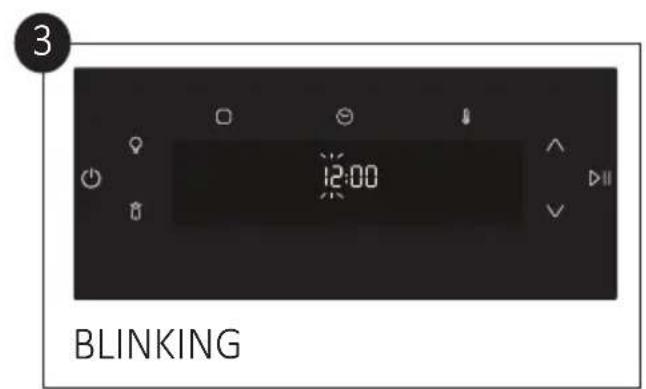
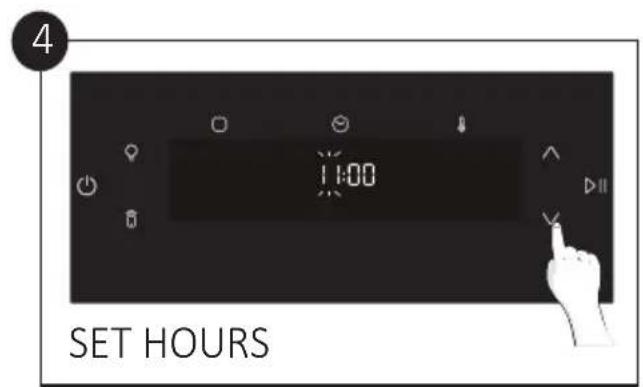
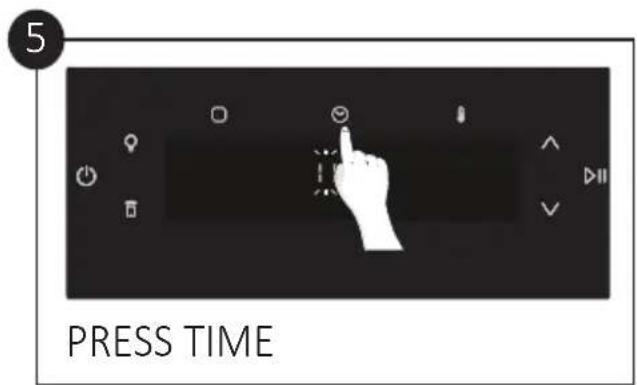
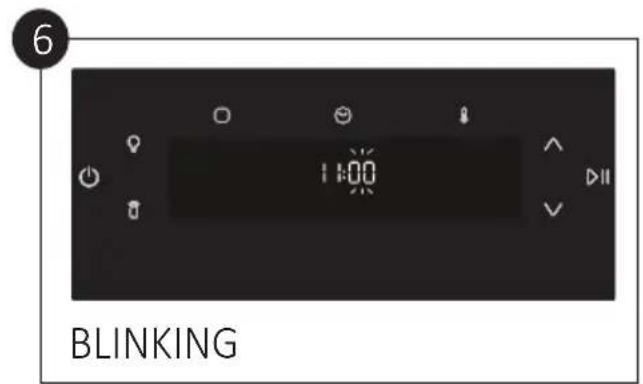
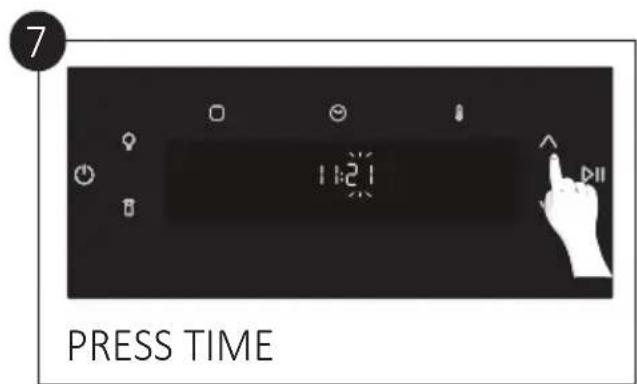

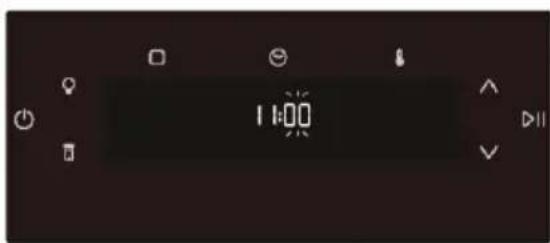
The display will be showing the blinking preset time "12:00". To modify it press ☺ and use the arrows to set the current hour. Press ☺ again to confirm and follow the same procedure to set the minutes. To confirm press ☺.
2.4. Connectivity
Wireless parameters
| Technology Wi-Fi Bluetooth | ||
| Standard IEEE 802 11 b/g/n Bluetooth v 2, BR/EDR, BLE | ||
| Frequency Band(s) [MHz] 2401÷2483 2402÷2480 | ||
| Maximum Power [mW] 100 10 |
Product information for networked equipment
Power consumption of the product in networked standby if all wired network ports are connected, and all wireless network ports are activated: 2,0 W.
How to activate wireless network port:
Wifi module switches on as soon as the user press the power on button.
How to deactivate wireless network port:
Wi-fi module deactivates as soon as the user presses the power off button. The wi-fi can also be deactivated when the oven is on by selecting "off" in the Wi-fi settings.
Hereby, CANDY HOOVER GROUP S.R.L. declares that the radio equipment is in compliance with Directive 2014/53/EU and with the relevant statutory requirements for the UK market. The full text of the declaration of conformity is available at the following internet address: www.candy-home.com
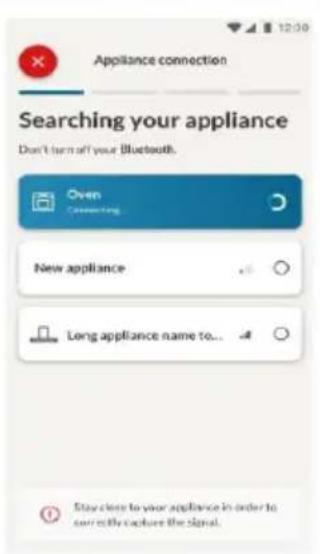
HOW TO INTERACT WITH THE APP
Your appliance may be connected to your home wireless network and operated remotely using the app. Connect your appliance to ensure it stays up to date with the latest software and features.
Getting started
- Ensure your home Wi-Fi network is turned on.
- You will be given step by step guidance on both your appliance and mobile device.
- It may take up to 10 minutes to connect your oven.
- For further guidance and troubleshooting, please refer to the app.
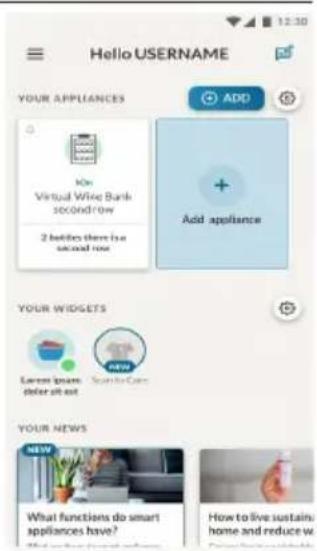
Download on your smartphone.


NEW USER REGISTRATION
- Click on "Register"
- You can register through social accounts or sign up with your personal email


QUICK PAIR ENROLLMENT
Step 1
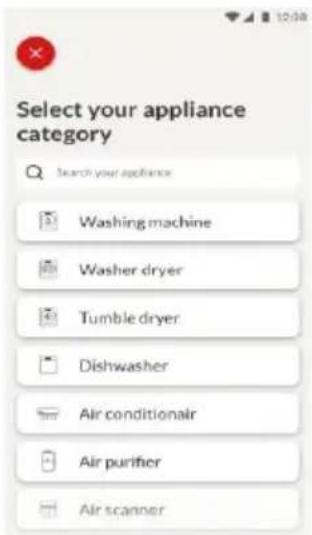
- Select "Add appliance".
Step 2
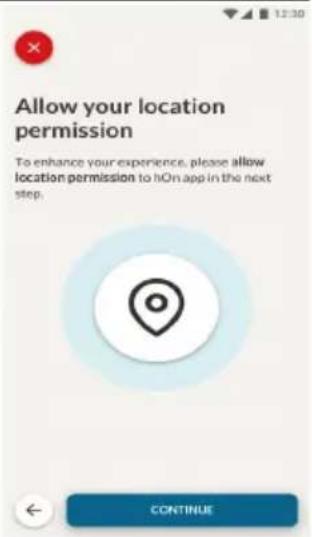
- Allow your location permission.
Step 3
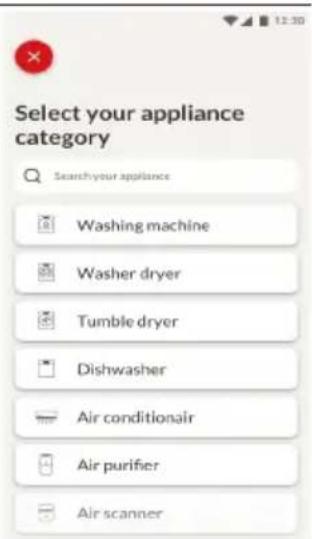
- Select oven from the appliance category.
Step 4
- Turn on your appliance; if it is already on, turn it off and on again.
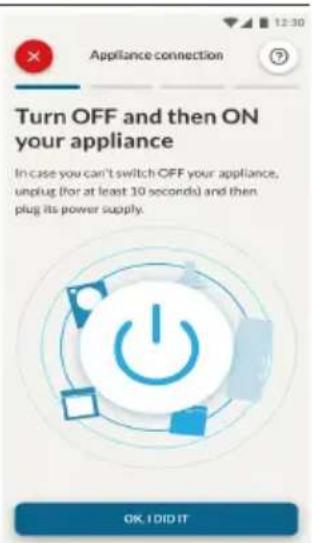
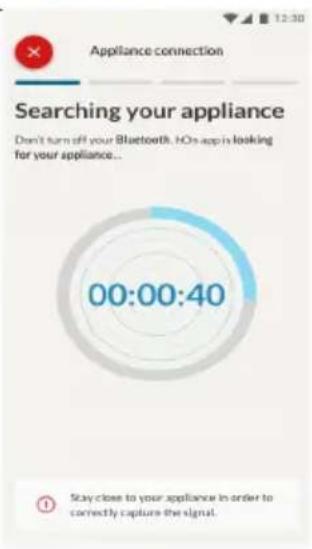
Step 5
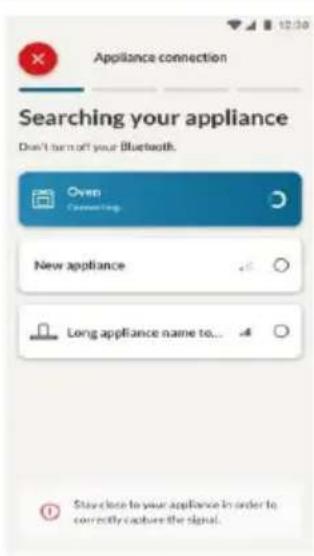
• After turning on, the hOn app will start searching for your home appliance.
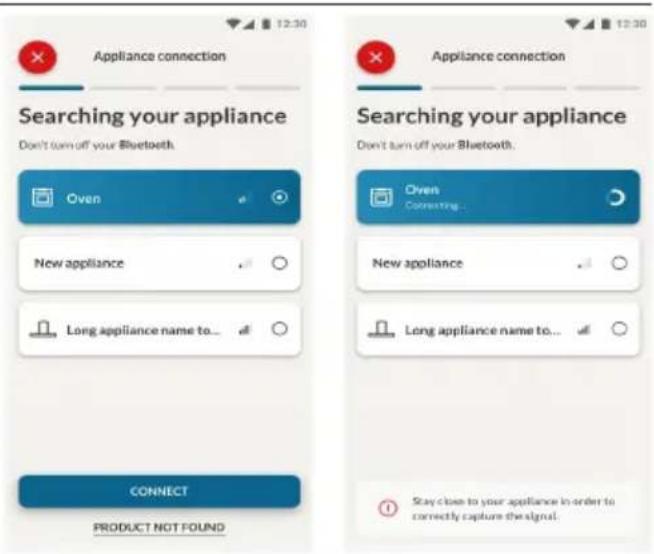
Step 6.1-6.2
- Select your home appliance, tap on "connect" and wait a few seconds.
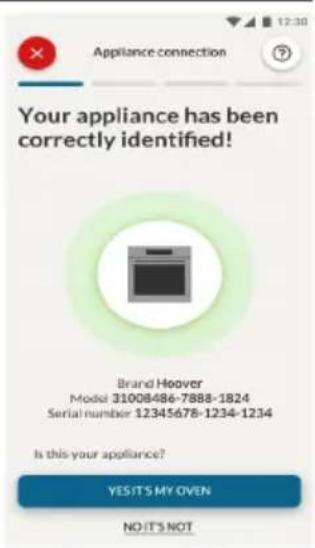
Step 7
- Your Oven will be found and you can control it through hOn.
PLEASE NOTE: the oven is provided with an automatic update function. The automatic update function is enabled as soon as the product is enrolled in app. When the update is available, the oven will update automatically. The process may take a few minutes. During the update, the buttons will blink and the display will show the software update progress.
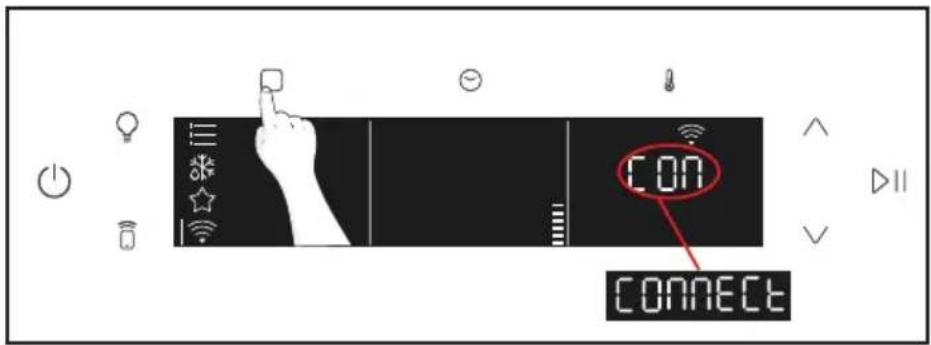
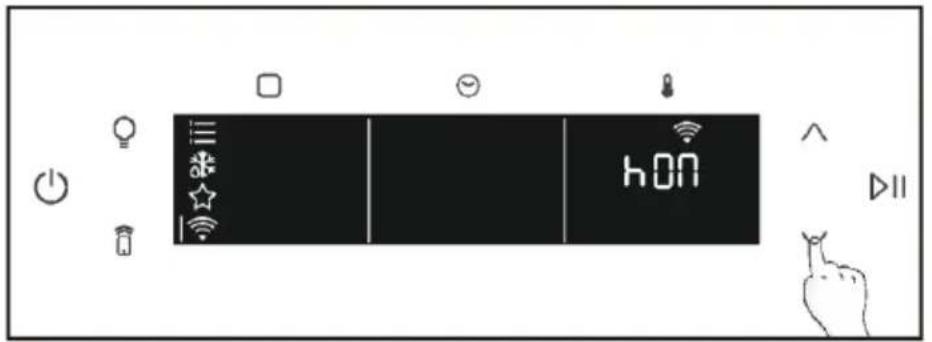
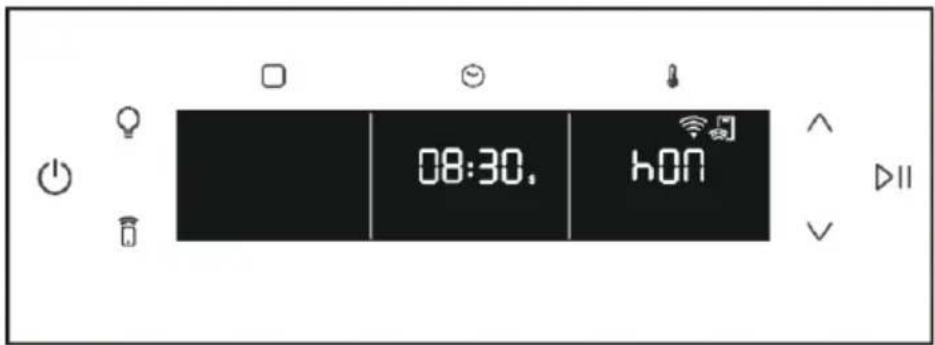
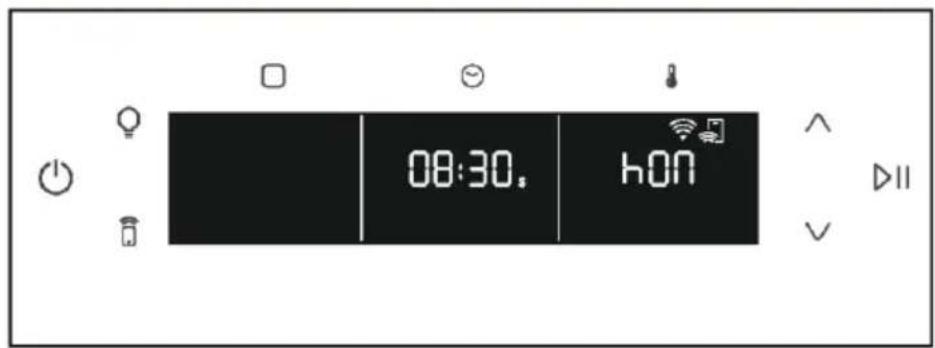
Once the appliance is enrolled, the user can change the Wi-Fi setting, switching off the Wi-Fi icon in advertising state or resetting Wi-Fi status.
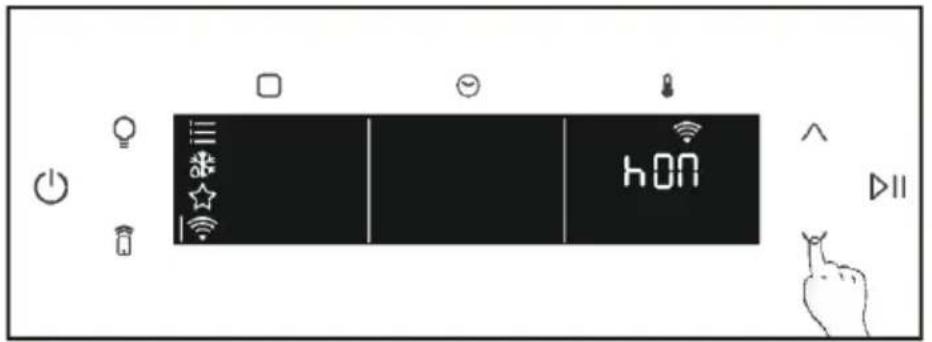
- Access the Wi-Fi menu of the User Interface.
- On display "CONNECT" appears.
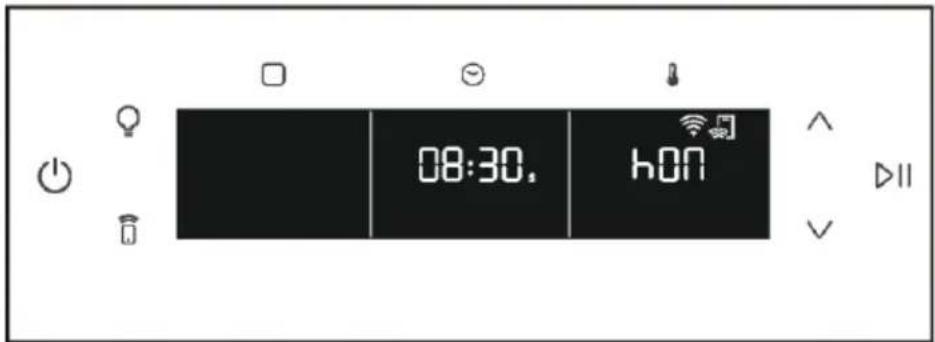
- Press the keys until "hOn", "On", "Off" or the reset setting "rSt" will be shown.

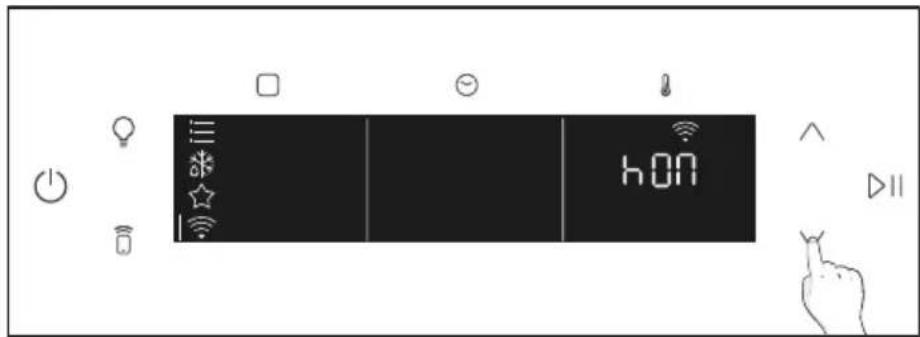

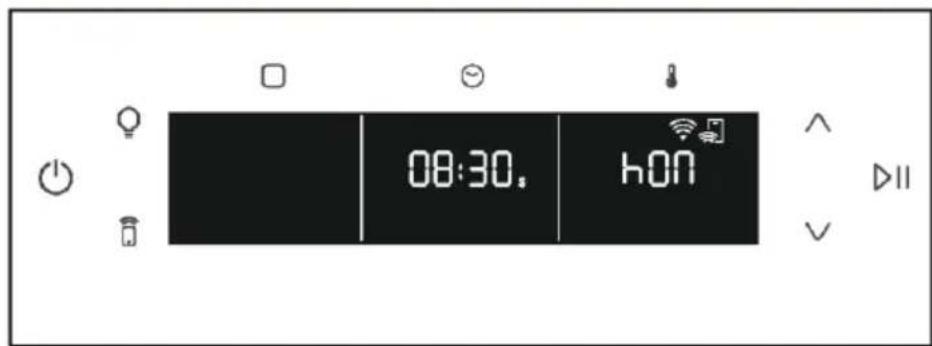
REMOTE CONTROL
This function allows the user to edit power, temperature and duration values directly from both the appliance and hOn App.
It can be activated only if product is already enrolled and in any cooking function that is allowed to operate remotely.
ACTIVATION:
- Access the WiFi menu on user interface.
- Press the arrow button to turn on remote control ("hOn" will appear on screen)
- On display, WiFi and Remote Control icon will stop blinking.
- At this point access the App, select a program and let the cooking start. During the process is possible to control and change the program parameters from both product and App.

It's also possible to activate Remote Control during cooking process by pressing related button.
DEACTIVATION:
Stop cooling or stop the program from the App.
3. BEFORE STARTING
3.1. Information to start
How illumination works
The oven cavity is illuminated by one or more light bulbs, which are activated when the appliance door is opened. For almost all cooking programs, the lighting comes on as soon as the oven is started. The light may turn off automatically after a certain time depending on the function for energy saving.
How cooling fans work
When running the baking, microwave and combination function, both the axial flow fan (microwave) and the cross flow fan start simultaneously.
When only the baking function is running and both cooling fans are turned off simultaneously when both of the following conditions are met:
- There is no heating program running
- The temperature inside the cavity drops to ≤ 55^ C
When running the microwave or combination function, both cooling fans will be turned off simultaneously when both of the following conditions are met:
- Run without heating/microwave program for more than 5 minutes
- The temperature inside the cavity drops to ≤ 55^
How door works
When operating the oven, microwave, and combination functions, opening the door:
- If the door is opened before the mode is running, click the start button and the mode will not run until the door is closed.
- If the door is opened during mode operation, the mode immediately stops and prompts "close the door" until the door is closed and press start icon.
For delayed start mode, the door must be closed before starting.
3.2. Preliminary cleaning
Conditioning
- Condition your oven before using it for cooking for the first time by turning it on for 1h at maximum temperature.
- Ensure all packaging has been removed from the oven and place all shelves in the oven.
• There may be a small amount of smoke during conditioning. Ensure the kitchen is well ventilated.
After conditioning
- Wait for the oven to cool completely.
- Wipe oven with a damp cloth and mild detergent.
- Dry with a clean, lint-free cloth.
- Wash all accessories and wipe inside the oven with a solution of hot water and washing up liquid.
4. OPERATION OF PRODUCT
4.1. How the product works
SWITCHING ON/OFF THE OVEN
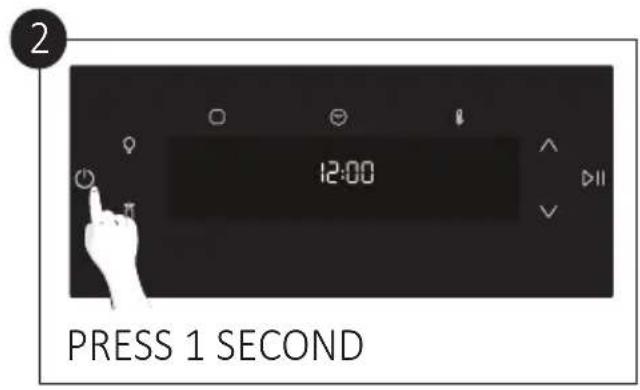
To switch ON/OFF the oven long press the icon ⏻.
FUNCTION MENU
Access the Function menu by pressing the ☐ button. To navigate into the menu, tap as many time as is needed to enter in the following settings:
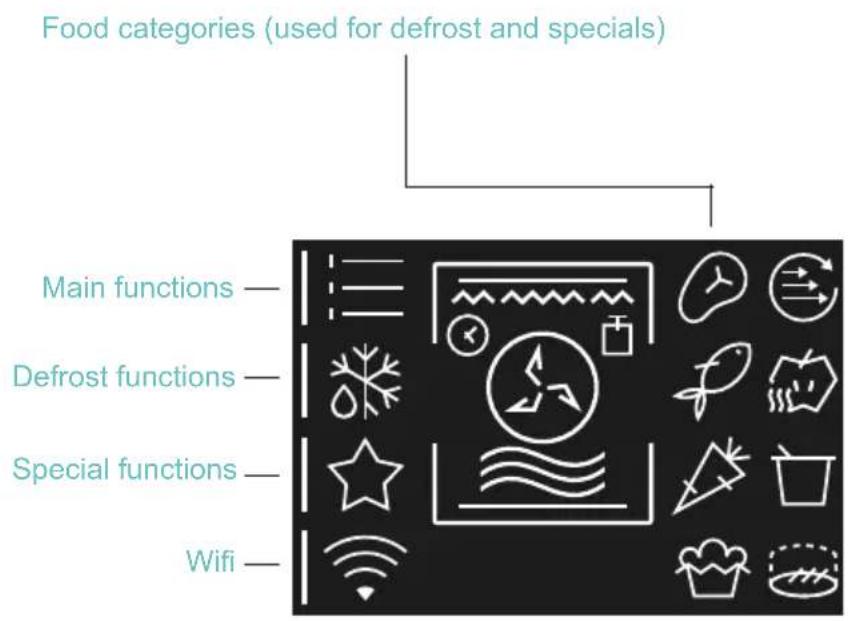
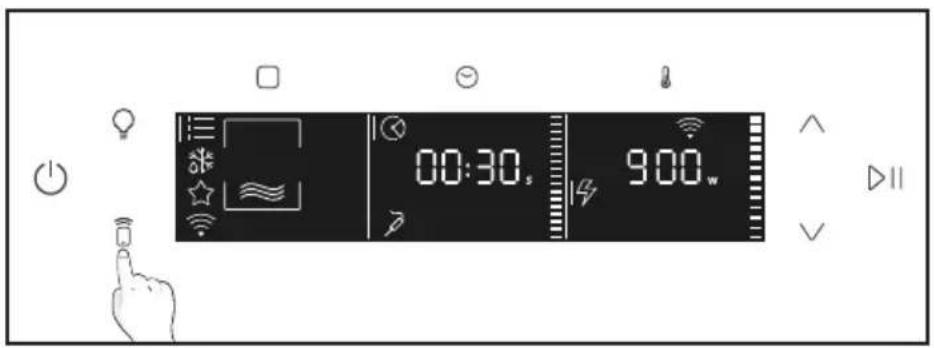
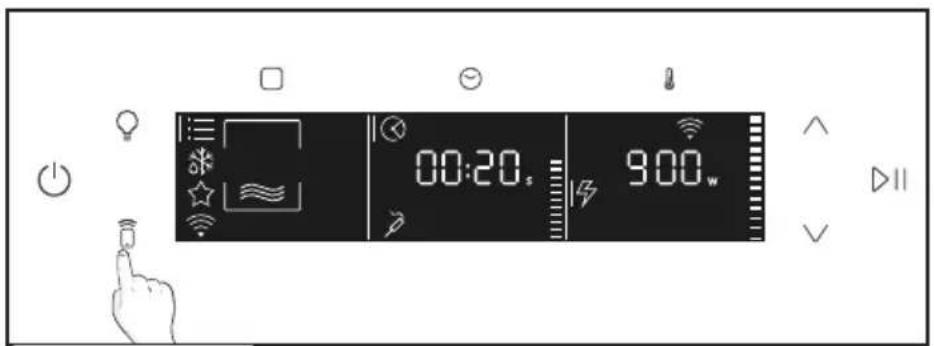
MAIN FUNCTIONS: allows to select the desired cooking program by using arrows. Tap icon ⏻ and 🔒 to set time and temperature (power). Press ▷ to start the function. To pause the program, click the icon ▷ again.
DEFROST FUNCTIONS: allows to perfectly defrost your foodstuff, by weight or by time.
SPECIAL FUNCTIONS: allows to choose between Air Fry, Dehydrate, Yogurt and Leavening by using arrows.
WIFI: allows to enter the WIFI setting menu.
TIME MENU
Access Time menu by pressing the □ button. To navigate into the menu, tap as many time as is needed to enter in the following settings:
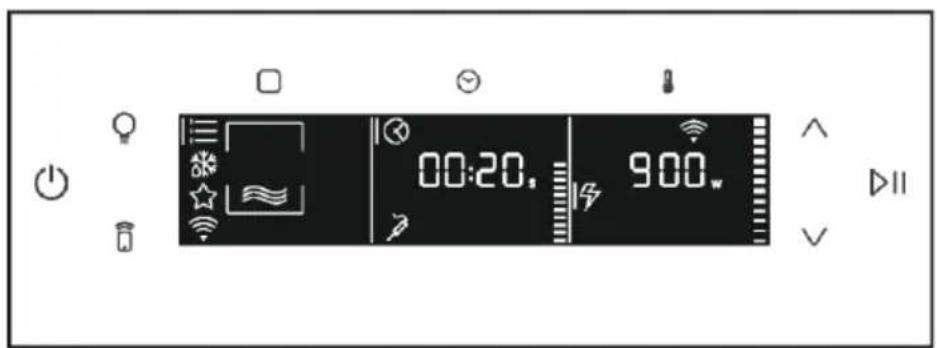
• COOKING DURATION
Allows to preset the cooking time required for the recipe chosen.
ACTIVATION: press 😊 to enter the Time menu. Tap 😊 as many times as you need to select “Cooking duration” function. Then use the arrows to regulate the value and press ▷ to confirm.
The countdown starts at the end of preheating (if present). During cooking phase is possible to change the duration value. When duration is elapsed the cooking stops.

KITCHEN TIMER
Allows to use the oven as alarm clock.
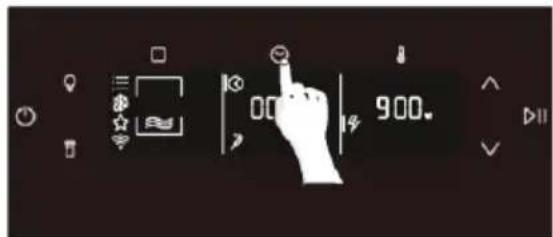
ACTIVATION: press 🔕 to enter the Time menu. Tap 🔕 as many times as you need to select “Minute minder” function. Then use the arrows to regulate the value and press ▷II to confirm.
When the function is set, the primary information showed on display is always the temperature. To edit Minute minder value, press ⏻ to enter dedicated edit mode. When duration is elapsed the cooking continues until the oven is turned off.
DELAY START
Allows to choose the cooking start time.
ACTIVATION: press ⏻ to enter the Time menu. Tap ⏻ as many times as you need to select "Delay start" function. Then use the arrows to regulate the value and press ▷□ to confirm.
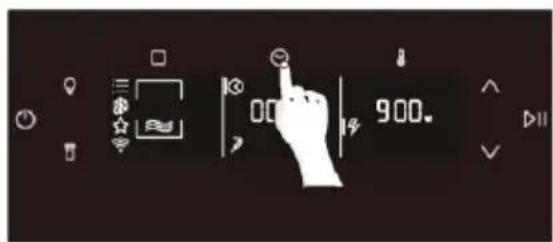
TEMPERATURE MENU
Access Temperature menu by pressing the corresponding button. To navigate into the menu, tap as many time as is needed to enter in the following settings:
MW POWER LEVEL: allows to change the MW power level
ADDITIONAL FUNCTIONS
KEY LOCK
This function enables to lock the screen in order to prevent any unwanted use by minors. Press and hold down Temperature for 5 seconds to activate the screen lock. Activation allowed only during preheating or cooking process. Do the same to deactivate it.
4.2. Cooking functions
Standard functions
| Symbol Function | Default values Range | Shelf position | Preheat Suggestions | |
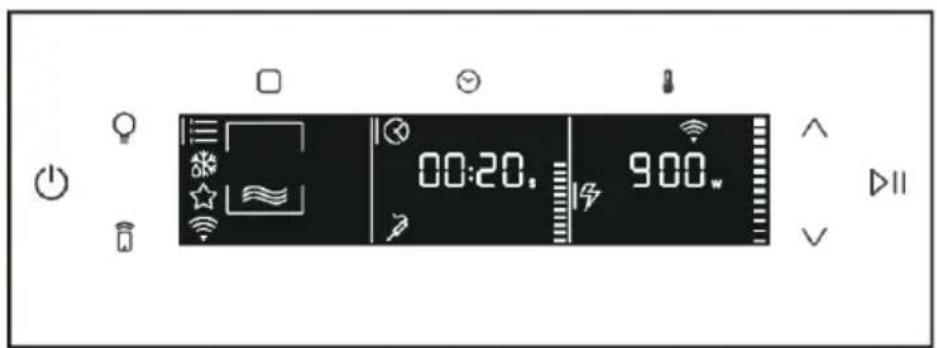
 | Microwave | MW: 900WMW: 150 W-900 W | L1 No | |
 | Conventional | T: 180°CT: 50-250°C | L1-L2 Yes | |
 | Fan assisted | T: 160°CT: 50-250°C | L1-L2 Yes | |
 | Multilevel | T: 160°CT: 50-250°C | L2 Yes | |
 | Grill | L: 5L: 1-5 | L4 No | |
 | Grill + Fan | T: 180°CT: 50-250°C | L2 Yes | |
 | Roast | T: 180°CT: 50-230°C | L1-L2 No | |
| Symbol | Function | Default values Range | Shelf position | Preheat | Suggestions |
 | Multilevel +Microwave | MW: 300W/T: 160°CMW: 150-300W/T: 50-230°C | L2 Yes | Ideal to cook roasts, fish, frozen foods and cakes. | |
 | Grill +Fan +Microwave | MW: 300W/T: 180°CMW: 150-300W/T:50-230°C | L2 Yes | Ideal to cook stuffed vegetables, meat cuts and chicken fillets. | |
 | Grill +Microwave | MW: 300W/L: 5MW: 150-300W/L: 1-5 | L4 No | Ideal to cook gratin foods, lasagna, potatoes and roasted poultry. | |
 | Roast +Microwave | MW: 300WT: 175°CMW: 150-300W/T: 50-230°C | L1-L2 Yes | Ideal for roasting meats, searing the juices while cooking the inside with the help of microwave. | |
 | Time defrost | MW: 150W- | L1 No | Ideal to defrost frozen food. | |
 | Weight defrost(+food category) | MW: 150W- | L1 No | Ideal to defrost frozen food. |
Special functions
| Symbol Function | Default values Range | Shelf position | Preheat | Suggestions | |
 | Air Fry | T: 200°CT: 50 - 250°C | L2 No | To obtain cruncy foods without adding fat. | |
 | Dehydrate | T: 60°CT: 35 - 100°C | L2 No | For drying meat, aromatic herbs, fruit and vegetables. | |
 | Yogurt | T: 40°CT: 40°C | L2 No | To ferment yogurt. | |
 | Leavening | T: 35°CT: 35°C | L2 No | For faster leavening of bread and pizza dough. | |
5. COOKING GUIDELINES
5.1. Everyday cooking table
| Symbol Description Preheat | Cooking position | Heat Feel temperature (°C) | Default setting (°C) | Cooking time after preheat (min) | |
 | Meat Y 2 | 58-74 | 190 60 | ||
 | Fish Y 2 65 170 30 | ||||
 | Vegetables Y 2 70 190 45 | ||||
 | Bakery Y 2 90 210 30 | ||||
Attention
• Microwave functions
Place food in the oven before pressing start. Microwave functions tend to generate water vapour -condensation of water on the door may occur, it is an expected behavior.
• Microwave and convection functions
Place food in the oven when prompted.
- Convection functions
Wait for the oven to preheat before you begin cooking. Some functions do not need to preheat. For those functions the dial halo will remain red throughout cooking. Place food in the oven when ready to start cooking. All the functions require the door to be closed in order to operate. If the door is opened, the UI will ask you to close the door before restarting the cooking process.
- Rapid preheat
To reach the set temperature quickly, some functions have a rapid preheat stage that uses all elements. To prevent burning, wait until the oven has reached temperature before placing food in the oven.
- Delayed cook
The grill element may come on while the oven is heating up. Position food on a lower shelf or cover to prevent burning as the oven heats up.
When using DELAYED COOK we do not recommend using GRILL, FAN GRILL or AIR FRY.
- Food safety
Leave food in the oven for as short a time as possible before and after cooking.
- Ensure meat is fully defrosted before cooking.
- Rest meat after cooking to allow the internal temperature to continue to rise.
- High risk foods such as fish should reach a minimum internal temperature of 63 – 70 °C and poultry and minced meat should reach 75 - 85 °C.
6.1. General recommendations
Regular cleaning can extend the lifecycle of your appliance. Wait for the oven to cool before carrying out manual cleaning.
• After each use of the oven, a minimum of cleaning will help keep the oven perfectly clean.
- Do not line the oven walls with aluminium foil or single-use protection available from stores. Aluminium foil or any other protection, in direct contact with the hot enamel, risks melting and deteriorating the enamel of the insides.
- In order to prevent excessive dirting of your oven and the resulting strong smokey smells, we recommend not using the oven at very high temperature. It is better to extend the cooking time and lower the temperature a little.
- In addition to the accessories supplied with the oven, we advise you only use dishes and baking moulds resistant to very high temperatures.
6.2. Cleaning the oven
- Glass part
Clean the glass oven window with absorbent kitchen towel after every use. For stubborn stains, use a detergent-soaked sponge, wrung out, and then rinse with water.
- Oven window seal
If dirty, the seal can be cleaned with a damp sponge.
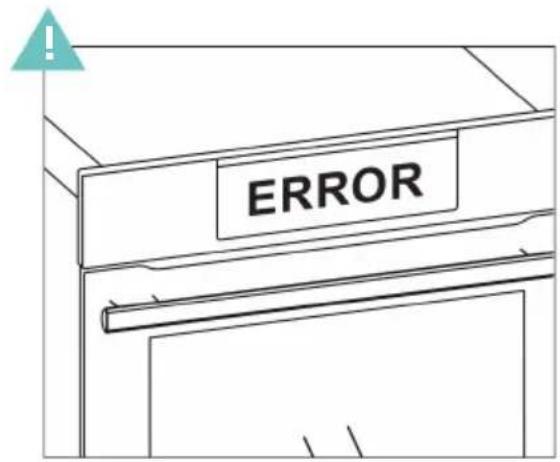
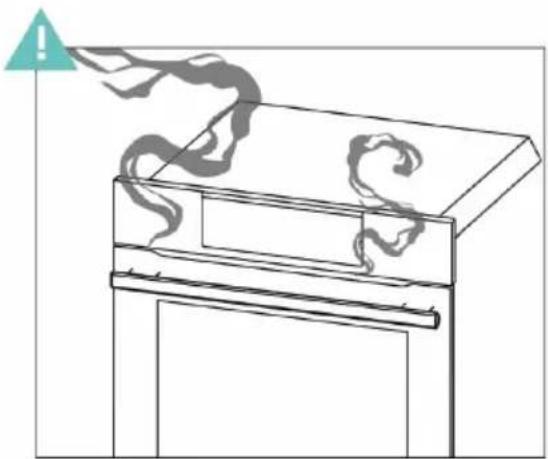
7. TROUBLE SHOOTING
Error

Smoke
natural_image
Simple line drawing of a cabinet with smoke rising from top, no text or symbols present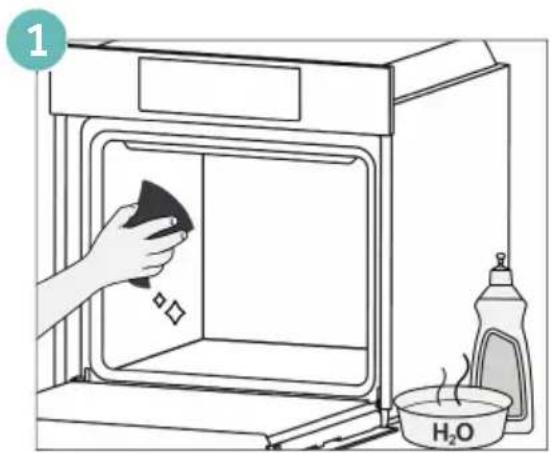
8.1. Appliance disposal
natural_image
Simple line drawing of a trash bin with crossed lines indicating no waste or plastic inside (no text or symbols)This appliance is labelled in accordance with European Directive 2012/19/EU regarding electric and electronic appliances (WEEE). The WEEE contain both polluting substances (that can have a negative effect on the environment) and base elements (that can be reused). It is important that the WEEE undergo specific treatments to correctly remove and dispose of the pollutants and recover all the materials. Individuals can play an important role in ensuring that the WEEE do not become an environmental problem; it is essential to follow a few basic rules:
- the WEEE should not be treated as domestic waste;
- the WEEE should be taken to dedicated collection areas managed by the town council or a registered company.
In many countries, domestic collections may be available for large WEEEs. When you buy a new appliance, the old one can be returned to the vendor who must accept it free of charge as a one-off, as long as the appliance is of an equivalent type and has the same functions as the purchased appliance.
8.2. Saving and respecting the environment
Where possible, avoid pre-heating the oven and always try to fill it.
Open the oven door as infrequently as possible, because heat from the cavity disperses every time it is opened. For a significant energy saving, switch off the oven between 5 and 10 minutes before the planned end of the cooking time, and use the residual heat that the oven continues to generate. Keep the seals clean and in order, to avoid any heat dispersal outside of the cavity. If you have an electric contract with an hourly tariff, the "delayed cooking" programme makes energy saving more simple, moving the cooking process to start at the reduced tariff time slot.
9. INSTALLATION
i NOTE:
It is not recommended to install the oven under cooktop.
If this is necessary, be sure to leave a large enough gap for the cooktop according to the manufacturer's instructions.
Secure the product on the cabinet by using the attached two screws.
natural_image
Diagram showing a box being placed on a base with an arrow indicating upward motion (no text or symbols)
natural_image
Isometric line drawing of a multi-level cabinet with drawers and a tray, no text or symbols present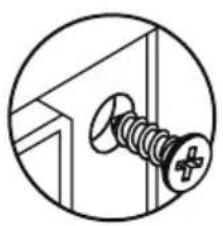
natural_image
Simple line drawing of a screw with a plus button, enclosed in a circle (no text or symbols)EN 39
BIENVENUE
natural_image
Line drawing of an oven with labeled components (no text or symbols present)natural_image
Empty white rectangle with black border (no text or symbols)natural_image
Line drawing of a rectangular tray with internal compartments (no text or symbols)natural_image
Isometric line drawing of a rectangular plate with horizontal slats and an arrow indicating direction (no text or symbols)natural_image
Two identical metal frame structures arranged side by side, no text or symbols visiblenatural_image
Line drawing of a window with a circular diagram showing a fan or pointer (no text or symbols)natural_image
Technical line drawing of a rectangular metal grate or rack structure with a directional arrow indicating force or movement (no text or symbols present)natural_image
Isometric line drawing of a rectangular plate with horizontal slats and corner handles (no text or symbols)natural_image
Isometric line drawing of a square frame with rounded corners and a small triangular cutout at the top center (no text or symbols)natural_image
Simple line drawing of a medical or laboratory probe with a curved tube and two connectors (no text or symbols)natural_image
Simple line drawing of a roasted chicken (no text or symbols)natural_image
Hand icon pointing at a black screen with control buttons and navigation icons (no text or symbols)APPUYEZ SUR TEMPS
6

CLIGNOTANT
7

APPUYEZ SUR TEMPS
8

COMMENT INTERAGIR AVEC L'APPLICATION
INSCRIPTION D'UN NOUVEL UTILISATEUR

APPAIRAGE RAPIDE
Étape 1
Étape 2
Étape 3
Étape 4
Étape 5
Étape 6.1-6.2
Étape 7

CONTRÔLE À DISTANCE
DÉSACTIVATION :
3. AVANT DE COMMENCER
MISE EN MARCHE/ARRÊT DU FOUR
natural_image
Line drawing of a device emitting smoke or vapor, with no visible text or symbols
8. PROTECTION DE L'ENVIRONNEMENT ET ÉLIMINATION
natural_image
Symbol of a trash bin with crossed lines indicating no waste or discharge (no text or labels)9. INSTALLATION

REMARQUE :
natural_image
Simple line drawing of a rectangular box with internal lines and a clip (no text or symbols)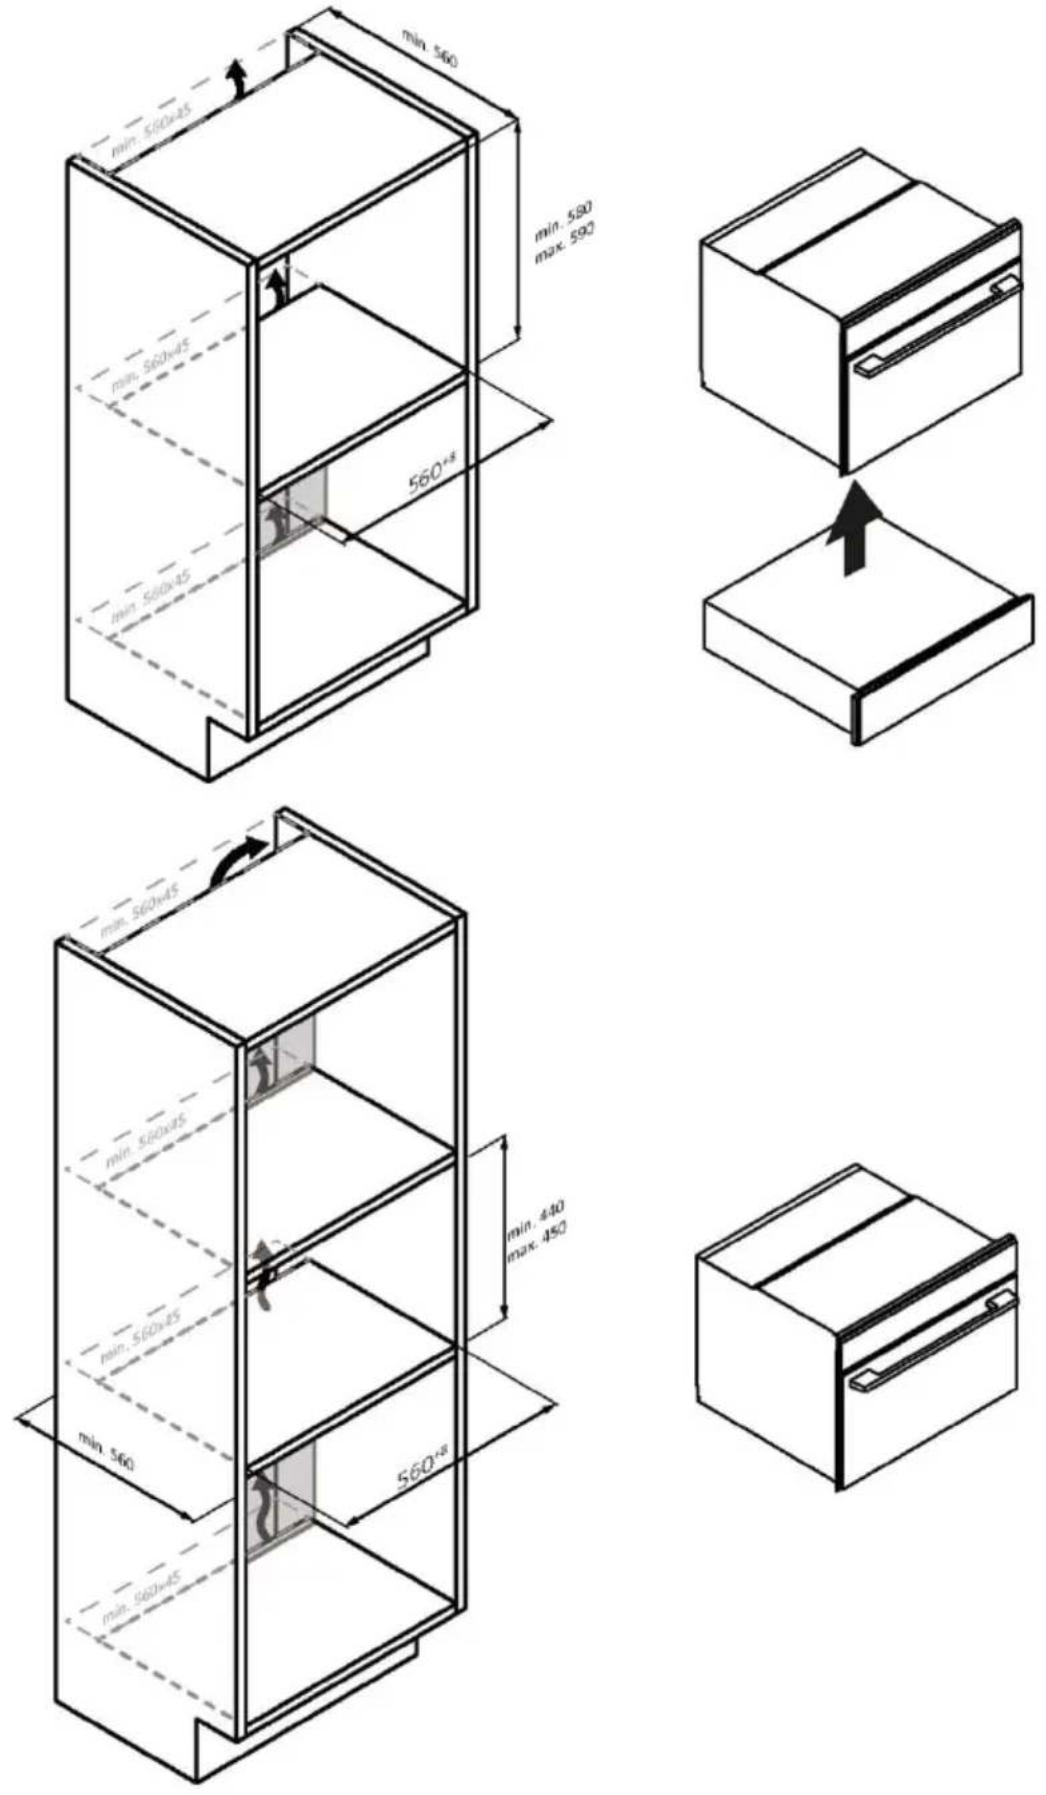

FR 39
BENVENUTI
natural_image
Empty white rectangle with black border (no text or symbols)natural_image
Line drawing of a rectangular tray with internal compartments (no text or symbols)natural_image
Isometric line drawing of a rectangular grid structure with an arrow indicating direction (no text or symbols)natural_image
Two identical metal frame structures arranged vertically (no text or symbols)natural_image
Line drawing of a window with a circular diagram showing a fan or pointer (no text or symbols)natural_image
Technical line drawing of a rectangular grid structure with an arrow indicating direction (no text or symbols)natural_image
Isometric line drawing of a rectangular plate with horizontal slats and corner handles (no text or symbols)natural_image
Isometric line drawing of a square frame with rounded corners and a small triangular cutout at the top center (no text or symbols)natural_image
Simple line drawing of a medical or laboratory probe with a curved tube and two connectors (no text or symbols)natural_image
Simple line drawing of a roasted chicken (no text or symbols)natural_image
Hand interacting with a touchscreen device (no text or symbols visible)PREMERE IL TASTO TEMPO
6
LAMPEGGIANTE
7

PREMERE IL TASTO TEMPO
8


Passo 2
Passo 3
Passo 4
Passo 5
Passo 6.1-6.2
Passo 7

CONTROLLO DA REMOTO

DISATTIVAZIONE:

3. PRIMA DI COMINCIARE
natural_image
Simple line drawing of a cabinet with smoke rising from the top (no text or symbols)
natural_image
Simple line drawing of a trash bin with crossed lines indicating no waste or discharge (no text or symbols)9. INSTALLAZIONE

NOTA:
natural_image
Isometric line drawing of a rectangular box with internal compartments and a clip (no text or symbols)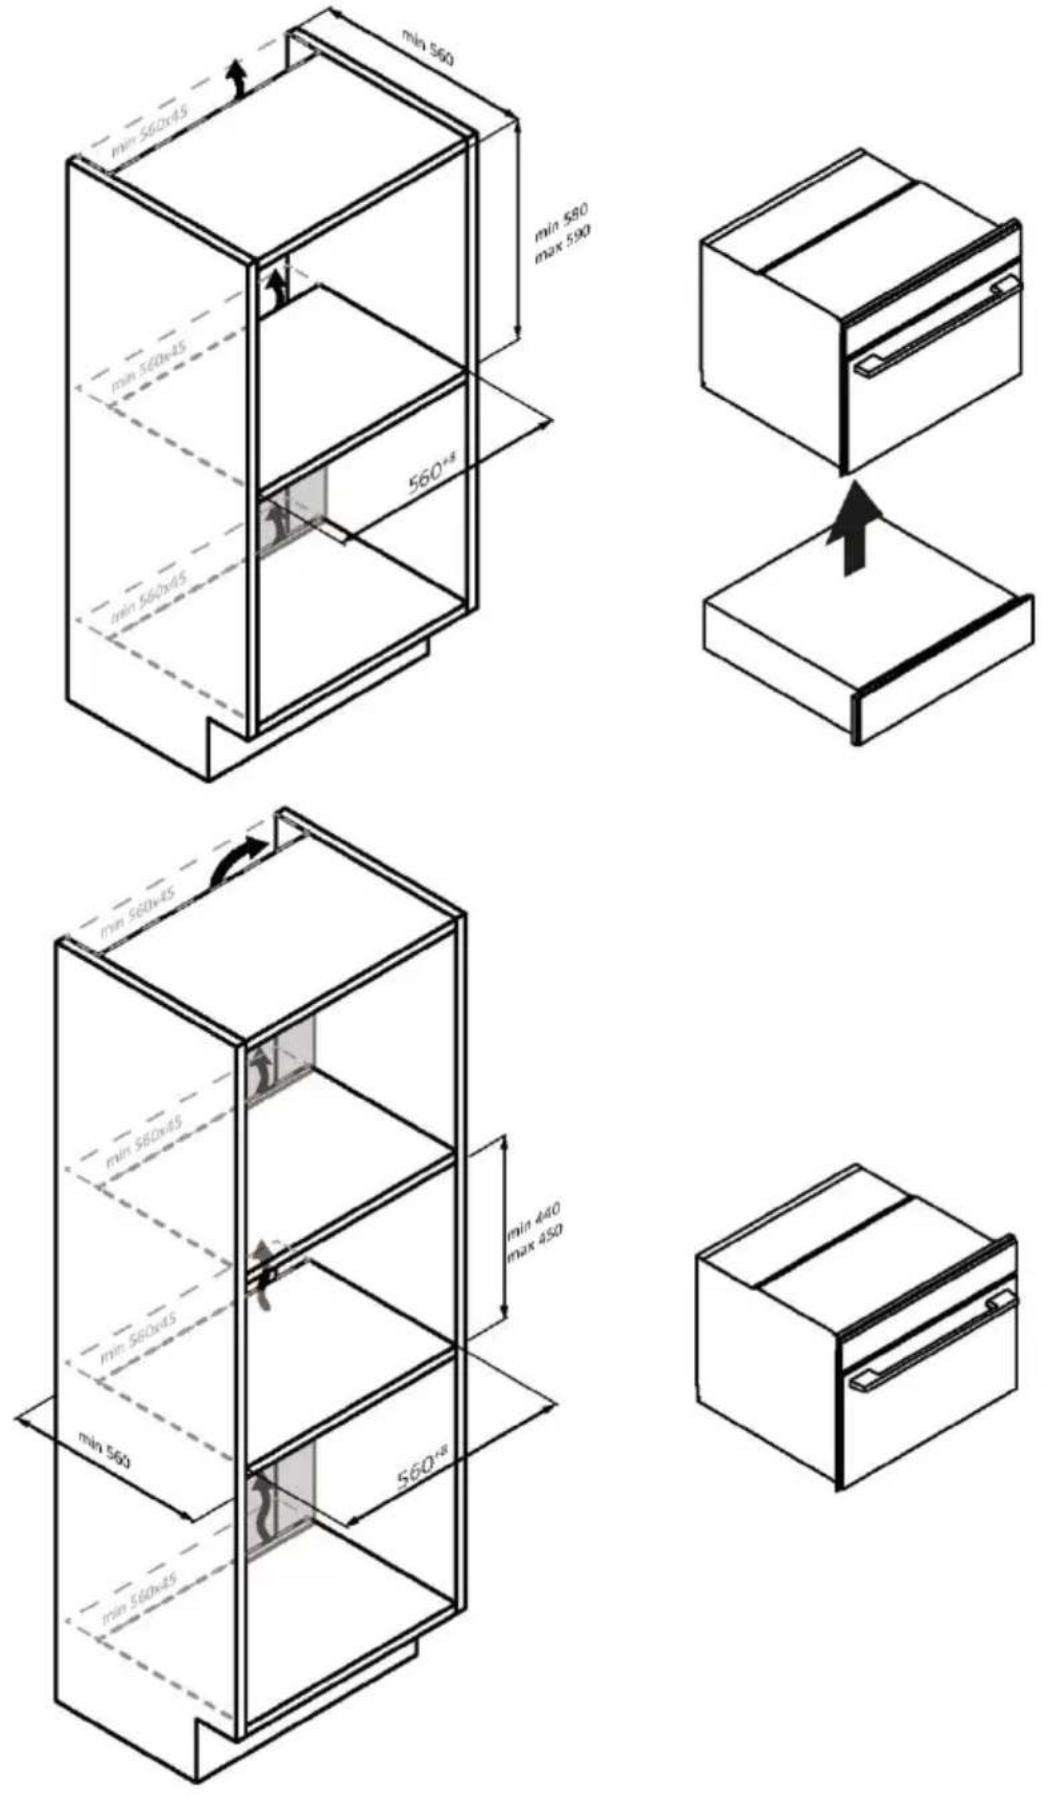

WILLKOMMEN
natural_image
Empty white rectangle with black border (no text or symbols)natural_image
Line drawing of a rectangular tray with internal compartments (no text or symbols)natural_image
Isometric line drawing of a rectangular grid structure with an arrow indicating direction (no text or symbols)natural_image
Two identical metal frame structures arranged vertically (no text or symbols)natural_image
Line drawing of a window with a circular diagram showing a fan or pointer (no text or symbols)natural_image
Technical line drawing of a rectangular metal grate or rack structure with a directional arrow indicating force or movement (no text or symbols present)natural_image
Isometric line drawing of a rectangular plate with horizontal slats and corner handles (no text or symbols)natural_image
Isometric line drawing of a square frame with rounded corners and a small triangular cutout at the top center (no text or symbols)natural_image
Simple line drawing of a medical or laboratory probe with a curved tube and two connectors (no text or symbols)natural_image
Simple line drawing of a roasted chicken (no text or symbols)2.3. Bedienfeld
natural_image
Hand interacting with a touchscreen device (no text or symbols visible)ZEIT DRÜCKEN
6
BLINKT
7
ZEIT DRÜCKEN
8

Schritt 2
Schritt 3
Schritt 4
Schritt 5
Schritt 6.1-6.2
Schritt 7

APP-BEDIENUNG


DEAKTIVIERUNG:
3. VOR DEM START
natural_image
Line drawing of a device emitting smoke or vapor, with no visible text or symbols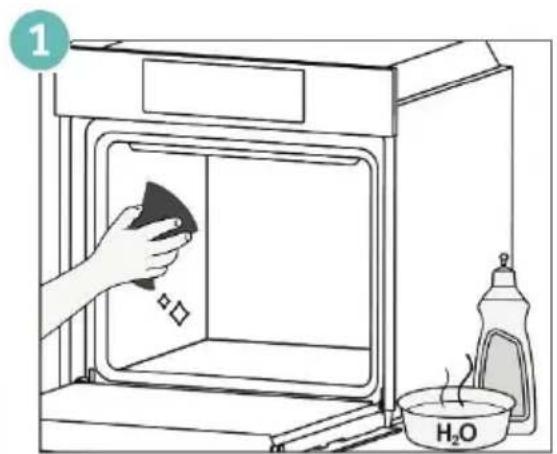
natural_image
Simple line drawing of a trash bin with crossed lines indicating no waste or discharge (no text or symbols)9. INSTALLATION
i HINWEIS:
natural_image
Isometric line drawing of a rectangular box with internal compartments (no text or symbols)

DE 39
BIENVENIDO/A
natural_image
Line drawing of an oven with labeled components (no text or symbols present)natural_image
Empty white rectangle with a thin black border (no text or symbols)natural_image
Line drawing of a rectangular tray with internal compartments (no text or symbols)natural_image
Isometric line drawing of a rectangular grid structure with an arrow indicating direction (no text or symbols)natural_image
Two identical metal frame structures arranged vertically (no text or symbols)natural_image
Line drawing of a door with a circular diagram showing a fan or pointer (no text or symbols)natural_image
Technical line drawing of a rectangular grid structure with an arrow indicating direction (no text or symbols)natural_image
Isometric line drawing of a square frame with rounded corners and a small triangular cutout at the top center (no text or symbols)natural_image
Isometric line drawing of a rectangular plate with horizontal slats and corner holes (no text or symbols)natural_image
Line drawing of a medical or laboratory probe with a curved tube and two connectors (no text or symbols)natural_image
Simple line drawing of a roasted chicken (no text or symbols)2.3. Panel de control
natural_image
Hand interacting with a touchscreen device (no text or symbols visible)PULSAR TIEMPO
6

PARPADEANDO
7

PULSAR TIEMPO
8

REGISTRO RÁPIDO PARA EMPAREJAMIENTO
Paso 1
Paso 2
Paso 3
Paso 4
Paso 5
Paso 6.1-6.2

Paso 7


CONTROL REMOTO

DESACTIVACIÓN:
3. ANTES DE EMPEZAR
natural_image
Line drawing of a device emitting smoke or vapor, with no visible text or symbols
natural_image
Simple line drawing of a trash bin with crossed lines indicating no waste or discharge (no text or symbols)9. INSTALACIÓN

NOTA:
natural_image
Simple line drawing of a rectangular box with internal lines and a clip (no text or symbols)

WELKOM
2. PRODUCTINTRODUCTIE
4. WERKING VAN HET PRODUCT
2. PRODUCTINTRODUCTIE
natural_image
Empty white rectangle with a thin black border (no text or symbols)natural_image
Line drawing of a rectangular tray with internal compartments (no text or symbols)natural_image
Technical line drawing of a corrugated metal sheet with a directional arrow indicating force or movement (no text or symbols)natural_image
Two identical metal frame structures arranged vertically (no text or symbols visible)natural_image
Line drawing of a window with a magnified circular detail showing a fan or pointer (no text or symbols)natural_image
Technical line drawing of a rectangular metal grate or rack structure with a directional arrow indicating force (no text or symbols)natural_image
Isometric line drawing of a rectangular plate with horizontal slats and corner handles (no text or symbols)natural_image
Isometric line drawing of a square frame with rounded corners and a small triangular cutout at the top center (no text or symbols)natural_image
Line drawing of a medical or laboratory probe with a curved tube and two connectors (no text or symbols)natural_image
Simple line drawing of a roasted chicken (no text or symbols)natural_image
Hand interacting with a touchscreen device (no text or symbols visible)REGISTRATIE NIEUWE GEBRUIKER

SNELLE KOPPELING
Stap 1
Stap 2
Stap 3
- Selecteer 'Oven' in de apparaatcategorie.
Stap 4
Stap 5
Stap 6.1–6.2

Stap 7


DEACTIVEREN:
3. VOORDAT U BEGINT
4. WERKING VAN HET PRODUCT
natural_image
Line drawing of a device emitting smoke or vapor, with no visible text or symbols
natural_image
Simple line drawing of a trash bin with crossed lines indicating no waste or discharge (no text or symbols)9. INSTALLATIE

OPMERKING:
natural_image
Isometric line drawing of a rectangular box with internal compartments (no text or symbols)

BEM-VINDO
- Painel de controlo
- Grades de arame laterais
- Grades metálicas
- Tabuleiro
- Porta do forno
- Número de série e código QR
natural_image
Empty white rectangle with black border (no text or symbols)natural_image
Line drawing of a rectangular tray with internal compartments (no text or symbols)natural_image
Isometric line drawing of a rectangular grid structure with an arrow indicating direction (no text or symbols)natural_image
Two identical metal frame structures arranged vertically (no text or symbols)natural_image
Hand-drawn sketch of a window with a circular diagram showing light rays, no text or symbols presentnatural_image
Technical line drawing of a rectangular grid structure with an arrow indicating direction (no text or symbols)natural_image
Isometric line drawing of a rectangular plate with horizontal slats and corner handles (no text or symbols)natural_image
Isometric line drawing of a square frame with rounded corners and a small curved cutout (no text or symbols)natural_image
Line drawing of a medical or laboratory probe with a curved tube and two connectors (no text or symbols)Mede a temperatura interna dos alimentos durante a cozedura.
AVISOS:
natural_image
Simple line drawing of a roasted chicken (no text or symbols)natural_image
Hand interacting with a touchscreen device (no text or symbols visible)PREMIR TEMPO
6

PISCAR
7

PREMIR TEMPO
8

Passo 2
Passo 3
Passo 4
Passo 5
Passo 6.1-6.2

Passo 7

CONTROLO REMOTO
DESATIVAÇÃO:

3. ANTES DE COMEÇAR
natural_image
Line drawing of a device emitting smoke or vapor, with no visible text or symbols
natural_image
Simple line drawing of a trash bin with crossed lines indicating no waste or discharge (no text or symbols)9. INSTALAÇÃO

NOTA:
natural_image
Isometric line drawing of a rectangular box with internal compartments (no text or symbols)


bar
| Category | Value | |---|---| | Category 1 | 100 | | Category 2 | 100 | | Category 3 | 100 | | Category 4 | 100 | | Category 5 | 100 | | Category 6 | 100 | | Category 7 | 100 | | Category 8 | 100 | | Category 9 | 100 | | Category 10 | 100 | | Category 11 | 100 | | Category 12 | 100 | | Category 13 | 100 | | Category 14 | 100 | | Category 15 | 100 | | Category 16 | 100 | | Category 17 | 100 | | Category 18 | 100 | | Category 19 | 100 | | Category 20 | 100 | | Category 21 | 100 | | Category 22 | 100 | | Category 23 | 100 | | Category 24 | 100 | | Category 25 | 100 | | Category 26 | 100 | | Category 27 | 100 | | Category 28 | 100 | | Category 29 | 100 | | Category 30 | 100 | | Category 31 | 100 | | Category 32 | 100 | | Category 33 | 100 | | Category 34 | 100 | | Category 35 | 100 | | Category 36 | 100 | | Category 37 | 100 | | Category 38 | 100 | | Category 39 | 100 | | Category 40 | 100 | | Category 41 | 100 | | Category 42 | 100 | | Category 43 | 100 | | Category 44 | 100 | | Category 45 | 100 | | Category 46 | 100 | | Category 47 | 100 | | Category 48 | 100 | | Category 49 | 100 | | Category 50 | 100 | | Category 51 | 100 | | Category 52 | 100 | | Category 53 | 100 | | Category 54 | 100 | | Category 55 | 100 | | Category 56 | 100 | | Category 57 | 100 | | Category 58 | 100 | | Category 59 | 100 | | Category 60 | 100 | | Category 61 | 100 | | Category 62 | 100 | | Category 63 | 100 | | Category 64 | 100 | | Category 65 | 100 | | Category 66 | 100 | | Category 67 | 100 | | Category 68 | 100 | | Category 69 | 100 | | Category 70 | 100 | | Category 71 | 100 | | Category 72 | 100 | | Category 73 | 100 | | Category 74 | 100 | | Category 75 | 100 | | Category 76 | 100 | | Category 77 | 100 | | Category 78 | 100 | | Category 79 | 100 | | Category 80 | 100 | | Category 81 | 100 | | Category 82 | 100 | | Category 83 | 100 | | Category 84 | 100 | | Category 85 | 100 | | Category 86 | 100 | | Category 87 | 100 | | Category 88 | 100 | | Category 89 | 100 | | Category 90 | 100 | | Category 91 | 100 | | Category 92 | 100 | | Category 93 | 100 | | Category 94 | 100 | | Category 95 | 100 | | Category 96 | 100 | | Category 97 | 100 | | Category 98 | 100 | | Category 99 | 100 | | Total (Total) = [sum of bars] / [values] * (sum of bars + bars) * (sum of bars + bars) * (sum of bars + bars). The values in the table represent the sum of the bars and the corresponding sum of the bars. There is no additional data series or categories specified.