
OMHDFWCRT6 - Hot dog maker Kraft - Free user manual and instructions
Find the device manual for free OMHDFWCRT6 Kraft in PDF.


User questions about OMHDFWCRT6 Kraft
0 question about this device. Answer the ones you know or ask your own.
Ask a new question about this device
Download the instructions for your Hot dog maker in PDF format for free! Find your manual OMHDFWCRT6 - Kraft and take your electronic device back in hand. On this page are published all the documents necessary for the use of your device. OMHDFWCRT6 by Kraft.
USER MANUAL OMHDFWCRT6 Kraft
All products are trademarks of Nostalgia Products LLC.
Worldwide design & utility patented or patents pending.
© 2023 Nostalgia Products LLC.
www.nostalgiaproducts.com
(rev. 11/01/23 DJ)
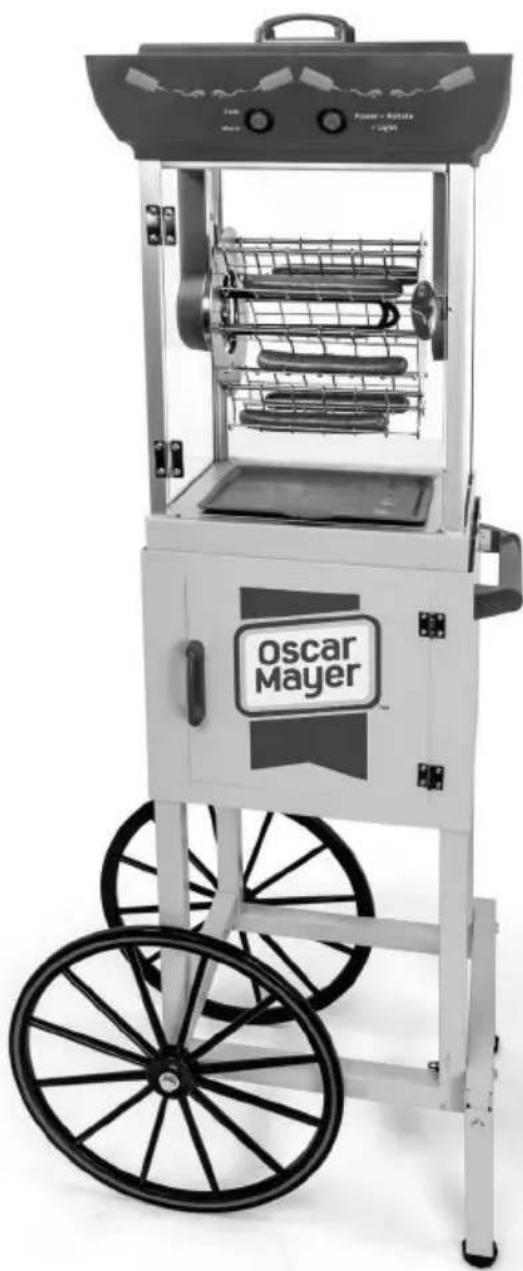
natural_image
Black-and-white photo of an Oscar Mayer portable food cart with wheels and a basket (no visible text or symbols on the device itself)SERIES
OMHDFWCRT6
Hot Dog Ferris Wheel Cart Chariot pour chien-chaud style grande roue Carro Para Perros Calientes De Vuelta Al Mundo
Instructions and Recipes Instructions et Recettes Instrucciones y Recetas
Make everyday a party!
Visit www.nostalgiaproducts.com for more fun products.
CONTENTS
SAFETY 2
IMPORTANT SAFEGUARDS 3
ADDITIONAL IMPORTANT SAFEGUARDS. 3
INTRODUCTION 4
PARTS & ASSEMBLY 5
HOW TO OPERATE 10
HELPFUL TIPS 11
CLEANING & MAINTENANCE 11
RECIPES 11
RETURNS & WARRANTY 12
SAFETY
Your safety and the safety of others are very important.
We have provided many important safety messages in this manual and on your appliance. Always read and obey all safety messages.

This is the safety alert symbol.
This symbol alerts you to potential hazards that can cause serious injury to you and others.
All safety messages will follow the safety alert symbol.
All safety messages will tell you what the potential hazard is, tell you how to reduce the chance of injury, and tell you what can happen if the instructions are not followed.
Appliance Specifications:
120 Volts, 60 Hertz
800 Watts
THIS PRODUCT IS FOR USE IN 120V AC OUTLET ONLY.

Refer to www.nostalgiaproducts.com/user-manuals/ for the most updated manual.

IMPORTANT SAFEGUARDS
A person who has not read and understood all operating and safety instructions is not qualified to operate this appliance. All users of this appliance must read and understand this Instruction Manual before operating or cleaning this appliance.
When using electrical appliances, basic safety precautions should always be followed, including:
- Read all instructions before operating this appliance.
- DO NOT TOUCH the hot surfaces. Use handles or knobs.
- This appliance is NOT A TOY.
- Unsupervised young children and cognitively challenged individuals should never operate this appliance.
- Close supervision is necessary when any appliance is used by or near children.
- To protect against electrical shock do not immerse cord, plug or any part of this unit in water or other liquids.
- Unplug from outlet when not in use, before removing parts and before cleaning. Allow to cool before putting on or taking o any parts, and before cleaning.
- DO NOT operate any appliance with a damaged cord or plug, or after the appliance malfunctions, or if the appliance has been damaged in any manner. Return the appliance to the nearest repair shop for examination, repair or adjustment.
- The manufacturer does not recommend the use of accessory attachments other than what is provided by the manufacturer. Use of attachments may cause injuries.
- DO NOT use the appliance for other than its intended use.
- DO NOT use outdoors. FOR HOUSEHOLD USE ONLY.
- DO NOT place on or near a hot gas or electric burner, or in a heated oven.
- DO NOT let cord hang over edge of table or counter, or touch hot surfaces.
- NEVER leave unit unattended while in use or when plugged into an outlet.
- Extreme caution must be used when moving an appliance containing hot food.
- Always attach plug to appliance first, then plug cord in the wall outlet. To disconnect, turn any control to "o," then remove plug from wall outlet.

ADDITIONAL IMPORTANT SAFEGUARDS
Operating Safety Precautions
- Check carousel for presence of foreign objects prior to use.
- Make sure the carousel is properly inserted into base prior to using.
- DO NOT attempt to insert or remove carousel while motor is on.
-
DO NOT place appliance directly under kitchen cabinets as the unit generates steam that could damage the cabinets.
-
Hot dogs may burst during grilling, causing hot oil to splash. Use caution when cooking to avoid burns.
Instructions for the Electrical Cord and Plug
-
ELECTRICAL SHOCK HAZARD: Failure to follow these instructions can result in death, fire, or electrical shock.
-
Plug into a grounded 3 prong outlet.
- DO NOT remove ground prong.
• DO NOT use an adapter. -
DO NOT use an extension cord.
-
This unit MUST be grounded. In the event of an electrical short circuit, grounding reduces the risk of electric shock by providing an escape wire for the electric current. This unit is equipped with a cord having a grounding wire with a grounding plug. The plug must be plugged into an outlet that is properly installed and grounded.
- WARNING: Improper use of the grounding plug can result in a risk of electric shock. If the plug does not fit fully into the outlet, contact a qualified electrician. Do not attempt to modify the plug in any way.
- A short power supply cord is provided to reduce the risk resulting from becoming entangled or tripping over a long cord.
- The manufacturer does not recommend using this machine in countries that do not support 120V AC even if a voltage adapter, transformer, or converter is in use.
SAVE THESE INSTRUCTIONS!
INTRODUCTION
Thank you for purchasing the HOT DOG FERRIS WHEEL CART! This 54" tall vendor-style hot dog cart cooks up to 6 regular-size hot dogs and includes a built-in hot dog and bun warmer. Great for birthdays, parties, family gatherings and more!
Features include:
• Cooks up to 6 regular-size hot dogs
- Dual heating elements with Cook and Warm temperature settings
- Carousel rotates for even heating
• Built-in hot dog and bun warmer
• Full-size 54 inches tall
• Durable enameled steel construction
- Includes sliding drip tray
• Storage compartment for supplies
• Utility shelf for hot dog preparation
- Carousel and baskets remove for easy cleaning
- Top unit removes from cart for countertop use
PARTS & ASSEMBLY
Please ensure that you have removed all of the hardware and parts listed before discarding packaging. In our efforts to reduce packaging, we maximize the packing material to protect your new purchase. As a result, small parts may not be readily visible.
Hardware

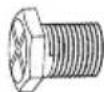
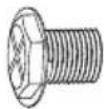
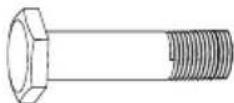
1 Screw (8mm)
2 Screw (8mm)
3 Bolt (25mm) #4 Bolt (60mm)
Qty. 4 Qty. 6 Qty. 4 Qty. 4
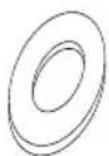
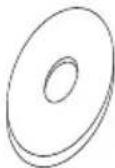
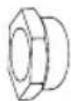
5 Flat Washer #6 Flat Washer #7 Nut Cap Qty. 2 Qty. 4 Qty. 6
Parts
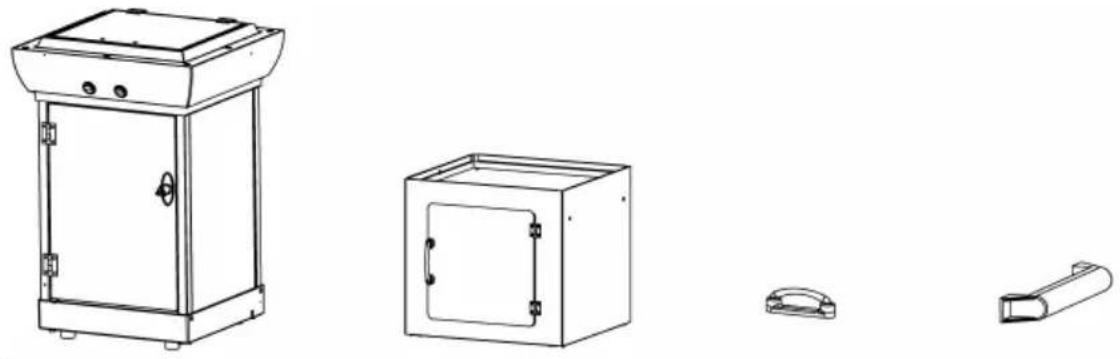
natural_image
Line drawings of four different industrial or electrical components: a cabinet, a safety box, a switch, and a cylindrical device (no text or symbols present)(A) Main Unit (B) Storage
Compartment
(C) Top Handle (D) Push Handle
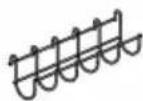
(E) Basket Qty. 6

(F) Tray (G) Axle Bolts (H) Wheel
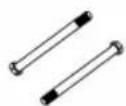
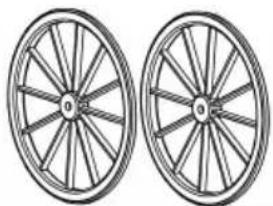
natural_image
Two identical bicycle wheel rim diagrams with spokes, shown from different angles (no text or symbols)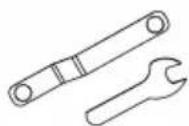
natural_image
Simple line drawing of three vertical metal supports with base plates (no text or symbols)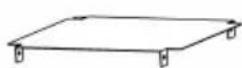

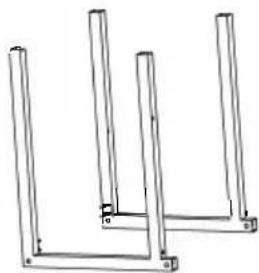
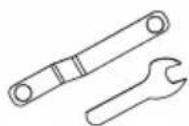
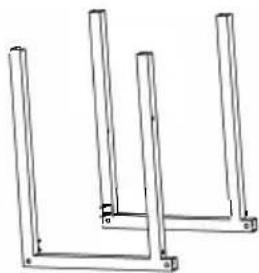
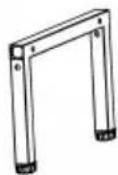
(I) Wrench (J) Base Support (K) Bottom Plate (L) Cross Bar
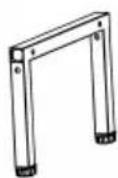

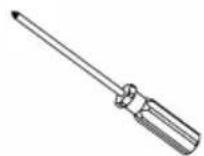
(M) Leg Assembly (N) Lock Screw (O) Screwdriver
Assembly of Base Support
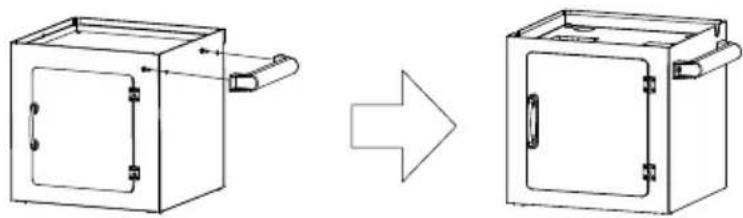
- Attach Push Handle (D) from inside Storage Compartment (B) using supplied #1 Screws.
natural_image
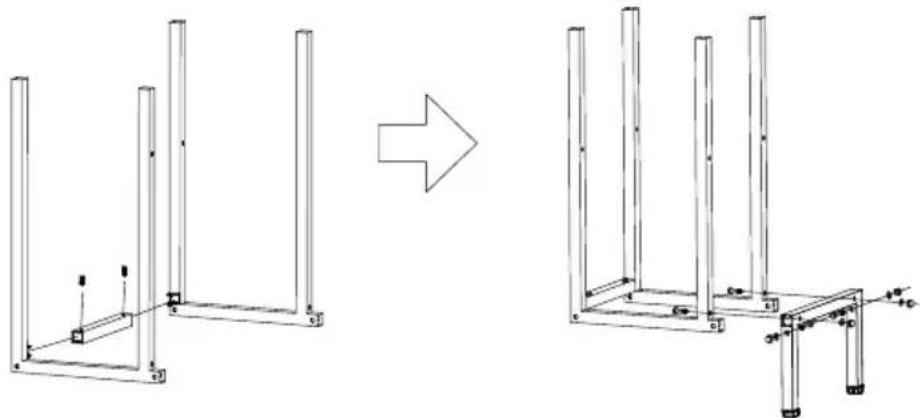
Diagram showing a device transformation from a rectangular box to a closed chamber, with no text or symbols present.- Insert Cross Bar (L) into the square inserts on the inside of Base Support (J) and secure from below with two #2 Screws. Insert the Leg Assembly (M) over the protruding ends of the Base Support (J) and fasten from the inside of Base Support (J) using four #4 Bolts, and four #7 Nut Caps.
natural_image
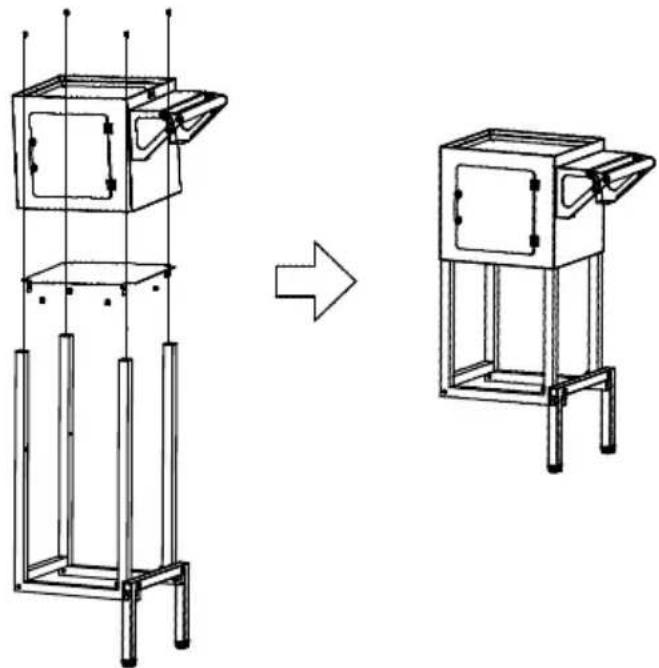
Diagram showing structural change from a frame structure to a posttable frame, with no visible text or symbols.- Secure Bottom Plate (K) to Base Support (J) using four #2 Screws.
- Assemble Base Support (J) into the bottom of the Storage Compartment (B) and secure with four #3 Bolts.
natural_image
Technical line drawing of a vertical structural frame before and after modification, showing structural change (no text or symbols)Assembly of Wheels
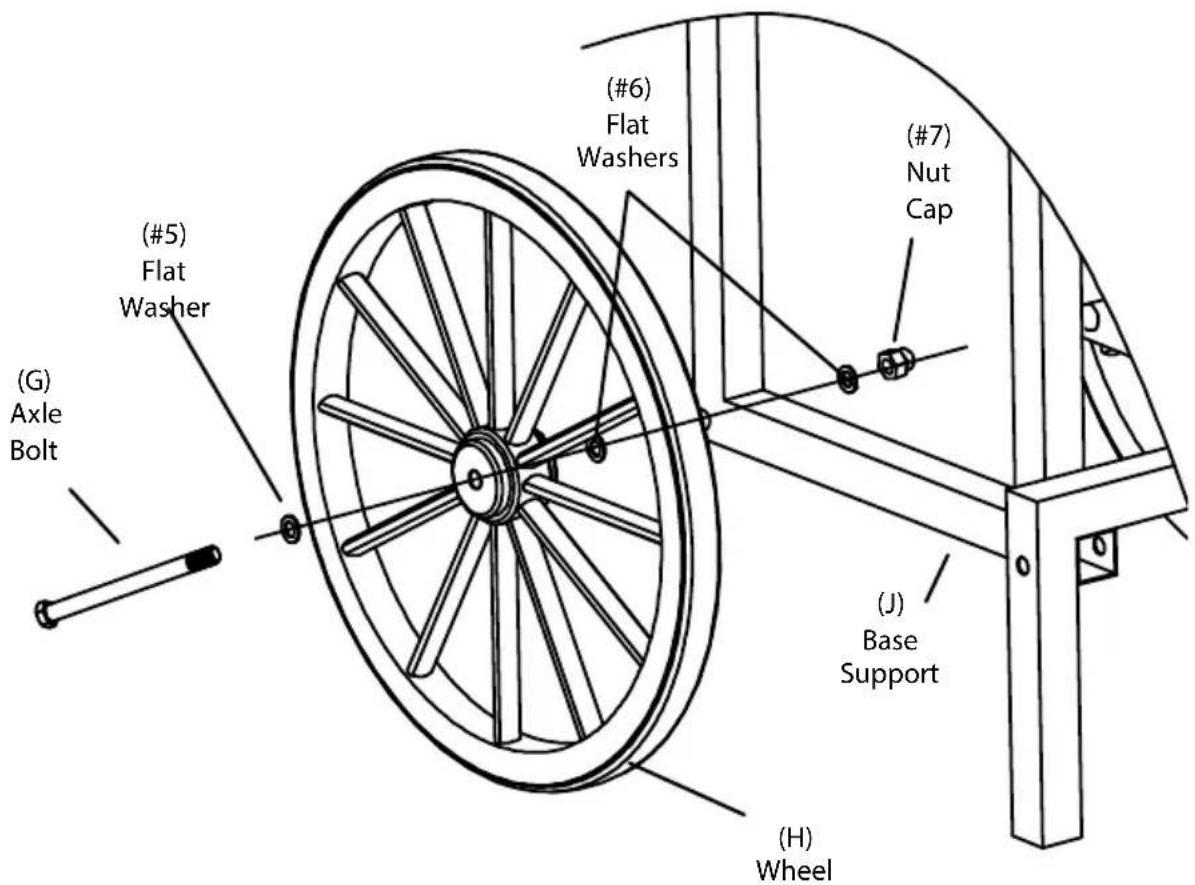
- Slide one #5 Flat Washer onto Axle Bolt (G) and insert Axle Bolt (G) into Wheel (h).
- Put on one #6 Flat Washer. Insert Axle Bolt (G) with Wheel (H) into Base Support (J).
- Add a second #6 Flat Washer and #7 Nut Cap. Use Wrench (I) to tighten the #7 Nut Cap.
- Repeat steps to attach second Wheel (H) onto the other side of the Base Support (J).
text_image
(G) Axle Bolt (G) Flat Washer (#5) Flat Washer (#6) Flat Washers (#7) Nut Cap (J) Base Support (H) WheelAssembly of Main Unit
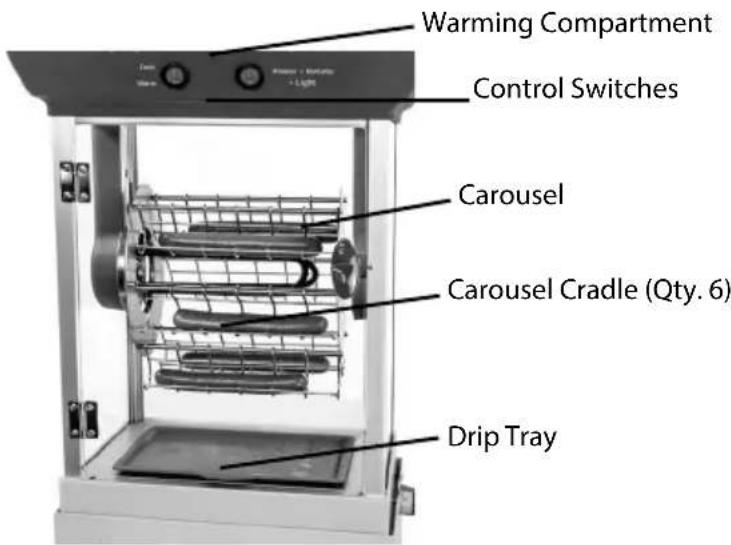
Carefully guide the Carousel into the brackets located on the sides of the interior of the main unit. Hang the Carousel Cradles on the crossbars of the Carousel.
text_image
Warming Compartment Control Switches Carousel Carousel Cradle (Qty. 6) Drip TrayControl Switches
text_image
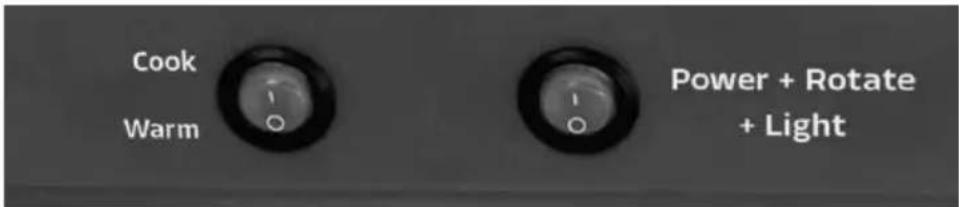
Cook Warm Power + Rotate + LightNOTE: The left and right Control Switches have 3 positions, as described below.
LEFT: Cook / OFF / Warm
RIGHT: Power+Rotate / OFF / Power+Rotate+Light
Locking Main Unit to Storage Compartment
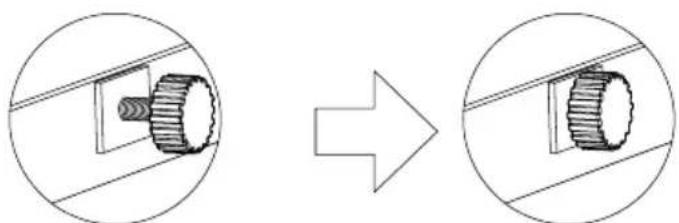
Place the Main Unit (A) onto the Storage Compartment (B) so that the two side holes match up. Lock by tightening the Lock Screws as shown below:
natural_image
Diagram showing a mechanical component being processed into a final state, with no visible text or symbols.Attaching the Tray Handle
Using included screwdriver (O) attach tray handle (C) to outside of tray with the included screws.
HOW TO OPERATE
Before first use, clean the inside of your HOT DOG FERRIS WHEEL CART by wiping with a moist, non-abrasive sponge, towel or cloth and then wipe with a non-abrasive dry towel. Wipe down the Carousel and Carousel Cradles and be sure it is properly placed in the brackets before starting.
-
Find a flat surface near an electrical outlet, and ensure the cord is away from any water source.
-
Gather your hot dog making supplies: hot dogs, buns, condiments, serving tongs, etc.
-
Make sure the Carousel is properly secured in the support brackets.
-
Plug in the appliance while all Control Switches are flipped to the OFF (middle) positions.
-
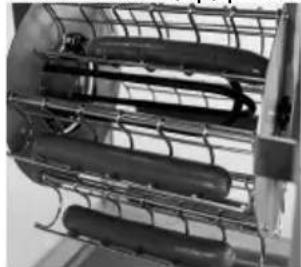
Place a hot dog in each Cradle. To rotate the Cradles, flip the Right switch to the Power+Rotate (up) position. Flip to the OFF (middle) position to stop rotating.
natural_image
Close-up of a metal cage with multiple cylindrical components (no visible text or symbols)- If desired, place hot dog buns into the Warming Compartment.
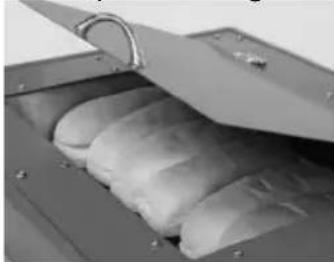
natural_image
Interior view of a metal storage or oven with open lid and stacked sacks (no visible text or symbols)- To cook hot dogs, flip the Left switch to the Cook (Up) position and the Right switch to the Power+Rotate (Top) position.
NOTE: If you would like to activate the internal light while rotating, flip the Right switch to the Power+Rotate+Light (Bottom) Position.
-
Allow the hot dogs to cook. You will notice the color begin to darken as the hot dogs are cooking. The time required to cook the hot dogs will vary, depending upon the size and starting temperature of the hot dogs.
-
When ready to serve, flip the Right switch to OFF (Middle) position to stop rotating, then use a tongs or fork to remove hot dogs from Carousel Cradles. Toggle the Right switch to rotate the Carousel and reach the hot dogs at the back of the unit.
CAUTION: Unit will be HOT when serving. Take care to avoid touching the Carousel and Cradles, as well as the Heating Elements located on the ceiling and back of the unit. An oven mitt may be used to avoid burns.
- Keep remaining hot dogs warm by flipping the Left switch to the Warm (Bottom) position and the Right switch to the Power+Rotate (Top) position.
HELPFUL TIPS
CAROUSEL
When cooking less than 6 hot dogs, be sure to evenly space the hot dogs in the Cradles. This will ensure there is an even weight distribution and allow the Carousel to evenly rotate.
If the Carousel does not turn, make sure the Right switch is in the Top or Bottom position, and the electrical cord is properly plugged into the outlet.
WARMING COMPARTMENT
The Warming Compartment may also be used to keep hot dogs warm. Be sure to place a small tray in the bottom of the compartment to avoid grease dripping into the Warming Compartment. You may also wrap hot dogs in aluminum foil to avoid grease dripping.
OTHER FOODS
The HOT DOG FERRIS WHEEL CART will also cook a variety of other foods. Try corn dogs, taquitos, frozen burritos, and more!
CLEANING & MAINTENANCE
- Make sure appliance is unplugged and cool before cleaning.
- Remove the Carousel and Cradles from the support brackets.
- Wash the Carousel and Cradles in hot, soapy water and let sit for several minutes to cut the grease. If necessary, use the scrubber side of a cleaning sponge to scrub away remaining grease.
- Use slightly damp, non-abrasive sponge, towel or cloth to wipe down the inside and outside of Main Unit and Warming Compartment, then wipe with a non-abrasive towel to dry.
- Carefully rinse all parts and dry.
RECIPES
Use a variety food items with your HOT DOG FERRIS WHEEL CART for an easy-to-serve meal:
• Hot dogs and wieners (beef, turkey, veggie, or chicken)
- Sausage links
- Corn dogs
• Taquitos, burritos, chimichangas
RETURNS & WARRANTY
SHOULD YOUR UNIT NOT WORK OR IF DAMAGED WHEN YOU FIRST TAKE IT OUT OF THE BOX, PLEASE RETURN IT TO THE PLACE OF PURCHASE IMMEDIATELY.
HOT DOG FERRIS WHEEL CART / OMHDFWCRT6SERIES
Should you have any questions, please contact us via email or at the customer service number listed below between the hours of 9:00 AM and 4:00 PM, Monday through Friday, Central Standard Time.
Distributed by:
Nostalgia Products LLC
1471 Partnership Dr.
Green Bay, WI 54304-5685
Customer Service
Phone: (920) 347-9122
Web: www.nostalgiaproducts.com
Customer Service Inquiry
To submit a Customer Service inquiry, go to www.nostalgiaproducts.com and fill out the Customer Service Inquiry form and click the Submit button.
A representative will contact you as soon as possible.
Product Warranty Terms
Nostalgia Products LLC (the "Company") hereby warrants that for a period of one (1) year from the date of original purchase, this product will be free of defects in material and workmanship under normal home use, provided that the product is operated and maintained in accordance with the operating instructions. As the sole and exclusive remedy under this warranty, the Company will at its discretion either repair or replace the product found to be defective, or issue a refund on the product during the warranty period. This warranty is only available to the original retail purchaser of the product from the date of initial retail purchase, and is only valid with the original sales receipt, as proof of purchase date is required to obtain warranty benefits. All warranty claims must be brought to the attention of the Company within the warranty period and no later than 30 days of the failure to perform. This warranty does not cover normal wear or damage caused by shipping, mishandling, misuse, accident, alteration, improper replacement parts, or other than ordinary household use. You may be required to return the product (with shipping prepaid by you) for inspection and evaluation. Return shipping costs are not refundable. The Company is not responsible for returns damaged or lost in transit. Unless otherwise specifically permitted by the operating instructions, this warranty applies to indoor household use only. In order to obtain service under this warranty, please contact the Company at the telephone number listed above or by filling out the Customer Service Inquiry Form located at www.nostalgiaproducts.com. Warranty valid only in USA and Canada.
This warranty is in lieu of all other warranties, expressed or implied, including warranties of merchantability and fitness for a particular purpose, which are hereby excluded to the extent permitted by law. In no event shall the Company be liable for any indirect, incidental, consequential, or special damages arising out of or in connection with this product or the use thereof. Some states, provinces or jurisdictions do not permit the exclusion or limitation of incidental or consequential damages, so the foregoing exclusion or limitation may not apply to you.
This warranty does not apply to re-manufactured merchandise.
Please read the operating instructions carefully. Failure to comply with the operating instructions will void this warranty.
For more information, visit us online at www.nostalgiaproducts.com.
Like us on Facebook at www.facebook.com/NostalgiaElectrics.
Follow our boards on Pinterest at www.pinterest.com/nostalgiaelctrx.
Tweet along with us on Twitter at www.twitter.com/NostalgiaElctrx.
CONSERVEZ CES INSTRUCTIONS!
INTRODUCTION
natural_image
Two identical line drawings of a bicycle wheel with spokes, no text or symbols present.natural_image
Simple line drawing of three vertical supports with base plates, no text or symbols present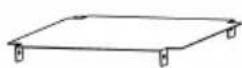
natural_image
Diagram showing a device being processed into a larger box, with no visible text or symbols.natural_image
Diagram showing structural change from a frame-like structure to a simplified panel assembly (no text or symbols)natural_image
Technical line drawing of a mechanical device before and after assembly (no text or symbols)text_image
Cook Warm Power + Rotate + Lightnatural_image
Diagram showing a mechanical component before and after transformation, with no visible text or symbols.natural_image
Close-up of a metal cage with internal components, possibly a filter or industrial device (no visible text or symbols)natural_image
Interior view of a metal storage cabinet with open lid and multiple cushioned compartments (no visible text or symbols)Nostalgia Products LLC
1471 Partnership Dr.
Green Bay, WI 54304-5685
natural_image
Two identical bicycle wheels shown side by side, no text or symbols present(F) Bandeja (G) Pernos del eje (H) Rueda
(E) Cesta Qty. 6
natural_image
Simple line drawing of three vertical metal supports with base plates (no text or symbols)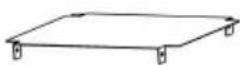

(I) Llave inglesa (J) Soporte básico (K) Placa inferior (L) Barra transversal

natural_image
Diagram showing a device being processed into a larger box, with no visible text or symbols.natural_image
Diagram showing structural change from a frame-like structure to a simplified panel assembly (no text or symbols)natural_image
Technical line drawing of a mechanical device before and after assembly (no text or symbols)text_image
Cook Warm Power + Rotate + Lightnatural_image
Diagram showing a mechanical component before and after transformation, with no visible text or symbols.natural_image
Close-up of a metal cage with multiple cylindrical objects inside (no visible text or symbols)natural_image
Interior view of a metal filing cabinet with multiple sacks (no visible text or symbols)Nostalgia Products LLC
1471 Partnership Dr.
Green Bay, WI 54304-5685
Servicio al cliente