Odette - Electric kettle BEEM - Free user manual and instructions
Find the device manual for free Odette BEEM in PDF.

User questions about Odette BEEM
0 question about this device. Answer the ones you know or ask your own.
Ask a new question about this device
Download the instructions for your Electric kettle in PDF format for free! Find your manual Odette - BEEM and take your electronic device back in hand. On this page are published all the documents necessary for the use of your device. Odette by BEEM.
USER MANUAL Odette BEEM
22 Information About Your Operating Instructions
22 Explanation of the Symbols
22 Explanation of the Signal Words
22 Intended Use
23 Safety Instructions
26 Items Supplied and Device Overview
27 Before Initial Use
28 Operation
28 Thermostat regulator
28 Filling the Water Reservoir
28 Operating the Discharge Tap
29 Preparation
29 Boiling Water
29 Heating Water
29 Interval Boiling
30 Tips For Making Tea
30 Black Tea
31 Green Tea
32 Herbal Tea
32 Hot Instant Beverages
33 Cleaning and Care
33 Descaling
34 Storage
35 Troubleshooting
36 Warranty and Limitations of Liability
37 Technical Data
37 Disposal
Congratulations!
Dear Customer,
We are delighted that you have chosen this samovar.
If you have any questions about the device and about spare parts/accessories, contact the customer service department via our website: www.beem.de
Information About Your Operating Instructions
Before using the device for the first time, please read the operating instructions carefully and keep them for future reference. If the device is given to someone else, these operating instructions should also be handed over with it. The manufacturer and importer do not accept any liability if the information in these operating instructions is not complied with.
Explanation of the Symbols

Danger symbols: These symbols indicate risks of injury (e.g. from electricity or fire). Read through the associated safety instructions carefully and follow them.

Supplementary information

carefully and follow them.

Suitable for food use.

Beware of hot surfaces!

Read operating instructions before use!
Explanation of the Signal Words
DANGER Warns of serious injuries and danger to life.
WARNING Warns of possible serious injuries and danger to life.
CAUTION Warns of slight to moderate injuries.
NOTE Warns of damage to property.
Intended Use
- This device is only intended to be used to heat water for tea and hot instant beverages.
- This device is intended to be used in private households and similar applications, for example:
– in kitchens for employees in shops, offices and other commercial areas;
-in agricultural businesses;
-by customers in motels, hotels and other similar accommodation;
-in bed and breakfasts.
- The device should only be used as described in the operating instructions. Any other use is deemed to be improper.
Safety Instructions

The device is equipped with safety features. Nevertheless, the device may still present dangers if it is not used in the intended way and / or is utilised in some other way. Comply with the following safety instructions and the procedures that are specified in these operating instructions.
- This device may be used by children aged 8 and over and by people with reduced physical, sensory or mental abilities or a lack of experience and/or knowledge if they are supervised or have received instruction on how to use the device safely and have understood the dangers resulting from failure to comply with the relevant safety precautions.
• Children must not play with the device. - Cleaning and user maintenance may not be performed by children, unless they are older than 8 years of age and are supervised.
- Children younger than 8 years of age and animals must be kept away from the device and the mains cable.
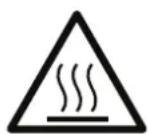
CAUTION: hot surfaces!
The device and the accessories are very hot during and shortly after use. Only ever touch the lever of the discharge tap or the controls while the device is in operation. Allow the device to cool down completely before it is cleaned.
- Never exceed the maximum fill level (MAX marking). If the water reservoir is overfilled, hot water could splash out or overflow during boiling.
- The device is not designed to be operated with an external timer or a separate remote control system.
-
Never immerse the base of the water reservoir, mains cable or mains plug in water or other liquids and ensure that they cannot fall into water or become wet.
-
The device must always be disconnected from the mains when it is left unattended and before assembling, disassembling, filling or emptying the water reservoir or cleaning it.
- In the interest of your own safety, check the device, the mains cable and the mains plug for damage every time before use. Use the device only if it is in working order.
- Do not make any modifications to the device. Do not replace the mains cable yourself. If the device, the mains cable or the mains plug of the device is damaged, they must be replaced by the manufacturer, customer service department or authorised retailers in order to avoid any hazards.
- It is essential to follow the instructions in the “Cleaning and Care” chapter.

DANGER – Danger of Electric Shock from Water
- Use the device only in closed rooms.
- Do not use the device in rooms with high humidity.
- Should the device fall into water, switch off the power supply immediately. Do not attempt to pull it out of the water while it is still connected to the mains power!
- Never touch the device, mains cable or mains plug with wet hands when these components are connected to the mains power.
- Make sure that the steam which emerges is not aimed directly at electrical devices and equipment containing electrical components.

WARNING – Danger of Electric Shock from Damage and Inappropriate Use
- Only connect the device to a socket with safety contacts that is properly installed and matches the technical data of the device. The socket must also be readily accessible after connection so that the connection to the mains can quickly be isolated.
- Do not use the device in conjunction with extension cables.

WARNING – Danger of Injury
- Danger of suffocation! Keep children and animals away from the packaging material.
Danger of scalding from heat, hot steam or condensation!
- Avoid coming into contact with the rising steam. Do not open the lid of the water reservoir during the boiling and heating process.
- Never pour water into the water reservoir when the device is switched on. Allow the device to cool down before filling it again.
- Do not move the device during the boiling and heating process.
-
The heated water is hot! Be careful when handling hot liquids.
-
Danger of tripping! Make sure that the connected mains cable does not present a trip hazard.
- The water reservoir must be completely emptied, cleaned and disinfected at regular intervals in order to prevent the risk of harmful germs forming.

WARNING – Danger of Fire
- Do not use the device in rooms containing easily ignitable dust or poisonous and explosive fumes.
- Do not connect the device along with other consumers (with a high wattage) to a multiple socket in order to prevent overloading and a possible short circuit (fire).
- Do not operate the device in the vicinity of combustible material. Do not place any combustible materials (e.g. cardboard, paper, wood or plastic) in or on the device.
- Do not cover the device during operation.
- In the event of a fire: Do not extinguish with water! Smother the flames with a fireproof blanket or a suitable fire extinguisher.
NOTE – Risk of Damage to Material and Property
- The device should only be used if it has been correctly assembled! Before each use, check whether the lid from the water reservoir is placed on correctly, the lever of the discharge tap is in the correct position and the water reservoir is filled correctly!
- Lay the mains cable in such a way that it does not become squashed or bent and does not come into contact with hot surfaces (also applies to the hot surfaces of the device!).
-
The mains cable must not hang down from the surface on which the device is placed in order to prevent the device from being pulled down.
-
Switch off the device and pull the mains plug out of the plug socket if an error occurs during operation, when there is a power cut or before a thunderstorm.
- Never pull or carry the device by the mains cable. When you pull it out of the plug socket, always pull on the mains plug and never the mains cable!
- Protect the device from other heat sources, naked flames, sub-zero temperatures, persistent moisture, wet conditions and impacts.
- Use only original spare parts from the manufacturer.
Items Supplied and Device Overview
NOTES
- Never remove the rating plate and any possible warnings!
-
Keep the original packaging during the warranty period of the device so that the device can be properly packaged up if it needs to be returned. The packaging is specially designed for this device and it must be exactly repacked (Picture A). The warranty claim shall lapse if any damage is caused during transport.
-
Unpack the items supplied and check them for completeness and transport damage. If the device, the mains plug or the mains cable does have damage, do not use the device(!), but contact our customer service department.
-
Remove all packaging materials and any possible protective films used for protection during transportation.
Key
(See fold-out page for illustrations)
1 Teapot with lid
2 Steam outlet
3 Water reservoir lid
4 Water reservoir handles
5 Water reservoir
6 Thermostat regulator
7 Base with integrated mains cable
8 Feet
9 On / Off switch with operating lamp (at the foot of the base)
10 Control lamp
11 Discharge tap
12 Discharge tap lever
13 Lid handles
Not shown:
- Operating instructions
- Tea strainer (in teapot)
• Limescale fi lter (in the water reservoir)
• Heating element (attached at the foot of the water reservoir)
Before Initial Use
NOTES
- Always set up the device with a clear space at the sides (at least 20 cm) and clear space above it (at least 30 cm) on a flat, solid and heat-resistant surface that is resistant to splashing.
- Do not place the device below kitchen wall units or similar cupboards. The rising steam could cause damage to them!
- The surfaces of furniture may possibly contain elements which can attack and soften the adjustable feet of the device. If necessary, place a suitable pad below the adjustable feet.
-
There may still be some production residues on the device. To avoid harmful effects to your health, clean the device thoroughly before you first use it (see the "Cleaning and Care" chapter).
-
Clean the device and all accessories thoroughly (see the "Cleaning and Care" chapter).
- Screw the lever (12) onto the discharge tap (11):
- place the lever on the discharge tap (Picture B1),
-press down lightly and
- tighten the screw cap clockwise (Picture B2). Do not over-tighten the screw cap!
Two to three turns is enough to attach the lever.
- Fully unwind the mains cable.
- Place the device in a suitable location, following the safety instructions and the notes provided at the beginning of this chapter.
- Ensure that the On / Off switch (9) on the bottom side of the base (7) is in Position 0 (off). The operating lamp must not be lit.
- Insert the mains plug into a properly installed plug socket that is easily accessible.
- Before you first enjoy tea or hot instant beverages, we recommend that you carry out a trial run to remove any possible production residues. To do this, follow the instructions in the “Operation” and “Preparation” chapters.

When the device is first used, production-related additives (e.g. grease) may cause a small amount of smoke and / or an odour to be produced. This is normal and not a device defect.
- Perform this process twice. Do not drink this water!
- Clean the device and accessories (see the "Cleaning and Care" chapter).
Operation
NOTES
- Do not attempt to carry the device by the lid handles. Only use the handles on the water reservoir.
- Do not place the device in the sink or similar in order to fill the water reservoir.
Thermostat regulator
The thermostat control (6) is used to switch the device on and off and set the temperature of the water (Picture C).
Switch on (a) Turn the thermostat control clockwise until it resists.
Switch off (b) Turn the thermostat control counter clockwise until it resists.
The control lamp (10) lights up blue as soon as the heating element of the device starts heating the water. The control lamp lights blinks when the water is being kept warm and when boiling at intervals.
Filling the Water Reservoir

Only ever fill the water reservoir (5) with fresh, clear tap water. Do not pour in any other liquids.
- Hold the lid (3) by the lid handle (13) and pull it upwards.
- Pour the desired quantity of water (about 5 litres) using a carafe or similar into the water reservoir. Note the MAX level mark (Picture D).
- Put the lid back on and carefully secure it. You must hear and feel it close.
Operating the Discharge Tap
- Press down the lever (12) and keep it pressed down. The discharge tap (11) opens and water flows out from the water reservoir (5) (Picture E).
- Let go of the lever when the quantity of water you want has been removed. The discharge tap closes again.
Preparation
NOTE
- Do not operate the device without water. If this does happen, the heating element of the device switches off automatically (dry-running protection). In this case, allow the device to cool down for around 5 – 10 minutes before water is poured in and the device is used again.

If water needs to be added, switch off the device, pull the mains plug out of the plug socket and allow the device to cool down for a few minutes. When opening the lid (3), use potholders or similar gloves and be careful.
Boiling Water
- Pour water into the water reservoir (5) (see the “Operation” chapter | “Filling the Water Reservoir”).
- Insert the mains plug into a properly installed plug socket that is easily accessible.
- Set the On / Off switch (9) on the bottom of the base (7) to Position I (on) in order to turn the device on. The operating lamp in the On / Off switch lights up.
- Turn the thermostat control (6) clockwise to start heating. The control lamp (10) lights up blue. Turn the thermostat control until it resists in order to boil water. The water carries on boiling until it has completely evaporated.
Heating Water
If water is just to be heated, boil the water once (see the “Boiling Water” section). As soon as it boils, turn the thermostat control (6) counter clockwise until it resists. The control lamp (10) extinguishes and the device switches off. The water gradually cools if it is not removed and reused.
Interval Boiling
For an energy-saving way to boil water, it is advisable to choose the interval boiling setting. Here the thermostat regulates the supply of power as required. The device switches off the heating element once the water has boiled and switches it back on again as soon as the temperature of the water drops.
For this purpose, boil the water once (see the “Boiling Water” section). As soon as it boils, turn the control dial (6) down so that the control lamp (10) goes out.
As soon as the thermostat switches the heating back on, the control lamp lights up blue again.

Switch the device off after every use by turning the thermostat control clockwise until it resists.
Set the On / Off switch (9) on the bottom of the base (7) to Position 0 (off) in order to turn the device completely off. The operating lamp in the On / Off switch lights goes out.
Pull the mains plug out of the plug socket and allow the device to cool down before it is cleaned and / or stored away (see the “Cleaning and Care” chapter).
Tips For Making Tea
Not all tea is the same. In very literal terms, tea is just an aqueous infusion of the tea plant Camellia sinensis. This may be black or green tea. A distinction should be made from tea-like products, the so-called herbal and fruit teas.
This also means that not all tea-making can be the same. Depending on the variety, teas are infused with water at a different temperature in order to bring out the valuable ingredients and the flavour of the particular variety on the one hand and also preserve them on the other hand. For this reason, the different varieties also have infusion times of different lengths.
Below we have summarised a few of the most important basics for making tea. But you should also always note the preparation details provided on the packaging.
Black Tea
Proceed as follows to make black tea:
- Pour water into the water reservoir (5) (see the “Operation” chapter | “Filling the Water Reservoir”).
- Fill the tea strainer with tea leaves (approx. one teaspoon per cup) or tea bags (approx. 1 tea bag for 1 – 2 cups).

The more tea leaves or tea bags and the less water are poured into the teapot, the stronger the tea concentrate will be. Tip: It is better to add slightly more tea so that you really do get a concentrate (connoisseurs enjoy an infusion with approx. 3 g for 200 ml of water).
-
Set the tea strainer in the teapot (1) (Picture F1) and place the lid on the teapot (Picture F2).
-
Place the teapot on the lid (3) of the water reservoir. This will preheat the teapot while the water is boiling.
-
Set the On / Off switch (9) on the bottom of the base (7) to Position I (on) in order to turn the device on. The operating lamp in the On / Off switch lights up.
-
Turn the thermostat control (6) clockwise until it resists to start the heating process and to boil the water. The control lamp (10) lights up blue.
-
As soon as the water boils, turn the thermostat control down so that the control lamp goes out (see the “Preparation” chapter | “Interval Boiling”).
-
Take the teapot off the water reservoir. For precaution, use potholders or oven mitts because the teapot can be very hot.
- Remove the lid from the teapot and pour boiling water from the water reservoir over the tea (see the “Operation” chapter | “Operating the Discharge Tap”).
- Place the teapot back on the lid of the water reservoir. The steam rising up in the water reservoir keeps the tea concentrate in the teapot at the temperature that it requires for "infusion".
- After the required infusion time, cautiously remove the tea strainer from the teapot. Remove the teapot from the water reservoir if necessary.
- Pour the concentrate that has been created in the teapot into a tea cup or a tea glass and top it up with hot water from the water reservoir. This enables you to vary the strength and the flavour of the tea as you wish.

Cups can also be ideally preheated by filling with warm water.
The teapot can also remain on the water reservoir after the infusion time while the device is in operation. This keeps the tea concentrate hot.
Green Tea
Green tea can also be made using the samovar. However, it should not be brewed using boiling water. Depending on the variety, the ideal temperature is 50 – 70 °C. The higher quality the tea, the lower the optimum water temperature. The infusion time also differs depending on the quality of the tea. Most varieties need to infuse for roughly 1 – 3 minutes. High-quality green tea only needs to infuse for around 1 – 1½ minutes.

In the case of tea bags, it is essential to note the manufacturer's preparation instructions.
Proceed as follows to make green tea:
- Pour water into the water reservoir (5) (see the “Operation” chapter | “Filling the Water Reservoir”).
- Fill the tea strainer with tea leaves or tea bags.

Green tea generally has a lower concentration than black tea. Roughly 1 g is added to 100 ml of water or 1 heaped teaspoon is added to 200 ml of water.
- Set the tea strainer in the teapot (1) (Picture F1) and place the lid on the teapot (Picture F2).
- Place the teapot on the lid (3) of the water reservoir. This will preheat the teapot while the water is boiling.
-
Set the On / Off switch (9) on the bottom of the base (7) to Position I (on) in order to turn the device on. The operating lamp in the On / Off switch lights up.
-
Turn the thermostat control (6) clockwise until it resists to start the heating process and to boil the water. The control lamp (10) lights up blue.
- As soon as the water boils, turn the thermostat control down so that the control lamp goes out (see the “Preparation” chapter | “Interval Boiling”).
- Allow the water to cool down for approx. 5 - 6 minutes.
- Take the teapot off the water reservoir.
- Remove the lid from the teapot and pour boiling water from the water reservoir over the tea (see the “Operation” chapter | “Operating the Discharge Tap”).
- Place the teapot back on the lid of the water reservoir. The steam rising up in the water reservoir keeps the tea concentrate in the teapot at the temperature that it requires for "infusion".
- After the required infusion time, remove the tea strainer from the teapot.
- Pour the concentrate that has been created in the teapot into a tea cup or a tea glass and top it up with hot water from the water reservoir. This enables you to vary the strength and the flavour of the tea as you wish.
Herbal Tea
Herbal tea and other types of tea such as fruit, rooibos and spiced teas are made in the same way as black tea (see the “Tips For Making Tea” chapter | “Black Tea”). Depending on the variety, the different mixtures require an infusion time of approx. 5 – 10 minutes.

In rare cases, herbal tea mixtures may contain germs (such as salmonella) which are killed off by being heated. Herbal tea must therefore always be infused using boiling water. This is the only way to obtain a safe product to consume!
Herbal tea mixtures also contain spores which are not killed off by boiling water. They can germinate in warm water. For this reason, infused herbal tea must not be left standing for several hours.
Hot Instant Beverages
To make hot instant beverages such as instant coffee, pour the amount you want into a cup and brew it using hot water from the samovar (see the “Operation” chapter | “Operating the Discharge Tap”).
Cleaning and Care
NOTES
- Before commencing the cleaning, note the safety instructions in the "Safety Instructions" chapter!
• Regularly descale the device. -
Do not use any toxic, corrosive or abrasive cleaning agents or scouring sponges to clean the device. These can damage the surface.
-
Fully empty the device.
- Wipe down the housing with a damp cloth. If necessary, use a little mild detergent to remove more intense soiling.
- Rinse out the water reservoir (5) well with clear water.
- Remove the small limescale filter in side the water reservoir and clean it with warm water and mild detergent.
- Empty the tea filter and clean with warm water and mild detergent.
- Clean the teapot (1) and the lid (3) of the water reservoir with warm water and mild detergent, or in the dishwasher.
- Dry all parts properly before the device is reassembled and / or stored away.
- Check the mains cable regularly for any damage.
When you do this, do not immerse the base (7) of the device in water!
Descaling
Limescale deposits have an adverse effect not only on the quality of the tea and the water, but they also cause power losses and shorten the lifespan of the device. The thicker a limescale layer is, the more difficult it is to remove.
We therefore recommend regularly removing limescale deposits with a descaling agent in accordance with the water quality in your area and how often the device is used (approx. every 2 – 6 weeks).
The first indications that descaling is required are a large amount of steam being produced and slower boiling of the water. Limescale deposits on the bottom of the reservoir in samovars can cause the device to switch off prematurely.
For descaling we recommend the BEEM premium descaler concentrate. The efficient, food-safe and environmentally friendly BEEM premium descaler concentrate is available from selected specialist stockists, via our website www.beem.de or from our customer service department on request.
Descaling with the BEEM Premium Descaler Concentrate
- Fill the water reservoir (5) up to the MAX marking with a concentrate/water solution of no more than 1:20 (one part concentrate to 20 parts water).
- Set the On / Off switch (9) on the bottom of the base (7) to Position I (on) in order to turn the device on. The operating lamp in the On / Off switch lights up.
- Turn the thermostat control (6) clockwise until it resists to start the heating process and to bring the solution to a boil. The control lamp (10) lights up blue. The solution starts boiling.
- As soon as the solution comes to a boil, turn the thermostat control counter clockwise so that the control lamp goes out (see the "Preparation" chapter | "Interval Boiling"). Let the solution take effect for a little while.
- Allow the solution to run through the discharge tap (11) so that it is also freed of any limescale residues (see the “Operation” chapter | “Operating the Discharge Tap”).
- To rinse the device, allow two tankfuls (about 5 litres) of clear water to run through it. The device is now descaled and ready to be used again.
Storage
Disconnect the device from the mains power when it is not going to be used for a prolonged period. Clean the device again (see the “Cleaning and Care” chapter) to avoid possible mould formation. Mould can cause spots and damage on the device that can no longer be removed / repaired. Allow the device and all accessories to dry completely.
Store the device and all accessories in a dry, clean, frost-free place that is protected from direct sunlight and cannot be accessed by children or animals.
Troubleshooting
If the device does not work properly, check whether you are able to rectify the problem yourself. If the problem cannot be solved with the steps that are listed, contact the customer service department.

Do not attempt to repair a defective electrical device yourself!
| Problem Possible | cause Fix | |
| The device cannot be switched on. | The mains plug is not inserted correctly in the plug socket. | Insert the mains plug. |
| The plug socket is defective. | Try another plug socket. | |
| No mains voltage is present. | Check the fuse of the mains connection. | |
| The On / Off switch (9) has not been activated. | Put the On / Off switch to position I. | |
| The heating process does not start. / The control lamp (10) does not light up blue. | The thermostat control (6) has not been activated. | Turn the control dial to the highest temperature. |
| The fuse in the fuse box is triggered. | Too many devices connected to the same circuit. | Reduce the number of devices in the circuit. |
| No error can be identified. | Contact our customer service department. | |
| Water runs out of the device. | There is too much water in the water reservoir (5). | Do not overfi ll the water reservoir! |
| The discharge tap (11) is still open. | Close the discharge tap and ensure that the lever (12) cannot be blocked. | |
| No water or only a very small amount of water runs out of the discharge tap. | The discharge tap is blocked. | Clean the discharge tap (see the “Cleaning and Care” chapter | “Descaling”). |
| The device is furred up. | Descale the device (see the “Cleaning and Care” chapter | “Descaling”). | |
| The control lamp (10) lights up red. | There is no water in the water tank. | Refi ll with water (see the “Operation” chapter | “Filling the Water Reservoir”). |
| No error can be identified. | Contact our customer service department. | |
| A large amount of steam is produced in the brewing process. | The device is furred up. | Descale the device (see the “Cleaning and Care” chapter | “Descaling”). |
| During use, an unpleasant smell is detected. | Is the device being used for the first time? | A smell often develops when new devices are first used. The smell should disappear once the device has been used several times. |
| Has the device just been descaled? | Rinse out the device with clear water. |
Warranty and Limitations of Liability
The warranty excludes any defects caused by improper use, calcification, damage or repair attempts. This also applies to normal wear and tear.
We do not accept any liability for damage or consequential damage resulting from:
- Failure to follow the operating instructions
• Non-designated use - Improper or unsuitable handling
• Repairs which are not carried out properly - Unauthorised modifications
- Use of outside parts or spare parts
- Use of unsuitable additional parts or accessories
Technical Data
Article number: 06134
Model number: SA4.5.1
Voltage supply: 230 V \~ 50 / 60 Hz
Power: 1800 W
Protection class: I
Capacity: max. 5.3 litres
Disposal
Dispose of the packaging material in an environmentally friendly manner and take it to a recycling centre.
Dispose of the device in an environmentally friendly manner at a recycling centre for used electrical and electronic devices. It should not be disposed of in the normal household waste. More information is available from your local authorities.
All rights reserved.