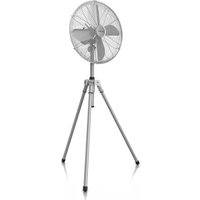
304961 - Fan Brandson - Free user manual and instructions
Find the device manual for free 304961 Brandson in PDF.


| Product Type | Pedestal Fan |
| Brand | Brandson |
| Model | 304961 |
| Dimensions (width x depth x height) | 85 x 73 x 122-136 cm (adjustable height) |
| Blade Diameter | Approx. 45 cm |
| Weight | Not specified |
| Power Supply | 220-240 V AC, 50-60 Hz |
| Power Consumption | 60 W |
| Noise Level | Less than 70 dB(A) |
| Number of Speeds | 3 (low, medium, high) |
| Oscillation | Yes, approx. 80°, can be turned on/off |
| Tilt | Yes, approx. 20° |
| Adjustable Height | Yes, via adjustment nut |
| Protective Grille | Double grille (front and back) removable |
| Cleaning | Damp cloth, do not immerse |
| Safety | Do not use near water, keep out of reach of children, unplug before cleaning |
| Spare Parts and Repairability | Repair by manufacturer or qualified professional; no spare parts provided |
| Warranty | Not specified in the manual |
| Package Contents | Fan, instruction manual |
| Intended Use | Domestic use, indoor only |
| Standards | EU 2014/35, 2014/30, 2011/65, WEEE 2012/19 |
Frequently Asked Questions - 304961 Brandson
User questions about 304961 Brandson
0 question about this device. Answer the ones you know or ask your own.
Ask a new question about this device
Download the instructions for your Fan in PDF format for free! Find your manual 304961 - Brandson and take your electronic device back in hand. On this page are published all the documents necessary for the use of your device. 304961 by Brandson.
USER MANUAL 304961 Brandson
Important safety guidelines for this device
- Use the device for the private and intended purpose only. This product is not intended for commercial use. Do not use the device outdoors and keep it away from heat and direct sunlight.
- Please do not keep the device in the immediate vicinity of water sources such as bathtub, shower, washbasin or swimming pool.
- Do not use this device with wet hands.
- If the device becomes moist or wet, pull out the power plug immediately. Ensure your own safety and do not touch any conductive material on the device.
- Protect the device against humidi-
ty, sharp edges, or coarse sources of dust. It should never be immersed in water.
- Do not place the fan next to heat sources (e.g., ovens or heaters).
- Keep it on an suitable surface so that it does not tip over.
- Unplug the power plug when the device is not in use, during transport or during cleaning.
- Never keep the fan machine unattended; keep it out of reach of animals and children wherever you use or store it.
- Operate the device only with the voltage specified on the type plate of the device.
- This product can be operated by children from 8 years of age and above, as well as by people with reduced
physical, sensory or mental capacities or who lack knowledge or experience, if they have been supervised or instructed regarding safe use of the device, and understand the resultant dangers.
- Children should not play with the device. Cleaning and user maintenance should not be carried out by children without supervision.
- Keep the device and its connection cable out of reach of children under 8 years.
- For the safety of your children, keep the packaging parts away from their reach (plastic bag, foils, carton or polystyrene).
- Do not allow small children to play with the foil or plastic bags.
Danger of suffocation!
- While operating the device, ensure that the protective cage is closed.
- The fan, rotational switch and switches should not be blocked!
- It is not allowed to remove the cage for cleaning purposes once the fan is mounted.
- Never insert your body parts (e.g., fingers) or objects through the protective cage.
- Ensure that your hair is not within the range of the protective cage. It may get caught in the air current.
-
If the power cable of this device is damaged, it should be replaced by the manufacturer, its after-sales service or by an equally qualified person, so as to prevent any risk.
-
Allow the device to cool down before cleaning it, or pull out the power plug from the socket.
- Wipe the device housing with a damp cloth and then dry it using a clean dry cloth. Never immerse the housing in water to clean it.
- Once the fan has been assembled, the protective cage should not be removed.
Thank you for choosing a Brandon product. Please read the following user manual carefully so that you can enjoy the purchased product for a long time. Before using the product, first check that the delivered item is complete, accurate and undamaged.
1. Scope of delivery
- Fan
- User manual
2. Technical data
| Input voltage 220 - 240V | AC |
| Power consumption 60 W | |
| Noise emission Workplace | related emission value less than 70 dB(A) |
| Diameter approx. 45 cm | |
| Oscillation/tilt • oscillation | of approx. 80° can be enabled/disabled• can be tilted by about 20° |
| Dimensions Width about | 85 cm, depth about 73 cm,Height about 122-136 cm (adjustable) |
3. Functions
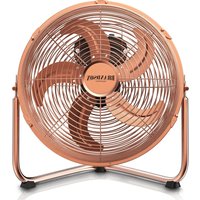
The Brandon pedestal fan (tripod stand) has a powerful motor and 45 cm rotor blades which ensure optimum ventilation on hot days. Thanks to the three speed levels, adjustable angle of inclination and switchable oscillation, you can adapt the fan to your individual requirements.
4. Product details
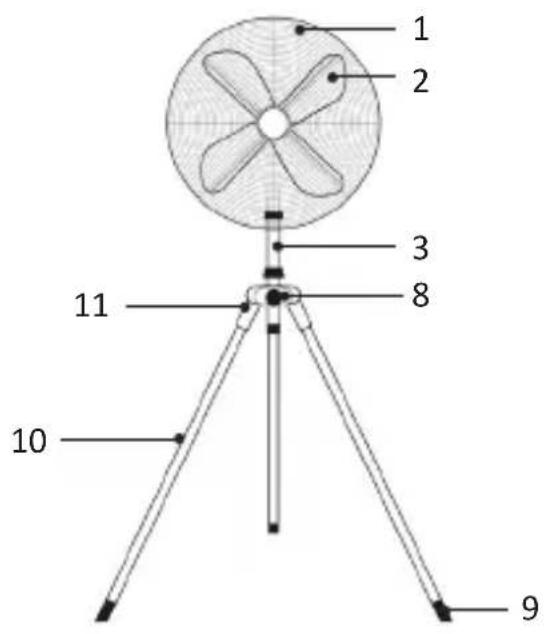
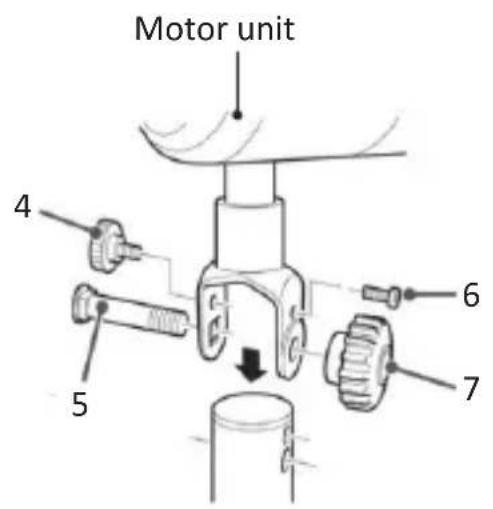
| 1 Enclosure | |
| 2 Rotor blades | |
| 3 Centre bar | |
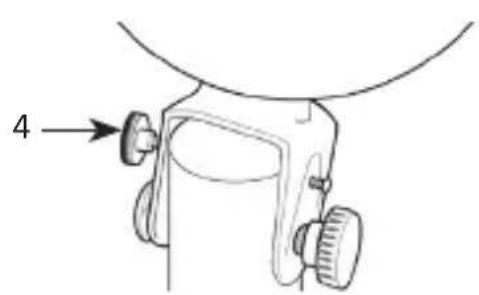
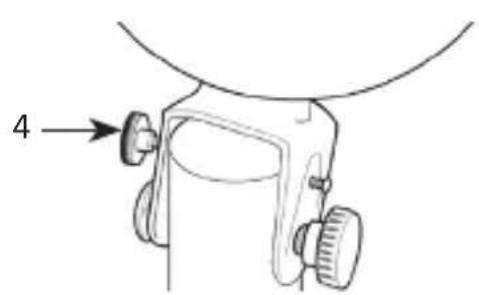
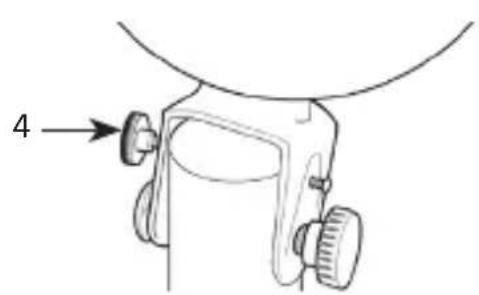
| 4 Small knurled screw | |
| 5 Carriage bolt | |
| 6 Limiting screw | |
| 7 Lock nut for carriage bolt | |
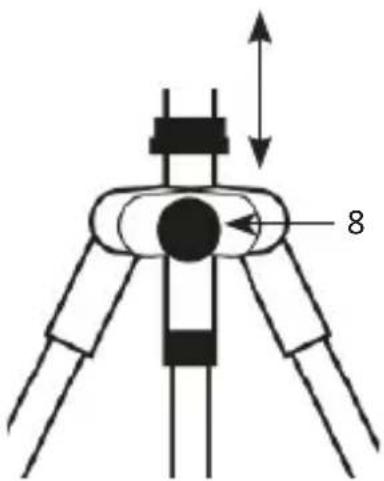
| 8 Height adjustment nut | |
| 9 Pedestal | |
| 10 Metal base | |
| 11 Coupling piece |
5. Assembly
Take the fan out of the package and check that the device and the installation material are complete (see table). Please contact the vendor if any part is missing or damaged.
Connect the metal base (10) with the coupling piece (11). Then screw it securely using the mounting screws.
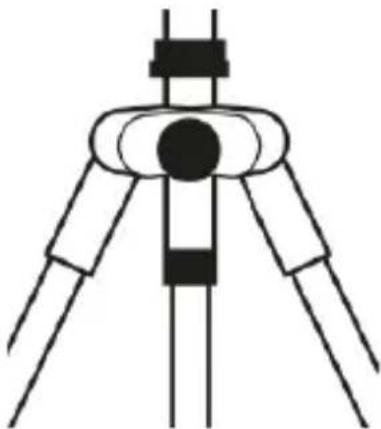
Remove the nuts and screws from the top side of the centre bar (3) and mount the motor unit on the centre bar.
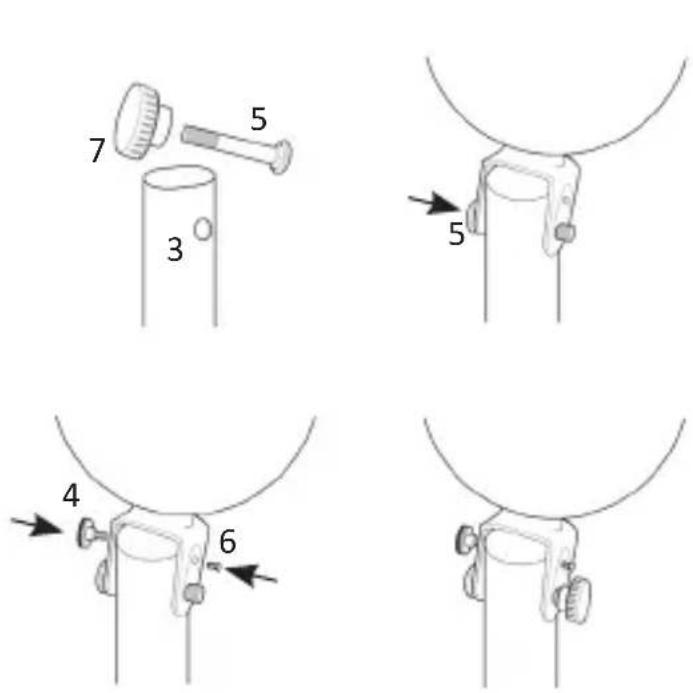
Remove the screws from the top side of the centre bar and the screws from the motor unit.
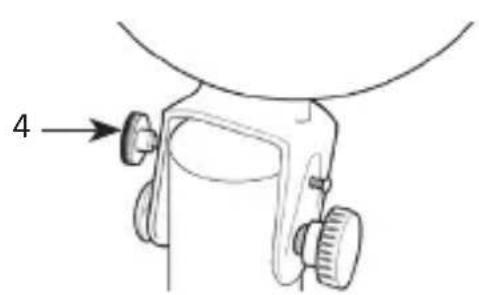
Place the motor unit on the centre bar (3) and secure it using the carriage bolt (5). The next step is to mount the small knurled screw (4) and the limiting screw (6) as shown in the figure.
Then secure the motor unit with the lock nut (3) and the carriage bolt (10).
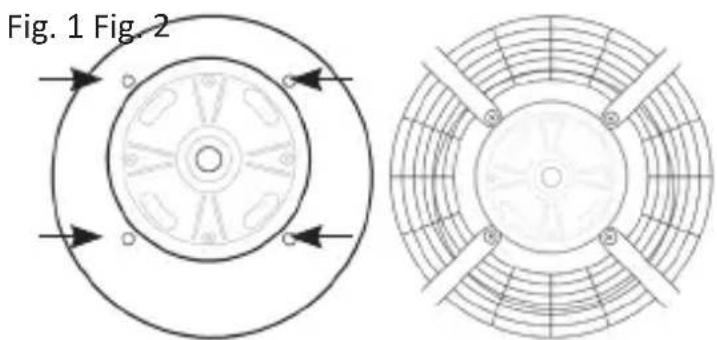
Remove the mounting screws for the enclosure from the motor unit (Fig.1). Then mount the enclosure onto the motor unit. (Figure 2) Make sure that the 4 holes on the motor match the 4 holes on the back of the fan enclosure. Insert the screws and tighten them.
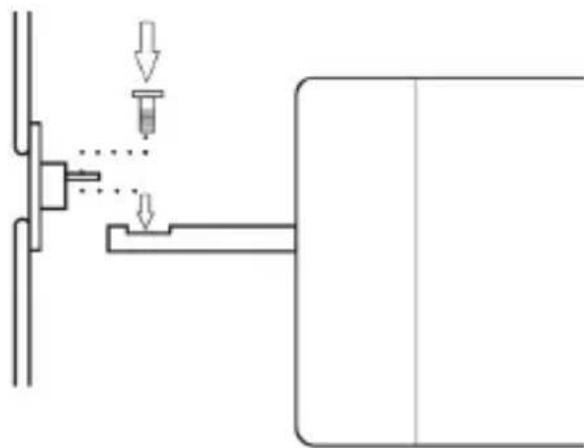
Place the rotor blades on the motor unit and tighten the screw carefully. Make sure that the rotor is properly positioned and screwed. The following figure shows the correct assembly of the rotor.
Subsequently, mount the front fan enclosure on the rear enclosure and fasten it using the metal brackets. Finally, tighten the small screw at the bottom of the enclosure.
6. Usage
Keep the fan in an appropriate location and connect the device to a properly installed 220-240V AC socket. Use the rotary switch on the back to switch on the device and to control the speed: 0 = off, 1 = slow, 2 = medium and 3 = fast. To switch on the oscillation, depress the pin at the top of the motor unit. If you do not want the fan to oscillate, pull the pin out slightly.
Tilt angle
The tilt angle can be adjusted by loosening the knurled nut (7) and moving the small knurled screw (4) by pulling or pushing the enclosure slightly forward or backward. The limiting screw (2) ensures that the tilt angle is not too great and the motor unit can tilt with the enclosure.
Important note: If the device is to be tilted independently, the screws (4) and (7) must be tightened securely till the desired support is ensured!
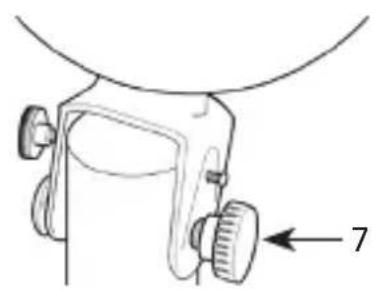
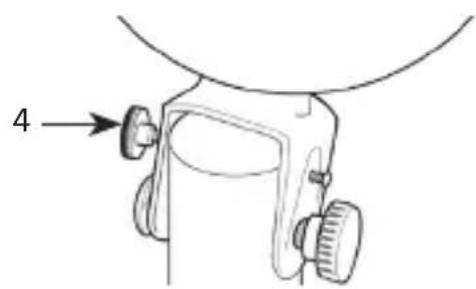
The height of the fan can be adjusted using the height adjustment attachment (8).
7. Cleaning
Pull out the power plug from the socket before starting the cleaning process! Use a slightly moist cloth for cleaning (wetted with water). For cleaning, never immer-se the device into water! This could lead to electric shock or fire!
8. Safety instructions and disclaimer
Please do not try to open the device to carry out repairs or modifications by yourself. Avoid contact with the mains supply. The device does not carry current only when disconnected. Please do not short-circuit the product. Do not forget to disconnect the power cord when the device is not being used or during thunderstorms.
The device is not approved for outdoor use. Therefore, please use it only in dry surroundings. Protect it from high humidity, water and snow. Do not expose the device to high temperatures. Do not expose the device to sudden changes in temperature or strong vibrations, as this could damage the electronic components. Check the device for any damage before using it.
The device should not be used if it has been subject to impact or has been damaged in any other way. Please follow the local regulations and restrictions. Do not use the device for purposes other than those described in this manual. This product is not a toy. Keep it out of the reach of children or mentally disabled persons. Any repair or modifications to the device, which is not carried out by the original supplier will void any warranty and guarantee claims. The device should only be used by those who have read and understood this user manual. The specifications of the device may be changed without prior intimation.
9. Disposal instructions
In line with the European WEEE directive, electrical and electronic devices should not be disposed of along with domestic waste. Their components have to be separately sent for recycling or disposal, because improper disposal of toxic and dangerous components may permanently damage the environment. According to the Electronic Equipment Act (ElektroG), you are obliged (as a consumer) to return (free of charge) all electrical and electronic devices to the manufacturer, the point of sale or public collection points at the end of their service life. The relevant local laws regulate the details in this regard. The symbol displayed on the product, in the user manual or/and on the packaging refers to these regulations. With this manner of sorting, recycling and disposal of used devices, you make an important contribution towards protecting our environment.

WEEE Guideline: 2012/19/EU
WEEE Register no.: DE 67896761
The company WD Plus GmbH hereby certifies that the device 303830/304961 complies with the fundamental requirements and all other relevant stipulations of the guideline 2014/35/EC, 2014/30/EC and 2011/65/EC. A complete conformity statement can be obtained from: WD Plus GmbH, Wohlenbergstraße 16, 30179 Hanover



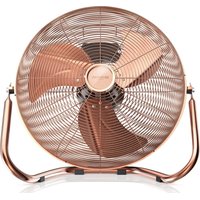
Brand : Brandson
Model : 304961
Category : Fan