Form - Electronic muscle stimulator TensCare - Free user manual and instructions
Find the device manual for free Form TensCare in PDF.


User questions about Form TensCare
0 question about this device. Answer the ones you know or ask your own.
Ask a new question about this device
Download the instructions for your Electronic muscle stimulator in PDF format for free! Find your manual Form - TensCare and take your electronic device back in hand. On this page are published all the documents necessary for the use of your device. Form by TensCare.
USER MANUAL Form TensCare
Smart Muscle Recovery
Utilising EMS Technology
Instructions For Use

Quickstart Guide
natural_image
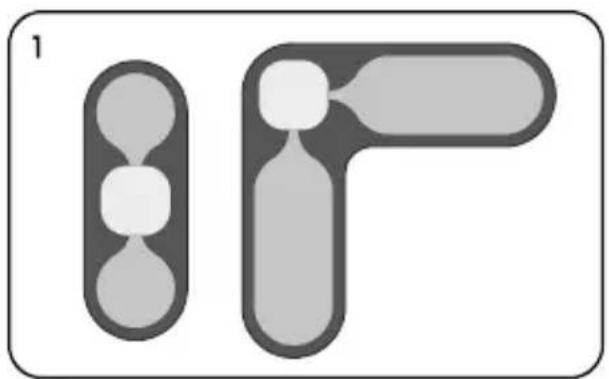
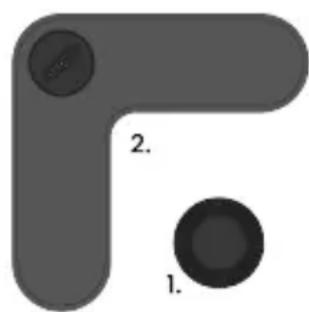
Diagram of two abstract shapes resembling molecular or cellular structures, with no visible text or symbols.Select electrode for the targeted muscle Seleccione el electrodo para el músculo objetivo Sélectionner l'électrode correspondant au muscle ciblé Elektrode für den Zielmuskel auswählen Selezionare l'elettrodo per il muscolo mirato
text_image
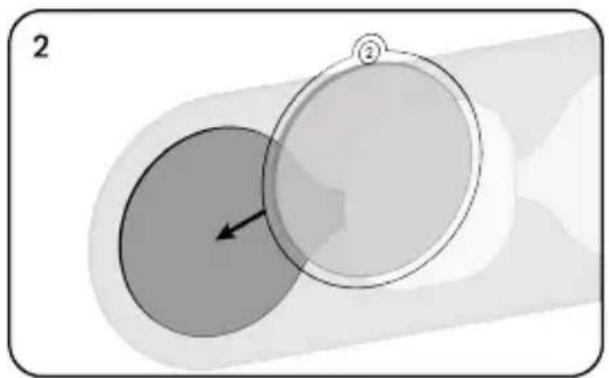
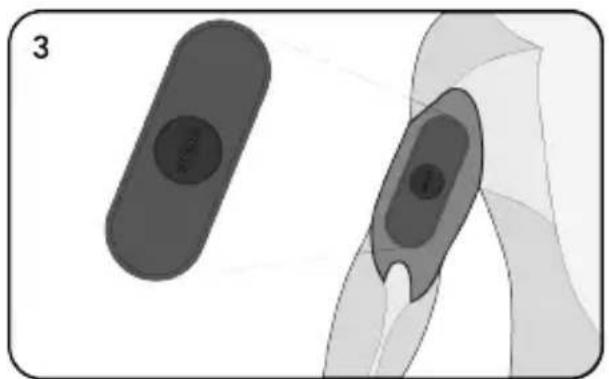
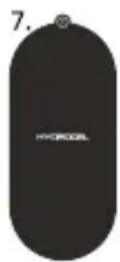
2Apply hydrogels to the rear of the electrode Aplicar los hidrogeles en la parte posterior del electrodo Appliquer les hydrogels à l'arrière de l'électrode Aufbringen von Hydrogelen auf der Rückseite der Elektrode Applicare idrogel sul retro dell'elettrodo
natural_image
Two abstract diagrams showing a dark oval object with a central dot and a lighter gray oval object with a labeled point, both without any text or symbols.Apply electrode to the body Aplique el electrodo en el cuerpo Appliquer l'électrode sur le corps Elektrode am Körper anlegen Applicare l'elettrodo sul corpo
natural_image
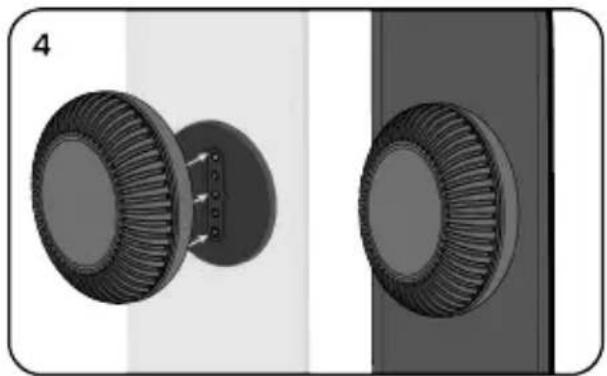
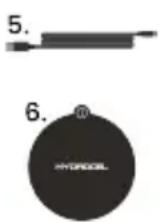
Technical illustration of two mechanical components with ribbed surfaces, shown from front and side views (no text or symbols)Connect the stimulator Conecte el estimulador Connector le stimulateur Anschließen des Stimulators Collegare lo stimolatore
natural_image
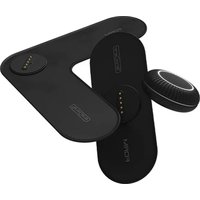
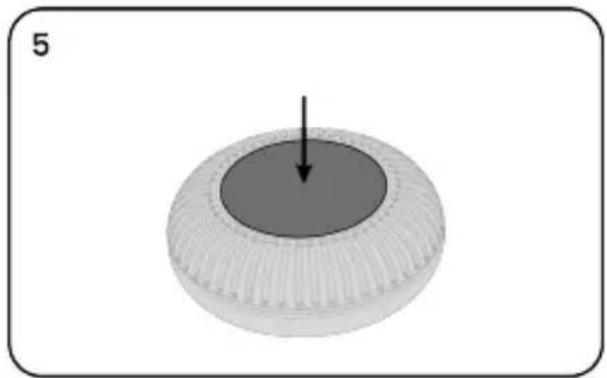
3D rendering of a circular object with a central shaded region and an arrow pointing downward (no text or symbols)Form is an innovative electrical muscle stimulator used to target muscles for local and whole-body muscle recovery. The stimulator delivers small electrical impulses via smart, body-worn electrodes, designed to optimise muscle coverage, motor point activation and elicit small muscle contractions. This type of 'active recovery' helps the muscle recovery process without causing cardiovascular fatigue. Enhance your recovery routine and return to activity faster with Form.
2. Contents
- 1x Form stimulator
- 1x Small smart electrode
- 1x Large smart electrode
- 1x Charging cradle
- 1x USB cable
- 1 x Pack of small hydrogel pads
- 1 x Pack of large hydrogel pads
- 1x Travel case
- 1x User manual
natural_image
Simple 3D diagram of a gray L-shaped object with two circular features labeled 1 and 2 (no text or symbols beyond labels)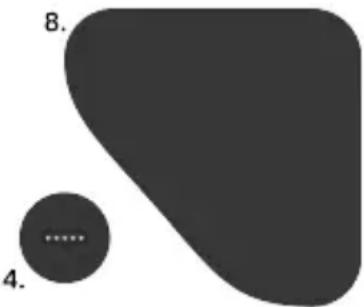
text_image
8. 4.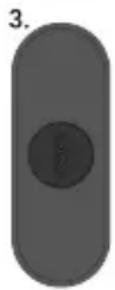
3. Safety Guidelines

Contraindications
- Do not use if you have a heart pacemaker, (or if you have a heart rhythm problem) or with any electronic medical devices. Using this unit with electronic medical devices may cause erroneous operation of the device. Electrical stimulation in the direct vicinity of an implanted device may affect some models.
- Do not use during the first three months of pregnancy. It is not known whether EMS may affect foetal development.
- Do not use on the abdomen in the later stages of pregnancy. Stop using immediately if you experience unexpected contractions.

Warnings
- Do not use when driving, operating machinery, or similar actions needing muscular control. Loose electrode pads or sudden changes in contact may cause brief involuntary muscle movements.
- Do not use or consult with your clinician before use if you have, in the area being treated: active or suspected cancer or undiagnosed pain with a history of cancer. Stimulation directly through a confirmed or suspected malignancy should be avoided as it may stimulate growth and promote spread of cancer cells.
- Do not use simultaneously with high frequency hospital diagnostic/therapeutic equipment. Doing so may result in burns at the site of the electrodes and possible damage to device.
- Do not use in close proximity (e.g., 1 m) to a shortwave or microwave, TV'S and hi-fi speakers, as this may produce instability in the stimulator output may affect the correct operation of this unit. If it appears to behave unusually, move it away from these devices.
- Do not apply near the thorax because the introduction of electrical current may increase the risk of cardiac fibrillation.

- Stimulation should not be applied across or through the head, directly on the eyes, covering the mouth or on the front of the neck (especially the carotid sinus).
- Stop using the device and consult a health care professional if you experience any adverse reactions from the device.

Cautions
- Caution should be used if you have a bleeding disorder as stimulation may increase blood flow to the stimulated region.
- Caution should be used if you have suspected or diagnosed epilepsy as electrical stimulation may affect seizure threshold.
- Caution should be used following recent surgical procedures. Stimulation may disrupt the healing process.
-
Do not permit use by children unable to understand the instructions or persons with cognitive disabilities, i.e., Alzheimer's disease or dementia.
-
Caution should be observed when using Form at high strength settings. Prolonged use at high settings may cause muscle injury or tissue inflammation. Form can deliver outputs in excess of 10 mA (RMS) or 10 V averaged over any period of 1 sec. This is indicated by the yellow LED light on bottom of the stimulator.
- Maintenance and all repairs should only be carried out by an authorized agency. The manufacturer will not be held responsible for the results of maintenance or repairs by unauthorized persons.
- Do not immerse your device in water or place it close to excessive heat or humidity as this may cause it to cease to operate correctly.
- Temperature & Relative Humidity of storage: -25^ to +70^ , up to 93% R.H. Temperature & Relative Humidity of transportation: -25^ to +70^ , up to 93% R.H.
- There are no serviceable user parts. Do not attempt to open or modify the unit. This may affect the safe operation of the unit and will invalidate the warranty.
Note: There are no known side effects and long-term use is not considered harmful. However, the device works your muscles and unaccustomed amounts of exercise may produce muscle ache. If this happens, simply reduce the strength of the machine or allow your muscles time to rest until the aching disappears.
4. Using Form
Stimulator
text_image
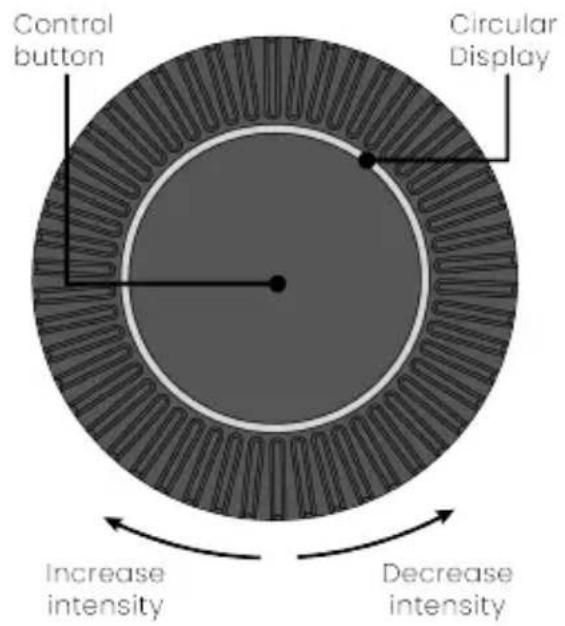
Control button Circular Display Increase intensity Decrease intensityCircular Display
radar
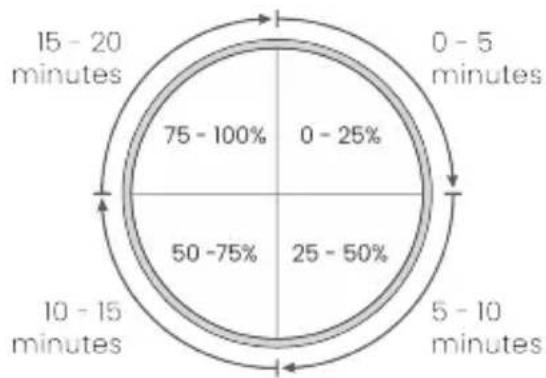
| Time Period | Percentage (%) | | :--- | :--- | | 0 - 5 minutes | 75 - 100 | | 5 - 10 minutes | 50 - 75 | | 10 - 15 minutes | 25 - 50 | | 15 - 20 minutes | 0 - 25 |Controls and Interface
Power
To turn the stimulator on, press and hold the control button for 1 second.
To turn the stimulator off, press and hold the control button for 3 seconds.
Increase / Decrease
The stimulation intensity can be increased or decreased by rotating the stimulator dial. Rotate clockwise to increase the intensity and anti-clockwise to decrease the intensity. The selected intensity is displayed on the circular display.
Treatment Time
Once the chosen intensity has been selected, the remaining treatment time will
be indicated on the display after 5 seconds. Note each session is 20 minutes long. The stimulator will automatically switch off at the end of the session.
Lock / Unlock
To prevent accidental changes of intensity, the stimulator can be locked. Double press the control button to lock and unlock the stimulator. This will be indicated on the display by two flashes.
Check Battery Level
Triple press the control button to display the battery level. Battery level will be shown for 5 seconds before returning to the session treatment time.
Preparing For a Session
For best results, a Form muscle recovery session should be completed within two hours of finishing physical exercise.
Select the correct smart electrode for the targeted muscle (see electrode placement guide).
Wipe clean and dry the targeted area of the body.
Remove the hydrogels from their foil bag.
text_image
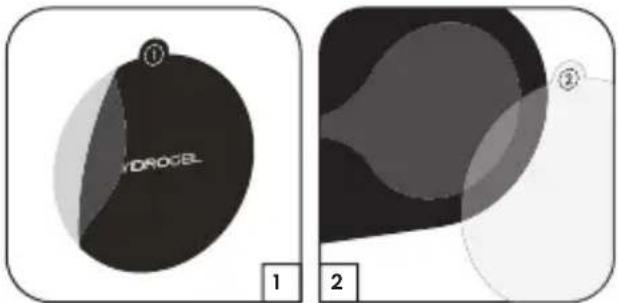
HYDROCEL 1 2- Remove the black liner labelled 1 from one of the hydrogels.
- Apply to the rear of the electrodes.
- Remove the clear liner labelled 2 from the electrodes. Be careful to ensure the hydrogels remain stuck to the electrode.
Note: It is important the liners are removed in this order. Ensure to keep one of the liners to re-apply onto the gel once your session is complete.
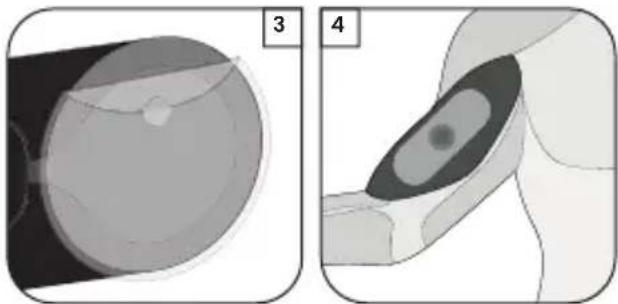
natural_image
Medical illustration showing a cross-sectional view of a human joint with an internal organ, labeled 3 and 4 (no text or symbols present)- Place the electrode on the selected muscle (see electrode placement guide).
Connect the stimulator to the electrode pad via the magnetic fixing point.
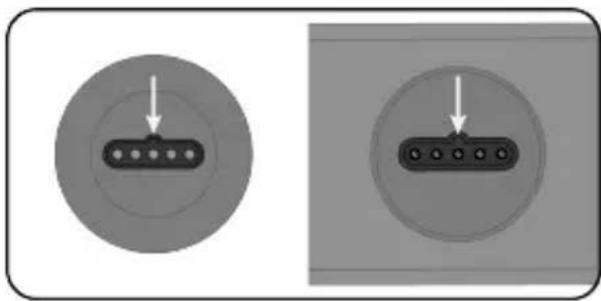
natural_image
Two circular diagrams showing a connector with pins, one with an arrow pointing to it and the other with an arrow pointing to it (no text or symbols present)Note: The stimulator must be connected to the electrode in the correct orientation. If you feel magnetic resistance, rotate the stimulator 180° and try connecting again.
Warning: Ensure the stimulator is switched off before connecting to, or removing from the electrodes.
We recommend competing a Form recovery session in a comfortable resting position, ideally seated or lying down.
Completing A Session
1) Press the control button for one second to switch the stimulator on.
The smart electrode will now automatically configure the programme output settings.
2) Increase the intensity by rotating the stimulator dial in a clockwise direction.
There are 45 levels of intensity. On first use, we recommend increasing the intensity slowly. The aim is to produce small, visible muscle contractions.
Note: The intensity cannot be increased until it is connected to the electrode.
3) Once the intensity has been selected, after 5 seconds the display will indicate the 20 minute remaining session time.
4) It may be necessary to increase the intensity during a session as your body becomes accustomed to the stimulation.
Note: If there is a connection error during the session, the display will flash 5 times, the session will pause, and the intensity will revert to zero. This could be due to either:
• The stimulator has been disconnected from the electrode
• The electrode is not making a good connection with the body
Ensure the stimulator and electrode are connected and applied correctly to the body. Once reconnected the stimulator will remember the remaining treatment time. The intensity will need to be increased.
After A Session
At the end of the 20-minute session, the stimulator will automatically switch off. We recommend one Form recovery session per each muscle group after exercise. Complete a new session on the next targeted muscle.
- Disconnect the stimulator from the electrode.
- Remove the smart electrode and attached hydrogel from the body, ensuring the hydrogel remains applied to the rear of the electrode.
- Apply to the next targeted muscle.
- Once you have completed all required muscle groups, disconnect the stimulator and remove the smart electrode as before.
- Re-apply the clear plastic liner onto the hydrogels and store the electrodes and the stimulator in the travel case. Proper storage between uses will help maximise the life of the gel.
5. Charging Form
When the stimulator battery level reduces below 20%, the display will start to pulse slowly. Once it is less than 10% the display will flash quickly.
Charge the stimulator using the provided charging cradle and micro-USB cable. As with the electrodes, the stimulator will magnetically connect to the cradle. Ensure the stimulator is in the correct orientation to allow the magnets to attract.
The stimulator is fully charged once the display shows a complete full circle.

Note: Battery should take 60 minutes to charge. The battery life will last
approximately 22 hours in normal use at 50% intensity.
Ensure the stimulator is fully charged before first use.
Battery Warnings
Do not expose to temperatures above 60^ C (140F).
Do not put, store or leave near heat sources, in direct sunlight, in a high temperature location, in a pressurized container or in a microwave oven.
Do not immerse in water and do not apply to wet skin.
If battery leakage occurs and comes in contact with the skin or eyes, wash thoroughly with lots of water and immediately seek medical attention.
Disposal: Always dispose of batteries and device responsibly according to local government guidelines. Do not throw batteries onto a fire. Risk of explosion.
6. Hydrogels
The hydrogels are reusable and should provide 10-20 applications per gel. However, this will vary depending on the user's skin condition and how the hydrogels are stored between use. Try to limit the amount of time the gels are exposed to the air.
Replace the hydrogels when they lose their stickiness. Poor connection to the body may cause ineffective treatment, discomfort and skin irritation.
The hydrogels supplied are for single patient use. The adhesive is a peelable hydrogel (water based).
The shelf life of an unopened packet of hydrogels is 3 years. This can be affected by very high temperatures or very low humidity.
Caution: Do not ignore any allergic reaction to the hydrogels: If a skin irritation develops, stop using the device, as this type of hydrogel may not be suitable for you.
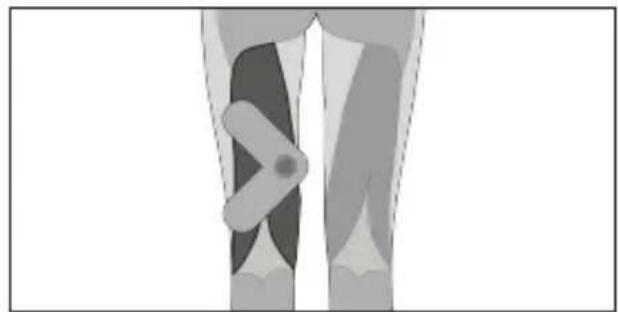
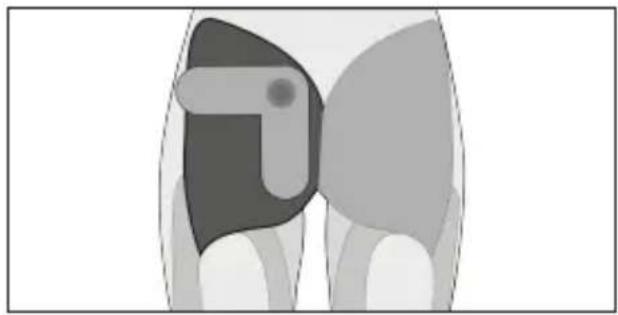
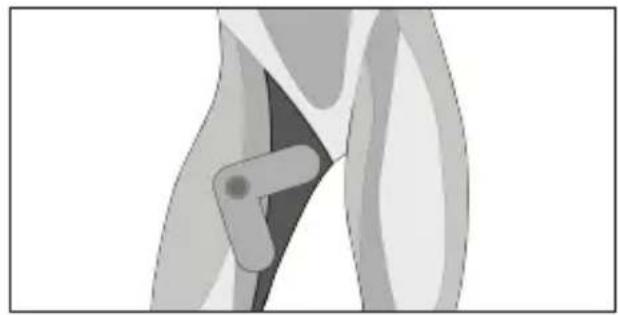
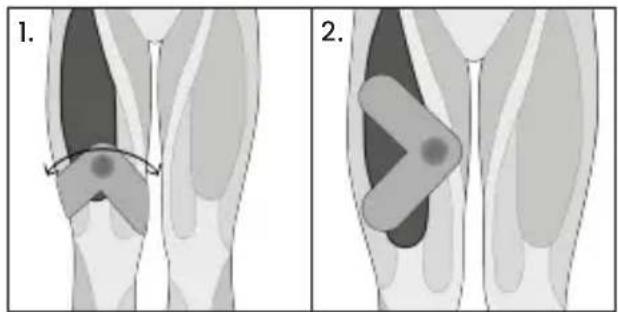
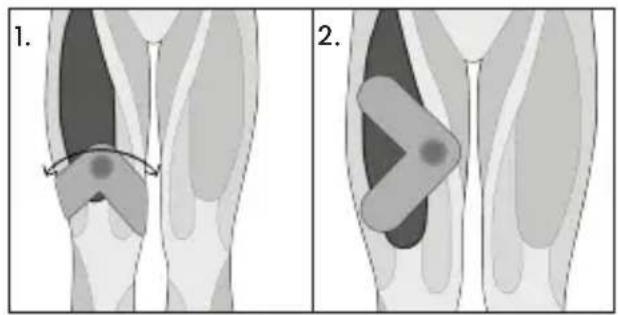
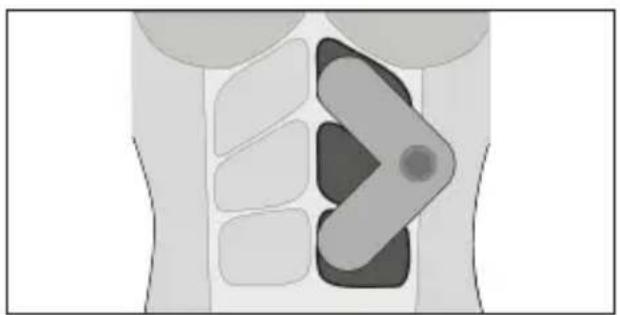
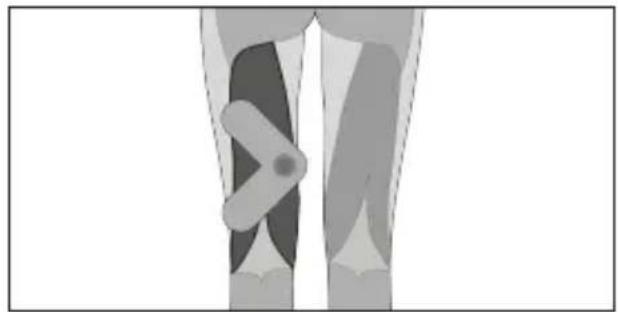
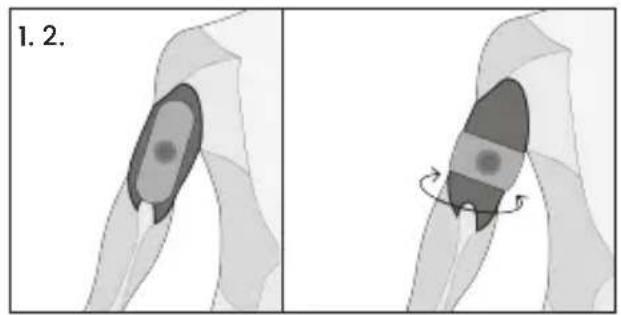
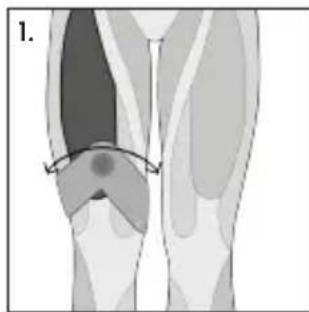
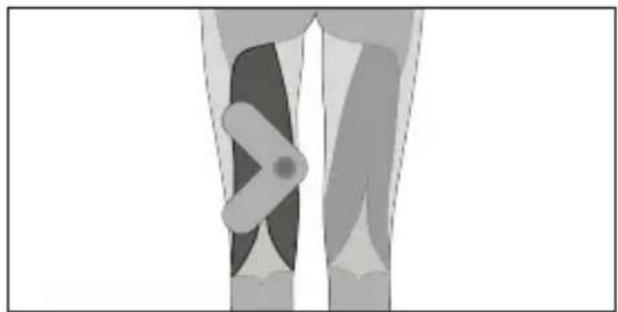
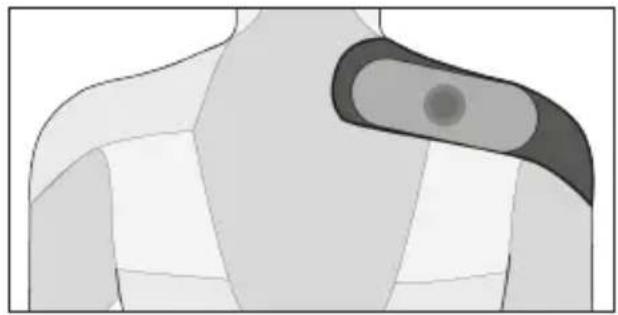
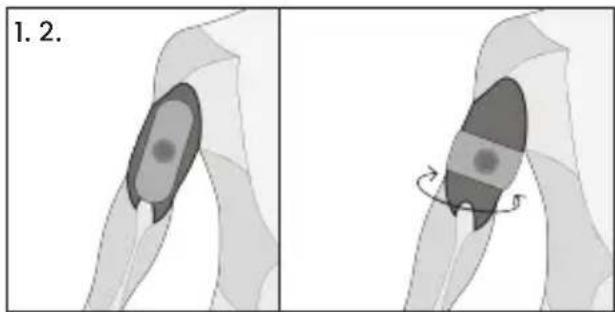
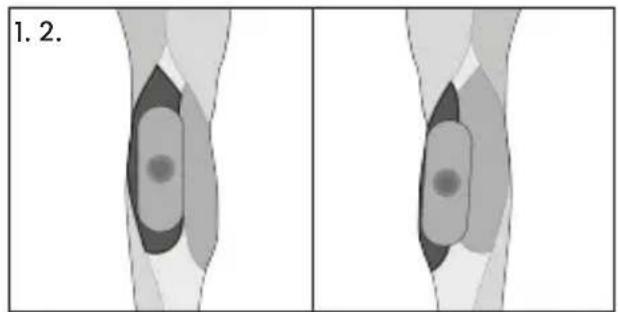
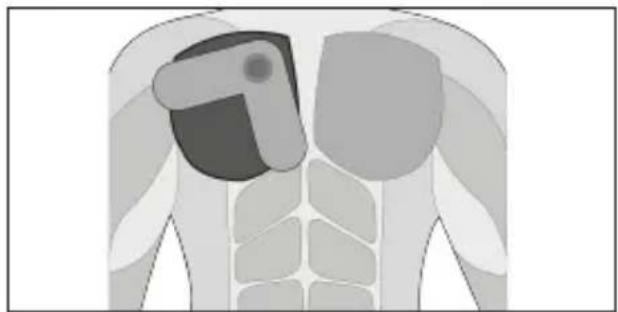
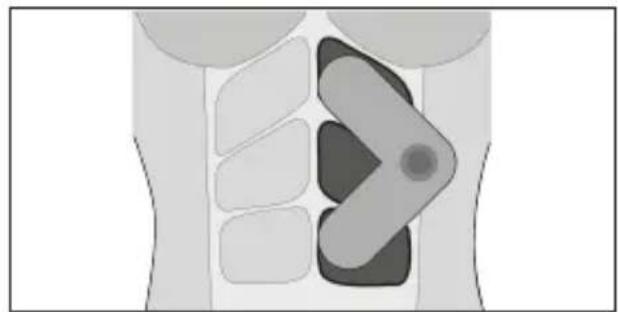
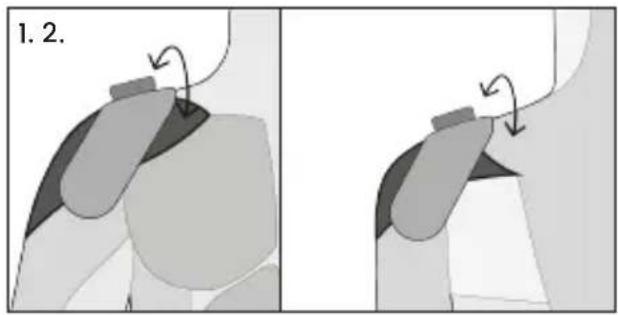
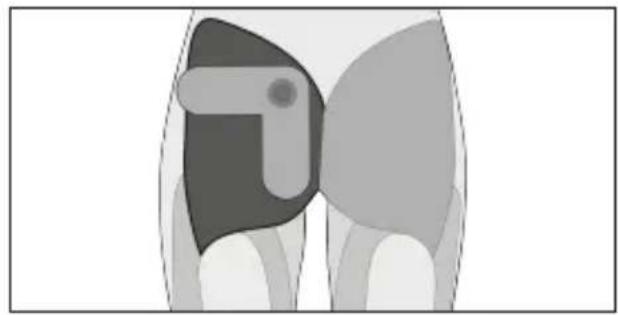
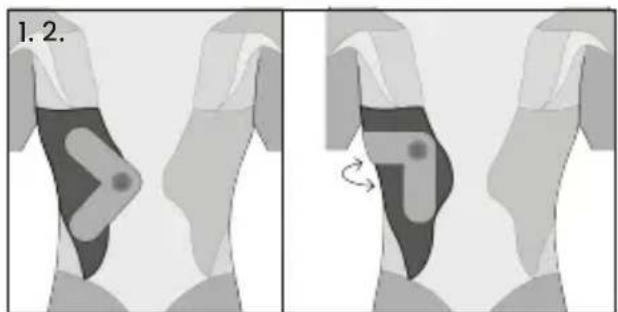
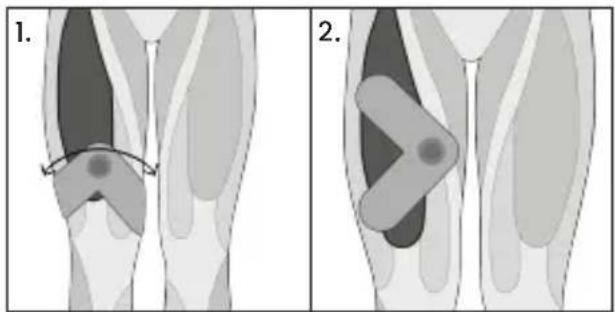
7. Electrode Placement Guidelines
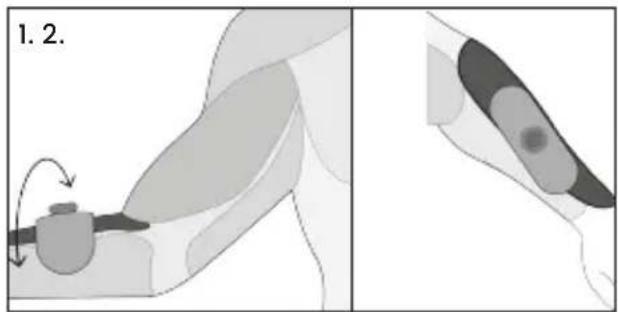
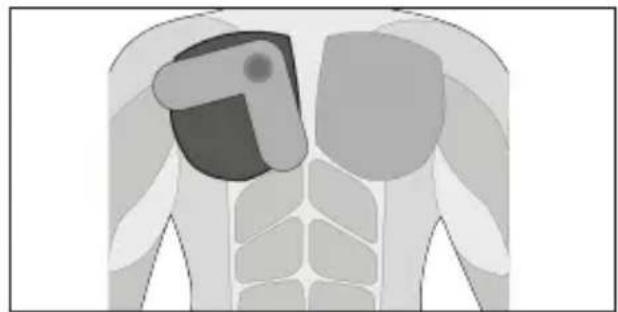
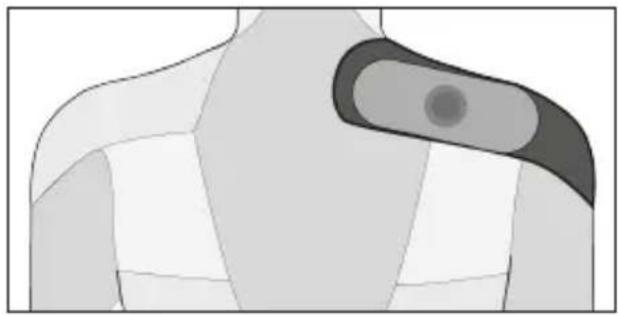
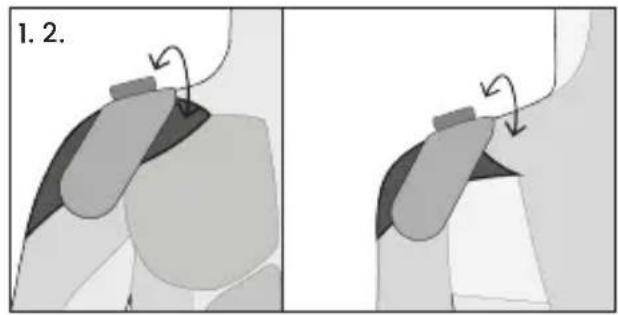
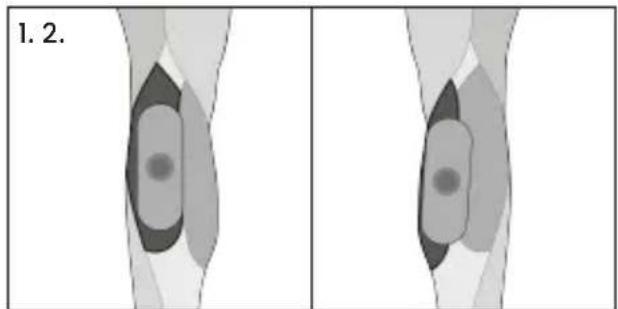
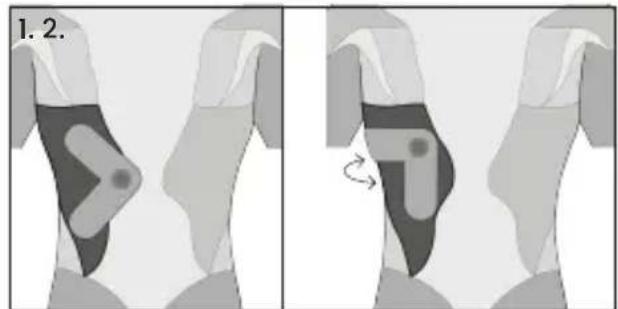
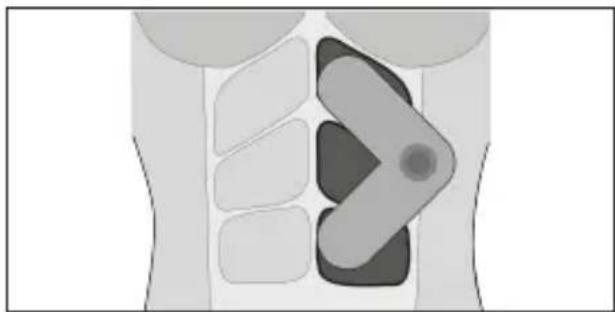
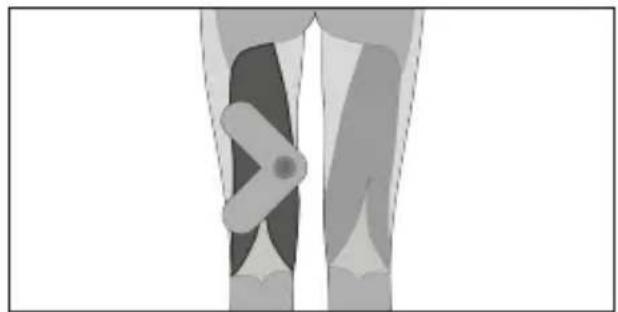
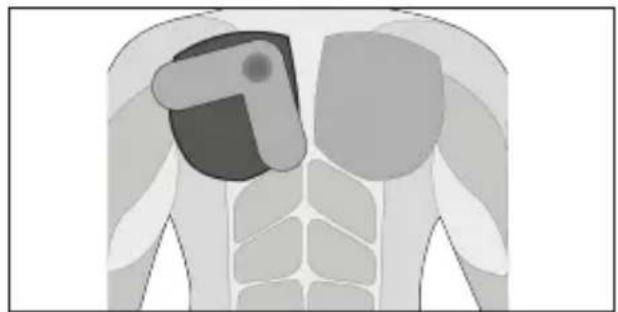
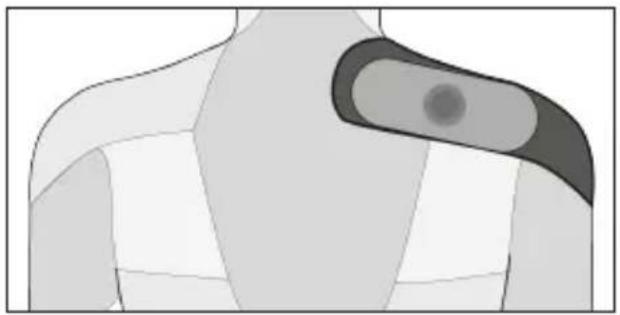
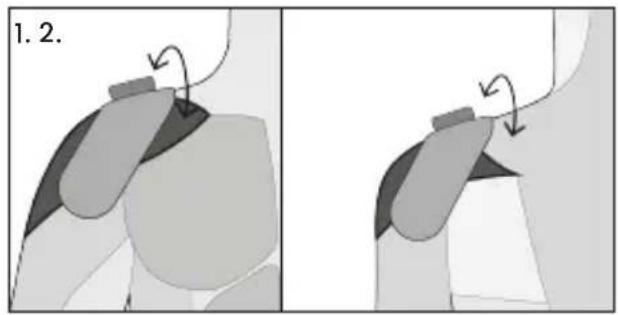
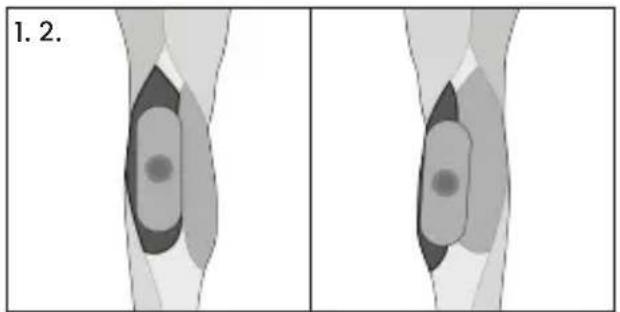
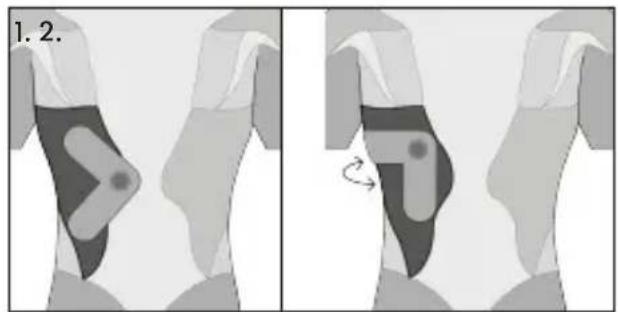
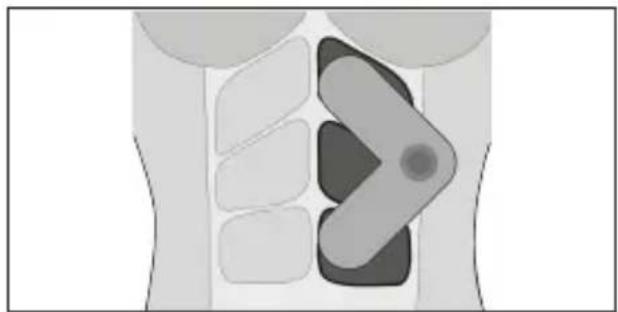
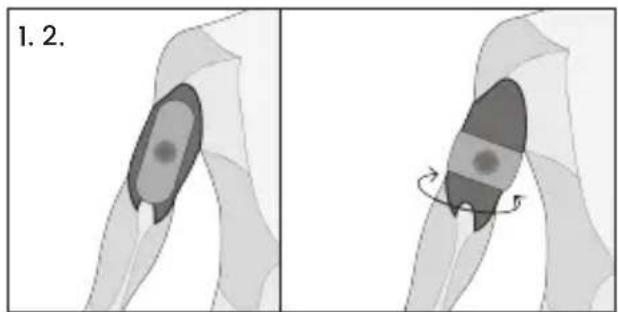
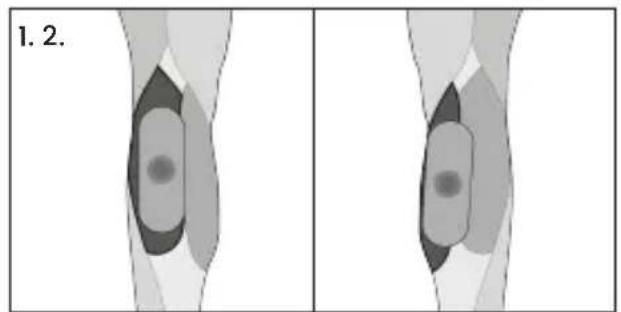
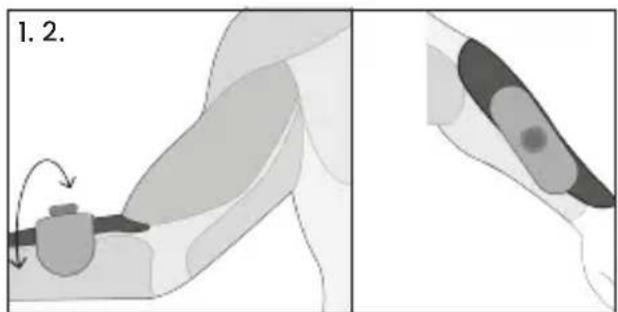
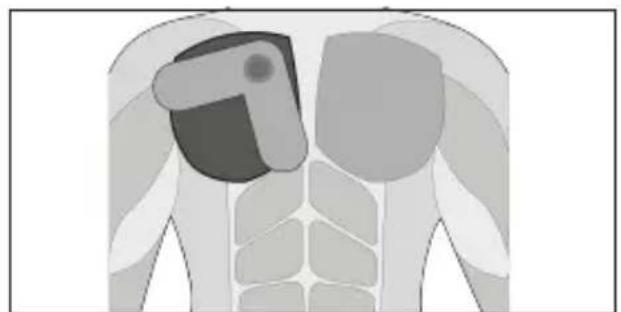
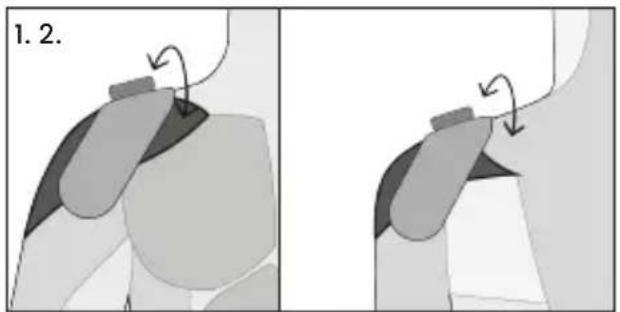
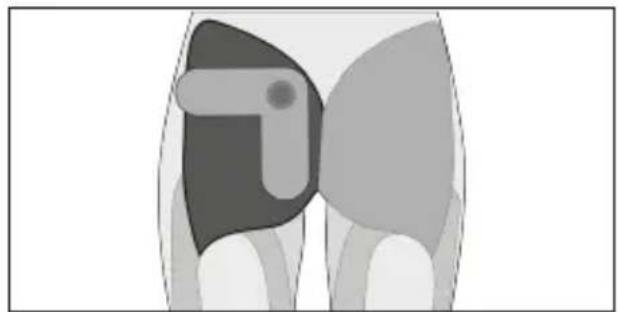
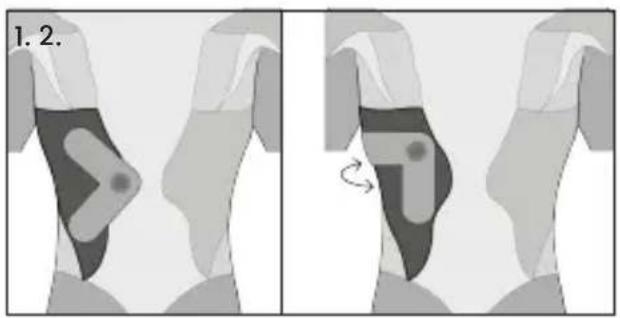
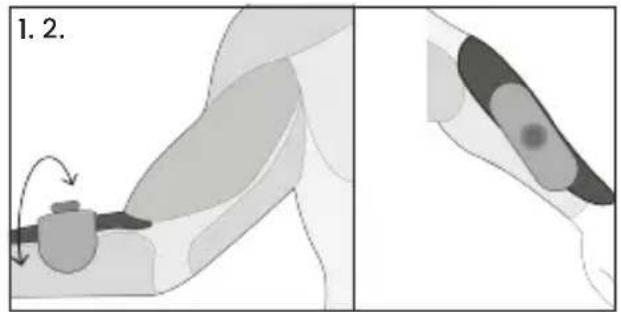
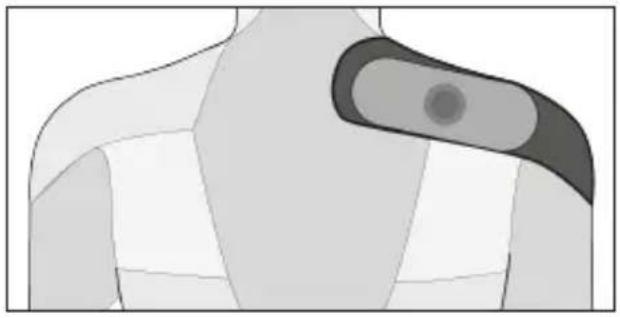
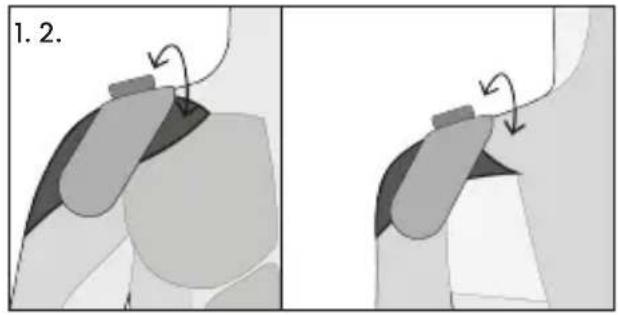
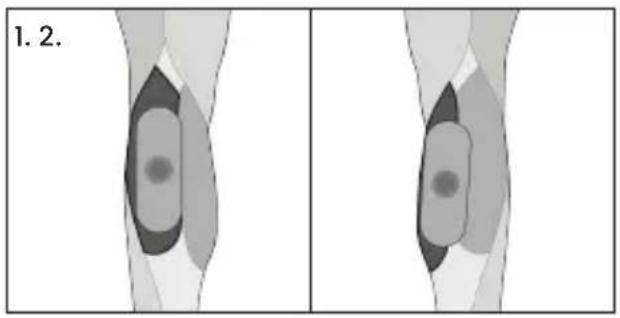
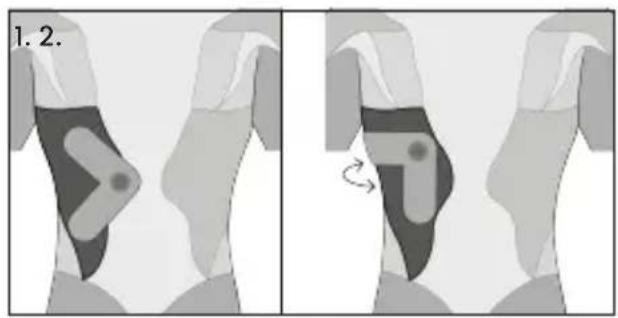
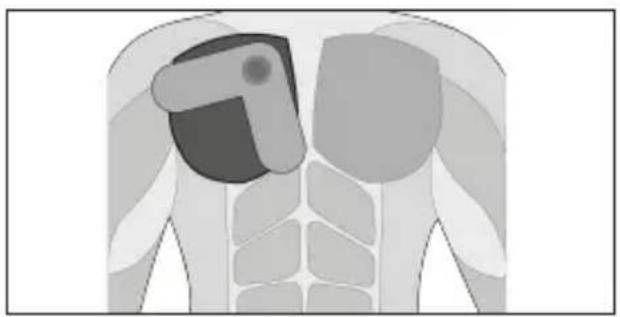
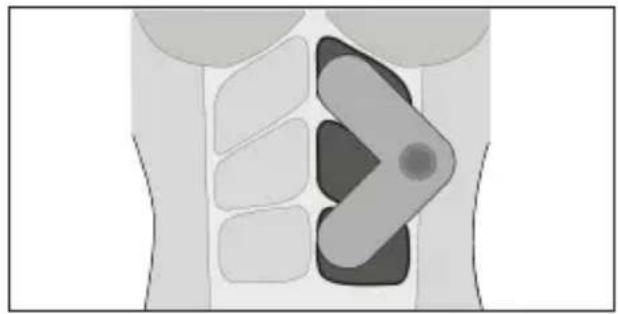
The Form electrodes have been designed to maximise muscle coverage and motor point activation.
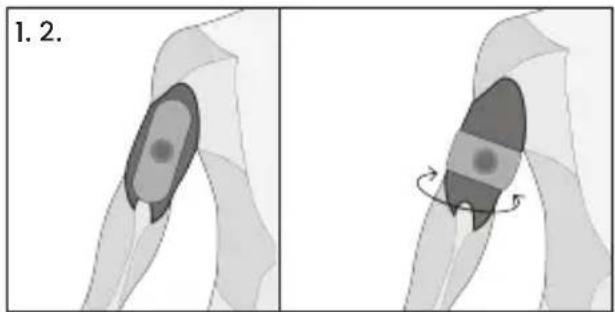
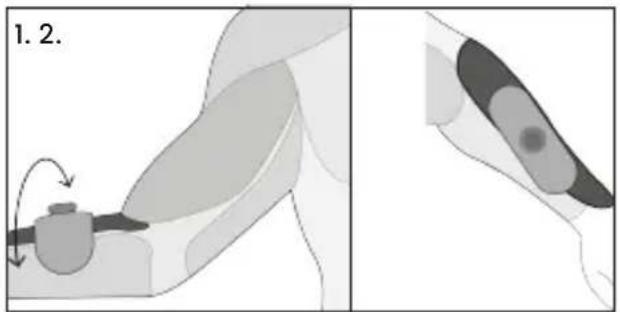
There are two different sized smart electrodes provided in the kit. These are to be used on different sized muscle groups, with the small electrode on small muscles
and large electrodes on large muscle groups. The smart electrodes automatically configure the programme settings to optimise the EMS parameters for the chosen muscle.
To optimise stimulation effectiveness and safety, we recommend using the following guidelines for electrode placement.
Electrode Cautions
Do not place electrodes:
- On skin, which does not have normal sensation. If the skin is numb, too great a strength may be used, which could result in skin inflammation.
- On broken skin. The electrode pads could encourage infection.
- On the front of the neck. This could cause the airway to close, causing breathing problems. May cause sudden drop in blood pressure (vasovagal response).
• Over the eyes. May affect eyesight or cause headaches.
- Across the front of the head. Effect on patients who have had strokes or seizures is not known. May affect
your sense of balance. The effects of stimulation on the brain are unknown.
- Do not use electrodes across the chest. Very strong stimulation across the chest may cause an extra heartbeat and/or rhythm disturbances to your heart, which could be lethal.
Biceps
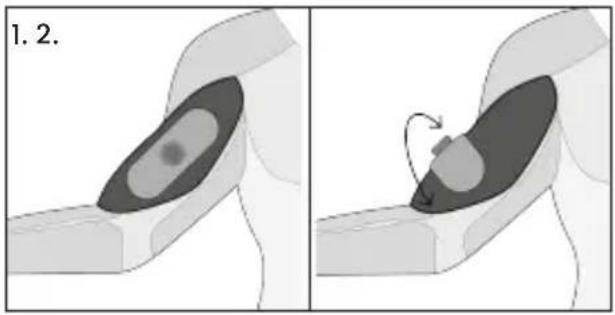
natural_image
Two-panel diagram showing a hand holding a device with a circular object inside, and a curved arrow indicating rotation (no text or symbols)Triceps
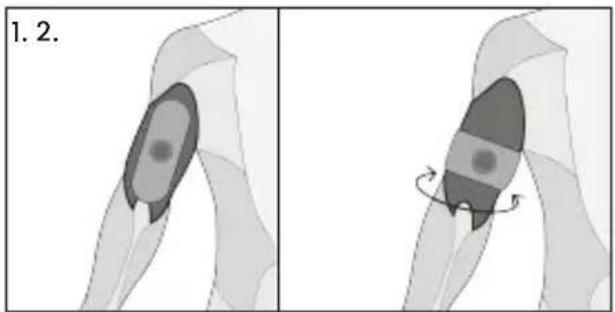
natural_image
Two-panel illustration showing a human leg with shaded areas and a rotation arrow, labeled '1.2.' (no text or symbols on the diagram itself)Forearms
text_image
1. 2.Pectorals
natural_image
Anatomical illustration of human torso and shoulder muscles, highlighting a specific muscle area (no text or labels present)Traps
natural_image
Abstract geometric shape with shaded regions and a central circular element (no text or symbols)Deltoids
natural_image
Two-panel diagram showing a mechanical or ergonomic component with arrows indicating motion, no text or symbols present.Calves
natural_image
Two side-by-side grayscale images showing a shaded anatomical region in the left image and a similar shaded region in the right image, both labeled with number 1.2 (no text or symbols within the regions themselves)Lats
natural_image
Illustration of a dog's leg showing two stages of movement, one with highlighted areas and the other with a rotation arrow (no text or symbols)Abdominals
natural_image
Anatomical illustration of human abdominal organs with a highlighted muscle area (no text or labels)Hamstrings
natural_image
Anatomical illustration of human lower legs and foot area, showing muscle and hip bones (no text or labels)Glutes
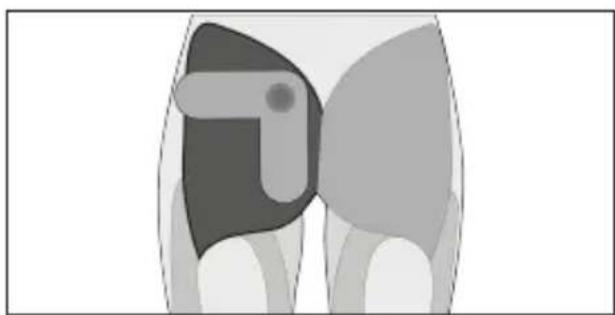
natural_image
Abstract grayscale illustration of a stylized animal figure (no text or symbols)Adductors
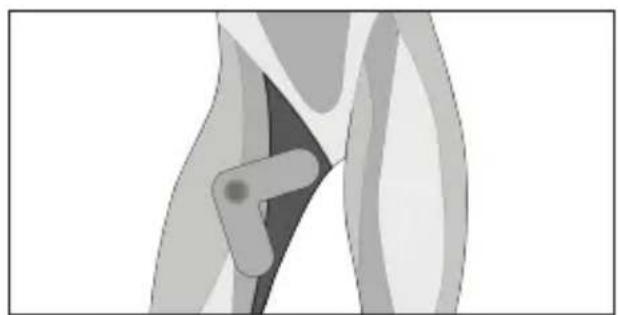
natural_image
Illustration of a human leg with a highlighted joint area (no text or symbols)Quadriceps
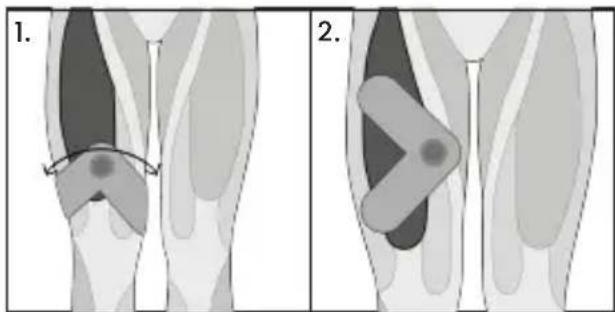
natural_image
Medical illustration showing two stages of a joint or implantation process, labeled 1 and 2, with no visible text or symbols.8. Troubleshooting
If Form is not working properly, please check the following:
If the above review has failed to resolve your problem, or to report unexpected operation or events, or to provide feedback call TensCare or your local dealer (address on back cover) for advice.
| Problem Possible causes Solution | ||
| The display will not turn on | Flat battery Charge battery. | |
| Damaged stimulator | Contact supplier. | |
| Stimulator will not connect to the electrode | Stimulator is in the wrong orientation | Rotate the stimulator so the shapes on the bottom of the stimulator and top of the electrode align. This should allow the magnets in the stimulator and electrode to attract. See section 4. |
| Stimulator will not connect to the charging cradle | Stimulator is in the wrong orientation | Rotate the stimulator so the shapes on the bottom of the stimulator and top of the cradle align. This should allow the magnets in the stimulator and charging cradle to attract. |
| Electrode won't stick to the body | Hydrogel pads are old and have lost their adhesion | Purchase replacement hydrogel pads |
| Incorrect electrode placement | Place electrodes as per the electrode placement guide | |
| Unusually low or inconsistent sensation | Hydrogel pads are old and have lost their adhesion | Purchase replacement hydrogel pads |
| Display is flashing | Low battery | Increase the intensity until you feel a strong but comfortable sensation. |
| Connection error between stimulator and electrode. | Disconnect & reconnect the stimulator and increase intensity | |
| Connection error between electrode and body. | Ensure the electrode and hydrogels are applied effectively to the body. Replace hydrogel pads if necessary. | |
| Cannot change intensity settings / rotating dial does not work | Stimulator is locked Unlock the stimulator by double-pressing the control button. | |
| No sensation Intensity is not strong enough | Increase intensity | |
| Incorrect connection between electrode, stimulator and body | Ensure the electrode is effectively attached to the body. Ensure connection between stimulator and electrode. If electrodes will not easily adhere to the body for a full session you may be using old hydrogels pads and need to purchase replacements. | |
9. Accessories
Replacement hydrogels are available from your supplier or distributor (see back cover for contact details), by mail order from TensCare, by telephone using a credit or debit card, or through the TensCare website.
The following replacement parts may be ordered from TensCare at www.tenscare.co.uk or +44(0) 1372 723434.
| E-FORM-S Pack of 3 pairs of small Form hydrogels |
| E-FORM-L Pack of 3 pairs of large Form hydrogels |
| E-FSE-S Replacement smart electrode (small) |
| E-FSE-L Replacement large smart electrode (large) |
| X-FORM-CR Form charging cradle and micro-USB cable |
10. Warranty
This warranty refers to the stimulator and smart electrodes only. It does not cover hydrogels, charging cradle, cable or travel case.
PRODUCT WARRANTY INFORMATION
This product is warranted to be free from manufacturing defects for 1 year from date of purchase.
This warranty is void if the product is modified or altered, is subject to misuse or abuse; damaged in transit; lack of responsible care; is dropped; if the unit has been immersed in water; if damage occurs by reason of failure to follow the written instructions for use booklet enclosed; or if product repairs are carried out without authority from TensCare Ltd.
We will repair, or at our option replace free of charge, any parts necessary to correct material or workmanship, or replace the entire unit and return to you during the period of the warranty. Otherwise, we will quote for any repair which will be carried out on acceptance of our quotation. The benefits conferred by this warranty are in addition to all other rights and remedies in
respect of the product, which the consumer has under the Consumer Protection Act 1987.
Our goods come with guarantees that cannot be excluded under the UK consumer Law. You are entitled to have the goods repaired or replaced if the goods fail to be of acceptable quality.
If necessary, we will provide circuit diagrams, component part lists or other information that will assist authorized service personnel to repair the device.
Before sending in your unit for service, please make sure you have reviewed the troubleshooting section, read the manual fully and followed all the instructions.
Returning your unit for service
Please ensure all relevant details are completed and your purchase receipt is included before sending your unit in for service.
- Name:
- Address:
- Postcode:
- Telephone:
-
Email:
-
Model:
- Date of purchase:
- Attach proof of purchase
- Retailers name:
- Retailers address:
• Retailers postcode:
- Brief description of problem you are experiencing:
For hygiene reasons, please do not include used hydrogels. Send only the Form stimulator unit, smart electrodes and charging cradle.
Returns should be sent to:
TensCare Ltd
9 Blenheim Road,
Epsom, Surrey
KT19 9BE, UK
Should you require any further information please do not hesitate to contact us by calling our number: +44 (0) 1372 723 434.
WARRANTY IS VOID UNLESS THE ABOVE INFORMATION IS COMPLETED AND CORRECT.
11. Disposal
One of the provisions of the European Directive 2012/19/EU is that anything electrical or electronic should not be treated as domestic waste and simply thrown away. To remind you of this Directive all affected products are now being marked with a crossed-out wheelie bin symbol, as depicted below.
To comply with the Directive, you can return your old electro-therapy unit to us for disposal. Simply print a postage paid PACKETPOST RETURNS label from our website www.tenscare.co.uk, attach this to an envelope or padded bag with the unit enclosed, and post it back to us. Upon receipt, we will process your old device for components recovery and recycling to help conserve the world's resources and minimise adverse effects on the environment.
12. Technical Specification
Stimulator Dimensions 55 x 55 x 21.25mm
Small Electrode Dimensions 160 x 60 x 5.5mm
Large Electrode Dimensions 180 x 180 x 5.5mm
Stimulator Weight 41g
Intensity Steps 45
Waveform Symmetrical Bi-Phasic Rectangular
Frequency Range 3 - 10Hz
Pulse Width 280 / 340us
Battery Built-in lithium-ion battery
Ratings: 3.7V, 110mAh
Software Version R3_00
Environmental Specifications
Operating Conditions Temperature range: 5 to 40°C
Humidity: 15 to 90% RH non-condensing
Atmospheric pressure: 700 hPa to 1060 hPa
Storage Conditions Temperature range: -10 to 60°C
Humidity: 15 to 75% RH non-condensing
Atmospheric pressure: 700 hPa to 1060 hPa
Contenido
natural_image
Two grayscale medical illustrations showing a circular object and a shaded anatomical region, labeled 3 and 4 (no text or symbols present)natural_image
Two circular diagrams showing a connector with pins, one with an arrow pointing to it and the other with an arrow pointing to it (no text or symbols present)natural_image
Two-panel diagram showing a mechanical or anatomical process with shaded regions and an arrow indicating rotation (no text or symbols)Tríceps
natural_image
Two-panel diagram showing a biological or mechanical process with shaded regions and an arrow indicating rotation (no text or symbols)Antebrazos
text_image
1. 2.Pectorales
natural_image
Anatomical illustration of human torso and shoulder muscles, highlighting a specific muscle area (no text or labels present)Troncos
natural_image
Abstract grayscale illustration of a stylized human figure with a circular object on the shoulder (no text or symbols)Deltoides
natural_image
Two-panel diagram showing a mechanical or ergonomic device with curved arrows indicating motion or rotation (no text or symbols)Pantorrillas
natural_image
Two side-by-side grayscale images showing a human leg with internal organ structures, labeled '1.2.' (no text or symbols within the diagrams)Laterales
natural_image
Two-panel illustration showing a dog's leg with shaded areas and a rotation arrow (no text or symbols)Abdominales
natural_image
Anatomical illustration of the human abdomen showing internal organs and a highlighted region (no text or labels)Isquiotibiales
natural_image
Anatomical illustration of human lower legs and foot area, showing muscle and hip joint structures (no text or labels)Glúteos
natural_image
Abstract grayscale illustration of a stylized animal figure (no text or symbols)Aductores
natural_image
Medical illustration of a joint with a metallic implant (no text or labels)Cuádriceps
natural_image
Medical illustration showing two stages of a joint or implantation process, labeled 1 and 2, with no visible text or symbols.natural_image
Simple 3D rendered diagram of a circular object with a pointed center and curved lines, no text or symbols present.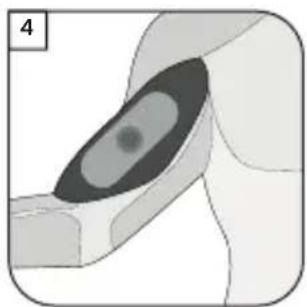
natural_image
Diagram of a biological or mechanical structure with concentric oval regions, no visible text or symbolsnatural_image
Two circular diagrams showing a connector with pins, one with an arrow pointing to it and the other with an arrow pointing to it (no text or symbols present)natural_image
Two-panel diagram showing a mechanical or anatomical process with shaded regions and an arrow indicating rotation (no text or symbols)Traps

natural_image
Diagram of a human shoulder with a circular object on the shoulder area (no text or symbols)Triceps
natural_image
Two-panel diagram showing a biological or mechanical component with internal structures and rotation arrows (no text or symbols)Mollets
natural_image
Two side-by-side grayscale images showing a shaded anatomical region in the left image, and a similar shaded region in the right image (no text or symbols)Avant-bras
natural_image
Medical illustration showing a hand positioning with an arrow indicating motion, alongside a close-up of a device (no text or symbols present)Pectoraux
natural_image
Anatomical illustration of human torso and shoulder muscles, highlighting a specific muscle area (no text or labels present)Deltoïdes
natural_image
Two-panel diagram showing a mechanical or ergonomic device with curved arrows indicating motion or rotation (no text or symbols)Fessiers
natural_image
Abstract grayscale illustration of a stylized animal figure (no text or symbols)Lats
text_image
1. 2.Quadriceps
natural_image
Medical illustration showing two stages of a joint or soft tissue manipulation, with shaded regions and arrows indicating movement (no text or symbols present)Abdominaux
natural_image
Anatomical illustration of human abdominal organs with a highlighted muscle area (no text or labels)Ischio-jambiers
natural_image
Anatomical illustration of human lower legs and foot area, showing muscle and tendon structures (no text or labels)Adducteurs

natural_image
Anatomical illustration of a human leg and hip joint (no text or labels)08. Dépannage
INFORMATIONS RELATIVES À LA GARANTIE DU PRODUIT
natural_image
Medical illustration showing a cross-sectional view of a human joint with highlighted internal structures (no text or labels)natural_image
Two circular diagrams showing a connector with pins, one with an arrow pointing to it and the other with an arrow pointing to it (no text or symbols present)natural_image
Two-panel illustration showing a mechanical or anatomical process with shaded regions and an arrow indicating rotation (no text or symbols)Trizeps
natural_image
Two-panel illustration showing a human leg with shaded areas and a rotation arrow, labeled '1.2.' (no text or symbols on the diagram itself)Unterarme
text_image
1.2.Nacken
natural_image
Abstract geometric shape with shaded regions and a central circular spot (no text or symbols)Deltamuskein
natural_image
Two-panel diagram showing a mechanical or architectural component with curved arrows indicating motion or rotation (no text or symbols)Waden
natural_image
Two side-by-side grayscale images showing a human leg with shaded regions, labeled '1.2.' (no text or symbols within the image itself)Lats
natural_image
Two-panel illustration showing a dog's leg with shaded areas and a rotation arrow (no text or symbols)Pektorale
natural_image
Anatomical illustration of a human torso showing internal organs and muscle structures (no text or labels)Bauchmuskeln
natural_image
Anatomical illustration of human abdominal organs with a highlighted muscle area (no text or labels)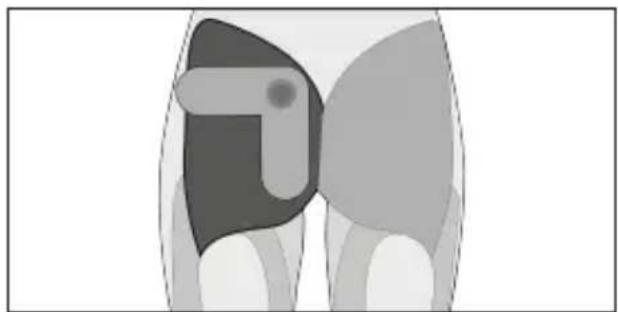
natural_image
Abstract grayscale illustration of a human figure in profile, showing segmented body and limbs (no text or symbols)natural_image
Medical illustration of a joint with a metallic implant (no text or labels)Quadrizeps
natural_image
Anatomical illustration of human lower limbs with a curved arrow indicating a specific area (no text or labels present)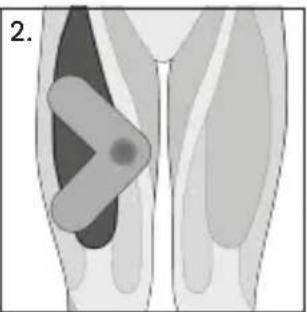
natural_image
Anatomical illustration of pelvic bones with shaded regions, labeled '2.' (no text or symbols present)Kniesehnen
natural_image
Anatomical illustration of human lower body with a highlighted joint area (no text or labels)08. Fehlersuche
INFORMATIONEN ZUR PRODUKTGARANTIE
natural_image
Simple 3D rendered diagram of a circular object with a central dot and curved lines, no text or symbols present.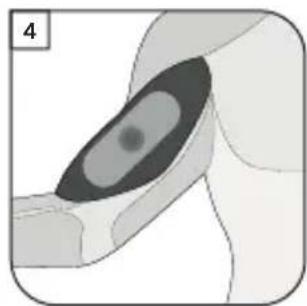
natural_image
Diagram of a joint with a highlighted elliptical area, no text or symbols presentnatural_image
Two circular diagrams showing a connector with pins, one with an arrow pointing to it and the other with an arrow pointing to it (no text or symbols present)natural_image
Two-panel diagram showing a biological or mechanical process with shaded regions and an arrow indicating rotation (no text or symbols)Trapezio
natural_image
Illustration of a human shoulder with a shaded area on the chest (no text or symbols)Tricipiti
natural_image
Two-panel illustration showing a biological or anatomical structure with shaded regions and a rotation arrow (no text or symbols)Polpacci
natural_image
Two side-by-side grayscale images showing a shaded anatomical region in the left and right views of a human leg (no text or symbols)Pettorali
natural_image
Anatomical illustration of human torso and shoulder muscles, highlighting a specific muscle area (no text or labels present)Addominali
natural_image
Anatomical illustration of human abdominal organs with a highlighted muscle area (no text or labels)Deltoidi
natural_image
Two-panel diagram showing a mechanical or architectural component with curved arrows indicating motion or rotation, no text or symbols present.Glutei
natural_image
Abstract grayscale illustration of a human torso and pelvic region (no text or symbols)Dorsali
text_image
1. 2.Quadricipiti
natural_image
Two anatomical diagrams showing hip joint movements, labeled 1 and 2, with shaded regions indicating movement direction (no text or symbols present)natural_image
Anatomical illustration of human lower legs and foot area, showing muscle and tendon structures (no text or labels)Adduttori

natural_image
Medical illustration of a human hip joint with a metallic implant (no text or labels)9 Blenheim Rd, Epsom,
Surrey, KT19 9BE, UK
+44 (0)1372 723 434.

TensCare Europe BV
I-FORM-ML [UK,ES,FR,DE,IT] Rev 1.0 10/22