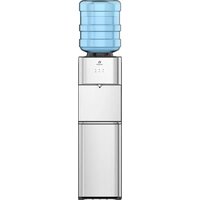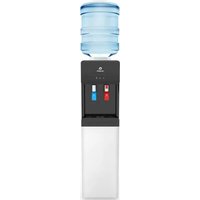
A2 - Water dispenser Avalon - Free user manual and instructions
Find the device manual for free A2 Avalon in PDF.


User questions about A2 Avalon
0 question about this device. Answer the ones you know or ask your own.
Ask a new question about this device
Download the instructions for your Water dispenser in PDF format for free! Find your manual A2 - Avalon and take your electronic device back in hand. On this page are published all the documents necessary for the use of your device. A2 by Avalon.
USER MANUAL A2 Avalon
A few simple steps to ensure perfect water, every time.
English
We're Here to Help

natural_image
Line drawing of a person wearing a headset and holding a tablet device on a tablet screen (no text or symbols)We are also available for live video chat!
Call Us:
1.800.256.0695
Email Us:
support@avalonh2o.com
sales@avalonh2o.com
Live Chat:
Monday-Thursday: 9 a.m.-5:30 p.m.
Friday: 9 a.m.-4:30 p.m.
Let's Connect
Follow our social media accounts and stay up to date on the latest Avalon news.

@avalon_h2o

Avalon Water Coolers Avalonh2o
www.avalonh2o.com
Use and Care Guide
MODELS: A1TL • A2TL
Registration
Please visit the website below to register your new water cooler within the first 30 days of purchase. Registration within the first 30 days will activate your one year warranty.
www.avalonh2o.com/register-my-avalon-cooler
Please keep your model number, order number and purchase date for future support. You can reach us at 1-800-256-0695.
Model Number
Order Number ____
Purchase Date ____
Contents
About Your Water Cooler
Meet Your Avalon Product 1
Part Names 2
Indicator Lights 3
Tech Specs 4
Getting Started
Unpacking 6
Operation instructions 7-9
Cleaning
Rinsing, Cleaning and Draining 11-13
Cleaning 14-15
Troubleshooting 16-18
Safety 19-21
Warranty 23
English
Meet Your Avalon Product

Attractive Design
Attractive design with press-paddle spouts

Custom Temperature
Piping hot, or crisp cold water

Top Loading
Suitable for 3 or 5 gallon bottles

UL Listed
We design & manufacture with your safety in mind

Child Safety Feature
Ensures safe hot water flows for the entire family
English
About Your Water Cooler
Part Names
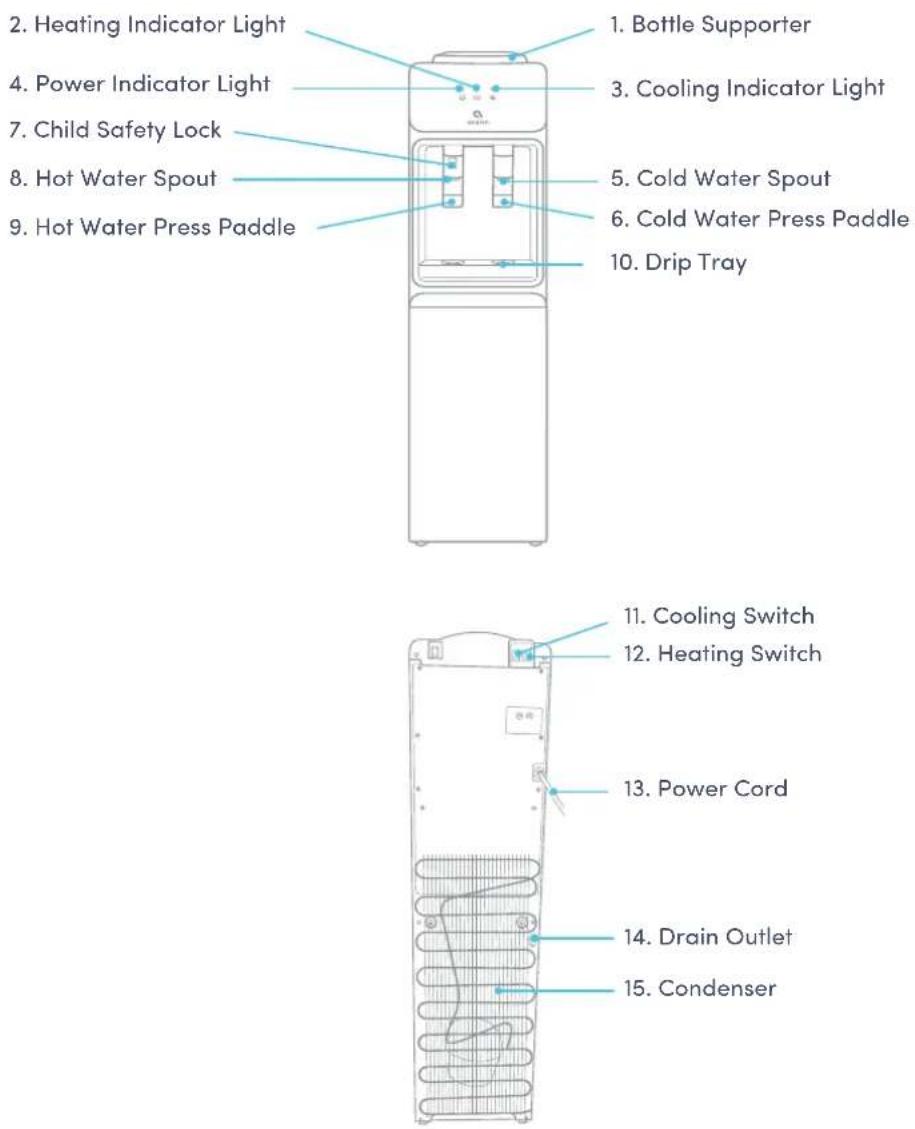
text_image
2. Heating Indicator Light 4. Power Indicator Light 7. Child Safety Lock 8. Hot Water Spout 9. Hot Water Press Paddle 1. Bottle Supporter 3. Cooling Indicator Light 5. Cold Water Spout 6. Cold Water Press Paddle 10. Drip Tray 11. Cooling Switch 12. Heating Switch 13. Power Cord 14. Drain Outlet 15. CondenserIndicator Lights

Power Indicator Light
This light will remain on as long as the water cooler is plugged in to indicate that the cooler is on.
Heating Indicator Light

This light will indicate when the water is heating. The light will remain on while the water is heating and will turn off when it has reached the correct temperature of 185^ F. As the water is dispensed the hot tank will refill and the water will heat. As the water reheats this indicator light will turn on.

Cooling Indicator Light
This light will indicate when the water is cooling. The light will remain on while the water is cooling and will turn off when it has reach the correct temperature of 47^ F. As the water is dispensed the cold tank will refill and the water will cool. As the water cools this indicator light will turn on.
English
About Your Water Cooler
Tech Specs
| Model | A1TL • A2TL |
| Hot/Cold Temp Output | 2L/min / 2.2L/min |
| Hot Water Capacity | 4 L/H ( ≥ 185°F) |
| Hot Tank Volume | 1.02 Liters |
| Cold Water Capacity | 2 L/H ( ≤ 47°F) |
| Cold Tank Volume | 3 Liters |
| Product Size | 11.25"(L)x10.75"(W)x42"(H) |
| Packing Size | 15.5"(L)x14.3"(W)x46.5"(H) |
| Net Weight/Gross Weight | 30.65 lb /34.8 lb |
| Voltage/Frequency | 115 V 60Hz |
| Cooling Method | Compressor |
| Heating Method | Internal Element |
| Heating Watts / Cooling Watts | 420W / 100 W |
| Power Consumption | 520 W |
English
Getting Started
Unpacking Your Avalon Water Cooler
The unit has been cleaned prior to departing from the factory. To remove any dust and debris that may collect during shipping we recommend cleaning the unit prior to installation. For cleaning instructions, see pages 12-16.
Locating Dispenser
Do NOT plug in the power cord yet.
Place dispenser upright on a hard and level surface in a cool and shaded location near a grounded wall outlet. Position the dispenser so there is about four inches of clearance from the wall on the back and both sides.
English
Getting Started
Operation Instructions
Do not plug in the machine or turn on the heating (#12) and cooling (#11) switches until water has begun to dispense from the cold (#5) and hot (#8) water spout.
- Remove any label or sticker from the mouth of the bottle.
natural_image
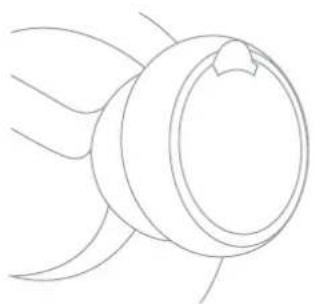
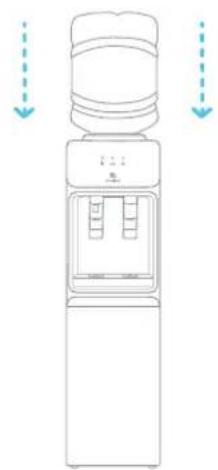
Simple line drawing of a jet or aircraft with airflow lines (no text or symbols)- Vertically insert the bottle into the bottle supporter (#1) on the top of the machine. The bottle supporter has a built-in puncturing rod to allow you to use spill proof caps without opening the plastic bottle seals.
natural_image
Line drawing of a water dispenser with two side panels and downward arrows indicating flow or movement (no text or symbols)Operation Instructions
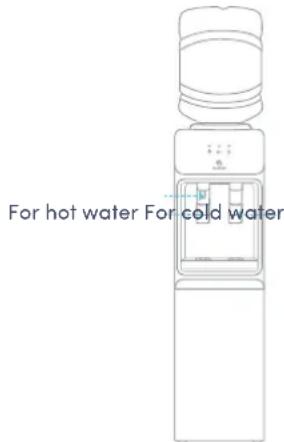
- Press the hot (#9) and cold (#6) water press paddles for the hot (#8) and the cold (#5) water spout to dispense a drop of water. To dispense water from the hot water spout (#8), please press and hold the red child safety lock button (#7) and press the hot water press paddle (#9) simultaneously.
text_image
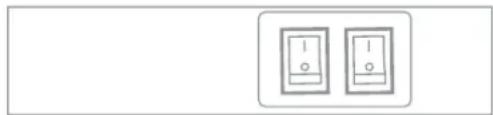
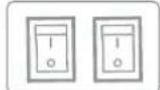
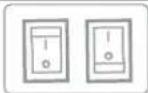
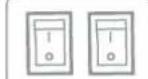
For hot water For cold water- Once water is dispensing from both spouts insert the power plug into a power socket. Turn on (I) the heating switch (#12) and the cooling switch (#11). (If you do not wish to have hot water, please leave the heating switch (#12) in the off (O) position. If you do not wish to have cold water, please leave the cooling switch (#11) in the off (O) position.)
natural_image
Two identical electrical switch symbols with circular terminals, no text or labels presentEnglish
Getting Started
Operation Instructions
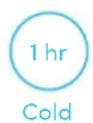
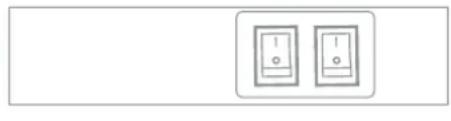
- Once the switches are in the on position the heating indicator light (#2) and the cooling indicator light (#3) will turn on (I). It will take about 15 – 20 minutes for the hot water to heat to the appropriate temperature. It will take about 1 hour for the cold water to cool to the appropriate temperature.
natural_image
Two identical electrical switch symbols with circular terminals, no text or labels present
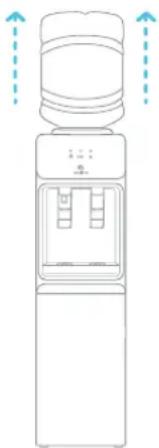
- To replace the bottle, vertically pull out the empty bottle with two hands. Using two hands place the new bottle of water vertically into the bottle supporter (#1).
natural_image
Line drawing of a water dispenser with two upward arrows indicating flow or movement (no text or symbols)- When the water has reached the appropriate temperatures for hot and cold the indicator lights will turn off and the water is ready for use. The indicator lights will turn back on automatically when the machine needs to reheat or cool again.

English
Cleaning
English
Cleaning
Rinsing, Cleaning, and Draining
To prolong the lifetime of the machine, it is recommended that the unit be cleaned and sanitized manually about every six months.
To clean the outside of the unit
Use a disinfectant of your choice to wipe down the outside of the machine.
Disinfectant does not come with this unit. It can be purchased separately from a local store.
To rinse the inside of the unit
The machine has been disinfected prior to departing from the factory. However, it is recommended to rinse and drain the unit prior to installation.
- Before cleaning, make sure that the cooling switch (#11) and heating switch (#12) are in the off (O) position and unplug the machine.
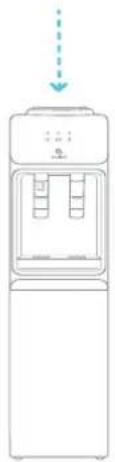
- Once the machine is off, pour water into the top of the unit where the bottle would be placed.
natural_image
Line drawing of a water dispenser with control panel and liquid level indicator (no text or symbols)Rinsing, Cleaning, and Draining
-
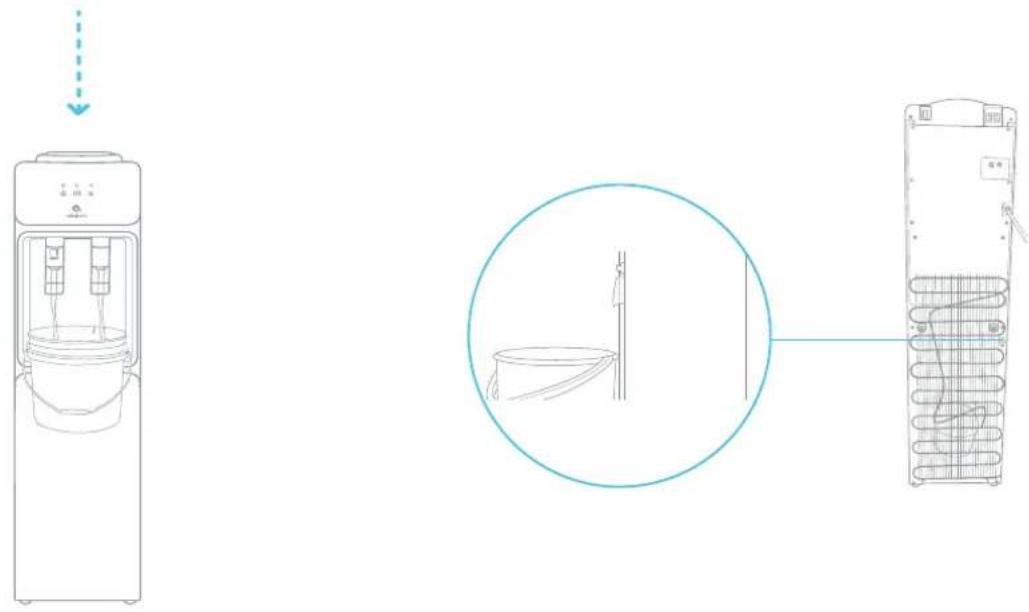
Dispense about 2 liters of water from the unit into a bucket by pressing the hot water press paddle (#9) and the cold water press paddle (#6) into a bucket.
-
Place a large bucket beneath the drain outlet (#14) located on the back of the unit. Remove the drain cover and allow the water to drain from the unit. Water will start flowing as soon as the drain cover is removed.
natural_image
Line drawing of a water dispenser and its internal components, showing front, side, and top views (no text or symbols)Caution: The dispenser will heat water to a temperature of approximately 185^ F. It can cause severe burns if not handled carefully. Please use caution while operating and cleaning. Please allow ample time for any hot water inside the machine to cool down before draining it.
English
Cleaning
Rinsing, Cleaning, and Draining
- Remove any remaining water in the tanks by dispensing water from the hot water spout (#8) and the cold water spout (#5) into a bucket.
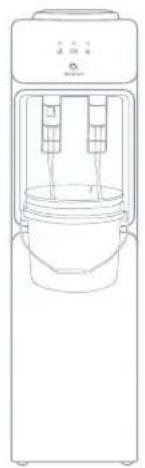
natural_image
Line drawing of a water dispenser with two tubes and a handle (no text or symbols)- After draining is complete, replace the drain cover and use the machine as normal.
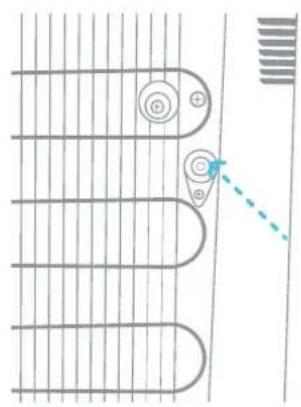
natural_image
Pure diagram of a grid-like structure with circular elements and a dashed arrow pointing to a corner detail (no text or symbols)Cleaning
To remove mineral deposits that may have built up inside the the cold tank, mix 4 L of water with 200 g of citric acid crystals (not included) or cleaning solution of your choice.
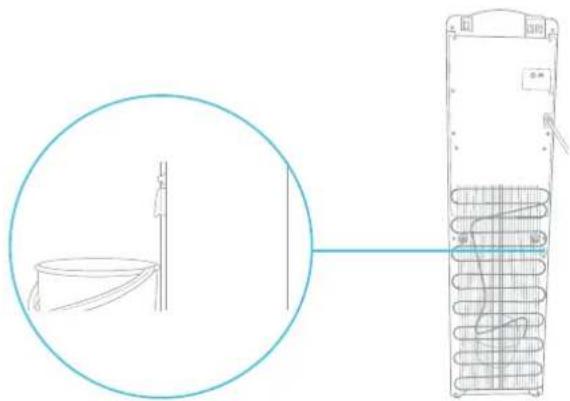
- Twist off the bottle supporter. 2. Put the mixture into the machine's cold
tank and make sure the water can flow out of the hot water spout (#8).
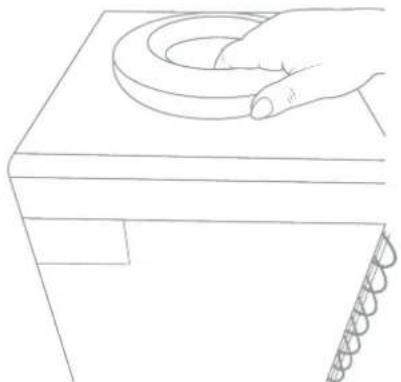
natural_image
Line drawing of a hand holding a circular object on a rectangular base (no text or symbols)
natural_image
Diagram of a circular mechanical component with internal components and a dashed arrow indicating direction (no text or symbols)English
Cleaning
Cleaning
-
Plug in the power cord and turn on (I) the heating switch (#12). Allow the water to heat for 15 minutes.
-
Turn off (O) the heating switch (#12) and allow the liquid mixture to cool down for 20 minutes.
(15 min)20 min

- Drain the liquid from the drain outlet (#14), then flush with water two or three times by following the rinsing instructions above. Only disassemble parts mentioned to avoid damaging the machine.
natural_image
Diagram showing a vertical pole connected to a coiled heater unit, with an inset circular view of the cable (no text or symbols)English
Troubleshooting
English
Troubleshooting
Troubleshooting
If you are having trouble with your water cooler please see the following solutions. You can also view our trouble shooting videos at the website below. Please feel free to contact us with any questions.

1-800-256-0695

support@avalonh2o.com

www.avalonh2o.com
Troubleshooting
No water dispensing from spouts
This could be caused by the water bottle being empty. Please replace the bottle and allow 5-10 minutes for the water cooler tanks to fill up. Allow the proper time for the water to heat and cool.
This could be the result of the bottle supporter (#1) being blocked. Please lift the bottle from the bottle supporter with two hands. Check to ensure that the seal or possible paper from the bottle is not causing a blockage. Install the bottle again.
Water is leaking from the bottle supporter (#1)
This could be the cause of a broken bottle. Please check to make sure that the bottle is not broken and if so please replace it.
This could also be caused by a misaligned seal. Using two hands please remove the bottle. Please remove the bottle supporter (#1) and ensure that the seal is aligned correctly around the edge.
Noisy operation
This could be caused by the machine not sitting flat. Please make sure that the machine is placed on a placid and solid surface.
Water not dispensing at a hot or cold temperature
This could be caused by an over consumption of water in a short period of time causing the tanks to empty. Please allow 5 to 10 minutes for the water cooler tanks to refill. Allow the proper time for the water to heat and cool.
This could be caused by an interruption in the power supply. Please ensure that the power cord is connected to an outlet. Please make sure that the heating (#12) and cooling (#11) switches are in the on (l) position.
English
Safety
Safety
To reduce risk of injury and property damage, user must read this entire guide before assembling, installing and operating the dispenser.
Failure to execute the instructions in this manual can cause personal injury or property damage.
This product dispenses water at very high temperatures. Failure to use this properly can cause personal injury.
When operating this dispenser, always exercise basic safety precautions, including the following:
- Prior to use, this dispenser much be properly assembles and installed in
- accordance with this manual.
- This dispenser is intended for water dispensing only. Do NOT use other liquids. Do NOT use for other purposes. Never use any other liquid in the dispenser other than known microbiologically safe tap water.
- For indoor use only. Keep water dispenser in a dry place away from direct sunlight. Do NOT use outdoors.
• Install and use only on a hard, flat and level surface. - Do NOT place dispenser in an enclosed space or cabinet.
- Do NOT operate the dispenser in the presence of explosive fumes.
- Position back of dispenser no closer than 20 cm from wall and permit free airflow between wall and dispenser. There must be at least 20 cm clearance on the sides of the dispenser to permit airflow.
- Use only properly grounded outlets.
- Do not use and extension cord with your water dispenser.
- Always grasp plug and pull straight out from outlet. Never unplug by pulling on power cord.
- To protect against electric shock, do NOT immerse cord, plug or any other part of the dispenser in water or other liquid.
English
Safety
Safety
- Ensure dispenser is unplugged prior to cleaning.
- Never allow children to dispense hot water without proper and direct supervision. Unplug unit to prevent unsupervised use by children.
• Service should be performed only by a certified technician.
- Warning: Do not damage the refrigerant circuit.
- This appliance can be used my children aged from 8 years and above if they have been given supervision or instruction concerning use of the appliance in a safe way and if they understand the hazards involved. Cleaning and user maintenance shall not be made by children unless they are older than 8 and supervised. Keep the appliance and its cord out of reach of children less than 8 years.
- Appliances can be used by persons with reduced physical, sensory or mental capabilities or lack of experience and knowledge if they have been given supervision or instruction concerning use of the appliance in a safe way and understand the hazards involved. Children shall not play with the appliance.
- This appliance is intended to be used in a household and similar applications such as: kitchen area in shops, offices and other working environments, bed and breakfast type environments, catering and similar non-retail applications.
- Do not store explosive substances such as aerosol cans with flammable propellant in this appliance.
- If the supply cord is damaged, it must be replaced by a special cord assembly available from the manufacturer or its service agent.
- Never turn the machine upside down or lean it more than 45^ .
- Thermostat has been adjusted. There is no need to adjust it by yourself. When the matching is below the freezing point and blocked by ice, the cooling switch should be turned off for 4 hours before turning it on again to continue its operation.
- This machine should not be plugged back in until 3 minutes after it has been unplugged.
English
Warranty
English
Warranty
Warranty
Models included are:
A1TLWATERCOOLER, A2TLWATERCOOLER, A3BLOZONEWTRCLR, A3F, A3F-SC, A4BLWTRCLR, A4F, A1BOTTLELESS, A5BOTTLELESS, A5BLK, A6BLWTRCLRWHT, A6BLWTRCLRBLK, A7BOTTLELESS, A7BOTTLELESSBLK, A8CTBOTTLELESSWHT, A8CTBOTTLELESSBLK, A9CTELECTRICSS, A9ELECTRICBLK, A9ELECTRICWHT, A10-TL, A11-CTTL, A12-CTPOU, A13, A14, A15, A1CTWTRCLRBLK, A1CTWTRCLRWHT, A3BLK, A4F, A5BLK, A6SC-WHT, A6SC-BLK, A10BLK, A11BLK, A12BLK, A13BLK, A14BLK, A13CT, A13-S, B8WHT, B8BLK, A9
Products listed above are covered by the terms of this Limited Warranty. For purposes of this Limited Warranty, the term "product" means any water cooler bottled or bottleless manufactured for Avalon. Avalon warrants that it will, at Avalon's option, replace or repair the Purchaser's Avalon product sold in the U.S. or Canada by an authorized retailer if that product is defective due to faulty workmanship or materials, subject to the limitations described in this Limited Warranty. Avalon undertakes no responsibility for the quality of the goods except as otherwise provided in this warranty. There are no warranties that extend beyond the description on the face hereof. This Limited Warranty is valid only in connection with the original purchase of new products from authorized retailers and extends from the original purchase date of the original product purchased. This warranty extends only to the original purchaser of the product and lasts for one (1) year from the date of the original purchase or until the original purchaser of the product sells or transfers the product, whichever first occurs. An "original purchaser," for the purposes of this Limited Warranty, is an individual or entity who purchases the product directly from Avalon or an authorized retailer of Avalon with the intent to use the product for personal consumer use and commercial or industrial use and not with the intent to resell the product. An "authorized retailer," for purposes of this Limited Warranty, is an individual or entity authorized by Avalon to sell the product directly to original purchasers. An individual or entity that purchases the product from whatever source with the intent to resell the product is an unauthorized reseller ("unauthorized reseller"). For the purpose of this Limited Warranty a "Third Party" would be considered any plumber, maintenance company, or individual hired by the Purchaser.
This Limited Warranty does not apply to used, refurbished, renewed, floor model or "demo" products, or to products sold by unauthorized resellers, including without limitation, unauthorized resellers on third party websites, including, without limitation, Craigslist, eBay, Amazon, etc. Unauthorized resellers are not "original purchasers" for the purpose of this Limited Warranty. If the purchaser is not the original purchaser of this product, the purchaser takes the product "AS IS," "with all faults" and without warranty. Avalon reserves the right to require a valid serial number located on your product to submit a valid claim under this Limited Warranty. Products where the serial number has been removed or evidence showing the removal or attempted removal of the serial number label will not be eligible to make a claim under this Limited Warranty. IF THE PURCHASE OF THIS PRODUCT WAS NOT DIRECTLY FROM AVALON, PROOF OF PURCHASE WILL BE REQUIRED TO DEMONSTRATE THAT PURCHASER IS THE ORIGINAL PURCHASER AND THE PRODUCT WAS PURCHASED FROM AN AUTHORIZED RETAILER, AND ELIGIBLE TO MAKE A VALID CLAIM UNDER THIS LIMITED WARRANTY.
Your purchase date is established from the date of your sales receipt. Avalon may require the purchaser to provide proof of the quality and condition of the water cooler if the purchaser makes a claim under this Limited Warranty. Avalon reserves the right to invalidate this Limited Warranty if the water cooler is determined, in Avalon's reasonable discretion, to be inadequate or if the water cooler is found to be in an unsanitary condition. This warranty does not apply if the product was damaged or failed because of accident, improper handling or operation, relocation, abuse, misuse, unauthorized repairs made or attempted, or improper installation or maintenance. Under this Limited Warranty, products are required to be plugged directly into a grounded wall outlet. Plugging a product into an extension cord or surge protector will be considered misuse and will void this Limited Warranty. If damage to the product has occurred during shipping, the damage must be reported to Avalon within the first 30 days from the original purchase date to be eligible to make a claim under the Limited Warranty. Shipping damage reported to Avalon outside of the first 30 days from the original purchase date will not be eligible for a valid claim under this Limited Warranty. This warranty does not cover shipping costs for the return of products to Avalon for repair or replacement.
To submit a valid claim under this Limited Warranty, troubleshooting the product with an Avalon Customer Success Expert is required. If troubleshooting the product is refused by the Purchaser, Avalon reserves the right to deny the Limited Warranty Claim. In the event a part is necessary to correct the problem with a Product, Avalon will provide the part at no cost to the original purchaser under this Limited Warranty. Replacing parts or attempting to correct an issue with the Product is required prior to submitting a claim for a replacement product under this Limited Warranty. Instructions for troubleshooting a Product or replacing a part will be provided by Avalon. Troubleshooting, repairs, part replacement, installation, and proper maintenance are the responsibility of the Purchaser. Instructions for proper installation and maintenance will be provided in the user manual.
Installation, maintenance, or repairs of the Product is the responsibility of the Purchaser. The Purchaser reserves the right to use a Third Party for installation, maintenance, and repair at their own risk. Avalon is not responsible for any additional cost incurred for installation, maintenance, or repair of the Product including but not limited to additional material needed for installation or the cost of a Third Party. Damage or failure of the Product due to improper installation, maintenance, or repair caused by a Third Party or the Purchaser is not the responsibility of Avalon and will not be covered under this Limited Warranty. Instructions for proper installation and maintenance will be provided in the user manual.
ANY AND ALL WARRANTIES, EXPRESSED OR IMPLIED (INCLUDING, WITHOUT LIMITATION, ANY IMPLIED WARRANTY OF MERCHANTABILITY), LAST ONE YEAR FROM THE DATE OF ORIGINAL PURCHASE OR UNTIL THE ORIGINAL PURCHASER OF THE PRODUCT SELLS OR TRANSFERS THE PRODUCT, WHICHEVER FIRST OCCURS. IN NO EVENT SHALL AVALON'S LIABILITY UNDER ANY EXPRESS OR IMPLIED WARRANTY INCLUDE (I) INCIDENTAL OR CONSEQUENTIAL DAMAGES FROM ANY CAUSE WHATSOEVER, INCLUDING BUT NOT LIMITED TO ELECTRICAL OR WATER DAMAGE, OR (II) REPLACEMENT OR REPAIR OF ANY HOUSE FUSES, CIRCUIT BREAKERS OR RECEPTACLES. NOT WITHSTANDING ANYTHING TO THE CONTRARY, IN NO EVENT SHALL AVALON'S LIABILITY UNDER ANY EXPRESS OR IMPLIED WARRANTY EXCEED THE PURCHASE PRICE OF THE PRODUCT AND ANY SUCH LIABILITY SHALL TERMINATE UPON THE EXPIRATION OF THE WARRANTY PERIOD.
Except as otherwise provided, Avalon will not charge Original Purchaser to repair or replace the purchaser's Product if it is deemed defective during the length of this Limited Warranty, but any transportation costs associated with repairs or replacements are Purchaser's responsibility. No new warranty is provided with a replacement product. The warranty for the replacement product runs from the date of the original purchase of the original product. In the event that repair is necessary, such repair will be at no charge to the Purchaser except for transportation costs associated with such repair or replacement of a product in compliance with the terms of this Limited Warranty.
In the event, a warranty claim is filed and a warranty replacement is deemed necessary, the purchaser will be required to surrender the original product to Avalon at the time of replacement.
Some states and provinces do not allow limitations on how long an implied warranty lasts or the exclusion or limitation of incidental or consequential damages, so these exclusions or limitations may not apply to you. This warranty gives you specific legal rights. You may also have other rights which vary from state to state and province to province.
English
Español
natural_image
Line drawing of a person wearing a headset and holding a tablet, displayed on a smartphone screen (no text or symbols)support@avalonh2o.com
sales@avalonh2o.com
Chat en Vivo:
Lunes-Jueves: 9:00-17:30
Viernes: 9:00-16:30
Conectemos
Avalon Water Coolers Avalonh2o
www.avalonh2o.com
www.avalonh2o.com/register-my-avalon-cooler
text_image
Diagram of a water dispenser with labeled ports and control buttonstext_image
Technical diagram of a refrigerator with labeled components and internal coil structurenatural_image
Simple line drawing of a stylized object resembling a helmet or capsule with wings, no text or symbols present.natural_image
Line drawing of a water dispenser with two control panels and downward arrows indicating flow or movement (no text or symbols)natural_image
Two identical electrical switch symbols with circular terminals, no text or labels presentEspañol
Empezando
natural_image
Two identical electrical switch symbols with no text or labels
natural_image
Line drawing of a water dispenser with directional arrows indicating flow or movement (no text or symbols)natural_image
Line drawing of a water dispenser with control panel and indicator lights (no text or symbols)natural_image
Line drawing of a water dispenser with liquid level indicator (no text or symbols)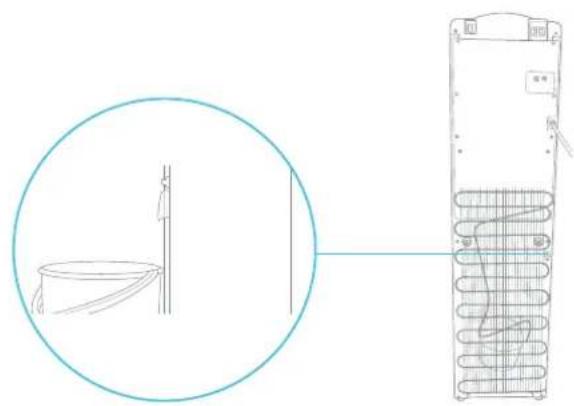
natural_image
Diagram showing a vertical pole with a magnified inset of a cylindrical component, connected to a vertical stack of coiled springs (no text or symbols present)natural_image
Line drawing of a water dispenser with two tubes and a handle (no text or symbols)natural_image
Pure diagram of a grid-like structure with circular elements and a dashed arrow pointing to a corner detail (no text or symbols)Limpieza
natural_image
Line drawing of a hand holding a circular object on a rectangular base with a serrated edge (no text or symbols)natural_image
Diagram of a circular mechanical component with internal features and a dashed arrow indicating direction (no text or symbols)Español
Limpieza
Limpieza
natural_image
Simple diagram with two vertical gauges and a circle, no text or symbols presentnatural_image
Diagram showing a vertical structure with a magnified inset of a coiled spring, connected to a vertical-mounted device (no text or symbols present)Español
support@avalonh2o.com

www.avalonh2o.com
natural_image
Line drawing of a person wearing a headset and holding a tablet, displayed on a smartphone screen (no text or symbols)support@avalonh2o.com
sales@avalonh2o.com
Tchat en Direct:
Lundi-Jeudi: 9h-17h30
Vendredi: 9h-16h30
Connectons-Nous
Avalon Water Coolers Avalonh2o
www.avalonh2o.com
MODÈLES: A1TL • A2TL
Registre:
www.avalonh2o.com/register-my-avalon-cooler
Rincer, Laver et Drainage 11-13
Nettoyage 14-15
Dépannage 16-18
Sécurité 19-21
Garantie 23
Français
text_image
Diagram of a water dispenser with labeled ports and control buttonsnatural_image
Technical line drawing of a vertical cylindrical device with internal coiled structure and mounting points (no text or symbols)natural_image
Simple line drawing of a stylized object resembling a helmet or capsule with wings, no text or symbols present.natural_image
Line drawing of a water dispenser with two control panels and downward arrows indicating flow or movement (no text or symbols)natural_image
Two identical electrical switch icons with circular terminals, no text or symbols presentFrançais
Commencement
natural_image
Two identical electrical switch symbols with terminals, no text or labels present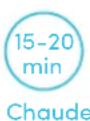
natural_image
Line drawing of a water dispenser with two upward arrows indicating flow or movement (no text or symbols)natural_image
Line drawing of a water dispenser with control panel and indicator lights (no text or symbols)Rincer, Nettoyer, Drainage
natural_image
Line drawing of a water dispenser with two tubes and a handle (no text or symbols)natural_image
Pure diagram of a grid-like structure with circular elements and a dashed arrow pointing to a corner detail (no text or symbols)Nettoyage
natural_image
Line drawing of a hand holding a circular object on a rectangular base with a serrated edge (no text or symbols)natural_image
Diagram of a circular mechanical component with internal components and a dashed arrow indicating direction (no text or symbols)Français
Nettoyage
Nettoyage
natural_image
Diagram showing a vertical pole connected to a coiled heater unit, with an inset circular view of the cable (no text or symbols)Français
Dépannage
Français
Dépannage
Dépannage
support@avalonh2o.com

www.avalonh2o.com