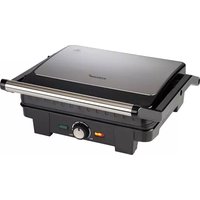
46117 - Grill plate KORONA - Free user manual and instructions
Find the device manual for free 46117 KORONA in PDF.

| Product Type | Electric Grill Plate on Stand |
| Model | Korona 46117 |
| Voltage | 220-240 V ~ 50 Hz |
| Power | Approximately 2000 W |
| Water Tray Capacity | 0.4 to 0.9 L (max) |
| Grid Material | Chrome-plated steel |
| Housing Material | Sheet metal |
| Heating Element Coating | Protective (remove before first use) |
| Temperature Control | Variable thermostat from MIN to MAX |
| Indicator Light | Yes, indicates heating cycle |
| Removable Windshield | Yes |
| Aluminum Reflector Tray | Removable |
| Grease Collection Tray | Removable, with water fill |
| Adjustable Grid Height | 2 positions (high and low) |
| Legs | 4 rubber feet + metal support with storage shelf |
| Usage | Indoor (ventilated room) or sheltered outdoor |
| Maintenance | Clean with a damp cloth; dishwasher not recommended for grid and tray |
| Safety | Safety switch on heating element; thermal fuse |
| Warranty | 2 years against material and manufacturing defects |
Frequently Asked Questions - 46117 KORONA
User questions about 46117 KORONA
0 question about this device. Answer the ones you know or ask your own.
Ask a new question about this device
Download the instructions for your Grill plate in PDF format for free! Find your manual 46117 - KORONA and take your electronic device back in hand. On this page are published all the documents necessary for the use of your device. 46117 by KORONA.
USER MANUAL 46117 KORONA
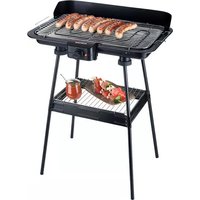
Barbecue grill with stand
Dutch
Handleiding
natural_image
Black-and-white photo of a dish with leafy greens and sliced vegetables on a diagonal line (no text or symbols)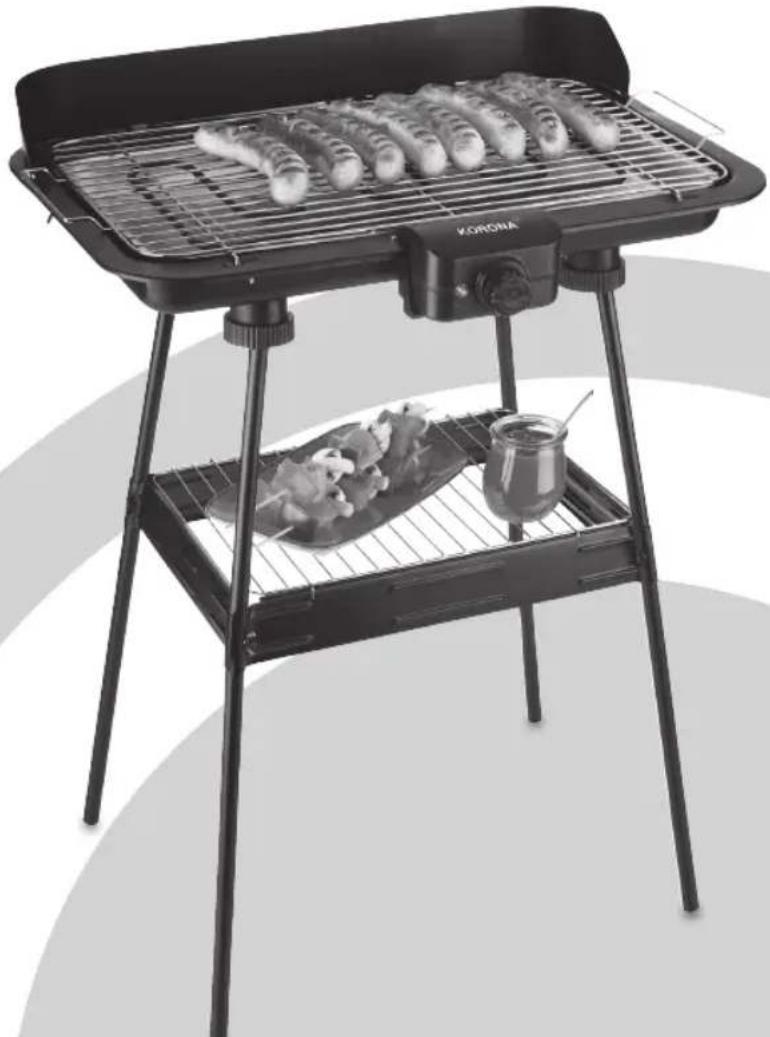
natural_image
Black KORONA portable grill with grating and food tray (no visible text or symbols)CE
KORONA electric GmbH, Sundern/Germany
www.korona-electric.de
Produktbeschreibung
natural_image
Close-up of a mechanical assembly with a black component and white panel, no visible text or symbols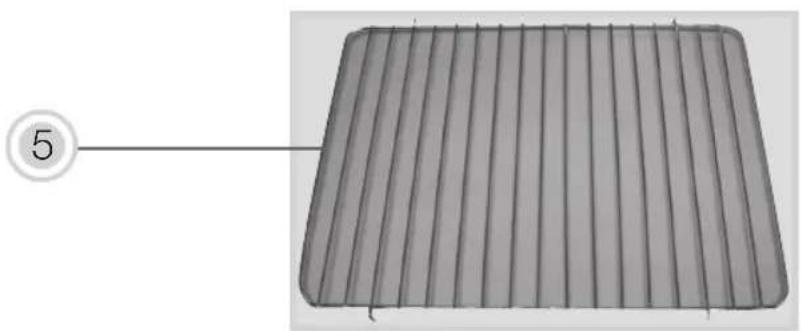
natural_image
3D diagram of a rectangular grid with parallel lines, labeled with number 5 (no text or symbols on the grid itself)Vor Erstgebrauch
natural_image
Close-up of a metal mechanical component with mounting holes and a dashed line indicating a measurement or alignment (no text or symbols visible)Kurzes Metallrohr
Langes Metallrohr
natural_image
Close-up of a hand holding a metallic mechanical component with a circular hole (no visible text or symbols)natural_image
Exterior view of a black metal structural component with a vertical rod and flange (no text or symbols visible)natural_image
Two views of a metal bracket with vertical supports, shown from different angles (no text or symbols visible)natural_image
Close-up of a finger pressing a cylindrical component with a dashed arrow indicating a downward motion (no text or symbols visible)natural_image
Close-up of a metal grate with slatted edges and a small object inserted into the middle section (no text or symbols visible)natural_image
Exterior view of a black metal grate with slatted edges and vertical supports (no text or symbols)natural_image
Close-up of a mechanical component with a tool tip, possibly a cutting or inspection tool, against a plain background (no visible text or symbols)natural_image
Top-down view of a rectangular metal tray with four small cutouts, no visible text or symbols.natural_image
Close-up of a mechanical component with a circular hole and metallic end (no visible text or symbols)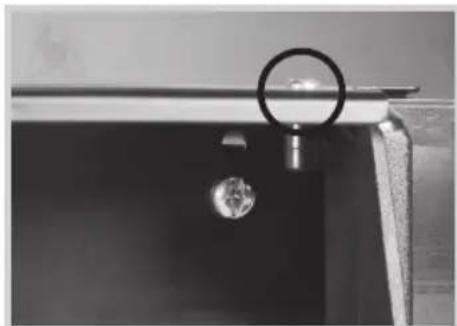
natural_image
Close-up of a mechanical component with a circular ring and central hole (no visible text or symbols)natural_image
Interior view of a rectangular kitchen appliance with coiled heating elements (no text or symbols visible)natural_image
Close-up of a car's front grille with a metallic handle and circular emblem (no text or symbols visible)Hoch
natural_image
Close-up of a grater's grille with a circular mark highlighting a specific area (no text or symbols visible)Niedrig
Before use, please read these instructions carefully and keep them in a safe place for future reference. When passing on the appliance to a third party, make sure to include these instructions for use.
This appliance is only intended and suitable for broiling foods. All other use or modification of the appliance is not intended by the manufacturer and might entail a risk of damage or injury. This appliance is not intended for commercial use!
Safety:
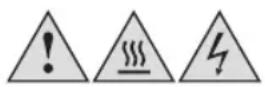
This symbol identifies hazards which may cause injuries!

This symbol warns of hot surfaces. Risk of burns!

This symbol identifies electric shock hazards!

General Safety Instructions
- Manufacturer takes no responsibility for any damage caused by incorrect use.
- Incorrect or improper use can damage the appliance and cause injuries to the user.
- Before connecting this appliance to the mains, make sure your local voltage matches the technical data of the appliance. Otherwise the appliance may overheat and get damaged.

Caution! Danger of electric shock!
- Never put the appliance, cord or plug into water or any other liquid.
- Do not use the appliance near a sink or wash basin.
- Do not use the appliance with wet hands.
- Do not use the appliance outdoors.
An electric appliance is not a toy!
- Never leave the appliance unattended during use.
- This appliance can be used by children aged from 8 years and above and persons with reduced physical, sensory or mental capabilities or lack of experience and knowledge if they have been given supervision or instruction concerning the use of the appliance in a safe way and understand the hazards involved. Children shall not play with the appliance. Cleaning and user maintenance shall not be made by children unless they are older than 8 and supervised.
- Keep the appliance and its cord out of reach of children less than 8 years.
- Always unplug your appliance when it is not in use, and before cleaning.
• Always pull the plug – not the cord. - Keep the appliance and the cord well away from any hot surfaces to avoid any damage to the appliance.
- Make sure the cord may not inadvertently be pulled cause anyone to trip when in use. Do not allow the cord to hang over sharp edges.
- Do not bend the cord or wind it round the appliance.
Do not use the appliance,
• if the cord is damaged.
• in case of malfunction.
- if the appliance was dropped or is damaged otherwise. Have it checked and, if necessary, repaired by a qualified person/Customer Service. Never attempt to make any modifications to or repair the appliance yourself.
- Only use accessories evaluated for use with this appliance.
• Never attempt to drive any objects into the appliance.
• Never attempt to open the housing yourself!
- The appliance is not intended to be operated by means of an external timer or separate remote-control system.
Special Safety Instructions
Warning! To avoid the possibility of injury/damage to the appliance, electric shock, risk of fire and burns!
- Only use the appliance for its intended purpose and as described in this manual.
- Place the appliance on a even and heat-resistant surface. Do not place it on top of a metal surface.
- Always let the appliance cool down before attempting to exchange accessories or clean it.
- Never use the appliance without having filled water into the drip pan of the housing enclosure but NEVER fill water into the aluminium reflector tray of the appliance
- When filling in water, make sure not to exceed the MAX (0.9L) filling mark inside the housing enclosure
- Water level decreases during use. Fill up water, if necessary. When filling up, make sure not to exceed the MAX amount of 0.9 L and not to splash water onto the heating element.
- Do not move the appliance during use. Danger of serious burns from hot water!
- The appliance heats up during use. Therefore, only touch the protected control panel area to set the cooking temperature. When handling food on the grill always use tongs, spatulas or forks. Never touch the heating element with these utensils! Danger of serious burns!
- Never operate the appliance near inflammable liquids or gas sources.
- Never use charcoal or similar combustible fuels with this appliance.
- Do not use the appliance close to or under inflammable objects, e.g. table cloth, curtains, wall cabinets.
- Attention: Foods with a high oil and fat content might easily ignite and catch fire.
- Ensure proper room ventilation, when using the barbecue indoors, as smoke may develop.
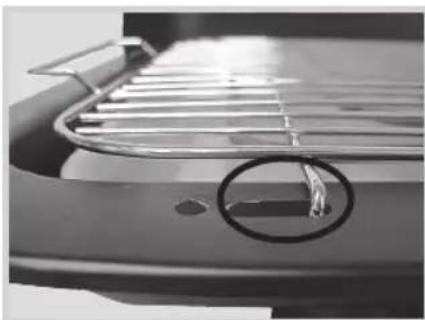
- ONLY switch on the appliance when all parts have been assembled! When the heating element is detached from the barbecue, never connect it to the mains. Danger of serious burns!
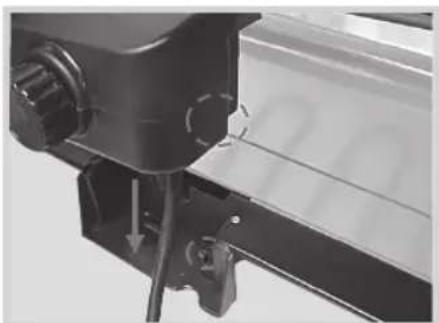
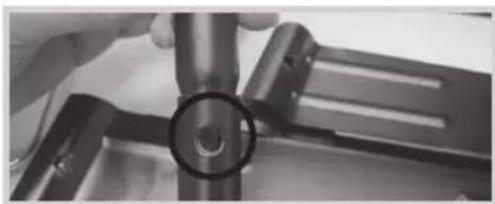
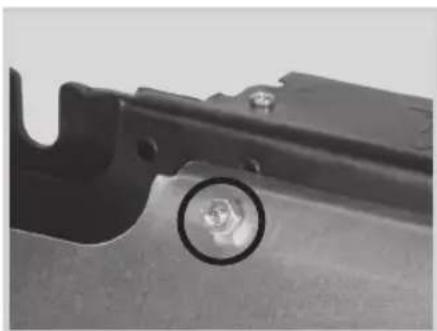
- Attention! The control panel of the heating element has an integrated safety switch (see photo underneath). Fixing the heating element to the barbecue enclosure's sheet metal activates this switch. Should the enclosure be bent, the safety switch might not be able to operate, i.e. the appliance would not heat. If necessary, adjust sheet metal manually.
- Do not connect any other household appliances to the same receptacle / multiple receptacle, as in an emergency the plug must be quickly accessible.
- CAUTION: In order to avoid a hazard due to inadvertent resetting of the thermal cut out, this appliance must not be supplied through an external switching device, such as an external timer, or connected to a circuit that is regularly switched on and off by the utility.
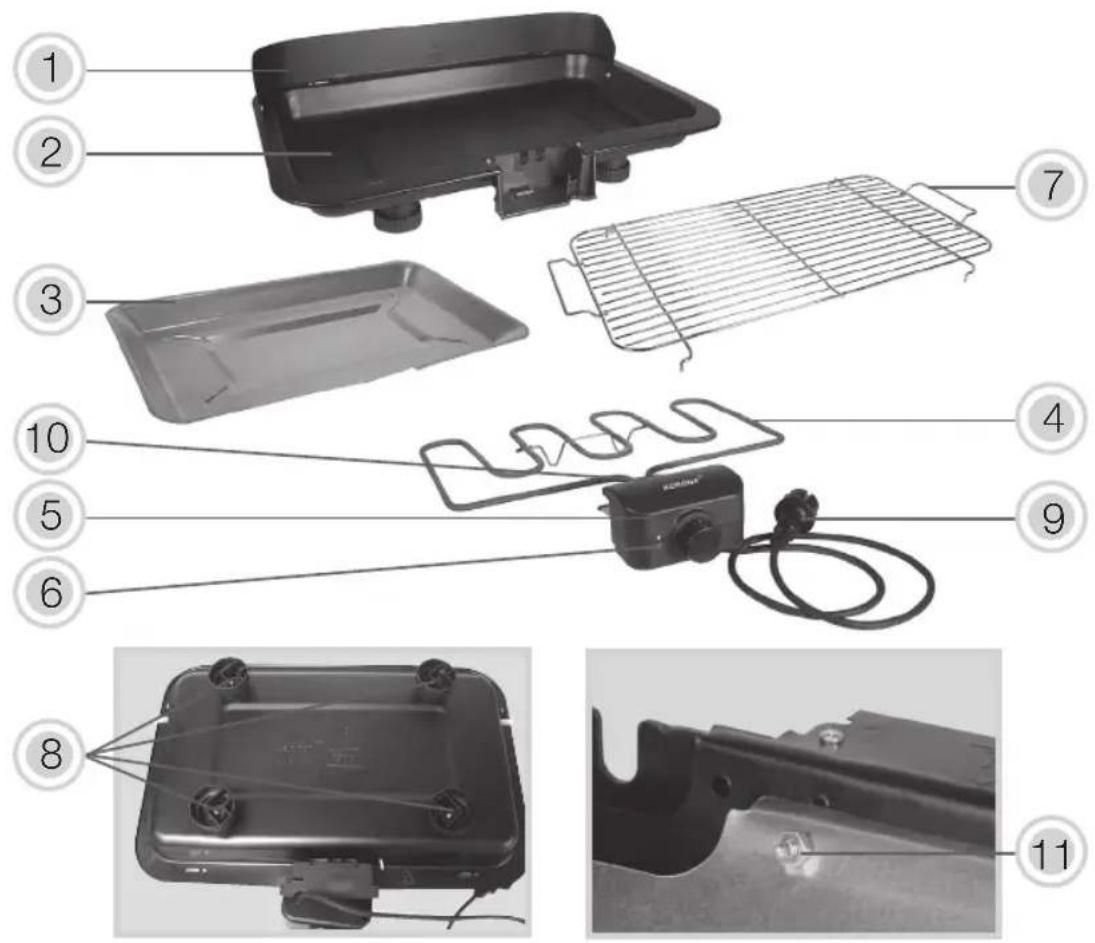
Product Description
-
Detachable windshield
-
Barbecue enclosure (housing)
-
Removable aluminium reflector tray
-
Heating element
-
Operating control with temperature control knob / Thermostat
-
Indicator light
-
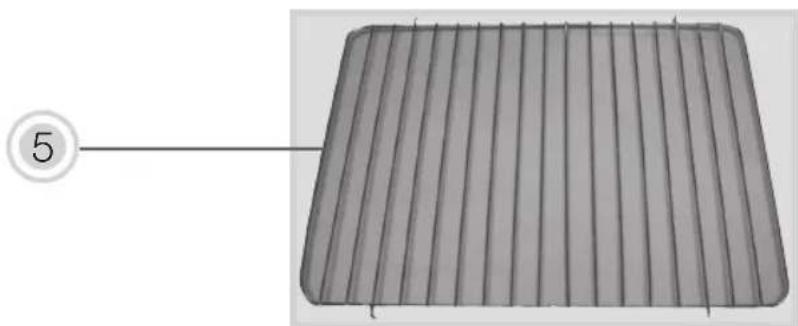
Grill rack
-
4 rubber feet (rear side)
-
Power cord and plug
-
Safety switch
-
Screw & Nut (drip tray)
Temperature control knob/Thermostat:
-MIN
-MAX
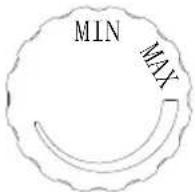
During operation, an integrated thermostat switches the appliance on and off to ensure a constant temperature. This is indicated by the indicator light cycling on and off.
Windshield
When using the barbecue outside, the windshield can help to avoid heat loss owing to strong wind and thus prolonged cooking times.
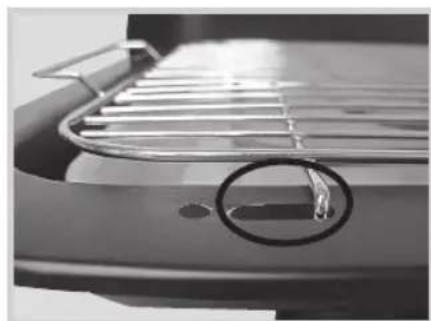
Safety Switch
natural_image
Close-up of a mechanical assembly with a black component and a white panel, showing no visible text or symbols.Note: The Safety switch ensures that the heating element will only start the heating process, once it is properly sitting on the barbecue enclosure!
Stand
- Legs (long metal poles (4x) / short metal poles (4x))
- Rubber caps (8x)
- Metal plates (long (2x), short(2x))
- Screw and nuts (4x)
- Storage rack

natural_image
3D diagram of a rectangular grid structure with vertical lines, labeled with number 5 (no text or symbols on the grid itself)Before First Use
- Remove all packaging material and check whether appliance is complete.
• Clean the parts as described under Cleaning and Care.
• Assemble the appliance as described under Assembly. - Place the appliance on an even, non-slippery and resistant surface.
- Fully unwind the power cord and connect the appliance to a properly installed wall socket.
- Do not use the appliance if it shows any sign of damage.

Warning: Plastic bags are a danger to toddlers and es, therefore keep them away to avoid suffocation.
Protective coating
The heating element of the appliance has a protective coating. To remove the protective layers on the heating element, heat up the appliance for about 10 minutes on the highest setting. Afterwards, let the appliance and accessories completely cool down and clean them according to “Cleaning and Care”.

Note: During this process, the appliance may briefly use some smoke or smell which is due to residues the heating elements left over from the manufacturing ess. This is normal and not harmful. Make sure that the is well ventilated.
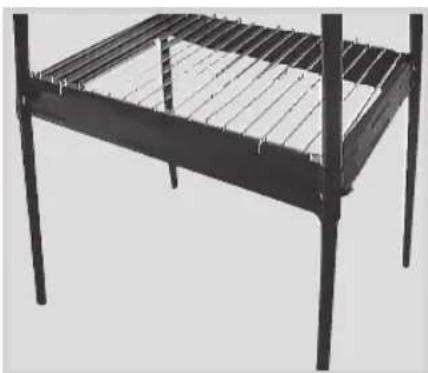
Assembly of the Stand
The stand must be assembled before using the barbecue grill.
Remove all parts from its packing and start assembling the stand.
natural_image
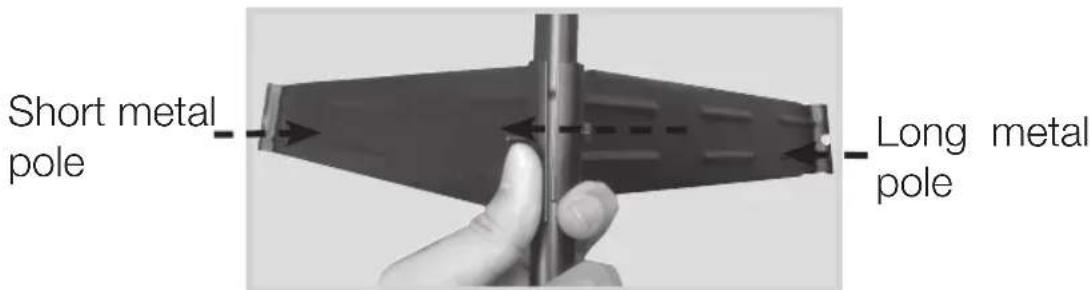
Close-up of a metal bracket with mounting holes and a dashed line indicating a measurement or alignment (no text or symbols visible)Short metal pole
Long metal pole
natural_image
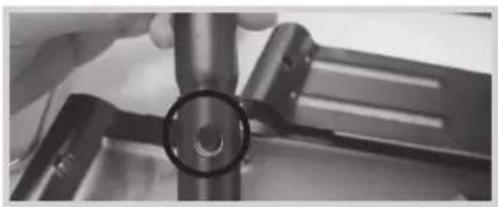
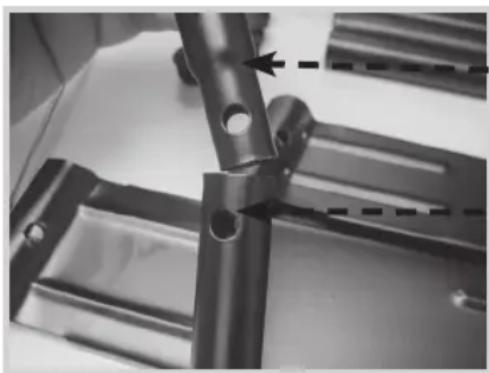
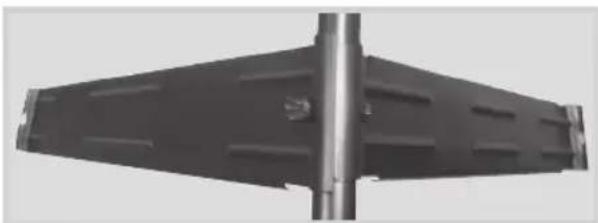
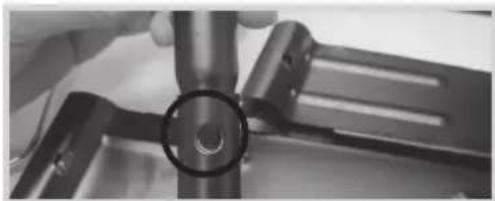
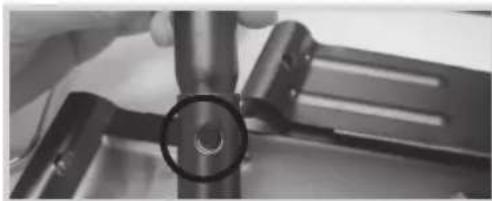
Close-up of a mechanical component with a circular hole, no visible text or symbols- Take the metal poles (1) and insert the long pole (1) into the short pole (1). Make sure that the holes of both poles (1) are aligned. The shorter metal pole (1) should be facing upwards towards the grill unit.
-
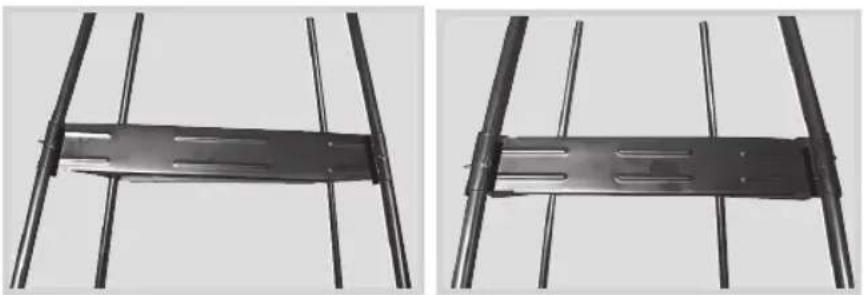
Attach the legs (metal poles) (1) of the stand to the metal plates (3).
-
Place the holes of the short as well as plates (3) over the holes of the metal poles (1) and insert the screw (4).
- Attach the nut (4) onto the screw (4) and slightly fasten it. The long metal plates (3) should be attached to the front and the short metal plates (3) should be attached to the sides of the stand.
- Attach the remaining 3 legs (1) to the stand accordingly.
natural_image
Exterior view of a metal-framed industrial chimney or support structure (no visible text or symbols)- Now, fasten the nut (4).
natural_image
Two views of a metal bracket mounted on vertical rods, shown from close-up and side-up (no text or symbols visible)Note: The mounted stand has a trapezoidal shape. The narrow side is facing upward.

natural_image
Close-up of a finger pressing a black cylindrical component with a serrated tip (no text or symbols visible)- Insert the rubber caps (2) into each opening of the assembled leg (1).
natural_image
Close-up of a metal grate with slatted edges and a small rod inserted into the center (no text or symbols visible)- Insert the storage rack.
natural_image
Metal fence structure with vertical slats and horizontal ribs (no text or symbols)- The stand is now fully assembled.
Assembly of the Grill
- Attach the 4 rubber feet (8) to appliance (rear side).
natural_image
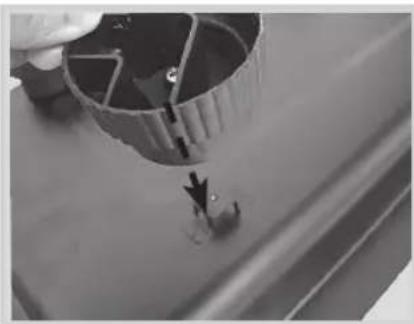
Close-up of a mechanical component with a downward arrow indicating motion or force (no visible text or symbols)- Attach the windshield (1) by inserting the prongs into the respective openings of the housing (2). Make sure to properly secure it.
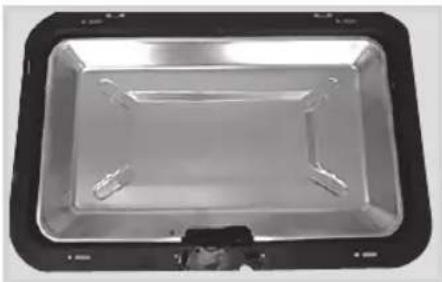
- Place the removable aluminium reflector tray (3) into the barbeque enclosure (housing) (2).
natural_image
Top-down view of a metallic rectangular tray with four small protrusions, no visible text or symbols.- Fasten the aluminium reflector tray (3) with the screw and nut (11). The drilling holes are at the front, on the left of the operating control.
natural_image
Close-up of a metal bracket with a circular hole and a small hexagonal bolt (no text or symbols visible)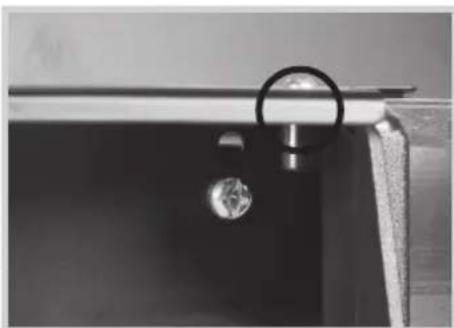
natural_image
Close-up of a mechanical component with a metallic ring and circular end (no visible text or symbols)- Insert the two prongs of the operating control (5) into the drilling holes of the appliance housing (2). Make sure when
inserting the thermostat (5) that it is properly positioned into the guides on both sides and press it down firmly until it clicks into place.
natural_image
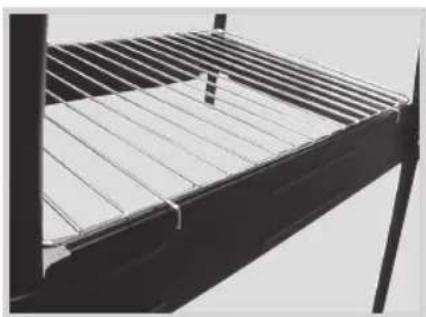
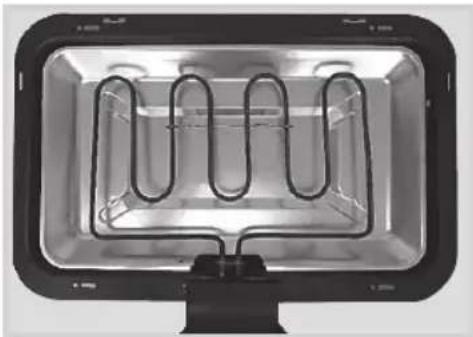
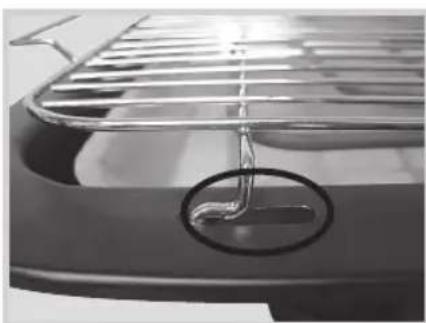
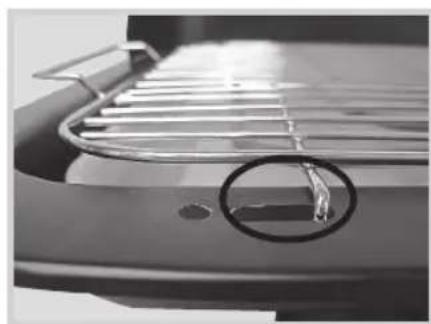
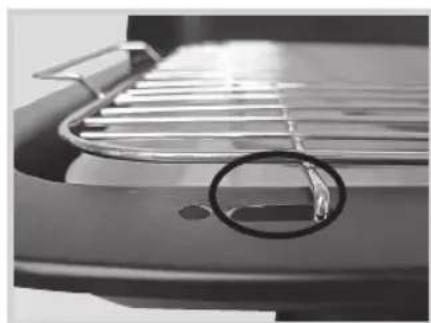
Interior view of a rectangular oven with three coiled heating elements (no text or symbols visible)- Attach the grill rack (7) to the appliance housing (2) and make sure that it is properly secured. The height of the grill rack is adjustable: High or Low.
natural_image
Close-up of a car's front grille with a circular emblem on the rim (no text or symbols visible)Higher Level
natural_image
Close-up of a grater with a circular annotation highlighting a specific object (no text or symbols visible)Lower level
Operation
Always make sure to fill water into the drip pan of the barbecue enclosure (2) before operating the appliance. The removable drip tray (3) will be placed on top, after the drip pan of the barbecue enclosure (2) has been filled with water.
Never operate the appliance without water in the barbecue enclosure drip pan (2)!

The appliance should only by used in a well-ated room or a wind protected outer area!
- After assembling the appliance, remove the grill rack (7), heating element (4) and removable aluminium reflector tray (3).
- Fill between 0.4L to 0.9L of water into the drip pan of the barbecue enclosure (housing) (2). Make sure not to exceed the MAX (0.9L) level.

Caution! Make sure the appliance is shut off and rugged! Danger of electric shock.
- Follow steps 3. - 6. under Assembly.
- Connect the appliance plug to a properly installed and easy accessible wall socket.
- Switch the appliance on by turning the temperature control knob (5) to the highest level (MAX). Heat the appliance up for approx. 10 Minutes. The indicator light (6) lights up. After this heating up process, adjust the temperature by turning the temperature control knob (5) to your desired level. The integrated thermostat will keep the pre set temperature at a constant level.
- As soon as the respective temperature is reached the indicator light (6) goes out.

Attention: The temperature control (5) is continuously able.
- The appliance I is now ready for use. - Always place the food to be grilled into the middle of the grill rack (7) -

During use the indicator light will will cycle on and off the thermostat keeps the heating element at the right erature.
- After use, always turn the temperature control knob (5) to MIN. and unplug the appliance.
The temperature of accessible surfaces may be high during operation. Therefore, do not touch the appliance during and/or immediately after operation. Use pot handlers when handling the food.
Warning: This appliance should only be connected to a properly installed wall socket and should not be operated by any means of an external timer or separate remote-control system.
Cleaning and Care
Due to hygienic reasons clean your appliance on a regular basis, best after each use, and remove any food residues. Not doing so could possibly result in a hazardous situation.
Before cleaning, always switch off the appliance and disconnect it from the mains. Let it completely cool down.
Never immerse the appliance in water. Danger! Electric Shock!
Remove the heating element with the operating control before cleaning and wipe it off with a dry cloth. Make sure that it has completely cooled down.
Clean the housing of the appliance with a moistened soft cloth. Do not use any aggressive cleaning agents and/or other hard objects to clean the appliance.
Once the aluminium reflector tray and grill rack have cooled down, clean them in warm water using some dishwashing detergent, rinse and dry them thoroughly.
Remove splatter/food residues with a damp soft cloth. necessary, use a mild washing up liquid.
The parts of the appliance are not dishwasher safe.
Cleaning and user maintenance shall not be made by en without supervision.
Storage
Disconnect the appliance from the mains and let it completely cool down.
Keep the appliance away from children and store it in a clean and dry place.
Disposal Instructions
Waste electrical devices marked with this sign must not be disposed of with your household waste, but are to be collected separately. Therefore, please return this device at the end of its life cycle to special collection points for disposal or your local dealer.

Your Barbecue Grill with Stand 46221 is packed in a retail box. Such boxes are recyclable waste, i.e. they are reusable or recyclable.
Technical Data:
Voltage: 220 - 240 V \~ 50 Hz
Rated Power: 2200 W
Protection Class: I
Technical data subject to change!
CE
Guarantee:
This product is guaranteed against defects in materials and workmanship for a period of 2 years.
This guarantee is not valid:
- if the appliance has not been used in accordance to the instructions
• for damages due to wear and tear (batteries, etc.)
• for damages known by customer at time of purchase
• for damages caused by owner
This guarantee does not affect your statutory right, nor any legal right you may have as a customer under applicable national legislation governing the purchase of goods.
In order to assert his/her right in a guarantee case during the guaranteed period, the customer must provide evidence of the date of purchase (receipt).
The guarantee is to be asserted against
KORONA electric GmbH, Sundern/Germany.
Telephone Hotline: +49 2933 90284-80
Mail: service@korona-electric.de
web: www.korona-electric.de
within 2 years after the date of purchase. In case of guarantee the customer is given the right to get the appliance repaired at our own or at an authorized shop. Further rights (due to guarantee case) are not given to the customer.
Beoogd gebruik
Productbeschrijving
natural_image
Close-up of a mechanical assembly with a black component and white panel, no visible text or symbols
natural_image
3D rendering of a rectangular grid structure with parallel lines, labeled with number 5 (no text or symbols on the diagram itself)natural_image
Close-up of a metallic mechanical component with mounting holes and a dashed line indicating a measurement or alignment (no text or symbols visible)Korte metalen paal
Lange metalen paal
natural_image
Close-up of a hand holding a metallic mechanical component with a circular hole (no visible text or symbols)natural_image
Close-up of a hand holding a metallic object with directional arrows, no visible text or symbolsLange metalen paal
natural_image
Exterior view of a metal bracket with a vertical pole and textured side (no text or symbols visible)natural_image
Two views of a metal bracket with vertical supports, shown from different angles (no text or symbols visible)natural_image
Close-up of a finger pressing a cylindrical component with a serrated tip (no visible text or symbols)natural_image
Close-up of a metal grate with slatted edges and a small rod inserted into the middle section (no text or symbols visible)natural_image
Exterior view of a black metal bench with slatted top and four legs (no text or symbols visible)natural_image
Close-up of a mechanical component with a downward arrow indicating motion or force, no visible text or symbolsnatural_image
Top-down view of a rectangular metal tray with internal compartments and mounting base (no text or symbols visible)natural_image
Close-up of a mechanical component with a circular hole and a central screw (no visible text or symbols)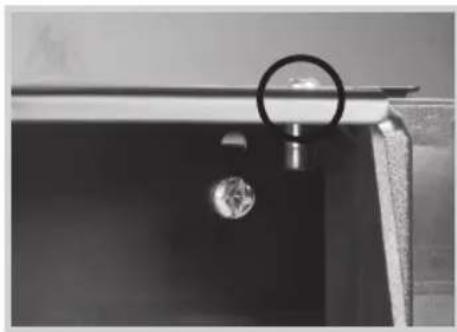
natural_image
Close-up of a dark metal door with a circular handle and central knob, mounted on a horizontal surface (no text or symbols visible)natural_image
Interior view of a rectangular oven with coiled heating elements (no text or symbols visible)natural_image
Close-up of a car's front grille and side trim (no text or symbols visible)Hoge stand
natural_image
Close-up of a grater's grille with a circular annotation highlighting a specific area (no text or symbols visible)Lage stand
Gebruik
natural_image
Close-up of a mechanical assembly with no visible text or symbolsnatural_image
Close-up of a metal bracket with mounting holes and a dashed line indicating alignment or repair (no text or symbols visible)Tube en métal court
Tube en métal long
natural_image
Close-up of a hand holding a metal mechanical component with a circular hole, no visible text or symbolsnatural_image
Close-up of a hand holding a metallic object with directional arrows indicating movement or force (no text or symbols visible)natural_image
Exterior view of a metal bracket with a vertical pole and textured side (no text or symbols visible)natural_image
Two views of a metal bracket with vertical supports, shown from different angles (no text or symbols visible)natural_image
Close-up of a finger pressing down on a black cylindrical component (no visible text or symbols)natural_image
Close-up of a metal grate with slatted edges and a small rod inserted into the middle section (no text or symbols visible)natural_image
Exterior view of a black metal fence structure with slatted edges and vertical supports (no text or symbols)natural_image
Close-up of a mechanical component with a tool inserted, showing no visible text or symbols.natural_image
Top-down view of a rectangular metal tray with four small cutouts and a black base (no text or symbols visible)natural_image
Close-up of a mechanical component with a circular inset showing a small metallic feature (no text or symbols visible)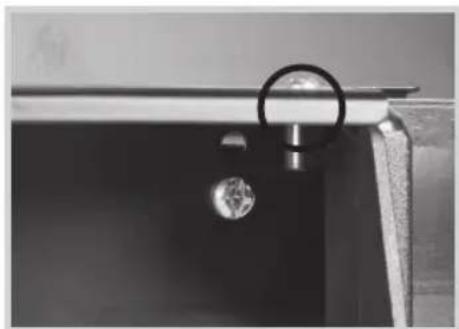
natural_image
Close-up of a mechanical component with a circular ring and central hole (no visible text or symbols)natural_image
Interior view of a rectangular oven with three U-shaped heating elements (no text or symbols visible)natural_image
Close-up of a car's roof grille with a circular inset showing a coiled cable or wire (no text or symbols visible)Position haute
natural_image
Close-up of a grater handle with a circular annotation highlighting a specific area (no text or symbols visible)Position basse
Fonctionnement
natural_image
Abstract geometric shape with curved and angular gray segments, no text or symbols presentRef: 46221/2021.1