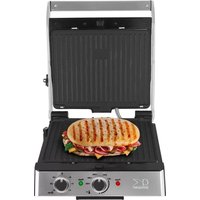
FHG 43302 SS - Grill plate KALORIK - Free user manual and instructions
Find the device manual for free FHG 43302 SS KALORIK in PDF.


User questions about FHG 43302 SS KALORIK
0 question about this device. Answer the ones you know or ask your own.
Ask a new question about this device
Download the instructions for your Grill plate in PDF format for free! Find your manual FHG 43302 SS - KALORIK and take your electronic device back in hand. On this page are published all the documents necessary for the use of your device. FHG 43302 SS by KALORIK.
USER MANUAL FHG 43302 SS KALORIK
GRIL EATSMART 4-EN-1
EN......4
ES......14
FR.....25
natural_image
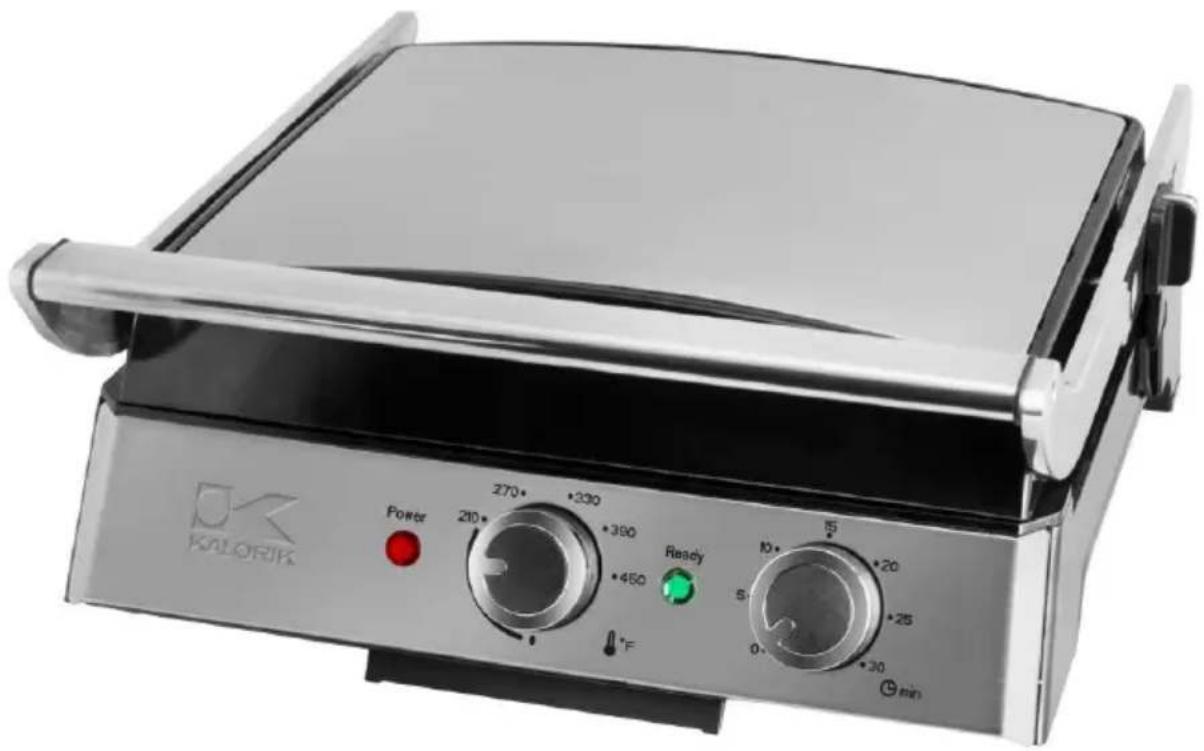
Exterior view of a Kalorik grating appliance (no signage or text beyond branding)PARTS DESCRIPTION/ DESCRIPCIÓN DE PARTES/DESCRIPTION DES PIÈCES
text_image
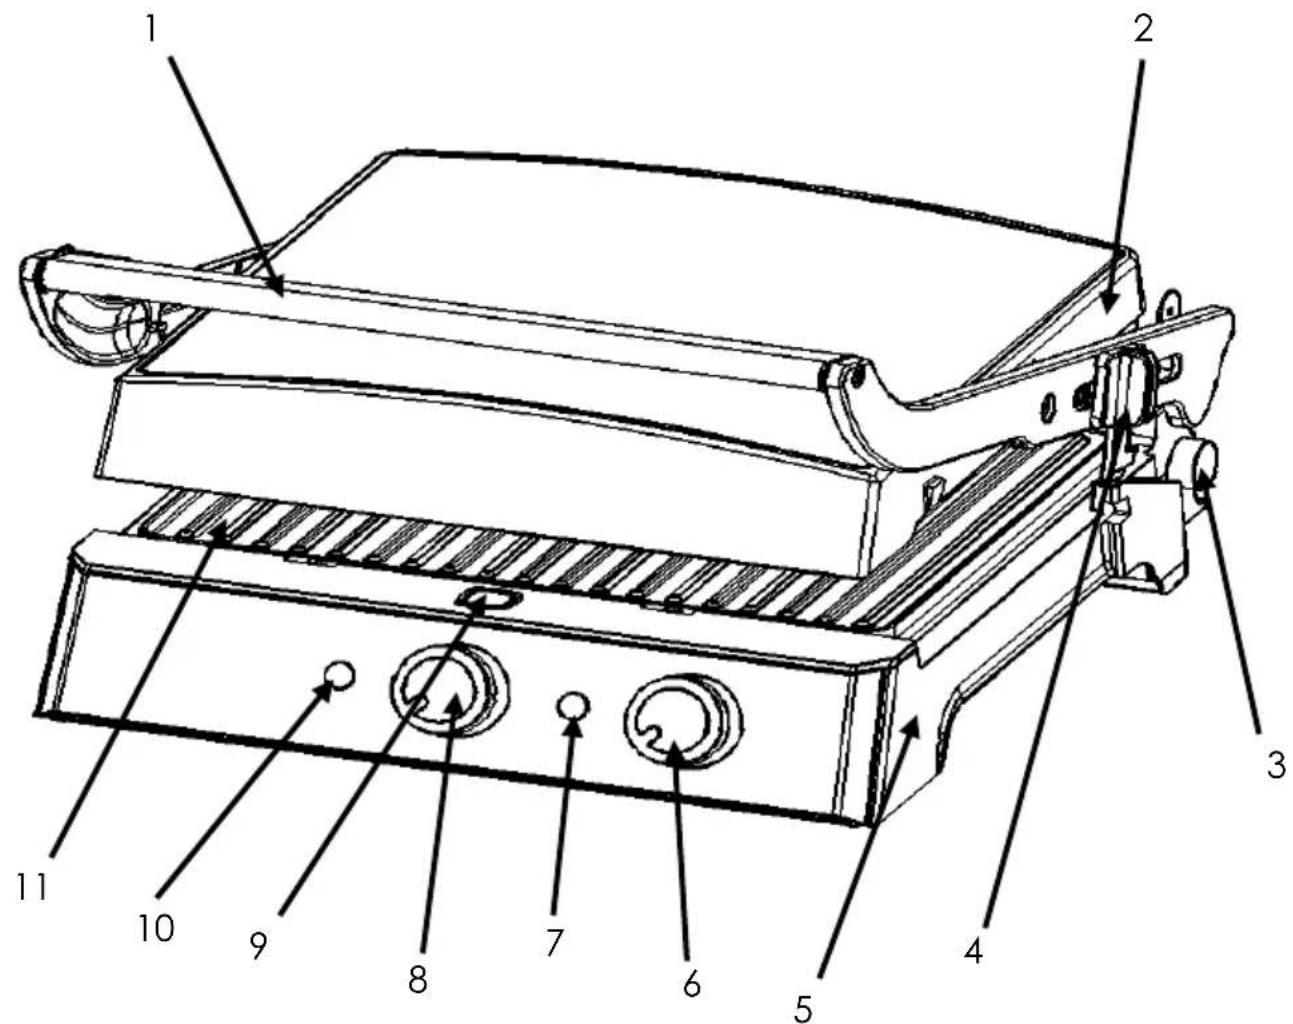
Technical diagram of a mechanical device with numbered parts for identification and assembly reference.PARTS DESCRIPTION/ DESCRIPCIÓN DE PARTES/DESCRIPTION DES PIÈCES
ENGLISH:
-
Handle
-
Upper housing
-
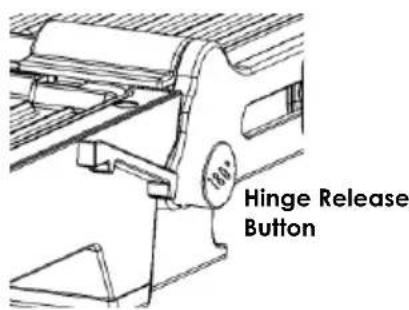
Hinge release button (for 180° opening)
-
Lift lever
-
Bottom Housing
-
Timer knob
-
Ready Light (Green)
-
Thermostat Knob
ESPAÑOL:
Also includes 1 fat collecting tray (not pictured)
(verde)
When using electrical appliances, basic safety precautions should always be followed, including the following:
1. READ ALL INSTRUCTIONS BEFORE USE.
- Use only with AC 110-120 Volt, 50/60 Hz
- DO NOT touch hot surfaces. Use handles or knobs.
- To protect against electrical shock do not immerse the cord, plug, temperature controller or the appliance in water or other liquids.
- Close supervision is necessary when any appliance is used by or near children.
- Unplug from outlet when not in use and before cleaning. Allow to cool before putting on or taking off parts and before cleaning the appliance.
- DO NOT operate any appliance with a damaged cord or plug or after the appliance malfunctions or has been damaged in any manner. Return the appliance to the nearest authorized service facility for examination, repair, or adjustment.
- Do not use outdoors or for commercial purposes.
- The use of accessory attachments not recommended by the appliance manufacturer may result in fire, electric shock or cause injury.
- DO NOT let the cord hang over the edge of a table or counter, or touch hot surfaces.
- DO NOT place on or near a hot gas or electric burner, or in a heated oven.
- DO NOT use the appliance for other than intended use.
- To disconnect, turn any control to "0", then remove the plug from wall outlet.
- Do not intend to operate by means of an external timer or separate remote-control system.
- Extreme caution must be exercised when moving an appliance containing hot oil or other hot liquids
- Do not use on plastic or synthetic tablecloths or any unstable place or near flammable goods including curtains, draperies, walls, and the like, as fire may occur.
-
Never impact this unit or drop from high place.
-
Ensure that this appliance stays clean as it comes into direct contact with food.
- DO NOT touch the plate surface while in use or before cooling down, even when the power is switched to the "0" position.
- DO NOT touch the stainless steel cover during use. HOT SURFACE!
- Do not use metal utensils on the cooking plate, as they will scratch the non-stick coating.
- DO NOT operate without the drip tray.
SAVE THESE INSTRUCTIONS HOUSEHOLD USE ONLY
POLARIZED PLUG INSTRUCTIONS
This appliance is equipped with a polarized plug (one blade is wider than the other). To reduce the risk of electric shock, this plug will fit into the polarized outlet only one way. If the plug does not properly fit into the outlet at first, reverse it. If it still does not fit, contact a qualified electrician.
Do not attempt to modify the plug in any way.
SHORT CORD INSTRUCTIONS
A short detachable power supply cord is provided to reduce the hazards resulting from becoming entangled in, or tripping over a longer cord. Longer detachable power supply cords may be used if care is exercised in their use.
- The electrical rating of the longer cord should be at least that of the appliance. If the electrical rating of the extension cord is too low, it could overheat and burn.
- The longer cord should be arranged so that it will not drape over the counter top or tabletop where it can be pulled on by children or tripped over.
PARTS DESCRIPTION
See page 2-3.
- Before using the appliance for the first time, remove and peel off any promotional and packaging materials. Check that the cooking plates are clean and free of dust.
- Clean the Grill and the accessories (See "Cleaning and Care") and place the appliance on a surface that is flat, dry, and heat resistant. It is recommended to heat the Grill for about 10 minutes without any foodstuff on its surfaces. This helps to eliminate any grease that may have adhered during manufacturing and to eliminate the "new" appliance smell.
- Ventilate the room during this period. When your grill is heated for the first time, it may emit slight smoke or odor. This is normal with many heating appliances. This does not affect the safety of your appliance.
OPERATION
- Place the unit on a flat, dry, and heat resistant surface.
- Select the grill or griddle side of the plates and follow the instructions from the “How to remove the plates” section to remove and/or attach the plates.
- With the thermostat set to the lowest position, plug the appliance in. The red “Power” light will light up.
- Position the fat collecting tray near the spout on the back of the appliance.
- Turn the thermostat knob to the desired temperature level. The highest temperature is better aimed for searing or grilling meat. For Paninis or sandwiches, we recommend a medium setting (330°F). For reheating, a low temperature setting is recommended (210°F).
- Preheat the grill to reach the ideal cooking temperature. When the appliance reaches the desired temperature, the green pilot light will light up. In order to preheat faster, keep the plates of the appliance closed. Once the target temperature is reached, open the grids to avoid overheating of the unit.
- Apply a little oil or a non-stick cooking spray on the cooking plate if needed. The food can then be placed on the grill.
To Use as a contact grill
Use the Grill as a contact grill to cook burgers, boneless pieces of meat and thin cuts of meat and vegetables.
- Set the thermostat knob to your desired temperature. At first, try a medium to high temperatures (330°F - 390°F). You may later adjust it lower or higher according to your preference.
- Prepare the burgers, boneless pieces of meat and thin cuts of meat or other foods as directed and, using oven mitts and heat-resistant wooden or plastics utensils, place onto the bottom cooking plate.
- Close the top cooking plate, which is equipped with a floating hinge that is designed to evenly press down on the food. The top plate must be fully lowered to achieve grill marks on the selected foods and ensure the best cooking.
- To adjust the height of the upper cooking plate, simply slide the lift lever up or down.
- When the food is cooked, use the handle to open the lid. Remove the food with the help of a heat-resistant plastic or wooden spatula. Never use metal tongs or a knife as these can cause damage to the non-stick coating of the cook plates.
- NOTE: The ribs on the grill plates and the grease spout at the corner of the plate are designed to allow the grease to drip from the meat and drain off into the fat collecting tray.
Cooking with less fat
- If you want to cook with less fat, you can get rid of the excess cooking fat by using the slanted leg underneath the front of the appliance. This will provide the contact grill with a slope that will help evacuate the extra fat near the front edge of the cooking plate, and towards the fat collecting tray.
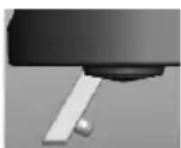
Slanted leg
To Use as Press Grill
Use the Grill as press grill to grill sandwiches, breads and quesadillas.
- Set the thermostat knob to your desired setting. At first, try a medium setting. You may later adjust it lower or higher according to your preference.
- Prepare the sandwiches and, using oven mitts and heat-resistant wooden or plastics utensils, place them onto the bottom cooking plate. Always place the sandwiches towards the rear of the bottom cooking plate first.
- Close the top cooking plate, which is equipped with a floating hinge that is designed to evenly press down on the sandwich. The top plate must be fully lowered to cook sandwiches.
- Cook for about 3 to 6 minutes or until golden brown, adjusting the time to suit your own individual taste.
- When the sandwich is cooked, use the handle to open the lid. Remove the sandwich with the help of a heat-resistant plastic or wooden spatula. Never use metal tongs or a knife as these can cause damage to the non-stick coating of the cook plates. Place the cooked food on a plate as it will be hot.
- To ensure proper and uniform grilling, when cooking more than one food item on the grill, it is important for the thickness of all food items to be consistent, so that the cover will close evenly on the food.
To Use as Open Grill
Use the Grill as an open grill to cook burgers, steak, poultry fish and vegetables. We do not recommend cooking chicken parts with bones, as they may not cook evenly on an open grill.
- Put the Grill on a clean, flat, heat-resistant surface where you intend to cook in flat position.
- With your left hand on the handle, use your right hand to push the hinge release button. Push the handle back until the cover rests flat on the counter. The unit will stay in this position until you lift the handle and cover to return it to the closed position.
text_image
Hinge Release Button- The upper plate/cover is now level with lower plate/base. The upper and lower plates line up to create one large cooking surface. You should use the two fat collecting trays in this configuration, one per plate.
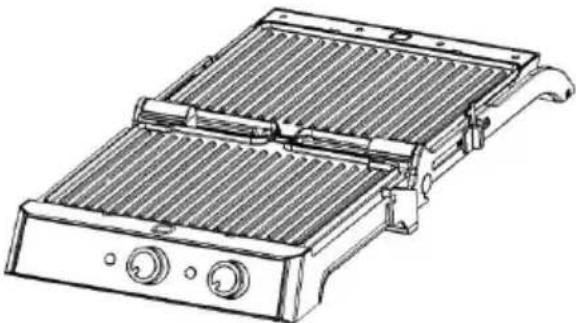
- Cooking on the open grill is the most versatile method of using the Grill. In the open position, you have double the surface area for grilling.
- You have the option of cooking different types of foods on separate surfaces without combining their flavors, or cooking large amounts of the same type of food. The open position also accommodates different cuts of meat with varying thicknesses, allowing you to cook each piece to your liking.
natural_image
Line drawing of a portable grating or heater with heat exchangers and control knobs (no text or symbols)TO REMOVE THE COOKING PLATES
- Your grill comes with reversible cooking plates allowing you to use your appliance as a grill or as a griddle.
- Always unplug the grill and allow it to cool down completely before removing the cooking plates.
- Open the grill to the open grill position (180°).
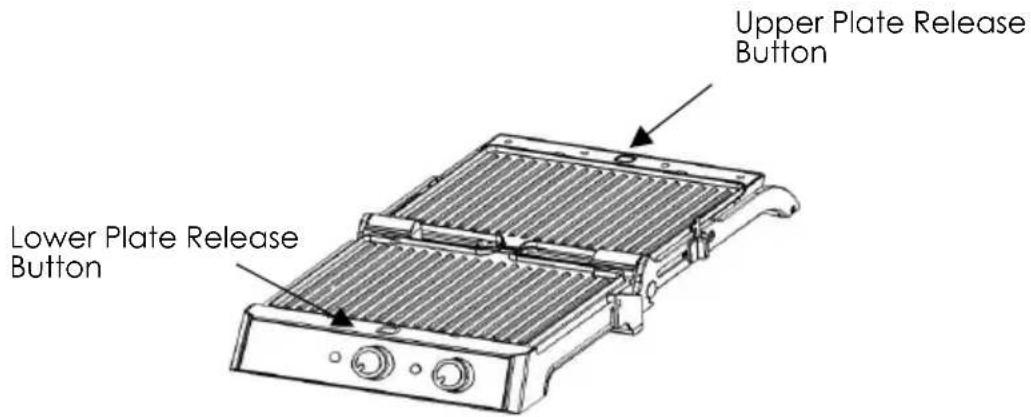
- Press the upper plate release button to unlock and remove the upper plate. Press the lower plate release button to unlock and remove the lower plate.
- When pressing the button, the plate will lift up slightly from the base. Use both hands to lift it up further and slide it from under the metal brackets.
text_image
Upper Plate Release Button Lower Plate Release ButtonPRACTICAL HINTS
- Frozen food should always be thawed before it is grilled.
- To grill meat, turn the thermostat to the maximum position and preheat the grill. For other ingredients, choose the temperature accordingly.
- If you grill vegetables, fish or lean meat, add a little oil on the grids or spray the grilling surface with a non-stick cooking spray. If you are grilling meat with any amount of fat, or if the food has been marinated, there is no need to treat the grill prior to cooking.
GET MORE OUT OF YOUR PRODUCT
Browse Chef-created recipes specifically made for your Kalorik product. Visit our website www.kalorik.com to see our extensive recipe library and start cooking. Sign up for the Kalorik email mailing list to receive special offers and recipes and connect with us on social media for daily inspiration.
- Put in "0" position, pull the plug from the power socket and let the appliance cool down completely before cleaning it.
- Clean the removable grill plates with a damp cloth, sponge, a paper towel or place them in the dishwasher.
- Do not use anything abrasive that can scratch or damage the non-stick coating.
- Do not use hard, sharp utensils. If the grill plates are very dirty, use a mild dish detergent. Rinse with hot water on a sponge or towel and dry the plates carefully. Cleaning is best achieved when the grill plates are still slightly warm. Avoid touching burning surfaces.
- To clean the housing, use a damp cloth with mild surface cleaning detergent, if necessary.
- The fat collecting tray can be washed in the sink with warm soapy water.
- Make sure no water or other liquid penetrates into the appliance.
- NEVER clean or rinse the appliance under running water.
• DO NOT IMMERSE IN WATER OR ANY OTHER LIQUIDS!
STORAGE
- Always unplug the grill before storage. Unplug from the wall outlet first.
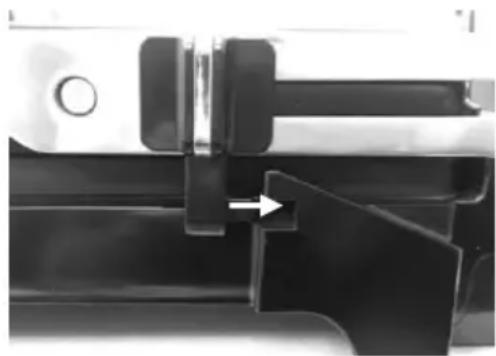
• Always make sure the grill is cool and dry before storing. - Lock the cooking plates in the closed position by sliding the lift lever towards you (position closest to the front handle), lowering the upper plate to the closed position and sliding the lever back 12 inch to the locked position.
natural_image
Close-up of a mechanical component with a highlighted section and arrow indicating direction (no visible text or symbols)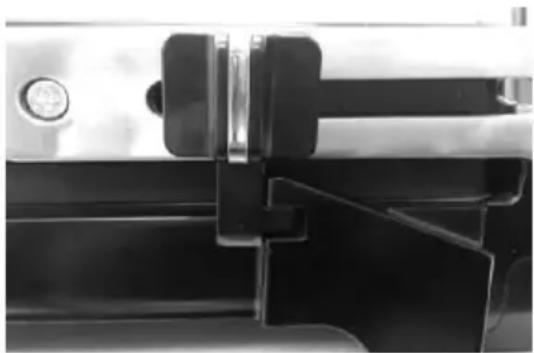
natural_image
Close-up of a metallic mechanical component with black and white clamping mechanism (no visible text or symbols)We suggest that you complete and return the enclosed Product Registration Card promptly to facilitate verification of the date of original purchase. However, return of the Product Registration Card is not a condition of these warranties. You can also fill out this warranty card online, at the following address: www.KALORIK.com
This KALORIK product is warranted in the U.S.A. and in Canada for 1 year from the date of purchase against defects in material and workmanship. This warranty is not transferable. Keep the original sales receipt. Proof of purchase is required to obtain warranty performance.
During this period, if the KALORIK product, upon inspection by KALORIK, is proven defective, it will be repaired or replaced, at Kalorik's option, without charge to the customer. If a replacement product is sent, it will carry the remaining warranty of the original product.
This warranty does not apply to any defect arising from a buyer's or user's misuse of the product, negligence, failure to follow KALORIK instructions noted in the user's manual, use on current or voltage other than that stamped on the product, wear and tear, alteration or repair not authorized by KALORIK, or use for commercial purposes. There is no warranty for glass parts, glass containers, filter basket, blades and agitators, and accessories in general. There is also no warranty for parts lost by the user.
ANY WARRANTY OF MERCHANTABILITY OR FITNESS WITH RESPECT TO THIS PRODUCT IS ALSO LIMITED TO THE ONE YEAR LIMITED WARRANTY PERIOD.
Some states do not allow limitation on how long an implied warranty lasts or do not allow the exclusion of incidental or consequential damages, so the above limitations may not apply to you. This warranty gives you specific legal rights, and you may also have other rights which vary from state to state.
If the appliance should become defective within the warranty period and more than 30 days after date of purchase, do not return the appliance to the store: often, our Customer Service Representatives can help solve the problem without having the product serviced. If
servicing is needed, a Representative can confirm whether the product is under warranty and direct you to the nearest service location.
If this is the case, bring the product, or send it, postage prepaid by the user (all Kalorik customers are responsible for the initial shipment back to the warranty center), along with proof of purchase and a return authorization number indicated on the outer package, given by our Customer Service Representatives. Send to the authorized KALORIK Service Center (please visit our website at www.KALORIK.com or call our Customer Service Department for the address of our authorized KALORIK Service Center).
When sending the product, please include a letter explaining the nature of the claimed defect.
If you have additional questions, please call our Customer Service Department (please see below for complete contact information), Monday through Thursday from 9:00am - 5:00pm (EST) and Friday from 9:00am - 4:00pm (EST). Please note hours are subject to change.
If you would like to write, please send your letter to:
KALORIK Customer Service Department
Team International Group of America Inc.
16175 NW 49 ^th Avenue
Miami Gardens, FL 33014 USA
Or call:
Toll Free: +1 888-521-TEAM / +1 888-KALORIK
Only letters can be accepted at this address above. Shipments and packages that do not have a return authorization number will be refused.
natural_image
Technical line drawing of a mechanical assembly with no visible text or symbolsnatural_image
Line drawing of a portable electric grill with heat exchangers and control knobs (no text or symbols)PARA QUITAR LAS PLANCHAS DE COCION
OBTENGA MÁS DE SU PRODUCTO
natural_image
Close-up of a mechanical component with black and white surfaces, no visible text or symbols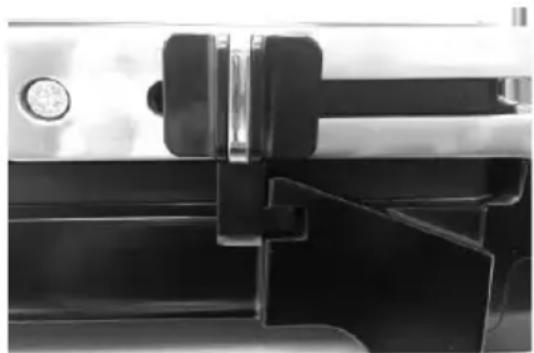
natural_image
Close-up of a mechanical component with black and metallic parts, no visible text or symbolsTeam International Group of America Inc.
16175 NW 49 ^th Avenue
Miami Gardens, FL 33014 USA
O llame gratuitamente (U.S.A.) al +1 888-521-TEAM / +1 888-KALORIK
natural_image
Line drawing of a portable grill with heat exchangers and control knobs (no text or symbols)ENLEVER LES PLAQUES DE CUISSON
natural_image
Close-up of a mechanical component with black plastic parts and an arrow indicating a specific part (no visible text or symbols)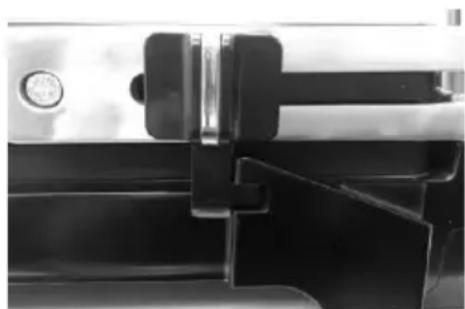
natural_image
Close-up of a metallic mechanical component with black clamps and a circular valve (no visible text or symbols)Team International Group of America Inc.
16175 NW 49 ^th Avenue
Miami Gardens, FL 33014 USA
For questions please contact:
Para preguntas contacte a:
Team International Group of America Inc.
16175 NW 49th Avenue
Miami Gardens, FL 33014 USA

text_image
1 AÑO GARANTIA • GARANTIE 1 AÑO • 1 YEAR WARRANTY 1 YEARModel FHG 43302
User manual content and recipes courtesy of Team International Group – Do not reproduce without consent of the authors - All rights reserved.