EMK6A - Coffee machine DELONGHI - Free user manual and instructions
Find the device manual for free EMK6A DELONGHI in PDF.

| Product type | Moka-type electric coffee maker |
| Brand | DeLonghi |
| Model | EMK6A |
| Dimensions (approx.) | 25 x 15 x 30 cm |
| Weight (approx.) | 1.2 kg |
| Power supply | 230 V ~ 50 Hz, 1200 W |
| Capacity | 3 cups (with half-cafetiere adapter) |
| Material | Aluminum and plastic |
| Functions | Moka coffee brewing, keep warm 30 min, automatic shut-off |
| Care and cleaning | Hand wash, do not put in dishwasher, do not immerse base |
| Safety | Safety valve, do not use without water, hot surfaces |
| Spare parts and repairability | Gasket, funnel filter, filter disk available; repair at authorized service center |
| General information | Household use only |
Frequently Asked Questions - EMK6A DELONGHI
User questions about EMK6A DELONGHI
0 question about this device. Answer the ones you know or ask your own.
Ask a new question about this device
Download the instructions for your Coffee machine in PDF format for free! Find your manual EMK6A - DELONGHI and take your electronic device back in hand. On this page are published all the documents necessary for the use of your device. EMK6A by DELONGHI.
USER MANUAL EMK6A DELONGHI
CAFFETTIERA ELETTRICA
ELECTRIC MOKA COFFEE MAKER
MOKA ÉLECTRIQUE
ELEKTRISCHER ESPRESSOKOCHER
KOFFIE-APPARAAT
CAFETERA
CAFETEIRA
Ηλεκτρική καφετιέρα
ELEKTRISK KAFFEMASKINE
ELEKTRISK ESPRESSOBRYGGARE
ELEKTRISK KAFFEMASKIN
SÄHKÖKAHVINKEITIN
A) If your appliance comes fitted with a plug, it will incorporate a 13 Amp fuse. If it does not fit your socket, the plug should be cut off from the mains lead, and an appropriate plug fitted, as below. WARNING: Very carefully dispose of the cut off plug after removing the fuse: do not insert in a 13 Amp socket elsewhere in the house as this could cause a shock hazard. With alternative plugs not incorporating a fuse, the circuit must be protected by a 15 Amp fuse. If the plug is a moulded-on type, the fuse cover must be re-fitted
The wires in the mains lead are coloured in accordance with the following code:
Green and yellow: Earth
Blue: Neutral
Brown: Live
As the colours of the wires in the mains lead in correspondence with the coloured markings identifying the terminals in your plug, proceed as follows:
when changing the fuse using a 13 Amp Asta approved fuse to BS 1362. In the event of losing the fuse cover, the plug must NOT be used until a replacement fuse cover can be obtained from your nearest electrical dealer. The colour of the correct replacement fuse cover is that as marked on the base of the plug.
B) If your appliance is not fitted with a plug, please follow the instructions provided below:
WARNING - THIS APPLIANCE MUST BE EARTHED IMPORTANT
The green and yellow wire must be connected to the terminal in the plug marked with the letter E or the earth symbol of coloured green or green and yellow.
The blue wire must be connected to the terminal marked with the letter N or coloured black.
The brown wire must be connected to the terminal marked with the letter L or coloured red.

ITALIANO
natural_image
Illustration of a windmill with propeller blades and rotor blades (no text or symbols)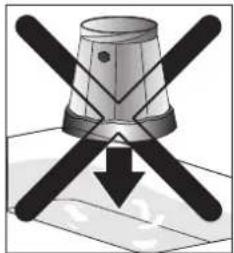
natural_image
Diagram of a mechanical component with two cross-shaped blades and a central cylindrical top, showing a downward arrow (no text or symbols)Carefully read this instruction booklet before installing and using the appliance. This is the only way to ensure the best results and maximum safety for the user.
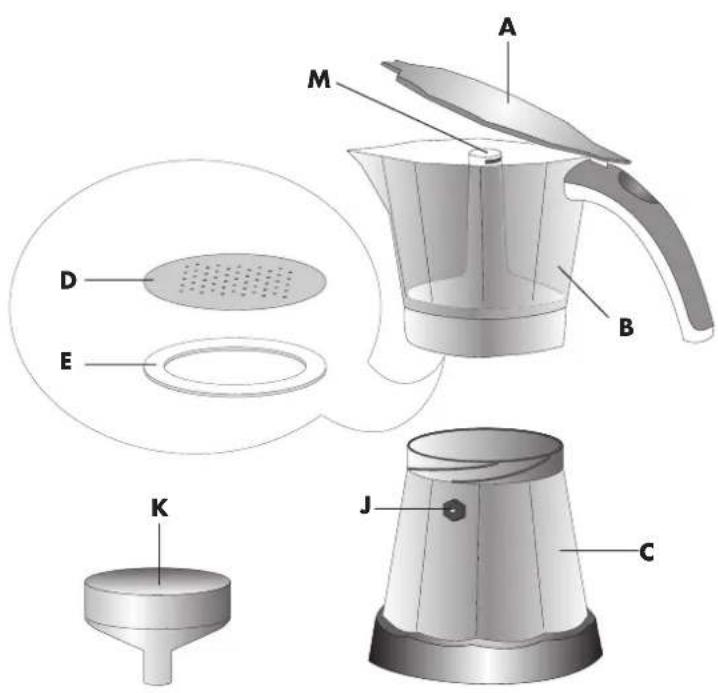
DESCRIPTION OF THE APPLIANCE
The following terminology will be used repeatedly on the following pages.
A. Pitcher lid
B. Pitcher
C. Boiler
D. Disk filter
E. Gasket
F. Support base
G. Power cable
H. On/off switch
I. Pilot light
J. Safety valve
K. Funnel filter
L. Half pot adapter disk
M. Tube
SAFETY WARNINGS
- This machine has been manufactured to "make coffee". Never use other extracts, cocoa powder, camomile, other infusions or soluble substances: these may block the holes in the filter.
- During cleaning, never immerse the base and the boiler in water: this is an electrical appliance.
- Be careful to avoid being scalded by spraying water or steam or due to the improper use of the appliance.
- When using the appliance do not touch the hot surfaces. Use the buttons or handles.
- After having removed the packaging, check that the appliance is in tact. If in doubt, do not use the appliance and contact a professionally qualified person.
- The parts of the packaging (plastic bags, polystyrene foam, etc.) not must be left within the reach of children, as they are potential sources of danger.
- This appliance must only be used for household purposes. All other uses are considered improper and as a result dangerous.
- The manufacturer declines all liability for any damage deriving from improper, erroneous and unreasonable use of the appliance.
- The appliance must work only connected to a power outlet; never use it directly on flames.
- Never touch the appliance with wet or damp hands or feet.
- Never allow the appliance to be used without supervision by children or incapable persons.
- Make sure that children do not play with the appliance.
- In the event of faults or malfunctioning of the appliance, switch it off and not tamper with it. For any repairs, only contact service centres that are authorised by the manufacturer and insist on the use of original spare parts. Failure to observe the above warnings may compromise the safety of the appliance.
- The power cable for this appliance must not be replaced by the user, in that this operation requires the use of special tools. In the event of damage, only contact a service centre authorised by the manufacturer so as to avoid any risks.
INSTALLATION
- Place the appliance on a bench away from water taps and sinks.
- Check that the voltage of the mains power supply corresponds to the value indicated on the appliance's rating plate. Only connect the appliance to a power outlet with a minimum rating of 6A that is properly earthed. The manufacturer declines all liability for any accidents caused if the system is not correctly earthed.
- If the power outlet does not match the plug on the appliance, have the outlet replaced with a suitable type by qualified personnel.
HOW TO PREPARE THE COFFEE
1) Check that the coffee maker is cold, and then unscrew it by holding the boiler with one hand and turning the pitcher anticlockwise with the other (Fig. 1).
2) Remove the funnel filter and, to prepare a full pot of coffee, fill the boiler with fresh water until reaching the safety valve (visible inside the boiler), without exceeding it (Fig. 2).
On the other hand, to prepare half a pot of coffee maker, fill the boiler with water to the circular mark under the safety valve (Fig. 3 - X).
TIP: use fresh and soft water. Salty or hard water will weaken the flavour.
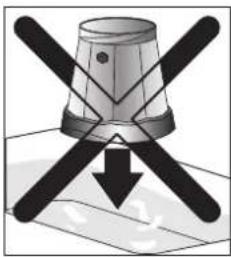
IMPORTANT: do not use the coffee maker without water in the boiler or alternatively using hot water for faster operation.
3) Insert the funnel filter in the boiler (Fig. 4). When preparing half a pot, also place the adapter disk (L) into the funnel filter (Fig. 5).
4) Fill the funnel filter with ground coffee, without pressing it (Fig. 6). Fill it a little at a time to prevent spilling the ground coffee.
5) Distribute the ground coffee uniformly and remove any excess coffee from the edge of the filter.
IMPORTANT: Use good quality, medium-ground coffee, for Moka coffee makers.
6) Tighten the coffee maker securely, without exaggerating, holding the boiler with one hand and turning the pitcher clockwise with the other, without pushing on the handle.
7) Rest the coffee maker on the base (Fig. 7). Close the lid.
8) Press the on/off switch (Fig. 8). The pilot light indicates that the coffee maker is on.
9) The coffee will start to be released after a few minutes.
10) When the coffee has brewed, stir the coffee for uniformity before serving it.
When preparing just half a pot, the coffee maker should be left on the base for around 5 minutes after brewing, to allow it to reach the ideal temperature.
11) When the coffee has brewed, the "keep warm" function will start and the coffee maker will continue to keep the coffee warm for around half an hour. After this period the coffee maker will switch off automatically.
IMPORTANT: the first time that the coffee maker is used, all the accessories and the internal circuits should be washed with hot water. Then make a few batches of coffee to throw away.
KEEP-WARM FUNCTION
Using the keep warm device, the coffee can be drunk hot at the right temperature up to half an hour after starting the machine.
This device is automatically disabled when the coffee maker is removed from the support base after the coffee has brewed.
If the coffee maker is rested on the base with coffee still in the pitcher, it can be kept warm for another half an hour by pressing the on/off switch.
In any case, once the coffee has brewed, the coffee maker can be switched off by pressing the on/off switch.
CLEANING AND MAINTENANCE
- Before performing the cleaning operations, wait for the coffee maker to have cooled down after use.
- Clean the inside of the tube periodically.
- Regularly check the funnel and the gasket: replace if there are signs of wear or deterioration. Use original spare parts only.
- Every so often check that the holes in the disk filter are not blocked; if necessary, clean using a pin (Fig. 9).
- Do not wash the coffee maker in the dishwasher.
- When cleaning do not use solvents or abrasive detergents. Simply clean it with a sponge, keeping attention not to wet the electrical parts.
Never rinse the boiler under the tap water and never immerse it in water.
natural_image
Diagram of a helicopter with wings and propeller (no text or symbols)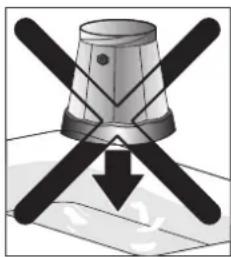
natural_image
Diagram of a mechanical device with four blades and a central hub, showing directional arrows (no text or symbols)TROUBLESHOOTING
| PROBLEM CAUSE SOLUTION | ||
| No coffee is released | No water in the boiler | Fill the boiler with fresh water |
| The coffee takes a long time to be released | The coffee used is not the right typeThe disk filter is blockedThe coffee has been pressed | Use ground coffee expressly for Moka coffee makersClean the disk filter as described in the paragraph "Cleaning and maintenance"Do not press the ground coffee |
| Coffee leaks from the edges of the boiler | The disk filter is blockedThe gasket is burned or torn | Clean the disk filter as described in the paragraph "Cleaning and maintenance"Replace the gasket. |
FRANÇAIS
natural_image
Illustration of a windmill with a propeller and rotor blades (no text or symbols)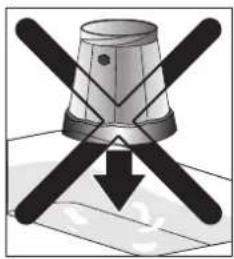
natural_image
Diagram of a mechanical component with two crossed blades and a downward arrow, no text or symbols present.PROBLÈMES DE FONCTIONNEMENT
WARMHALTEFUNKTION – KEEP WARM FUNKTION
natural_image
Diagram of a helicopter with wings and propeller (no text or symbols)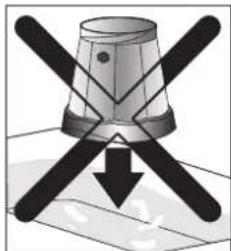
natural_image
Diagram of a mechanical component with two cross-shaped arms and a downward arrow, no text or symbols present.BETRIEBSSTÖRUNGEN
BESCHRIJVING VAN HET APPARAAT
natural_image
Illustration of a windmill with propeller blades and rotor blades (no text or symbols)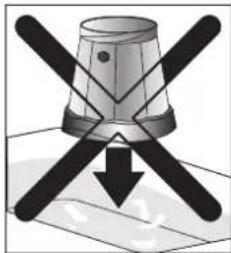
natural_image
Diagram of a mechanical component with two cross-shaped arms and a downward arrow, no text or symbols present.WERKINGSPROBLEMEN
CÓMO PREPARAR EL CAFÉ
natural_image
Illustration of a windmill with propeller blades and rotor blades (no text or symbols)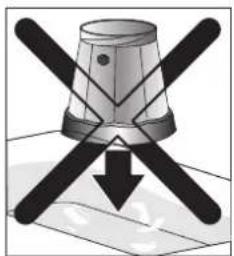
natural_image
Diagram of a mechanical device with four cross-shaped blades and a downward arrow, no text or symbols present.natural_image
Illustration of a windmill with propeller blades and rotor blades (no text or symbols)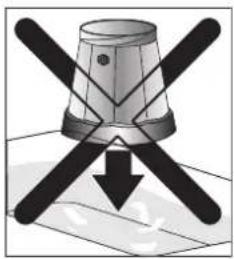
natural_image
Diagram of a mechanical component with two crossed blades and a downward arrow, no text or symbols present.natural_image
Diagram of a wind turbine with propeller and rotor blades (no text or labels)