USER MANUAL 304589 Bearware
Safety guidelines for this device
- Read the user manual carefully and follow the safety instructions. If you do not follow the safety instructions and information on proper handling given in this user manual, we will not be liable for any consequential physical injuries or damage to property.
- This product is not a toy. Keep it out of the reach of children and pets.
- Never leave packaging material lying around. It may become a dangerous plaything for children!
-
Do not expose the product to any mechanical stress.
-
If the product can no longer be used safely, then stop using it and prevent it from being used unintentionally. The product is no longer safe to use if its is visibly damaged, not functioning properly and / or has been stored for a long period under unfavourable conditions or has been exposed to considerable stress during transport.
- Keep the product away from extreme temperatures, direct sunlight, heavy impacts, high humidity, moisture, flammable gases, vapours and solvents.
-
Please handle the product with care. Jolts or falling down even from a low height can damage the product.
-
Get the device installed only by a technician!
- Maintenance and repair work should only be carried out by a technician or a specialised workshop.
- The rechargeable battery is fixed inside the product and cannot be replaced.
- Do not damage the rechargeable battery under any circumstances. There is a risk of explosion and fire if the battery housing is damaged!
- Do not short-circuit the battery.
-
Do not throw the battery or the product into fire. There is a risk of explosion and fire!
-
The input current of the electrical load connected should not exceed a resistive load of 16 A, or an inductive load of 5 A.
- The device is suitable for DIN rails only. It should only be used in dry, closed rooms. Always avoid contact with moisture.
Thank you for choosing a BEARWARE product. Please read the following user manual carefully so as to get the most from the product you have purchased. Before using the product, first check that the delivered item is complete, accurate and undamaged.
1. Scope of delivery
- Digital timer
- User manual
2. Technical data
| Input voltage 230V~50/60 Hz |
| Maximum load 16 (3)A, 3680 W |
| Inductive load 5 A | |
| Accuracy ± 1s / day at + 20 °C |
| Time setting | • Minimum: 1 minute
• Maximum: 168 hours |
| Programs 28 On programs / 28 Off programs |
| Ambient temperature -20°C - +50°C |
3. Important tips
Do not connect any devices, where the current of 16 (3) A is exceeded. Make sure that the device is fully and properly connected to the timer. If you need to clean the product, first disconnect the timer from the mains completely and wipe the device using a dry cloth. Never immerse the timer in water or other liquids! Heaters and similar devices should never be left unattended during operation. The manufacturer recommends not connecting any such devices to the timer.

- Only for use in dry rooms
- Do not connect in series
4. Product details
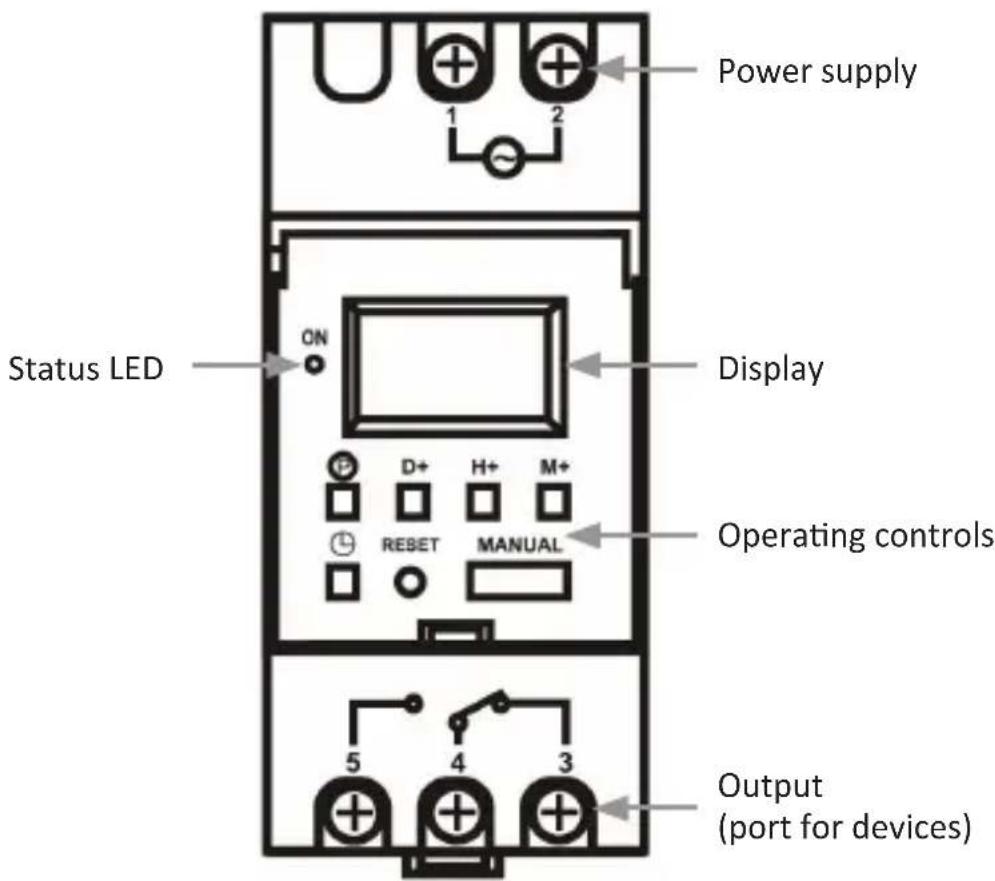
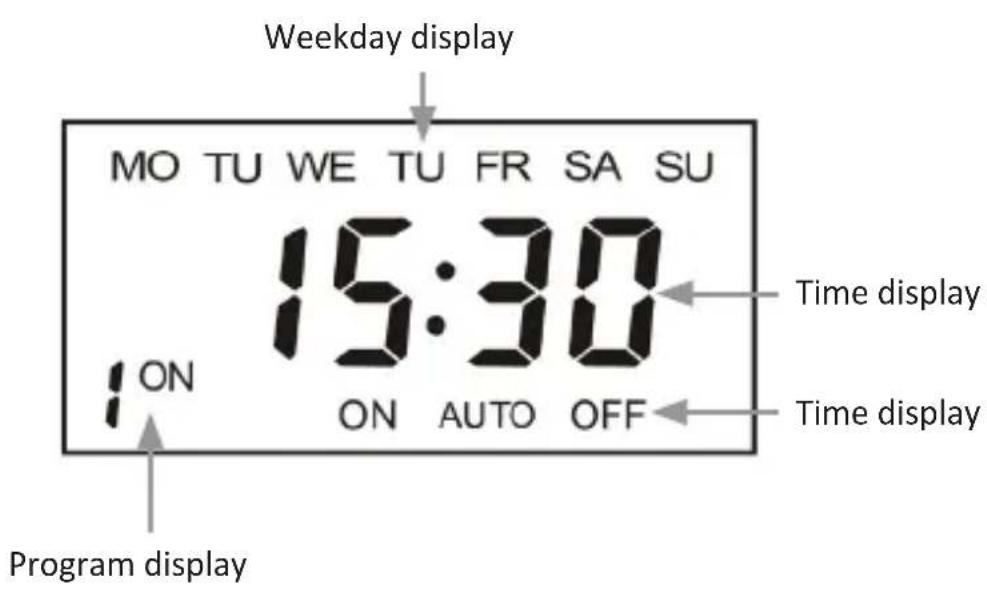
Display
5. Initial use
Take the product out of the package and remove all the packaging material. Get the device installed only by a technician! Please ensure that the voltage matches the specifications of the timer.
Switch off power to the circuit where you are working and connect the timer as follows:
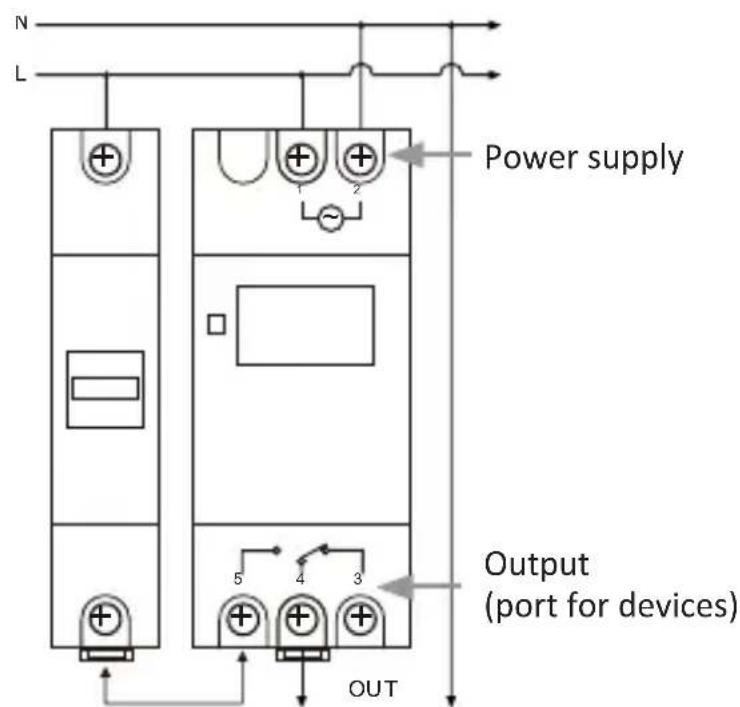
Connect and leave the timer for about 12 hours so that the backup battery charges fully. After charging, press the RESET button using a pointed non-conductive object to clear or completely reset the current configuration of the timer.
The device is then ready for use. The following sections of this manual describe how to make the individual settings.
6. Functional overview
The timer provides the following functions and setting options:
- Configurable timer programs
- Can be switched ON/OFF manually
- Different combinations of the weekdays can be set
The individual days of the week are shown in the timer LC display in the form of English abbreviations. The following table shows the abbreviations and the corresponding day of the week:
| Mo | Monday |
| Tu | Tuesday |
| We | Wednesday |
| Th | Thursday |
| Fr | Friday |
| No. | Weekdays No. Weekdays | | |
| 1 Mo | 9 Mo, Tu, We, Th, Fr, Sa | | |
| 2 Tu | 10 Mo, Tu, We, Th, Fr | | |
| 3 We | 11 Sa, Su | | |
| 4 Th | 12 Mo, We, Fr | | |
| 5 Fr | 13 Tu, Th, Sa | | |
| 6 Sa | | 14 Mo, Tu, We | |
| 7 Su | 15 Th, Fr, Sa | | |
| 8 Mo, | Tu, We, Th, Fr, Sa, Su | | |
The above table shows an overview of the combinations that can be selected for the respective days of the week.
| Button Description | |
| "P" button Program setting (28 On / Off settings are possible) |
| "D+" button Selecting days of week |
| "H+" button Setting the Hour |
| "M+" button Setting the Minute |
| "按钮 | Setting the default display time |
| "MANUAL" button | Setting: Continuously ON, Continuously OFF, Automatic (AUTO) |
| "RESET" button Resetting the timer (e.g. clearing programming errors) |
7. Setting the current time
Press and hold the"按钮 and simultaneously press the "D+" button until the current day is shown on the timer display.
Keep the "M" button pressed and set the current time using the "H+" button (Hour) and the "M+" button (Minute).
Then, release the buttons. The current time and day of the week are now set.
8. Setting the timer programs
Press the "P" button briefly. You can first set the time at which the connected device has to be switched on (ON).
Press the "D+" button till the desired days of the week on which the timer program has to be executed are shown on the display. Now set the desired time using the "H+" and "M+" buttons.
Then press the "P" button again. You can then set the time at which the connected device has to be switched off (OFF). Configure the time and days of the week using the "D+", "H+", and "M+" buttons as described in the previous step.
Note: Please remember that the days of the week for switching on and switching off have to be configured separately. The selected combination is not automatically adopted for the entire timer programme.
Press the "P" button briefly. You can then configure the second timer program.
A total of 28 ON/OFF timer programs are available, which you can configure in this way. Once all the programs have been customised as needed, please press the " 電 button. The display again shows the current time and the day of the week. The timer is ready to use.
Note: Please ensure that the times of the individual timer programmes do not overlap in order to avoid unintentional switching on or off.
To disable a timer programme again or to enable a disabled program, press the "P" button until the desired program is shown in the display.
9. Switching on and off manually
You can manually switch on (ON) and switch off (OFF) the device connected to the timer using the "Manual" button or enable the automatic control (AUTO) according to the configured timer programs again.
Press the button to change between the different modes. The display changes between "AUTO", "ON" and "OFF".
Please note that when changing from "ON" or "OFF" to "AUTO", the last timer state is retained until one of the configured timer programmes triggers a change.

10. Safety instructions and disclaimer
Never try to open the device to repair or make modifications. Avoid contact with the mains voltage. Do not short-circuit the product. The device is not approved for outdoor use. Therefore please use it only in dry surroundings. Protect it from high humidity, water and snow. Do not expose the device to high temperatures. Do not expose the device to sudden changes in temperature or strong vibrations, as this could damage the electronic components. Check the device for any damage before using it.
The device should not be used if it was subject to impact or has been damaged in some other manner. Please comply with the local regulations and restrictions. Do not use the device for purposes other than those described in the user manual. This product is not a toy. Keep it out of the reach of children or mentally disabled persons. Any repair or modification to the device, which is not carried out by the original supplier, will void any warranty and guarantee claims. The device should only be used by those who have read and understood this user manual. The specifications of the device may be changed without any special prior notification.

11. Disposal instructions
In line with the European WEEE directive, electrical and electronic devices should not be disposed of along with domestic waste. Their components have to be separately sent for recycling or disposal, because improper disposal of toxic and dangerous components may permanently damage the environment.
According to the electrical and electronic equipment act (ElektroG), you are obliged (as a consumer) to return (free of charge) electrical and electronic devices to the manufacturer, the point of sale or public collection points at the end of their service life. The relevant local laws regulate the details in this regard. The symbol displayed on the product, in the user manual or/and on the packaging refers to these regulations. With this manner of sorting, recycling and disposal of used devices, you make an important contribution towards protecting our environment.

12. Instructions for battery disposal
In conjunction with the sale of batteries along with the supply of devices that include batteries, the supplier is obliged to point out the following to the customer: The customer is legally obliged to return used batteries. He can return used batteries which the supplier offers or has offered as new batteries in his assortment free of charge to the supplier's dispatch warehouse (shipping address). The symbols shown on the batteries indicate the following: Pb = battery contains more than 0.004 percent lead by weight, Cd = battery contains more than 0.002 percent cadmium by weight, Hg = battery contains more than 0.0005 percent mercury by weight.
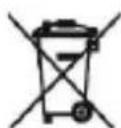
The symbol of the crossed-out dustbin means that the battery should not be disposed of in household waste.

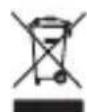
WEEE directive 2012/19/EU
WEEE Register no.: DE 67896761
The company WD Plus GmbH hereby certifies that the device 304589/20200702WZ005 complies with the fundamental requirements and all other relevant stipulations. A complete conformity statement can be obtained from: WD Plus GmbH, Wohlenbergstraße 16, 30179 Hannover