306570 - Automatic watering Brandson - Free user manual and instructions
Find the device manual for free 306570 Brandson in PDF.


| Product type | Automatic watering |
| Brand | Brandson |
| Model | 306570 |
| Power supply | 4 AA batteries (1.5 V) |
| Water pressure | 0.5 - 8 bar (7.25 - 116 psi) |
| Hose connection | 3/4" male thread |
| Protection rating | IP55 |
| Ambient temperature | 4.5 °C to 45 °C (40.1 °F to 113 °F) |
| Operating frequency | 2412 - 2482 MHz (Wi-Fi 2.4 GHz) |
| Maximum transmission power (EIRP) | 12.23 dBm |
| Package contents | Irrigation controller, quick start guide |
| Main functions | Programming via Smart Life app, manual watering, rain delay (24/48/72 h), scheduled cycles |
| Network compatibility | Wi-Fi 2.4 GHz only |
| Freeze protection | Remove and store indoors in case of frost |
| Care and cleaning | Clean with a dry cloth, avoid high humidity |
| Safety | Do not open, do not expose to water, keep out of reach of children |
| Spare parts and repairability | No spare parts available, repairs by manufacturer only |
| General information | Warranty void if unauthorized modification, CE compliance |
Frequently Asked Questions - 306570 Brandson
User questions about 306570 Brandson
0 question about this device. Answer the ones you know or ask your own.
Ask a new question about this device
Download the instructions for your Automatic watering in PDF format for free! Find your manual 306570 - Brandson and take your electronic device back in hand. On this page are published all the documents necessary for the use of your device. 306570 by Brandson.
USER MANUAL 306570 Brandson
ENG: Current drivers, user manuals and other relevant documents for this product can be found on our homepage.
Thank you for purchasing a BRANDSON product. To ensure that you also enjoy your purchased appliance, please read the following brief instructions carefully. Before using the delivered product, check that it is complete, free of defects and undamaged.
1. Scope of delivery
- Irrigation computer
- Quick guide
2. Technical data
| Input voltage 4x 1.5V AA batteries | |
| Frequency range 2412-2482 MHz | |
| Max. Transmitting power (EIRP) max. 12.23 dBm | |
| Protection class IP55 | |
| Min/Max pressure 0.5Bar - 8Bar (7.25psi-116psi) | |
| Hose connection 3/4" male thread | |
| Ambient temperature 4.5°C - 45°C (40.1°F - 113°F) | |
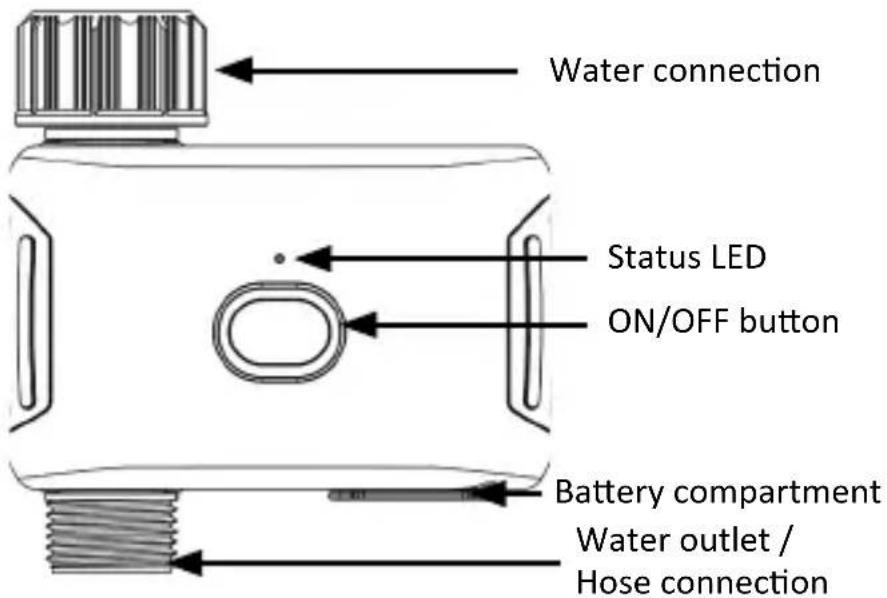
3. Product details
- Important safety instructions for this appliance

Attention! Updates to the software may change the functioning and use of the unit!
Attention!

- Do not place the unit in an underground valve box or in a location where your WIFI signal is obstructed.
4. Additional notes for this unit
- If temperatures below freezing are expected, the timer should be removed from the tap and stored indoors to avoid possible frost damage.
- Do not mix alkaline, standard (carbon-zinc) or rechargeable (nickel-cadmium) batteries. Used or flat batteries must be must be removed from the unit and disposed of properly.
6. Commissioning
Remove the unit from the packaging and remove any packaging material.
Remove the battery compartment and insert 4 AA batteries. Make sure that the polarity of the contacts is correct. Then firmly reinsert the battery compartment into the watering computer.
7. Setup via the app
Open the Appstore of your mobile device (e.g. smartphone or tablet PC) with which you want to control the unit. Search for the app "Smart Life" in the app store and install it.
Alternatively, you can find the app with the following QR code:

Log in to the app or register if necessary.
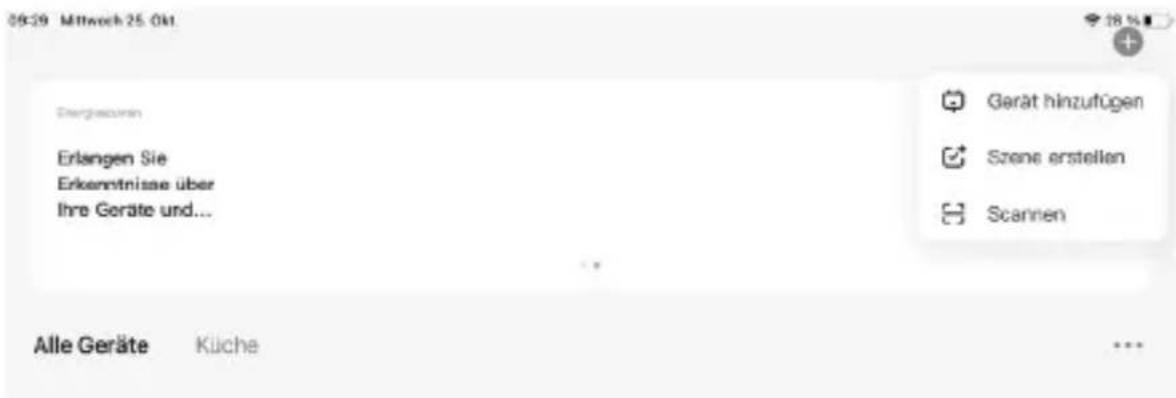
In the main menu you can now add a new device via the "+" symbol.
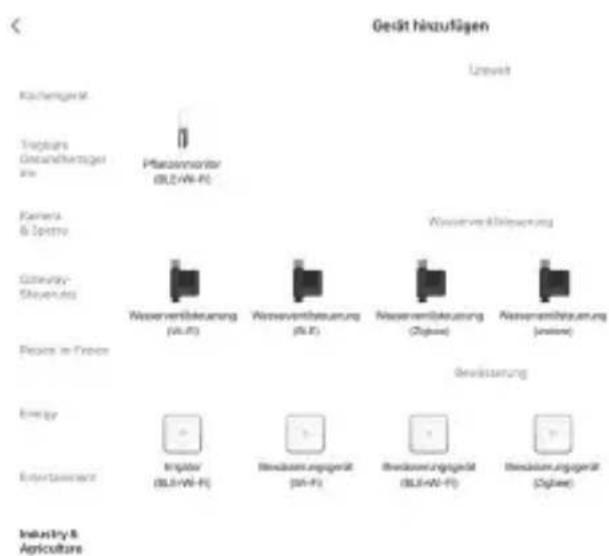
Select the correct category (water valve control Wi-Fi).
Set the unit to pairing mode. Press the On/Off button for 6 seconds until the green light flashes quickly.
Now enter your Wi-Fi data in the app. The app then connects to the socket. As soon as the process is complete, the app shows that the device has been successfully added.
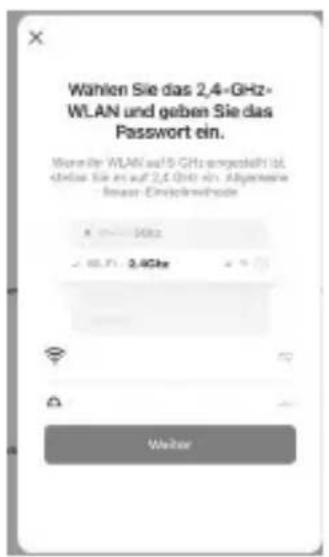
Note: If you use both a 2.4 GHz and a 5 GHz network (or other guest networks), please deactivate all networks except the 2.4 GHz network in the meantime. Make this visible, as the IP socket is addressed and connected via the network.
8. Advanced settings of the app
To use the advanced functions of the unit, such as the schedule or cycle function, it is necessary to press the connected water valve control icon in the menu.
An advanced settings menu appears:
You can switch the water valve control on and off via the "ON/OFF" key.
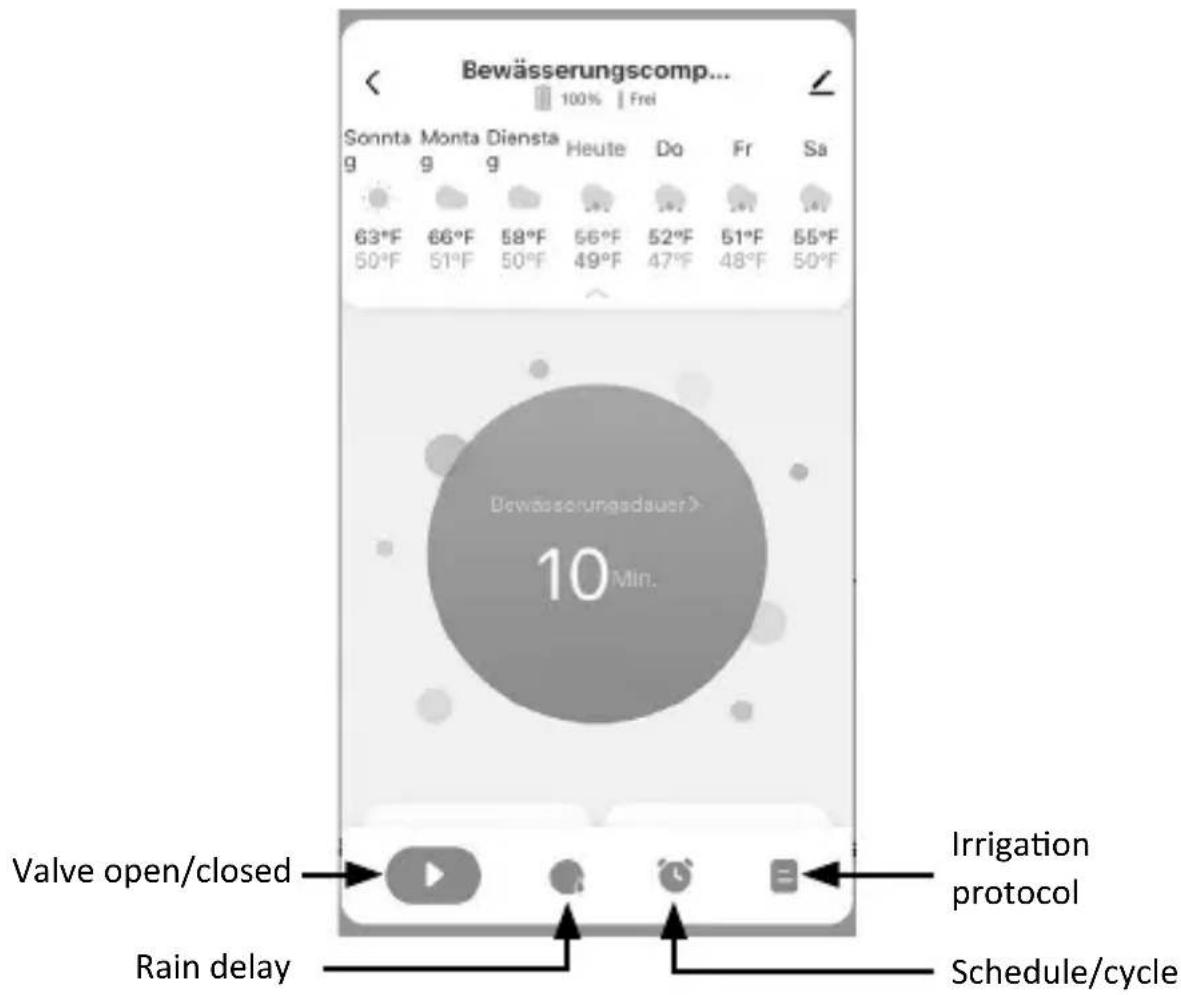
Rain delay:
You can set a rain delay of 24/48/72 hours, after which the timer will not continue to run until the rain delay has elapsed. While the rain delay is on, you also cannot switch on the unit manually.
Schedule/cycle:
Open the schedule/cycle menu and tap the "+". Then select between "Normal schedule" and "Watering cycle".
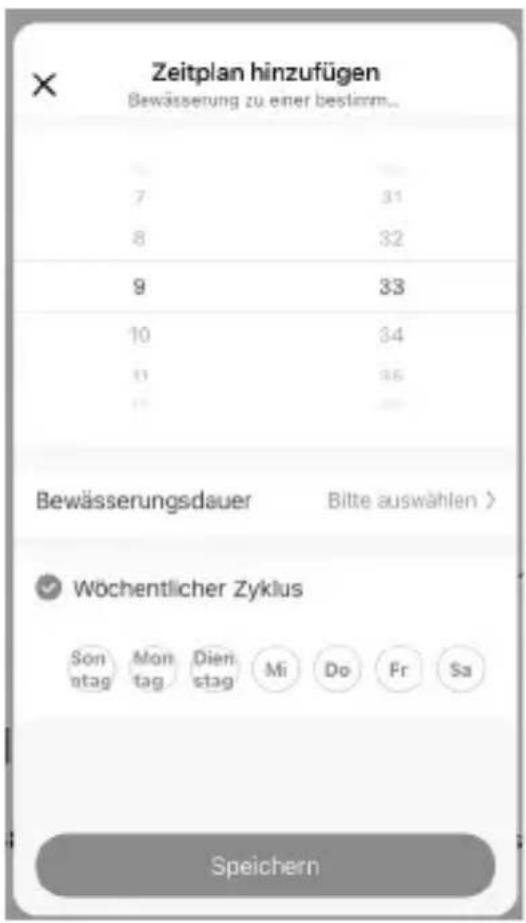
Select the time when the unit should start watering. Then select the watering duration and finally the days on which schedule the unit should operate.
Cycle (time loop)
You can set the start time and the end time of the watering period. Then select the corresponding days on which the unit is to operate. Then select the watering duration and the pause duration after watering.
9. Installation at the water connection
Connect the Water Computer to a water tap. If necessary, use PTFE sealing tape around the thread of the tap.
You can now operate devices of your choice on the hose connection.
10. Manual watering
The unit gives you the option to water manually without interrupting the programmed schedule. Manual watering is used to test equipment, to run an additional watering cycle in an area or to use the tap without removing the timer. Press the ON/OFF button to activate manual watering. You can set how long the preset manual cycle should run via the app.
11. Stop water flow
You can stop the water flow at any time, either during manual watering or during a programmed time. Press the ON/OFF button once to stop watering.
12. Troubleshooting
| Error Possible cause of error / troubleshooting | |
| Why does the appliance not switch on/off at the set time? | The programming is wrong.The water pressure is too low.Dirt particles or deposits stuck in the valve.More than one start time programmed / schedules overlap.Manual watering is switched on.Defective valve.The water tap is closed. |
| The connection of the water tap is leaking. | The O-ring is not correctly connected to the hose connection.The connection spigot or the water pipe is broken.The tap and the water pipe have a different thread. If necessary, use an appropriate adapter or PTFE tape. |
| The timer does not react or reacts with a delay when we operate the APP. | Please check if the network is working.If the unit is too far from the router, the signal strength may be too weak.A delay of up to 30 seconds may be normal. |
13. Safety instructions and disclaimer
Never attempt to open the unit to carry out repairs or modifications. Avoid contact with the mains voltages. Keep the unit frost-free. Do not expose the unit to sudden temperature changes or strong vibrations as this could damage the electronic parts. Check the unit for damage before use. The unit should not be used if it has been bumped or damaged in any way. Please observe the national regulations and restrictions. Do not use the appliance for purposes other than those described in the instructions. This product is not a toy. Keep it out of the reach of children or mentally impaired persons. Any repair or modification to the unit not carried out by the original supplier will invalidate the warranty or guarantee. The appliance may only be used by
persons who have read and understood these instructions. The specifications of the appliance are subject to change without prior notice.
14. Disposal instructions
According to the European WEEE Directive, electrical and electronic equipment must not be disposed of with household waste. Their components must be recycled or disposed of separately because toxic and hazardous components can cause lasting damage to the environment if disposed of improperly. As a consumer, you are obliged under the Electrical and Electronic Equipment Act (ElektroG) to return electrical and electronic equipment free of charge at the end of its service life to the manufacturer, the point of sale or to public collection points set up for this purpose. Details are regulated by the respective national law. The symbol on the product, the operating instructions or/and the packaging indicates these regulations. By separating, recycling and disposing of old appliances in this way, you are making an important contribution to protecting our environment.
15. Notes on battery disposal
In connection with the sale of batteries or the delivery of devices containing batteries, the supplier is obliged to inform the customer of the following:
The customer is legally obliged to return used batteries as an end user. He can return used batteries, which the supplier carries or has carried as new batteries in the product range, free of charge to the supplier's dispatch warehouse (dispatch address). The symbols shown on the batteries have the following meaning: Pb = battery contains more than 0.004 mass percent lead, Cd = battery contains more than 0.002 mass percent cadmium, Hg = battery contains more than 0.0005 mass percent mercury.

The symbol of the crossed-out dustbin means that the battery must not be disposed of in household waste.

WEEE Directive 2012/19/EU WEEE Register No: DE 67896761
WD Plus GmbH hereby declares that the device 306570 is in compliance with the essential requirements and other relevant provisions of Directive 2014/53/EU. A complete declaration of conformity can be obtained from: WD Plus GmbH, Wohlenbergstraße 16, 30179 Hannover, Germany, or at the following Internet address: https://model.ganzeinfach.de/306570
MO-FR 9:30am - 18pm CET

brandson-equipment.de
WD Plus GmbH
- Scope of delivery
- Technical data
- Product details
- Attention!
- Additional notes for this unit
- Commissioning
- Setup via the app
- Advanced settings of the app
- Rain delay:
- Schedule/cycle:
- Cycle (time loop)
- Installation at the water connection
- Manual watering
- Stop water flow
- Troubleshooting
- Safety instructions and disclaimer
- Disposal instructions
- Notes on battery disposal
Brand : Brandson
Model : 306570
Category : Automatic watering