303337 - Heating Brandson - Free user manual and instructions
Find the device manual for free 303337 Brandson in PDF.


User questions about 303337 Brandson
0 question about this device. Answer the ones you know or ask your own.
Ask a new question about this device
Download the instructions for your Heating in PDF format for free! Find your manual 303337 - Brandson and take your electronic device back in hand. On this page are published all the documents necessary for the use of your device. 303337 by Brandson.
USER MANUAL 303337 Brandson
Ceramic Fan Heater, analog
Mod.-Nr.: 303328
Mod.-Nr.: 303337
This product is only suitable for well insulated rooms or for occasional use.

text_image
Prohibition sign with red circle and black document icon, no text presentnatural_image
Diagram showing a series of concentric circular patterns above and a triangular shape below (no text or symbols)flowchart
graph TD
    A["II"] --> B["1"]
    C["OSC"] --> D["2"]
Usage and safety instructions
- Read the manual completely before using the product! Keep this user manual for future reference.
- Before using the heater, check whether the voltage indicated on the rating plate matches that of your mains supply!
- Do not pull the cable if you want to disconnect the plug from the power source. Always pull the plug itself!
- Never block the fan in the device. This could damage the device, result in a fire or electric shock!
- Never block the air inlet of the interior fan heater!
-
Disconnect the plug from the power source if the device is not being used! Do not leave the fan heater unattended!
-
This device emits a lot of heat during operation. Therefore, touch only the operating controls. In case of doubt, use heat-resistant gloves.
- Keep flammable materials such as pillows, paper, clothing, curtains or other highly flammable objects away from the fan heater!
- This device is intended for personal use only!
- Caution! The fan heater is not suitable to be used in confined areas if they are occupied by persons who are not able to leave the room or the vehicle by themselves.
- Cleaning and maintenance should not be carried out by children.
- This appliance can be operated by children from 8 years of age and above, as well as by people with re-
duced physical, sensory or mental capacities or who lack knowledge or experience, if they have been supervised or instructed regarding safe use of the device, and they understand the resultant dangers.
- CAUTION! Some parts of the product may become very hot and cause burns. Be very careful if children or frail persons are present.
- Never immerse it in water for cleaning. Wipe the body with a dry cloth.
- Place the appliance at a distance of least 1m from other objects.
- Use the product only on a flat surface.
- Disconnect the appliance from the mains when it is not being used or during cleaning.
- Keep the appliance at least 1m away from flammable materials, such as
furniture, curtains, bedding, clothing or paper.
- Ensure that the cable does not come into contact with any hot or moist surfaces.
- Do not turn on the appliance if you find a defect in the power cord. Contact the manufacturer of the product in such cases.
- Never move the appliance during operation.
- The appliance should be opened or repaired only by qualified technicians!
- Remove the packaging material and check if the appliance is in proper working condition before using it.
- Ensure that children do not play with the appliance or the packaging material!
• This product is not a toy!
- Close supervision is required if the product is used by or near children or frail persons.
- Do not use the appliance after a malfunction, if it has been dropped, or appears to be damaged in any way. Return the complete product to the manufacturer for inspection, repair or replacement.
- Ensure that the appliance is switched off before disconnecting the mains cable. If you touch it, make sure that your hands are dry so as to avoid electric shock.
- Hold the heater only using the handle on the back.
- Do not use the heater in places such as garages, where petrol, paint, or other flammable materials are used
or stored.
- This product should not be used near water, such as a bathtub, washbasin, swimming pool, etc., where there is a risk of immersion or splashing.
- Dust and lint deposits which get into the appliance are a common cause of overheating. Make sure that these deposits are removed regularly by disconnecting the heater from the socket, so that it can cool down and be cleaned (as described in the section on "Cleaning and care").
- Never connect the appliance to an extension cable or power strip!
- Do not use the appliance outdoors!
- Use this heater only as described in this manual. Using the appliance for any other purpose which is not recommended by the manufacturer may
cause fire, electric shock or physical injury and void the guarantee.
- CAUTION: Please do not cover!
- Do not cover the product during use or shortly after use (e.g., using a cloth, a blanket, a curtain, etc.) to prevent overheating of the product. There is also a risk of fire!
Thank you for choosing a Brandon product. Please read the following user manual carefully so that you can enjoy the purchased product for a long time.
1. Scope of delivery
- Fan heater
- User manual
2. Technical data
| Power supply 220-240 V AC / 50/60 Hz | |
| Power consumption | Setting 1: 600 W / Setting 2: 1200 W |
| Dimensions (H x W x D) approx. 275 mm x 190 mm x 160 mm | |
| Weight approx. 1415 g | |
| Features • Oscillation option | • 2 heat settings• Thermostat |
3. Function
You can heat the desired area with the Brandon heater. Thanks to the oscillation function and the 2 heat settings, you can heat as desired.
Note: To ensure that the heater works and heats properly, the desired temperature must be set on the heater.
To arrive at the ideal thermostat setting, proceed as follows:
Adjust the thermostat to the maximum setting. Once the desired room temperature is reached, turn the thermostat back slowly until the heater switches off. The heater will automatically maintain the desired temperature. If the heater does not seem to be heating, increase the desired temperature on the heater to activate the heating elements.
4. Product details
flowchart
graph TD
    A["II"] --> B["1"]
    B --> C["2"]
    C --> D["3"]
    C --> E["4"]
    F["OSC"] --> G["5"]
    style A fill:#f9f,stroke:#333
    style F fill:#ccf,stroke:#333
    style B fill:#cfc,stroke:#333
    style C fill:#fcc,stroke:#333
    style D fill:#ffc,stroke:#333
    style E fill:#cfc,stroke:#333
    style F fill:#fcc,stroke:#333
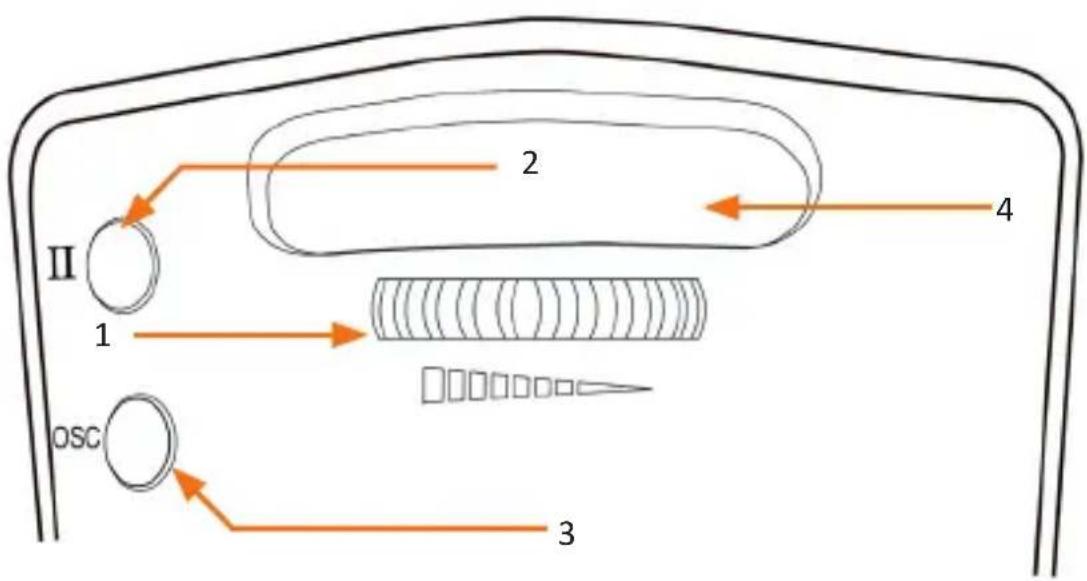
| No. Description |
| 1 Thermostat/Heat setting 1 |
| 2 Heat setting 2 |
| 3 Oscillation On/Off |
| 4 Carrying handle |
5. Installation
Take the appliance out of the packaging and remove any packaging material and check the appliance for any damage. The fan heater must be placed on a flat surface. Ensure that the heater is placed at least 1m away from other objects, and not directly below a socket. A socket should be available for supplying power to the appliance.
Caution! Ensure that the appliance is not placed near any flammable materials or fluids, or with the air discharge pointing in these directions.
6. Commissioning
Connect the appliance to a properly installed socket. Set the On/Off switch on the back of the appliance to the position "I" (ON). To start the appliance and enable heat setting 1, turn the thermostat on the back of the appliance to the desired setting (the lower the setting, the sooner the fan heater switches off).
natural_image
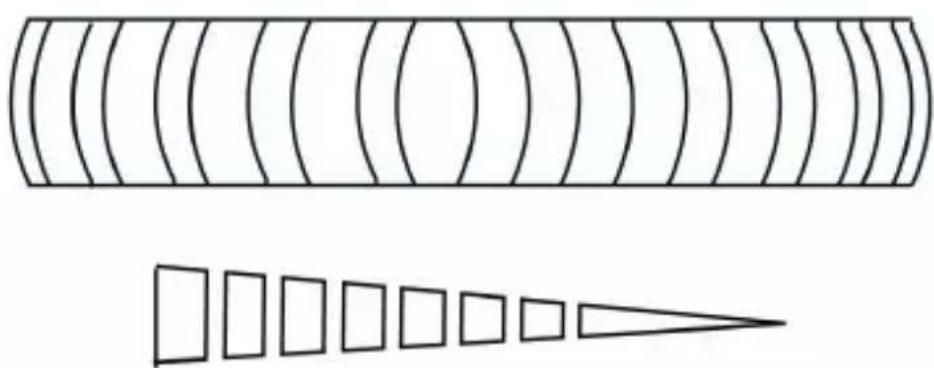
Diagram showing a cylindrical structure with concentric curved lines and a triangular shape below it (no text or symbols)By turning the rotary knob to the right, you can reduce the temperature setting. If you turn the knob to the left, you increase the setting. Set the On/Off switch on the back of the appliance to the position "0" (OFF) to switch off the appliance. The set temperature is maintained almost constant by switching the appliance on and off automatically. Please remember that the appliance is switched on and
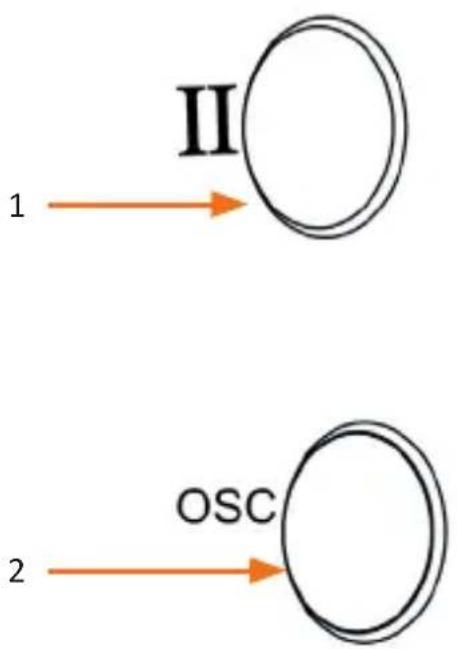
starts heating only if the thermostat setting is higher than the room temperature. Using the two additional buttons at the back of the appliance, you can switch the heat setting 2 and the oscillation On or Off.
7. Overheating
flowchart
graph TD
    A["II"] --> B["1"]
    C["OSC"] --> D["2"]
| 1 Second heat setting (1200W) On/Off |
| 2 Oscillation On/Off |
Overheating generally occurs only if one of the openings of the fan heater is blocked. This appliance comes with a non self-resetting thermal fuse. The heater switches off automatically once the overheating temperature is reached. The fan heater can be operated again only after the fuse is replaced by the manufacturer or by an equally qualified person.
8. Cleaning and Care
Completely switch off the appliance and disconnect it from the power supply before you start cleaning it.
Clean the housing with a slightly damp cloth, a vacuum cleaner or a dusting brush. Never use flammable, aggressive or scouring cleaning agents such as benzene or spirit to clean the appliance.
Clean the air inlet and outlet regularly using a vacuum cleaner.
If the appliance is not going to be used for a long time, then it must be protected against excessive dust and dirt.
Dust filter
The appliance comes with a dust filter. Remove the dust filter once the appliance is completely switched off by removing the grille at the back of the appliance. Clean the dust filter by rinsing it and then brushing it clean. Replace the dust filter properly and close the protective grille after cleaning.

9. Safety instructions and disclaimer
Never try to open the appliance to carry out repairs or modifications. Avoid contact with the mains voltage. Do not short-circuit the product. The appliance is not approved for outdoor use. Therefore please use it only in dry surroundings. Protect it from high humidity, water and snow. Do not expose the device to high temperatures. Do not expose the appliance to sudden changes in temperature or strong vibrations, as this could damage the electronic components.
Check the appliance for any damage before using it. The device should not be used if it has been subject to impact or has been damaged in any other manner. Please comply with the local regulations and restrictions. Do not use the device for purposes other than those described in the user manual. This product is not a toy. Keep it out of the reach of children or mentally disabled persons. Any repairs or modifications to the appliance not carried out by the original supplier will void any
warranty and guarantee claims. The appliance should be used only by persons who have read and understood this user manual. The specifications of the appliance may be changed without special prior notice.
10. Disposal instructions
In line with the European WEEE directive, electrical and electronic devices should not be disposed of along with domestic waste. Their components have to be sent separately for recycling or disposal, as improper disposal of toxic and dangerous components may permanently damage the environment.
According to the electrical and electronic equipment act (ElektroG), you are obliged (as a consumer) to return (free of charge) all electrical and electronic devices to the manufacturer, the point of sale, or public collection points at the end of their service life. The relevant local laws regulate the details in this regard. The symbol on the product, in the user manual or/and the packaging refers to these regulations. With this manner of sorting, recycling and disposal of used devices, you make an important contribution towards protecting our environment.
WEEE Guideline: 2012/19/EU WEEE Register no.: DE 67896761
WD Plus GmbH hereby certifies that the devices 303328 and 303337 comply with the fundamental requirements and all other relevant stipulations. A complete conformity statement can be obtained from: WD Plus GmbH, Wohlenbergstraße 16, 30179 Hannover, or from the following Internet address: downloads.ganzeinfach.de

text_image
Prohibition sign with a red circle and black icon depicting a document or file, crossed out by a diagonal line.natural_image
Diagram showing a cylindrical structure with concentric curved lines and a triangular shape below it (no text or symbols)flowchart
graph TD
    A["II"] --> B["1"]
    C["OSC"] --> D["2"]
text_image
Prohibition sign with red circle and black icon depicting a document or device, no text presentnatural_image
Diagram showing a series of concentric curved lines and a triangular shape, no text or symbols present.flowchart
graph TD
    A["II"] --> B["1"]
    C["OSC"] --> D["2"]
WD Plus GmbH hereby certifies that the devices 303328 and 303337 comply with the fundamental requirements and all other relevant stipulations. A complete conformity statement can be obtained from: WD Plus GmbH, Wohlenbergstraße 16, 30179 Hannover, or from the following Internet address: downloads.ganzeinfach.de

text_image
Prohibition sign with red circle and black icon depicting a document or file, crossed by a diagonal linenatural_image
Diagram showing a series of concentric circular patterns above and a triangular shape below (no text or symbols)flowchart
graph TD
    A["II"] --> B["1"]
    C["OSC"] --> D["2"]
| Model identifier(s): 303328; 303337 | |||||||
| Item | Symbol | Value | Unit | Item | Unit | ||
| Heat output | Type of heat input, for electric storage local space heaters only (select one) | ||||||
| Nominal heat output | P_nom | 1,5 | kW | manual heat charge control, with integrated thermostat | NA | ||
| Minimum heat output (indicative) | P_min | 0.75 | kW | manual heat charge control with room and/or outdoor temperature feedback | NA | ||
| Maximum continuous heat output | P_max,c | 1,5 | kW | electronic heat charge control with room and/or outdoor temperature feedback | NA | ||
| Auxiliary electricity consumption | fan assisted heat output | NA | |||||
| At nominal heat output | el_max | N/A | kW | Type of heat output/room temperature control (select one) | |||
| At minimum heat output | el_min | N/A | kW | single stage heat output and no room temperature control | No | ||
| In standby mode | el_sb | N/A | kW | Two or more manual stages, no room temperature control | No | ||
| with mechanic thermostat room temperature control | Yes | ||||||
| with electronic room temperature control | No | ||||||
| electronic room temperature control plus day timer | No | ||||||
| electronic room temperature control plus week timer | No | |||||
| Other control options (multiple selections possible) | ||||||
| room temperature control, with presence detection | No | |||||
| room temperature control, with open window detection | No | |||||
| with distance control option | No | |||||
| with adaptive start control | No | |||||
| with working time limitation | No | |||||
| with black bulb sensor | No | |||||
| Contact details | WD Plus GmbHWohlenbergstraße 16 · 30179 Hannover | No | ||||
SERVICE
We hope you enjoy your new product in every way! If there is still something you're concerned about; please feel free to let us know. You're welcome to contact our service team at any time.