FULLMIX PROTOOL - Blender Create - Free user manual and instructions
Find the device manual for free FULLMIX PROTOOL Create in PDF.

| Product type | Immersion blender |
| Brand | Create |
| Model | FULLMIX PROTOOL |
| Category | Blender |
| Main functions | Mix, chop, whisk |
| Speed regulator | Variable with Turbo function |
| Included accessories | Mixing foot, 500 ml chopper bowl, chopper blade, whisk, measuring cup, wall mount |
| Chopper bowl capacity | 500 ml |
| Bowl and accessories material | Plastic |
| Supply voltage | 220-240 V ~ |
| Frequency | 50/60 Hz |
| Control type | Push buttons (on/off, unlock) |
| Safety | Very sharp blades, do not immerse motor block, do not mix hot liquids |
| Cleaning of removable parts | Dishwasher safe up to 60°C (except motor block and chopper bowl lid) |
| Cleaning of motor block | Wipe with a damp cloth, do not immerse |
| Blade maintenance | Rinse immediately after contact with very salty foods |
| Recommended usage time | Soft foods: 1 min per interval; hard foods: 15 sec per interval, max 3 intervals then cooling |
| Usage precautions | Do not use the chopper bowl for extremely hard foods (nutmeg, coffee beans, seeds) |
| Compliance | Directives 2012/19/EU and 2015/863/EU |
| Usage | Domestic |
Frequently Asked Questions - FULLMIX PROTOOL Create
User questions about FULLMIX PROTOOL Create
0 question about this device. Answer the ones you know or ask your own.
Ask a new question about this device
Download the instructions for your Blender in PDF format for free! Find your manual FULLMIX PROTOOL - Create and take your electronic device back in hand. On this page are published all the documents necessary for the use of your device. FULLMIX PROTOOL by Create.
USER MANUAL FULLMIX PROTOOL Create
natural_image
Line drawing of a handheld device with a lever and handle (no text or symbols)Fullmix Protocol
User manual | Manual de instrucciones
CREATE CREATE CREATE ATE CREATE CREATE CRE CREATE CREATE CREATE ATE CREATE CREATE CRE CREATE CREATE CREATE ATE CREATE CREATE CRE CREATE CREATE CREATE ATE CREATE CREATE CRE CREATE CREATE CREATE ATE CREATE CREATE CRE CREATE CREATE CREATE ATE CREATE CREATE CRE CREATE CREATE CREATE ATE CREATE CREATE CRE CREATE CREATE CREATE ATE CREATE CREATE CRE CREATE CREATE CREATE ATE CREATE CREATE CRE CREATE CREATE CREATE ATE CREATE CREATE CRE CREATE CREATE CREATE ATE CREATE CREATE CRE CREATE CREATE CRE CREATE CREATE CRE CREATE CREATE CRE
CREATE CREATE CREATE ATE CREATE CREATE CRE CREATE CREATE CREATE ATE CREATE CREATE CRE CREATE CREATE CREATE ATE CREATE CREATE CRE CREATE CREATE CREATE CREATE CREATE CREATE CREATE CREATE CREATE CREATE CREATE CREATE CREATE CREATE CREATE CREATE CREATE CREATE CREATE CREATE CREATE CREATE CREATE CREATE CREATE CREATE CREATE CREATE CREATE CREATE CREATE CREATE CREATE CREATE CREATE CREATE CREATE CREATE CREATE CREATE CREATE CREATE CREATE CREATE CREATE CREATE CREATE CREATE CREATE CREATE CREATE CREATE CREATE CREATE CREATE CREATE CREATE CREATE CREATE CRE
INDEX
ENGLISH
Security instructions 6
Parts list 7
Operating instructions 8
Cleaning 9
Processing Guide 9
PORTUGUÊS
Thank you for choosing our blender. Before using the appliance, and to ensure the best use, carefully read these instructions.
The safety precautions enclosed herein reduce the risk of death, injury and electrical shock when correctly adhered to. Keep the manual in a safe place for future reference, along with the completed warranty card, purchase receipt and package. If applicable, pass these instructions on to the next owner of the appliance. Always follow basic safety precautions and accident-prevention measures when using an electrical appliance. We assume no liability for customer failing to comply with these requirements.
SECURITY INSTRUCTIONS
When using any electrical appliance, basic safety precautions should always be observed.
- Unplug the blender when it is not in use. Make sure the appliance is unplugged before assembling, disassembling, adding additional accessories or cleaning.
- Children should be supervised to ensure that they do not play with the appliance.
- This appliance can be used by children and persons with reduced physical, sensory or mental capabilities or lack of experience and knowledge if they have been given supervision or instruction concerning use of the appliance in a safe way and understand the hazards involved.
- Incorrectly operating the appliance can cause problems with the appliance and injury to the user.
- Ensure that the voltage indicated on the Technical Specification matches the mains voltage before plugging in the appliance.
- Don't plug the appliance into the mains until it is fully assembled and always unplug before disassembling the appliance or handling the blade.
- Do not pick up or operate the appliance if the power supply cord or the plug are damaged, or if the blender is malfunctioning or has been dropped or damaged in any way. In case of damage, contact the aftersales service. A damaged cord or plug must be exclusively replaced by the manufacturer or a qualified person in order to avoid injuries.
- Do not let the cord hang over the edge of a table or bench top. Do not let it come in contact with hot surfaces, avoid proximity to open fires and all types of heat and sources of ignition.
- Blades are sharp! Handle with care.
- Keep your hands and utensils out of the container while blending to reduce the risk of severe injury to persons or damage to the blender. A scraper may be used but must be used exclusively when the blender is not running.
-
Never immerse the cord, plug or the main body of the blender in water or other liquids. Should the appliance fall into water, immediately unplug the plug from the mains and have the appliance checked by an expert before using it again. It may cause fire, electric shock, injury or death.
-
Do not touch the blender's moving parts.
- Do not blend hot liquids.
- Neither the measuring beaker, nor the chopping bowl is microwave safe.
- When blending soft foods, operate the blender in one minute intervals. For hard foods, operate in 15 second intervals. After 3 cycles, please allow for the blender to cool down to avoid burning the motor.
- To reduce the risk of injury, never place the cutting blade on the base without first putting the bowl properly in place.
- Please, make sure the lid is securely locked into place before operating the appliance.
- Use a damp cloth to clean the motor body.
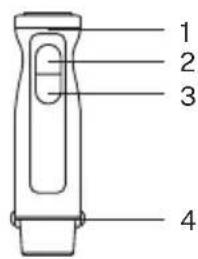
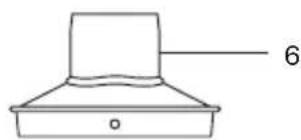
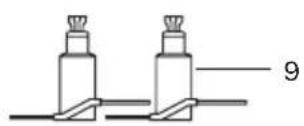
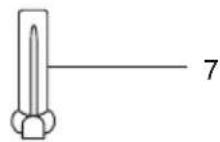
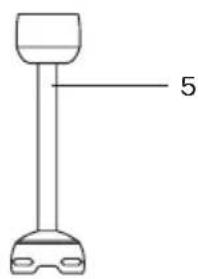
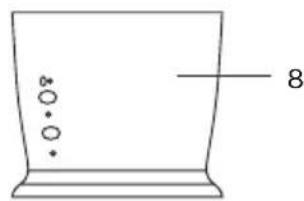
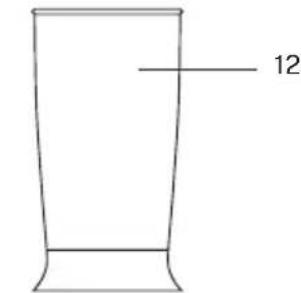
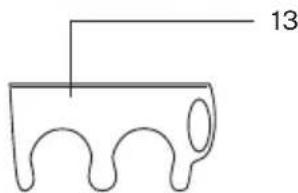
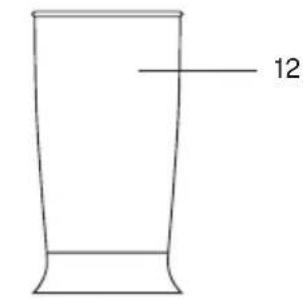
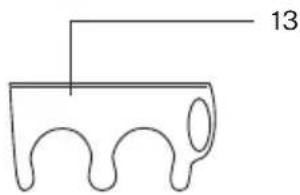
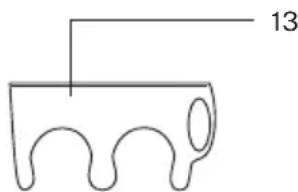
PARTS LIST

natural_image
Simple line drawing of a container with three small circles and a label '8' on the side (no text or symbols on the container itself)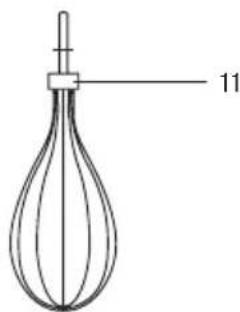
- Speed control dial
- ON/OFF switch
- Turbo
- Release button
-
Blending arm
-
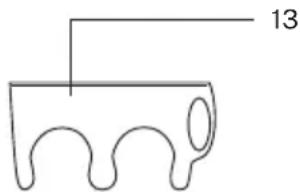
Chopping bowl lid
- Chopping blade
- Chopping bowl
-
Chopping blade
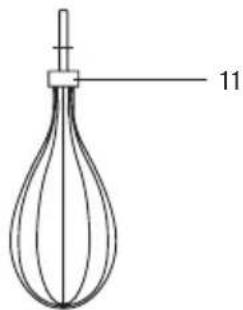
-
Whisk driver
- Whisk Attachment
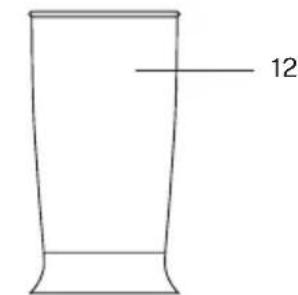
- Beaker
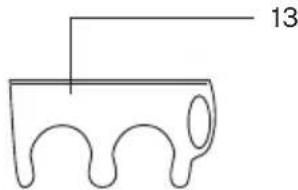
- Wall mount
HOW TO USE THE HAND BLENDER
The hand blender is perfectly suited for preparing dips, sauces, soups, mayonnaise, and baby food as well as for blending and shakes.
- Fit the blending arm to the motor body until it locks.
- Introduce the hand blender into the beaker. Now press the switch to begin blending.
- Unplug then press the release button to remove the blending arm.
You can use the hand blender in the measuring beaker as well as in any other vessel. Caution! The blades are very sharp.
HOW TO USE THE CHOPPER
The chopper is ideal for hard foods, such as cheese, onion, herbs, garlic, carrots, walnuts, almonds, prunes etc.
Don't chop extremely hard foods, such as nutmeg, coffee beans and grains.
To crush ice, use only the serrated blade with the chopping bowl.
- Before chopping, carefully remove the plastic cover from the blade. Always hold it by the plastic top, never by the blades.
- Place the blade on the spindle and press it down to lock it on the chopping bowl. Always place the chopping bowl on the anti-slip base.
- Put the food into the bowl and cover the bowl with the lid.
- Fit the motor unit into the chopping bowl lid and lock it.
- Press the switch to operate the chopper. While chopping, hold the motor body with one hand and the bowl with the other.
- After its use, unplug the blender and press the release buttons to remove the motor body. Now take the lid off.
- Carefully take out the blade.
- Remove the processed food from the bowl.
HOW TO USE THE WHISK
Only use the whisk to whip cream, beat eggs and mix batters.
- Fit the whisk to the whisk driver and then onto the motor body until it locks.
- Place the whisk in a vessel and only then press the switch to operate it.
-
Unplug the appliance and press the release buttons to remove the motor body and the driver.
-
All parts and accessories, except for the motor body and the chopping bowl lid, are dishwasher safe. However, after processing very salty food, you should rinse the blades right away.
- Do not use a program higher than 60^ in the dishwasher, the pieces could deform. Do not immerse the motor body in water. Clean the motor body and the chopping bowl lid with a damp cloth.
- Be careful not to use an excessive amount of soap in your dishwasher.
- Foods with colour may stain the plastic parts of the appliance. Wipe these parts with vegetable oil before placing them in the dishwasher.
• Always unplug the appliance before cleaning. - The blades are very sharp, please, handle with care.
PROCESSING GUIDE
For 500ml chopping bowl
| Food Maximum Operation time | ||
| Meat 250g 15seg | ||
| Herbs 50g 10seg | ||
| Nuts, almonds 150g 15seg | ||
| Cheese 100g 10seg | ||
| Bread 80g 10seg | ||
| Onion 200g 10seg | ||
| Biscuits 150g 10seg | ||
| Soft fruit | 200g 10seg |
In compliance with Directives: 2012/19/EU and 2015/863/EU on the restriction of the use of dangerous substances in electric and electronic equipment as well as their waste disposal. The symbol with the crossed dustbin shown on the package indicates that the product at the end of its service life shall be collected as separate waste. Therefore, any products that have reached the end of their useful life must be given to waste disposal centres specialising in separate collection of waste electrical and electronic equipment, or given back to the retailer at the time of purchasing new similar equipment, on a one for one basis. The adequate separate collection for the subsequent start-up of the equipment sent to be recycled, treated and disposed of in an environmentally compatible way contributes to preventing possible negative effects on the environment and health and optimises the recycling and reuse of components making up the apparatus. Abusive disposal of the product by the user involves application of the administrative sanctions according to the laws.
natural_image
Simple line drawing of a container with four small circular indentations and a label '8' on the side (no text or symbols on the container itself)
natural_image
Simple line drawing of a container with three curved handles and an arrow labeled '13' pointing to the top section (no text or symbols beyond the number)natural_image
Simple line drawing of a cylindrical object with a flared base (no text or symbols)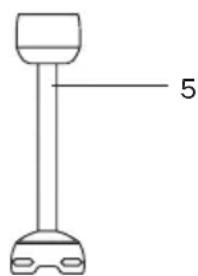

natural_image
Simple line drawing of a container with circular and dot symbols, labeled '8' on the side (no text or symbols on the container itself)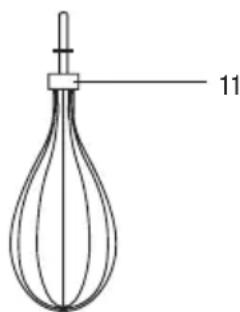
natural_image
Simple line drawing of a three-lobed object with a label '13' pointing to it (no text or symbols on the object itself)natural_image
Simple line drawing of a screw with a pin and a numbered line (7), no text or symbols present.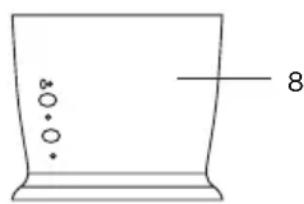
natural_image
Simple line drawing of a container with internal circles and a label '8' (no text or symbols on the diagram itself)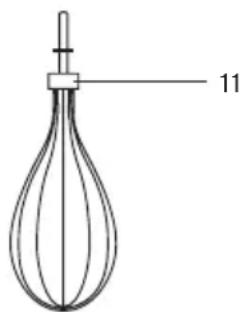
BELANGRIJKE VEILIGHEIDSWAARSCHUWINGEN
natural_image
Simple line drawing of a screw with a pin and a numbered line (7), no text or symbols present.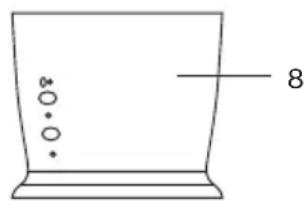
natural_image
Simple line drawing of a container with three small circles and a label '8' on the side (no text or symbols on the container itself)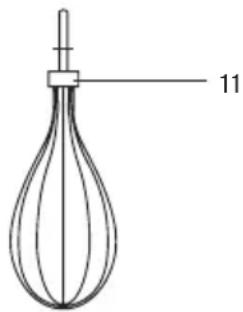
natural_image
Simple line drawing of a container with circular indentations and a label '8' on the side (no text or symbols on the container itself)