
ProMix HR2629 - Hand blender PHILIPS - Free user manual and instructions
Find the device manual for free ProMix HR2629 PHILIPS in PDF.


User questions about ProMix HR2629 PHILIPS
0 question about this device. Answer the ones you know or ask your own.
Ask a new question about this device
Download the instructions for your Hand blender in PDF format for free! Find your manual ProMix HR2629 - PHILIPS and take your electronic device back in hand. On this page are published all the documents necessary for the use of your device. ProMix HR2629 by PHILIPS.
USER MANUAL ProMix HR2629 PHILIPS
natural_image
Black Philips 300 W handheld device with a triangular base and control buttons (no visible text or symbols on the device body)EN User manual 2
3 Before first use 8
Preparing for use 8
Using the appliance 8
Trigger switch 8
Hand blender 8
Chopper 10
Whisk (HR2627 only) 12
Spiralizer (HR2629 only) 14
Bottle to go 17
4 Cleaning 19
5 Storage 22
6 Recycling 22
Guarantee and support 22
7 Troubleshooting 22
IMPORTANT SAFEGUARDS
When using electrical appliances, basic safety precautions should always be followed including the following:
- Read all instructions before using the appliance and save them for future reference.
- To protect against risk of electrical shock, do not put or immerse the motor unit, power cord, or electrical plug in water or any other liquid. Do not rinse it under the tap and do not clean it in the dishwasher. Only the detachable blender bar and certain other parts of this appliance have been designed to be immersed in water or other liquids. If the blender motor unit falls into liquid, immediately unplug it. Carefully remove the blender bar, then clean and dry unit thoroughly before continuing.
- This appliance is not intended for use by persons (including children) with reduced physical, sensory, or mental capabilities, or lack of experience and knowledge, unless they are closely supervised and instructed concerning use of the appliance by a person responsible for their safety. Close supervision is necessary when any appliance is used by or near children. Children should be supervised to ensure that they do not play with the appliance.
- Turn the appliance OFF, then unplug from the outlet when not in use, before assembling or disassembling parts and before cleaning. To unplug, grasp the plug and pull from the outlet. Never pull from the power cord.
- Avoid contact with moving parts. Keep hands, hair, clothing as well as spatulas and other utensils away from beaters during operation to reduce risk of injury to persons or damage to the mixer.
- Moving Parts. Keep fingers out of discharge opening.
- Keep hands and utensils away from the cutting blade while chopping food or to reduce the risk of severe injury to persons or damage to the food chopper. A scraper may be used but only when the food chopper is not running.
- Keeps hands and utensils out of the container while blending to prevent the possibility of severe injury to persons or damage to the unit. A scraper may be used but must be used only when the unit is not running.
- Do not operate any appliance with a damaged cord or plug or after the appliance malfunctions or is dropped or damaged in any manner. Contact the manufacturer at their customer service telephone number for information on examination, repair, or adjustment. For assistance in the U.S. or Canada only call 1-866-309-8817.
- The use of attachments not recommended or sold by the appliance manufacturer may cause fire, electric shock or injury.
- Do not use the appliance outdoors or in moving vehicles or boats. Misuse may cause injury.
- Never feed food by hand. Always use food pusher.
- The blades are very sharp. Do not touch the blades or blender bar, especially when the appliance is plugged in. Handle carefully when removing, inserting or cleaning. Exercise care when removing or inserting the cutter blade for the chopper attachment.
- Do not let the power cord hang over the edge of a table or counter.
- Do not let cord contact hot surface, including the stove.
- Remove the beaters from the mixer before washing.
- To reduce the risk of injury, never place cutting blade on base without first putting bowl properly in place.
- Be certain cover is securely locked in place before operating appliance.
- Do not attempt to defeat the cover interlock mechanism.
4 ENGLISH
- Make certain the chopper attachment lid is securely locked in place before operating appliance. Do not attempt to remove cover or empty chopper bowl until blade has stopped rotating.
- If the operation of a multi-speed appliance, intended for use with various attachments, at speeds exceeding those recommended by the manufacturer results in a risk of injury to persons, the instruction manual provided with the appliance shall indicate the recommended speeds of operation.
- When mixing liquids, especially hot liquids, use a tall container or make small quantities at a time to reduce risk of spillage, splattering or possible injury or burns from hot liquids.
- This appliance has a polarized plug (one blade is wider than the other). To reduce the risk of electric shock, this plug will fit in a polarized outlet only one way. If the plug does not fit fully in the outlet, reverse the plug. If it still does not fit, contact a qualified electrician. Do not modify the plug in any way.
- Check if the voltage indicated on the base of the appliance corresponds to the local electrical voltage before you connect the appliance.
- This appliance is intended for household use only. Do not use this appliance for anything other than its intended use as described in this manual.
- If the blades or blending bar get stuck, unplug the appliance before you remove the ingredients that block the blades. BLADES ARE SHARP.
- Do not place the appliance or power cord near a hot surface, gas or electric burner, or in a heated oven.
- Always unwind the power cord completely before you switch on the appliance.
- Keep hands, fingers, hair, scarves, clothing as well as spatulas and other utensils away from the appliance while using to reduce the risk of injury to persons, and/or damage to the appliance.
- To avoid splashing, always immerse the bar into the ingredients before you switch on the appliance.
- Remove the detachable bar or accessories from the appliance before washing.
- Always ensure the appliance is turned off after each use. Always unplug the appliance from the electrical outlet when not in use, before putting on or taking off parts, before touching parts that move and before cleaning or attempting to move the appliance.
- Never leave the appliance unattended while in use.
- Always place the appliance on a stable, level and horizontal surface.
- Make sure all parts are assembled properly before you switch on the appliance. Do not disassemble while appliance is operating.
- Do not exceed the suggested quantities and running time specified in the user manual or run the motor continuously.
- Do not process more than one batch without interruption (maximum 3 minutes). Let the appliance cool down completely before continuing to process.
- Maximum rating is based on the Food Chopper accessory (mini Chopper for HR2627 and XL Chopper for HR2629) that draws the greatest power. The other recommended attachments may draw significantly less power.
SAVE THESE INSTRUCTIONS
IMPORTANT
Danger
- Never immerse the motor unit in water or any other liquid and do not rinse it under the tap or clean it in the dishwasher. Only use a moist cloth to clean the motor unit.
Warning
- Never use a chopper blade unit without a chopper bowl.
- To avoid splashing, always immerse the blender bar into the ingredients before you switch on the appliance, specially when you process hot ingredients.
- Thoroughly clean the parts that come into contact with food before you use the appliance for the first time. Refer to the instruction manual.
- If the blender motor unit falls into liquid, imminently unplug it an carefully remove the blender bar, then stop using the appliance and contact service center.
- Vibration may occur while operating the appliance. This is normal. Make sure the appliance is always operated on a stable, flat surface.
- If a significant amount of juice or fluid spills onto, around or under the appliance while operating, turn the appliance off, and unplug from outlet. Then clean and dry the appliance before continuing to use.
- Do not process ingredients with quantity higher than 3/4 of the blender bar height.
Caution
- Do not use the appliance with any of the accessory longer than 3 minutes without interruption. Let the appliance cool down for 15 minutes before you continue processing.
-None of the accessories is suitable for use in the microwave.
-Keep the motor unit away from heat, fire moisture and dirt.
- Never fill the beaker, chopper bowl with ingredients that are hotter than 80°C/175°F.
- Do not exceed the quantities and processing times indicated in the table.
- Never use any accessories or parts from other manufacturers or that Philips does not specifically recommend. If you use such accessories or parts, your guarantee becomes invalid.
- Clean the blade unit of the blender bar under the tap. Do not immerse in water or clean it in the dishwasher.
- After cleaning, let the blender bar dry. Store it either horizontally of with the blade pointing upwards. Make sure the blade unit is completely dry before you store the blender bar.
- This appliance is intended for household use only. Do not use this appliance for anything other than its intended use as described in this manual.
Electromagnetic fields (EMF)
This Philips appliance complies with all applicable standards and regulations regarding exposure to electromagnetic fields.
6 ENGLISH
1 Introduction
Congratulations on your purchase and welcome to Philips! To fully benefit from the support that Philips offers, register your product at www.philips.com/welcome.
2 General description
Hand blender
1 Power cord
2 Trigger switch
3 Motor unit
4 Release button
5 Blender bar with integrated blade unit
6 Blade guard
XL chopper (HR2629 only)
7 Gear unit for XL chopper
8 XL chopper blade
9 XL Chopper bowl (for XL chopper and spiralizer HR2629)
Spiralizer (HR2629 only)
10 3 Spiralizer inserts (spaghetti, linguine, ribbon)
11 Feeding tube
12 Spiralizer driving plate
13 Spiralizer gear unit
Bottle to go
14 Bottle
15 Lid
Whisk (HR2627 only)
16 Whisk gear unit
17 Whisk
Mini chopper (HR2627 only)
Thoroughly clean all parts that will come into food contact before you use the appliance for the first time (see chapter "Cleaning").

Note
• Make sure all parts are completely dry before you start using the appliance.
Preparing for use
1 Let hot ingredients cool down before you process them or put them in the bottle to go or soup container (maximum temperature 80°C).
2 Cut large ingredients into pieces of around 2 x 2 x 2 cm before you process them.
3 Assemble the appliance properly before you put the plug in the wall outlet.

Note
• Always unwind the power cord completely before you switch on the appliance.
- Remove all packing material or labels before using.
Using the appliance
Use this appliance for its intended household use as described in this manual.

Caution
- Avoid contact with moving parts. Keep hands and fingers away from blades and out of container during operation or while appliance is plugged in to prevent the possibility of severe injury to persons and/or damage to the appliance.
Trigger switch
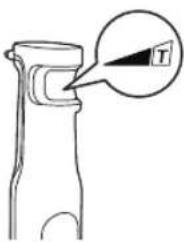
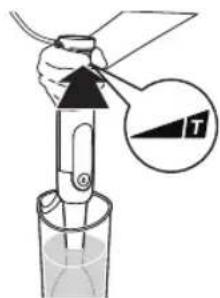
This appliance is equipped with a trigger switch and a visual speed indication on top of the device.
1 The deeper you press, the higher the speed gets. The deepest setting of the speed trigger switch is the Turbo speed.
text_image
Diagram showing a device with a labeled component 'T' and an arrow pointing to it, likely indicating a measurement or annotation.Hand blender
The hand blender is intended for:
-blending fluids, e.g. dairy products, sauces, fruit juices, soups, mixed drinks and shakes.
-mixing soft ingredients, e.g. pancake batter or mayonnaise.
-pureeing cooked ingredients, e.g. for making baby food.
-chopping nuts, fruits and vegetables.

Caution
- Do not process ingredients such as ice cubes, frozen ingredients or fruits with stones.
- Do not process ingredients with quantity higher than 3/4 of the blender bar height.
Blending quantities and processing times
| Ingredients | Blending quantity | Time Speed |
| Fruits and vegetables | 100 - 200 g 30 sec. |  |
| Baby food, soups, and sauces | 100 - 400 ml 60 sec. |  |
| Batters 100 - 500 ml 60 sec. |  | |
| Shakes and mixed drinks | 100 - 500 ml 60 sec. |  |
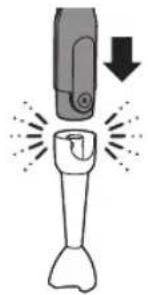
1 Attach the blender bar to the motor unit ("click").
natural_image
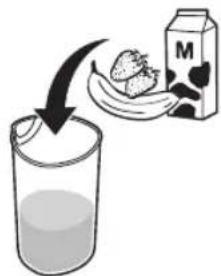
Illustration of a flashlight emitting exhaust smoke from a flame (no text or symbols)2 Put the ingredients into a beaker.
text_image
Illustration showing a glass of juice being added to a milk carton and a strawberry, with a downward arrow indicating the process.3 Put the plug in the wall outlet.
natural_image
Diagram of a plug inserted into a wall socket with an arrow indicating direction (no text or symbols)4 Immerse the blade guard completely in the ingredients in order to avoid splashing.
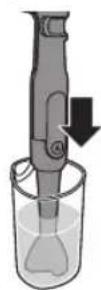

Caution
- Do not process ingredients with quantity higher than 3/4 of the blender bar height.
5 Switch on the appliance by squeezing the trigger switch. You can increase the speed by pressing the switch harder. If you press the switch up to maximum, the blender will work with Turbo speed.
text_image
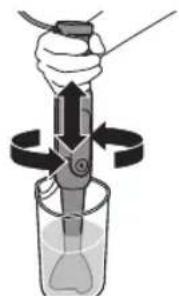
Diagram showing a hand holding a tool with an arrow and a magnified view labeled 'T' pointing to a section.6 Move the appliance slowly up and down and in circles to blend the ingredients.
natural_image
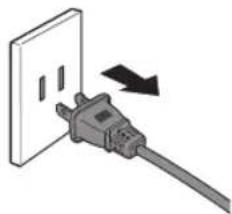
Illustration of a hand using a tool to interact with a device in a beaker (no text or symbols visible)7 After you have finished blending, release the trigger switch to turn the appliance off and unplug the appliance.
natural_image
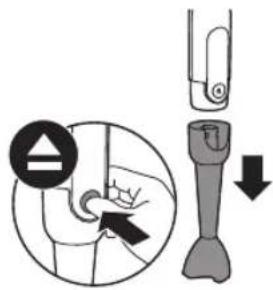
Diagram of a plug inserted into a wall socket with an arrow indicating direction (no text or symbols)8 Remove the blender bar by pressing the release button.
text_image
Diagram illustrating a mechanical or electrical component with directional arrows and a warning symbol, likely indicating a repair or disassembly process.10 ENGLISH

Caution
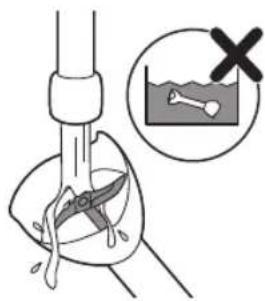
- Blades are sharp. Handle carefully. Always unplug the appliance first. Never touch the blade itself when cleaning or clearing food caught in blades.
9 For easy cleaning, rinse the bar immediately after use with hot water. Do not immerse the bar completely in water.
text_image
Diagram illustrating a medical procedure with labeled components and a warning symbol10 Place the bar in an upright position with the blade guard on top and let it dry for at least 10 minutes before storing.

text_image
Diagram illustrating surgical procedure steps with labeled diagrams and checkmarks indicating approval or rejection actions.Chopper
The chopper is intended for chopping ingredients such as nuts, raw meat, onions, hard cheese, boiled eggs, garlic, herbs, dry bread, etc.

Caution
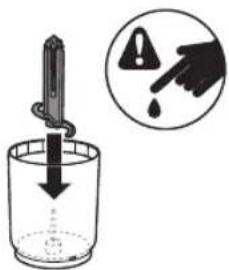
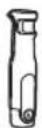
- Always unplug the appliance first. Be very careful when you handle the chopper blade unit, the cutting edges are very sharp. Always hold the unit by the center plastic rod. Never touch the blade itself. Be particularly careful when you insert or remove the blade unit from the chopper bowl, when you empty the chopper bowl, when clearing food caught in blades and during cleaning. - Do not process ingredients such as ice cubes, frozen ingredients or fruits with stones.
Chopping quantities and processing times
XL Chopper (HR2629 only) Mini Chopper (HR2627 only)
| Ingredients | XL Chopper | Mini Chopper | Time Speed |
| Onions 200 g | 100 g | 5 x 1 sec. | |
| Eggs 200 g | 100 g 5 sec. | ||
| Meat 200 g | 100 g 10 sec. | ||
| Herbs 30 g | 20 g 10 sec. | ||
| Parmesan cheese | 200 g 100 g | 15 sec. | |
| Nuts and almonds | 200 g 80 g | 30 sec. | |
| Dark chocolate | 100 g 50 g | 20 sec. | |
| Dry bread cubes | 80 g 30 g | 30 sec. |
Strawberry Ice Cream with honey
This recipe can be prepared with the Mini or XL chopper. They are supplied as a standard accessory with models HR2627/91 and HR2629/91, respectively. -50g honey (60g for XL Chopper) -50g strawberry ice cream (55g for XL Chopper).
1 Put the chopper blade unit in the chopper bowl and pour the honey in the bowl.
2 Put the strawberry ice cream in the chopper bowl over the honey and put the bowl into the freezer for 40 minutes at -18°C.
3 Take the chopper bowl out of the freezer and put the chopper lid on the bowl and then fasten the motor unit onto the lid.
4 Press the trigger switch as far as it goes to reach the highest speed and let the chopper operate for 15 seconds at this speed.
Note: if needed, add more ice cream after processing, according to your taste.
1 Put the blade unit in the chopper bowl.
text_image
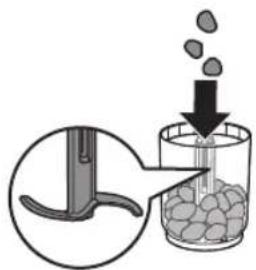
Diagram showing a hand holding a nail being inserted into a glass container, with an instructional icon indicating warning and drop.2 Put the ingredients in the chopper bowl.
text_image
Diagram illustrating a chemical process with a container being heated by a rod, showing liquid and particles being poured into it.3 Put the gear unit for chopper on the chopper bowl.
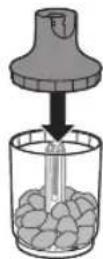
4 Attach the motor unit onto the gear unit for chopper ("click").
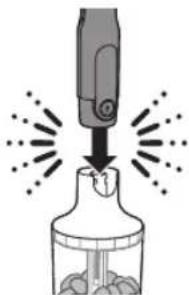
natural_image
Illustration of a soldering iron being inserted into a bottle (no text or symbols)5 Put the plug in the wall outlet.
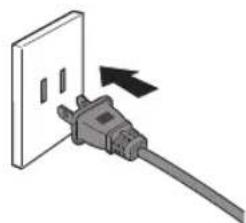
natural_image
Diagram of a plug inserted into an outlet, showing a black arrow indicating direction (no text or symbols present)6 Press the trigger switch and let it operate until all ingredients are cut.
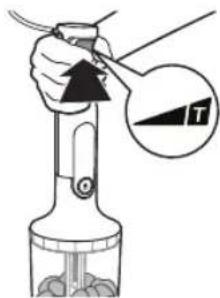
text_image
Diagram showing a hand holding a tool with an arrow and a magnified inset labeled 'T' pointing to a section.12 ENGLISH
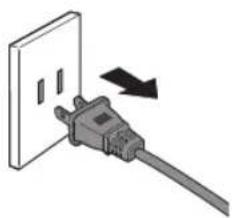
7 After you have finished chopping, release the trigger switch to turn the appliance off and unplug the appliance.
natural_image
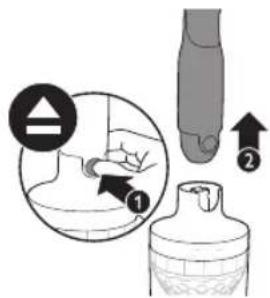
Diagram of a plug inserted into a wall socket with an arrow indicating direction (no text or symbols)8 Press the release button to remove the motor unit from the gear unit.
text_image
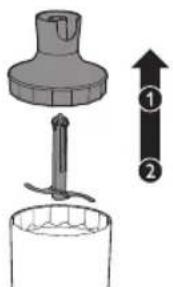
Diagram illustrating a step-by-step procedure for a blood glucose meter, showing step ① and step ② with magnified view.9 Carefully remove the gear unit and the blade unit (fig. 18).
text_image
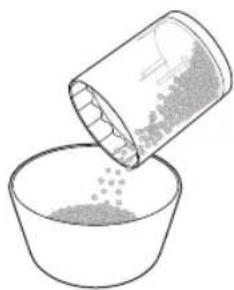
Diagram showing a mechanical assembly with labeled parts and directional arrows indicating measurement or assembly.10 Pour the chopped ingredients out (fig. 19).
natural_image
Simple line drawing of a container pouring granular material into a bowl (no text or symbols)Whisk (HR2627 only)
The whisk is intended for whipping cream, whisking egg whites, desserts etc


Caution
- Do not process ingredients with quantity higher than 3/4 of the blender bar height.
Whisking quantities and processing time.
| Ingredients | Whisking quantity | Time Speed | ||
 | Cream 250 g | 70-90 sec |  | |
| Egg whites 4 x | 120 sec |  | ||
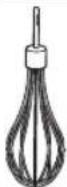
1 Attach thee whisk to the whisk gear unit, or attach the mixer accessory to the mixer accessory gear unit ("click").
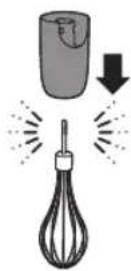
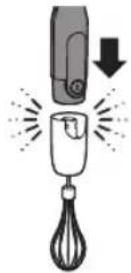
2 Attach the whisk gear unit or the mixer gear unit to the motor unit ("click").
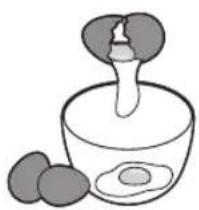
3 Put the ingredients in a bowl.
natural_image
Simple line drawing of a dropper in a container with two small objects nearby (no text or symbols)4 Put the plug in the wall outlet.
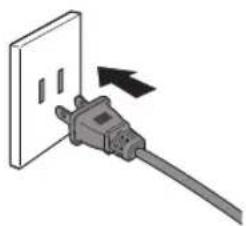
natural_image
Diagram of a plug inserted into an electrical outlet, showing a black arrow indicating direction (no text or symbols present)5 Immerse the whisk or the mixer accessory in the ingredients.
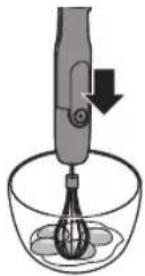
natural_image
Illustration of a hand mixer in a bowl with an arrow indicating downward motion (no text or symbols)
Caution
- Do not process ingredients with quantity higher than 3/4 of the blender bar height.
6 Press the trigger switch.
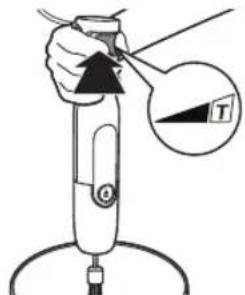
text_image
Diagram showing a hand holding a tool with an arrow and a magnified view labeled 'T' pointing to a section of the tool.7 Move the appliance slowly in circles.
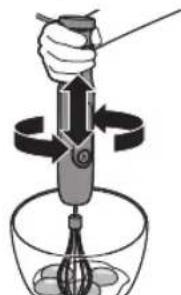
natural_image
Illustration of a hand using a pipette to interact with a bowl of liquid (no text or symbols)8 After you have finished the whisking/mixing, release the trigger switch to turn the appliance off and remove the plug from the wall outlet.
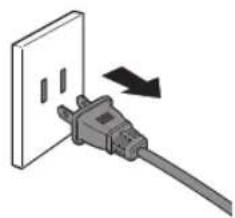
natural_image
Diagram of a plug inserted into a wall socket with an arrow indicating direction (no text or symbols)9 Press the release button to remove the motor unit from the gear unit.
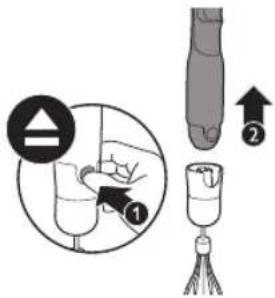
text_image
Diagram illustrating a medical procedure with labeled steps and an arrow indicating direction of movement14 ENGLISH
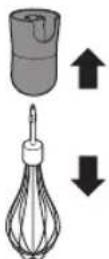
10 To detach the whisk/mixer accessory from the gear unit, pull the whisk/mixer accessory straight down out of the gear unit.
Spiralizer (HR2629 only)
The spiralizer is intended for creating spirals from different vegetable, e.g. potatoes, carrots, cucumber, zucchini, white radish, beet roots, turnips, etc.
3 Inserts:
The spiralizer has three different inserts which produce spirals with different widths. The "Spaghetti" insert and the "Linguine" inserts have two different knives, the plain knife cuts spiral ribbons and the second knife unit with the small teeth divides them into fine (Spaghetti) or thicker (Linguine) strips. The insert for the wide ribbons only has one plain knife.

Caution
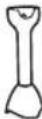
- Be very careful when you handle the inserts, the cutting edges are very sharp. Always hold the inserts by the outer radius. Never touch the blade itself. Be particularly careful when you insert or remove the inserts from the chopper bowl. Grab the inserts with two fingers by using the holes in the insert. Be very careful when clearing food caught in blades and during cleaning.
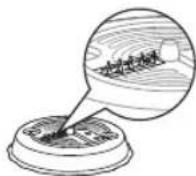
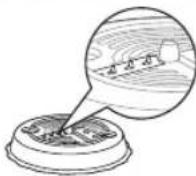
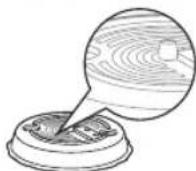
 |  |  | Speed | |
| Courgette |  |  |  |  |
| Sweet potatoes | [4H80] |  |  |  |
| Carrots (thicker than 3 cm) |  |  | [DS4G] | [3H50] |
| Radish |  |  |  | [3COY] |
| Cucumber |  |  |  | [2TG0] |
| Potatoes |  |  | [S8TO] |  |
Vegetable preparation tips
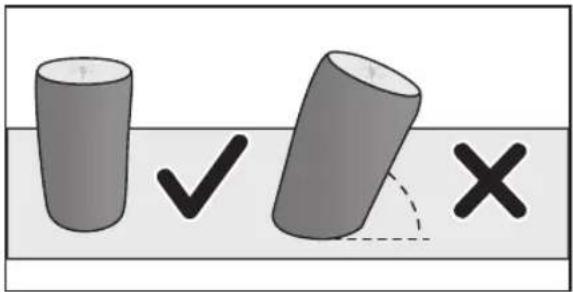
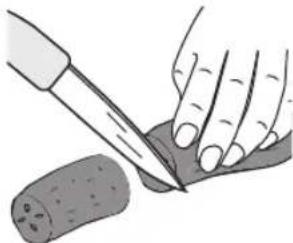
-In order to get nice and long spirals, cut the vegetable into straight cylinders with approximately the same height as the feeding tube.
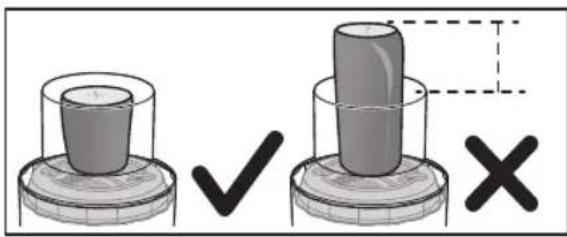
natural_image
Two mechanical components with checkmark and cross symbols, no text or labels present- Cut off each end of e.g. a cucumber/ potato in order to have a good contact with the driving plate and the cutting insert.
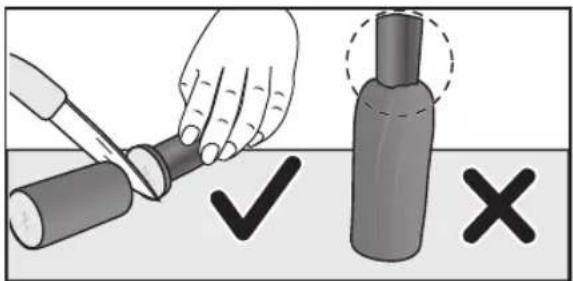
text_image
Diagram illustrating a hand holding a cylindrical object with checkmark and cross symbols, alongside a bottle with a dashed circle highlighting it.-Only a straight cylinder will remain centered from the beginning to the end of processing.
text_image
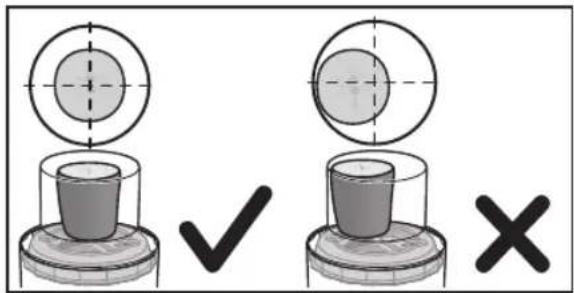
Diagram showing two 3D cylinders with checkmark and cross symbols, likely illustrating a geometric or spatial reasoning concept.-Center the prepared vegetable by pressing it on the small metal tube in the middle of the cutting insert.
text_image
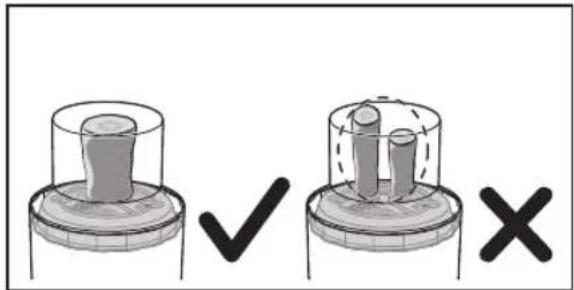
Diagram showing two identical views of a cylindrical object with crosshair indicators, one marked ✓ and the other X.- Never place more than one piece of vegetable at the same time on the cutting inserts.
text_image
Diagram showing two labeled mechanical components with checkmark and cross symbols indicating status or failure.Using the spiralizer
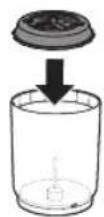
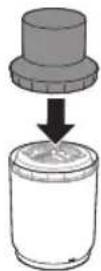
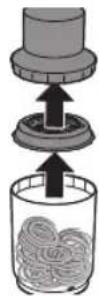
1 Remove the chopping blade from the XL chopping bowl and put one of the inserts in the XL chopper bowl.
16 ENGLISH
2 Attach the translucent feeding tube onto the XL chopper bowl.
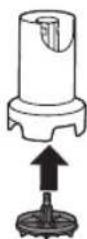
3 Attach the driving plate to the spiralizer gear unit.
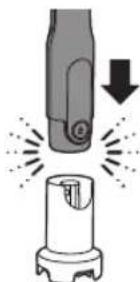
4 Attach the motor unit to the gear unit (fig. 2).
natural_image
Diagram showing a mechanical component with a downward arrow and radiating lines, no text or symbols present.5 Prepare the vegetable as described in the preparation tips.
natural_image
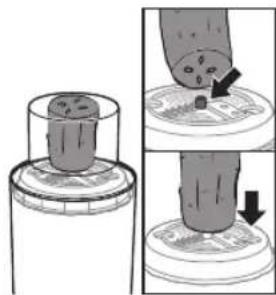
Illustration of a hand using a knife to cut a textured object (no text or symbols visible)6 Center the vegetable and press it onto the small metal tube of the insert.
natural_image
Illustration of a mechanical component with a cylindrical part inserted into a container, showing two steps of tool manipulation (no text or symbols present)7 Put the plug in the wall outlet.
natural_image
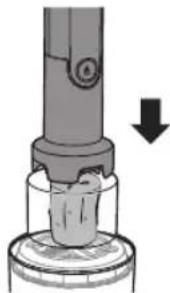
Electrical outlet with a cable inserted, showing a black arrow indicating direction (no text or symbols)8 Press the motor unit with attached gear unit and driving plate onto the vegetable (fig. 6).
natural_image
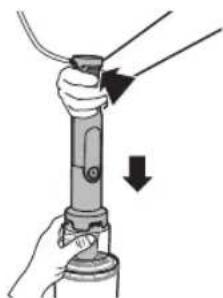
Mechanical component with a downward arrow indicating compression or disassembly (no text or symbols visible)9 Fix the chopper bowl and the feeding tube with one hand, and press the trigger switch with the middle finger of the other hand. Press down the vegetable at the same time.
natural_image
Illustration of a hand holding a cylindrical device with two arrows indicating direction (no text or symbols)10 The spirals are processed into the bowl.
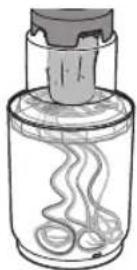
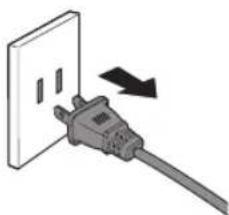
11 After you have finished processing, release the trigger switch to turn the appliance off and unplug the appliance.
natural_image
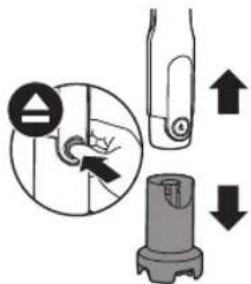
Electrical plug with a black arrow indicating direction (no text or symbols)12 Remove the gear unit by pressing the release button.
text_image
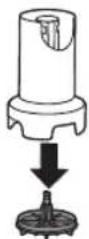
Diagram illustrating a mechanical or electrical process with directional arrows and a warning symbol, likely for safety or repair instructions.13 Remove the driving plate from the gear unit.
14 Remove the feeding tube and the insert, and then empty the bowl.

Note
- If you want to make another batch, remove the remaining vegetable from the driving plate or the insert.
- If you make larger quantities, empty the bowl before it's full.
Bottle to go
The bottle to go is intended for directly blending the bottle and to take to work.
| Fruit, Veggie quantity | Milk, Juice quantity | Time | Speed | |
| Berries, Banana, Milk, Juice | 100 g 300 | ml 60 sec. |  | |
| Veggies Juice | 200 g 200 | ml 60 sec. |  |
18 ENGLISH
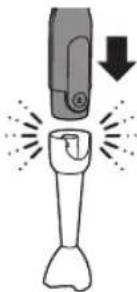
1 Attach the blender bar to the motor unit ("click").
natural_image
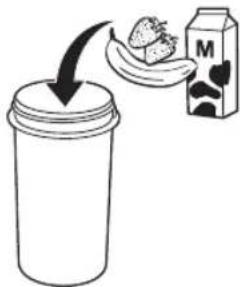
Illustration of a flashlight emitting exhaust flames, no text or symbols present2 Put the ingredients into the bottle.
text_image
Diagram showing a hand-drawn drop of strawberries into a container with a milk carton, illustrating the concept of fruit loss.3 Put the plug in the wall outlet.
natural_image
Illustration of a U-shaped electrical outlet with a cable inserted, showing an arrow indicating direction (no text or symbols present)4 Immerse the blade guard completely in the ingredients in order to avoid splashing.
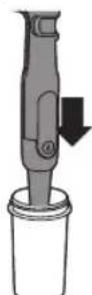
5 Switch on the appliance by squeezing the trigger switch. You can increase the speed by pressing the switch harder.
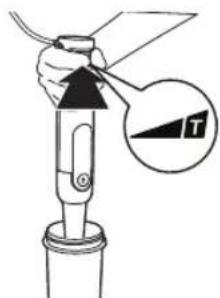
text_image
Diagram showing a hand holding a tool with an arrow and a magnified view of a numbered item labeled '1'.6 Move the appliance slowly up and down and in circles to blend the ingredients.
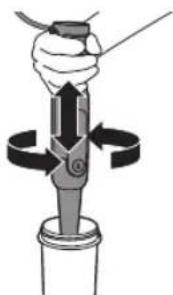
natural_image
Illustration of a mechanical device with a handle and rotating arm (no text or symbols)7 After you have finished blending, release the trigger switch to turn the appliance off and unplug the appliance.
natural_image
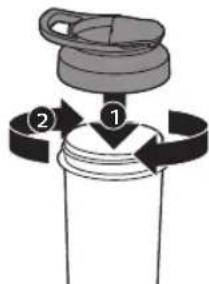
Diagram of a plug inserted into a wall socket with an arrow indicating direction (no text or symbols)8 Attach the lid by turning it clockwise.
text_image
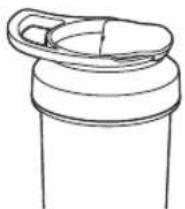
Diagram showing a mechanical assembly with labeled parts 1 and 2, likely illustrating a turning or rolling process.9 Make sure you lock the lid securely.
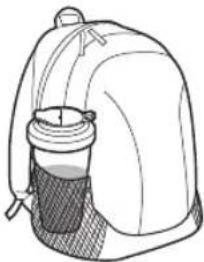
10 Now you can take the bottle to go.
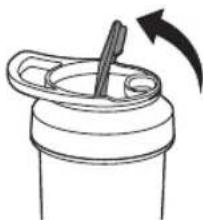
natural_image
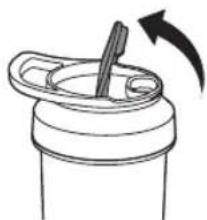
Line drawing of a backpack with a cup holding a glass, no text or symbols present11 Open the lid.
natural_image
Simple line drawing of a cup with a straw and arrow indicating rotation (no text or symbols)12 Enjoy your home made smoothie or shake.
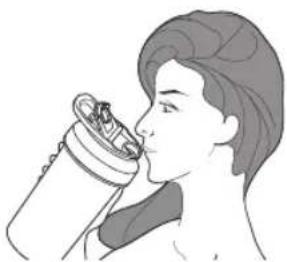
natural_image
Illustration of a person drinking from a cup (no text or symbols)4 Cleaning

Caution
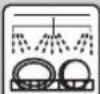
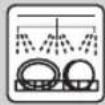
- Do not immerse the motor unit, the chopper gear unit, the whisk gear unit and the mixer accessory gear unit in water or any other liquids, nor rinse them under the tap. Use a moist cloth to clean these parts. The blender bar blade and guard can be rinsed under the tap. All other accessories are dishwasher proof. - Never use scouring pads, abrasive cleaning agents or aggressive liquids such as alcohol, gasoline or acetone to clean the appliance.
1 Unplug the appliance.
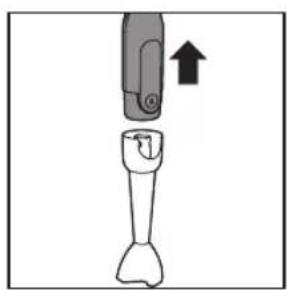
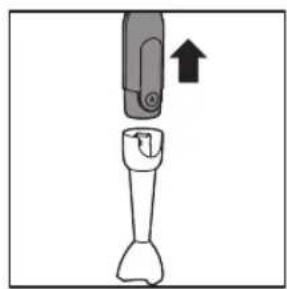
2 Press the release button on the motor unit to remove the accessory you have used.
3 Disassemble the accessory.
4 See the 'Cleaning' charts for further instructions.
20 ENGLISH
 |  |  | ||
 |  |  |  | |
 |  |  |  | |
HR2627 |  |  |  | |
HR2627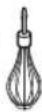 |  |  |  | |
 HR2627 HR2627 |  |  |  | |
 HR2629 HR2629 | [7798] | [3692] |  | |
| [XCKW]HR2629[HY58] |  |  |  | |
HR2629 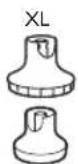 HR2627 HR2627 | × | × | √ | |
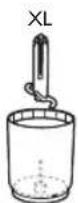 HR2629 HR2629 | √ | √ | √ | |
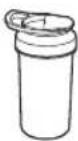 HR2627HR2629 HR2627HR2629 | √ | √ | √ | |
natural_image
Diagram of a mechanical component with an upward arrow indicating motion (no text or symbols)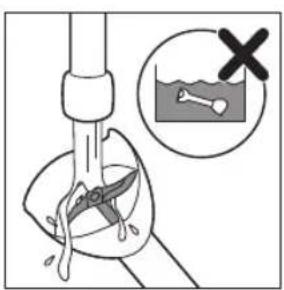
text_image
Diagram illustrating a mechanical or fluidic process with a valve, tool, and a cross symbol indicating failure or damage.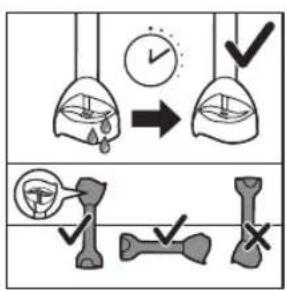
text_image
Diagram illustrating correct and incorrect eye condition options with hand-drawn visual examples22 ENGLISH
5 Storage
1 Wind the power cord loosely around the heel of the motor unit.
2 Store the appliance in a cool, dry place away from direct sunlight or other heat source.
6 Recycling
-Do not throw away the product with the normal household waste at the end of its life, but hand it in at an official collection point for recycling. By doing this, you help to preserve the environment.
-Follow your country's rules for the separate collection of electrical and electronic products. Correct disposal helps prevent negative consequences for the environment and human health.
Guarantee and support
If you need information, support, or if you have a problem, please visit
www.philips.com/support or (in the US or Canada only) call 1-866-309-8817 for assistance.
One year limited warranty
Philips warrants that this product shall be free from defects in material, workmanship and assembly, under normal use, in accordance with the specifications and warnings, for a period of one year from the date of purchase. This warranty extends only to the original purchaser of the product, and is not transferable. To exercise your rights under this warranty, you must provide proof of purchase in the form of an original sales receipt that shows the product name and the date of purchase. For customer support or to obtain warranty service, please visit our website
www.philips.com/support.
THERE ARE NO OTHER EXPRESS OR IMPLIED WARRANTIES.
Philips' liability is limited to repair or, at its sole option, replacement of the product. Incidental, special and consequential damages are disclaimed where permitted by law. This warranty gives you specific legal rights.
You may also have other rights that vary from state to state, province to province or country to country.
7 Troubleshooting
This chapter summarizes the most common problems you could encounter with the appliance. If you are unable to solve the problem with the information below, visit www.philips.com/support for a list of frequently asked questions or contact the Consumer Care Center in your country.
| Problem Solution | |
| The appliance makes a lot of noise, produces an unpleasant smell, feels hot to the touch or produces smoke. What should I do? | The appliance may produce an unpleasant smell or emit a little smoke if it has been used too long. In this case you should switch off the appliance and let it cool down for 60 minutes. |
| Is it possible to damage the appliance by processing very hard ingredients? | Yes, the appliance may get damaged if you process very hard ingredients such as bones, fruit with stones or frozen ingredients. |
| Why does the appliance suddenly stop working? | Some hard ingredients may block the blade unit. Release the trigger switch, unplug the appliance, detach the motor unit and carefully remove the ingredients that block the blade unit. |
CONTENIDO
1 Introducción 27
text_image
Diagram of a mechanical component with a labeled section marked 'T' and an arrow pointing to it.Batidora de mano
natural_image
Illustration of a flashlight emitting sound waves, no text or symbols presenttext_image
Illustration showing a glass of juice being added to a milk carton, with a hand pointing to the fruit.natural_image
Illustration of a plug inserted into a wall socket with an arrow indicating direction (no text or symbols)text_image
Diagram showing a hand holding a tool above a glass with a labeled arrow and 'T' symbol, likely illustrating a measurement or inspection process.natural_image
Illustration of a hand using a tool to interact with a glass in a beaker, showing motion arrows (no text or symbols)natural_image
Diagram of a wall socket connected to a plug with an arrow indicating direction (no text or symbols)text_image
Diagram illustrating a mechanical or electrical component with directional arrows and a warning symbol, likely from an engineering or manufacturing context.
Precaución
text_image
Diagram illustrating a medical procedure with labeled components and a cross symbol indicating failure or absence.text_image
Medical diagram illustrating surgical procedure steps with labeled anatomical views and checkmark indicatorsPicadora
text_image
Diagram showing a hand holding a droplet above a glass with a pen, indicating liquid level or concentration.text_image
Diagram illustrating a chemical process with a funnel and dropping liquid into a beaker, showing an arrow indicating downward motion.natural_image
Illustration of a soldering iron being inserted into a bottle with motion lines indicating force (no text or symbols)natural_image
Diagram of a plug inserted into a wall socket with an arrow indicating direction (no text or symbols)text_image
Diagram showing a hand holding a spray gun with an arrow and a label 'T' pointing to it, indicating a process or measurement.natural_image
Electrical outlet with a plug inserted, showing a black arrow indicating direction (no text or symbols)text_image
Diagram illustrating a step-by-step procedure for handling a bottle, with labeled steps and directional arrows.text_image
Diagram showing a mechanical assembly with labeled parts and directional arrows indicating movement or force.natural_image
Simple line drawing of a cup pouring granular material into a bowl (no text or symbols)34 ESPAÑOL
Levantaclaras (solo modelo HR2627)
natural_image
Simple line drawing of a dropper in a container with two small objects beside it (no text or symbols)natural_image
Diagram of a plug inserted into an electrical outlet, showing a black arrow indicating direction (no text or symbols present)natural_image
Illustration of a hand mixer in a bowl with an arrow indicating the process (no text or symbols present)
Precaución
text_image
Diagram showing a hand holding a tool with an arrow and a magnified view labeled 'T' pointing to a section of the device.natural_image
Illustration of a hand using a brush to stir contents in a bowl (no text or symbols)natural_image
Diagram of a wall socket connected to a plug with an arrow indicating direction (no text or symbols)text_image
Diagram illustrating a dental procedure with labeled steps and an arrow indicating direction of insertion or repair.natural_image
Three-panel illustration showing a boat navigating a wooden boat, with no text or symbols present.natural_image
Two 3D mechanical parts with checkmark and cross symbols, no text or labels presenttext_image
Diagram illustrating a hand holding a bottle with a checkmark and an X mark, alongside a close-up of the bottle's tip.text_image
Diagram showing two 3D cylinders with checkmark and cross symbols, likely illustrating a geometric or logical concept.text_image
Diagram showing two identical views of a cylindrical object with crosshair indicators, one marked ✓ and the other X, indicating selection or validation.text_image
Diagram showing two mechanical components with checkmark and cross symbols indicating status or failurenatural_image
Illustration of a mechanical device emitting powder, with no visible text or symbolsnatural_image
Illustration of hands using a knife to cut a cylindrical object (no text or symbols visible)38 ESPAÑOL
natural_image
Diagram showing a mechanical component being inserted into a housing, with arrows indicating the process (no text or symbols present)natural_image
Electrical outlet cable with a plug inserted, showing an arrow indicating direction (no text or symbols)natural_image
Diagram of a mechanical device with a downward arrow indicating compression or disassembly (no text or symbols present)natural_image
Illustration of a hand holding a cylindrical device with arrows indicating direction (no text or symbols)natural_image
Electrical outlet plug with a black arrow indicating direction (no text or symbols)text_image
Diagram illustrating a mechanical or electrical process with directional arrows and labeled components, including a warning symbol and a bottle-like object.natural_image
Illustration of a flashlight emitting exhaust smoke from its tip, with no text or symbols present.text_image
Diagram showing a hand holding a strawberry inside a container, with a milk carton nearby and a hand pulling the fruit.natural_image
Diagram of a plug inserted into an electrical outlet, showing a black arrow indicating direction (no text or symbols present)text_image
Diagram showing a hand holding a tool with an arrow and a label 'T' pointing to it, indicating direction or force.40 ESPAÑOL
natural_image
Illustration of a hand holding a tool with a circular motion arrow indicating rotational motion (no text or symbols)natural_image
Diagram of a plug inserted into a wall socket with an arrow indicating direction (no text or symbols)text_image
Diagram showing a mechanical or electrical component with labeled parts 1 and 2, indicating a step or sequence.natural_image
Line drawing of a backpack with a cup and handle, no text or symbols present11 Abra la tapa.
natural_image
Simple line drawing of a cup with a straw and arrow indicating rotation (no text or symbols)natural_image
Illustration of a person drinking from a cup (no text or symbols present)4 Limpieza

Precaución
 |  |  | ||
| [WCEX] |  |  |  | |
| [S284] |  |  |  | |
HR2627 |  | [7DZY] |  | |
HR2627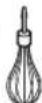 |  |  |  | |
 |  | [6H0D] |  | |
HR2629 |  |  |  | |
[CW00] HR2629 HR2629 |  |  |  | |
 |  |  | ||
| HR2629HR2627 | 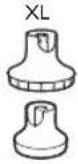 | × | × | √ |
| HR2629 | 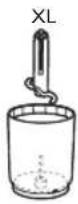 |  |  |  |
| HR2627HR2629 | 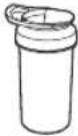 |  |  |  |
natural_image
Diagram of a mechanical device with an upward arrow indicating motion (no text or symbols present)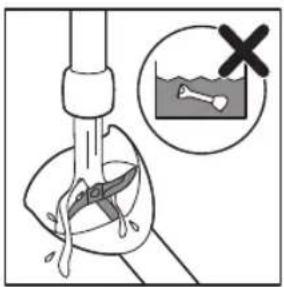
text_image
Diagram illustrating a procedure involving a tool and a container with liquid, including a cross symbol indicating failure or rejection.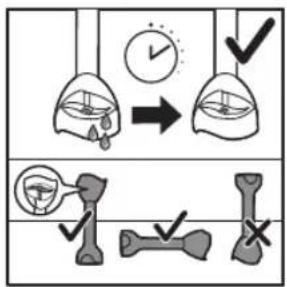
text_image
Diagram illustrating eye anatomy and bone alignment with checkmarks indicating correct and incorrect eye positions44 ESPAÑOL
5 Almacenamiento
RECOMMANDATIONS IMPORTANTES
Hachoir XL (HR2629 uniquement)
text_image
Diagram of a mechanical component with a labeled section marked 'T' and an arrow pointing to it.Mixeur plongeant
natural_image
Illustration of a flashlight emitting sound waves, no text or symbols presenttext_image
Illustration showing a glass of milk being transferred to a strawberry using a milk carton, with a hand pouring liquid into the fruit.natural_image
Diagram of a plug inserted into a wall socket with an arrow indicating direction (no text or symbols)text_image
Diagram showing a hand holding a tool with an arrow and a magnified view labeled 'T' pointing to a component.natural_image
Illustration of a hand using a tool to lift a beaker with a pen, no text or symbols presentnatural_image
Diagram of a plug inserted into an electrical outlet, showing a black arrow indicating direction (no text or symbols present)text_image
Diagram illustrating a mechanical or dental procedure with labeled parts and directional arrows indicating movement or force.
Attention
text_image
Diagram illustrating a mechanical or fluidic process with a valve and tool, accompanied by a magnified view showing a dislocation or failure symbol.text_image
Medical diagram illustrating surgical procedure steps with labeled anatomical views and checkmark indicatorsHachoir
text_image
Diagram showing a hand holding a test tube above a beaker with downward arrows, accompanied by an instructional icon with warning symbols.text_image
Diagram illustrating a chemical process with a funnel and droplet being poured into a beaker, showing an arrow indicating the process.natural_image
Illustration of a dropper being heated by a bottle, emitting vapor or heat (no text or symbols)natural_image
Diagram of a plug inserted into an electrical outlet, showing a black arrow indicating direction (no text or symbols present)text_image
Diagram showing a hand holding a spray bottle with an arrow and a magnified inset labeled 'T' pointing to the spray bottle.natural_image
Diagram of a wall socket connected to a plug, showing an arrow indicating direction (no text or symbols present)text_image
Diagram illustrating a step-by-step procedure for blood glucose application, showing steps from initial injection to final product.text_image
Diagram showing a mechanical assembly with labeled parts and directional arrows indicating motion or force.natural_image
Simple line drawing of a container pouring granular material into a bowl (no text or symbols)natural_image
Simple line drawing of a dropper in a container with two small objects nearby (no text or symbols)natural_image
Diagram of a plug inserted into an electrical outlet, showing a black arrow indicating direction (no text or symbols present)natural_image
Illustration of a hand mixer in a bowl with an arrow indicating downward motion (no text or symbols)
Attention
text_image
Diagram showing a hand holding a tool with an arrow and a magnified inset highlighting a section labeled 'T'natural_image
Illustration of a hand using a tool to interact with a mechanical device in a bowl (no text or symbols visible)natural_image
Diagram of a plug inserted into a wall socket with an arrow indicating direction (no text or symbols)text_image
Diagram illustrating a step in a medical procedure involving a bottle tip, catheter insertion, and a tube insertion step.natural_image
Three-panel illustration showing a boat navigating a wooden platform, with one view highlighting the boat's interior (no text or symbols present) |  |  |  | |
| Courgette | √ | √ | √ |  |
| Patates douces | √ | √ | √ |  |
| Carottes (+ de 3 cm d'épaisseur) | √ | √ | √ |  |
| Radis | √ | √ | √ |  |
| Concombre | √ | √ | — |  |
| Pommes de terre | √ | √ | √ |  |
natural_image
Two mechanical components with checkmark and cross symbols, no text or labels presenttext_image
Diagram illustrating a bottle being cut with checkmark and cross symbols, showing correct and incorrect states.text_image
Diagram showing two 3D cylinders with checkmark and cross symbols, likely illustrating a geometric or logical concept.text_image
Diagram showing two identical views of a cylindrical object with crosshair indicators, one marked ✓ and the other X, indicating selection or validation.text_image
Diagram showing two labeled mechanical components with checkmark and cross symbols indicating status or failure.natural_image
Illustration of a mechanical device with a downward arrow and radiating lines, no text or symbols present.natural_image
Illustration of hands using a knife to cut a piece of bread (no text or symbols visible)60 FRANÇAIS
natural_image
Illustration of a mechanical component being cut into a circular base, showing surface wear and a close-up view (no text or symbols)natural_image
Diagram of a plug inserted into a wall socket with an arrow indicating direction (no text or symbols)natural_image
Diagram of a mechanical device with a downward arrow indicating compression or disassembly (no text or symbols present)natural_image
Illustration of a hand holding a cylindrical device with two arrows indicating direction (no text or symbols)natural_image
Electrical outlet plug with a black arrow indicating direction (no text or symbols)text_image
Diagram illustrating a mechanical or electrical process with directional arrows and labeled components, including a warning symbol and a bottle-like object.natural_image
Illustration of a flashlight emitting exhaust flames, no text or symbols presenttext_image
Diagram showing a hand holding a strawberry inside a container, with a milk carton in the background.natural_image
Electrical plug with a black arrow indicating direction, mounted on a wall (no text or symbols)text_image
Diagram showing a hand holding a tool with an arrow and a magnified view labeled 'T' pointing to the tool.62 FRANÇAIS
natural_image
Illustration of a hand holding a tool with a rotating knob, no text or symbols presentnatural_image
Diagram of a plug inserted into a wall socket with an arrow indicating direction (no text or symbols)text_image
Diagram showing a mechanical assembly with labeled parts 1 and 2, likely illustrating a step in a process.natural_image
Simple line drawing of a cylindrical container with a lid (no text or symbols)natural_image
Line drawing of a backpack with a cup, no text or symbols presentnatural_image
Simple line drawing of a cup with a straw and arrow indicating rotation (no text or symbols)natural_image
Illustration of a person drinking from a cup (no text or symbols)4 Nettoyage

Attention
natural_image
Diagram of a mechanical component with an upward arrow indicating motion (no text or symbols)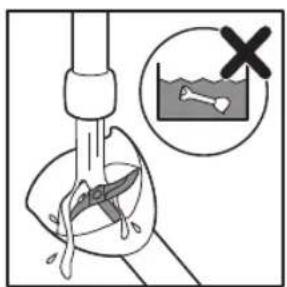
text_image
Diagram illustrating a water tap with a valve, showing an incorrect water level and a cross symbol indicating the incorrect condition.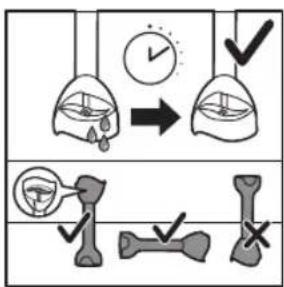
text_image
Diagram illustrating correct and incorrect eye condition changes, showing hand gestures and error symbols66 FRANÇAIS
5 Stockage
© 2022 Philips Domestic Appliances Holding B.V.
All rights reserved.