S20-G - Surveillance Camera Ctronics - Free user manual and instructions
Find the device manual for free S20-G Ctronics in PDF.


User questions about S20-G Ctronics
0 question about this device. Answer the ones you know or ask your own.
Ask a new question about this device
Download the instructions for your Surveillance Camera in PDF format for free! Find your manual S20-G - Ctronics and take your electronic device back in hand. On this page are published all the documents necessary for the use of your device. S20-G by Ctronics.
USER MANUAL S20-G Ctronics
CT-S20 Series Operation Instruction Manual (EN/DE/FR/IT/ES)
Contents
English (01--13)---- \~
Deutsche ---- \~ (14 25)
Française ---- \~ (26 37)
Italiana ---- \~ (38 49)
Española ---- \~ (50 61)
Table of Contents
- Product details 02
- Download the mobile phone APP 02
- Connect the camera to Wi-Fi network 03
3.1 Method 1:Configure network via sound----03
3.2 Method 2:Configure network via hotspot 05 - Password modification 08
- Functions interface 09
- Alarm and Video 10
- Video playback and download 11
- FAQ----11
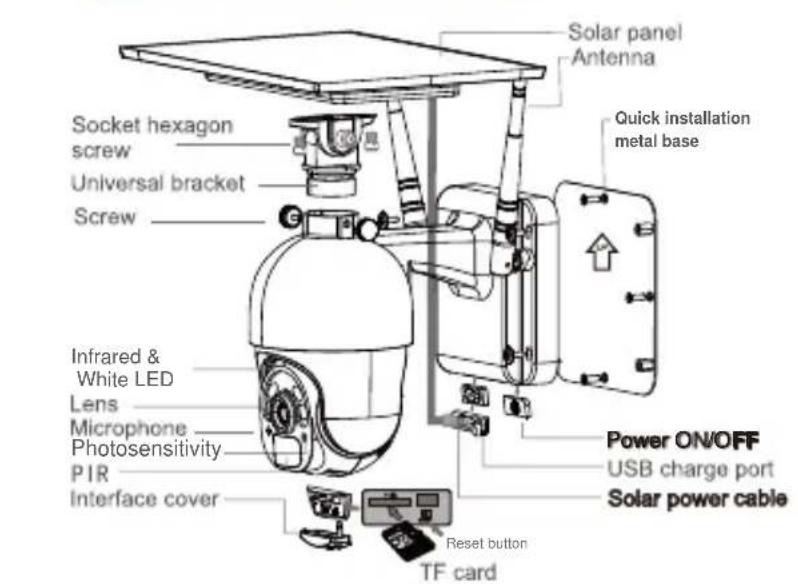
1 Product details
text_image
Solar panel Antenna Quick installation metal base Socket hexagon screw Universal bracket Screw Infrared & White LED Lens Microphone Photosensitivity PIR Interface cover Power ON/OFF USB charge port Solar power cable Reset button TF card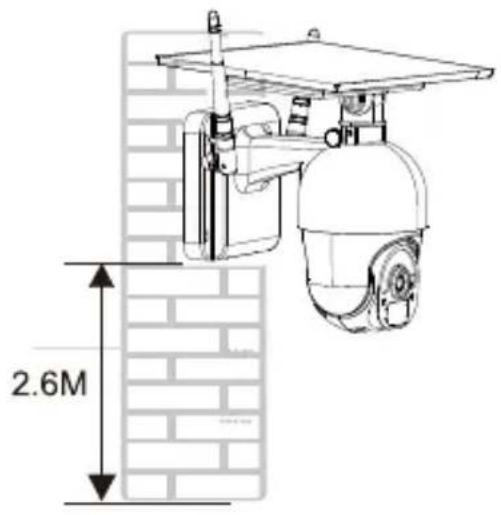
text_image
2.6M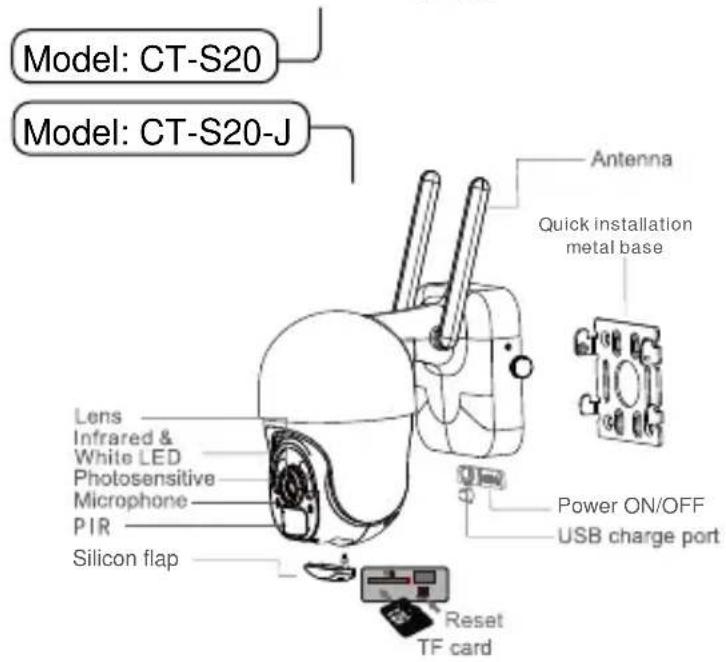
text_image
Model: CT-S20 Model: CT-S20-J Lens Infrared & White LED Photosensitive Microphone PIR Silicon flap Antenna Quick installation metal base Power ON/OFF USB charge port Reset TF card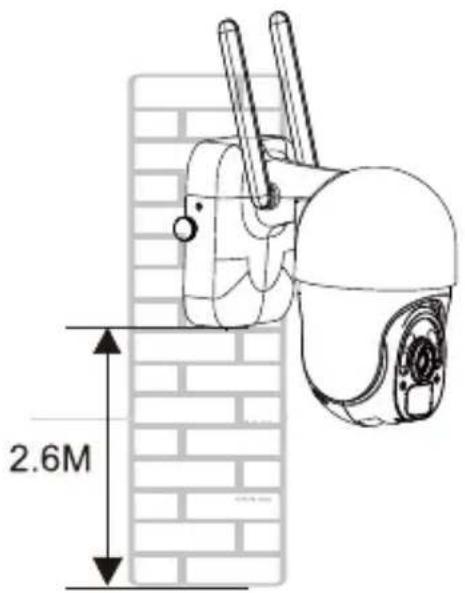
text_image
2.6M2. Download the Mobile Phone APP
① For Apple iOS, download the mobile phone application "CTRONICS" in the App store. For Android, download the mobile phone application "CTRONICS" in the Google Play store.
② During the camera connection, it will prompt you on whether to "Allow the APP to pass the application authority of the mobile phone?" Please select "Yes" to ensure all functions of the APP will operate normally.
3. Connect the camera to a Wi-Fi network
3.1 Method 1: Configure network via sound
(Please refer to the link:https://youtu.be/XMys8PfOv6E)
① The camera may have low battery power during long-term transportation so, please use a 5V mobile phone charger or computer USB port to charge the camera before use. The charging port lights up red when charging, and lights up green when fully charged. Please also insert an SD card into the camera for video recording.
② Find your home Wi-Fi and connect to it. Please place your mobile phone and camera next to the router for operation. Please press the camera's power button, the light board indicator will flash red light. The camera will constantly sound a chime when network configuration, waiting for the camera to configure the network (Picture 1 and Picture 2).
③ Please note: the camera only works with 2.4G Wi-Fi. It does not support 5G Wi-Fi.
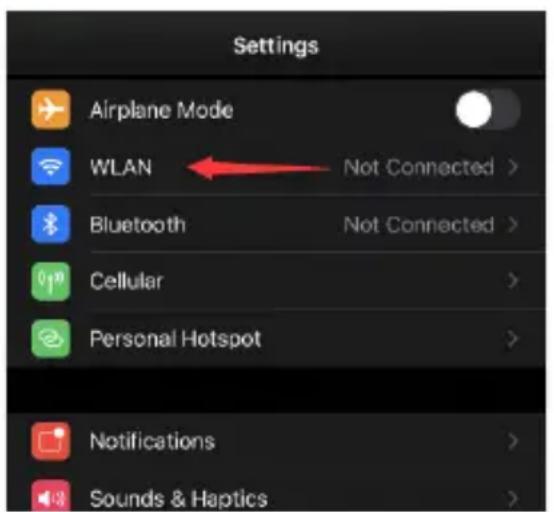
text_image
Settings Airplane Mode WLAN Not Connected > Bluetooth Not Connected > Cellular > Personal Hotspot > Notifications > Sounds & Haptics >Picture 1 Picture 2
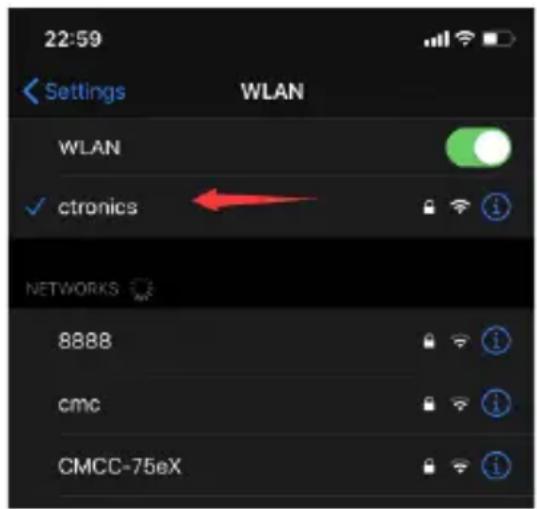
text_image
22:59 Settings WLAN WLAN ctronics NETWORKS 8888 cmc CMCC-75eX④ Open the CTRONICS APP and add the camera according to the following steps:
- Click Add camera; (Picture 3)
-
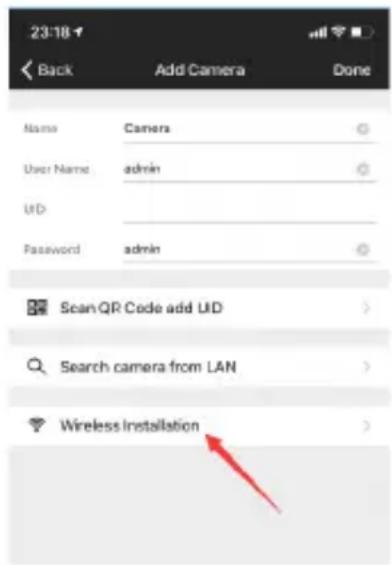
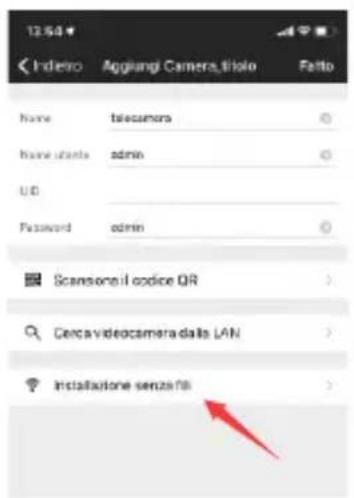
Click Wireless Installation; (Picture 4)
-
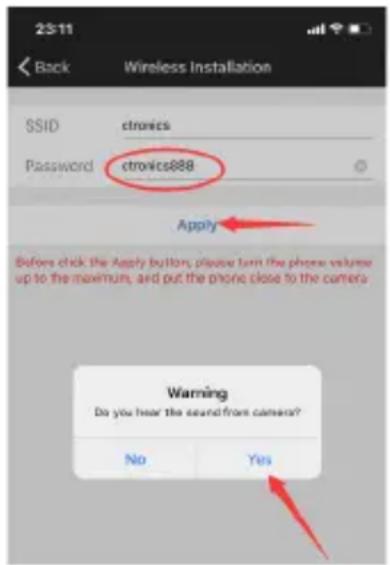
Choose your home wireless network SSID, and input pass word (ctronics888 is just for reference, please input your own password for your home SSID), click Apply, and click Yes when you hear the sound from camera; (Picture 5)
-
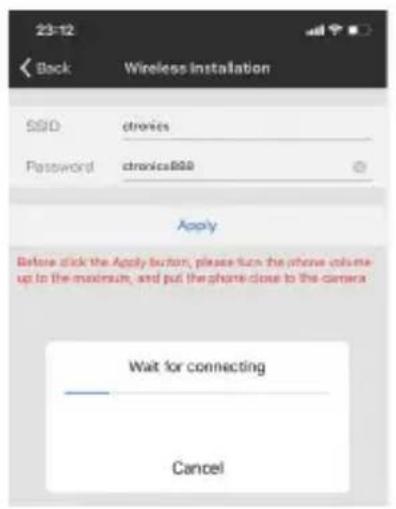
Waiting for connecting; (Picture 6)
-
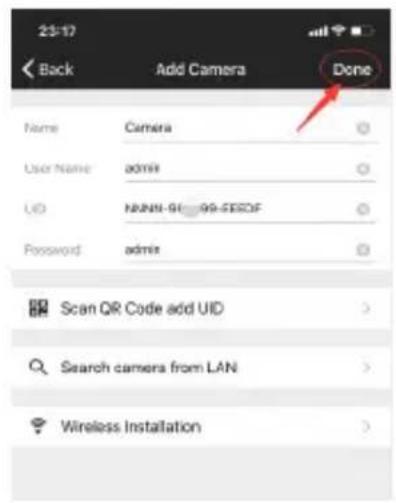
Click Done when connection is finished; (Picture 7)
-
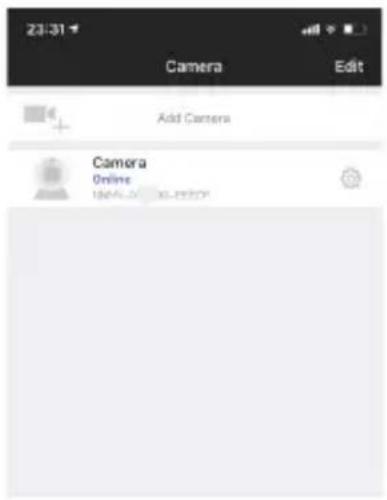
Camera shows online. (Picture 8)
Note: As shown in picture 5, if the SSID shows "unknown ssid", please open the location permission of the CTRONICS App in the phone settings.
When entering the Wi-Fi password, please ensure that it is case sensitive. After the password is entered correctly, please click on the mobile phone application to enter the network configuration. At the same time, the mobile phone will emit a sound signal. Please adjust the phone volume to the maximum and also keep the distance between the phone and the camera within 10 cm. Then, wait for the network configuration to complete.
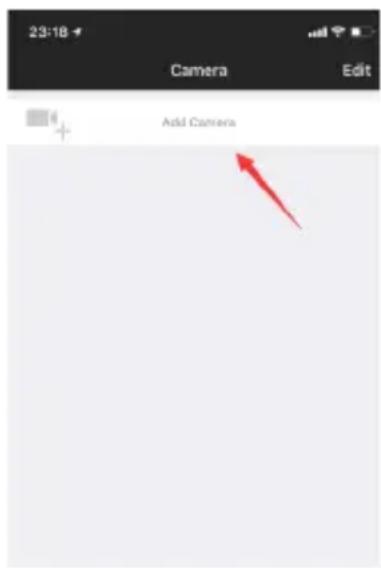
text_image
23:18 Camera Edit Add CameraPicture 3
text_image
23:18 Back Add Camera Done Name Camera User Name adults UID Password adults Scan QR Code add UID Search camera from LAN Wireless InstallationPicture 4
text_image
23:11 Back Wireless Installation SSID ctroics Password ctroics888 Apply Before click the Apply button, please turn the phone volume up to the maximum, and put the phone close to the camera. Warning Do you hear the sound from camera? No YesPicture 5
text_image
23-12 Back Wireless Installation SSD otrics Password otrics@ssg Apply Before click the Apply button, please turn the phone volume up in the mode/sin, and put the phone close to the camera Wait for connecting CancelPicture 6
text_image
23:17 Back Add Camera Done Name Camera User Name admin UID NANIN-91_99-FE0DF Password admin Scan QR Code add UID > Search camera from LAN > Wireless Installation >Picture 7 Picture 8
text_image
23:31 Camera Edit Add Camera Camera Online 100% 0% 05-28/20243.2 Method 2: Configure network via hotspot
(Please refer to the link: https://youtu.be/CldJLXUVtp0)
① Press the power button. The indicator light will flash red and the camera will constantly sound a chime for network configuration.
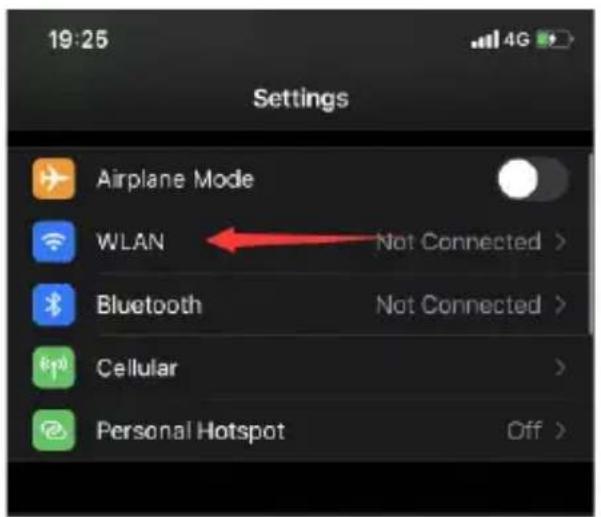
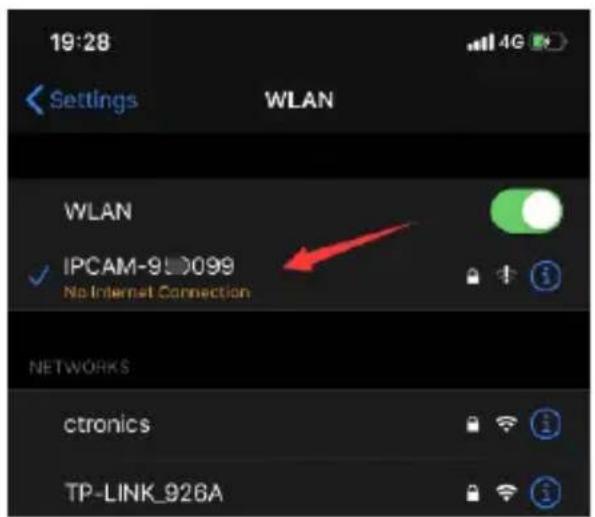
② Place your mobile phone and camera next to the router for operation. Open the Wi-Fi setting interface of the mobile phone and find the hotspot with the name IPCAM-XXXXXX sent by the camera. Click connect and use the password 01234567.
This Wi-Fi is the camera hotspot. After the phone is connected, it will prompt "The current Wi-Fi has no Internet connection." Please choose to continue using (Picture 9 to Picture 10).
text_image
19:25 Settings Airplane Mode WLAN Not Connected > Bluetooth Not Connected > Cellular > Personal Hotspot Off >Picture 9 Picture 10
text_image
19:28 Settings WLAN WLAN ✓ IPCAM-950099 No Internet Connection NETWORKS ctronics TP-LINK_926A③ Open the CTRONICS APP and add the camera according to the following steps:
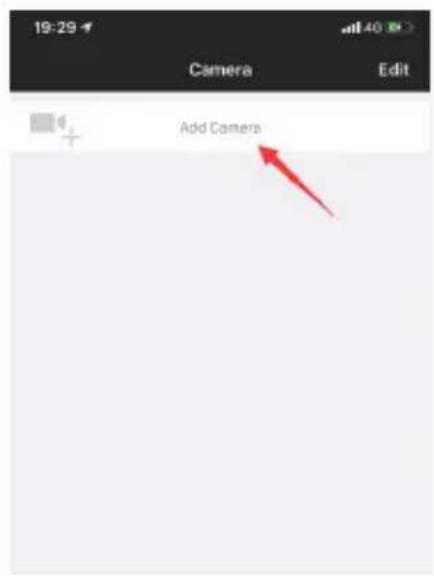
- Click Add Camera; (Picture 11)
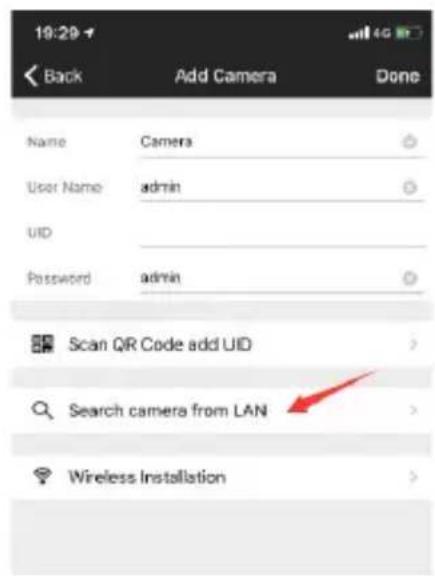
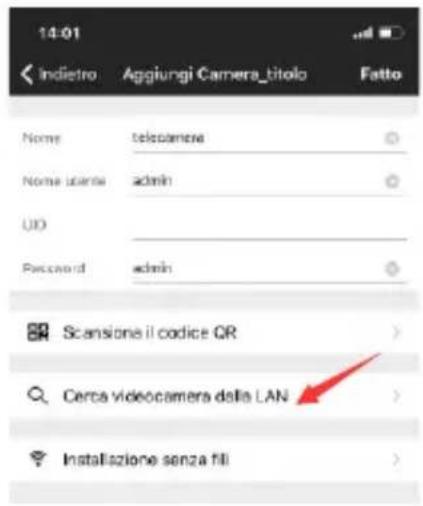
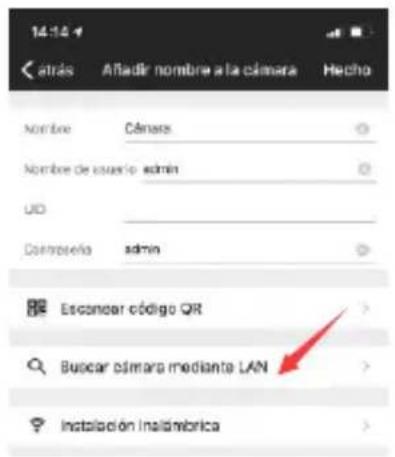
- Click Search camera from LAN; (Picture 12)
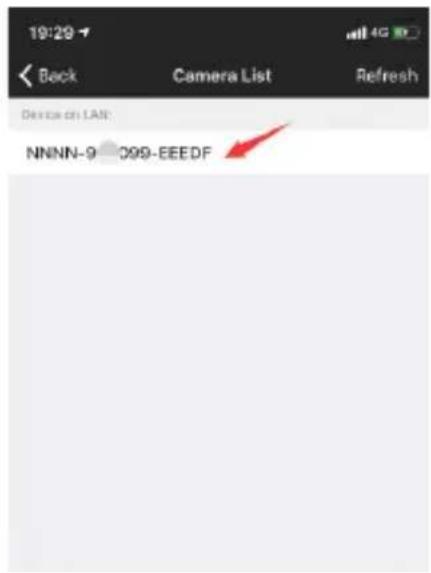
- Find device ID on LAN; (Picture 13)
- Find camera online, click the tool icon; (Picture 14)
-
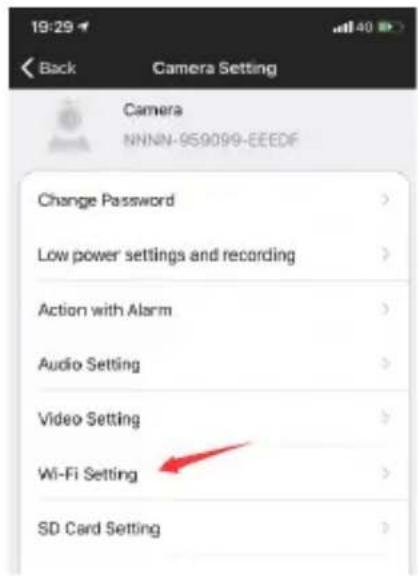
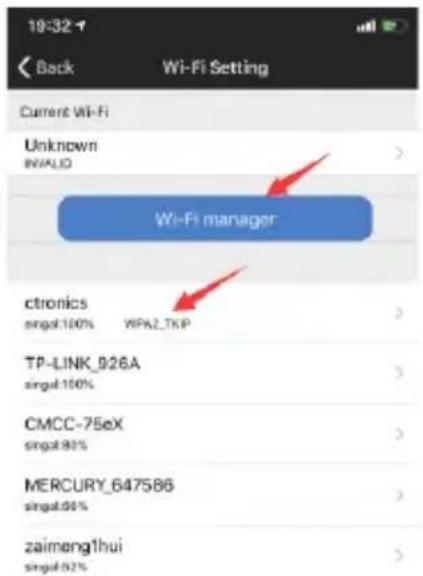
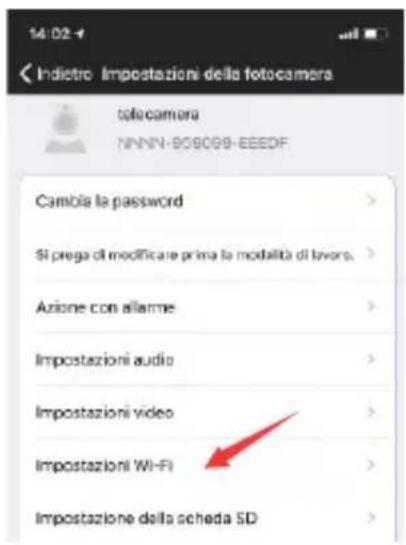
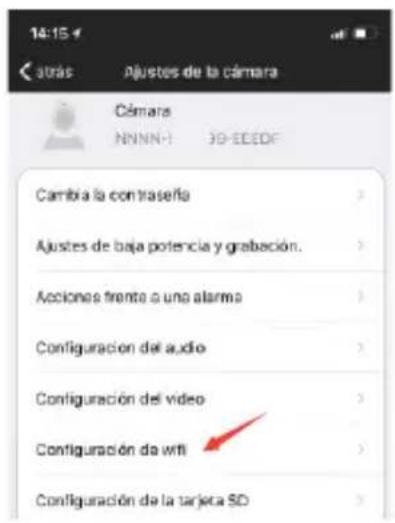
Click WI-FI Setting; (Picture 15)
-
Find your home network SSID and input password (ctronics888 is just for reference, please input your own password for your home SSID); (Picture 16 to Picture 17)
-
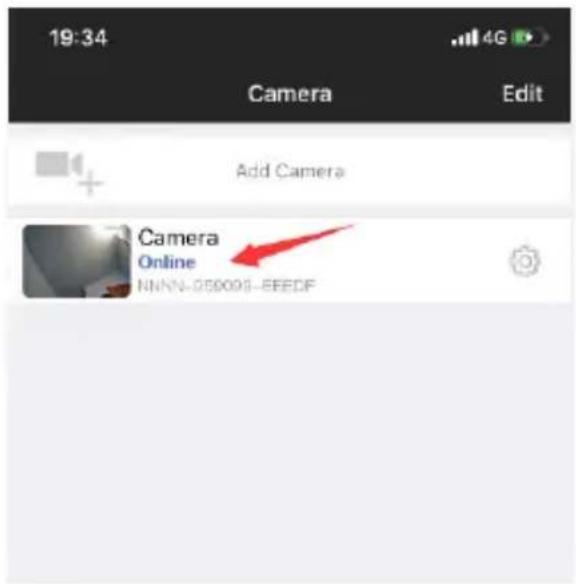
Camera is online from WAN. (Picture 18)
text_image
19:29 Camera Edit Add CameraPicture 11
text_image
19:29 Back Add Camera Done Name Camera User Name adults UID Password adults Scan QR Code add UID Search camera from LAN Wireless InstallationPicture 12 Picture 13
text_image
19:29 Back Camera List Refresh Device on LAN: NNNN-9 009-EEEDF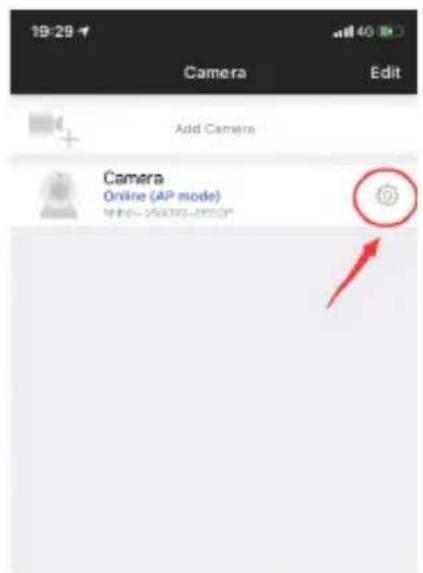
text_image
19:29 Camera Edit Add Camera Camera Online (AP mode) N/A © 2018-05-03/2018-05-03/2018Picture 14
text_image
19:29 Back Camera Setting Camera NNNN-959099-EEEDF Change Password > Low power settings and recording > Action with Alarm > Audio Setting > Video Setting > Wi-Fi Setting > SD Card Setting >Picture 15 Picture 16
text_image
19:32 Back Wi-Fi Setting Current Wi-Fi Unknown INVALID Wi-Fi manager ctronics singat 100% YIFAZ_TKP TP-LINK_926A singat 100% CMCC-75eX singat 80% MERCURY_647586 singat 90% zaimeng1hui singat 82%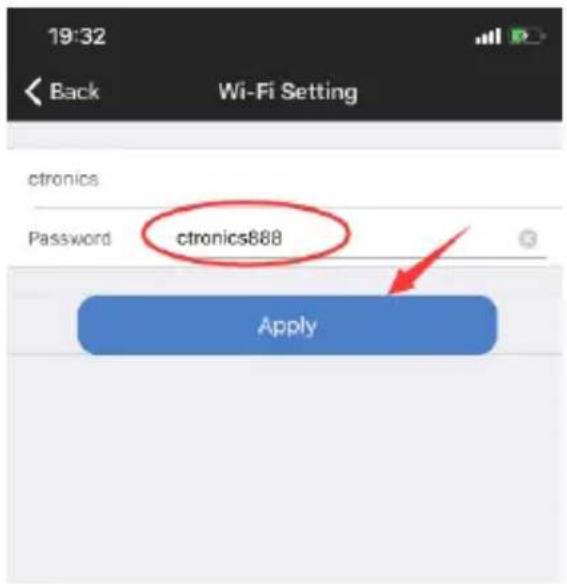
text_image
19:32 Back Wi-Fi Setting ctronics Password ctronics888 ApplyPicture 17
text_image
19:34 Camera Edit Add Camera Camera Online NNNN-050098-EFEDFPicture 18
Note: If the network configuration is not successful, please operate as the following steps to try again:
-
After turning on the camera for one minute, please press and hold the camera reset button for 10 seconds, then release the camera reset button and reconfigure network again.
-
The home WiFi password cannot exceed 31 characters. The password should be case sensitive and avoid using special characters such as "?!,!, &,". We recommend you use a combination of numbers and letters.
-
If you still cannot complete the network configuration of the camera or have any questions, please contact our email: support@c-tronics.com. We will reply you within 24 hours.
4 Password Modification
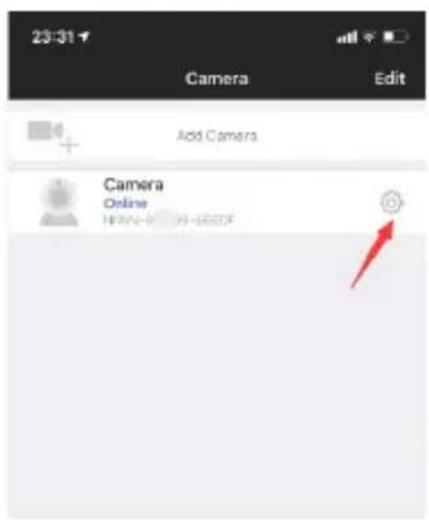
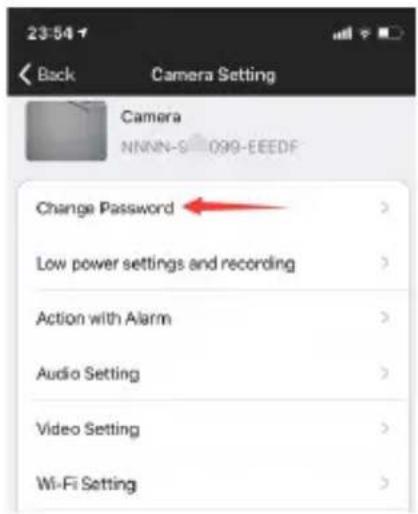
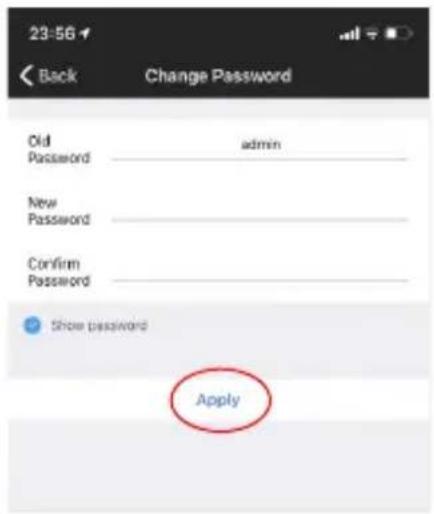
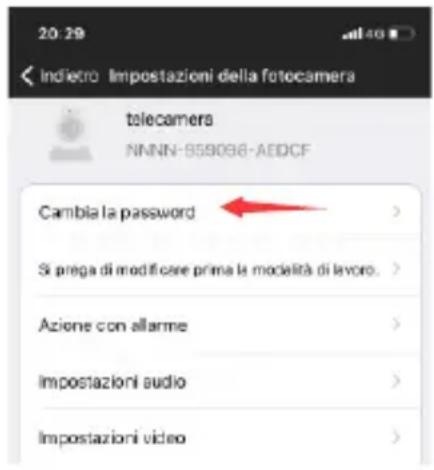
To protect your privacy, we suggest you modify the camera password in the settings menu. The old password is "admin." After entering the new password, please click "Apply" and the camera will restart to complete the new password. (Picture 19 to Picture 21)
text_image
23:31 Camera Edit Add Camera Camera Online N004-87 99-88EDFPicture 19
text_image
23:54 Back Camera Setting Camera NNNN-S 090-EEEDF Change Password > Low power settings and recording > Action with Alarm > Audio Setting > Video Setting > Wi-Fi Setting >Picture 20 Picture 21
text_image
23:56 Back Change Password Old admin Password New Password Confirm Password Show password Apply5 Functions interface
text_image
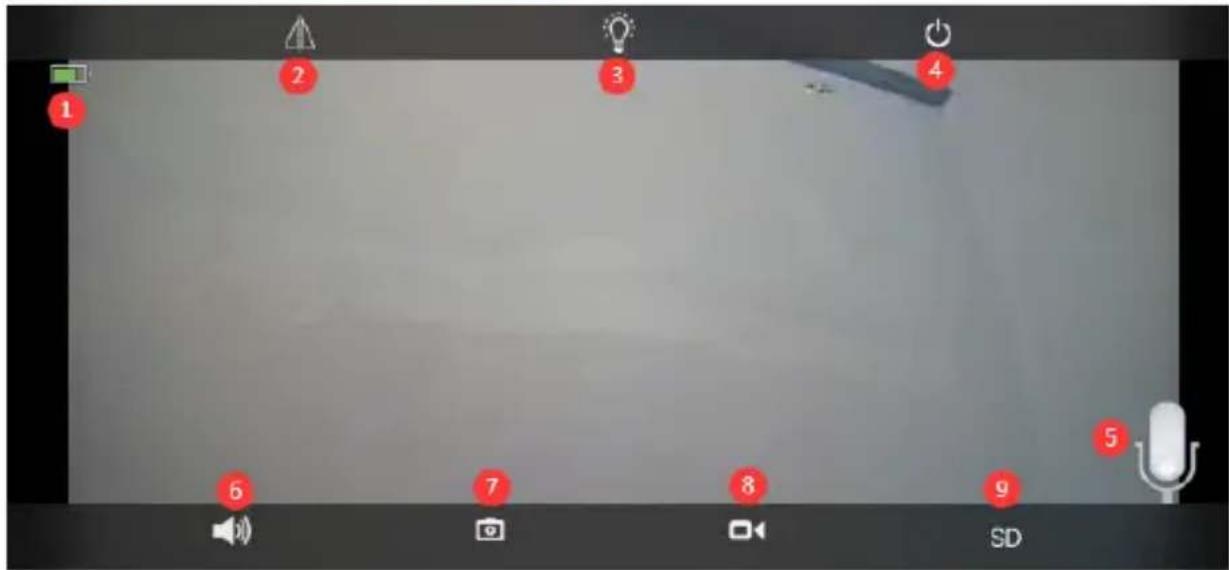
1 2 3 4 5 6 7 8 9 SD| 1.Battery | Displays the current quantity of electric charge and charging status. |
| 2.Flip & Mirror Image | You can adjust the up and down flip and left and right mirroring of the camera image. |
| 3.Light Mode | You can choose black and white night vision or color night vision. |
| 4.Close the preview | You can close the preview image. |
| 5. Intercom | Press and hold this icon to talk using intercom voice. |
| 6.Voice Monitor | Turn on the voice monitor. Using the mobile app turn off the mute function and adjust the sound to the maximum. |
| 7.Manual Capture | By pressing it, you can capture the current picture and save it in the APP local picture. |
| 8.Manual Video | Press video recording to record the current screen and save it to the APP local recording. |
| 9.HD and SD | You can easily switch the clarity of the preview images to HD and SD. |
6 Alarm and Video
text_image
23:54 Back Camera Setting Camera NNNN-9 099-EEEDF Change Password > Low power settings and recording > Action with Alarm > Audio Setting >Picture 22
text_image
00:28 Back Action with Alarm Alarm Notifications Push Name Camera PIR alarm The device detects an alarm when an object moves. PIR alarm sensitivity Low Medium High humanoid alarm Smart Humanoid RecognitionPicture 23
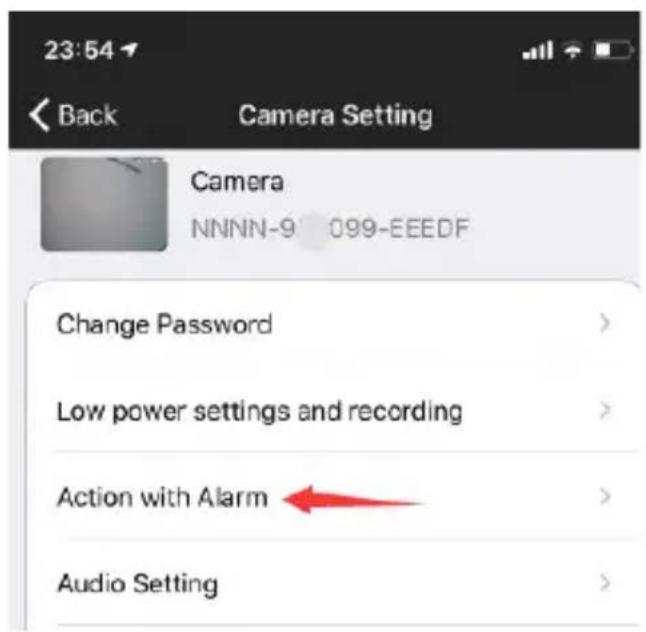
① Action with Alarm. If your mobile phone cannot receive an alarm push, please check whether the alarm notification permission is turned on in the CTRONICS application. The Android system usually automatically exits the APP after the phone is locked. Please set to allow the CTRONICS application to run in the background in "system settings."(Picture 22)
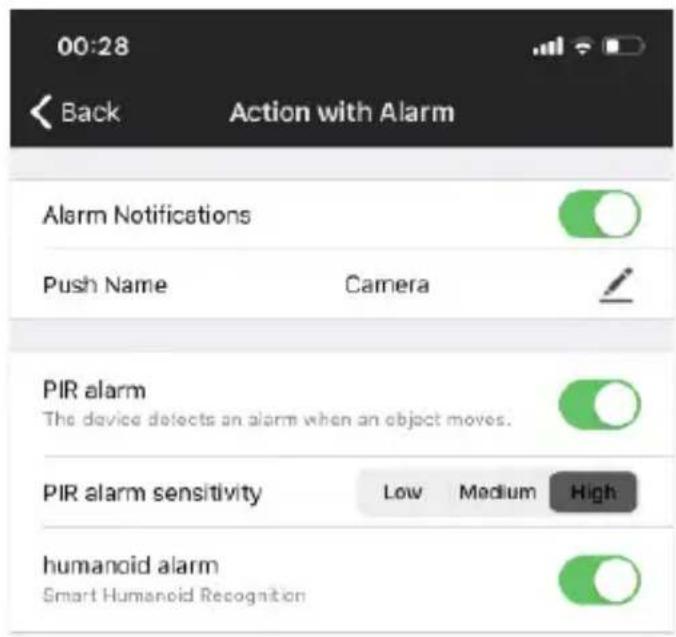
② Push Name: You can customize the name of the camera by modifying the Push Name. (Picture 23)
③ In order to reduce the false alarm of PIR caused by slow-moving cars or environmental factors, we recommend you turn on the PIR alarm and the humanoid alarm at the same time. (Picture 23)
④ Open the alarm recording to the SD card. You can select the length of the recording time after a single trigger of 10 seconds or 30 seconds. If you need to upload the alarm video to your own FTP server, you need to insert an SD card.
7 Video playback and download
text_image
Camera1 CNC WORKSTREAMS OKPicture 24
text_image
Recordings (00:14-00:00 00:00:00) Search 2028-11-07 09:01:00 - 00:02:53 2028-11-07 09:51:32 - 00:51:47 2028-11-07 09:51:50 - 00:51:25 Where Reporting 2028-11-07 09:51:36 - 00:51:47 2028-11-07 09:51:37 - 00:51:47 2028-11-07 09:51:38 - 00:51:47 2028-11-07 09:51:39 - 00:51:47 2028-11-07 09:51:40 - 00:51:47 2028-11-07 09:51:41 - 00:51:47 2028-11-07 09:51:42 - 00:51:47 2028-11-07 09:51:43 - 00:51:47 2028-11-07 09:51:44 - 00:51:47 2028-11-07 09:51:45 - 00:51:47 2028-11-07 09:51:46 - 00:51:47 2028-11-07 09:51:47 - 00:51:47 2028-11-07 09:51:48 - 00:51:47 2028-11-07 09:51:49 - 00:51:47 2028-11-07 09:51:50 - 00:51:47 2028-11-07 09:51:51 - 00:51:47 2028-11-07 09:51:52 - 00:51:47 2028-11-07 09:51:53 - 00:51:47 2028-11-07 09:51:54 - 00:51:47 2028-11-07 09:51:55 - 00:51:47 2028-11-07 09:51:56 - 00:51:47 2028-11-07 09:51:57 - 00:51:47 2028-11-07 09:51:58 - 00:51:47 2028-11-07 09:51:59 - 00:51:47 2028-11-07 09:51:60 - 00:51:47 2028-11-07 09:51:61 - 00:51:47 2028-11-07 09:51:62 - 00:51:47 2028-11-07 09:51:63 - 00:51:47 2028-11-07 09:51:64 - 00:51:47 2028-11-07 09:51:65 - 00:51:47 2028-11-07 09:51:66 - 00:51:47 2028-11-07 09:51:67 - 00:51:47 2028-11-07 09:51:68 - 00:51:47 2028-11-07 09:51:69 - 00:51:47 2028-11-07 09:51:70 - 00:51:47 2028-11-07 09:51:71 - 00:51:47 2028-11-07 09:51:72 - 00:51:47 2028-11-07 09:51:73 - 00:51:47 2028-11-07 09:51:74 - 00:51:47 2028-11-07 09:51:75 - 00:51:47 2028-11-07 09:51:76 - 00:51:47 2028-11-07 09:51:77 - 00:51:47 2O6APicture 25 Picture 26
text_image
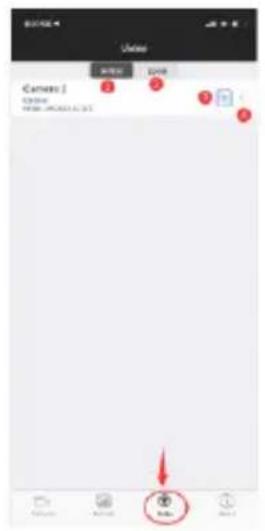
Readings (1998-02/2000 0:00:00) Search Write on how Write not easy Write again Write again Customs Cancel 2000-11-07 09:31:50 - 38:52:18 2000-11-07 09:31:52 - 38:51:63 2000-11-07 09:31:40 - 38:51:58 2000-11-07 09:30:50 - 38:51:58 2000-11-07 09:30:38 - 38:53:51 2000-11-07 09:30:44 - 38:53:58①"Online" means SD card video recording. (Picture 24)
② Local means manual video recording in the local video. (Picture 24)
③ The alarm log. (Picture 24)
④ Entering the video list. (Picture 24)
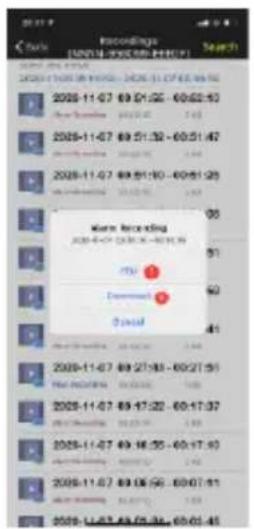
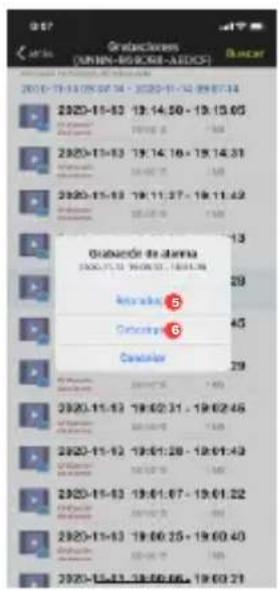
⑤ Playing video. (Picture 25)
⑥ Downloading video to your mobile phone. (Picture 25)
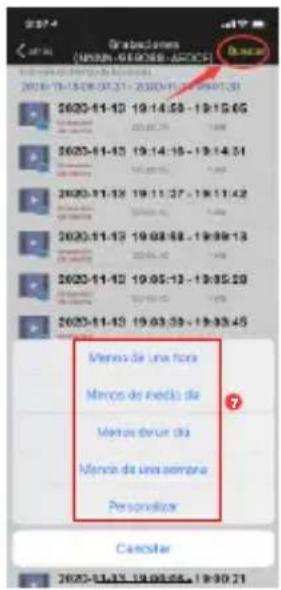
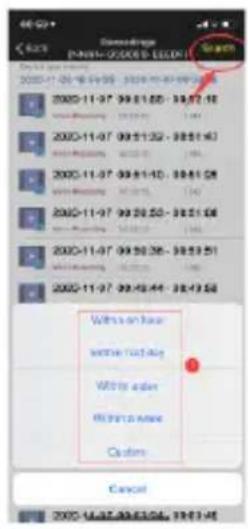
⑦ Filtering videos according to time. (Picture 26)
8 FAQ
① Why does the camera automatically shut down after the red light flashes several times after pressing the power button?
The camera has not been charge for long enough and the battery is low. Please use a 5V charger to charge the camera. The 5v/2a camera should charge for at least 8 hours and the 5v/1a should charge for at least 16 hours. If the camera is fully charged the charging indicator will change from red to green.
② Why did the camera fail to match the network?
The camera and mobile phone must be placed next to the router when initially configuring the network. In addition, the volume of the mobile phone needs to be adjusted to the maximum during voice distribution. Please pay attention to the case of the password when entering the password and avoid using special characters such as, "?!, !, &," . We recommend that you use a combination of numbers and letters. If the Wi-Fi password is entered incorrectly, please reset the camera and reconnect to the network.
③ Why does the mobile phone continue to receive false alarms and the camera consumes a lot of power?
For the location of the camera, we recommend avoiding a large number of moving cars, chimneys, and direct sunlight. Such environments will cause false alarms and interference with PIR detection. In addition, the humanoid alarm can be turned on at the same time in the alarm settings to reduce false alarms, reduce camera wake-up time, and save power.
④ Why can't I see the video on my mobile phone?
We recommend that you check whether the camera's SD card is installed correctly. After inserting the card, please format the card in the phone APP settings. If the reading is still abnormal, please take the card and format it as FAT32 on the computer or replace the card for the test. In addition, please set the device time zone and the phone time zone to be consistent in the settings.
⑤ Why is the camera's recording time not the same as the local time?
Please set the device time zone and the phone time zone to be consistent in the settings. If the daylight saving time starts in the local time, please check the daylight saving time in the time zone setting.
⑥ The place where my camera is installed is not well-lit, can I install the solar panel in another location?
Yes, please contact us to buy the CT-S20 accessory kit, which contains the solar panel bracket and the charging extension cable. The solar panel and the camera can be installed separately.
⑦ Mobile APP often cannot connect to the camera, sometimes the picture freezes, and it takes a long time to see the picture after buffering?
The Wi-Fi signal strength of the camera receiving the router is affected by the installation environment. Therefore, it should be as close as possible to the router. The upload rate of the Wi-Fi network speed must reach at least 1.5 M/S to achieve stable data transmission.
⑧ My alarm recording is only 15 seconds, can I set the time longer?
Yes, you can set the alarm recording time to 30 seconds in the alarm settings. Please refer to the fifth part of the manual.
⑨ How do I delete the video files in the SD card?
The video files in the camera's SD card will be automatically overwritten after recording. For the safety of your video files, single file deletion is not supported. If you need to delete all, you can format the SD card in the APP.
⑩ How can I recover the password of the camera if I forget it?
The password cannot be recovered. If you forget the password, please press the power button for one minute and press and hold the reset button for 10-15 seconds, then release the reset button, the camera will be restored to the factory default and the password will be restored to the default "admin." At this time, please re-add the camera network to the mobile APP.

ctronics
Akku PTZ Kamera
text_image
13:54 Impostazioni WLAN WLAN ✓ ctronics-ctFigura 2
text_image
12:00 telecamera modified Aguiro DavisFigura 3
text_image
telecamera modificare Aggunti camera telecamera lines SINN-5009-8E5Ptext_image
14:01 telecamera modificare + Appungi cameraFigura 11
text_image
telecamera modificore Applungi camera telecamera Online (modella AP) NNN-050099-CEEOFFigura 14
text_image
20:28 telecamera modificare Aggiungi camera telecamera in line NANN-RODGE-AIDGFFigura 19
text_image
Camera Editor Mac cameras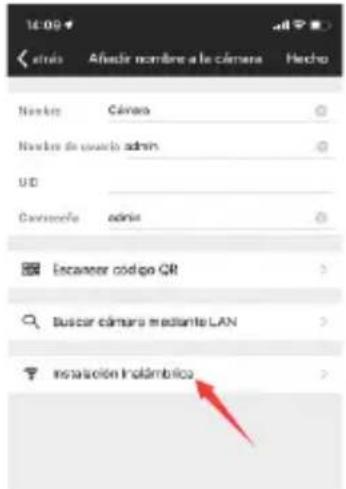
text_image
14:14 Câmera Editor Aided-cameraImagen 11
text_image
14:16 Cârrara Editor + Modi-cârrara Cârrara Online (mode AP) N/A 1 30-50/20FImagen 14
text_image
Cirara By: Cirears Status: 00:00:00 1 2 3 4Imagen 24
text_image
0:57 Mio Obrustadores (UNION - BURGER - ALEJOS) Bucar 2010-11-13 05:07:14 - 2020-11-14 09:07:14 2020-11-03 19:14:30 - 19:15:05 2020-11-03 19:14:16 - 19:14:31 2020-11-03 19:11:37 - 19:11:42 Gruparón de la Arena 2020-11-13 19:08:31 - 19:08:38 Atracada 5 Orcañez 6 Cancalor 2020-11-03 19:02:31 - 19:02:46 2020-11-03 19:01:28 - 19:01:43 2020-11-03 19:01:07 - 19:01:22 2020-11-03 19:00:25 - 19:00:40 2020-11-03 19:00:06 - 19:00:21Imagen 25 Imagen 26