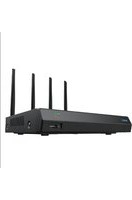
RLN12W - Surveillance Camera REOLINK - Free user manual and instructions
Find the device manual for free RLN12W REOLINK in PDF.


| Product Type | NVR (Network Video Recorder) |
| Brand | Reolink |
| Model | RLN12W |
| Dimensions | 255 x 49.5 x 222.7 mm |
| Weight | 1.4 kg |
| Power Supply | Included power adapter (12 V) |
| Connectivity | WiFi 2.4 GHz / 5 GHz, Ethernet |
| Ports | 2x USB, HDMI, VGA, audio input, 1x LAN port (Internet), 1x LAN port (IPC) |
| Storage | Internal hard drive (not included, status LED) |
| Operating Temperature | -10 °C to +45 °C |
| Main Features | Video recording, remote access via Reolink app, WiFi sync with cameras, live viewing |
| Box Contents | NVR, power adapter, Ethernet cable (1 m), HDMI cable, quick start guide, USB mouse |
| Maintenance and cleaning | Clean the lens with a soft cloth, protect ports from water and humidity |
| Safety | Compliant with FCC/ISED standards, minimum distance of 20 cm between transmitter and body |
| Spare parts and repairability | Contact Reolink support (https://support.reolink.com); 2-year limited warranty |
Frequently Asked Questions - RLN12W REOLINK
User questions about RLN12W REOLINK
0 question about this device. Answer the ones you know or ask your own.
Ask a new question about this device
Download the instructions for your Surveillance Camera in PDF format for free! Find your manual RLN12W - REOLINK and take your electronic device back in hand. On this page are published all the documents necessary for the use of your device. RLN12W by REOLINK.
USER MANUAL RLN12W REOLINK
If you need any technical help, please visit our official support site and contact our support team before returning the products, https://support.realink.com.
CET PRODUCT SERVICE SP. Z O.O.
Ul. Dluga 33 102 Zgierz, Polen

CET PRODUCT SERVICE LTD.
Beacon House Stokenchurch Business Park, Ibstone Rd,
Stakenchurch High Wycombe, HP14 3FE, United Kingdom
August 2023
QSG1_A
58.03.006.0016

Be Prepared, Be Reolink
EN/DE/FR/IT/ES
Operational Instruction
Apply to: RLN12W

@ReolinkTech https://reolink.com
EN
Contents
What's in the Box 2
NVR Introduction....3
Connection Diagram 4
Access the NVR via Smartphone or PC 6
Mount Tips for the Camera 7
Troubleshooting 8
Specification 9
Notification of Compliance 10
What's in the Box
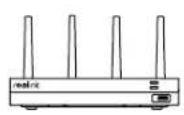
NVR NVR Power
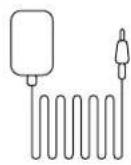
Adapter
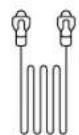
1m Ethernet Cable
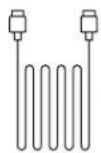
HDMI Cable
Quick Start Guide
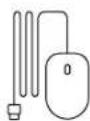
USB Mouse
NVR Introduction
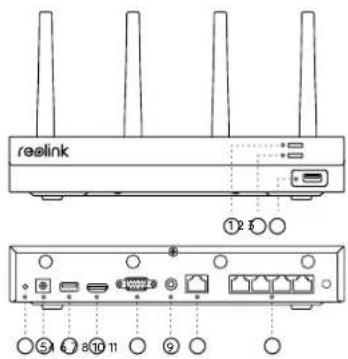
① Power LED
② HDD LED
③ USB Port
④ Reset
⑤ Power Input
⑥ USB Port
⑦ HDMI Port
⑧ VGA Port
⑨ Audio Out
⑩ LAN Port(For Internet)
⑪ LAN Port (For IPC)
Different states of the status LEDs:
Power LED: Solid green to indicate the NVR is powered on.
HDD LED: Flashing red to indicate the hard drive is operating properly.
EnglishEnglish3 4
Connection Diagram
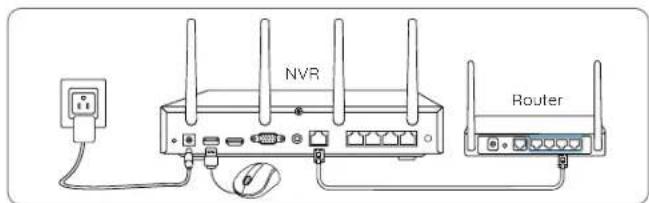
- Connect the included power adapter to the NVR and a power outlet.
- Connect the NVR to your router with an Ethernet cable (if you hope to use it remotely).
Next, connect the mouse to the USB port of the NVR.
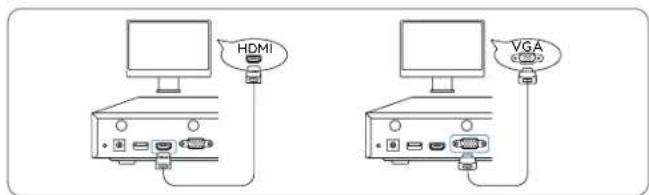
- Connect the NVR to the monitor with a VGA or HDMI cable.
NOTE: There is no VGA cable and monitor included in the package.
- Follow the steps on the monitor to complete the initial setup. NOTE: In the second step, UID is disabled by default. You're recommended to enable it for remote access on smartphones or computers. Or you can set it later in "Settings > System >Info".
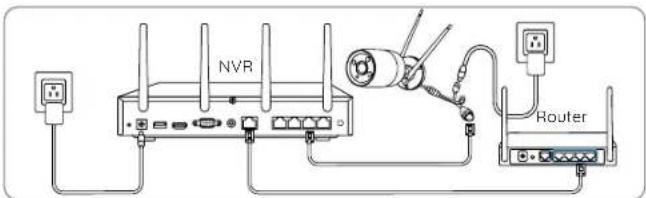
5.Power on your WiFi Cameras and connect them to the LAN ports (for IPC) on the NVR via Ethernet cables. 6.Click Sync WiFi Info to connect the cameras to the NVR's WiFi.

Sync WI-FI info
- After the synchronization succeeded, remove the Ethernet cables and wait for a few seconds for them to be reconnected wirelessly.
- After the wireless connection is successful, the camera can be installed at the desired location.
NOTE: There are no cameras included in the package.
EnglishEnglish5 6
Access the NVR via Smartphone or PC
- Connect the NVR to a router using the included Ethernet cable.
- Download and launch the Reolink App or Client and follow the instructions to access the NVR.
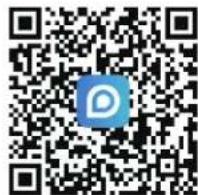
- On Smartphone Scan to download the Reolink App.
- On PC Download path: Go to https://reolink.com > Support > App & Client.
Mount Tips for the Camera
Installation Tips
- Do not face the camera towards any light sources.
- Do not point the camera towards a glass window. Or, it may result in poor image quality because of the window glare by infrared LEDs, ambient lights or status lights.
- Do not place the camera in a shaded area and point it towards a well-lit area. Or, it may result in poor image quality. To ensure best image quality, the lighting condition for both the camera and the capture object shall be the same.
- To ensure better image quality, it's recommended to clean the lens with a soft cloth from time to time.
- Make sure the power ports are not directly exposed to water or moisture and not blocked by dirt or other elements.
- With IP waterproof ratings, the camera can work properly under conditions like rain and snow. However, it doesn't mean the camera can work underwater.
- Do not install the camera at places where rain and snow can hit the lens directly.
- The camera may work in extreme cold conditions as low as -10^ . Because when it is powered on, the camera will produce heat. You may power on the camera indoors for a few minutes before installing it outdoors.
NOTE: Please install the cameras within the NVR's signal range.
EnglishEnglish7 8
Troubleshooting
Camera Not Displaying Images on the Monitor
Cause 1: Camera is not Powering on
Solutions:
- Cover the camera's IR LEDs to see if they light up.
- If you have a 12V power adapter, power up the camera with the power adapter.
Cause 2: Incorrect Account Name or Password
Solution:
Login to the NVR, go to Settings > Channel page and click Modify to input the correct password for the camera. If you forget your password, please reset your camera to reset the password to default (blank).
Cause 3: Camera is not Assigned to a Channel
Solution:
Go to Settings > Channel page, click the channel you want, and then select your camera for that channel. If all channels are already in use, please delete the offline camera from the NVR. Then the channel this camera was taken is free now.
Cause 4: No WiFi After Removing the Ethernet Cable
Solutions:
- Connect the camera to the NVR with an Ethernet cable. Go to Network
Wi-Fi > Settings on the monitor to sync the NVR's WiFi.
• Install the camera within the NVR's signal range.
• Install antennas on the camera and the NVR.
If these won't work, please contact Reolink
Support https://support.reolink.com
Specification
NVR
Operating Temperature: -10°C to 45°C
RLN12W Size: 255 x 49.5 x 222.7mm
Weight: 1.4kg, for RLN12W
Notification of Compliance
FCC Compliance Statements
This device complies with Part 15 of the FCC Rules. Operation is subject to the following two conditions: (1) this device may not cause harmful interference, and (2) this device must accept any interference received, including interference that may cause undesired operation.
Note: This equipment has been tested and found to comply with the limits for a Class B digital device, pursuant to Part 15 of the FCC Rules. These limits are designed to provide reasonable protection against harmful interference in a residential installation. This equipment generates, uses and can radiate radio frequency energy and, if not installed and used in accordance with the instructions, may cause harmful interference to radio communications. However, there is no guarantee that interference will not occur in a particular installation. If this equipment does cause harmful interference to radio or television reception, which can be determined by turning the equipment off and on, the user is encouraged to try to correct the interference by one or more of the following measures:
- Reorient or relocate the receiving antenna.
- Increase the separation between the equipment and receiver.
- Connect the equipment into an outlet on a circuit different from that to which the receiver is connected.
- Consult the dealer or an experienced radio/TV technician for help.
Caution: Changes or modifications not expressly approved by the party responsible for compliance could void the user's authority to operate the equipment.
FCC Radiation Exposure statement
This equipment complies with FCC radiation exposure limits set forth for an uncontrolled environment. This equipment should be installed and operated with minimum distance 20cm between the radiator and your body.
ISED Compliance Statements
This device contains licence-exempt transmitter(s)/receiver(s) that comply with Innovation, Science and Economic Development Canada's licence-exempt RSS(s). Operation is subject to the following two conditions:
ISED Radiation Exposure statement
This equipment complies with IC RSS-102 radiation exposure limits set forth for an uncontrolled environment. This equipment should be installed and operated with minimum distance 20 cm between the radiator and your body.
CE Simplified EU Declaration of Conformity
Reollink declares that this device is in compliance with the essential requirements and other relevant provisions of Directive 2014/53/EU and Directive 2014/30/EU.
WiFi Operating Frequency
The functions of Wireless Access Systems including Radio Local Area Networks(WAS/RLANs) within the band 5150-5350 MHz for this device are restricted to indoor use only within all European
Union countries (BE/BG/CZ/DK/DE/EE/IE/EL/ES/FR/HR/IT/CY/LV/LT/LU/HU/MT/NL/AT/PL/PT/RO/SI/SK/FI/SE/TR/N O/CH/IS/LI/UK(NI)
UKCA Declaration of Conformity
Reolink declares that this product is in compliance with Electromagnetic Compatibility Regulations 2016 and Electrical Equipment Safety Regulations 2016.

Correct Disposal of This Product
This marking indicates that this product should not be disposed with other household wastes. throughout the EU. To prevent possible harm to the environment or human health from uncontrolled waste disposal, recycle it responsibly to promote the sustainable reuse of material resources. To return your used device, please use the return and collection systems or contact the retailer where the product was purchased. They can take this product for environmentally safe recycling.
Limited Warranty
This product comes with a 2-year limited warranty that is valid only if purchased from Reolink Official Store or a Reolink authorized reseller. Learn more: https://reolink.com/warranty-and-return/.
Terms and Privacy
Use of the product is subject to your agreement to the Terms of Service and Privacy Policy at reolink.com. Keep out of reach of children.
English13
DE
Katalog
Lieferumfang 15
Über den NVR 16
(BE/BG/CZ/DK/DE/EE/IE/EL/ES/FR/HR/IT/CY/LV/LT/LU/HU/MT/NL/AT/PL/PT/RO/SI/SK/FI/SE/TR/N O/CH/IS/LI/UK(NI)
Operation of 5150-5250 MHz is restricted to indoor use only.
- Operational Instruction
- EN
- Contents
- What's in the Box
- NVR Introduction
- Different states of the status LEDs:
- Connection Diagram
- Sync WI-FI info
- Access the NVR via Smartphone or PC
- Mount Tips for the Camera
- Installation Tips
- Troubleshooting
- Camera Not Displaying Images on the Monitor
- Cause 1: Camera is not Powering on
- Cause 2: Incorrect Account Name or Password
- Cause 3: Camera is not Assigned to a Channel
- Cause 4: No WiFi After Removing the Ethernet Cable
- Specification
- NVR
- Notification of Compliance
- FCC Compliance Statements
- FCC Radiation Exposure statement
- ISED Compliance Statements
- ISED Radiation Exposure statement
- CE Simplified EU Declaration of Conformity
- WiFi Operating Frequency
- UKCA Declaration of Conformity
- Correct Disposal of This Product
- Limited Warranty
- Terms and Privacy
- Katalog
Brand : REOLINK
Model : RLN12W
Category : Surveillance Camera