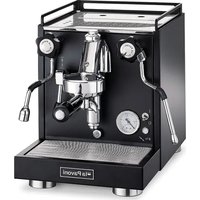
New Cellini Classic - Coffee machine LA PAVONI - Free user manual and instructions
Find the device manual for free New Cellini Classic LA PAVONI in PDF.


| Brand | La Pavoni |
| Model | New Cellini Classic |
| Product Type | Espresso coffee machine with boiler and pump |
| Category | Coffee machine |
| Dimensions (L x W x H) | Approximately 30 x 40 x 38 cm (estimated) |
| Weight | Approximately 12 kg (estimated) |
| Power Supply | 220-240 V, 50/60 Hz, 1200 W (estimated) |
| Heating Type | Boiler with heat exchanger |
| Pump Pressure | 8-9 bar (adjustable) |
| Boiler Pressure | 1.1-1.3 bar |
| Water Tank Capacity | Approximately 1.5 liters (to be confirmed) |
| Main Functions | Espresso preparation, hot water dispensing, steam for milk, passive cup warmer |
| Number of Groups | 1 group |
| Included Portafilters | Single spout and double spout portafilters, 1-cup (7g) and 2-cup (16g) filter baskets, blind filter |
| Included Accessories | Dosing cup, tamper, cleaning brush, direct water connection hose (depending on model) |
| Body Material | Stainless steel and chrome |
| Maintenance and Cleaning | Regular cleaning of nozzles, group head, filters, drip tray; periodic descaling recommended |
| Safety | Automatic shut-off in case of water shortage, overheating protection, main switch |
| Spare Parts and Repairability | Filters, portafilters, gaskets, shower screen, parts available through authorized after-sales service |
| General Information | Machine for domestic use, models LPSCCS01, LPSCCB01, LPSCVS01 (direct water connection possible) |
Frequently Asked Questions - New Cellini Classic LA PAVONI
User questions about New Cellini Classic LA PAVONI
0 question about this device. Answer the ones you know or ask your own.
Ask a new question about this device
Download the instructions for your Coffee machine in PDF format for free! Find your manual New Cellini Classic - LA PAVONI and take your electronic device back in hand. On this page are published all the documents necessary for the use of your device. New Cellini Classic by LA PAVONI.
USER MANUAL New Cellini Classic LA PAVONI
5. USO DELLA MACCHINA
Instructions for use of models
LPSCCS01, LPSCCB01, LPSCVS01

Dear Customer,
Thank you for having purchased one of our products, which has been manufactured using the latest technological innovations. By carefully following some simple instructions regarding the correct use of our product in compliance with the essential safety instructions indicated in this manual, you will be able to obtain the best performance and enjoy the remarkable reliability of this product over the years. In case of faults, please contact one of our Service Centres that are at your disposal from now on.
SYMBOLS USED IN THIS MANUAL
Important information is indicated by these symbols. It is imperative that you comply with these instructions.

Please read the instructions manual carefully before using the appliance.

Caution! Particularly important and / or dangerous operations.

Information (useful for using the appliance).

Advice.

Operations that can be carried out by the user.

Operations that should only be carried out by a qualified technician.
CONTENTS
-
INTRODUCTION TO THE MANUAL
-
INSTRUCTIONS
2-1. SAFETY INSTRUCTIONS 16
2-2. INTENDED USE OF THE MACHINE 17
2-3.DISPOSAL 18
2-4. RESIDUAL RISKS 18
- DESCRIPTION
3-1.PRODUCT DESCRIPTION 18
- STARTING THE MACHINE FOR THE FIRST TIME 19
4-1. CONNECTING TO THE WATER SUPPLY 19
4-2. ELECTRICAL CONNECTION AND FIRST USE 19
4-3. MANUAL PRESSURE SWITCH ADJUSTMENT 20
4-4. MANUAL BREWING PRESSURE ADJUSTMENT 20
- USING THE MACHINE
5-1. PREPARING AND DISPENSING COFFEE 20
5-2. DISPENSING HOT WATER 21
5-3. DISPENSING STEAM 21
- CLEANING AND MAINTENANCE
6-1. CLEANING THE STEAM AND HOT WATER NOZZLES 22
6-2. CLEANING THE GROUP HEAD AND SHOWER SCREENS 22
6-3. CLEANING THE FILTERS AND FILTER HOLDERS 22
6-4. CLEANING THE LOWER DRIP TRAY 23
6-5.CLEANING THE OUTSIDE OF THE MACHINE 23
6-6. REPLACING THE GROUP HEAD GASKET 23
- TROUBLESHOOTING

1. INTRODUCTION TO THE MANUAL
This instructions manual is an integral part of the machine. It should be read carefully and kept readily available for reference for the entire service life of the machine.
The manual contains information regarding the proper use of the machine, its cleaning and maintenance. It also provides information about operations to be carried out that require particular attention and possible residual risks.
The manual reflects the technological innovations at the time it was drafted. The manufacturer reserves the right to make any necessary technical modifications to its products and to update the manuals with no obligation to revise previous versions.
LA PAVONI S.p.A. declines any liability for damage or injury that may be caused directly or indirectly to people or property due to:
the failure to comply with all the requirements of current safety regulations
-incorrect installation
defective power supply
- improper or incorrect use of the machine
- uses other than those specified in this manual
- lack of or incorrect maintenance
- unauthorised modifications or repairs
the use of non-original or non model-specific spare parts
complete or partial failure to follow the instructions
exceptional events
2. INSTRUCTIONS
2-1. SAFETY INSTRUCTIONS
- The user must comply with the safety regulations in force in the country where the machine is used, in addition to using common sense and the instructions provided in this manual.
To ensure that machine works correctly and provides a long service, we recommend that you make sure that the environmental conditions are correct (room temperature should be between 5°C and 35°C ). Avoid using the machine in places where jets of water are used or in outdoor environments that are exposed to the weather (sun, rain etc.).
After removing the machine from its packaging, make sure that it is intact and has not been damaged.
The packaging should be taken to a proper waste disposal centre. Under no circumstances should it be left unattended where children, animals or unauthorized persons may have access to it. - Before switching on the machine, make sure that the power supply indicated on the data plate, located under the base of the machine, is the same as the one used in your country.
- This appliance must not be used by persons (including children) with reduced physical, sensory or mental capabilities or without sufficient experience and knowledge, unless appropriately supervised or instructed on the safe use of the appliance by a person responsible for their safety.
- This appliance may be used by children from the age of 8 provided they are supervised or instructed on the safe use of the appliance and they understand the associated risks.
- Keep the appliance and its cord out of
reach of children under the age of 8 years.
Children must never play with the appliance.
- The appliance may be used by people with reduced physical, sensory or mental capabilities or who lack experience and knowledge if they are supervised or instructed on the safe use of the appliance by someone who is responsible for their safety and if they understand the hazards involved.
- Do not immerse the machine in water.
- Put the machine in a safe position on a solid surface, away from heat sources and out of the reach of children.
The machine must not be used in a recess.
- Before connecting or disconnecting the machine, make sure that the ON/OFF switch is in the OFF position.
- Do not use the machine if it is not working properly or if the power cable or plug is damaged. If the power cable is damaged, contact an authorised service centre.
- Do not touch the hot surfaces (boiler, group head, filter holder, steam supply nozzle) to avoid burns.
- Do not remove the filter holder while coffee is being dispensed to avoid possible burns.
- Under no circumstances place your hands under the group head or the steam supply nozzle as the liquids or steam delivered are hot and may cause burns.
- Do not use the coffee machine with parts or accessories of other manufacturers.
- Only use original spare parts. The use of spare parts not approved by the manufacturer could lead to fires, electric shocks or personal injury.
Make sure there is water in the
reservoir before using the coffee machine to avoid damaging the heating element.
In the case of faults or malfunction, switch of the machine. Do not attempt to repair it yourself. Contact an authorised service centre to have any worn or damaged parts replaced with original spare parts.
- Unauthorised repairs or the use of non-original spare parts will void the warranty and relieve the manufacturer of all liability.
- Do not use the machine outdoors.
- Do not use the machine for uses other than the one for which it was designed.
- In case of fire, use carbon dioxide (CO2) fire extinguishers. Do not use water or steam extinguishers.
- Before carrying out cleaning or maintenance, switch off the machine by placing the ON/ OFF switch on the OFF position and remove the plug from the power socket without pulling the power cable.
- Never use harsh detergents or sharp tools to clean the machine. Only use a soft damp cloth.
2-2. INTENDED USE OF THE MACHINE This machine has been designed for the home preparation of espresso coffee using coffee blends, the production of hot water and/or steam, and the preparation of hot milk.
In order to use the machine properly, the user must carefully read and understand the instructions provided in this manual.
This appliance is intended for household use and similar applications such as: - kitchen areas for use by staff in shops, offices, and other

professional environments;
- in farms/farm accommodation
- by guests in hotels, motels and other residential accommodation;
- in bed and breakfast accommodation
Any improper use of the machine will void the warranty and relieve the manufacturer of all liability for damage to property and/or injury to persons.
Improper use includes:
- any use other than the one specified in the instructions manual
- any intervention carried out on the appliance that does not comply with the instructions given in this manual;
- any use following unauthorized modifications to components or safety devices
- use of the appliance outdoors.
2-3. DISPOSAL
Electrical appliances must not be disposed of together with household waste. Devices marked with this symbol are subject
to European Directive 2012/19/EU All waste electrical and electronic appliances must be disposed of separately from domestic waste and taken to authorised waste disposal facilities. Disposing of the used appliance correctly, will help to safeguard the environment and human health. For further information regarding the disposal of used appliances, please contact your local authority waste disposal department or the shop where the appliance was purchased.
2-4. RESIDUAL RISKS

It is not possible to safeguard the user against direct jets of steam
or hot water. He/she should therefore be extremely careful when using the machine to avoid scalds or burns.
The manufacturer declines any liability for damage to property or injury to people or animals, due to interventions on the machine by unqualified or unauthorized persons.
3.DESCRIPTION
3-1. PRODUCT DESCRIPTION
- ON/OFF switch
- Water tank
- Cup warmer
- Pump pressure gauge*
- Boiler pressure gauge
- Hot water knob
- Steam knob
- Drip tray grid
- Hot water nozzle
- Steam nozzle
- Group head
- Filter holder
- Drip tray
- ON/OFF light and water tank level indicator
- Group head lever
- Cleaning brush
- Tube for connecting to the water supply*
- Coffee tamper
- Coffee scoop
- Filter basket for 1 cup 7g
21.Filter basket for 2 cups 16 g - Filter holder - one spout
- Filter holder - two spouts
- Blind filter
- Silicone water drainage hose
*Standard only on some models
4. STARTING THE MACHINE FOR THE FIRST TIME
4-1. CONNECTING TO THE WATER SUPPLY
- The LPSCVS01 machines can either be used with a water tank (2) or connected to the mains water supply using the hose provided (17).
In order to use the machine with a water tank (2), the switch (C) has to be in position "1" (this should be done with the machine switched off) (Fig. 1-2).
To use the machine connected to the water supply:
- Place the switch (C) to position "II" (this should be done with the machine switched off) (Fig. 1-2).
- Connect the hose (17) to the fitting (D) located under the machine and then connect it to the water supply (Fig. 1).

It is recommended that you install a water softener on the machine water supply system.
Make sure that the water in the water supply that you will be connecting the machine to is potable.
- This appliance should be connected to the water supply in compliance with the national Legislation of the country in which it is used.
The maximum inlet pressure to the machine from the water supply must not exceed 0.65MPa
- If the mains water pressure is higher than 0.5MPa (5 bar), it is recommended that you install a balanced pressure regulator for high pressures.
4-2. ELECTRICAL CONNECTION AND FIRST USE
- To start the espresso coffee machine, carefully follow the instructions below:
- Open the package, take out the machine and make sure that it is not damaged.
- Place the machine on a level surface, remove the cover, take out the water tank (2) and rinse it.
- Fill the tank with clean water, put it back in its seat. Close the machine cover.
- If you connect the machine to the water supply, make sure that the water supply tap is open before switching on the machine.
Water can be drained directly into a drainage outlet by removing the plug (A) from the drip tray (13) and connecting the silicon tube (25) to the tray (B) (Fig. 1).

Before connecting the machine, make sure that the mains power voltage is the same as the one indicated on the data plate located under the base of the machine.
- Insert the plug into the power socket.
- Turn on the machine by placing the on / off switch (1) to position "I". Wait for approximately 2 seconds to allow the circuit to perform a check. The lamp (14) lights up to indicate that the machine is powered.
The automatic water level device will start filling the boiler with water until it reaches the pre-set level; the level of water in the boiler is checked automatically and will be topped up automatically to the required level. - During start-up: when the boiler pressure gauge (5) indicates approximately 0.5 bar, slowly open the

steam knob (7) to discharge any air that may be contained in the boiler. Wait until steam starts to come out of the steam nozzle (10) before closing it.
- Wait for the machine to reach the operating pressure of 1.1 - 1.3 bar, checking the boiler pressure on the pressure gauge (5).
- Insert the filter holder (12) into the group head (11) and move the group head lever (15). When water is delivered, this allows the coffee circuit exchangers to fill correctly.
- Move the group head control lever (15) fully downwards to stop delivery.
The machine is now ready for use.

- The machine is fitted with a safety device that checks the amount of water in the tank. The ON/OFF light (14) flashes to indicate there is insufficient water in the tank (2). If the water level is too low, the device automatically stops all machine functions.

Coffee cannot be dispensed and the boiler heating element is not powered when the OFF indicator light is flashing.
4-3. MANUAL PRESSURE SWITCH ADJUSTMENT
The function of the pressure switch shown in the Figure is to keep the pressure in the boiler constant, by activating or deactivating the electric heating element.
The pressure switch is adjusted when the machine is tested (1.1 -1.3 bar). If a different working pressure is required, the operating range of the pressure switch can be modified by regulating the adjustment screw (Fig. 4).

If the pressure is reduced, the temperature decreases and if the pressure is increased the water temperature increases.
The direction of adjustment is indicated in the Figure and on the pressure switch.
The pressure changes by approximately 0.1 atm for each complete turn of the screw.
4-4. MANUAL BREWING PRESSURE ADJUSTMENT
The brewing pressure can be adjusted manually on the LPSCVS01 model only, by turning the pump pressure adjustment screw (E) (Fig. 3).
To check the pressure during delivery:
- Insert the filter holder full of properly ground, dosed and pressed coffee into the group head.
- Move the group head control lever (15) and read the pressure on the pump pressure gauge (4). The correct pressure is 8/9 bar.
- If the pressure indicated on the pressure gauge is not correct, turn the pump pressure adjustment screw (E) (Fig. 3) clockwise to increase the pump pressure or anticlockwise to decrease the pump pressure.
After regulating the pressure, check the pump setting by delivering one or more coffees.
5. USING THE MACHINE
5-1. PREPARED AND DISPENSING COFFEE
Once you have carried out the operations described in section 4.1-4.2, the machine is ready for use.

Do not cover the cup-warming shelf with fabrics, felt etc.
-
Place the required filter (20-21) into the filter holder (12).
-
Fill the filter with the required amount of coffee for 1 or 2 cups (7 g - 16 g) according to the filter selected (20-21).
- Level the coffee and compact it using the tamper (18). Remove any coffee residues from the edge of the filter using the palm of your hand and insert the filter holder into the group head (11), moving it towards the right to secure it.
- Place the cups under the spouts and start to dispense coffee using the group head control lever (15). The coffee is dispensed by moving the group head lever (15) located on the control panel upwards.
- Once the required amount of coffee has been dispensed, move the group head lever (15) down to stop delivery.
- To dispense additional cups of coffee, remove the filter holder (12) from the group head by moving it towards the left, empty the coffee grounds and repeat the steps described above.

Do not touch the group heads or the steam and hot water nozzles when the machine is in operation and do not place your hands under the groups heads or pipes during delivery in order to avoid possible scalding.

When the machine is new, the filter holder may not be aligned (perpendicular to the machine) as shown in Figure 5. However, this does not prevent the machine from working properly. After being used for a short time, the filter holder will gradually become settled in the correct position. G = Position of the closed filter holder when the machine is new H = Position of the closed filter
holder after the machine has been in use for a short time.

- Coffee should be ground just before it is used. Once ground, coffee loses its flavour very quickly. If the coffee is too coarsely ground, the coffee will be light coloured and weak without froth and if the coffee is too finely ground the espresso will be dark and strong with little froth.
Warm cups help maintain the coffee at the right temperature. We therefore recommended that before using them, you place the cups on the cup warmer shelf (3), which will be warmed by the heat given off from the boiler.
The pump pressure can be read on the respective pressure gauge during delivery. The correct pressure for making coffee is 8/9 bar.
5-2. DISPENSING HOT WATER
- Place a container under the hot water nozzle (9) and turn the hot water knob (6) anticlockwise to dispense hot water.
- When you have enough hot water, turn the hot water knob (6) clockwise to stop delivery.

We recommend that you dispense a maximum of 200ml of water.
- To protect the heating element, the machine has a filling time-out of 25 seconds.
5-3. DISPENSING STEAM
- Before heating any drinks, carefully dispense a small amount of steam from the steam nozzle (10) by turning the steam knob (7) anticlockwise to eliminate any condensation that may have formed in the boiler.

- Place the liquid to be prepared in a container, immerse the steam nozzle (10) into the liquid and slowly turn the steam knob (7) anticlockwise.
The amount of steam delivered is proportional to how much you turn the knob. The more you open it, the greater will be the amount of steam delivered.
- When the required amount has been dispensed, turn the knob clockwise to stop delivery. Remove the container and clean the steam nozzle with a damp cloth.
To froth milk for a cappuccino:
- Fill a container with cold semiskimmed milk.
- Place the container with milk under steam nozzle (10) then immerse it a few millimetres into the milk.
- Turn the steam knob (7) anticlockwise and slowly move the container upwards to obtain a creamier froth.
- Once the volume of milk has doubled, immerse the frothing nozzle completely and heat the milk.
- Stop the steam by turning the steam knob (7) clockwise.

Danger of burns! Spurts of hot water may be ejected when you first start to dispense steam. The nozzle can become extremely hot. Do not touch it directly with your hands.

After heating the liquid, it is recommended that you purge the steam pipe by opening the valve for a few seconds.
6. CLEANING AND MAINTENANCE
6-1. CLEANING THE STEAM AND HOT WATER NOZZLES
- To avoid altering the taste of the drinks to be heated and to prevent the holes at the end of the nozzles from becoming clogged, clean thoroughly with a damp cloth after each use and dispense a small amount of steam.
6-2. CLEANING THE GROUP HEAD AND SHOWER SCREENS
- Remove the filter holder from the group head and clean the group's gasket using the brush (16) provided.
- Place the blind filter (24) provided in the filter holder (22-23).
- Add a spoonful of coffee machine cleaning powder and insert the filter holder into the group head.
- Use the group head control (15) to start dispensing and stop delivery after approximately 15-20 seconds.
- Start and stop delivery several times until clean water is dispensed, in order to remove coffee and limescale deposits.
- Remove the blind filter (24) and start dispensing several times in order to rinse the group head and eliminate any residues from the shower screens and the group head.

If hot water has remained in the pipes for a long time, we recommend that you allow water to flow out to remove any deposits.
6-3. CLEANING THE FILTERS AND FILTER HOLDERS
- Regularly check the holes in the filters in order to remove any coffee deposits.
- Place approximately one litre of boiling water and four teaspoons of
coffee machine cleaner in a suitable container. Immerse the filters and filter holders in the solution for 20-30 minutes. Then rinse thoroughly under running water.
Remove the drip tray grid (8) and the drip tray (13). Remove any coffee residues from it by rinsing it under running water.
6-5. CLEANING THE OUTSIDE OF THE MACHINE
To keep the outer surface of the coffee machine in good condition, it should be cleaned regularly after use. Let the appliance cool down first. Clean with a soft, damp cloth.
6-6. REPLACING THE GROUP HEAD GASKET (FIG. 7)
- If coffee leaks from around the edges of the filter holder (l) when it is dispensed, it may be due to an obstruction in the delivery hole of the filter-holder, in which case the hole should be cleaned.
- If the problem persists or if the filter holder moves significantly beyond the centre of the group head when it is being fitted, the group head gasket should be replaced.
To replace it, proceed as follows:
Make sure that the machine is switched off and disconnect the power cable.
- Remove the gasket (H) and the shower screen (G), using a flat screwdriver as a lever.
After having removed the gasket and shower screen, clean the seat properly before installing the new components.
-Once the new components have been installed, insert the filter holder, without the filter, into the group head
and move it in order to seat the gasket.
7. TROUBLESHOOTING
PROBLEM CAUSE SOLUTION

| The machine does not work and the light of the ON/OFF switch does not turn on | 1. No power to the machine 2. The machine is not plugged in correctly 3. The power cable is damaged | 1. Switch the power on 2. Insert the plug correctly into the power socket 3. Contact an authorised service centre for replacement |
| The light on the ON/OFF switch is lit but the water does not heat up | 1. The service thermostats are not working 2. The heating element is broken or burnt out | 1. Contact an authorised service centre 2. Contact an authorised service centre |
| No coffee is dispensed | 1. No water in the tank 2. The coffee is too finely ground 3. There is too much coffee 4. The coffee has been compacted too much 5. The circuit has not been filled 6. Shower screen dirty | 1. Put water in the tank 2. Replace with a coarser coffee blend 3. Reduce the amount of coffee in the filter basket 4. Tamp the coffee less 5. See section 4 6. Clean or replace the shower screen |
| Loud noise coming from the pump | 1. The pump is not primed | 1. See section 4 “Starting the machine for the first time” |
| The coffee is too too quickly | 1. The coffee is too coarsely ground 2. There is not enough coffee 3. The coffee has not been compacted enough 4. The coffee is stale or unsuitable | 1. The coffee should be ground more finely 2. Increase the amount of coffee 3. Tamp the coffee more 4. Replace the coffee |
| The coffee is dispensed in drops | 1. The coffee is too finely ground 2. There is too much coffee 3. The coffee has been compacted too much | 1. The coffee should be ground more coarsely 2. Reduce the amount of coffee 3. Tamp the coffee less |
| Coffee leaks between the group head and the filter holder | 1. The filter holder is not inserted correctly 2. There is too much coffee in the filter basket 3. The edge of the filter holder has not been cleaned 4. The group head gasket is worn | 1. Insert it properly 2. Reduce the amount of coffee 3. Remove coffee residues from the edge of the filter holder and clean the group head gasket 4. Contact an authorised service centre |
| No froth forms on the coffee | 1. The coffee blend is not suitable for this type of machine 2. The grinding is unsuitable 3. There is not enough coffee | 1. Replace the coffee 2. Adjust the coffee grind 3. Increase the amount of coffee and compact it properly |
| The coffee is too cold | 1. The machine had not reached the correct temperature 2. The filter holder had not been pre-heated 3. The cups have not been preheated 4. The thermostat is not working within the required range | 1. Follow the instructions given in section 4.1-4.2 2. The filter holder should be heated at the same time as the water, see section 4.1-4.2 3. Heat the cups properly on the cup warmer (3) 4. Contact an authorised service centre |
| The coffee is too hot | 1. The thermostat is not working within the required range | 1. Contact an authorised service centre |
| The machine does not dispense steam | 1. The circuit has not been filled 2. The hole at the end of the steam nozzle is clogged 3. No water in the tank | 1. See section 4 2. Clean the hole with a needle 3. See section 4 |
- INTRODUCTION AU MANUEL
- AVERTISSEMENTS
2-1.AVERTISSEMENT DE SECURITE 28
2-2. USAGE PREVU DE LA MACHINE 30
2-3. ÉLIMINATION 30
2-4. RISQUES RÉSIDUELS 30
- DESCRIPTION
3-1.DESCRIPTIONDUPRODUIT 31
- PREMIÈRE MISE EN SERVICE
4-1. RACCORDEMENT À L'EAU 31
4-2. BRANCHEMENT ÉLECTRIQUE ET PREMIÈRE UTILISATION 31
4-3. RÉGLAGE MANUEL DU PRESSOSTAT 32
4-4. RÉGLAGE MANUEL DE LA PRESSION DE DISTRIBUTION 33
- UTILISATION DE LA MACHINE
5-1. PREPARATION ET DISTRIBUTION DE CAFÉ 33
5-2. DISTRIBUTION D'EAU CHAUBE 34
5-3. DISTRIBUTION DE VAPEUR 34
6. NETTOYAGE ET ENTRETIEN
6-1. NETTOYAGE DES BUSES DE DISTRIBUTION DE VAPEUR ET EAU CHAUBE 35
6-2. NETTOYAGE CORPS GROUPE ET DOUCHETTES 35
6-3. NETTOYAGE DES FILTRES ET DES PORTE-FILTRES 35
6-4. NETTOYAGE BASSINE INFÉRIEURE VIDANGE 35
6-5. NETTOYAGE DU CORPS 36
6-6. REMPLACEMENT DU JOINT D'ETANCHÉITE SOUS CORPS 36
7. CAUSES DE DYSFUNCTIONNEMENT OU ANOMALIES 37
1. INTRODUCTION AU MANUEL
7. CAUSES DE DYSFUNCTIONNEMENT OU ANOMALIES
PROBÉME CAUSE SOLUTION
2-1. VEILIGHEIDSWAARSCHUWINGEN
3-1. BESCHRIJVING VAN HET PRODUCT
PROBLEM OORZAAK OPLOSSING
6. LIMPEZA E MANUTENÇA
6-1. LIMPEZA DAS LANÇAS DE DISPENSEA DE VAPOR E DE ÁGUA QUENTE
PROBLEMA CAUSA SOLUÇÃO
HCTpyKcnnnoNCNoJIb3OBAHnIO MoJeIe
LPSCCS01, LPSCCB01, LPSCVS01
YBaKaembl NOKyNaTeIb!
- MEPbI IPEdoCTOPOXHOCTN 110
2-1. MEPblI NO TEXHnke 6E3OnACHOCTN 110
2-2. HA3HAUEHNE MAUNHbI 112
2-3. YTNJIIN3AUUN 112
2-4. OCTATOUHbIE PNCKN 113
3.ОПИСАНЕ 113
3-1.ОПИСАНUEИЗДЕЛЯ 113
- ΠΕΡБbI BBOДВЭКПЛУATAЦИО 113
4-1. NOДКЛЮЧЕНЕ K CETN BODОCHABKEHENIA 113
4-2. 3JIeKTPnueCKOE NOdKJIIOUeHne I INEPBOE NcNoJb3OBAHne 114
4-3.PUHARPEYUNIOBKAPEJE DABJEHNA 115
4-4.PUHAR HACTPOIKA IABJIENI NODAUH 115
5.ИСПОЛьЗOBAHNE MAШINHBI 115
5-1. NOДΓΟTOВКА И NOДАЧА KOΦE 115
5-2. IODAUCA TOPAUEB BODbI 116
5-3. IODAUAPA 116
6.ЧИСТКА И YXOD 117
6-1. YNCTKA TPyBOK IODaUH IAPA N IOPaYeB BODbI 117
6-2. YNCTKA KOPNYCA RPYIIN IINCNEPCNOHHbIX 3KPAHOB 117
6-3. YNCTKA ΦИЛьТРОВ И ДЕРЖATELEД ΦИЛьТРОВ 118
6-4. YNCTKA HNXHETO DPEHAXHOGI NOIDOHA 118
6-5. YNCTKA KOPNYCA 118
6-6. 3AMEHA ПОКладкУЧИДЕРЖATEЛЯ 118
7.ПИЧИНБI HENCПAPBHOCTEIMIN CBOEB B PABOTE 119
1. BBEDEHNE
HactoJee pyKOBoDCTBO AIBJeTc HcOTbEmIeMoY aCtBIO MaUINHb. BnMaTeNbHO npOuNTaIte erO n 6epexHo xpaHnTE dJa 6yDuNX npocMToPob Ha npotjKeHN BCero cPoka CnyX6bl MaUNHbI.
B pykoBOdCTBe coDepeKuNTcra
HΦOpMaUra O npaBnIbHo
3KcIIyatau, ouNCTke n yXoY 3a
MaIHHo, a TaKKe IpeOCTabJIaHTcra
yKa3aHnI OTHOCHTeNbHO OCTaTOUhbIX
PnCKOB n pa3JIuHbIX ONEpaUni,
KOTOpblE DOJXHbI BbINOLHrTbcra C
OCo6bIM BHIMaHHeM.
B pykoBOdCTBe OtpaKeH
TexHOJOrnueckn ypoBeHb,
CyUeCTByOUsn Ha MOMeHT eRo
BblNycka; npOn3BOdntelb OCTaBlaeT
3a co6oN npaBO BHOcNTb BCE
Heo6xOdMbIe TexHnueckne n3MeHeHnA
B CBOH npOdyKuHn IO6HOBJIaTb
pyKOBoDCTBa 6e3 6o3aTeJbHOrO
pepecMOrpa PpeDbIyux BepCn.
LA PAVONI S.p.A. CHIMaeT C ce6a
BCaKyHO OTBeTCTBHeHOCTh 3a
BO3MOxHbI yUeep6, KOTOpbI MOKeT
6bITb IprMbIM NnKOCBeHHbIM
O6pa3OM HaHeceH IIOJAM Nn
NMyuIeCTBy NO CNeDyUoIm PruHAm:
-Heco6JIIODeHnE BCex npeIncAHn DeiCTByUOuX Tpe6oBaHn 6e3OpacHOCTn;
- HenpaBnIbHa yCTaHOBka;
c60B NHTaHn;
He npabHbHa 3KcIyatauNn INcNoB3OBaHne MaunHbI He nO Ha3HaueHIO;
3KcIyataunC HapuweHnem INCTpykui n3 HactoJero pyKOBOdCTBa;
- cepbe3HbIe HeoCTaTKn B 06cLyXnBaHn;
BHeceHne N3MeHeHn B MaunHy nIINIO6bIe INbIe HecaHKUOHNpOBaHHbIE Oepaun;
NCNoJb3OBAHHe HeOpnHaJIbHbIX IIN He npedHa3HaueHHbIX dIaHHoM OdeIIM 3aIpaCTe;
-NOHoe HnIyactnHoe Heco6JHOeHne INHctpyKu;
-ACKJIHouHTeINbHbIe CO6bITnJ.
2. MEPbI IPEdoCTOPOXHOCTN
2-1. MEPbl IO TEXHnKE 6E3ONACHOCTN
-Пользовател Должень собл�аТгебовая 6e3oNaChocTN,ДeистуюшеВстран ЭкплyaТациMaшины, a Тakxe правILA,ДИКТУЕмBLEЗдравыIMСMbICLOM,InpedписаниИЗНаCTОЯserOpykoBoODCTBa.
-Дя obecneueHЯ npabnIbHOB pa60tI MaunHbI n COxpaHEny ee xapaKTePncTnK BO BpeMeH peKOMeHdyETc npOBepntb HAIuHne HaJIeXaUx YcNoBn OKpyKaIOUe Cpebl (TempepatypaB NOMeUeHN IOnJHa HaxOAnTbcR B PpeJeLaX OT 5do 35°C) , He ekcnlyatnpoBaTb MaunHy B MeCTax, rDe NcNoJIb3yOTc CTpyN BoDbl, INI CNapxN, rDe OHa MOKeT NOBepraTbcR BO3dEICTBNU aTMocΦephbx φakTopob (CoINCe, DOXdb NT. d.).
- BbHyMaunHy n3 ynaKOBKn, npOBepbTe ee celenochtocb n OTCyTCTBne NOBpeJdeHn.
CdaTe KOMNoHEnTbI yNaKOBKn B CneuaJIu3nPoBaHHbIe cHTpbI NO yTuIN3aUIn. HnB Koem clyuae He OCTabJrTe ux 6e3 npncmOTpa nn B MeCTax, Kyda NMeHOT DoCTyI dETn, XNBOTHbIe IIn HeyNoHOMOueHHbIe IInca.
-ПepeДВБОДМашINьВ
эКсплуATERUнpoВерьTe,
yTO6bI HAnpJxKeHne nHTaHnY,
yKa3aHHoe Ha nDeHTnΦnKauONHO
Ta6JIuYKe Ha OCHOBaHnMaUHNbI,
COOTBeTCTBOBaJIO HApJxKeHnO
CTpaHbI nCNoJIb3OBaHnY
06OpyDoBaHnY.
-Даньи пибор He могут
И спользовать Лица (ВКлючая DeTeи)
С орранчeyныIMи ФиЗУчecКIMи,
сеньсорныIMи Или УмстBEньIMи
спосбностяМи, Либ 6e3 OпыТи
ДОлжных 3HaHи, 3a ИСКЛЮчЕНeM
TEX СлчаeВ, KOrda Oни 6blIи
COOTВБETCTBYUQUIM МобразOM obvyehы
ВЗрCSblIMи, OTBeTCTBeHHbIMи 3a Иx
6e3ОпаСнOCTь, Или НaxОдЯТС ПОД ИX
HA6JILODEHnEМ.
-ДаньIM akceccyapom MoryT
ПользOBaTBcЯ DeTи OT 8-Mn ЛeT, ecIn
Оин HaxODЯТСЯ NOД пИСМOTpOM
Илл 6ылл обчЕнbl праВилam
6e3OpanCHO rICNoJIb3OBAHIN
прбopa И NOHIMaIOT CBЯЗAHHbIe C
эТИМ рИСКИ.
XpaHnte np6op n Ka6eB B MeCTe, HeoctyHOM dJa deTei MlaAdwe 8 JeT.
-He pa3pewaIte deTAm nIgpaTb c np6opom.
- Pnp60pOM MOryT NOJb3OBaTbcra IIOiC OOrpaHnueHHbIMN fN3NueCKnIMN,CEHCOPHBIMN NIN yMCTBeHHbIMN CNOcO6HOCTaMn, IN6o 6e3 OnbTa NDOJIKHBIX 3HaHn,HOTobko eCInOHN HAXODrTcN IOd KOHTPOJeM OTBETCTBeHHoro 3a HNX NuaNII 6blI INpOHnCTpykTnpOBaHbIMN OTHOCNTelbHo 6e3OpaCHOH 3KcPnyatauPi np60pa n 3HaOT OCOyTCTByUOx ONaCHOCTAx.
-He norpykaTe MaunHy B BoNy.
-PacnoJoxNte MaunHy BHaJeXHOM N HeOcraeMOM dJeTeMeCTe, Ha IpOuHOM OCHOBaHN, BdJI N OT NCTOChIKOB TePna.
MaunHy HeIb3a nCNoJb3OBaTb
BHyTpN Hnwn.
-перд Tem Кадо�снИТь N OTcoeINHTb MaUNHy, y6eINTecB B TOM,чTO BbIKIQUaTeJIb HaxOДNTcR B ПОLOЖЕHIN «ВыКЛЮЧЕHO».
He nCnoJb3yIte MaunHy,ecn OHa pa6oTaET HeNCnpaBHO nnIOBpeKdEhbl Ka6eIb IIn60 pa3bEm NITAHN.B Cnyae NOBpeKdEHNA Ka6eIb O6paUaITecB BVNOJHOMOueHHbI cepBVCbI ueHTp.
-He kacaitec b ropaunx nobepxnocte (6oJIepa, rpynnbl, depkaTeIa φ nIbTpa, Tpy6kn npa) Bo n36exKaHne IOnyuHnOxOrOB.
-He cHmMaIte DepxaTeIb fNJIbTp a BO BpeMnOdauN KoFe, yTo6bl npeoTbpaTITb OXOrn.
-Kateropnueckn 3anpeuaeTcnaCTaBnTb pykN nOd rpynny Ntpy6ky npapa, noCKoIbKy nOdaBaembleropnye XnkocTn nn Nap MOrytnpuHHTb OXKOrn.
He nCnoB3yIe KoΦemaunHy B coUeTaHn C uactaMn N aKceccyapamu dpynx npoN3BOdnteJe.
-ИспοлььзуйTe TOLьКО
Оригиналынье 3ап actи OT
ПроиЗВоДиТелЯ.ИспοЛьзВоВаHиЕ
HepeKOMeHДОВaHHbIX ПроиЗВоДиTeIeM
3aПаСнБiXЧаTeМожЕТпИВeCTи K
ПОЖApY,порожeНЮ ЭлeКТрИчecКIM
TOKOM И ТраВМИрОВaHHIO.
CneIte 3a Tem, yTO6bIB MaUNHe Bcerda 6bIa BOda, TaK KaK B npOTNBOM Cnyae BbIeT n3 CTPOJ T3H.
Bcnyae noLOMKn nn aHOMaIbHO pa60tbl BbIKIIOUHTe MaUNHy n He TpOraIte ee. O6paTntEcB yNoIHOMOueHHbI cepBnCHbI UeHTp dIy 3aMeHbI NOBpeXdEHHbIX nn N3HOWeHHbIX DeTaJeN Ha opuHaJIbHbIe 3aNuaCTn.
-Prn ocyuieCTBleHn HecaHKUHOHPOBaHHOro peMOHTa
MaunHbI IIN NCNOJb3OBaHnHeOpnHaJIbHbIX 3aPuaCTeI rapaHTnHbIe ycIOBnO OTMeHraOTcN I npOn3BOAnTeJIb IMeET npaBO npn3HaTb IX HeJeICTBnTeJIbHbIMN.
3anpeaetcnyKcnnyatnpoBaTb MaunHy chapyxN.
-ИсплььзуйTe Maшину TolьКо NO npedyCMOTpeHHOMy Ha3HaueHnIO.
-ПрвВОЗнКНовени пожар
ИСПОЛБ3уЛte УгLEКИСЛOTHь
eOrHeTuShITeNn(CO2). He nCpoJIb3yJTE
BODY IIN napOBbie OrHeTuShITeN.
-Перед Любов оочстков и уховом OTКЛЮчnte Maшину, установ в ВьIKЛЮчateNB B NOLOжень «ВьIKЛЮчeo》,И ВьИБTe BИКу ИЗ розтк, He Deprя за Кабел ПИТаня.
- HnKoIa He nCNoJIb3yIte KoppO3nOHHbIe YnCTaUcne CpeDcTba IIN INHCTpyMeHTbl, KOToPbIe MOrYT NOpaPaTaB MaunHy. DocTaTOuHO npotepeTb MaunHy BnaXHoMraKoI cafEeTKoI.
2-2. HA3HAUYEHNE MAUNHbI
dpyrnx cnyke6hblx nOmeuHenx;
- Ha φ epMax;
-BTOCTHnuaX,
MOTeJaxn dpyrnx
XINbIX CTpykTypax NocToIbIaMn;
-BMHNI-FOCTNUHnuaX.
IcnoJIb3OBAHnHe IIO Ha3HaueHnIO BeTe K yTpate IIO6oI rapaHTnI, npI 3TOM npOn3BOIDNTeB OCBO6OJaETcA OT IIO6oI OTBeTCTBeHHOCTN 3a npuHHeHHbI IIOJAM yUep6 n/nnI NOBpeXdEHe IMyUecTba.
IcnoJb3ObaHnEm He no Ha3HaueHnIO cHTaETca:
JIIO6oe PnpMeHHeHne, OTnUHaHOuEecr OTO3aBbEnHOrO;
- BbIIOJIHeHne IIO6bIX pa6oT c np6opom, He npeducmOTpeHHbIX HAcToaM pkyoBODCTBOM;
-JIIO6aJ3KcNlyaTaunI NOcIe HecaHKUHOHPOBaHHORO BCKpbITnKOMNoHEtOB NII INpeDOxpaHHTeJbHbIX yCTpOiCTB;
-3KcIpyaTaunn npnbopa Ha OTkpblom B03dyxe.
2-3. YTNJIIN3AUIN
3JIeKTpueckne np6Opbl He DOJXHbI yTINn3NpOBaTbcra BMeCTe C 6bITOBbIM N OTXdAMn. Ha np6Opbl c daHHbIM CmBOJOM
pacnpoctpaHareTcAeICTBne eBponeckoI npeKTHbI 2012/19/
UE.3neKtpnueckne n 3neKtpoHHbIe np6opbldoJXHbI yTInn3npOBaTbcr OTdJIbHOOT6bITOBbIXOTXODB.
CdaBaIte nX B cneuaJIbHbIe
rocydapCTBeHHbIe ceHTpbI. IpaBnJIbHa
yTnIIaIaIg OTClyJKBWSeIcPOK
npi6opa nO3BOJNT npeIoTbPaTITb
yUep6 OkpykaIOUSeI cpeI N
3dOpOBbI IOJeI. DInI noLyueHna
6oJIe IOdpo6HOINHΦOpMauN IIO
yTnIIaIaIaIaIaIaIaIaIaIaIaIaIaIaIaIaIaIaIaIaIaIaIaIaIaIaIaIaIaIaIaIaIaIaIaIaIaIaIaIaIaIaIaIaIaIaIaIaIaIaIaII
MyHnauJaJIbHbIE
opraHbI, B cHTp IIO yTnIIaIaIu IN IIN B
MaRa3HN, rKe Bbl erO npNo6peII.
2-4. OCTATOUHbIE PNCKN

HeBo3MOxHO 3aUHTb
PONb3OBaTeJIa OT PnRAMoI CTpyN
napa IINrROPaYe BODbl, N03TOMy
pnpa6Ote c annapaTOM OH,
BO n36ExKaHne OXoROB, DOnJKeH
CO6JIHOdaTb MaKcIMMaJIbHyHO
OCTOPOXHOCTb.
IpoIN3BOIDTeB CHNMaEt C ce6a IIO6yHO OTBeTCTBeHHOCTb 3a TpaBMblIOdeuNNKIBOTHbIX, a TaKKe 3a MaTePnaJIbHbI yUeP6 BCLeDCTBnepa60r, OcyueCTBHeEHbIX Ha MaUNHe HeKBaIINoIUPoBAHHbIMN NJI HeYPOJHOMOeHHbIMN IInaMn.
3. ONICAHNE
3-1. ONICAHNE N3DEJNIA
1.Главнын ВькючateNB
2.БачokДлЯВОды
3.ПолkaДЯЧашЕСпасCBHbIM noDorpeBOM
4. MaHometp Hacoca*
5. MaHometp 6oIepa
6. Puyka nodaun ropauey BoDby
7. Ручка пара
8. PeuTeKa noDoHa
9. Tpy6ka noDAu n ropJeB BoDbl
10. Tpy6ka napa
11. Гупna подачи
12.Держателфильтра
13.ДрehaЖньлnotok
14.ИнданkaTop BKЛ./BbIKЛ.и ИнданkaTop уровая Воры в бачke
15. Pbyar nodaun rpynnbI
16. YnctyaJyTeToyka
17. Tpy6ka noDcoeINHeHnK BOOpPBOOHOcTn*
18. Temnep
19. Мернай loхka дя kofoe
20.ФильТр Ha 1чашky 7r
21.Фильтп ha 2чашкn 16 r
22. OdnHapNbIepeKaTeJIb fIJIbTpA
23.Двоиновдерхаельфильтра
24.ΓnyxoΦnIbTp
25. CnIINKOHOBA Tpy6ka IJIa CInBa BOdbl
* B cTaHdapTHoN KOMnIeKTaUuHa HeKOToPbIX MoJeIax
HnKOrda He HaKpbIbAaTe NoIky dIy IODorpeBa YaWeK TkaHbIO, BOJLOKOM N T.I
BCTaBbTe Tpe6yeMbI ΦnIbTp (20-21) B CnEuaJIbHoe rHe3do DePkaTeJy FnIbTpTa (12).
3acbInbTe B fNlbTp 03y MOIOTOro Kofoe, DOCTaTOUHyO dIЯ npnroToBHeHna 1 yawkn nn 2 yawek Kofoe (7-16 r) B 3aBnCmOcTn OT Bbl6paHHoro fNlbTppa (20-21).
- BbipOBHnIe KoFe n Utpam6ynte ero TeMnepeom (18), npoTpne Kpai fNbTpa IaOHBIO, YTO6bl y6paTb OCTaTK KoFe, a 3aTeM BCTaBbTe B Kopnyc rpynnbl (11) depXaTeJIb fNtpa N 3akpeNTe ero DnXKeHnEM BnpaBO.
-ПОДСТАББTe NOД HOCИКУашКИ 3адeиCTByIte rpyPny NocpeDcTBOM COOTBeTcTBYUOSeRo pbluaXka (15). ДЯ pa3dauN KoFe nepemeCTnTe BBepx pbluaXOK rpyPnbl (15), paCNoLOXeHHbI Ha NaHeII.
-После подачи НухноюдзьkoфпpeкразиTe подау,оунctиВpbiuackok rpynnbl (15).
-4To6bl npoJoxnTb npiroTOBHeHne Kofoe,OTcoeHNHTe DBXKeHnEM BLeBO depKataJIbΦNtpa (12)OT rpynnI ydaJInte KofoeHnyo ryu, a 3aTeM NOBTopTe yka3aHHbIe Bblwe DeiCTBnI.

UTo6bI npeDoTbpaTnTb
BO3MOxHbIe OXoRn, He
DOtpaINBaITeCb Do rpynn, a
TaKxe Tpy6ok napa n ropaye
BODbI BO BpeM pa60TbI
MaunHbI HN B KOem clyuae He
NoDCTaBIAJTe pyKn NODrpyPbI N
Tpy6Kn BO BpeM pa3Daun.

EcnMaunHaHOBa,dePkaTeIb
HnIbTpAmoKeT Oka3aTbcra
He BblPOBHeHHbIM,TO eCTb He
NepneHdNKyIpaHbIM MaUNHe
(cm.PncyHok5),OdHaKO 3To He
CKa3bIbAeTcra Ha NcnpaBHO
pa6ote camoMaunHbI.
PiocLe HnPoDoJXnteJIbHOro
NCNoJIb3OBaHNr MaunHbI
dePkaTeJIbΦnIbTpapnoTepeHHo
npmET npaBnIbHOe noLoXkeHne.
G=PiIoXeHne BCTaBHeHHoro
dePkaTeJIaΦnIbTpabHOBO
MaUNHe
H=PiIoXeHne BCTaBHeHHoro
dePkaTeJIaΦnIbTpapocLe
HeIpdoJXnteJIbHOro
NCNoJIb3OBaHNr MaunHbI

3epHa Heo6xOIMOMO MOIOTb HENOCpeCTBeHHO B MOMHT npuroTOBHeHnKoFe, TaK KaK MOIOTbIKoFe OueHb 6bICTpo
TepaT CBOI apOMaTnueckne CBOICTBa. EcII NOMOJ CINuKOM rpy6bI, KoFe nOLyUHTcra CBETbIM IJIeRKM, 6e3 NeHKn, ecII CNIuKOM MeIKN - KoFe 6yJeT TeMHbIM, cpe3KIM BKyCOM n C He6oJIbWoJ peHKOJ.
-Подогретые淘汰н
пдерхиваOT паВьнHyTO
Temперату ТолькочTO
пригOTOBленHOrO Koфe.В CBЯЗИ
СЭТIM поед ИСПОЛБЗОВАнEHМ
peKOMeHДуETСЯТВNTьnx
Ha ПсOTOPHyTO peшЕТКУ ДЯ
Чашек (3), Кда постуаet телл,
ИЗлuyаemoe boйлepOM.
-ДаВлелипсocа
MOXHNo NOCMOTpeTb Ha
COOTBeTCTByIOUeM MaHOMeTpe
BO BpeMpa3dauN. ПраВиьhoe
Знayehne ДaВлелиЯ Дя рa3dauN
Коф paBHo 8-9 6ap.
HENCPABHOCTb PnUHACNOCOBYCTPAHEHNA
- RENGJØRING OG VEDLIKEHOLD
6-1. RENGJØRING AV DAMP-OG VARMTVANNSRØR 168
6-2. RENGJØRING AV UTTAKSENHET OG DUSJSILER 168
6-3. RENGJØRING AV FILTER OG FILTERHOLDER 168
6-4. RENGJØRING AV NEDRE DRYPPBEHOLDER 168
6-5. RENGJØRING AV HOVEDDEL 168
6-6. BYTTE AV GUMMIPAKNING 168
7.ARSAKER TIL MANGLENDE DRIFT ELLER DRIFTSFEIL 170
1. INTRODUKSJON TIL HANDBOKEN
6. RENGJØRING OG VEDLIKEHOLD
6-1. RENGJØRING AV DAMP-OG VARMTVANNSRØ


- USO DELLA MACCHINA
- LPSCCS01, LPSCCB01, LPSCVS01
- DEAR CUSTOMER
- SYMBOLS USED IN THIS MANUAL
- CONTENTS
- INTRODUCTION TO THE MANUAL
- INSTRUCTIONS
- 2-1. SAFETY INSTRUCTIONS
- 2-3. DISPOSAL
- 2-4. RESIDUAL RISKS
- 3.DESCRIPTION
- 3-1. PRODUCT DESCRIPTION
- STARTING THE MACHINE FOR THE FIRST TIME
- 4-1. CONNECTING TO THE WATER SUPPLY
- 4-2. ELECTRICAL CONNECTION AND FIRST USE
- 4-3. MANUAL PRESSURE SWITCH ADJUSTMENT
- 4-4. MANUAL BREWING PRESSURE ADJUSTMENT
- USING THE MACHINE
- 5-1. PREPARED AND DISPENSING COFFEE
- 5-2. DISPENSING HOT WATER
- 5-3. DISPENSING STEAM
- CLEANING AND MAINTENANCE
- 6-1. CLEANING THE STEAM AND HOT WATER NOZZLES
- 6-2. CLEANING THE GROUP HEAD AND SHOWER SCREENS
- 6-3. CLEANING THE FILTERS AND FILTER HOLDERS
- 6-5. CLEANING THE OUTSIDE OF THE MACHINE
- 6-6. REPLACING THE GROUP HEAD GASKET (FIG. 7)
- TROUBLESHOOTING
- PROBLEM CAUSE SOLUTION
- INTRODUCTION AU MANUEL
- CAUSES DE DYSFUNCTIONNEMENT OU ANOMALIES
- PROBÉME CAUSE SOLUTION
- 2-1. VEILIGHEIDSWAARSCHUWINGEN
- 3-1. BESCHRIJVING VAN HET PRODUCT
- PROBLEM OORZAAK OPLOSSING
- LIMPEZA E MANUTENÇA
- 6-1. LIMPEZA DAS LANÇAS DE DISPENSEA DE VAPOR E DE ÁGUA QUENTE
- PROBLEMA CAUSA SOLUÇÃO
- YBAKAEMBL NOKYNATEIB
- BBEDEHNE
- MEPBI IPEDOCTOPOXHOCTN
- 2-1. MEPBL IO TEXHNKE 6E3ONACHOCTN
- 2-2. HA3HAUYEHNE MAUNHBI
- 2-3. YTNJIIN3AUIN
- 2-4. OCTATOUHBIE PNCKN
- ONICAHNE
- 3-1. ONICAHNE N3DEJNIA
- HENCPABHOCTB PNUHACNOCOBYCTPAHEHNA
- INTRODUKSJON TIL HANDBOKEN
- RENGJØRING OG VEDLIKEHOLD
- 6-1. RENGJØRING AV DAMP-OG VARMTVANNSRØ
Brand : LA PAVONI
Model : New Cellini Classic
Category : Coffee machine