Borea BR10 - Speaker TRIANGLE - Free user manual and instructions
Find the device manual for free Borea BR10 TRIANGLE in PDF.

User questions about Borea BR10 TRIANGLE
0 question about this device. Answer the ones you know or ask your own.
Ask a new question about this device
Download the instructions for your Speaker in PDF format for free! Find your manual Borea BR10 - TRIANGLE and take your electronic device back in hand. On this page are published all the documents necessary for the use of your device. Borea BR10 by TRIANGLE.
USER MANUAL Borea BR10 TRIANGLE
MANUFACTURE ELECTROACOUSTIQUE
BOREA

natural_image
Abstract circular diagram with concentric lines and a central symbol, no text or labels presentMode d'emploi & Garantie Owner's manual & Warranty
SOMMAIRE / SUMMARY
MODE D'EMPLOI - FRANÇAIS 5
▶Déballage et manipulation 6
▶Assemblage 7
▶Branchements d'une configuration stéréo 10
▶Unpacking 16
▶Assembly 17
▶Connections for stereo setup 20
▶Stereo positionning 21
▶Connections for home theater setup 22
▶Home theater positionning 23
INFORMATIONS TECHNIQUES / TECHNICAL INFORMATIONS 26
GARANTIE / WARRANTY 28
INSTRUCTIONS DE SÉCURITÉ / SAFETY INSTRUCTIONS 30
MODE D'EMPLOI
FRANÇAIS
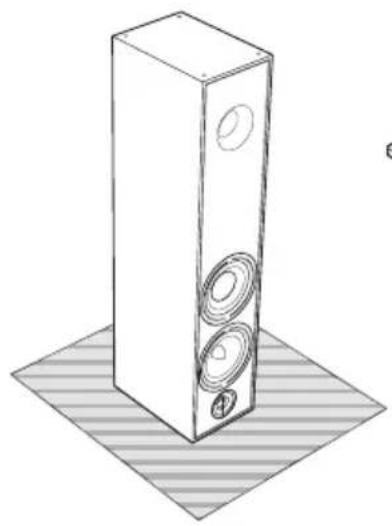
DÉBALLAGE
Contenu pack (BR02, BR03)
natural_image
Line drawing of a tall rectangular speaker with three circular speakers on a patterned base (no text or symbols)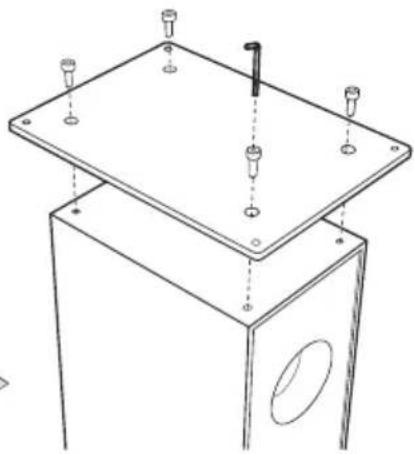
natural_image
Technical line drawing of a mechanical assembly with mounting base and mounting holes (no text or symbols)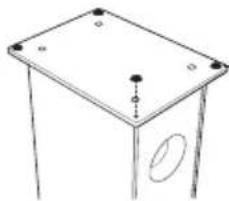
natural_image
Simple line drawing of a rectangular table with a central plate and an oval cutout on the side (no text or symbols)Surfaces rigides (parquet, carrelage) : plots caoutchouc adhésifs
natural_image
Simple line drawing of a rectangular box with a central hole and an oval opening (no text or symbols)natural_image
Isometric line drawing of a tall rectangular speaker with three circular speakers on the front panel, placed on a textured base (no text or symbols)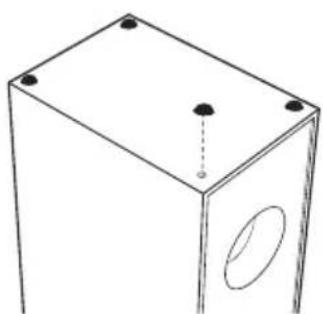
natural_image
Simple line drawing of a rectangular box with two dots at the top and an oval cutout on the side (no text or symbols)Surfaces rigides (parquet, carrelage) : plots caoutchouc adhésifs
natural_image
Line drawing of a rectangular box with a central hole and two mounting holes (no text or symbols)natural_image
Two speakers with circular filters, labeled A and B, placed side by side on a dark background (no text or symbols beyond labels)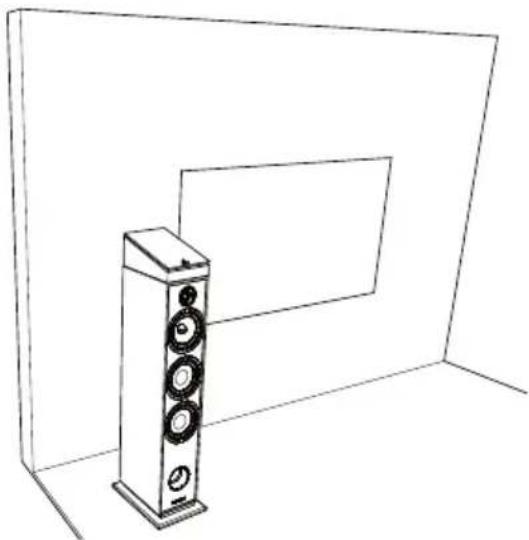
natural_image
Line drawing of a multi-tiered speaker tower mounted on a wall, with no text or symbols present.natural_image
Diagram showing two speaker units labeled A and B, with no text or symbols beyond labels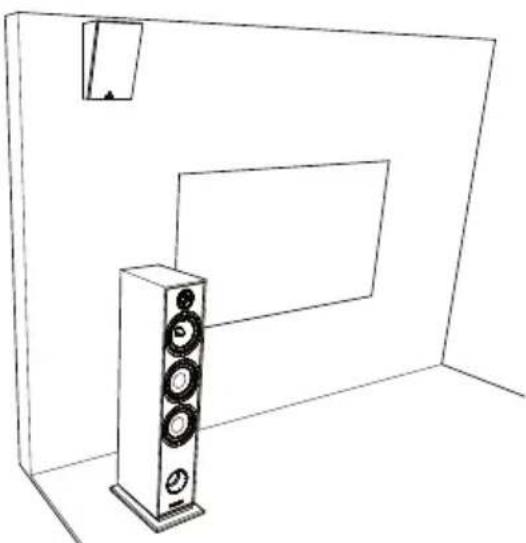
natural_image
Line drawing of a speaker tower with three speakers, mounted on a wall (no text or symbols)BRANCHEMENTS D'UNE CONFIGURATION STÉRÉO
text_image
BR02 BRC1 BR02 BRA1BR03
BR07
BR08
BR09
BR10
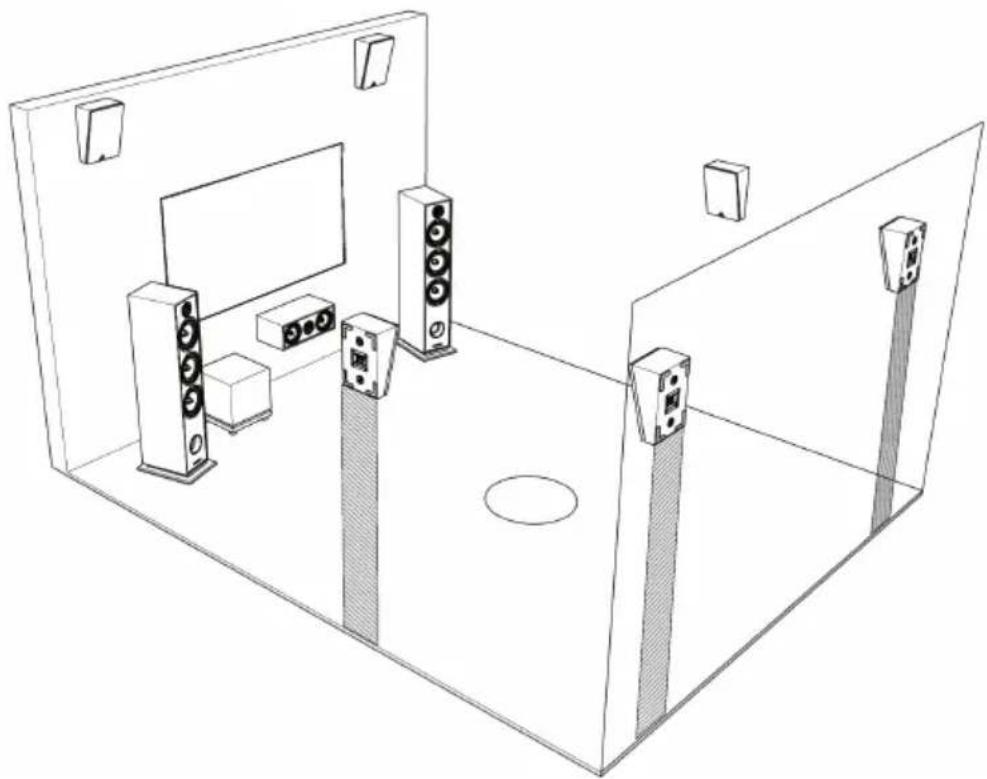
PLACEMENT POUR LE HOME CINÉMA
natural_image
Isometric line drawing of a room with multiple speakers and a central speaker (no text or symbols)Configuration 7.1.2
natural_image
Isometric line drawing of a room layout with speakers, TV, and lighting fixtures (no text or symbols)USER MANUAL
ENGLISH
UNPACKING
Open the box, and take out the speakers and accessories. If you notice any defects in one of the elements as you unpack, please get in touch with your reseller.
Before disposing of the packaging, make sure there is nothing left inside. Each box contains :
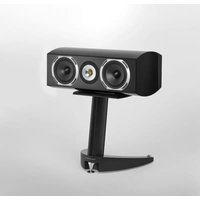
Box content (BRC1)
▶1 x Borea central speaker
▶1 x protection grid
▶4 x adhesive rubber plots
▶1 x user manual
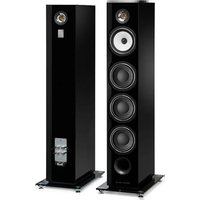
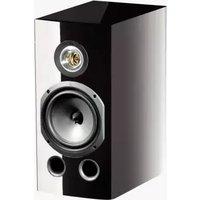
Content pack (BR02, BR03)
▶2 x Borea speakers
▶2 x protections grids
▶8 x adhesive rubber plots
▶1 x user manual
Content pack (BRA1)
▶2 x BRA1 speaker
▶2 x protections grids
▶8 x adhesive rubber plots
▶1 x template
▶1 x user manual
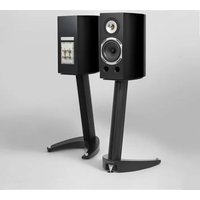
Content pack (from BR07)
▶2 x Borea speakers
▶2 x protections grids
▶2 x pedestals
▶8 x screws
▶1 xpedestal mounting tools
▶8 x adhesive rubber plots
▶8 x decoupling spikes
▶1 x user manual
INSTALLATION PRECAUTIONS
Location to avoid
Install your speakers in a temperate place and avoid humid locations or direct sunlight.
Recycling
Protection of the environment: Your products contain valuable materials which can be recovered or recycled. Take them to the appropriate collection points.
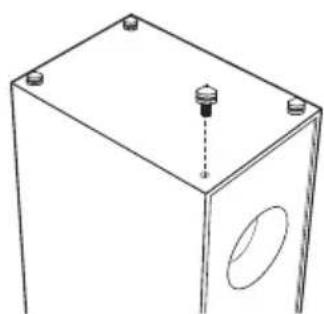
Pedestal and spikes assembly
natural_image
Line drawing of a tall rectangular speaker with three circular speakers on a striped base (no text or symbols)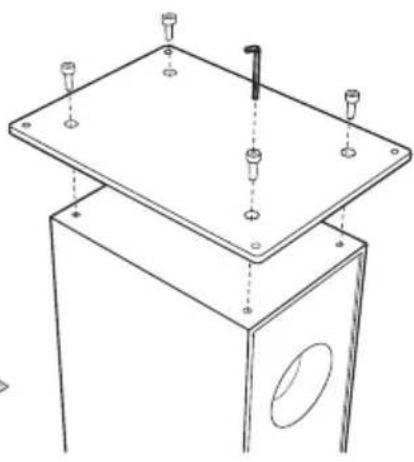
natural_image
Technical line drawing of a mechanical assembly with mounting base and mounting holes (no text or symbols)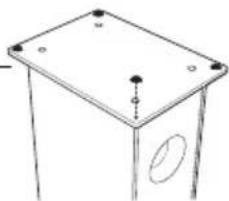
natural_image
Simple line drawing of a rectangular box with a flat top and side panel, no text or symbols present.Rigid ground (wood floor) : adhesive rubber pads

natural_image
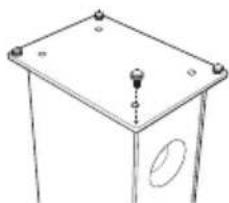
Simple line drawing of a square frame with a central bolt and an oval cutout on the side (no text or symbols)Soft ground (carpet, rug) : metal spikes screwed
12 Place your loudspeaker on the upper face (be sure to place it on a non-abrasive surface).
○ Screw the pedestal using the supplied key and screws.
○ Choose spikes according to your ground.
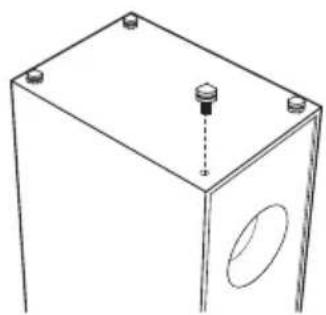
Spike assembly without pedestal
natural_image
Isometric line drawing of a vertical speaker tower with circular sound waves, placed on a textured base (no text or symbols)
natural_image
Simple line drawing of a rectangular box with three dots and an oval cutout on the side (no text or symbols)Rigid ground (wood floor) : adhesive rubber pads
natural_image
Line drawing of a rectangular box with a central hole and two mounting holes (no text or symbols)Soft ground (carpet, rug) : metal spikes screwed
1 Place your loudspeaker on the upper face (be sure to place it on a non-abrasive surface).
② Choose spikes according to your ground.
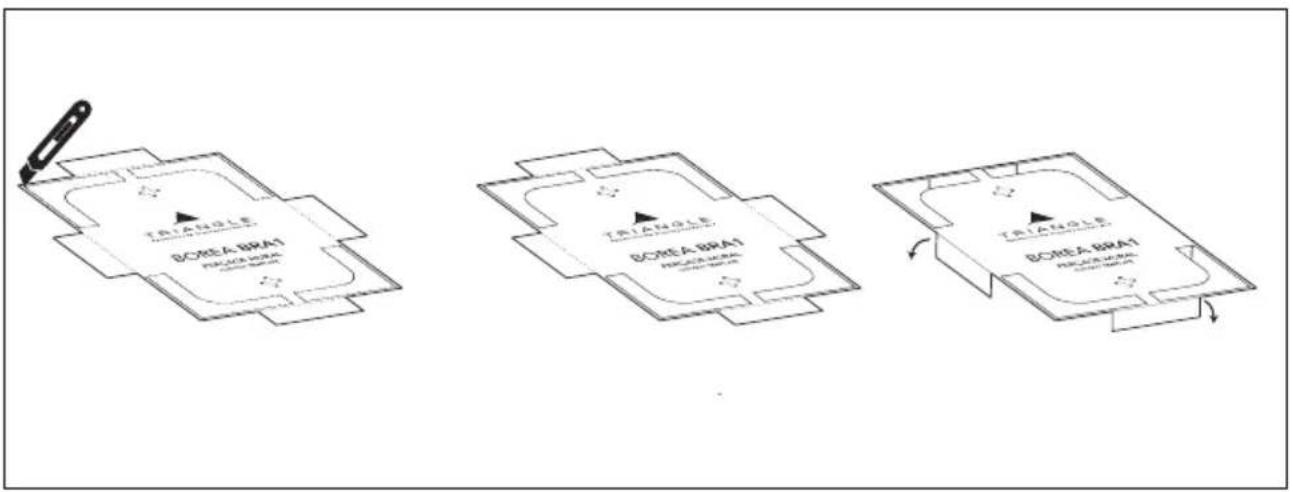
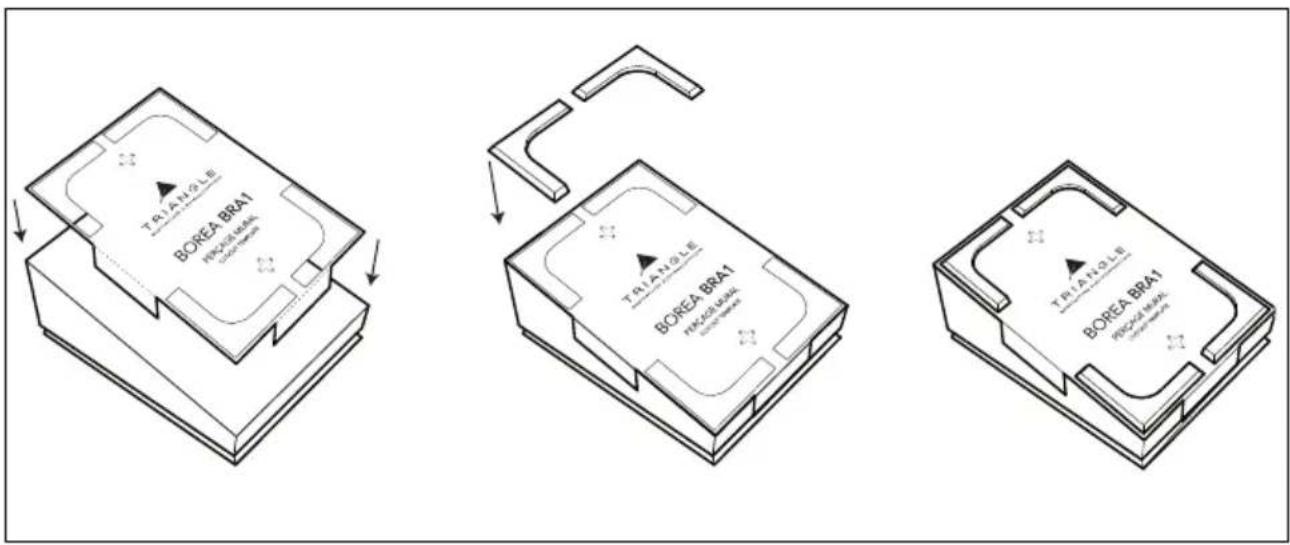
Assembling the pads of the BRA1
text_image
BOREA BRA1 BOREA BRA1 BOREA BRA1 BOREA BRA1
Cut out the template using a pair of scissors or a utility knife to cut around the dotted line.
flowchart
graph TD
    A["Step 1: Triangle BRA1 with BOREA BRA1 in rectangular block"] --> B["Step 2: Triangle BRA1 with BOREA BRA1 in rectangular block"]
    B --> C["Step 3: Triangle BRA1 with BOREA BRA1 in rectangular block"]

Position the template below the speaker, remove the protective stickers and position the pads.
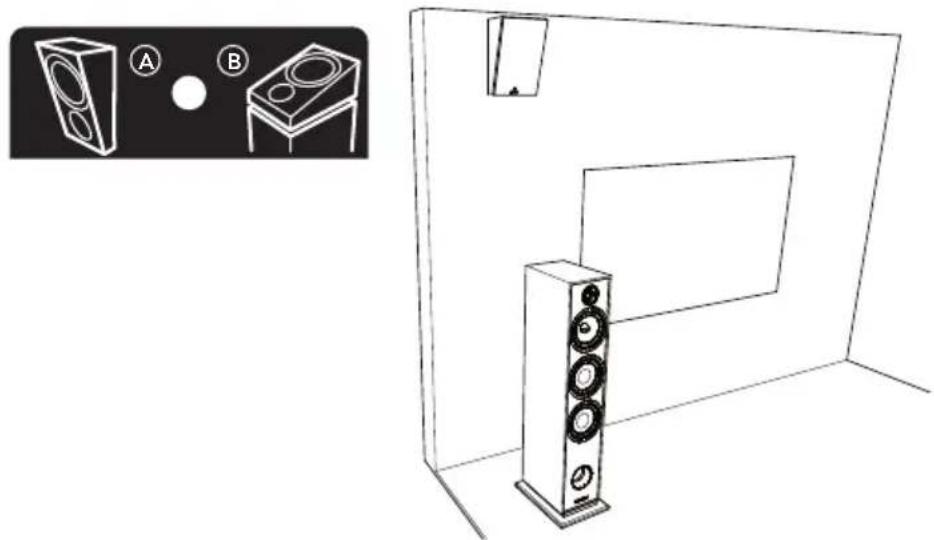
Positioning the BRA1 on a speaker
The BRA1 fits perfectly on the BOREA 03, 07, 08 and 09 speakers. In this configuration, the BRA1 pointing towards your ceiling, will add an effect of space when playing films or TV programs with this kind of sound format.
It is recommended to set the adjustment switch, located on the terminal block, to the position B. This position increases the high frequency of the speaker and thus compensates for the loss of directivity associated with its orientation.

natural_image
Line drawing of a speaker tower with two speakers labeled A and B, shown in an inset image (no text or symbols on the tower itself)Positioning the BRA1 on a wall
The BRA1 can be installed on the wall to be used as an effect channel. Using the template, you can easily determine the drilling points on your wall. Use screws and wall anchors adapted to your wallboard. The diameter of the screws must not exceed 4mm.
It is recommended to set the adjustment switch, located on the terminal block, to the position A. This position corresponds to a normal high-frequency level of the speaker in direct transmission.
natural_image
Line drawing of a room setup with a speaker tower and two speakers labeled A and B, alongside an inset image showing a speaker icon (no text or symbols on main elements)CONNECTIONS
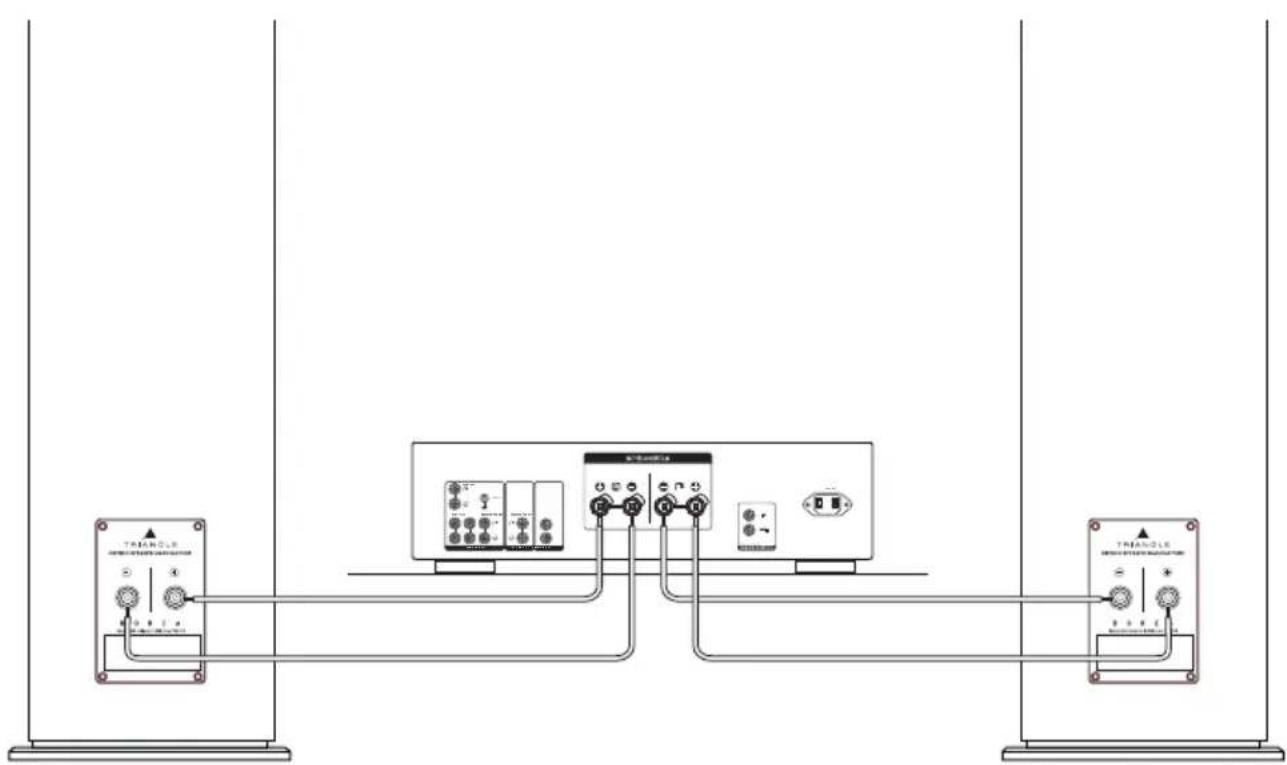
For optimal sound reproduction, we suggest that you choose a loudspeaker cable of high quality to connect your amplifier to your TRIANGLE loudspeakers. You should use cables of the same length for the left and right channels and take special care to respect the + and - polarity for each channel. Don't forget to strip the cables if it's necessary.
flowchart
graph TD
    A["TRIANGLE"] --> B["Control Unit"]
    B --> C["TRIANGLE"]
    A --> D["Measurement Device 1"]
    A --> E["Measurement Device 2"]
    A --> F["Measurement Device 3"]
    A --> G["Measurement Device 4"]
    A --> H["Measurement Device 5"]
    A --> I["Measurement Device 6"]
    A --> J["Measurement Device 7"]
    A --> K["Measurement Device 8"]
    A --> L["Measurement Device 9"]
    A --> M["Measurement Device 10"]
POSITIONING FOR STEREO
When positioning your loudspeakers, apply the following rules:
- Avoid rooms with too much reverberation, such as tiled rooms without carpets or curtains.
- Your listening position should no be too close to the loudspeakers, leave a minimum of 2 m
The distance between the speakers should be a minimum of 2 m for a good stereo effect.
▶ If possible, place the speakers so that sound is «diffused» lengthwise within the room.
- Avoid placing the speaker in corners; they should be at least at 40 cm away from the back wall and at least 50 cm from the sidewalls. Generally, a position close to the rear wall increase the response in the low frequencies (and reduce the imaging) and contrariwise, a position far from the back wall reproduces a wide and deep sound image. Carry out several test positions to find the best room set-up.

text_image
>0.4m >0.5m >0.5m >2m >2mCONNECTIONS FOR A HOME THEATER SETUP
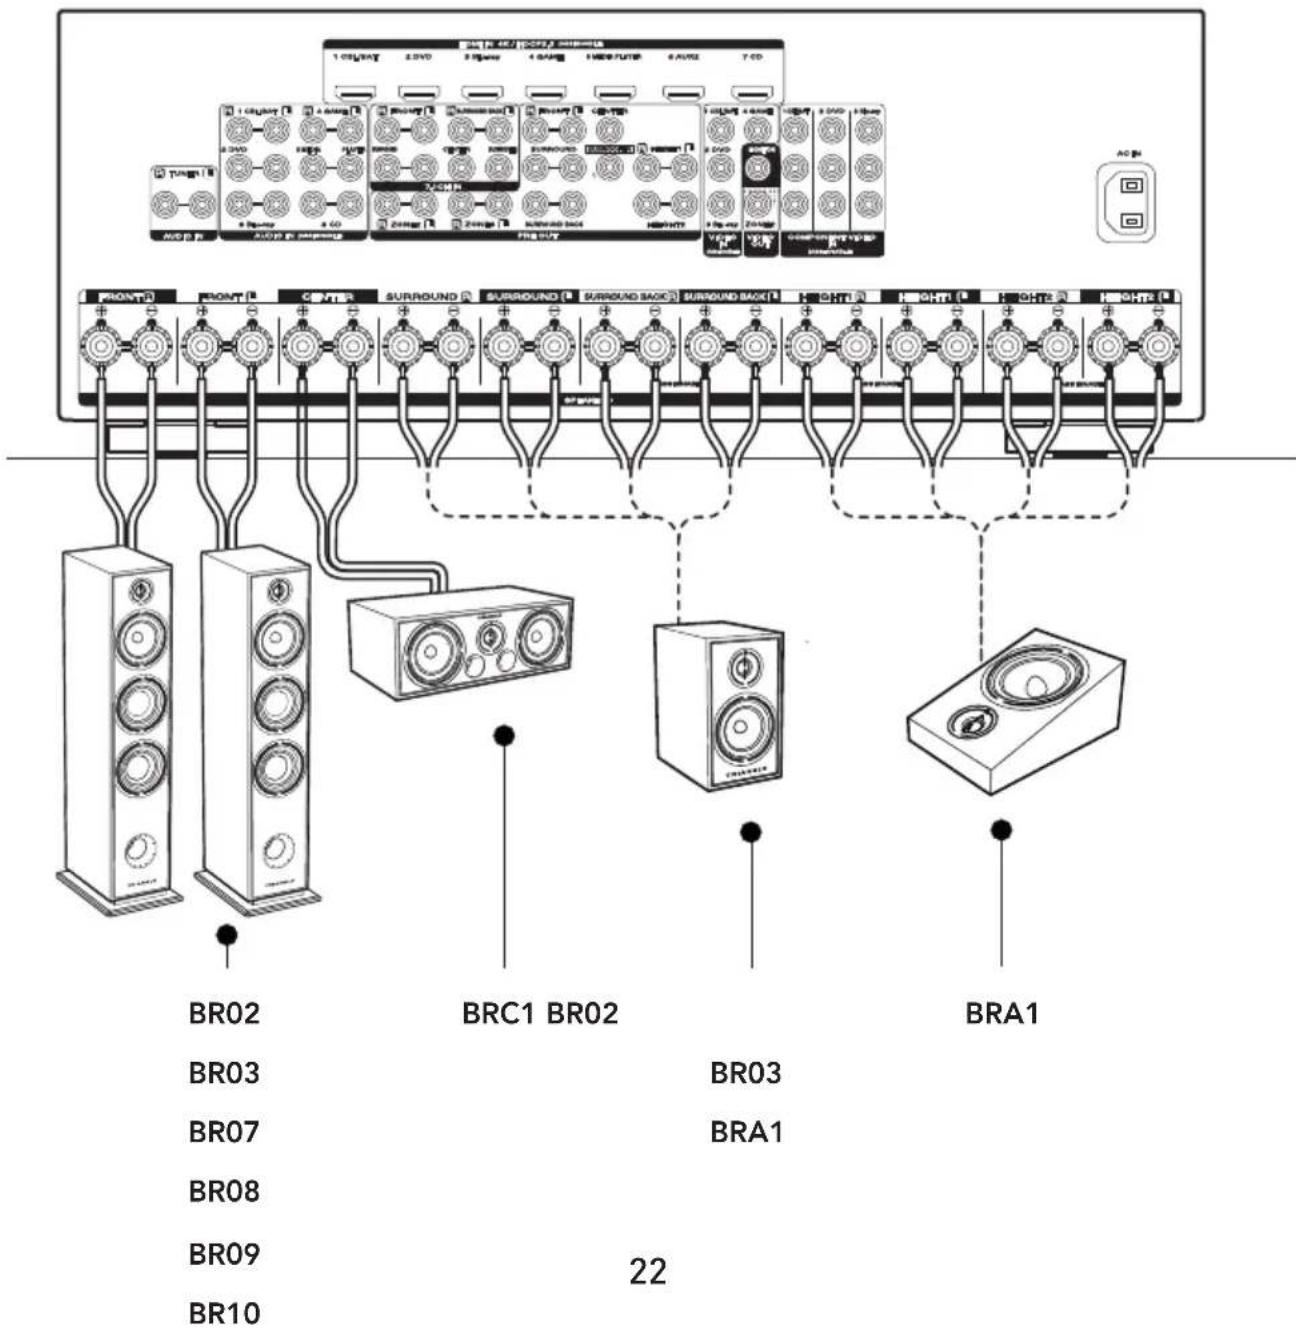
During your speaker installation, please make sure to follow the following rules:
▶ Ensure that you have a high enough cross-section cable, designed specifically for the connection of loudspeakers.
▶ Use identical cable lengths for the left and right speakers. Ensure that the speaker connection polarity (+ and -) is correct. Do not forget to strip the cables if necessary.
- Disconnect your amplifier from AC power during the connection of the speakers. You must check the user's manual of your amplifier to connect your speakers, depending on where they are placed in your room.
The illustration below may be different from the rear panel of your amplifier.
text_image
BR02 BR03 BR07 BR08 BR09 BR10 BRC1 BR02 BR03 BRA1 22 BRA1POSITIONING FOR HOME THEATER
A typical home cinema installation includes:
- Two main speakers, left and right
- A center speaker
- One or several subwoofers
- Surround speakers
To place the main speakers in the best position, follow the same rules as for a stereo installation (see previous page on stereo positioning).
The center speaker should be placed along the line formed by the two main speakers.
For home cinema setups a subwoofer is highly recommended in order to reproduce the special bass effects channel featured on supports such as DVD audio or video. The positioning of the subwoofer is not critical if you select a crossover frequency below 80 Hz. Above this frequency, it is better to move the subwoofer closer to the main speakers. The best position being in between the two main speakers. Ensure that it is not placed in the corner of the room to avoid creating unpleasant resonances.
We recommend that you place the rear speakers at between 1.5 and 2 m of height. Their role is to reproduce surround sound. Ensure that you take into account the weigh of the speaker when fixing it onto the wall.
You will find further instructions for configuring your installation in your A/V amplifier owner's manual.
SUGGESTIONS FOR A HOME THEATER
5.1.2 Configuration
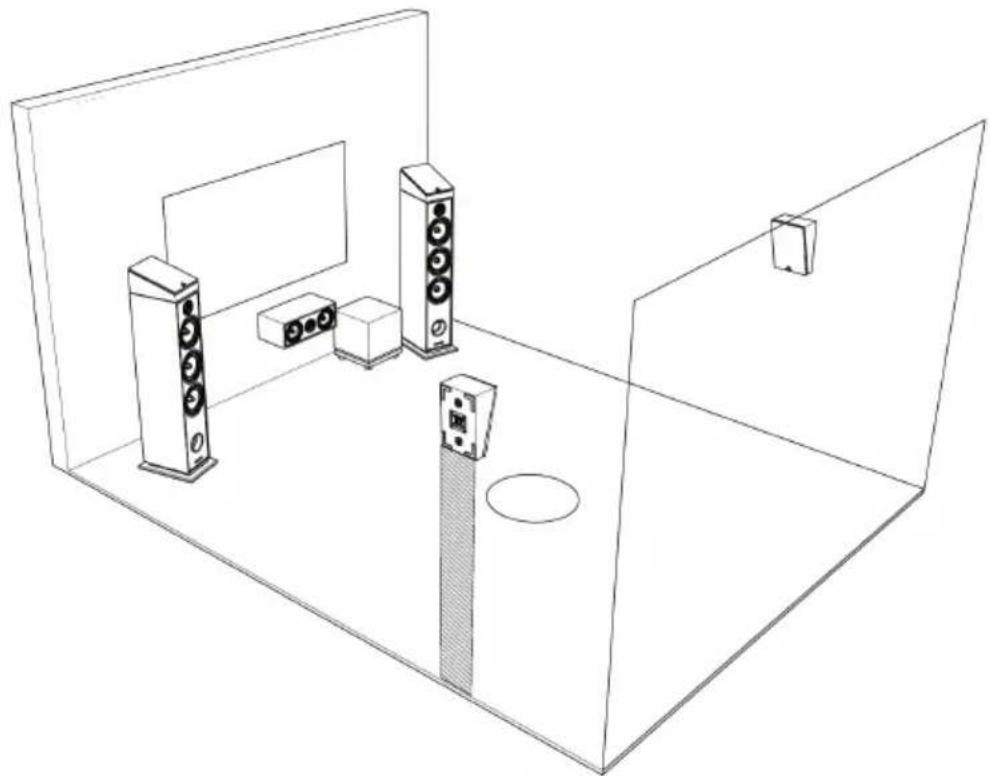
natural_image
Isometric line drawing of a room with multiple speakers and equipment (no text or symbols)7.1.2 Configuration
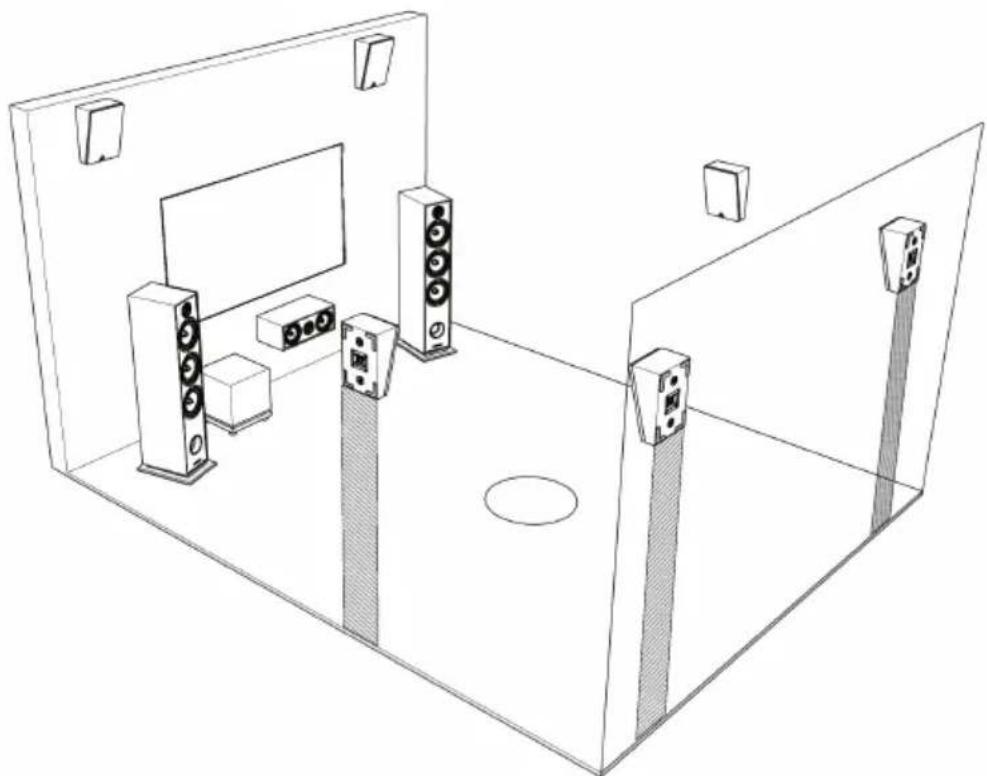
natural_image
Isometric line drawing of a room layout with speakers, TV, and lighting fixtures (no text or symbols)GAMME BOREA / BOREA RANGE
| Spécifications techniquesTechnical specifications | BRA1 BRC1 BR02 | ||
| Type | Voie d'effetsSurround speaker | Voie CentraleCentral speaker | Enceintes bibliothèquesBookshelf Speakers |
| Nombre de voiesWays | 2 2 2 | ||
| Haut-parleursSpeakers | Tweeter : 25mm / 1"Medium/Bass : 16 cm/ 6,5 " | Tweeter : 25mm / 1"Medium/Bass : 13 cm/ 5,1 " | Tweeter : 25mm / 1"Medium/Bass : 13 cm / 5,1 " |
| Sensibilité (dB/W/m)Sensitivity | 89 90 89 | ||
| Bande passante Bandwidth(+/- 3dB Hz-KHz) | 90- 22 57 - 22 51 - 22 | ||
| Puissance admissiblePower handling (W RMS) | 80 100 80 | ||
| Impédance minimale / optimale Minimal / Optimal impedance(Ohms) | 4,5 / 8 5.3 / 8 3.6 / 8 | ||
| Dimensions (LxHxP)(mm/inch) | 206 x 180 x 3008.11 x 7.08 x 11.8 | 485 x 176 x 27419.09 x 6.92 x 10.78 | 176 x 310 x 2746.92 x 12.2 x 10.78 |
| Poids de l'enceinte avec socleNet weight with pedestal | 3.75 kg8.26 lbs | 7.52 kg16.57 lbs | 4.87 kg10.7 lbs |
| Poids avec packagingGross weight with packaging | 8.5 kg18.73 lbs | 8.45 kg18.62 lbs | 11.79 kg25.9 lbs |
natural_image
Line drawing of a multi-tiered speaker tower with visible sound waves and a central button (no text or symbols)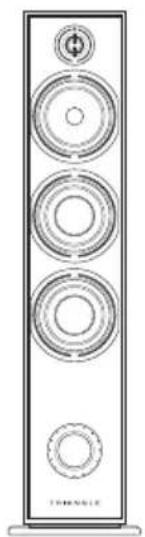
natural_image
Vertical speaker tower with four circular speakers and a power button, no visible text or symbols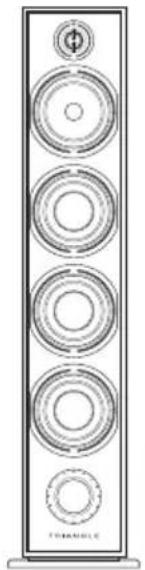
natural_image
Line drawing of a four-tiered speaker tower with no text or symbols
natural_image
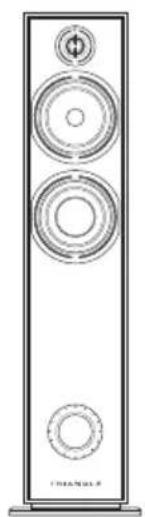
Line drawing of a multi-tiered speaker tower with concentric circles and a small top component (no text or symbols)| BR03 BR07 BR08 | BR09 BR10 | |||
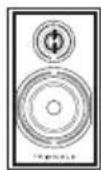
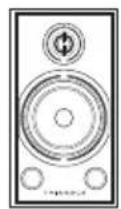
| Enceintes bibliothèques Bookshelf Speakers | Enceintes colonne Floorstand speakers | Enceintes colonne Floorstand speakers | Enceintes colonne Floorstand speakers | Enceintes colonne Floorstand speakers |
| 2 2.5 3 3 3 | ||||
| Tweeter : 25mm / 1" Medium/Bass : 16 cm / 6,5 " | Tweeter : 25mm / 1" Medium : 16 cm / 6,5 " Woofer : 16 cm / 6,5 " | Tweeter : 25mm / 1" Medium : 16 cm / 6,5 " Woofer : 16 cm / 6,5 " | Tweeter : 25mm / 1" Medium : 16 cm / 6,5 " Woofer : 16 cm / 6,5 " | Tweeter : 25mm / 1” Medium : 16 cm / 6,5 " Woofer : 21 cm / 8,2 " |
| 90 91 92 92.5 92 | ||||
| 46 - 22 44 - 22 40 - 22 35 - 22 30 - 22 | ||||
| 100 120 150 170 200 | ||||
| 4.2 / 8 5 / 8 | 3 / 8 | 3.3 / 8 | 3 / 8 | |
| 206 x 380 x 314 8.11 x 14.96 x 12.36 | 206 x 980 x 314 8.11 x 38.58 x 12.36 | 206 x 1020 x 314 8.11 x 40.15 x 12.36 | 206 x 1095 x 314 8.11 x 43.11 x 12.36 | 245 x 1110 x 380 9.64 x 43.7 x 14.96 |
| 6.26 kg 13.22 lbs | 18.95 kg 41.77 lbs | 21.2 kg 46.29 lbs | 23.4 kg 51.58 lbs | 29.5 kg 65.03 lbs |
| 16.64 kg 36.68 lbs | 23.05 kg 50.81 lbs | 24.01 kg 52.91 lbs | 26.1 kg 57.54 lbs | 34.5 kg 76.05 lbs |
GARANTIE / WARRANTY
Thanks for buying a TRIANGLE product.
We want you to enjoy your purchase to the fullest. The first step is an easy registration of your product. By doing this, you will benefit from helpful tips, products support, special offers and a 3 years extension warranty.
Online registration
Register your product easily online at the following address: http://register.trianglehifi.com/
Note on the warranty
Your TRIANGLE loudspeakers are warranted for 2 years. This warranty takes effect from the date of purchase and covers any manufacturing defect or damage your loudspeakers could suffer as a result of these same defects. This warranty is granted solely to the first owner of the product and is not transmittable in the case of resale. To validate your warranty, you will need to register online or mail the warranty coupon to TRIANGLE. Please note, this warranty is voided if any fault arises from ill-treatment or careless handling of the product.
The following are excluded from this warranty:
- A burned voice-coil caused by overloading the loudspeaker
- Any fault occurring from professional usage (public sound systems, PA systems, etc.)
- Any fault resulting from storage in areas of high humidity
- Improper use of the product (hearing too loud, unsuitable amplifier, etc.)
• A pierced or torn membrane - A torn suspension
- Any fault resulting from a mechanical shock (e.g. if dropped or handled roughly)
- Any fault arising from servicing by anyone other than an authorized TRIANGLE service technician
• Damaged cabinets due to mishandling
INSTRUCTIONS DE SÉCURITÉ
WARNING: Read carefully all the safety instructions before using the device.
- Keep these safety instructions for future reference.
- Do not use this apparatus near water or liquid.
- Only clean with a dry and soft cloth.
- Make sure the openings (vents) on the device are not blocked.
- Do not install near any heat sources such as radiators, stoves, or any other apparatus (including amplifiers) that produce heat.
- Only use accessories specified by the manufacturer.
- Be sure that the stand/table/furniture is strong enough to support the apparatus (stand, shelf, furniture...).
- Protect the power cord from being walked on or pinched, particularly at the plugs, and protect the connector where it exits from the apparatus.
- Unplug the apparatus during lightning storms or when it's unused for long periods of time.
- The plug of the apparatus must fit with the outlet. Never modify the plug in any way. The apparatus should be connected to a mains socket outlet with protective earthing connection.
- Refer to your authorized TRIANGLE dealer or qualified service personnel if the apparatus is damaged in any way. For example, if the power cord or the wall outlet is damaged, liquid has been spilled or objects have fallen on the apparatus, the apparatus has been exposed to rain or moisture, does not operate normally, or has been dropped.

text_image
CAUTION RISK OF ELECTRIC SHOCK DO NOT OPENwww.trianglehifi.com
facebook.com/trianglehifi

instagram.com/trianglehifi

x.com/trianglehifi