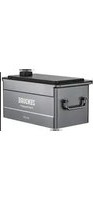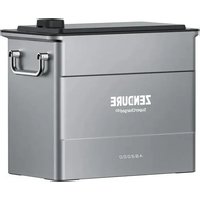
AB2000 - Inverter Zendure - Free user manual and instructions
Find the device manual for free AB2000 Zendure in PDF.


| Product type | Hybrid solar inverter with battery storage |
| Brand | Zendure |
| Model | AB2000 (Hyper 2000) |
| Dimensions (L x W x H) | 350 x 202 x 78 mm |
| Weight | Approximately 8.5 kg |
| Photovoltaic (PV) input power | 4 PV ports, voltage 15-55 V, recommended power 350-550 W per port, 2 MPPT of 900 W each (total 1800 W) |
| AC output power | Nominal power 1200 W, voltage 220/230/240 V, current 5.5 A, frequency 50 Hz |
| Battery power | Max input 1600 W (with multiple batteries), max output 1200 W, compatible AB1000/AB2000 |
| Main functions | Hybrid solar conversion, intelligent energy management, real-time tracking via app, WiFi/Bluetooth connection, OTA update, priority AC output |
| Maintenance and cleaning | Disconnect all cables before cleaning. Use only a dry cloth. Do not use chemicals or detergents. |
| Safety | IP65 rating (dust and water jet protection), do not immerse, do not expose to excessive heat, use only original cables |
| Spare parts and repairability | Use exclusively original Zendure spare parts. Any repair must be carried out by a qualified technician. Do not disassemble the device. |
| General information | CE certification. Warranty via Zendure help center. Zendure mobile app for setup and monitoring. Manual available in multiple languages. |
Frequently Asked Questions - AB2000 Zendure
User questions about AB2000 Zendure
0 question about this device. Answer the ones you know or ask your own.
Ask a new question about this device
Download the instructions for your Inverter in PDF format for free! Find your manual AB2000 - Zendure and take your electronic device back in hand. On this page are published all the documents necessary for the use of your device. AB2000 by Zendure.
USER MANUAL AB2000 Zendure
EN Contact US/Claim the Product Warranty
If you have any questions or need to claim the product warranty, please scan the QR code below to visit the Zendure help center and submit a ticket.
text_image
QR code image containing encoded data, no visible human-readable textDE FR、EU
text_image
QR code image containing encoded data, no visible human-readable textZENDURE
SuperCharged
EN Return, Refund and Warranty Policy
Please scan the QR code below for always up-to-date information on the details of the return, refund, and warranty policy for your product.
text_image
QR code image containing encoded data, no visible human-readable text
text_image
QR code image containing encoded data, no visible human-readable text
text_image
QR code image containing encoded data, no visible human-readable textDisclaimer
Read all safety guidelines, warnings and other product information in this manual carefully, and read any labels or stickers attached to the product before using. Users take full responsibility for the safe usage and operation of this product. Familiarize yourself with relevant regulations in your area. You are solely responsible for being aware of all relevant regulations and using Zendure products in a way that is compliant. Keep this manual for future reference.
Contents
- Safety Instructions .... 1
1.1 Usage 1
1.2 EC DECLARATION OF CONFORMITY 3
-
Symbols Used in This Guide ....3
-
Important Tips ....4
-
What's in the Box 4
-
Overview .... 5
5.1 System Overview .... 5
5.2 Product Overview ....6
5.3 Button Controls ....6
5.4 LED Display 7
- Installing Your Hyper 2000 Hybrid Inverter ....8
6.1 Pre-assembly 8
6.2 Assembly Process 10
6.3 Installing Multiple Hyper 2000 Sets ....12
6.4 Product Placement and Cable Management .... 13
-
Zendure App Setup 14
-
Maintenance ....14
8.1 Disconnection of the cables 14
8.2 Troubleshooting 15
- Technical Specifications ....16
1. Safety Instructions
1.1 Usage
-
Read all up-to-date documents carefully before installing, using or servicing the product. Documentation is subject to change over time.
-
Please check whether the Hyper 2000 hybrid inverter is damaged, cracked, leaking liquids, becoming hot, or exhibiting other abnormalities, and check any cables for damage before operating. If there are any problems, please stop using the product immediately and contact our customer service.
-
Do not place heavy objects on top of the Hyper 2000 hybrid inverter.
-
Make sure all cords and plugs are intact and dry before connecting to avoid electric shock.
-
Do not install or operate the system under extreme climatic conditions such as lightning, snow, heavy rain, strong winds, etc.
-
To reduce the risk of injury, close supervision is necessary when the product is used near children.
-
Do not put fingers or hands into the product.
-
For safety purposes, please use only the original charger and cables designed for the equipment. We are not liable for damage caused by third party equipment, and this may render your warranty invalid.
-
Keep a distance of 50mm between the Hyper 2000 hybrid inverter and other objects.
-
During the operation of the solar energy system, avoid direct sunlight to prevent the Hyper 2000 hybrid inverter from overheating. Do not place the Hyper 2000 hybrid inverter near any heat source.
-
Please install the product according to our user manual to avoid damage to the product or injury to other people.
-
Do not use this product near strong static electricity or strong magnetic fields.
-
Do not place the equipment in an environment with flammable or explosive compounds, gas, or smoke. Since the Hyper 2000 hybrid inverter relies on the shell to dissipate heat, exposing the enclosure to excessive heat will lead to damage.
-
To reduce the risk of damage to the electric cords and connectors, pull the connectors rather than the cord when disconnecting the product.
-
Do not use the product in excess of its output rating. Overloads may result in a risk of fire or injury to persons.
-
Do not use any products or accessories that are damaged or modified. Damaged or modified batteries may exhibit unpredictable behavior resulting in fire, explosion, or risk of injury.
-
Do not operate the product with a damaged cord or plug, or a damaged output cable.
-
Do not disassemble the product. Take it to a qualified service person when service or repair is required. Incorrect handling may result in a risk of fire or electric shock.
-
Do not expose the product to fire or high temperatures.
-
Do not attempt to replace the internal components of the equipment by any unauthorized personnel. Have servicing performed by a qualified repair person using only identical replacement parts. This will ensure that the safety of the product is maintained.
-
The Hyper 2000 hybrid inverter has a protection level of IP65, so the product cannot be immersed in liquids. If the product accidentally falls into water during use, please place it in a safe and open area and stay away from it until it is completely dry. The dried product should not be used again and should be properly disposed of according to the disposal guidelines in this manual.
-
The product may feel warm when it's working. This is a normal operating condition and should not be a cause for concern.
-
To reduce the risk of electric shock, disconnect the solar photovoltaic panels, batteries, and home grid before attempting any instructed servicing.
-
When charging the battery, work in a well-ventilated area and do not restrict ventilation in any way, as inadequate ventilation may cause permanent damage to the equipment.
-
Do not clean the product with harmful chemicals or detergents. Only clean it with a dry cloth.
-
Do not move or shake the unit while operating as vibrations and sudden impacts may lead to poor connections to the hardware inside.
-
Ensure that the Hyper 2000 hybrid inverter and the batteries are installed securely to avoid accidents and product damage caused by falling.
-
In case of a fire, only a dry powder fire extinguisher is suitable for this product.
-
Servicing of batteries should be performed or supervised by personnel knowledgeable about batteries and the required precautions.
1.2 EC DECLARATION OF CONFORMITY
ZENDURE TECHNOLOGY CO., LIMITED declares that the Hyper 2000 hybrid inverter complies with directive 2014/53/EU (RED), 2011/65/EU(RoHS), 2015/863/EU(RoHS).
The full text of the Declaration of Conformity is available at the following web address: https://zendure.de/pages/download-center
| CE | Declaration of conformityThe EU Declaration of Conformity can be requested at this address: https://zendure.de/pages/download-center |
 | Disposal and RecyclingDisposal of packaging: dispose of the packaging separately by type of material. |
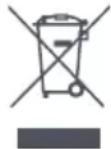 | Disposal of old equipment (applies in the European Union and other European countries with separate collection (waste collection) Old equipment must not be disposed of in household waste.Every consumer is legally obligated to dispose of old equipment that can no longer be used separately from household waste, for example at a collection point for recyclables.To ensure proper recycling and avoid negative impact on the environment, electronic devices must be taken to an appropriate collection site. For this reason, electronic devices are marked with the symbol shown to the left. |
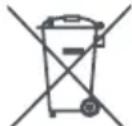 | Batteries and accumulators must not be disposed of in household waste. As a consumer, you are legally obligated to dispose of all batteries and accumulators, regardless of whether they contain pollutants or not, at a designated collection point.Marked with: Cd = Cadmium, Hg = Mercury, Pb = Lead. Discharge any built-in or accessory batteries before disposing. |
2. Symbols Used in This Guide
| Symbol Explanation | |
 | A high-risk hazard that, if not avoided, could result in death or serious injury. |
 | Important information that you must pay attention to. |
 | Included with your product |
 | Optional (not included) |
 | Indicates additional information on correct use or useful tips. |
3. Important Tips
 | The solar PV system is grid-tied. Please check if it is allowed in your area. we can remove this part. |
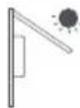 | The Hyper 2000 hybrid inverter should be protected from direct sunlight to prevent rapid temperature increase. |
 | Please check the required accessories before installation, as some accessories need to be purchased separately. |
 | After installation, please download the Zendure app to experience more smart features. |
 | It takes about 1 minute to connect to the grid after completing the installation and first startup of the Hyper 2000. |
 | Use the Zendure app to set the AC output power to the home. Make sure it doesn't exceed the safety power requirements of your country or region. |
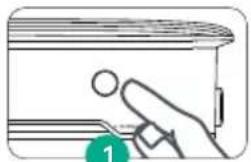
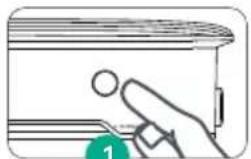
 | Please turn off the device (press and hold the button on the Hyper 2000 hybrid inverter for 6 seconds) and disconnect all power cables before removing. |
4. What's in the Box
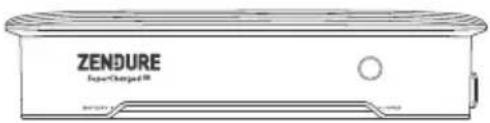
natural_image
Line drawing of a ZENDURE brand air conditioner unit (no text or symbols on body)
natural_image
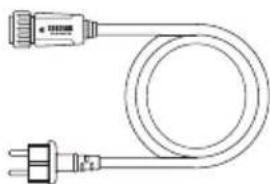
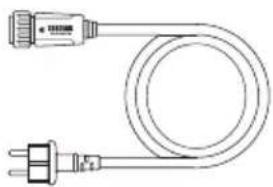
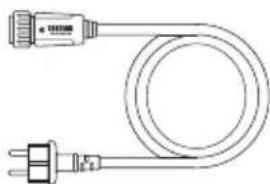
Pure electrical circuit lines without any symbolsHyper 2000 hybrid inverter 3m 10A AC power cableUser Manual
natural_image
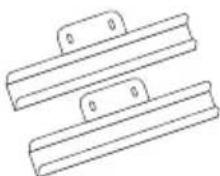
Pure technical line drawing of two parallel metal brackets with mounting holes (no text or symbols)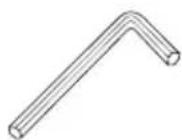
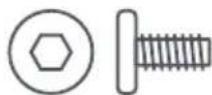
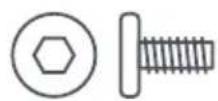
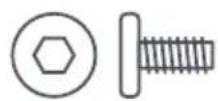
Bracket × 2 M4 Screw × 4M4 screwdriver × 1
5. Overview
5.1 System Overview
flowchart
graph LR
    A["Power Grid"] --> B["Control Panel"]
    B --> C["Motor"]
    C --> D["Solar Panel"]
    D --> E["Main Control Unit"]
    E --> F["Main Motor"]
    F --> G["Main Control Unit"]
    G --> H["Main Solar Panel"]
    style A fill:#f9f,stroke:#333
    style H fill:#ccf,stroke:#333
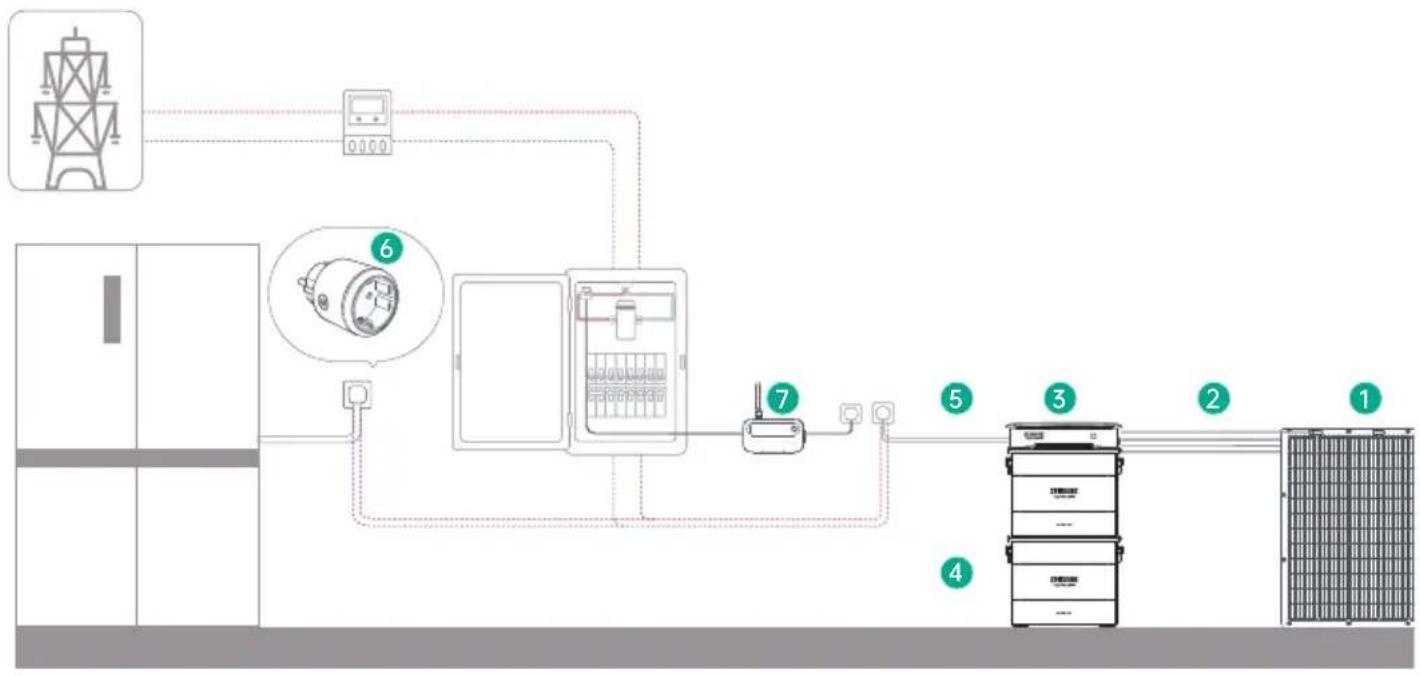
| Name Description | Included / Not Included | ||
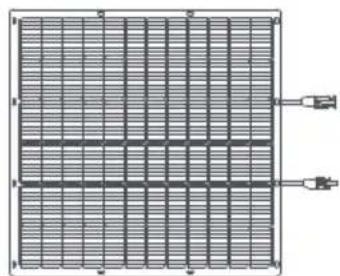
| 1 Solar Panel | One Hyper 2000 hybrid inverter can connect with up to four sets of solar modules. |  | |
| 2 Solar Cables | Used for the connection between The Hyper 2000 hybrid inverter and solar panels. |  | |
| 3 | Hyper 2000 hybrid inverter | Interconnects solar panels, batteries, and the household grid to efficiently operate the energy storage system and streamline power conversion among them. |  |
| 4 | AB1000/2000 Battery | Stores electricity for household consumption as needed. |  |
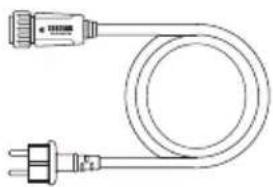
| 5 AC Power Cable Connects the Hyper 2000 to household socket. |  | ||
| 6 | Zendure Satellite Plug | Used to monitor device performance and communicate wirelessly with Hyper 2000 hybrid inverter to optimize energy usage. |  |
| 7 | Zendure Satellite Monitor CT | Monitors household electricity consumption and wirelessly communicates with the Hyper 2000 hybrid inverter to optimize energy usage. |  |

Optional accessories are available for purchase on the official Zendure website.
5.2 Product Overview

text_image
ZENDURE SuperCharged™ 1 2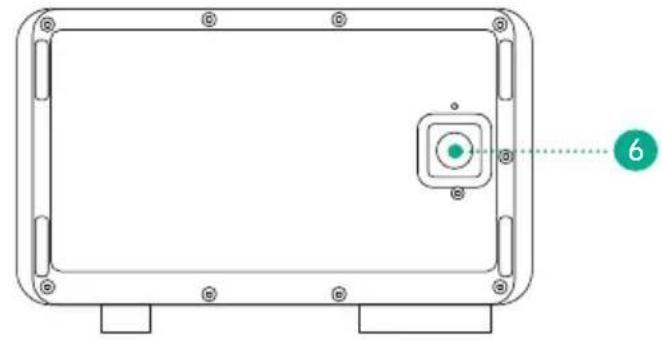
natural_image
Technical line drawing of a rectangular electronic device with mounting holes and a central square button (no text or symbols)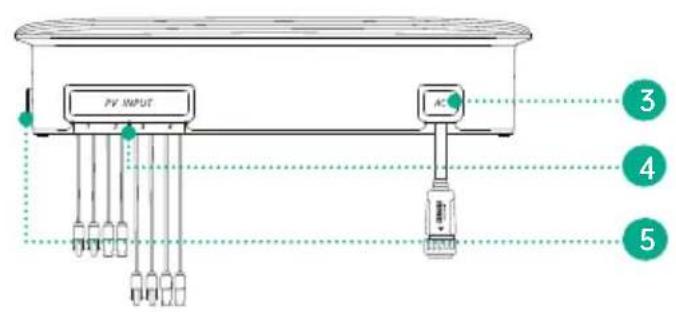
text_image
PV INPUT AC 3 4 5| 1 | Button |
| 2 | LED Light Strip |
| 3 | AC Port |
| 4 | PV Inputs 1-4 |
| 5 | Antenna |
| 6 | Battery Terminal |
5.3 Button Controls
| Button Action Function | ||
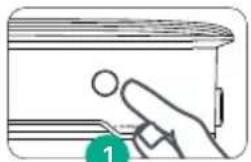
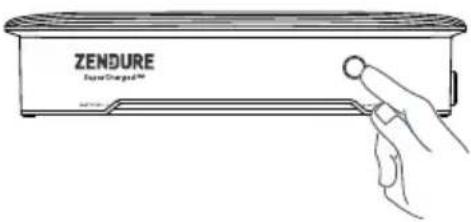 | Press once when powered on | The LED lights up to display the remaining battery level or other operational statuses. |
| Press for 2 second Turn on the Hyper 2000 | ||
| Press for 3 seconds Reset Wi-Fi connection | ||
| Press for 6 seconds Turn off the Hyper 2000 | ||
| Press for 10 seconds Reset the Hyper 2000 | ||
5.4 LED Display
| LED Indicator LED Description Detailed Explanation | ||
| Solid green | Operating normally and displaying the battery level from 0% to 100% | |
| Pulsing green Charging the Battery | ||
| Pulsing green Attempting network pairing | ||
| Breathing green Operating normally | ||
| Green and blue Updating via OTA | ||
| Solid yellow Blinking yellow Blinking red | Please check the "Troubleshooting" section for details | |
6. Installing Your Hyper 2000 Hybrid Inverter
6.1 Pre-assembly
This user guide only describes the cable connection method and assembly of the Hyper 2000 hybrid inverter. To install solar modules, please read the instructions for the solar module and accessories.
We recommend carrying out any solar-related setup on a sunny day, as it will be easier to assess the performance of your system and check for any issues.
Choose a location for the Hyper 2000 hybrid inverter
Make sure the Hyper 2000 hybrid inverter is within the Wi-Fi coverage area.

text_image
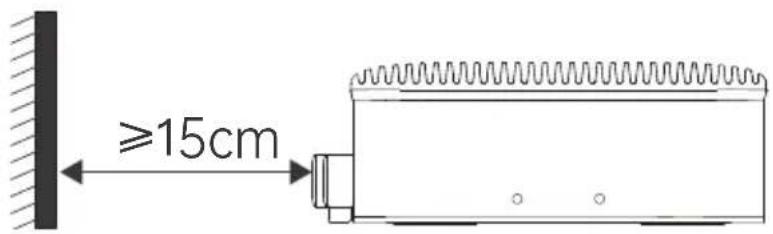
ZENDURE SuperCharger™ ZENDURE SuperCharger™The antenna casing on the device needs to be at least 15cm away from the wall.
text_image
≥15cmPlease install the Hyper 2000 within the length range of the solar panel and 3m AC connection cables, otherwise an extension cable may be required.

text_image
≤3m ZENDURE Super-Charged™Do not place the Hyper 2000 hybrid inverter in an area where flammable or explosive materials are stored.

text_image
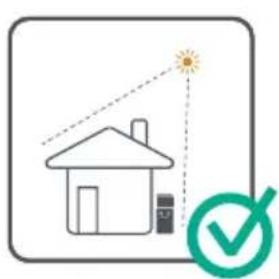
ZENDURE Super-Charged HV OFFICE ZENDURE Super-Charged HV OFFICE ZENDURE Super-Charged HV OFFICE ZENDURE Super-Charged HV OFFICE ZENDURE Super-Charged HV OFFICE ZENDURE Super-Charged HV OFFICE ZENDURE Super-Charged HV OFFICE ZENDURE Super-Charged HV OFFICE ZENDURE Super-Charged HV OFFICE ZENDUREThe Hyper 2000 hybrid inverter can be installed indoors or outdoors. Be sure the device is placed in area where it will not be subjected to direct sunlight or rain.
natural_image
Simple line drawing of a house with a sun and a checkmark icon (no text or symbols)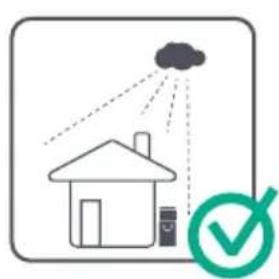
natural_image
Simple line drawing of a house with a cloud and a checkmark icon (no text or symbols)
natural_image
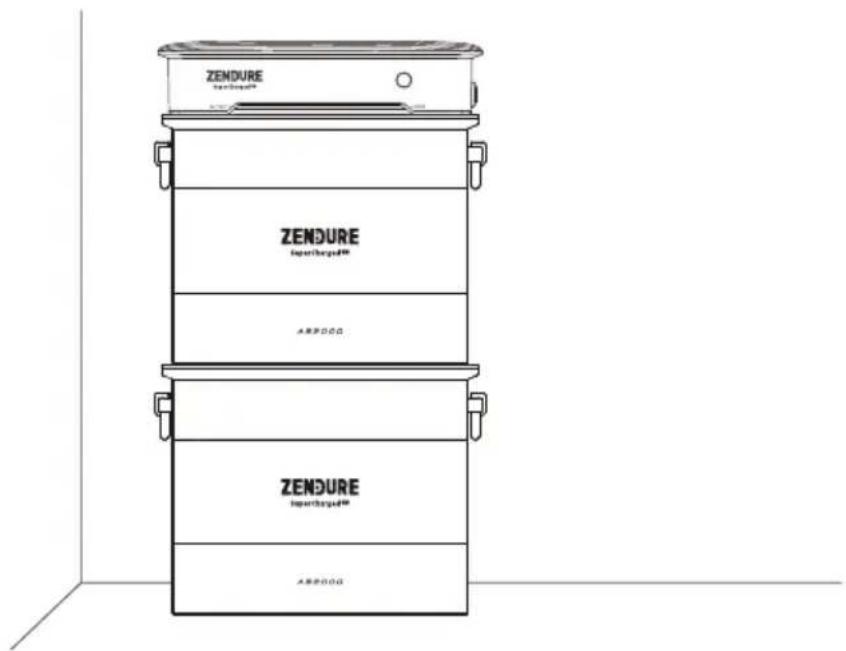
Simple line drawing of a house with a sun and a warning symbol (no text or labels)Position your Hyper 2000 hybrid inverter and batteries (not included) on a hard, level floor.
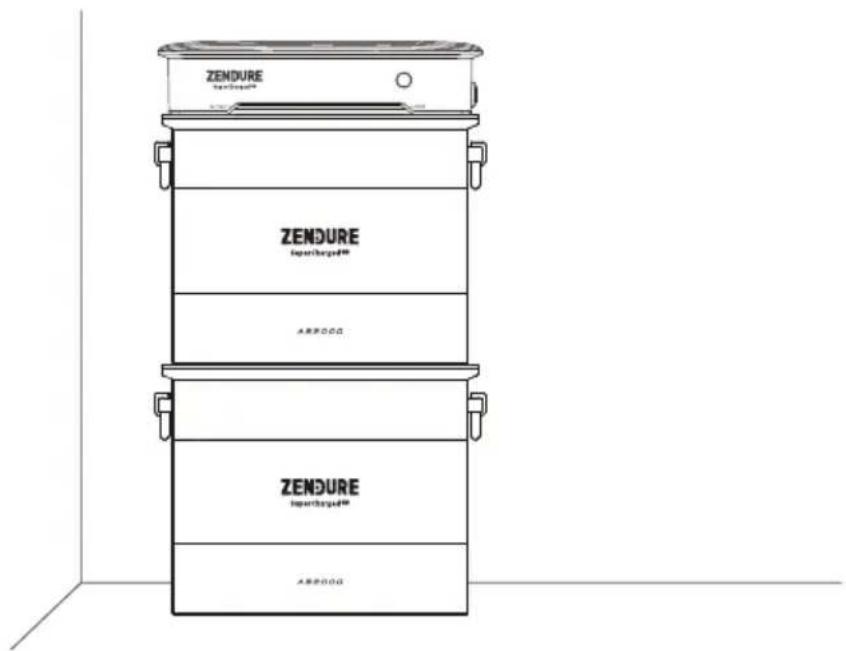
text_image
ZENDURE supercharger® ZENDURE supercharger® ABPOOG ZENDURE supercharger® ABPOOG6.2 Assembly Process
we can remove this part
| Picture Name Included / Not Included | |||
| 1 |  | Hyper 2000 hybrid inverter x 1 | |
| 2 |  | 3m 10A AC Power Cable | |
| 3 |  | AB1000/2000 Batteries | |
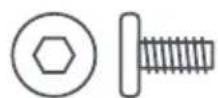
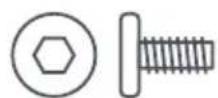
| 4 |  | M4 Screws x 4 | |
| 5 |  | M4 Wrench x 1 | |
| 6 |  | Bracket x 2 | |
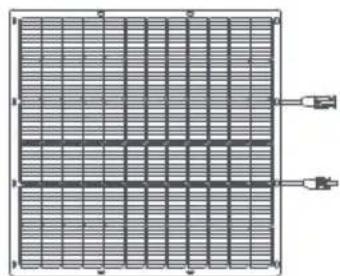
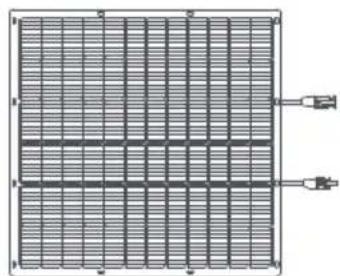
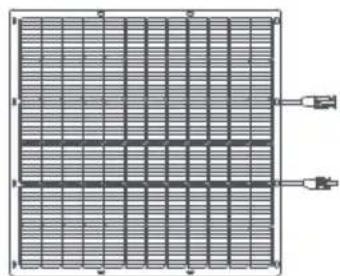
| 8 |  | Solar Panel | |
| 9 |  | Solar Panel Extension Cable | |
| 10 | 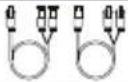 | Solar Panel Parallel Cable | |
1. Remove the Protective Cover
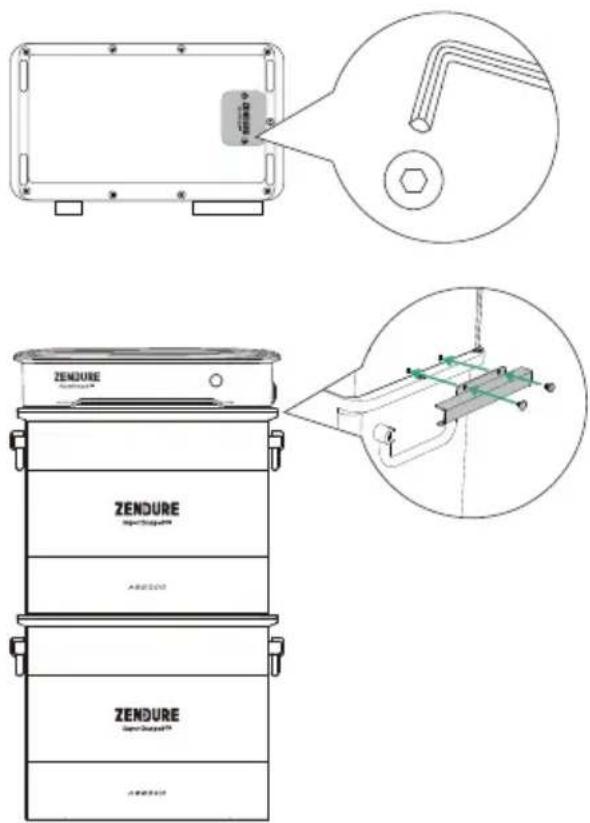
Use the M4 wrench to remove the battery terminal protective cover at the bottom of the Hyper 2000.
2. Connect to the Battery
(1) Place the Hyper 2000 hybrid inverter on Zendure Battery AB1000/AB2000. A single Hyper 2000 can be connected to up to 4 AB1000/2000 batteries in parallel.
(2) Use the fixed bracket and M4 screws to secure the Hyper 2000 and battery on both sides of the Hyper 2000.

For ease of installation, we recommend making the necessary cable connections prior to installing your system against a wall.
3. Connect to the Power Grid
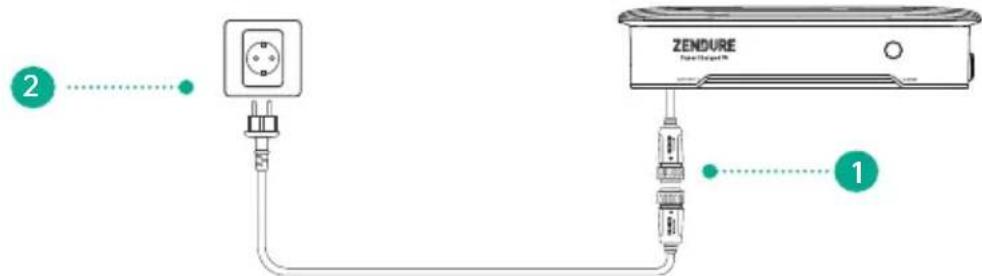
Using the provided AC power cable, connect the power cable to Hyper 2000 first, then plug it into a household power socket.

- Please confirm that the AC socket is switched on, and the power grid is being powered.
- To improve the power generation efficiency and enhance safety, it is recommended that you connect it to a circuit with lower load power or no other loads.
text_image
ZENDURE Power/Standard™4. Connect to a Solar Panel

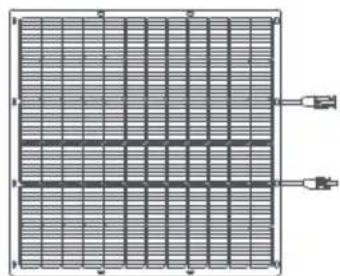
- Install solar panels in their desired location before connecting them to your Hyper 2000.
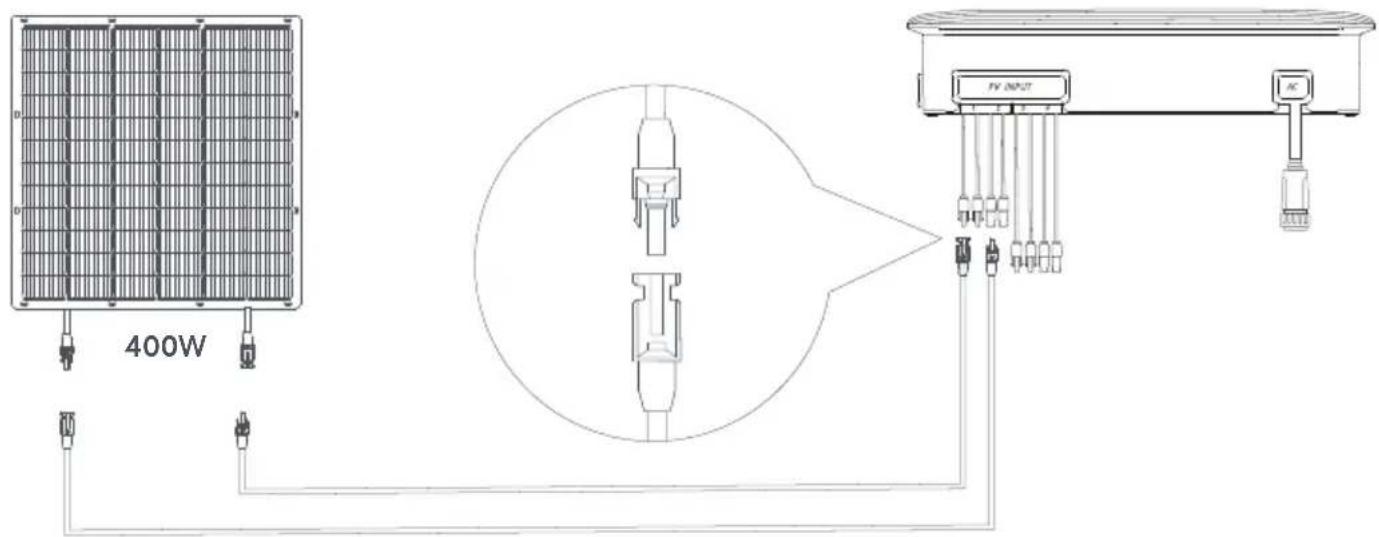
- There are two MPPTs in Hyper 2000. PV inputs 1 and 2 share MPPT1, and inputs 3 and 4 share MPPT2.
- Please note that the Voc (open circuit voltage) on each PV input must be lower than 55V.
- The total combined input current for PV1 and PV2 should not exceed 20A, and the same for PV3 and PV
- Recommended maximum power range for connecting the solar panels to each PV input is between 350W\~550W.
Connect Each Solar Panel Directly
(1) PV inputs 1 and 2 share MPPT1, and inputs 3 and 4 share MPPT2.
(2) The positive and negative terminals of the same solar panel must be connected to the same MPPT, for example, only to PV1 and PV2, or to PV3 and PV4.
text_image
400W FY INPUT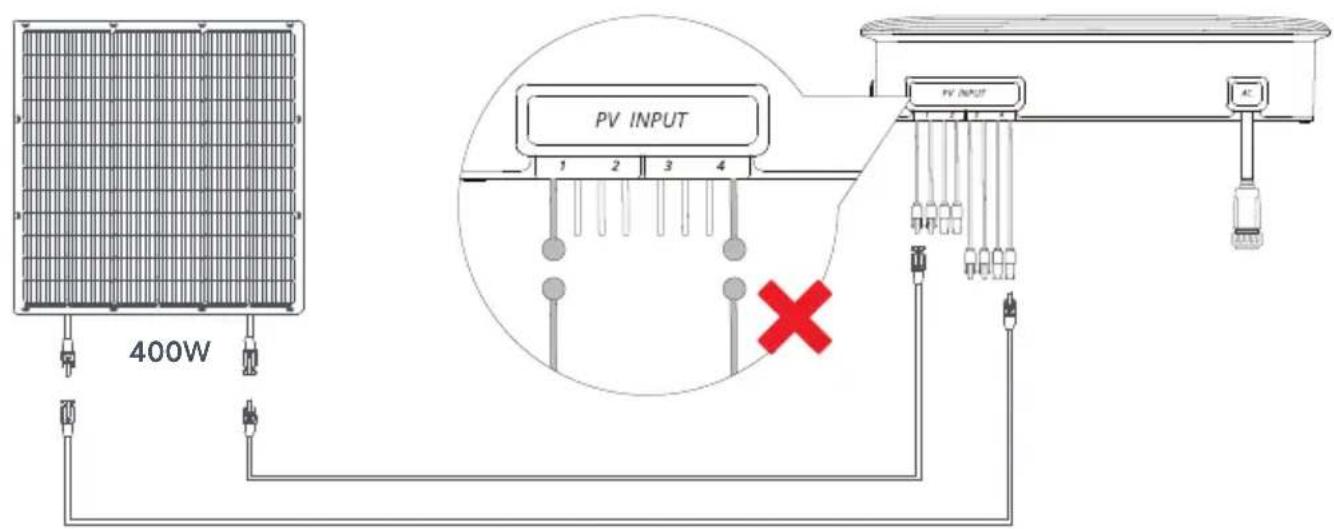
text_image
400W PV INPUT 1 2 3 4 PV INPUT ACConnecting Several Solar Panels in Parallel
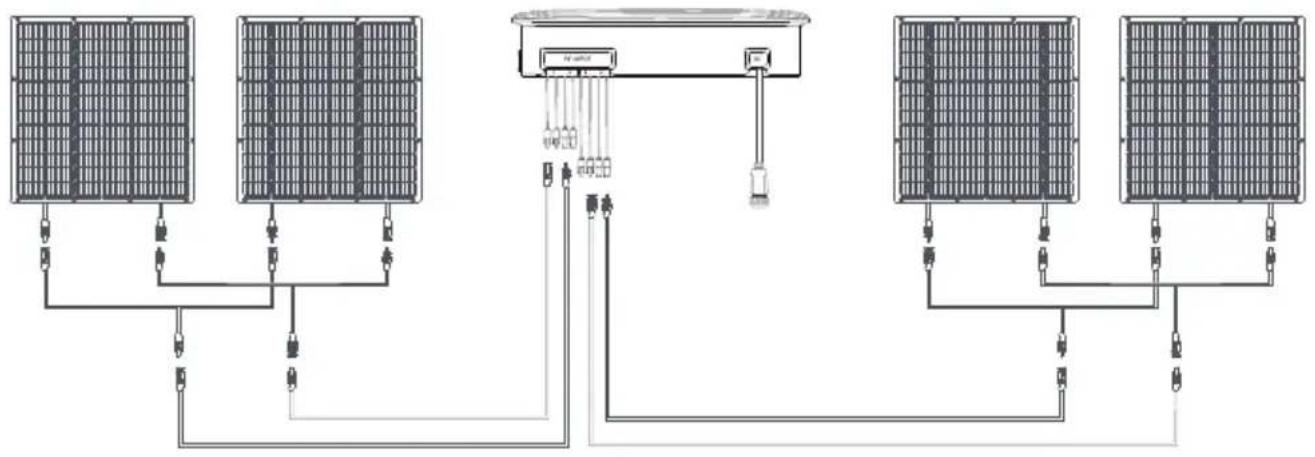
natural_image
Pure electrical circuit lines without any symbols6.3 Installing Multiple Hyper 2000 Sets
- Up to 3 Hyper 2000 sets can be installed on a single phase in your home's electrical circuits.
- Use the Zendure app to set the AC power output to the grid. Make sure it doesn't exceed the safety power requirements of your country or region.
Installation in single-phase electricity system
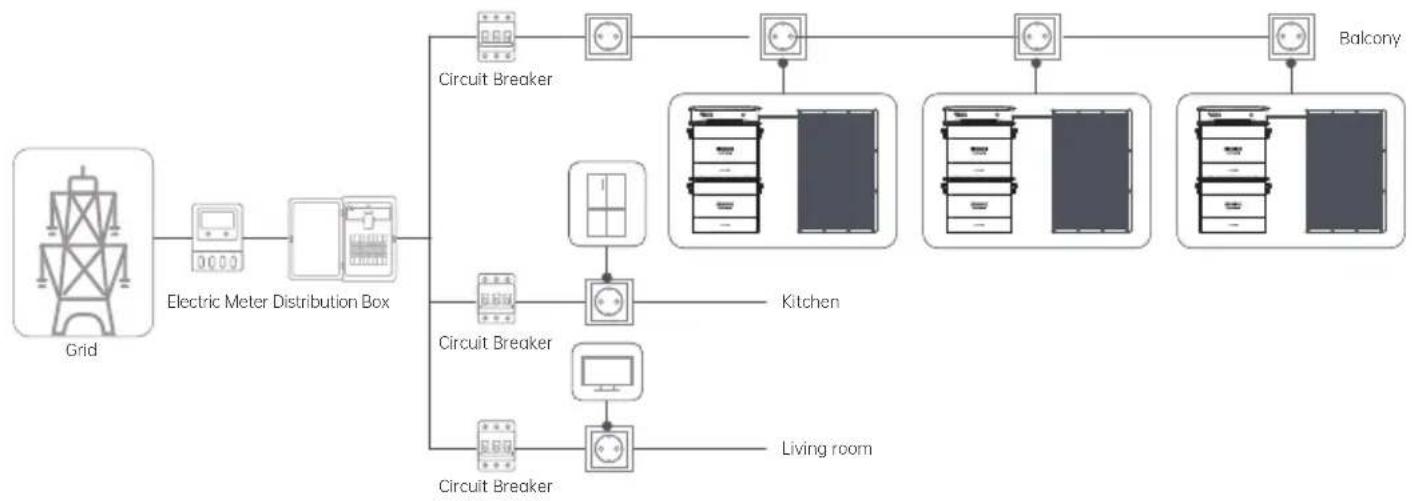
flowchart
graph TD
    A["Grid"] --> B["Electric Meter Distribution Box"]
    B --> C["Circuit Breaker"]
    C --> D["Electrical meters with switches"]
    D --> E["Kitchen"]
    E --> F["Electrical meters with switches"]
    F --> G["Balcony"]
    C --> H["Circuit Breaker"]
    H --> I["Living room"]
    H --> J["Circuit Breaker"]
    J --> K["Electrical meters with switches"]
    K --> L["Balcony"]
Installation in three-phase electricity system
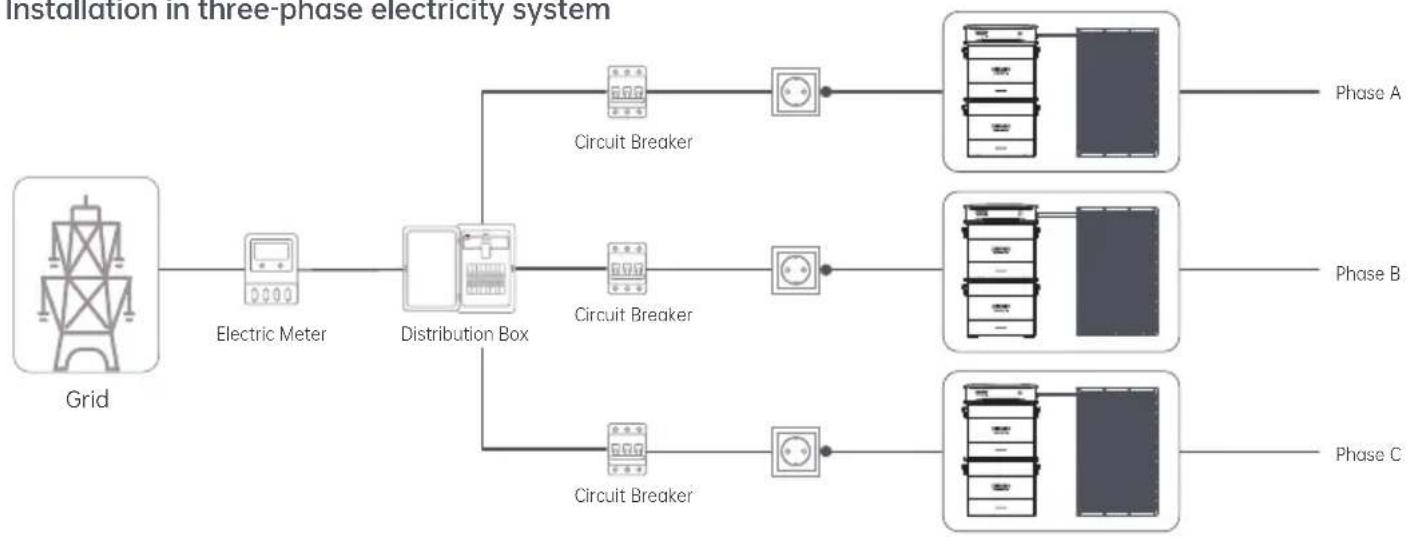
flowchart
graph LR
    A["Grid"] --> B["Electric Meter"]
    B --> C["Distribution Box"]
    C --> D["Circuit Breaker 1"]
    C --> E["Circuit Breaker 2"]
    C --> F["Circuit Breaker 3"]
    D --> G["Phase A"]
    E --> H["Phase B"]
    F --> I["Phase C"]
6.4 Product Placement and Cable Management
- Move the Hyper 2000 and battery packs near their final installation site.
- Your Hyper 2000 should be positioned such that the solar and AC cables can run straight down without significant bending.
- Use the brackets and screws provided with the battery packs to secure them to the wall.
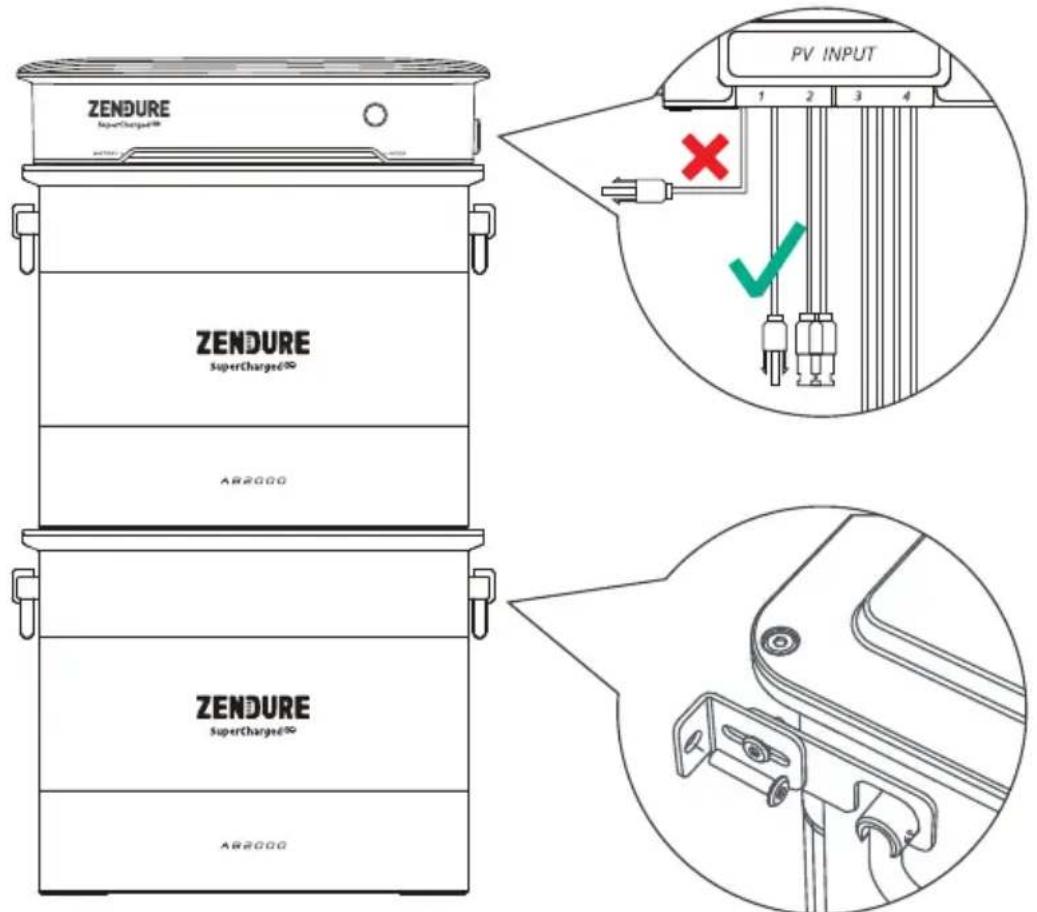
text_image
ZENDURE SuperCharged® ZENDURE SuperCharged® AB2000 ZENDURE SuperCharged® AB2000 PV INPUT 1 2 3 4 X ✓7. Zendure App Setup

- The Zendure app is continually being improved and may change over time. If there are any differences between the instructions in this guide and in the app, follow the in-app instructions.
- Privacy Policy: By using Zendure Products, Applications and Services, you consent to the Zendure Terms of Use and Privacy Policy, which you can access via the "About" section of the "User" page in the Zendure app.

text_image
ZENHORE Available on the App Store Get it an Google playThe Zendure app allows users to monitor and manage power systems, offering real-time power monitoring, historical records, charge/discharge scheduling, and more.
- To download the Zendure app, scan the QR code or search "Zendure" in the Apple App Store® or Google Play Store.
- Open the Zendure app. Log In or sign up.
- Follow the in-app instructions to add your Hyper 2000 hybrid inverter.
- Please update the firmware to the latest version in the settings before using.
8. Maintenance
8.1 Disconnection of the cables
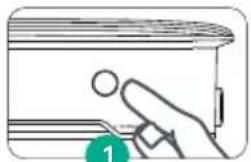
- Press the button on the Hyper 2000 for 6 seconds to power it off.
- Disconnect the AC power cable: please disconnect the AC cable from the AC outlet end first, then press the AC connector on the Hyper 2000 hybrid inverter to pull it out.
- Press the connectors on the PV inputs of the Hyper 2000 to pull out the solar panel cables.
- Release the two brackets fixed between the Hyper 2000 and the battery.
- Remove the Hyper 2000 from the batteries.
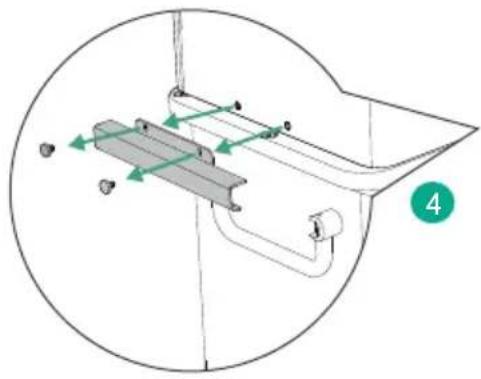
natural_image
Technical diagram of a mechanical assembly with labeled components and directional arrows (no readable text or symbols)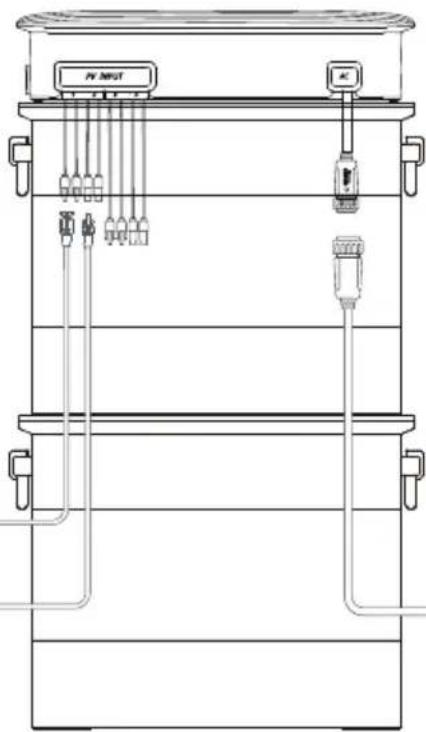
text_image
PV INPUT AC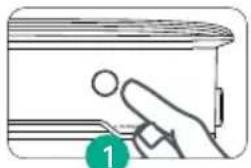
natural_image
Illustration of a hand inserting a coin into a rectangular device (no text or symbols)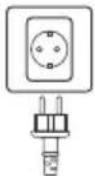
natural_image
Diagram of a grid-patterned rectangular structure with two small connectors at the top (no text or symbols)3
2
8.2 Troubleshooting
If the LED light strip turns yellow or red, there is a warning or error. Please follow the instructions in the app or the table below to address the problem. If it is not resolved, please contact our customer service.

Do not attempt to repair the Hyper 2000 hybrid inverter.
| LED Indicator LED | Description Detailed | Explanation | Description |
| Solid yellow on the left side | Battery level is below XX% and not charging | Make sure the both sides of the solar panel cable and AC power cable are correctly wired. Unplug all the cables and reconnect after 30sMake sure the home grid and solar panels are working normally.If the issue persists, contact customer service. | |
| Blinking yellow on the left side | Battery not connected | Lift the Hyper 2000 placed on the battery, and then put it back downIf the issue persists, contact customer service. | |
| Blinking yellow on the right side | Home grid not connected | Try pulling out the AC cable and inserting re-inserting it. Make sure that the plug is inserted well.If the issue persists, the power grid is probably faulty; wait for the power grid to recover.If the issue persists for more than 1 hour, contact customer service. | |
| Blinking yellow on both sides | Both battery and home grid not connected | Lift the Hyper 2000 placed on the battery, and then put it back downTry pulling out the AC cable and re-inserting it. Make sure that the plug is inserted well.If the issue persists, contact customer service. | |
| Blinking red on the left side | Abnormal status of Battery | Check the cause and resolution suggestions for abnormal faults in the Zendure App.If the issue persists, contact customer service. | |
| Blinking red on the right side | Abnormal status of Hyper 2000 | ||
| Blinking red on both sides | Abnormal status of Hyper 2000 and Battery |
- Technical Specifications
| PV Input | |
| PV Input Ports PV1 - 4 | |
| PV Input Rated Voltage 15V - 55V | |
| PV Input Recommended Power 350Wp - 550Wp | |
| Number of MPPTs 2 | |
| MPPT1 Connections PV1 & PV2 | |
| MPPT2 Connections PV3 & PV4 | |
| Each MPPT Rated Voltage Range 16 - 48V | |
| Each MPPT Rated Current 20.5A | |
| Each MPPT Rated Power 900W | |
| Dual MPPTs Rated Power 1800W | |
| AC Power Input/Output | |
| Rated Power 1200W | |
| Rated Voltage 220V/230V/240V | |
| Rated Frequency 50Hz | |
| Rated Current 5.5A | |
| Battery Terminal | |
| Charging Mode | |
| Maximum Input Power | One AB1000 Battery: 950WOne AB2000 Battery: 1200WTwo or More Batteries: 1600W |
| Discharging Mode | |
| Maximum Output Power | 1200W |
| Environmental Adaptability | |
| Charging Temperature | -20°C to 60°C |
| Discharging Temperature | -20°C to 60°C |
| Storage Temperature | -25°C to 85°C |
| Maximum Relative Humidity | 90% |
| IP Rating | IP65 |
| Others | |
| Wireless Type | Bluetooth, Wi-Fi |
| OTA Updates | Supported |
| Dimensions | 350 x 202 x 78mm |
| Product Weight | ≈ 8.5Kg |
Haftungsausschluss
natural_image
Pure electrical circuit lines without any symbolsnatural_image
Pure technical line drawing of two parallel metal brackets with mounting holes (no text or symbols)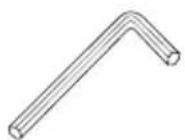
natural_image
Technical line drawing of a rectangular electronic device with mounting holes and a central square button (no text or symbols)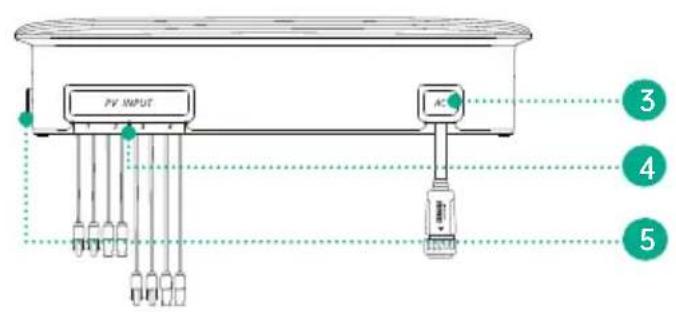
text_image
PV INPUT AC 3 4 5natural_image
Simple line drawing of a house with a sun and a checkmark icon (no text or symbols)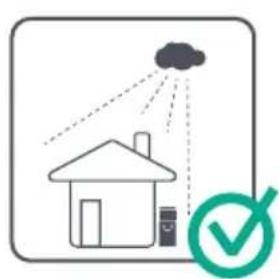
natural_image
Simple line drawing of a house with a cloud and a checkmark icon (no text or symbols)
natural_image
Simple line drawing of a house with a sun and a warning symbol (no text or labels)natural_image
Pure electrical circuit lines without any symbolstext_image
QR code with embedded green logo containing text 'ZENHUAWEI'

natural_image
Technical diagram of a mechanical assembly with labeled components and directional arrows (no readable text or symbols)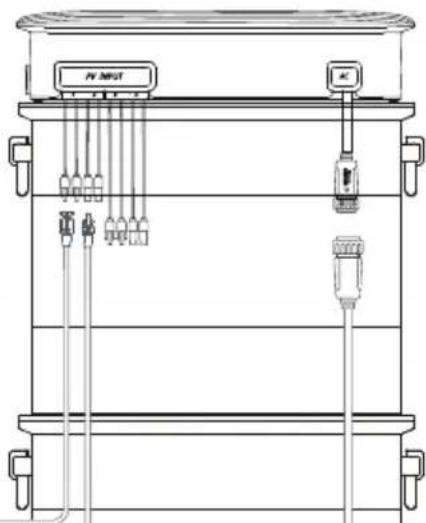
text_image
PV INPUT AC3
natural_image
Illustration of a hand holding a device with a green circular icon labeled '1' (no text or symbols on the device itself)1


natural_image
Diagram of a heat exchanger or cooling unit with grid lines and two connected sensors (no text or symbols)KDP
2
8.2 Fehlerbehebung
1.2 DÉCLARATION DE CONFORMITÉ CE
natural_image
Line drawing of a ZENDURE brand air conditioner unit (no text or symbols on body)
natural_image
Pure electrical circuit lines without any symbolsnatural_image
Pure technical line drawing of two parallel metal clamps (no text or symbols)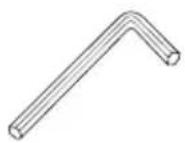
Support × 2 Vis M4 × 4 Tournevis M4 × 1
5. Vue d'ensemble
natural_image
Technical line drawing of a rectangular electronic device with mounting holes and a central square button (no text or symbols)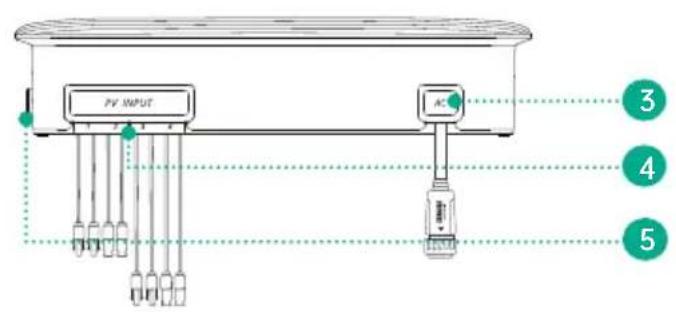
text_image
PV INPUT AC 3 4 5natural_image
Simple line drawing of a house with a sun and a checkmark icon (no text or symbols)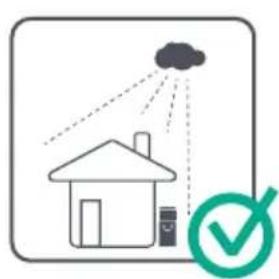
natural_image
Simple line drawing of a house with a cloud and a checkmark icon (no text or symbols)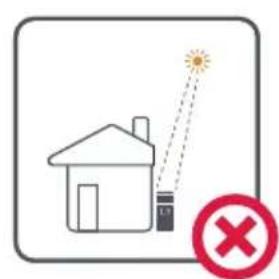
natural_image
Simple line drawing of a house with a sun and a warning symbol (no text or labels)natural_image
Pure electrical circuit lines without any symbolstext_image
QR code with embedded green logo containing text 'ZENHUAWEI'

natural_image
Technical diagram of a mechanical assembly with labeled components and directional arrows (no readable text or symbols)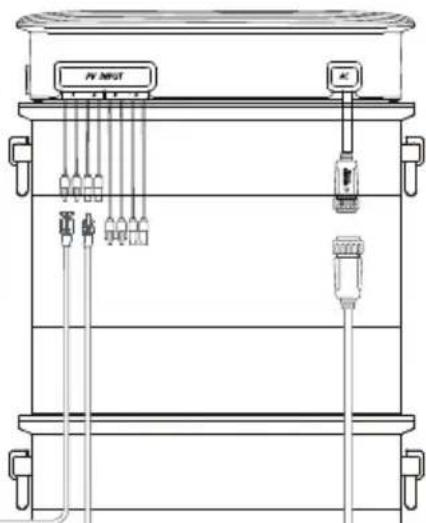
text_image
PV INPUT AC3
natural_image
Illustration of a hand holding a device with a green circular icon labeled '1' (no text or symbols on the device itself)1


natural_image
Diagram of a heat exchanger or cooling unit with grid lines and two connected sensors (no text or symbols)KDP
2
8.2 Dépannage
natural_image
Line drawing of a ZENDURE brand air conditioner unit (no text or symbols on body)
natural_image
Pure electrical circuit lines without any symbolsnatural_image
Pure technical line drawing of two parallel metal clamps (no text or symbols)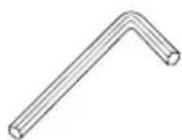
da 3 m a 10

Staffa × 2 Vite M4 × 4Cacciavite M4 × 1
5. Panoramica
natural_image
Technical line drawing of a rectangular electronic device with mounting holes and a central square button (no text or symbols)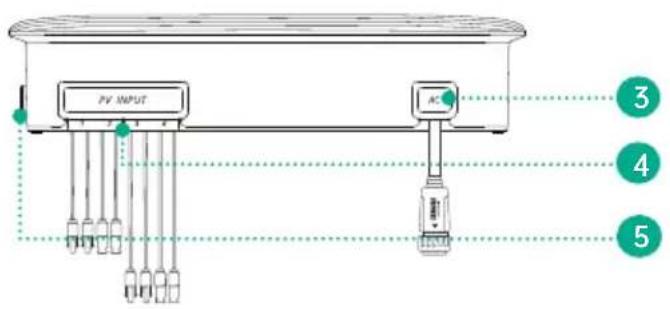
text_image
PV INPUT AC 3 4 5natural_image
Simple line drawing of a house with a sun and a checkmark icon (no text or symbols)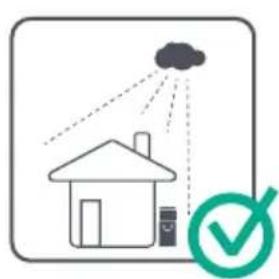
natural_image
Simple line drawing of a house with a cloud and a checkmark icon (no text or symbols)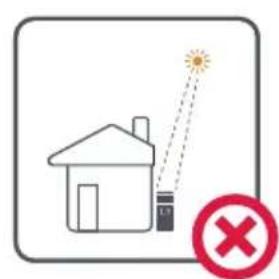
natural_image
Simple line drawing of a house with a sun and a warning symbol (no text or labels)Collocare l'inverter ibrido Hyper 2000 e le batterie (non incluse) su un pavimento duro in piano.
text_image
ZENDURE supercharger® ZENDURE supercharger® ASPOOG ZENDURE supercharger® ASPOOGnatural_image
Pure electrical circuit lines without any symbolstext_image
QR code with embedded green logo containing text 'ZENHUAWEI'

text_image
Technical diagram showing a mechanical assembly with labeled components and directional arrows, including a numbered circle marker '4' in the corner.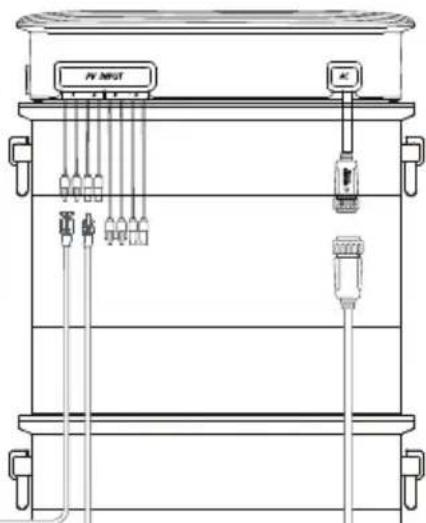
text_image
PV INPUT AC3
natural_image
Illustration of a hand holding a device with a green circular icon labeled '1' (no text or symbols on the device itself)1


natural_image
Diagram of a heat exchanger or cooling unit with grid lines and two connected sensors (no text or symbols)KDP
2
natural_image
Pure electrical circuit lines without any symbolsnatural_image
Pure technical line drawing of two parallel metal clamps (no text or symbols)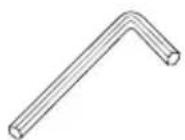
Soporte × 2 Tornillo M4 × 4Destornillador M4 × 1
natural_image
Technical line drawing of a rectangular electronic device with mounting holes and a central square button (no text or symbols)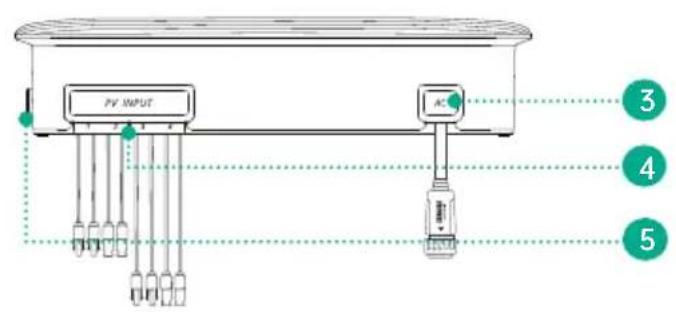
text_image
PV INPUT AC 3 4 5natural_image
Simple line drawing of a house with a sun and a checkmark icon (no text or symbols)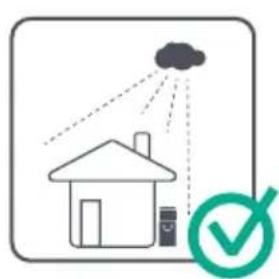
natural_image
Simple line drawing of a house with a cloud and a checkmark icon (no text or symbols)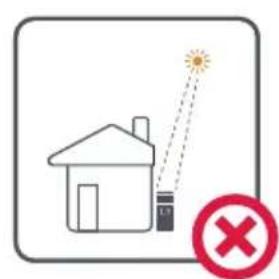
natural_image
Simple line drawing of a house with a sun and a warning symbol (no text or labels)natural_image
Pure electrical circuit lines without any symbolstext_image
QR code with embedded green logo containing text 'ZENHUAWEI'
natural_image
Technical diagram of a mechanical assembly with labeled components and directional arrows (no readable text or symbols)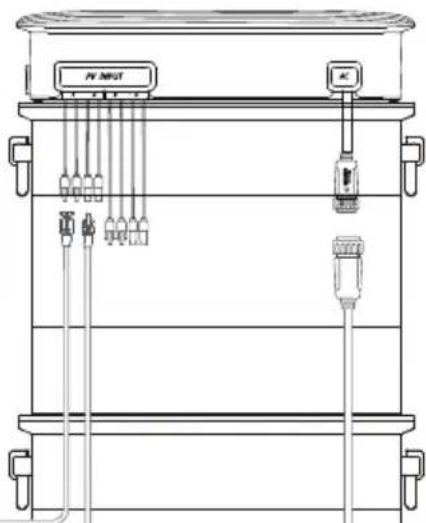
text_image
PV INPUT AC3
natural_image
Illustration of a hand holding a device with a green circular icon labeled '1' (no text or symbols on the diagram itself)1


natural_image
Diagram of a heat exchanger or cooling unit with grid lines and two connected sensors (no text or symbols)KDP
2
1.2 DEKLARACJA ZGODNOŚCI WE
natural_image
Line drawing of a ZENDURE air conditioner unit (no text or symbols on body)
natural_image
Pure electrical circuit lines without any symbolsnatural_image
Pure technical line drawing of two parallel metal clamps (no text or symbols)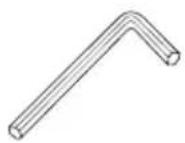
natural_image
Technical line drawing of a rectangular electronic device with mounting holes and a central square button (no text or symbols)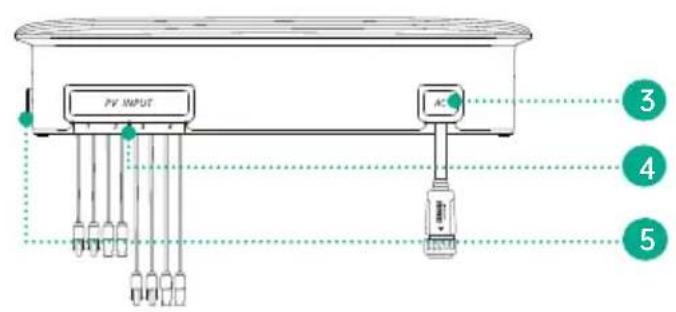
text_image
PV INPUT AC 3 4 5natural_image
Simple line drawing of a house with a sun and a checkmark icon (no text or symbols)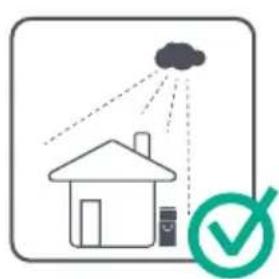
natural_image
Simple line drawing of a house with a cloud and a checkmark icon (no text or symbols)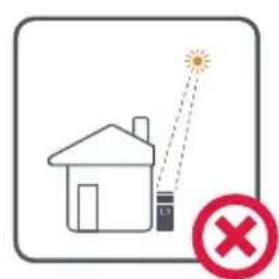
natural_image
Simple line drawing of a house with a sun and a warning symbol (no text or labels)natural_image
Pure electrical circuit lines without any symbolstext_image
Technical diagram of an air vent system with labeled components and wiring connectionstext_image
QR code image with a large letter 'D' in the center, likely linking to a digital resource or website.https://zendure.com
Zendure USA Inc.
ZENDURE TECHNOLOGY CO., LIMITED
Hours: Mon - Fri 9:00 - 17:00 Pacific
Phone: 001-800-991-6148 (US)
0049-800-627-3067 (DE)
Support / Contact:
© 2024 Zendure USA Inc. All Rights Reserved.
Printed on recycled materials. Made in China

Address: Rheinallee 1,40549 Düsseldorf
E-mail: sales@zendure.com
Phone: 0049-800-627-3067