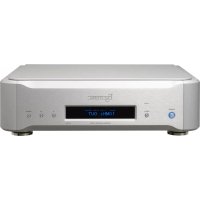
G-01XD - Clock Esoteric - Free user manual and instructions
Find the device manual for free G-01XD Esoteric in PDF.


User questions about G-01XD Esoteric
0 question about this device. Answer the ones you know or ask your own.
Ask a new question about this device
Download the instructions for your Clock in PDF format for free! Find your manual G-01XD - Esoteric and take your electronic device back in hand. On this page are published all the documents necessary for the use of your device. G-01XD by Esoteric.
USER MANUAL G-01XD Esoteric
The lightning flash with arrowhead symbol, within an equilateral triangle, is intended to alert the user to the presence of uninsulated "dangerous voltage" within the product's enclosure that may be of sufficient magnitude to constitute a risk of electric shock to persons.

The exclamation point within an equilateral triangle is intended to alert the user to the presence of important operating and maintenance (servicing) instructions in the literature accompanying the appliance.
WARNING: TO PREVENT FIRE OR SHOCK HAZARD, DO NOT EXPOSE THIS APPLIANCE TO RAIN OR MOISTURE.
CAUTION
●DO NOT REMOVE THE EXTERNAL CASES OR CABINETS TO EXPOSE THE ELECTRONICS. NO USER SERVICEABLE PARTS ARE INSIDE.
- IF YOU ARE EXPERIENCING PROBLEMS WITH THIS PRODUCT, CONTACT THE STORE WHERE YOU PURCHASED THE UNIT FOR A SERVICE REFERRAL. DO NOT USE THE PRODUCT UNTIL IT HAS BEEN REPAIRED.
- USE OF CONTROLS OR ADJUSTMENTS OR PERFORMANCE OF PROCEDURES OTHER THAN THOSE SPECIFIED HEREIN MAY RESULT IN HAZARDOUS RADIATION EXPOSURE.
1) Read these instructions.
2) Keep these instructions.
3) Heed all warnings.
4) Follow all instructions.
5) Do not use this apparatus near water.
6) Clean only with dry cloth.
7) Do not block any ventilation openings. Install in accordance with the manufacturer's instructions.
8) Do not install near any heat sources such as radiators, heat registers, stoves, or other apparatus (including amplifiers) that produce heat.
9) Do not defeat the safety purpose of the polarized or grounding-type plug. A polarized plug has two blades with one wider than the other. A grounding type plug has two blades and a third grounding prong. The wide blade or the third prong are provided for your safety. If the provided plug does not fit into your outlet, consult an electrician for replacement of the obsolete outlet.
10) Protect the power cord from being walked on or pinched particularly at plugs, convenience receptacles, and the point where they exit from the apparatus.
11) Only use attachments/accessories specified by the manufacturer.
12) Use only with the cart, stand, tripod, bracket, or table specified by the manufacturer, or sold with the apparatus. When a cart is used, use caution when moving the cart/ apparatus combination to avoid injury from tip-over.

natural_image
Silhouette of a person climbing a ladder inside a circular frame (no text or symbols)13) Unplug this apparatus during lightning storms or when unused for long periods of time.
14) Refer all servicing to qualified service personnel. Servicing is required when the apparatus has been damaged in any way, such as power-supply cord or plug is damaged, liquid has been spilled or objects have fallen into the apparatus, the apparatus has been exposed to rain or moisture, does not operate normally, or has been dropped.
- The apparatus draws nominal non-operating power from the AC outlet with its POWER or STANDBY/ON switch not in the ON position.
- The mains plug is used as the disconnect device; the disconnect device shall remain readily operable.
- Caution should be taken when using earphones or headphones with the product because excessive sound pressure (volume) from earphones or headphones can cause hearing loss.
WARNING
Products with Class I construction are equipped with a power supply cord that has a grounding plug. The cord of such a product must be plugged into an AC outlet that has a protective grounding connection.
IN USA/CANADA, USE ONLY ON 120V SUPPLY.
CAUTION
- Do not expose this apparatus to drips or splashes.
- Do not place any objects filled with liquids, such as vases, on the apparatus.
- Do not install this apparatus in a confined space such as a book case or similar unit.
●The apparatus should be located close enough to the AC outlet so that you can easily reach the power cord plug at any time. - If the product uses batteries (including a battery pack or installed batteries), they should not be exposed to sunshine, fire or excessive heat.
- CAUTION for products that use replaceable lithium batteries: there is danger of explosion if a battery is replaced with an incorrect type of battery. Replace only with the same or equivalent type.
Supplier's Declaration of Conformity
Model number: G-01XD
Trade name: ESOTERIC
Responsible party:
Please contact us from the address below.
https://teac.jp/int/support/usa/contact
This device complies with Part.15 of FCC Rules.
Operation is subject to the following two conditions:
1) This device may not cause harmful interference
2) This device must accept any interference received, including interference that may cause undesired operation.
Information
This equipment has been tested and found to comply with the limits for a Class B digital device, pursuant to Part 15 of the FCC Rules. These limits are designed to provide reasonable protection against harmful interference in a residential installation. This equipment generates, uses, and can radiate radio frequency energy and, if not installed and used in accordance with the instructions, may cause harmful interference to radio communications. However, there is no guarantee that interference will not occur in a particular installation. If this equipment does cause harmful interference to radio or television reception, which can be determined by turning the equipment off and on, the user is encouraged to try to correct the interference by one or more of the following measures:
- Reorient or relocate the equipment and/or the receiving antenna.
- Increase the separation between the equipment and receiver.
- Connect the equipment into an outlet on a circuit different from that to which the receiver is connected.
- Consult the dealer or an experienced radio/TV technician for help.
CAUTION
Changes or modifications not expressly approved by the party responsible for compliance could void the user's authority to operate the equipment.
Model for Canada
This Class B digital apparatus complies with Canadian ICES-003.
Model for Europe

This product complies with the European Directives request, and the other Commission Regulations.
Model for UK
This product complies with the applicable UK regulations.

For European Customers
Disposal of electrical and electronic equipment and batteries and/or accumulators
a) All electrical/electronic equipment and waste batteries/accumulators should be disposed of separately from the municipal waste stream via collection facilities designated by the government or local authorities.
b) By disposing of electrical/electronic equipment and waste batteries/accumulators correctly, you will help save valuable resources and prevent any potential negative effects on human health and the environment.
c) Improper disposal of waste electrical/electronic equipment and batteries/accumulators can have serious effects on the environment and human health because of the presence of hazardous substances in the equipment.
d) The Waste Electrical and Electronic Equipment (WEEE) symbols, which show wheeled bins that have been crossed out, indicate that electrical/electronic equipment and batteries/accumulators must be collected and disposed of separately from household waste.
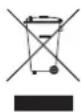
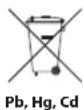
If a battery or accumulator contains more than the specified values of lead (Pb), mercury (Hg), and/or cadmium (Cd) as defined in the Battery Directive (2006/66/EC, 2013/56/EU), then the chemical symbols for those elements will be indicated beneath the WEEE
e) Return and collection systems are available to end users. For more detailed information about the disposal of old electrical/electronic equipment and waste batteries/accumulators, please contact your city office, waste disposal service or the shop where you purchased the equipment.
ESOTERIC is a trademark of TEAC CORPORATION, registered in the U.S. and other countries.
Other company names, product names and logos in this document are the trademarks or registered trademarks of their respective owners.
Contents
Thank you for purchasing this ESOTERIC product.
In order to provide you with the best audio quality for many years, we manufacture ESOTERIC products with strict quality control one unit at a time.
Read this manual carefully to get the best performance from this product. After reading it, keep it in a safe place with the warranty card for future reference.
IMPORTANT SAFETY INSTRUCTIONS 3
About the transportation locking screws....6
Before use....7
Connections....8
Names and functions of parts....10
Basic operation....11
Troubleshooting....11
Maintenance....12
Specifications....12
Dimensional drawings....13
About the transportation locking screws
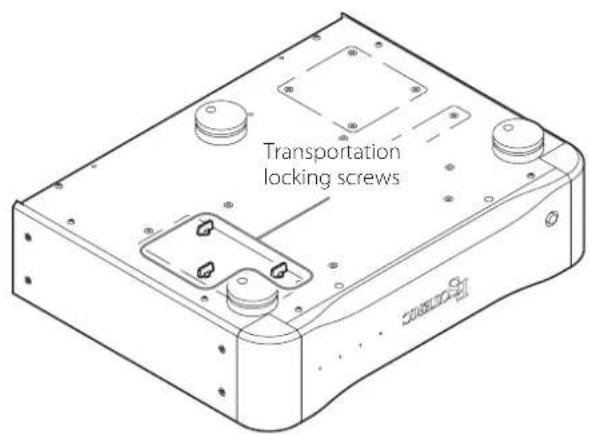
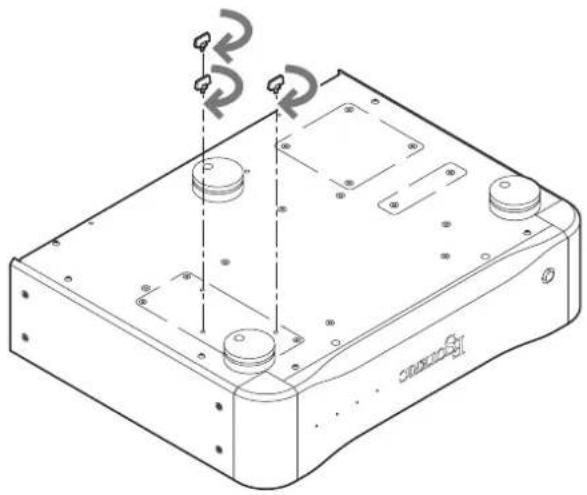
For the purpose of improving the sound quality, G-01XD is structured so that the crystal oscillator (OCXO) unit attachment has some play. For this reason, before shipment from the factory, transportation locking screws have been attached through the bottom of the unit to protect the crystal oscillator (OCXO) unit from vibration during transportation.
text_image
Transportation locking screwsBefore installing the unit
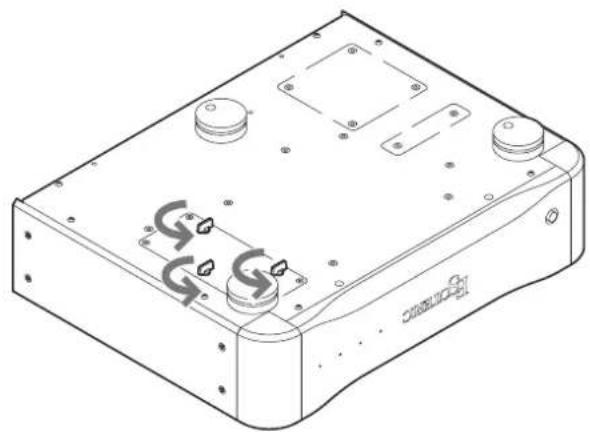
Before installing the unit, remove the three transportation locking screws.
- Save the transportation locking screws in a safe place because you will need to reattach them before transporting the unit in the future.
natural_image
Technical line drawing of a mechanical or electronic device casing with mounting holes and internal components (no text or symbols)Before transporting the unit
Before transporting the unit, reattach the three transportation locking screws removed when the unit was installed.
natural_image
Technical line drawing of a mechanical device with mounting holes and a central component (no text or symbols)Included accessories
Check to be sure the box includes all the supplied accessories shown below. Please contact the store where you purchased this unit if any of these accessories are missing or have been damaged during transportation.
Power cord × 1
Felt pads × 3
Owner's manual (this document) × 1
Warranty card × 1
Note about pinpoint feet
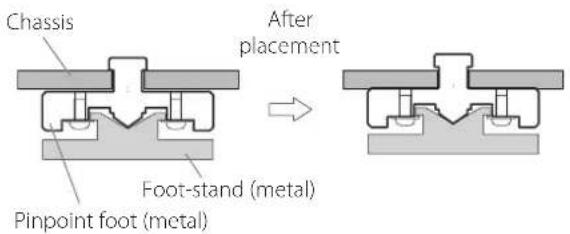
High-precision metal pinpoint feet are attached to the bottom plate of this unit.
The pinpoint feet and their stands are loose, but when the unit is placed in position, it is supported by these pinpoint feet, which effectively disperse vibrations.
text_image
Chassis Foot-stand (metal) Pinpoint foot (metal) After placement- If there is a gap between a chassis and a pinpoint foot after placement, turn the pinpoint foot in the direction that tightens the screw to eliminate the gap.
- Apply the included felt pads to the bottoms of the foot-stands to avoid scratching the surface where the unit is placed.
Precautions for use
- Do not install this unit in a location that could become hot. This includes places that are exposed to direct sunlight or near a radiator, heater, stove or other heating equipment. Moreover, do not place it on top of an amplifier or other equipment that generates heat. Doing so could cause discoloration, deformation or malfunction.
-
In order to enable good heat dissipation, leave at least 20 cm (8") between this unit and walls and other equipment when installing it. If you put it in a rack, for example, leave at least 5 cm (2") open above and 10 cm (4") open behind it. Failure to provide these gaps could cause heat to build up inside and result in fire.
-
Place the unit in a stable location.
- Do not place anything on top of the unit.
- Do not move the unit during use.
- Be careful to avoid injury when moving the unit due to its weight. Get someone to help you if necessary.
- The voltage supplied to the unit should match the voltage as printed on its back. If you are in any doubt regarding this matter, consult an electrician.
- When removing the power plug from an outlet, always pull directly on the plug; never yank on the cord itself.

Precautions when making connections
● After completing all other connections, plug the power plug into a power outlet.
- Read the owner's manuals of all devices that will be connected, and follow their instructions.
- For connections other than clock sync, refer to the owner's manuals of the other devices.
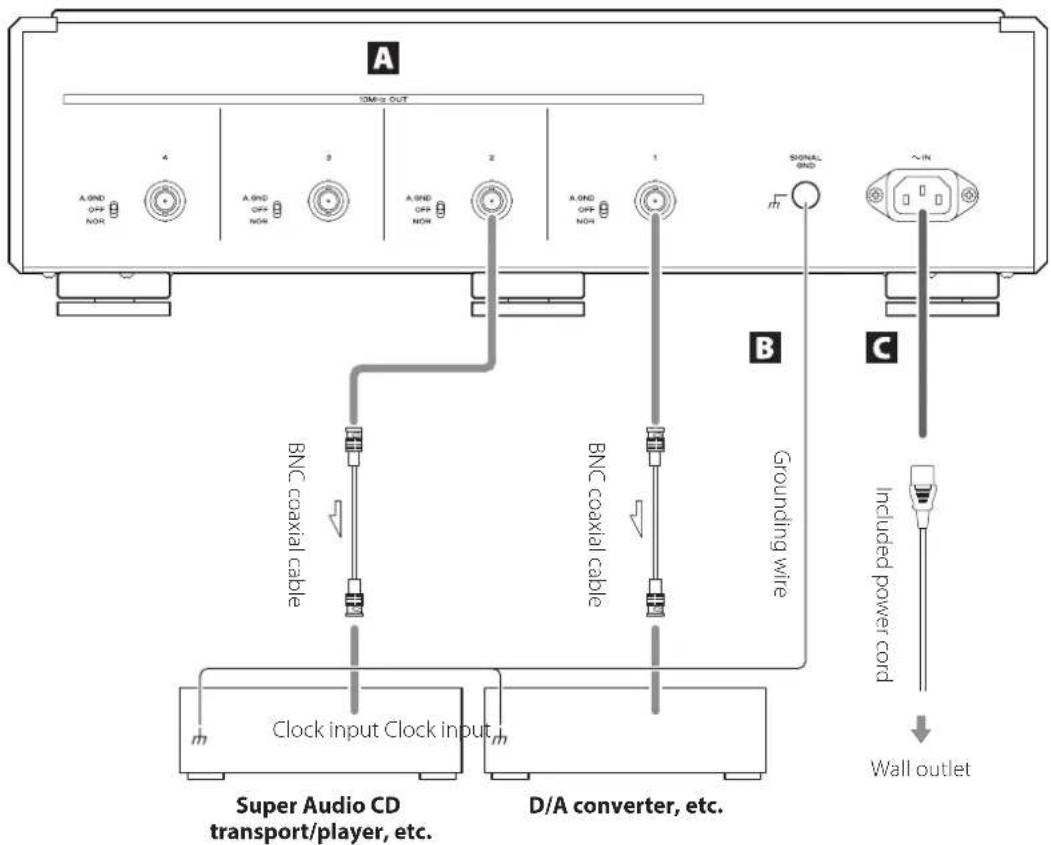
- When using separate devices, such as a CD transport and a D/A converter, input the clock signal from this unit to both.
text_image
A 10Mn Out A. OND OFF NOR 4 A. OND OFF NOR 3 A. OND OFF NOR 2 A. OND OFF NOR 1 B BNC coaxial cable BNC coaxial cable Grounding wire C Super Audio CD transport/player, etc. Clock input Clock input D/A converter, etc. Signal OND ~IN Grounding wire Included power cord Wall outletA 10MHz OUT connectors
These output 10MHz clock signals (sine wave, 0.5Vrms output level, 50Ω output impedance).
Connect these 10MHz OUT connectors to the clock input connectors of CD players, D/A converters and other digital devices that support 0.5Vrms 10MHz input.
Use commercially-available BNC coaxial cables (with 75Ω or 50Ω impedance) for connection.
Set the output switches according to how the connectors are being used.
A.GND (Adaptive Zero Ground)
This outputs a 10MHz clock signal.
●The amp is used to drive the negative connector so that it becomes 0 V.
OFF
Disabled
NOR (NORMAL)
This outputs a 10MHz clock signal.
B SIGNAL GND grounding terminal
Connecting this to the grounding terminal of a connected digital device, amplifier or other equipment might improve the audio quality.
●This is not a safety grounding terminal.
C Power inlet (\~IN)
Connect the included AC power cord to this AC inlet.
After completing all other connections, plug the power plug into a power outlet.
⚠️Use only a genuine ESOTERIC power cord. Use of other power cords could result in fire or electric shock.
⚠️Disconnect the power plug from the outlet if you will not use the unit for a long time.
text_image
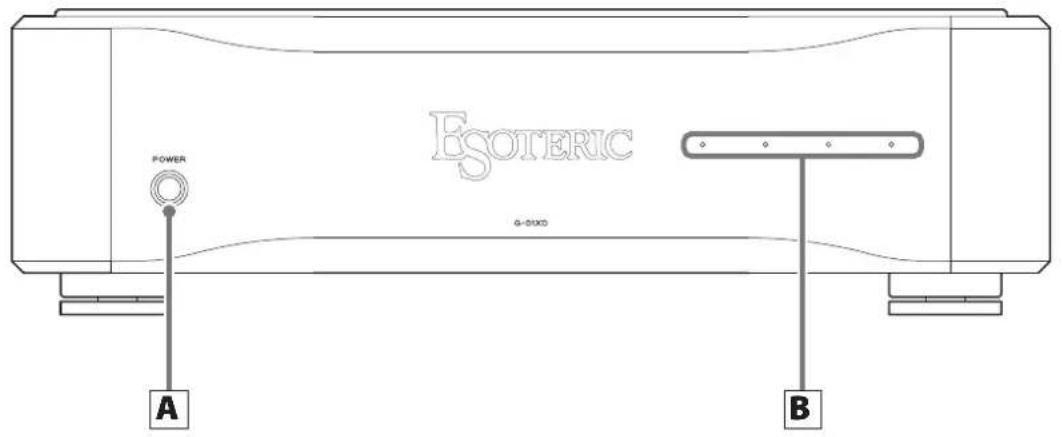
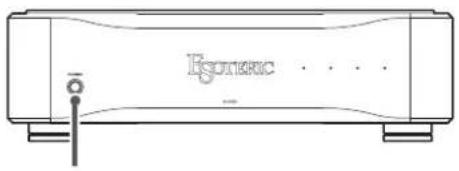
ESOTERIC POWER G-0100 A BA POWER button
Press this to turn the unit on and off.
After the unit is turned on, the ring around this button will blink while warming up until the oscillator stabilizes.
After warming up completes, the ring around the button will stop blinking and stay lit continuously.
- When the unit is turned on, it starts warming the crystal oscillator (OCXO) up to its operating temperature. It takes about ten minutes for the oscillator frequency to stabilize.
!Turn the unit off when you do not plan to use it for an extended amount of time.
B Clock output indicators
These show the status of each of the 10MHz OUT connectors. From left to right, the indicators correspond to 10MHz OUT 1, 2, 3 and 4.
Only indicators for channels being output light.
If an output connector on the back is set to A.GND (Adaptive Zero Ground), the indicator will light green.
1 Press the POWER button to turn this unit on.
text_image
Eptonic ....POWER
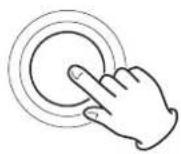
2 Start playback on the connected device after the ring around the POWER button stops blinking and stays lit continuously.
- We recommend waiting until the oscillator stabilizes after the power is turned on.
Troubleshooting
If you experience a problem with this product, please take a moment to review the following information before requesting service.
If this product still does not operate correctly, contact the retailer where you purchased it.
The unit does not turn on.
→Check that the power cord is plugged into a working power outlet.
→Check that the power cord is properly connected to this unit.
The clock output is not synchronizing another device.
→ Clock is not output from 10MHz outputs when their clock output indicators are unlit.
If the indicator of a 10MHz output that is being used is unlit, set the output switch for that 10MHz OUT connector to A.GND or NOR (page 8).
→Confirm that the connected device supports 0.5Vrms 10MHz clock.
Since clock signals that can be synchronized depend on how each device is connected and set, refer to the operation manuals of each device.
The ring around the POWER button continues blinking and does not stay lit continuously.
→The oscillator can take some time until its oscillation stabilizes.
Maintenance
Use a soft dry cloth to wipe the surface of the unit clean. For stubborn smudges, use a damp cloth that has been thoroughly wrung out to remove excess moisture.
●Never spray liquid directly on this unit.
- Do not wipe with chemical cleaning cloths, thinner or other chemical agents. Doing so could damage the surface.
- Avoid allowing rubber or plastic materials to touch the unit for long periods of time because they could damage the cabinet.
⚠ For safety, disconnect the power plug from the outlet before cleaning.
Specifications
Clock outputs
Output frequency 10 MHz (for audio)
Frequency precision..... within ±0.01 ppm (when shipped new)
Clock stabilization time.... about 10 minutes
BNC connectors 4
Output level..... sine wave, 0.5 ±0.1 Vrms/50 Ω
General
Power supply
Model for Europe.... AC 220-240 V, 50/60 Hz
Model for USA/Canada .... AC 120 V, 60 Hz
Power consumption 15 W (when stable)
External dimensions (W × H × D, including protrusions)
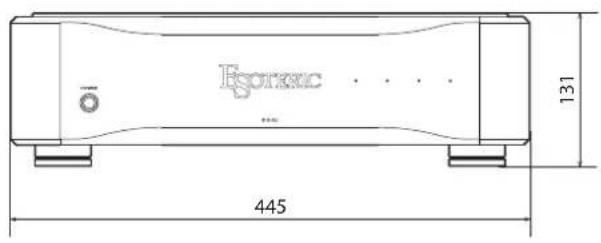
445 × 131 × 360 mm (17 5/8" × 5 1/4" × 14 1/4")
Weight 13 kg (28 3/4 lb)
Operating temperature range ....+5°C to +35°C
Included accessories
Power cord × 1
Felt pads × 3
Owner's manual (this document) × 1
Warranty card × 1
●Design and specifications are subject to change without notice.
●Weight and dimensions are approximate.
- Illustrations in this manual might differ slightly from production models.
Dimensional drawings
text_image
EcoXIC 445 131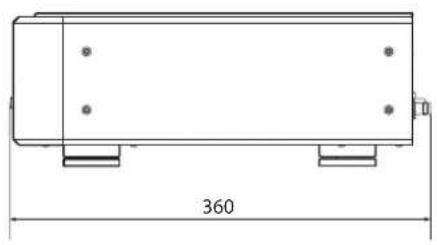
natural_image
Technical drawing of a rectangular mechanical component with mounting holes and dimension label (360), no readable text or symbols beyond the dimension line.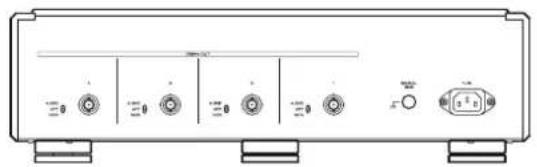
natural_image
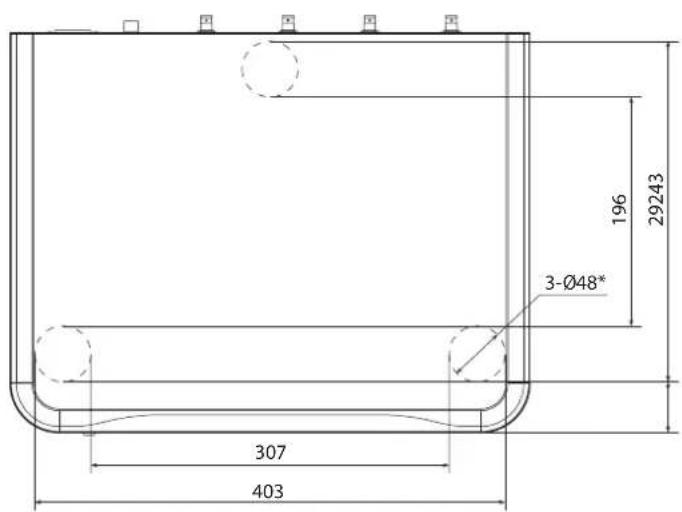
Front view of a device control panel with multiple ports and buttons (no text or labels visible)Foot placement diagram
text_image
196 29243 3-Ø48* 307 403Dimensions in millimeters (mm)
*48mm diameter feet × 3
CAUTION
RISK OF ELECTRIC SHOCK DO NOT OPEN

ATTENTION : POUR RÉDUIRE LE RISQUE D'ÉLECTROCUTION, NE RETIREZ PAS LE CAPOT (OU L'ARRIÈRE). AUCUNE PIÈCE INTERNE N'EST RÉPARABLE PAR L'UTILISATEUR. CONFIEZ TOUTE RÉPARATION À UN SERVICE APRÈS-VENTE QUALIFIÉ.

natural_image
Silhouette of a person climbing a ladder inside a circular frame (no text or symbols)AVERTISSEMENT
ESOTERIC is a trademark of TEAC CORPORATION, registered in the U.S. and other countries.
natural_image
Technical line drawing of a mechanical or electronic component with mounting holes and internal components (no text or symbols)natural_image
Technical line drawing of a mechanical device with mounting holes and a central base (no text or symbols)Accessoires fournis
A.GND (Adaptive Zero Ground)
text_image
Estatic ....POWER
Dimensions externes (L × H × P, saillies incluses)
445×131×360mm
Poids 13 kg
natural_image
Technical drawing of a rectangular mechanical component with mounting holes and dimension label (360), no readable text or symbols beyond the dimension line.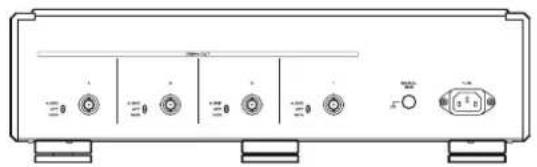
natural_image
Front view of a device control panel with multiple buttons and ports (no visible text or labels)natural_image
Symbolic icon of a person lifting a large object, enclosed in a circle with no text or symbolsESOTERIC is a trademark of TEAC CORPORATION, registered in the U.S. and other countries.
natural_image
Technical line drawing of a mechanical or electronic device casing with mounting holes and internal components (no text or symbols)natural_image
Technical line drawing of a mechanical component with mounting holes and a base plate (no text or symbols)A.GND (Adaptive Zero Ground)
text_image
Isometric ....POWER
natural_image
Technical drawing of a rectangular mechanical component with mounting holes and dimension label (360), no readable text or symbols beyond the dimension line.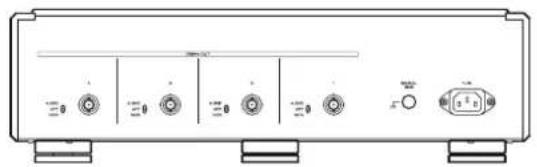
natural_image
Front view of a device control panel with multiple buttons and ports (no visible text or labels)This product has a serial number located on the rear panel. Please write it here and retain this for your records.
Model name: G-01XD Serial number