
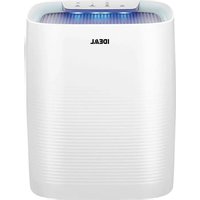
AP35 H - Air purifier IDEAL - Free user manual and instructions
Find the device manual for free AP35 H IDEAL in PDF.

| Product type | Air purifier and humidifier |
| Brand | IDEAL |
| Model | AP35 H |
| Dimensions (H x W x D) | 548 x 430 x 275 mm |
| Weight | 9.4 kg |
| Power supply | 220-240 V / 50 Hz |
| Power | 25 W |
| Fan speeds | 6 (including SLEEP and TURBO) |
| Recommended room size | 25 - 45 m² (height 2.50 m) |
| Humidification capacity | 300 ml/h |
| Purification capacity | Up to 300 m³/h |
| Noise level | 26 - 52 dB (A) |
| Water tank capacity | 2.5 L |
| Filtration | Pre-filter, deodorizing filter, HEPA filter |
| Sterilization | Plasma ionizer (ON/OFF) |
| Operating modes | AUTO, ROOM CARE, YELLOW DUST, BABY, SLEEP, AUTO HUMIDIFY, INTERVAL, TURBO |
| Timer | 1 to 12 hours (auto on/off) |
| Display | Air quality indicator (6 color levels), humidity level, fine dust concentration |
| Pre-filter maintenance | Clean every 2 weeks with warm water |
| Filter replacement | Deodorizing and HEPA filter every 12 months; evaporation cassette every 4 months |
| Included accessories | Casters (assembly required), evaporation cassette, water tank |
| Safety | Button lock, automatic shutdown in case of fault, open cover detection |
Frequently Asked Questions - AP35 H IDEAL
User questions about AP35 H IDEAL
0 question about this device. Answer the ones you know or ask your own.
Ask a new question about this device
Download the instructions for your Air purifier in PDF format for free! Find your manual AP35 H - IDEAL and take your electronic device back in hand. On this page are published all the documents necessary for the use of your device. AP35 H by IDEAL.
USER MANUAL AP35 H IDEAL
EN Operating Instructions
FR Mode d'emploi
natural_image
White portable air purifier with textured backrest and control panel (no visible text or symbols)natural_image
Simple line icon of an open book with an information symbol (no text or numbers present)Vorwort
Sicherheitshinweise
Sicherheitshinweise
natural_image
Warning symbol of a lightning bolt inside a triangle (no text or numbers)Achtung
Achtung
natural_image
Warning symbol of a flame inside a diamond shape (no text or numbers)Achtung
natural_image
Hand inserting a plug into a car door panel (no text or symbols visible)
natural_image
Illustration of a hand holding a tool inside a vehicle dashboard (no text or symbols visible)

natural_image
Top-down schematic of a vehicle or road intersection with no text or symbolsnatural_image
Hand inserting a plug into an electrical socket (no text or symbols visible)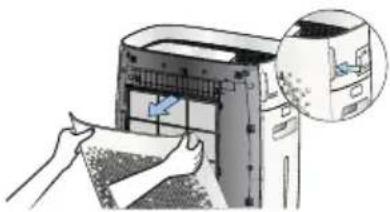
natural_image
Illustration of a printer being inserted into a paper, with a magnified inset showing the printer's internal structure (no text or symbols present)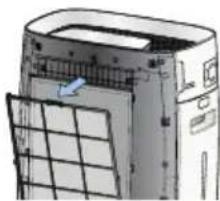
natural_image
Illustration of a server rack with a grid and ventilation unit (no text or symbols)
natural_image
Illustration of hands holding a wooden plank with a blue arrow indicating direction (no text or symbols)
natural_image
Illustration of hands inserting a printer into a machine (no text or symbols visible)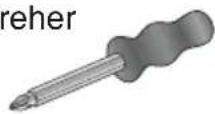

natural_image
Top-down schematic of a vehicle interior layout with four circular insets showing different components (no text or labels)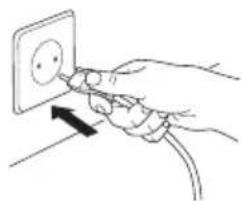
natural_image
Hand inserting a socket into an electrical outlet (no text or symbols visible)natural_image
Illustration of a hand inserting a component into a device (no text or symbols visible)
natural_image
Illustration of a portable air conditioner unit with cooling fan and front panel (no text or symbols visible)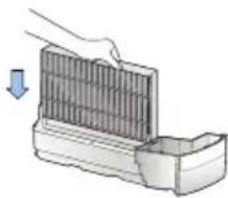
natural_image
Illustration of a hand placing a component into a container with a downward arrow indicating motion (no text or symbols)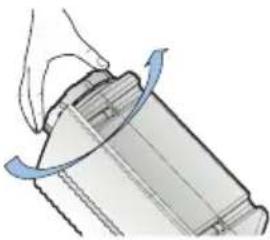
natural_image
Diagram of a mechanical component with a hand holding a curved blade, showing motion direction (no text or symbols)

natural_image
Illustration of a mechanical component with blue motion lines indicating movement (no text or symbols)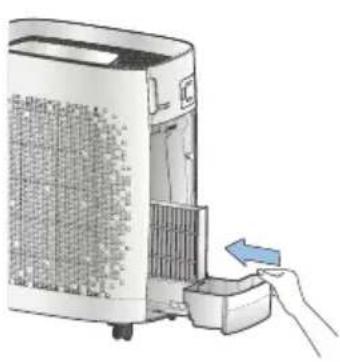
natural_image
Illustration of a hand inserting a small device into a power heater (no text or symbols visible)
Bedienfeld / Display

natural_image
Hand inserting a plug into an electrical socket (no text or symbols visible)MANUAL
AUTO TIMER ON
BUTTON LOCK
→ Kontakt: Service
• www.krug-priester.com
• service@krug-priester.com

natural_image
Illustration of a hand cleaning a white industrial air purifier with a cloth (no text or symbols)
natural_image
Illustration of hands handling a woven mat on a rectangular tray (no text or symbols)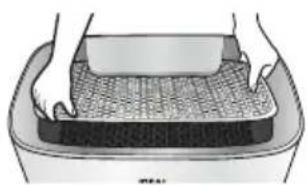
natural_image
Illustration of hands pressing a textured rectangular object on a tray (no text or symbols)
natural_image
Illustration of a hand pressing down on a textured rectangular object (no text or symbols)
natural_image
Simple line drawing of a container with a lid and a handle, emitting steam (no text or symbols)
natural_image
Illustration of a mechanical component with a blue curved arrow indicating motion (no text or symbols)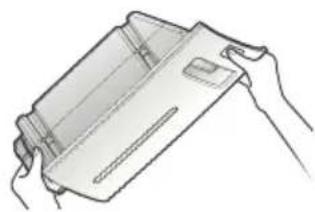
natural_image
Line drawing of hands holding a rectangular object (no text or symbols)natural_image
Diagram of a mechanical component with a rotating arrow indicating rotation (no text or symbols)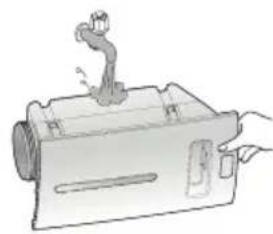
natural_image
Illustration of a mechanical device with a lever and handle (no text or symbols)
natural_image
Illustration of a mechanical component with a blue curved arrow indicating motion (no text or symbols)
natural_image
Illustration of a hand inserting a card into a device with a blue arrow indicating the action (no text or symbols present)natural_image
Illustration of a hand inserting a component into a clean air filter unit, showing the device's internal structure and airflow direction (no text or symbols)natural_image
Illustration of a hand placing a grating into a container with an arrow indicating upward motion (no text or symbols)
natural_image
Simple line drawing of a basin with a rectangular container and a spoon (no text or symbols)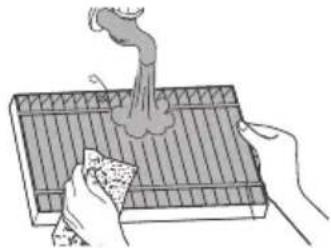
natural_image
Illustration of hands using a tool to generate smoke or vapor from a tray (no text or symbols)natural_image
Illustration of a hand holding a pen over a mechanical device (no text or symbols visible)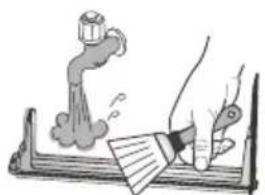
natural_image
Illustration of a hand using a tool to clean or brush a pipe, with a spray bottle and smoke rising (no text or symbols)
natural_image
Illustration of a hand using a faucet to lift water from a container (no text or symbols)natural_image
Illustration of a hand pressing down on a mechanical component with a blue arrow indicating downward motion (no text or symbols present)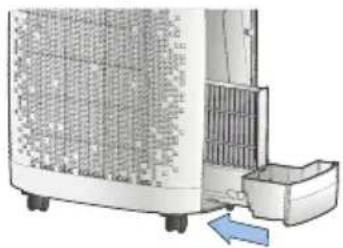
natural_image
Exterior view of a portable air conditioner unit with cooling fins and a blue directional arrow indicating airflow (no text or symbols)
natural_image
Hand inserting a card into a server rack (no text or symbols visible)Hinweis:
natural_image
Illustration of a computer with a paper being inserted into a device, and a close-up of a textured surface being held by hands (no text or symbols present)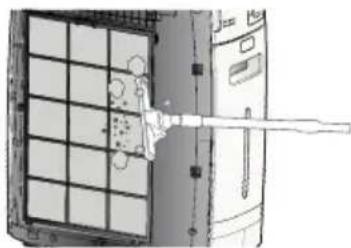
natural_image
Diagram of a mechanical or electrical component with grid and lever mechanism (no text or symbols)
natural_image
Illustration showing hands cleaning a water dispenser and collecting water from a drain (no text or symbols)• www.krug-priester.com
• service@krug-priester.com
Garantiebestimmungen
natural_image
Simple line drawing of a trash bin with two crossed lines indicating no waste or restriction (no text or symbols)CE
D-72336 Balingen (Germany)
EN Operating Instructions (35 - 67)
| Intended Use | 36 | |
| Safety | Instructions | 36 |
| Scope of Delivery / Parts Designation | 38 | |
| Filter | Functions | 39 |
| Setting Up / Commissioning | 40 | |
| Designations and Function Control Panel / Display | 42 | |
| Basic | Operation | 45 |
| Operating | Modes | 47 |
| Options | 52 | |
| Self | Diagnosis | 54 |
| Other | Settings | 55 |
| Cleaning and Maintenance | 59 | |
| Technical | Data | 64 |
| Intervals for Maintenance and Filter Change | 64 | |
| Filter | Change | 64 |
| Accessories | 64 | |
| Troubleshooting | 65 | |

natural_image
Simple line icon of an open book with an information symbol (no text or numbers present)Introduction
Thank you for choosing a device from IDEAL.
Intended use
- The device is used exclusively for cleaning and humidifying the ambient air indoors.
- Please read these operating instructions before using the machine and please follow the safety instructions.
The operating instructions must be kept available at all times.

Safety instructions
- Keep packing material, such as plastic wrapping, away from children! (Risk of suffocation)
- Please follow the safety instructions to prevent fire or electric shock. Only use the device indoors.
- Only use a socket that supplies the correct voltage (see rating plate).
- Do not modify or repair the device.
- Do not use the device if the power cable or mains plug is damaged or if the connection at the socket is not stable.
- Make sure that the power cable does not get crushed while you are using the device and that it cannot be damaged in any other way. Place the cable so that no one will trip over it.
Do not pull the power cable tight.
- Disconnect the plug from the socket for cleaning purposes and whenever the device is not in use for a significant period of time.
- Do not touch the plug or the device if you have wet hands.
- Do not spray any insect repellent.
- Do not use in rooms where the device may come into contact with fuel vapour, oil vapour or metal dust.
- Dot use any volatile liquids, petroleum, kerosene, paint thinner or polishing paste to clean the device. Such liquids may damage the surface of the device.
- Do not expose the device to rain, water, moisture or high humidity, and do not set it up in a bathroom or kitchen next to a sink.
- Make sure that no foreign objects get into the outlet grilles.
- Do not use near a naked flame or sparks.
- The device is not suitable for removing harmful gases (carbon monoxide, e.g. from heating appliances).
- Unless they are supervised, the device must not be used by those (including children) with reduced, physical, sensory and mental abilities or who do not have the required experience and knowledge.
Safety Instructions

Safety instructions
- Do not block the air intake or outlet.
- Do not expose the air purifier to direct sunlight, a naked flame or heat.
- Only use the air purifier in closed interiors and within the specified technical parameters. Improper usage may pose a threat to life and health.
- Do not use the device near a smoke detector. Air blowing towards a smoke detector could delay the alarm or not trigger at all.

natural_image
Warning symbol of a lightning bolt inside a triangle (no text or numbers)Caution
Risk of injury due to electric shock. Always disconnect the mains plug prior to:
- Moving the device
- Changing the filter
- Maintenance and cleaning

Caution
- Do not use any spray cans with flammable content near to the air purifier!

natural_image
Warning symbol of a flame inside a diamond shape (no text or numbers)Caution
- Do not use any flammable cleaning agents.
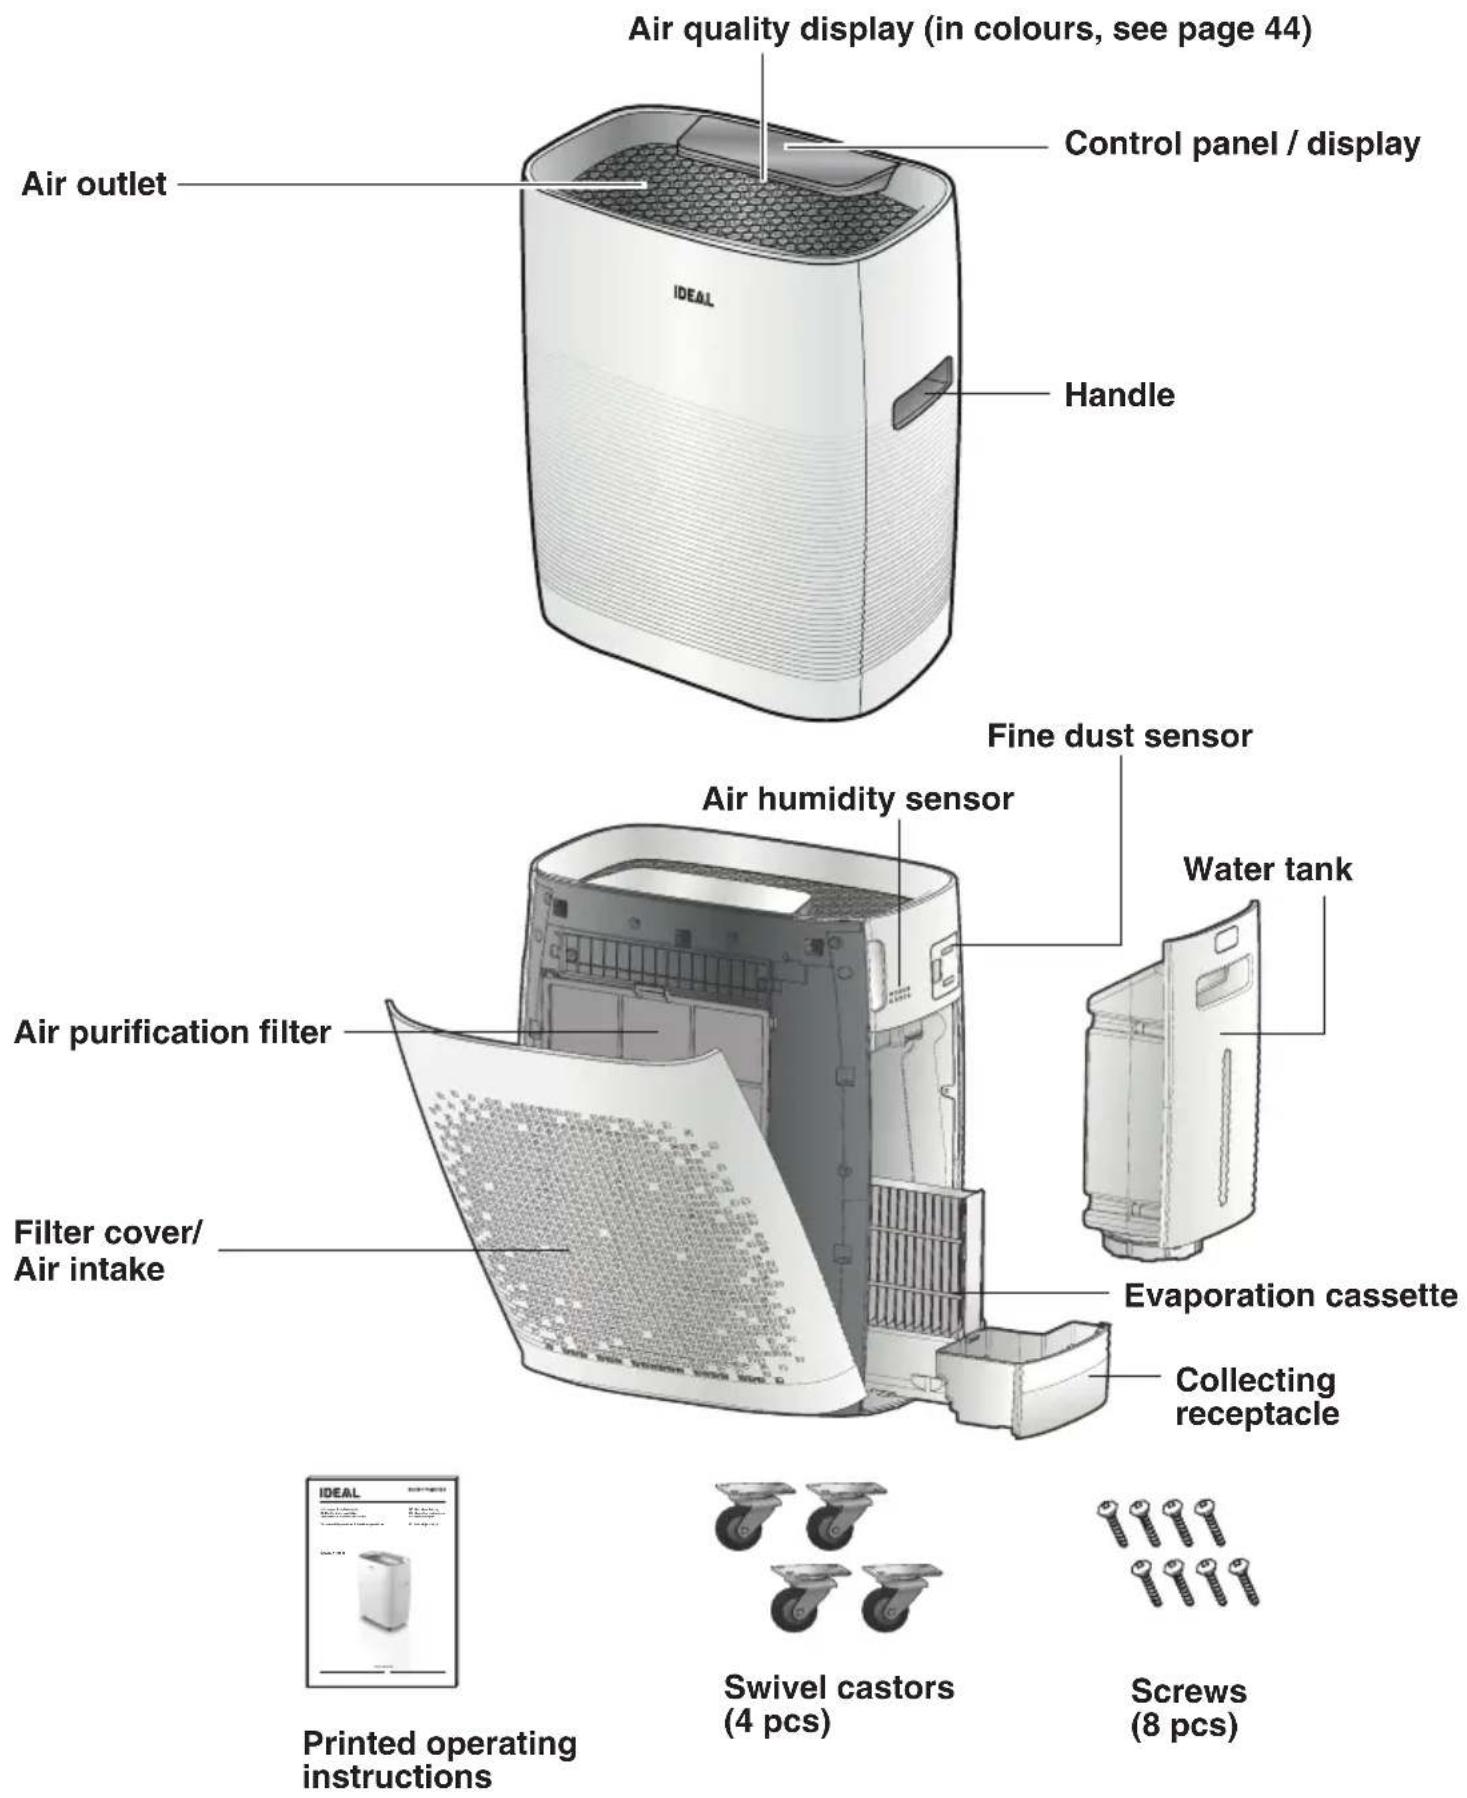
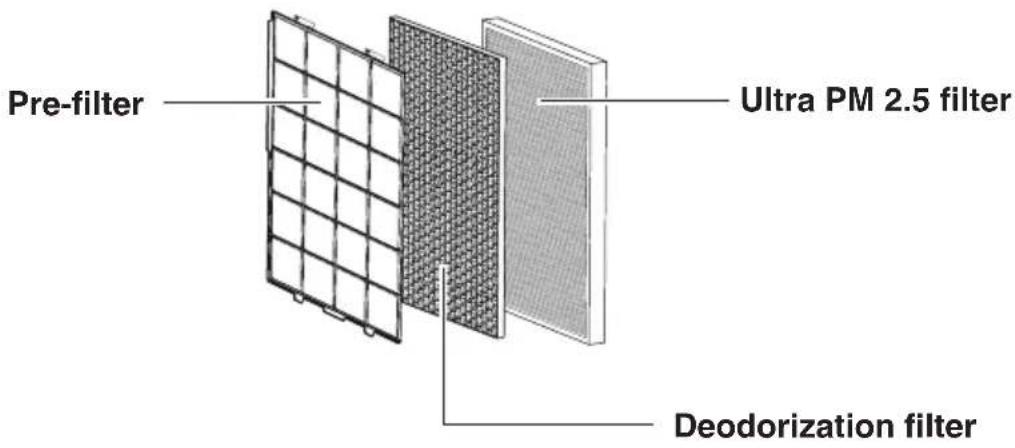
Stage 1 Pre-filter
Filters large dust particles and hair out of the ambient air and extends the filter service life.
Stage 2 Deodorization filter
The deodorization filter effectively filters unpleasant smells and health-injurious gases out to the ambient air.
Stage 3 Ultra PM 2.5 filter
Ideally suited for filtering pollen, fine dust and sensitizers out to the ambient air.
Filter fitting order:
Ultra PM 2.5 filter → Deodorization filter → Pre-filter
CAUTION!
Unplug the mains plug from the socket.
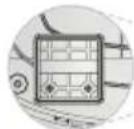
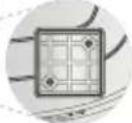
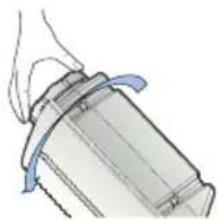
- Open the filter cover.
To open the filter cover, get hold of it at the top on the right and left-hand sides.
- Take out the filters.
Remove the plastic sheet packing from all filters and then follow the filter installation instructions. Filter fitting order:
Ultra PM 2.5 filter →
Deodorization filter → Pre-filter
(see Filter functions on page 39)
- Re-attach the filter cover on the device.
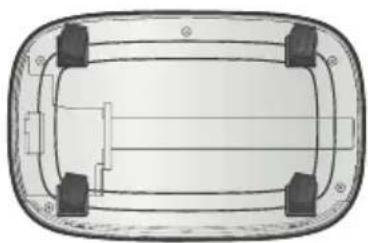
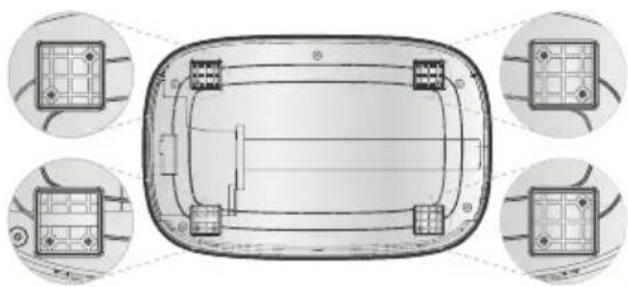
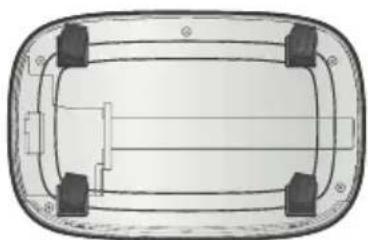
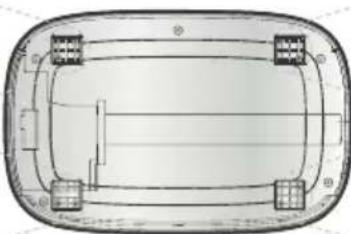
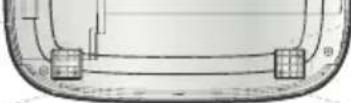
Fitting the rollers
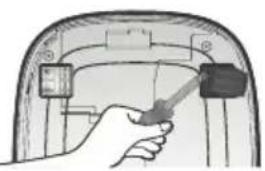
Tool needed for the fitting: Recessed head screwdriver (not included in the scope of delivery)
- Carefully turn the air purifier upside down.
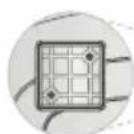
- The fitting position determines the differences of the drill holes for screwing on the rollers (see figure).
- Tighten the screws (2 screws for each roller) with a recessed head screwdriver.

natural_image
Hand inserting a plug into a car door panel (no text or symbols visible)

natural_image
Illustration of a hand holding a tool inside a vehicle dashboard (no text or symbols visible)
natural_image
Top-down schematic of a vehicle or road intersection with no text or symbols- Mains plug into the socket.
- Press the ON/OFF button to switch Use the MODE button to set the required operating mode.
- Press the ON/OFF button to stop the device operating. → All displays on the display unit are switched off.
natural_image
Hand inserting a plug into an electrical socket (no text or symbols visible)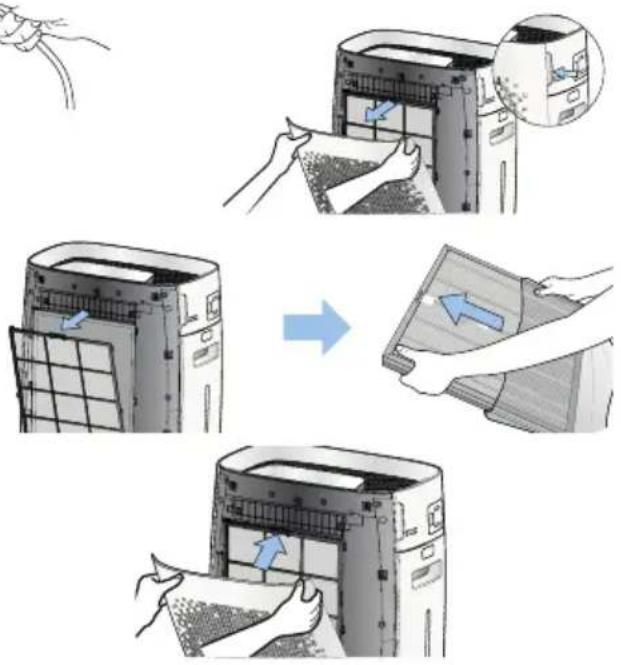

natural_image
Top-down schematic of a vehicle chassis with four circular insets showing internal components (no text or labels)
natural_image
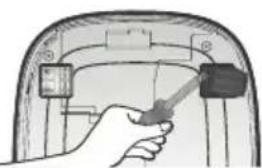
Top-down schematic of a vehicle or road intersection with no text or symbolsEvaporation cassette / Water tank
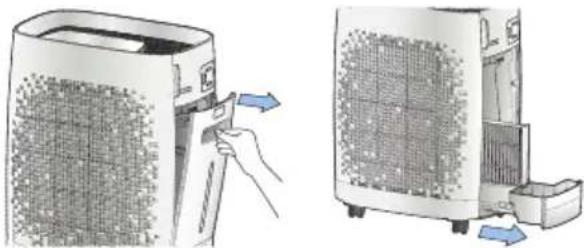
- Please remove the water tank (with your thumb press on PUSH, unlock, open and take out).
- Take care in removing the collecting receptacle (incl. evaporation cassette).
- Remove the plastic wrapping from the evaporation cassette and put it back into the collecting receptacle.
- Unscrew the cap of the water tank and fill it up with cold tap water.
- Screw down the water tank cap.
- Slide the collecting receptacle back into the device and then insert the water tank.
natural_image
Illustration of a hand inserting a device into a device with a blue arrow indicating direction (no text or symbols present)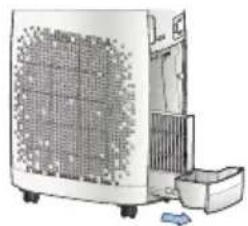
natural_image
Illustration of a portable air conditioner unit with cooling fan and front panel (no text or symbols visible)
natural_image
Illustration of a hand placing a component into a container with a downward arrow indicating motion (no text or symbols)
natural_image
Diagram of a mechanical component with a hand holding a cylindrical part, showing rotational motion (no text or symbols)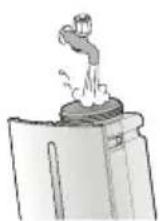

natural_image
Illustration of a mechanical component with blue motion lines indicating movement (no text or symbols)
natural_image
Illustration of a hand inserting a small device into a power heater (no text or symbols visible)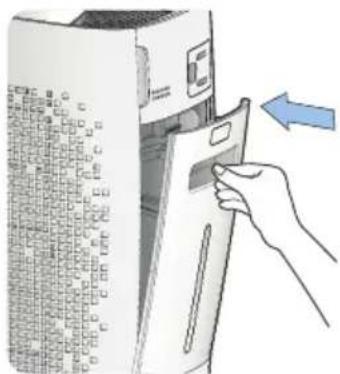
Control panel / display
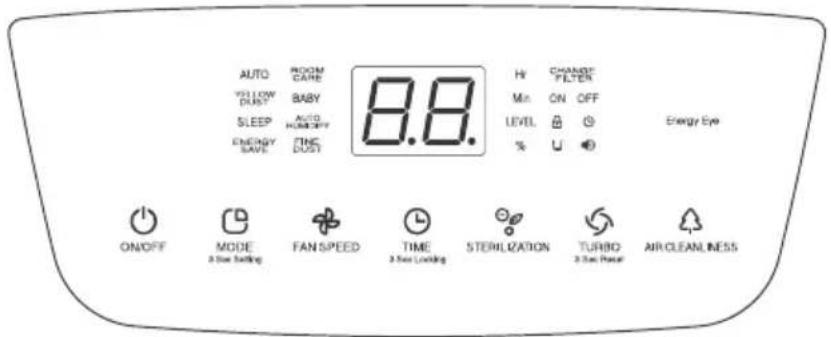
- ON/OFF: On ( lights up) - and off switching (OFF-operation = Standby) of the device.
• MODE: Selection of the required operating mode.
→ Each time the button is pressed, the operating mode changes in the following order AUTO, ROOM CARE, YELLOW DUST, BABY, SLEEP, AUTO HUMIDIFY and INTERVAL.
• FAN SPEED: Setting the fan speeds in the manual operation.
→Each time the button is pressed, the fan speed changes in the following order Speed 1, 2, 3 and 4.
• TIMER: Pre-selection and setting of TIMER ON/OFF.
→ You can set the timer (time for the repeated air purification) from 1 to 12 hours (in hour units).
• STERILIZATION: Switching the plasma ionizer on and off.
→ On pressing the button, the STERILIZATION icon lights up and the plasma ionizer is activated. On again pressing the button, the icon goes out and the plasma ionizer is deactivated.
• TURBO: TURBO mode selection.
→ Press the button to switch on the TURBO mode.
Press the button again to return to the previous operating mode.
• AIR CLEANLINESS: Check the fine dust concentration in the air.
→ On pressing the button, the fine dust concentration symbol and the readings are displayed.
• 3 SEC SETTINGS: Setting different functions.
→ On keeping the MODE button in the OFF operation pressed for at least 3 seconds, the device - accompanied by a bleep - changes into the various setting modi in the following order: ROOM CARE setting mode, on again tapping the MODE button bleep ON/OFF, then CHANGE FILTER (reminder), sensor sensitivity, automatic display brightness, ENERGY SAVE and TURBO operating time (see Pages 55 - 58).
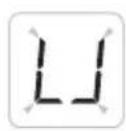
- BUTTON LOCK: Locking the buttons to prevent an unintentional operation.
The button lock is activated when you keep the button pressed for at least 3 seconds during the operation. On activating the button lock, "L" flashes 3-times on the display.
→ The button lock is activated, “ ☐” is displayed.
To lift the button lock, keep the button pressed for 3 seconds. "UL" flashes 3-times on the display.
→ The button lock is deactivated, the “ ⏻” display goes out.
• AIR QUALITY DISPLAY: The cleanliness of the ambient air is displayed.
→ This display lights up when you keep the AIR CLEANLINESS button pressed for 3 seconds during the operation and it goes out when you again press the button for 3 seconds.
Display
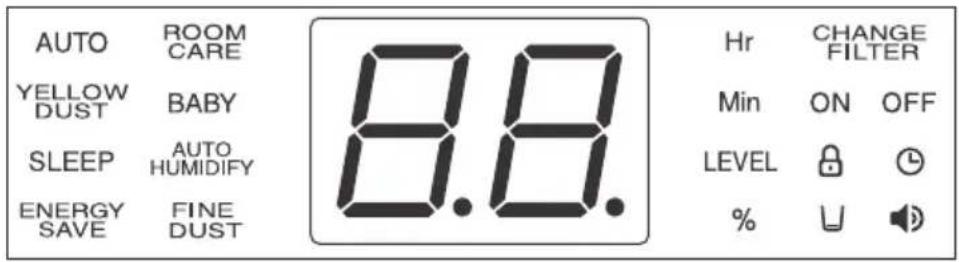
- AUTO: This indicates that the device is...in the automatic air purification mode...
- ROOM CARE: ...in the air purification mode conditioned by the room size...
- YELLOW DUST: ... in the special air purification mode for dust...
- BABY: ... in the special air purification mode for babies...
- INTERVAL: ...in the repeated air purification mode (ON and OFF is displayed)...
- SLEEP: ...in the special air purification mode for a night's sleep...
- AUTO HUMIDIFY: ...in the automatic air humidifying mode...
• 🏠: ...the bleep function is switched on... → The display goes out when the bleep function is turned to OFF. - AUTO TIMER ON: ...the AUTO TIMER ON function is set...
- AUTO TIMER OFF: ...the AUTO TIMER OFF function is set...
- CHANGE FILTER: ...it is now time for the filters to be changed...
• 🔒: ...the button lock is activated... - 88 / Min / Hr / LEVEL: ...indicates the fine dust concentration, timer settings and the fan speed levels for the various operating modes...
• U : ...when the water tank is empty...
• % : ...indicates the degree of humidity (air humidity).
Designations and Function Control Panel / Display
Display
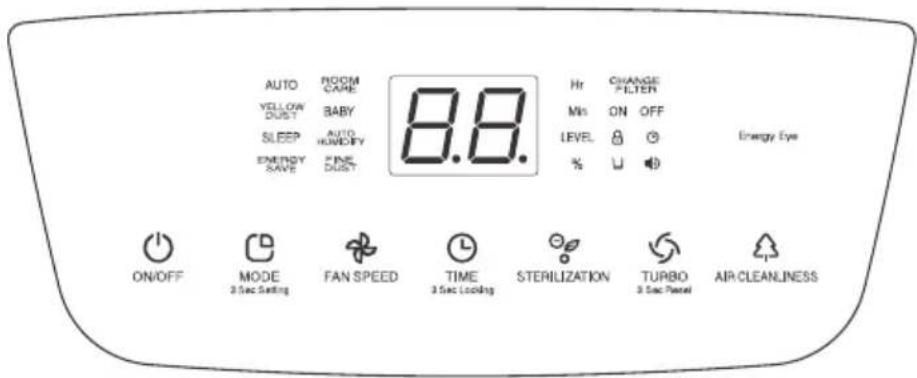
Air quality display (see Page 38): Indicates the cleanliness of the ambient air in various colours.
| Degree of contamination | Level 1 (clean) | Level 2 Level | Level 3 Level | Level 4 Level 5 Level | Level 6 Level 6 | (markedly contaminated) |
| Air quality indicator Blue | Blue- | green | Green Yellow | Low Violet Red |
→ Nothing is indicated if the device is not started after the mains plug is connected. Press the ON/OFF button to start the device.
→ The display automatically goes out when BABY or SLEEP is selected or when with ENERGY SAVE activated darkness is detected.
→ To display air cleanliness, keep the AIR CLEANLINESS button pressed for 3 seconds. The settings are used up to when the device is switched off.
By the way:
If various devices are used in the same room, the air flow may cause the fine dust concentration values to vary.
Basic Operation
- Insert the mains plug into a socket.
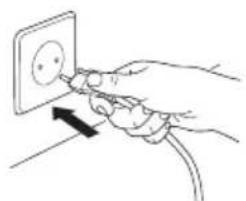
natural_image
Hand inserting a plug into an electrical socket (no text or symbols visible)→ With a bleep, the device changes to the Wait mode. Unplugging the mains plug during the current operation results in the device operating in the operating mode as set beforehand).
- Press the ON/OFF button.
→ The ON/OFF icon lights up on the display and the fan begins to run. The display indicates the current fan speed.
The fan runs in the previous fan speed. (Except for TURBO). A fault code is indicated on the display if the filter cover is not fitted.
- Press the MODE button to select the required operating mode.
→ Each time the button is pressed, the operating mode changes in the following order AUTO, ROOM CARE, YELLOW DUST, BABY, SLEEP, AUTO HUMIDIFY and INTERVAL.
- Press the FAN SPEED button to manually select the required air speed.
→ Pressing FAN SPEED suspends the AUTO operating mode. Each time the button is pressed, the speed setting changes in the following order Speed 1, 2, 3 and 4.
- Press the TIMER button to set the time when the device is to be switched off.
→ You can set the shutdown time during the operation by pressing the TIMER button. The button flashes for 3 seconds before lighting up continuously when the timer is set. You can set the timer in one-hour units between 1 and 12 hours. When you set the timer to “- -”, selection of the AUTO TIMER ON mode is cancelled.
- Press the STERILIZATION button to activate the plasma ionizer.
→ On pressing the button, generation of the ions of the plasma ionizers begins and the icon lights up. To terminate generation of the ions, press the button while the plasma ionizer is operating.
A crackling may be heard when the plasma ionizer is in operation. This is absolutely normal.
- Press the TURBO button to change to the TURBO operating mode.
→ Choose this operating mode to accelerate air purification at the maximum fan speed. The TURBO display lights up when this operating mode is selected. To return to the previous operating mode, again press the button. The TURBO operation is preset for 30 minutes. The device then returns to the previous operating mode. The TURBO operation running time can be changed in the settings (see Page 58).
Basic Operation
- Press the AIR CLEANLINESS button to check on the fine dust concentration.
The concentration values are indicated for 5 seconds on the front display unit.
-
Keep the AIR CLEANLINESS button pressed for 3 seconds to permanently switch the air quality indicator on or off.
-
To end operation of the device, again press the ON/OFF button.
→ All lights on the control panel/ display go out and the device switches to the OFF operation.
AUTO
- Press the ON/OFF button once in the OFF mode.
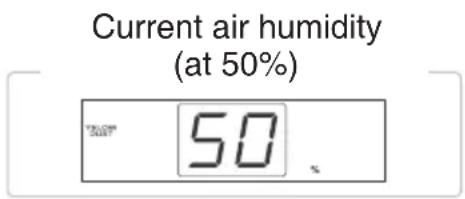
→ The device firstly runs in the AUTO mode. Should a different operating mode have been set beforehand, then the device runs in this mode. - The device checks the purity of the ambient air and adjusts the fan speed accordingly.
- During the operation, the device indicates the current fan speed and the current air humidity of the ambient air.
- Keep the AIR CLEANLINESS button pressed for 3 seconds to switch the air quality indicator on or off.
- The current air humidity and respective fan speed are alternately indicated at 5-second intervals.

ROOM CARE
- Press the MODE button once in the AUTO mode.
- The device automatically regulates the fan speed by means of preset air speeds.
- During the operation, the device indicates the fan speed and the ongoing air humidity of the ambient air.
- Keep the AIR CLEANLINESS key pressed for 3 seconds to switch the air quality indicator on or off.
- The ongoing air humidity and respective fan speed are alternately indicated at 5-second intervals.

YELLOW DUST
- Press the MODE button twice in the AUTO mode.
- The device automatically regulates the fan speed by means of preset algorithms.
- During the operation, the device indicates the current fan speed and the air humidity of the ambient air.
- Keep the AIR CLEANLINESS key pressed for 3 seconds to switch the air quality indicator on or off.
- The current air humidity and respective fan speed are alternately indicated at 5-second intervals.


BABY
- Press the MODE button three times in the AUTO mode.
- The device minimizes the air flow rate and activates the sterilization function to allow babies to sleep well.
- The MODE display firstly lights up for 5 seconds and after that only BABY is displayed.
- The air quality indicator firstly stays switched on for 5 seconds before switching itself off.
- To activate the air quality indicator, keep the AIR CLEANLINESS button pressed for 3 seconds. The indicator stays activated until the power plug is unplugged.

SLEEP
- Press the MODE button 4-times in the AUTO mode.
- The device minimizes the air flow rate for a peaceful, healthy and deep sleep.
- The MODE display firstly lights up for 5 seconds and after that only SLEEP is displayed.
- The air quality indicator firstly stays switched on for 5 seconds before switching itself off.
- To activate the air quality indicator, keep the AIR CLEANLINESS key pressed for 3 seconds. The indicator stays activated until the power plug is unplugged.


AUTO HUMIDIFY
- Press the TURBO button 5-times to change to automatic air humidification.
- The fan speed is automatically controlled in keeping with the pre-settings.
- The current fan speed and air humidity are displayed during the operation.
- To activate or deactivate the air quality indicator, keep the AIR CLEANLINESS button pressed for 3 seconds.
- The current air humidity and respective fan speed are alternately indicated at 5-second intervals.

Note:
- In view of accuracy and reaction rate differences, the indicated values may vary from those of other hygrometers.
- The indicated humidity ranges from a minimum 30 % to a maximum 80 %.
INTERVAL
The INTERVAL mode allows the device to be active for a certain period of time, then to become inactive for the same period of time, then to become active again and so on.
- Press the MODE button 6-times to enter the settings of the INTERVAL Mode.
→ ON and OFF is displayed at the same time. - Press the TIME button to set the repeating operation time (it can be set from 1 to 12 hours by hour).
- If the TIME button is no longer pressed, the unit switches to the set intervals and stops according to the set time.
- The operation corresponds to AUTO air cleaning.
- The current air humidity and respective fan speed are alternately indicated at 5-second intervals.

ENERGY SAVE
- The effect of the energy save function sensor detecting darkness during the operation is for all displays including the air quality indicator to be shut down and for the device to change to the ENERGY SAVE mode (Energy save mode).
- The energy save mode ends when it becomes light or when a button is pressed. → Information on setting the energy save function (through Energy Eye) can be found on Page 58.

MANUAL
- Press the FAN SPEED button to manually change the fan speed.
- Press the FAN SPEED button to set the required fan speed (1, 2, 3 or 4).
→ The fan firstly starts on Setting 1. - The device indicates the fan speed on the display.
- The air quality indicator firstly stays switched on for 5 seconds before switching itself off.
- To activate the air quality indicator, keep the AIR CLEANLINESS key pressed for 3 seconds. The indicator stays activated until the power plug is unplugged.
- The current air humidity and respective fan speed are alternately indicated at 5-second intervals

STERILIZATION
- Press the STERILIZATION button to activate the plasma ionizer. The STERILIZATION icon lights up on the display unit. Press the button again to deactivate the plasma ionizer.

AIR CLEANLINESS
- Press the AIR CLEANLINESS button during the operation to indicate the degree of contamination for 5 seconds.
| Degree of contamination | Level 1 (clean) | Level 2 Level 3 Level | 4 Level 5 Level 6 | (markedly contaminated) |
| Air quality indicator Blue | Blue- green | Green Yellow | Low Violet Red |
Note:
If various devices are used in the same room, the air flow may cause air cleanliness and the degree of contamination to vary.
TURBO
- Press the TURBO button once to change into the operating mode.
- For rapid cleaning of the ambient air, the fan accelerates up to the maximum speed.
- The current air humidity and Fan Speed 5 are alternately indicated at 5-second intervals.
- Keep the AIR CLEANLINESS button pressed for at least 3 seconds to switch the air quality indicator on or off.
- The TURBO operation is preset to run for 30 minutes. The device then returns to the previous operating mode.
- The TURBO operation running time can be changed in the settings.


AUTO TIMER OFF
- Press (in the ON operation) the TIMER button to activate the automatic shutdown.
• Each time the TIMER button is pressed, the time is moved forward by an hour up to 12 hours. - The device automatically switches itself off after expiry of the preset time.

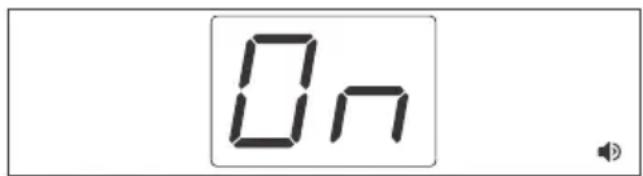
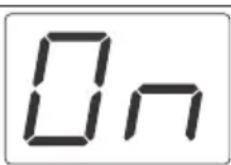
AUTO TIMER ON
- Press the TIMER button in the OFF operation to activate the automatic switch-on.
• Each time the TIMER button is pressed, the time is moved forward by an hour up to 12 hours. - The device automatically switches itself on after expiry of the preset time.
→ The device firstly runs in the AUTO mode. Should a different operating mode have been set beforehand, then the device runs in this mode.

BUTTON LOCK
- To avoid any malfunctions possibly arising during the cleaning or those caused by a child, the buttons can be locked. Keep (in the ON operation) the TIMER button pressed for 3 seconds to activate the button lock.
- To cancel the button lock, keep the TIMER button pressed for 3 seconds.

flowchart
graph LR
    A["TIME<br>3 Sec Locking"] --> B["Button lock activated"]
    B --> C["Button lock deactivated"]
    C --> D["UL"]
CHANGE FILTER
- This indicates that it is now time to change the filters. As soon as the filters are changed, acknowledge the filter change reminder.
- To acknowledge the filter change reminder, keep the TURBO button pressed in the OFF operation for 3 seconds until all readouts on the display unit disappear.
Self Diagnosis
The display unit displays the following warnings given inappropriate use or any malfunctioning. Do contact our Customer Service if one of the following warnings is continuously displayed even under normal operations or following a counter measure.

This points to malfunctioning of the fan motor. Contact our Service.

This points to malfunctioning of the filter cover. Re-fit the filter cover. Should the problem not be corrected as a result, then do contact our Service.

This points to malfunctioning of the memory. Contact our Service.
Appears when the water tank is not installed. Re-fit the water tank. Should the problem not be corrected as a result, then do contact our Service.

Appears when the water tank is empty. Please fill up the water tank. Should the problem not be corrected as a result, then do contact our Service.

→ Contact: Service
• www.krug-priester.com
• service@krug-priester.com
Settings of the room size-conditioned operation
This setting provision allows you to adapt the operation to the size of the room where the device is to be installed.
- The air purifier finds itself in the OFF operation once the mains plug is plugged in → all function displays are switched off. When the device is in operation, press the ON/OFF key to switch it off.
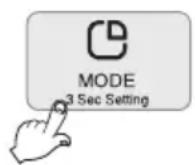
- Keep the MODE button pressed for more than 3 seconds to change to the settings for the room size-conditioned operation.
- “[]” appears on the display as shown below in the figure.
- Through the FAN SPEED button, set the room size (large room → medium-sized room → small room).
- Press the ON/OFF button to save the setting. → The function setting is stopped if you press the TIME button or if no button is pressed for over 20 seconds.


Large room
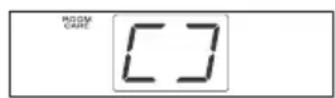
Medium-sized room
Small room
Setting the bleep
-
The air purifier finds itself in the OFF operation once the mains plug is plugged in
→ all function displays are switched off. When the device is in operation, press the ON/OFF key to switch it off.
Keep the MODE button pressed for 3 seconds to firstly access the room size-conditioned operation. Then press the MODE button once. -
"On" and "◀" appear on the display as shown below in the figure.
-
Press the FAN SPEED button to activate the bleep (On) or deactivate it ( _ _ ).
→ Selecting the FAN SPEED button “__” deactivates the bleep.
- Press the ON/OFF button to save the setting.
→ The setting is stopped when the TIMER button is pressed or the device is switched off.
→ The setting is automatically stopped when the button is not actuated for at least 20 seconds.
Setting the reminder at the filter change
-
The air purifier finds itself in the OFF operation once the mains plug is plugged in
→ all function displays are switched off. When the device is in operation, press the ON/OFF key to switch it off.
Keep the MODE button pressed for 3 seconds to firstly access the room size-conditioned operation. Then press the MODE button twice. -
“On” and “CHANGE FILTER” appear as shown below in the figure.
-
Press the FAN SPEED button to activate or deactivate this option.
→ If the option is deactivated, then there is no filter change reminder.
- Press the ON/OFF button to save the setting.
→ The setting is stopped when the TIMER button is pressed or the device is switched off.
→ The setting is automatically stopped when the button is not actuated for at least 20 seconds.
CHANGE FILTER
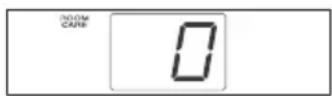
Setting the sensor sensitivity
Sensor sensitivity can be set in three stages: Level 1 “low”, Level 2 “medium” or Level 3 “high”. The default setting is “medium”.
- The air purifier finds itself in the OFF operation once the mains plug is plugged in → all function displays are switched off. When the device is in operation, press the ON/OFF key to switch it off. Keep the MODE button pressed for 3 seconds to firstly access the room size-conditioned operation. Then press the MODE button 3 times.
- “2” is indicated on the display as shown below in the figure.
- Press the FAN SPEED button to set Level 1, 2 or 3.
→ Level 1: Sensor sensitivity is high. (Select this setting in the AUTO mode if - with the air contaminated - the air flow hardly changes.
→ Level 2: Sensor sensitivity is medium.
→ Level 3: Sensor sensitivity is low. (Select this setting in the AUTO mode if - under clean air conditions - the air flow frequently changes.)
- Press the ON/OFF button to save the setting.
→ The setting is stopped when the TIMER button is pressed or the device is switched off.
→ The setting is automatically stopped when the button is not actuated for at least 20 seconds.

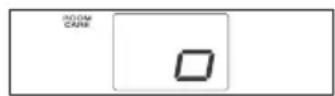
Setting the automatic display brightness
Using this function you can save energy by reducing the display screen brightness when no button is pressed during the operation.
-
The air purifier finds itself in the OFF operation once the mains plug is plugged in → all function displays are switched off. When the device is in operation, press the ON/OFF key to switch it off. Keep the MODE button pressed for 3 seconds to firstly access the room size-conditioned operation. Then press the MODE button 4-times.
-
“On” is indicated on the display as shown below in the figure.
- Press the FAN SPEEDbutton to activate or deactivate this option.
- Press the ON/OFF button to save the setting.
→ The setting is stopped when the TIMER button is pressed or the device is switched off.
→ The setting is automatically stopped when the button is not actuated for at least 20 seconds.

Energy Eye (setting the energy save function)
Using this function you can minimize energy consumption by having the device automatically detect the surrounding brightness. It minimizes the display functions on detecting a dark surrounding. The following instruction shows you how to set darkness detection sensitivity in order to save energy.
-
The air purifier finds itself in the OFF operation once the mains plug is plugged in
→ all function displays are switched off. When the device is in operation, press the ON/OFF key to switch it off.
Keep the MODE button pressed for 3 seconds to firstly access the room size-conditioned operation. Then press the MODE button again 5-times. -
“2” is indicated on the display as shown below in the figure.
-
Press the FAN SPEEDbutton to select a brightness level between "OFF" and "3".
→ OFF: Select this setting to deactivate the energy save function.
→ Level 1: Darkness detecting function with dark surroundings.
→ Level 2: Medium value for darkness detection.
→ Level 3: Darkness detecting function with dim surroundings.
- Press the ON/OFF button to save the setting.
→ The function setting is stopped if you press the TIMER button or the mains plug is unplugged.
→ The setting is automatically stopped when the button is not actuated for at least 20 seconds.
Note: Reaction up to switch-over takes approx. 1 minute.


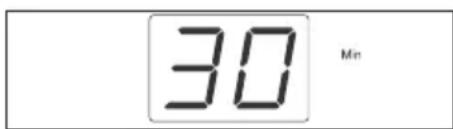
Setting the TURBO operating time
The default setting for the TURBO operating time is 30 minutes.
-
The air purifier finds itself in the OFF operation once the mains plug is plugged in
→ all function displays are switched off When the device is in operation, press the ON/OFF key to switch it off.
Keep the MODE button pressed for 3 seconds to firstly access the room size-conditioned operation. Then press the MODE button 6-times. -
“30” is indicated on the display as shown below in the figure.
-
Press the FAN SPEED button to select 10 minutes, 20 minutes, 30 minutes, 40 minutes, 50 minutes or an unlimited period (☐).
-
Press the ON/OFF button to save the setting.
→ The function setting is stopped if you press the TIMER button or the mains plug is unplugged.
→ The setting is automatically stopped when the button is not actuated for at least 20 seconds.
Cleaning the fine dust sensor (every two months)
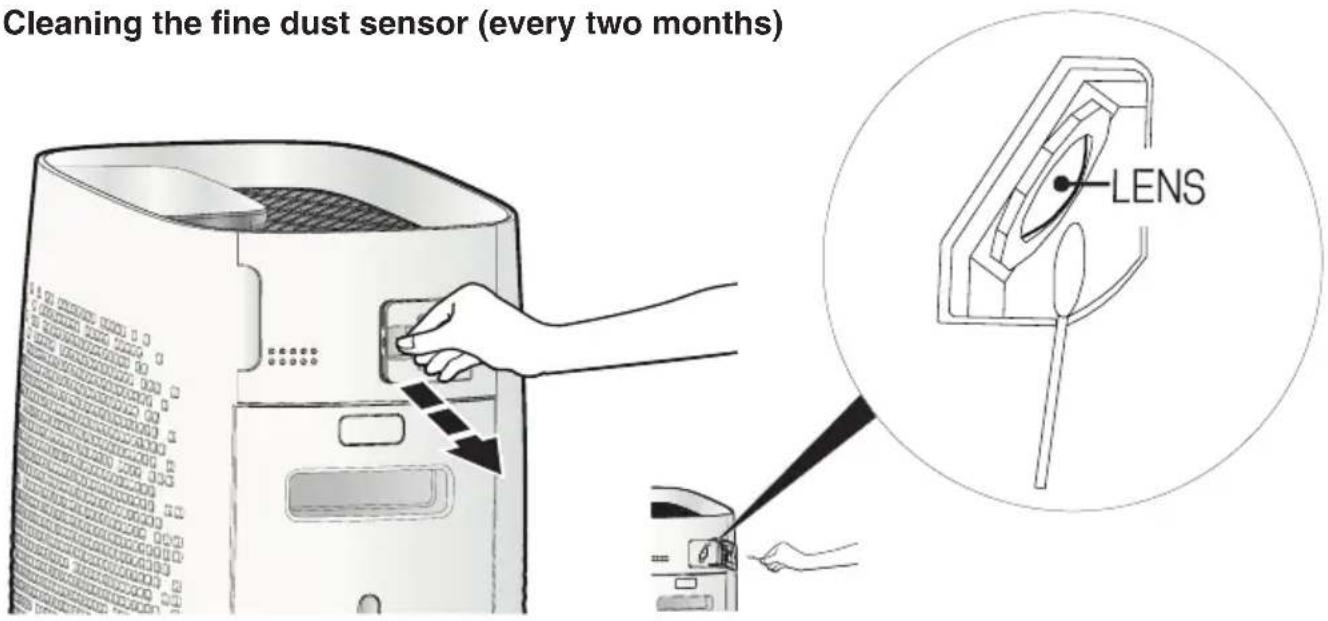
- Open the sensor flap.
- Carefully clean the sensor with a soft paintbrush or a dust extractor.
- Carefully wipe the sensor lens (LENS) with a cotton bud.
- Close the sensor flap.
Note:
Do not clean the sensor with cleaning agents containing volatile constituents such as alcohol or acetone.
If the sensor lens is covered with dust, the air quality indicator might constantly display "red" (very dirty). In this case, again clean the sensor thoroughly.
Cleaning and maintenance
CAUTION: Unplug the mains plug prior to cleaning and maintenance work!
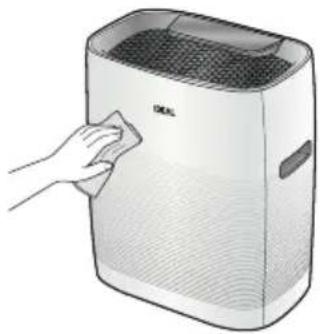
Cleaning the device housing (every two to four weeks)
- Clean the air purifier housing with a lint-free cloth moistened with soapy water.
- Do not use any solvents. Such liquids could damage the surface of the device.
- Protect the air purifier from water.
natural_image
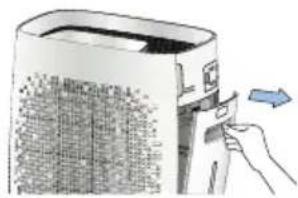
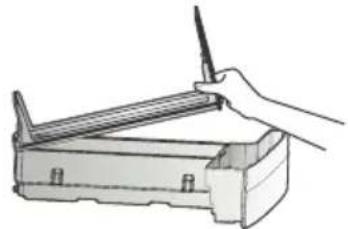
Illustration of a hand cleaning a white industrial air purifier with a cloth (no text or symbols)Cleaning the air outlet (every two to four weeks)
- With both hands, press onto the grille at top of the device at the back - as shown - so that it clips upwards to the front.
- Take hold of the grille here and pull out to the front.
- Clean the grille with a soft paintbrush or a dust extractor.
- Use a soft paintbrush or vacuum cleaner to remove any dust from the ventilation port.

natural_image
Illustration of hands handling a woven mat on a rectangular tray (no text or symbols)
natural_image
Illustration of hands cleaning a textured surface in a container (no text or symbols)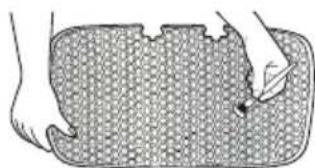
natural_image
Illustration of a hand pressing down on a textured rectangular object (no text or symbols)
CAUTION: Unplug the mains plug prior to cleaning and maintenance work!
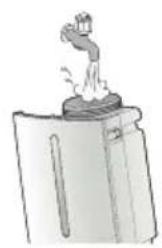
Cleaning the water tank (daily)
- Remove the water tank from the device at the side and unscrew the cap.
The cap is on the underside of the water tank. Pressing the pin at the centre of the cap to break the vacuum makes it easier to open the water tank. Pour out any water in the tank and then briefly rinse it out.
- Fill the water tank with coarse salt or some neutral cleaning agent and water; close the cap and shake the tank 4 or 5 times.
natural_image
Simple line drawing of a container with a lid and a handle, emitting steam (no text or symbols)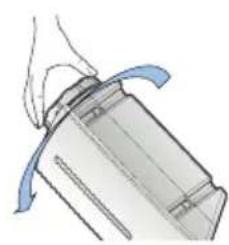
natural_image
Illustration of a mechanical component with blue motion arrows indicating rotation (no text or symbols)
natural_image
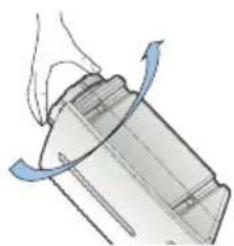
Line drawing of hands holding a rectangular object (no text or symbols)- Again unscrew the cap and rinse the water tank and cap with running water.
→ To remove any salt or cleaning agent residues, rinse out the tank and cap at least 3-times.
- Completely empty the water tank and allow to dry. Screw on the cap and re-fit the tank into the device.
natural_image
Diagram of a mechanical component with a rotating arrow indicating rotation (no text or symbols)
natural_image
Illustration of a mechanical device with a lever and handle (no text or symbols)
natural_image
Illustration of a mechanical component with a blue curved arrow indicating motion (no text or symbols)
natural_image
Illustration of a hand inserting a card into a device with a blue arrow indicating the action (no text or symbols present)Screw on the cap clockwise (towards CLOSE).
On first-time use, it may take some time for the device to operate correctly since the water firstly needs to get to the evaporation cassette.
When filling with waster, always check the condition of the watercylinder. The cylinder must be cleaned if dirty.
CAUTION: Unplug the mains plug prior to cleaning and maintenance work!
Cleaning the collecting receptacle (daily)
- Remove the water tank from the device at the side.
→ Make sure the water does not spill over.
natural_image
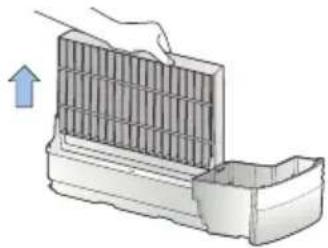
Illustration of a hand inserting a small electronic device into a power heater, showing the process (no text or symbols present)- Remove the evaporation cassette from the collecting receptacle.
→ When you take out the evaporation cassette, the absorbed water could run out.
→ Place the evaporator cassette for 30 minutes in tap water at the ambient temperature.
Then clean the filter with all due care with a brush under running water.
natural_image
Illustration of a hand placing a grating into a container with an arrow indicating upward motion (no text or symbols)
natural_image
Simple line drawing of a basin with a rectangular container and a spoon (no text or symbols)
natural_image
Illustration of hands using a tool to generate smoke or vapor from a tray (no text or symbols)- Take a soft cloth or cleaning brush together with a mild cleaning agent and wipe clean the collecting receptacle under running water.
→ Wipe clean the collecting receptacle with a soft, dry cloth.
natural_image
Illustration of a hand holding a pen resting on a mechanical device (no text or symbols visible)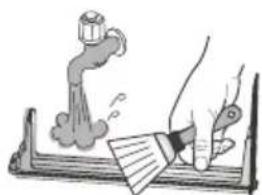
natural_image
Illustration of a hand using a tool to write or print a document with a smokestack (no text or symbols present)
natural_image
Illustration of a hand using a faucet to lift water from a container (no text or symbols)- Assembly everything again in the reverse order.
natural_image
Illustration of a hand pressing down on a grid-like structure with a blue arrow indicating downward motion (no text or symbols)
natural_image
Exterior view of a portable air conditioner unit with cooling fins and a blue directional arrow indicating airflow (no text or symbols)
Note:
- If the collecting receptacle. evaporation cassette and water tank are not correctly installed after cleaning, the device does not function.
- Discolouring and lime scale on the filter surface naturally occur when mineralized water evaporates. The extent to which this is pronounced depends on water quality and the ambient conditions.
- Discolouring or deposits which arise may impact on the humidifying capacity. Therefore, place the evaporation cassette in water for 30 minutes once a week and then clean it under running water.
- Considerable dirt contamination adhering to the evaporation cassette or collecting receptacle could adversely affect the humidifying capacity or make cleaning the collecting receptacle difficult. It results in smells and a deterioration of the device's efficiency.
CAUTION: Unplug the mains plug prior to cleaning and maintenance work! Cleaning the device housing (every two weeks)
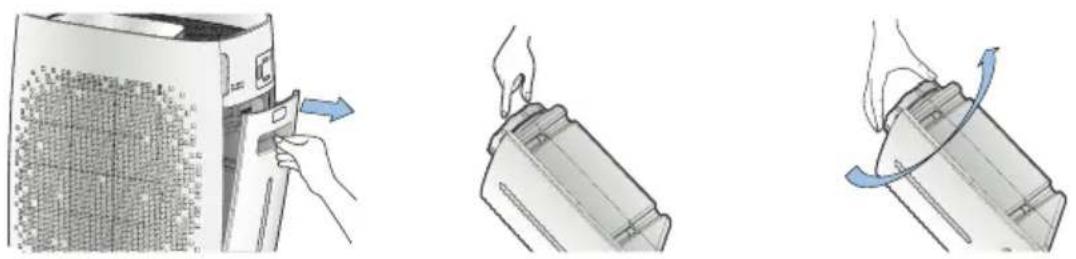
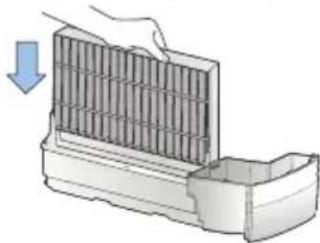
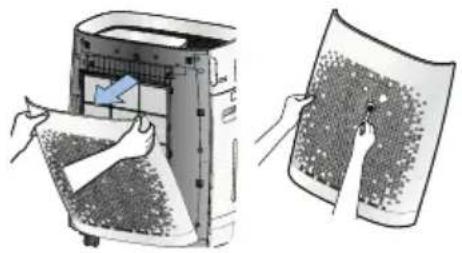
- Open the filter cover.
→ To open the filter cover, take hold of it at the top on the right and left-hand sides.
-
Clean the filter surface with a dust extractor as set to the lowest setting.
-
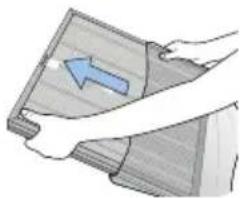
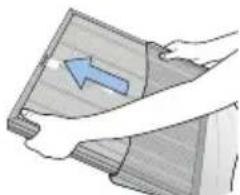
Pull out the pre-filter by the hand grip.
Wash it in warm water and allow to dry.
→ A wet or moist filter can result in smells and in malfunctioning.
natural_image
Illustration of a printer's internal structure being folded into a paper sheet, with hands holding the sheet (no text or symbols present)
natural_image
Diagram of a device with grid layout and a tool interacting with it (no visible text or symbols)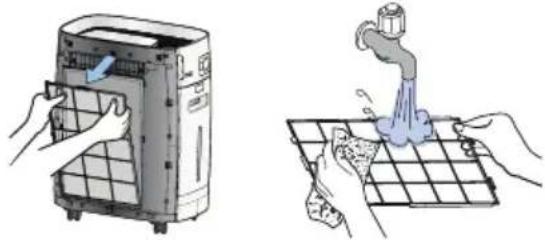
natural_image
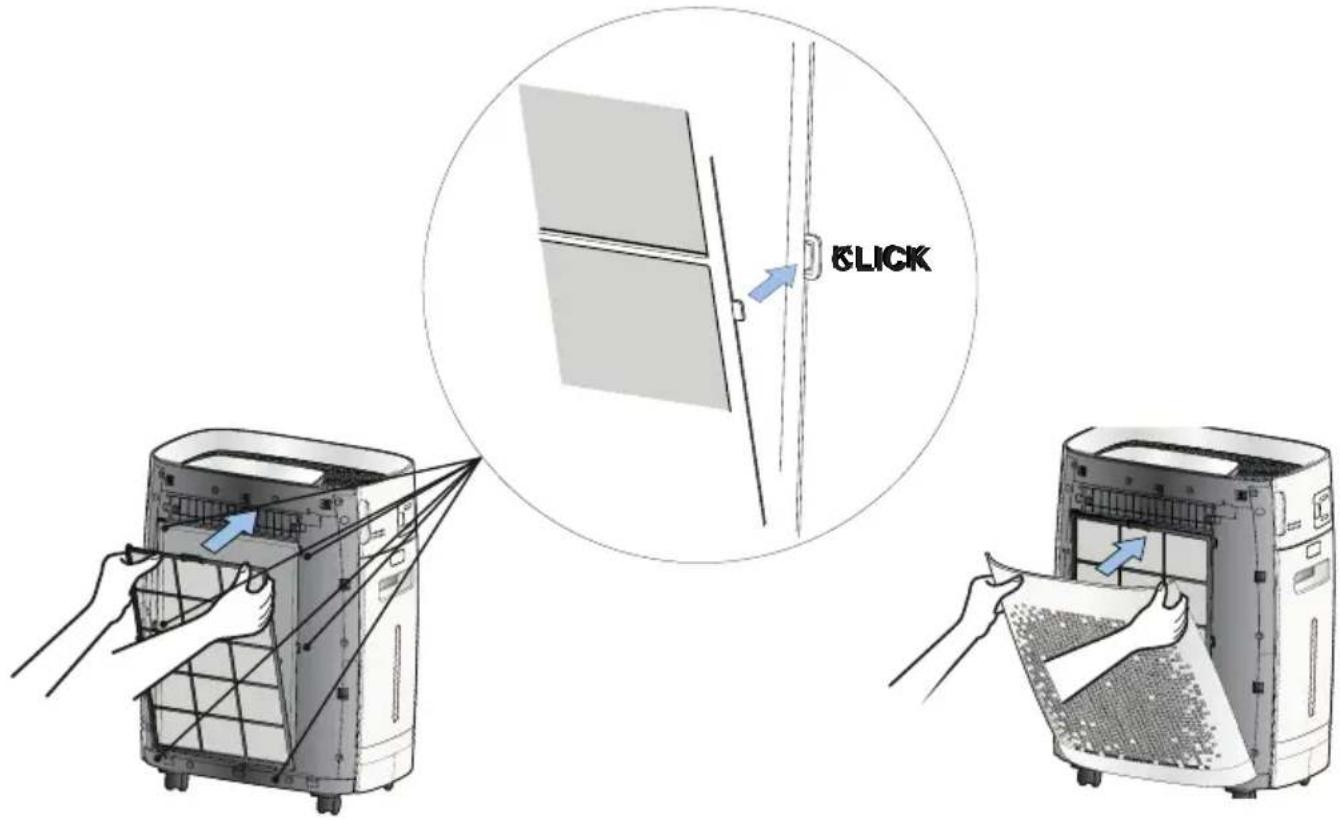
Illustration showing two different cleaning or cleaning methods: a hand washing a water dispenser and a hand cleaning a tiled floor with a faucet (no text or symbols present)- Mount the filter and re-fit the filter cover.
→ Make sure you correctly fit the filter into the grooves (CLICK).
Technical data / Intervals for Maintenance and Filter Change / Filter Change / Accessories
Technical data
| Power supply 220-240 V / 50 Hz | |
| Fan speeds 6 (incl. SLEEP & TURBO) | |
| Power 25 W | |
| Suitable for rooms 25 - 45 m^2 * | |
| Humidifying capacity 300 ml/h | |
| Cleaning capacity up to 300 m^3/h | |
| Noise level 26 - 52 dB (A) | |
| Water tank capacity 2.5 l | |
| Weight | 9.4 kg |
| Dimensions (H × W × D) | 548 × 430 × 275 mm |
Subject to technical changes.
* For a room height of 2.50 m
Intervals for Maintenance and filter change
| Filter Interval Clean / Replace | ||
| Pre-filter every 2 weeks Clean | ||
| Deodorization filter every 12 months Replace | ||
| Ultra PM 2.5 filter every 12 months Replace | ||
| Evaporation cassette (Humidification Filter) | weeklyevery 4 months | CleanReplace |
Filter change
Note:
On fitting, the filter pull tab must point forwards.

Accessories
Deodorization filter + Ultra PM 2.5 filter (Set)
Order. No. 8736 001
Evaporation cassette
Ordering No. 8736 002
| Problem Check list Recommendation | ||
| The device does not function even though I pressed the ON/OFF button. | Is the power cable connected to the socket?Is the room not darkened?Is the device not correctly assembled? | Insert the mains plug into a 220-240 V, 50 Hz socket.Check the energy save function settings (see Page 58)Correctly assemble the device. |
| The air flow rate does not change. • Isn't | the device in the manual mode (MANUAL)?Isn't the device in the SLEEP or BABY mode? | Change to the required operating mode.SLEEP and BAB mode only operate with the minimum air flow rate. |
| The air does not seem to be purified. • Is the | ambient air over-contaminated?Is the room too large?Is there any obstacle near the device?Is the device set up where air movements are restricted?Did you miss out on the time for cleaning and replacing the filter? | Ventilate the room before using the device.Use the device where its coverage limit is not exceeded. (Do not set up the device at a well aired spot, such as a door or a window.Remove all obstacles.Set up the device at another place.Note the filter cleaning and replacement intervals and clean the filters regularly or replace them in good time. |
| There is an unpleasant smell from the blow-off grille. | Did the smell arise on using the device for the first time shortly after its purchase?Do you use the device where there is considerable smoke and smell?Did you miss out on the time for cleaning and replacing the filter? | A smell of activated carbon persists. The smell disappears within one to two weeks after the device is commissioned. The smell is one of activated carbon (charcoal) which is harmless as far as health is concerned.Air purification efficiency may decrease where there is considerable smoke or smell.Air the room before you use the device.Note the filter cleaning and replacement intervals and clean the filters regularly or replace them in good time. |
| The device makes a noise. | Is it a jangling noise? | In the sterilization mode (STERILIZATION), ions generation may be responsible for clicking sounds. |
| There is never any change to the air purification status display. | Is there dust on the dust sensor lens?Does the incidence of dust stay low or high? | Clean the dust sensor lens.Set the sensor sensitivity to Level 1 (low) or Level 3 (high).To reset the sensor, unplug the mains plug and then reconnect it after 30 seconds. |
| The air humidity does not rise. • Is the room | too large?Is water in the water tank?Is the evaporation cassette dirty? | Please note the recommended room size.Fill the water tank with water.Clean the evaporation cassette or check the interval between replacements.No rise in the air humidity can be down to an over-large room, to the ventilation, to a dry floor or dry walls or to a covering carpet. |

Did none of the specified solutions help you with your problem?
→ Contact: Service
• www.krug-priester.com
• service@krug-priester.com
Guarantee terms
IDEAL provides a guarantee for this device from the date of purchase.
The guarantee terms are defined by our local representative.
- If a material or design defect occurs during the guarantee period, IDEAL shall, at its discretion, repair or replace the device, or refund the purchase price.
- The warranty will only be honoured if sufficient evidence is submitted, e.g. sales receipt, and the claim under guarantee is made within the guarantee period.
- The guarantee does not cover wearing parts or parts that need to be replaced regularly.
- The guarantee shall be void if the device is not set up, deployed and cleaned/maintained correctly (in accordance with the operating instructions).
- The guarantee shall be void if the device is connected to a power supply that does not comply with the identification plate data.
Storage
We recommend storing the air purifier in its original packaging in a cool, dry place.
Spare parts and accessories
You can source spare parts via your dealer or at www.ideal.de.
Only use the manufacturer's original parts.
Repairs
Repairs must only be carried out by qualified experts or the customer service department. This also applies if you have a defective power cable. Any attempt by untrained persons to perform repairs may pose considerable risk to the user and invalidate the warranty.
Disposal
This device must not be disposed of with any household waste! Please hand this device in at the collection points provided! Collecting and recycling electrical and electronic waste conserves valuable resources!
The packaging material can be recycled. Dispose of the packaging in an environmentally friendly manner and take it to the recyclable waste collection.
Thanks!

natural_image
Symbol of a trash bin with crossed lines indicating no waste or restriction, accompanied by a black rectangular block below (no text or labels)CE
Legal information
The device is CE-conform and complies with the following directives:
• 2014/35/EU Low Voltage Directive
• 2014/30/EU Electromagnetic compatibility directive
Applied harmonised standards in particular
EN 55014-1:2017
EN 55014-2:2015
EN 61000-3-2:2014
EN 61000-3-3:2013
EN 60335-1:2012+A11:2014+A13:2017
EN 60335-2-65:2003+A1:2008+A11:2012
EN 60335-2-98:2003+A1:2005+A2:2008
EN 62233:2008
The exact technical specifications can be found on the technical specifications sticker on the machine.
To claim under guarantee, the machine must still carry its original identification label.
Subject to alterations without notice.
Made in South Korea
24.06.2020
Date

- Managing Director -
Authorized representative for technical documentation
D-72336 Balingen (Germany)
natural_image
Simple line icon of an open book with an information symbol (no text or numbers present)Préface
natural_image
Warning symbol: black exclamation mark inside a triangle (no text or numbers)natural_image
Warning symbol of a lightning bolt inside a triangle (no text or numbers)Attention
Attention
natural_image
Warning symbol of a flame inside a diamond shape (no text or numbers)Attention
natural_image
Hand inserting a small black component into a car door panel (no text or symbols visible)

natural_image
Hand holding a tool inside a vehicle dashboard (no text or symbols visible)
natural_image
Top-down schematic of a vehicle or enclosure with four corner supports and internal structural lines (no text or symbols)natural_image
Hand inserting a plug into an outlet socket (no text or symbols visible)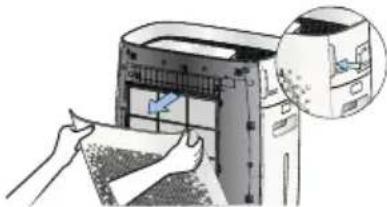
natural_image
Illustration of hands printing a printer into a paper airplane (no text or symbols visible)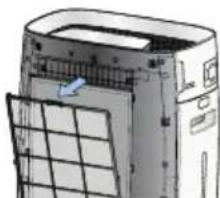
natural_image
Diagram of a computer tower with a grid layout and an arrow indicating a component (no text or symbols present)
natural_image
Illustration of hands holding a wooden board with a blue arrow indicating direction (no text or symbols)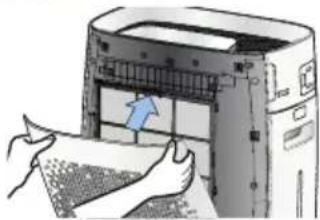
natural_image
Illustration of hands printing or spreading material into a printer (no text or symbols visible)
natural_image
Top-down schematic of a vehicle chassis with front and rear views (no text or symbols)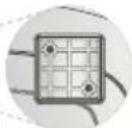

natural_image
Hand inserting a socket into an electrical outlet (no text or symbols visible)natural_image
Illustration of a hand inserting a component into a device (no text or symbols visible)
natural_image
Illustration of a portable air conditioner unit with cooling fan and front panel (no text or symbols visible)
natural_image
Illustration of a hand placing a component into a container with a downward arrow indicating motion (no text or symbols)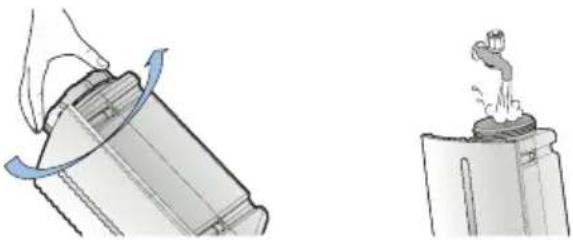
natural_image
Illustration showing a hand pressing down a cylindrical object with a blue curved arrow, and a close-up of a small water bottle on a stand (no text or symbols)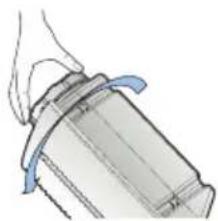
natural_image
Illustration of a mechanical component with blue motion lines indicating movement (no text or symbols)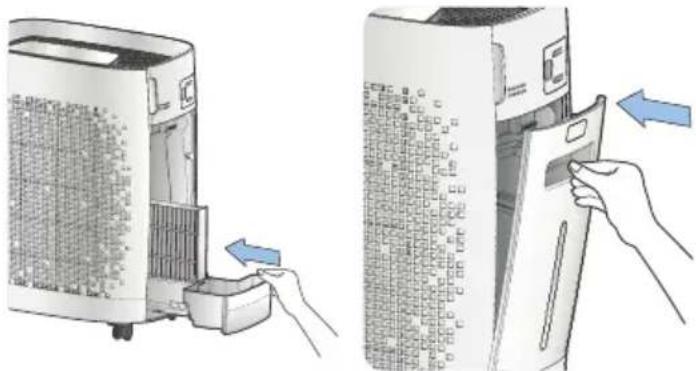
natural_image
Illustration of a hand inserting a card into a device, showing the process from external to internal storage (no text or symbols present)natural_image
Hand inserting a plug into an electrical socket (no text or symbols visible)MANUAL
AUTO TIMER ON
BUTTON LOCK
→ Contact : Service
• www.krug-priester.com
• service@krug-priester.com

natural_image
Illustration of a hand cleaning a white industrial air purifier with a cloth (no text or symbols)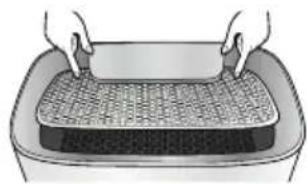
natural_image
Illustration of hands handling a rectangular container with a mesh-covered top (no text or symbols)
natural_image
Illustration of hands cleaning a textured surface in a container (no text or symbols)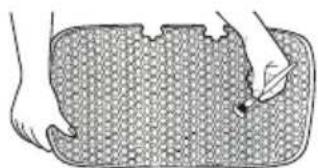
natural_image
Illustration of a hand pressing down on a textured rectangular object (no text or symbols)
natural_image
Simple line drawing of a container with a lid and a handle, emitting steam (no text or symbols)
natural_image
Illustration of a mechanical component with blue motion arrows indicating rotation (no text or symbols)
natural_image
Line drawing of hands holding a rectangular object (no text or symbols)natural_image
Diagram of a mechanical component with a rotating arrow indicating rotation (no text or symbols)
natural_image
Illustration of a mechanical device with a lever and handle (no text or symbols)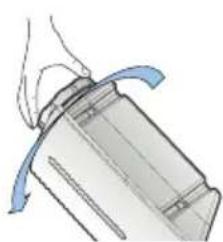
natural_image
Diagram of a mechanical component with a curved blue arrow indicating motion or force (no text or symbols)
natural_image
Illustration of a hand inserting a card into a device with a blue arrow indicating the action (no text or symbols present)natural_image
Illustration of a hand inserting a component into a clean air filter unit, showing the device's internal structure and airflow direction (no text or symbols)natural_image
Illustration of a hand placing a grating into a container with an arrow indicating upward motion (no text or symbols)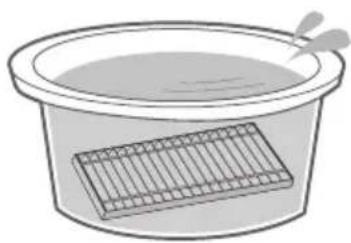
natural_image
Simple line drawing of a basin with a mesh structure inside, no text or symbols present.
natural_image
Illustration of hands using a griddle to remove smoke from a tray (no text or symbols)natural_image
Illustration of a hand holding a pen over a mechanical tool (no text or symbols visible)
natural_image
Illustration of a hand using a tool to write or print a document with a smokestack (no text or symbols present)
natural_image
Illustration of a hand using a faucet to lift water from a container (no text or symbols)natural_image
Illustration of a hand pressing down on a grating device with a blue arrow indicating downward motion (no text or symbols)
natural_image
Exterior view of a modern air purifier with cooling unit and fan (no text or symbols visible)
natural_image
Hand inserting a card into a computer case (no visible text or symbols)Remarque :
natural_image
Illustration of a printer being placed into a paper with a magnified view of its cover (no text or symbols present)
natural_image
Diagram of a mechanical or electrical component with grid and lever mechanism (no text or symbols)natural_image
Illustration showing two different cleaning or cleaning methods: a hand washing a water dispenser and a hand cleaning a tiled floor with a faucet (no text or symbols present)• www.krug-priester.com
• service@krug-priester.com
Clauses de garantie
natural_image
Simple line drawing of a trash bin with two crossed x-axes and a blank base (no text or symbols)CE
natural_image
Simple line icon of an open book with an information symbol (no text or numbers present)Wstep
natural_image
Warning symbol: black exclamation mark inside a triangle (no text or numbers)natural_image
Warning symbol of a lightning bolt inside a triangle (no text or numbers)Uwaga
Uwaga
natural_image
Warning symbol of a flame inside a diamond shape (no text or numbers)Uwaga
natural_image
Illustration of a printer being inserted into a paper, with hands performing the process (no text or symbols visible)
natural_image
Illustration showing a device with airflow direction and a hand holding a paper (no text or symbols)
natural_image
Illustration of hands inserting a printer into a machine (no text or symbols visible)

natural_image
Top-down schematic of a vehicle showing four circular insets with grid patterns, no text or symbols present.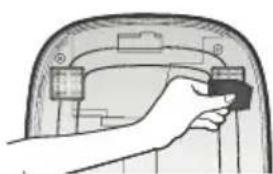
natural_image
Hand inserting a small black component into a car door panel (no text or symbols visible)
natural_image
Hand holding a tool inside a car dashboard (no visible text or symbols)

natural_image
Top-down schematic of a vehicle or enclosure with no visible text, numbers, or symbolsnatural_image
Hand inserting a socket into an electrical outlet (no text or symbols visible)natural_image
Illustration of a hand inserting a device into a device with a blue arrow indicating direction (no text or symbols present)
natural_image
Illustration of a portable air conditioner unit with cooling fan and front panel (no text or symbols)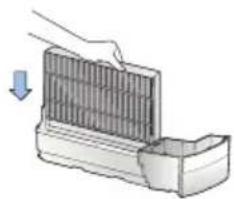
natural_image
Illustration of a hand placing a component into a container with a downward arrow (no text or symbols)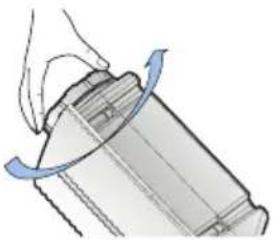
natural_image
Diagram of a mechanical component with a hand holding a curved blade and rotating around it (no text or symbols)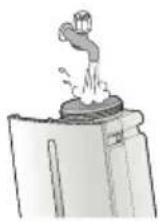
natural_image
Illustration of a mechanical component with blue motion arrows indicating movement (no text or symbols)
natural_image
Illustration of a hand inserting a small device into a large air purifier (no text or symbols visible)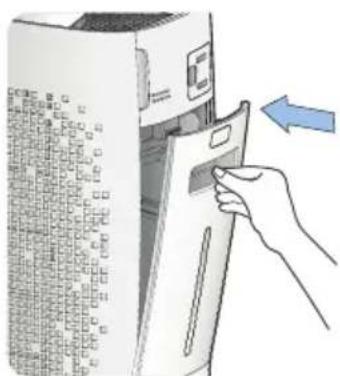
natural_image
Illustration of a hand inserting a card into a server rack (no text or symbols visible)natural_image
Hand inserting a plug into an outlet (no text or symbols visible)
MANUAL
BUTTON LOCK
→ Kontakt: Serwis
- www.opus.pl
• www.krug-priester.com
• service@krug-priester.com

natural_image
Illustration of a hand cleaning a white portable air conditioner unit (no text or symbols visible)
natural_image
Illustration of hands handling a rectangular container with a mesh-covered top (no text or symbols)
natural_image
Illustration of hands cleaning a textured surface in a container (no text or symbols)
natural_image
Illustration of a hand pressing down on a textured rectangular object (no text or symbols)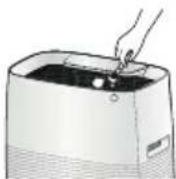
natural_image
Illustration of a faucet pouring liquid into a container (no text or symbols)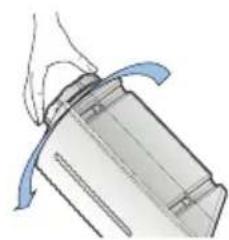
natural_image
Illustration of a mechanical component with blue motion arrows indicating motion (no text or symbols)
natural_image
Line drawing of hands holding a rectangular object (no text or symbols)natural_image
Diagram of a mechanical component with a rotating arrow indicating rotation (no text or symbols)
natural_image
Illustration of a mechanical device with a lever and handle (no text or symbols)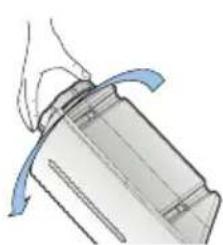
natural_image
Illustration of a mechanical component with blue curved arrows indicating motion or force (no text or symbols)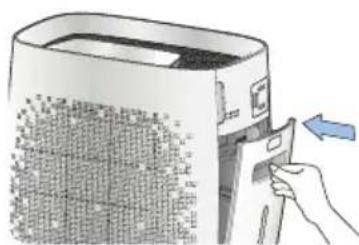
natural_image
Illustration of a hand inserting a card into a device with a blue arrow indicating the process (no text or symbols present)natural_image
Illustration of a hand inserting a component into a clean air filter unit, showing the device's internal structure and airflow direction (no text or symbols)natural_image
Illustration of a hand using a tool to lift a grating into a container (no text or symbols visible)
natural_image
Simple line drawing of a basin with a mesh structure inside, no text or symbols present.
natural_image
Illustration of hands using a griddle to remove a smoke from a tray (no text or symbols)natural_image
Illustration of a hand holding a pen over a mechanical device (no text or symbols visible)
natural_image
Illustration of a hand using a tool to write or print a document with a smokestack (no text or symbols present)
natural_image
Illustration of a hand using a faucet to lift water from a container (no text or symbols)natural_image
Illustration of a hand pressing down on a grating device with a blue arrow indicating downward motion (no text or symbols)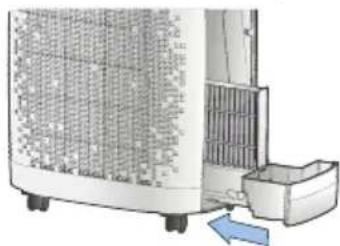
natural_image
Exterior view of a portable air conditioner unit with cooling fins and a blue directional arrow indicating airflow (no text or symbols)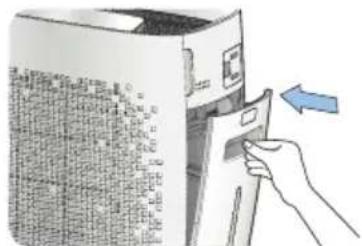
natural_image
Hand inserting a card into a computer case (no visible text or symbols)Wskazówka:
natural_image
Illustration of a computer with a paper being inserted into a device, and a close-up of a textured surface being held by hands (no text or symbols present)
natural_image
Diagram of a mechanical or electrical component with grid and lever mechanism (no text or symbols)natural_image
Illustration showing hands cleaning a water dispenser and collecting water from a drain (no text or symbols)Dane techniczne
• www.krug-priester.com
• service@krug-priester.com
Przechowywanie
natural_image
Simple line drawing of a trash bin with two crossed x-axes and a circular wheel, no text or symbols present.CE
Wskazówki prawne
For more health, vitality and quality of life. Perceptible.
With every breath you take.
D-72336 Balingen (Germany)
www.krug-priester.com

- Vorwort
- Sicherheitshinweise
- Achtung
- Bedienfeld / Display
- MANUAL
- AUTO TIMER ON
- BUTTON LOCK
- Hinweis:
- Garantiebestimmungen
- CE
- EN Operating Instructions (35 - 67)
- Introduction
- Intended use
- Safety instructions
- Caution
- Stage 1 Pre-filter
- Stage 2 Deodorization filter
- Stage 3 Ultra PM 2.5 filter
- Filter fitting order:
- CAUTION!
- Unplug the mains plug from the socket.
- Fitting the rollers
- Evaporation cassette / Water tank
- Control panel / display
- Display
- Designations and Function Control Panel / Display
- Basic Operation
- AUTO
- ROOM CARE
- YELLOW DUST
- BABY
- SLEEP
- AUTO HUMIDIFY
- Note:
- INTERVAL
- ENERGY SAVE
- STERILIZATION
- AIR CLEANLINESS
- TURBO
- AUTO TIMER OFF
- CHANGE FILTER
- Self Diagnosis
- Settings of the room size-conditioned operation
- Setting the bleep
- Setting the reminder at the filter change
- Setting the sensor sensitivity
- Setting the automatic display brightness
- Energy Eye (setting the energy save function)
- Setting the TURBO operating time
- Cleaning the fine dust sensor (every two months)
- Cleaning and maintenance
- CAUTION: Unplug the mains plug prior to cleaning and maintenance work!
- Cleaning the device housing (every two to four weeks)
- Cleaning the air outlet (every two to four weeks)
- Cleaning the water tank (daily)
- Cleaning the collecting receptacle (daily)
- CAUTION: Unplug the mains plug prior to cleaning and maintenance work! Cleaning the device housing (every two weeks)
- Technical data / Intervals for Maintenance and Filter Change / Filter Change / Accessories
- Filter change
- Accessories
- Guarantee terms
- Storage
- Spare parts and accessories
- Repairs
- Disposal
- Thanks!
- Legal information
- Préface
- Attention
- Remarque :
- Clauses de garantie
- Wstep
- Uwaga
- Wskazówka:
- Przechowywanie
- Wskazówki prawne
Brand : IDEAL
Model : AP35 H
Category : Air purifier