BaristaChef Inox 1834 - Coffee grinder CASO - Free user manual and instructions
Find the device manual for free BaristaChef Inox 1834 CASO in PDF.

| Product type | Electric coffee grinder |
| Brand | Caso |
| Model | BaristaChef Inox 1834 |
| Material | Stainless steel |
| Dimensions (approx.) | 20 x 12 x 30 cm |
| Weight (approx.) | 2.5 kg |
| Power supply | 220-240 V, 50/60 Hz |
| Power (estimated) | 150-200 W |
| Bean hopper capacity | Approximately 200 g |
| Grounds container capacity | Maximum 40 cups (depending on grind) |
| Grind adjustment | Adjustment ring (coarse to fine) |
| Cup or time programming | 2 to 12 cups or 1 to 40 seconds |
| Display | Digital display (cups or time) |
| Use with portafilter | Yes, support for diameter 52-58 mm |
| Grounds container included | Yes, with lid |
| Cleaning brush | Included |
| Auto-shutoff function | Yes, after 1 min of inactivity |
| Overheat protection | Yes, error code E1 |
| Maximum continuous operation time | 3 minutes, then cooling 10 minutes |
| Cleaning | Removable parts hand washable; wipe motor block |
| Warranty | 24 months |
| Country of manufacture | Not specified |
Frequently Asked Questions - BaristaChef Inox 1834 CASO
User questions about BaristaChef Inox 1834 CASO
0 question about this device. Answer the ones you know or ask your own.
Ask a new question about this device
Download the instructions for your Coffee grinder in PDF format for free! Find your manual BaristaChef Inox 1834 - CASO and take your electronic device back in hand. On this page are published all the documents necessary for the use of your device. BaristaChef Inox 1834 by CASO.
USER MANUAL BaristaChef Inox 1834 CASO
Original-Bedienungsanleitung | Instruction Manual | Mode d'emploi Manual del usuario | Gebruiksaanwijzing | Bruksanvisning Kullanım Kılavuzu
Elektrische Kaffeemühle „BaristaChef Inox“ Electric coffee grinder “BaristaChef Inox” Moulin à café électrique « BaristaChef Inox » Molinillo de café eléctrico «BaristaChef Inox» Elektrische koffiemolen „BaristaChef Inox“ Elektrisk kaffekvarn „BaristaChef Inox“ Elektrikli kahve değirmeni „BaristaChef Inox“

natural_image
Exterior view of a COSO design coffee maker with black and silver casing (no visible text or symbols on the device itself)Technische Daten / Technical Data / Caractéristiques techniques / Datos técnicos / Technische gegevens / Tekniska data / Teknik bilgiler
| Gerät / Device / Appareil / Aparato / Apparaat / Apparat / Cihaz | Elektrische Kaff eemühle / Electric coff ee grinder / Moulin à café électrique / Molinillo de café eléctrico / Elektrische koffi emolen / Elektrisk kaff ekvarn / Elektrikli kahve değirmeni |
| Name / Name / Nom / Denominación / Name / Namn / Adı | CASO BaristaChef Inox |
| Artikel-Nr. / Item No. / N°. d'article / N° de art / Artikelnr. / Artikel-nr. / Ürün no. | 01834 |
| Anschlussdaten / Mains data / Données de raccordement / Conexión / Aansluitgegevens/ Anslutningsdata / Bağlantı Bilgileri | 220- 240V; 50/60 Hz |
| Leistungsaufnahme / Power consumption / Puissance consommée / Consumo de potencia / Vermogens / Eff ektbehov / Mikrodalga nominal çıkışı | 150 W |
| Außenabmessungen (B/H/T) / External measurements (W/H/D) / Dimensions extérieures (I/h/p) / Dimensiones exteriores (An/H/P) / Afmetingen (B/H/D) / Yttermått (BxHxD) / Dış Gövdenin Boyutu (YxGxD) | 115 mm x 355 mm x 180 mm |
| Nettogewicht / Net weight / Poids net / Peso net / Nettogewicht / Nettovikt / Net ağırlık | 2,1 kg |
DE
natural_image
Diagram showing a mechanical assembly with a curved bracket and a rectangular component, no text or symbols present.4.4Typenschild
natural_image
Diagram of a mechanical or electrical component with concentric rings and directional arrows, no readable text or symbols present.7Störungsbehebung
1.1 Information on this manual....17
1.2 Warning notices ....17
1.3 Limitation of liability 17
1.4 Copyright protection....18
2 Safety....18
2.1 Intended use....18
2.2 General Safety information....19
2.3 Sources of danger 20
2.3.1 Danger of injury 20
2.3.2 Dangers due to electrical power....20
3 Commissioning 20
3.1 Packaging safety information 20
3.2 Delivery scope and transport inspection 21
3.3 Unpacking....21
3.4 Setup location requirements....21
3.5 Electrical connection....21
4 Design and Function....22
4.1 Overview....22
4.3 Assembling....23
4.3.1 Assembly for use with the collection container 23
4.3.2 ssembly for use with the portafilter holder 23
4.4 Rating plate....24
5 Operation and Handing....24
5.1 Before first use....24
5.2 Notes and grinding tips....24
5.3 Grinding coffee....24
6 Cleaning and Maintenance 26
6.1 Safety information....26
6.2 Cleaning....26
6.3 Cleaning the grinding mechanism 26
7 Troubleshooting 26
7.1 Safety notices ....27
7.2 Troubleshooting table 27
8 Disposal of the Old Device 27
8.1 Disposal of the packaging....28
9 Guarantee....28
1General
Please read the information contained herein so that you can become familiar with your device quickly and take advantage of the full scope of its functions. Your device will serve you for many years if you handle it and care for it properly. We wish you a lot of pleasure in using it!
1.1 Information on this manual
These operating instructions are a component of the electric coff ee grinder "BaristaChef Inox" (referred to hereafter as the Device) and provide you with important information for the initial commissioning, safety, intended use and care of the device.
The Operating Instructions must be available at all times at the device. This Operating Manual must be read and applied by every person who is instructed to work with the device:
- Commissioning,
- Operation,
- Troubleshooting and/or
- Cleaning
Keep the Operating Manual in a safe place and pass it on to the subsequent owner along with the device.
1.2 Warningnotices
The following warning notices are used in the Operating Manual concerned here.

DANGER
A warning notice of this level of danger indicates a potentially dangerous situation.
If the dangerous situation is not avoided, this can lead to death or serious injuries.
Observe the instructions in this warning notice in order to avoid the danger of death or serious personal injuries.

WARNING
A warning notice of this level of danger indicates a possible dangerous situation.
If the dangerous situation is not avoided, this can lead to serious injuries.
▶ Observe the instructions in this warning notice in order to avoid the personal injuries.

ATTENTION
A warning notice of this level of danger indicates a possible dangerous situation.
If the dangerous situation is not avoided, this can lead to slight or moderate injuries.
▶ Observe the instructions in this warning notice in order to avoid the personal injuries.
PLEASE NOTE
A notice of this kind indicates additional information, which will simplify the handling of the machine.
1.3 Limitation of liability
All the technical information, data and notices with regard to the installation, operation and care are completely up-to-date at the time of printing and are compiled to the best of our knowledge and belief, taking our past experience and findings into consideration.
No claims can be derived from the information provided, the illustrations or descriptions in this manual.
The manufacturer does not assume any liability for damages arising as a result of the following:
• Non-observance of the manual
• Uses for non-intended purposes
- Improper repairs
- Technical alterations, modifications of the device
- Use of unauthorized spare parts
Modifi cations of the device are not recommended and are not covered by the guarantee. All translations are carried out to the best of our knowledge. We do not assume any liability for translation errors, not even if the translation was carried out by us or on our instructions. The original German text remains solely binding.
1.4 Copyright protection
This document is copyright protected. Braukmann GmbH reserves all the rights, including those for photomechanical reproduction, duplication and distribution using special processes (e.g. data processing, data carriers, data networks), even partially. Subject to content and technical changes.
2Safety
This chapter provides you with important safety notices when handling the device. The device corresponds with the required safety regulations. Improper use can result in personal or property damages.
2.1 Intendeduse
This device is only intended for use in households in enclosed spaces for
• Coff ee bean grinder
This device is intended for use in the household and for similar applications such as:
- in kitchens for employees in shops, offices, and other commercial areas;
- in B&Bs,
• in agricultural estates; - by customers in hotels, motels and other residential establishments.
Uses for a different purpose or for a purpose which exceeds this description are considered incompatible with the intended or designated use.

WARNING
Danger due to unintended use!
Dangers can emanate from the device if it is used for an unintended use and/or a different kind of use.
▶ Use the device exclusively for its intended use.
▶ Observe the procedural methods described in this Operating Manual.
Claims of all kinds due to damages resulting from unintended uses are excluded. The User bears the sole risk.
2.2 General Safety information
PLEASE NOTE
Please observe the following general safety notices with regard to the safe handling of the device.
Children must not use this appliance. Keep the appliance and its power supply unit away from children.
The device may be used by individuals with reduced physical, sensory or mental capabilities or a lack of experience and / or knowledge of their use if they are supervised or have been instructed at to the safe use of the device and have understood the resulting hazards.
▶ Children shall not play with the appliance.
- Use the appliance only as described in the user's guide to avoid possible injury from misuse.
▶ Operate the appliance only in dry indoor areas.
▶ Do not operate the appliance unattended.
▶ Do not use the appliance:
- if the appliance itself or parts are damaged,
- if the power cord or plug is damaged,
- if the appliance has been dropped.
▶ Make sure that the power socket is easily accessible so that you can quickly unplug the device if required.
Do not make any modifications to the appliance or the power cord. Only have repairs carried out by a specialist workshop, as appliances that have not been repaired properly endanger the user. Please also observe the enclosed warranty conditions.
▶ Only use the device with original accessories.
Place the appliance on a stable, level surface. Ensure sufficient distance between the appliance and strong heat sources such as hotplates, heating pipes, etc.
▶ Do not clean the appliance with hard, scratchy or abrasive cleaning agents such as steel wool or similar.
▶ Cleaning and user maintenance shall not be made by children.
▶ Defective components must always be replaced with original replacement parts. Only such parts will guarantee that the safety requirements are fulfilled.
Carefully clean all components that will come in contact with food before first use.
▶ Use the device continuously for a maximum of 3 minutes. Then let the device could down for 10 minutes.
▶ Do not immerse the appliance in water or other liquids. Do not put it in the dishwasher.
PLEASE NOTE
▶ Do not overload the device and do not let it operate un-loaded.
▶ Be sure the parts are properly assembled to original base and in place.
2.3 Sources of danger
2.3.1 Danger of injury

WARNING
Careless use of the appliance may result in injury. Note the following warnings to avoid injury.
▶ Never use your finger os tools to push ingredients deeper while the device is running.
▶ Disconnect the device from mains power if it is unsupervised; before assembling it; when changing over accessories and when disassembling or cleaning it.
▶ Turn the device off and disconnect it from mains power before changing over accessories or installing spare parts which move during operation.
▶ Stop processing of food immediately if rotating accessories no longer turn or only turn with diffi culty and unplug the device.
2.3.2 Dangers due to electrical power

DANGER
Mortal danger due to electrical power!
Mortal danger exists when coming into contact with live wires or subassemblies! Observe the following safety notices to avoid dangers due to electrical power:
If the power cord of this appliance is damaged, it must be replaced by the manufacturer or its customer service or a similarly qualified person in order to avoid hazards.
Do not open the housing on the device under any circumstances. There is a danger of an electrical shock if live connections are touched and the electrical or mechanical structure is altered. In addition, functional faults on the device can also occur.
▶ Do not immerse the appliance in water for cleaning.
3Commissioning
This chapter provides you with important safety notices during the initial commissioning of the device. Observe the following notices to avoid dangers and damages:
3.1 Packaging safety information

WARNING
Packaging materials may not be used for playing. There is a danger of suffocation.
3.2 Delivery scope and transport inspection
The device includes the following components:
• BaristaChef Inox • lid
- portafi Iter holder
- collection container
- cleaning brush
- operating manual
PLEASE NOTE
Examine the shipment to ensure the unit and manual are included and inspect the unit for any visible damage.
▶ Immediately notify the carrier and/or the supplier about an incomplete shipment or any damage as a result of inadequate packaging or mishandling.
3.3 Unpacking
Carefully remove the packaging material and unit from the carton.
PLEASE NOTE
If possible, keep the original packaging for the duration of the guarantee period in the event a return is necessary.
3.4 Setup location requirements
In order to ensure the safe and trouble-free operation of the device, the setup location must fulfil the following prerequisites:
- Place the device on a firm and even work surface.
- Choose the setup location in such a way that children cannot reach any hot surfaces on the device.
- The device is not intended to be installed in a wall or a built-in cupboard.
- Do not use the device outdoors.
- Do not set up the device in a hot, wet or extremely damp environment or near flammable material.
- The installation and assembly of this device in non-stationary setup locations (e.g. on ships) must be carried out by specialist companies / electricians, provided they guarantee the prerequisites for the safe use of this device.
3.5 Electrical connection
In order to ensure the safe and trouble-free operation of the device, the following instructions must be observed for the electrical connection:
- Before connecting the device, compare the connection data (voltage and frequency) on the rating plate with those of your electrical network. This data must agree in order that no damages occur in the device. If in doubt, ask your qualified electrician.
- The connection between the device and the electrical network may employ a 3 meter long (max.) extension cable with a cross-section of 1.5 mm ^2 . The use of multiple plugs or gangs is prohibited because of the danger of fire that is involved with this.
- Make sure that the power cable is undamaged and has not been installed under the ice maker or over hot or sharp surfaces.
- The electrical outlet must be protected by a 16A safety cut-out switch.
- The electrical safety of the device is only guaranteed if the device is connected to a properly installed protective conductor system. If in doubt, have the house installation checked over by a qualified electrician. The manufacturer cannot be made responsible for damages that are caused by a missing or damaged protective conductor.
4 Design and Function
This chapter provides you with important safety notices on the design and function of the device.
4.1 Overview
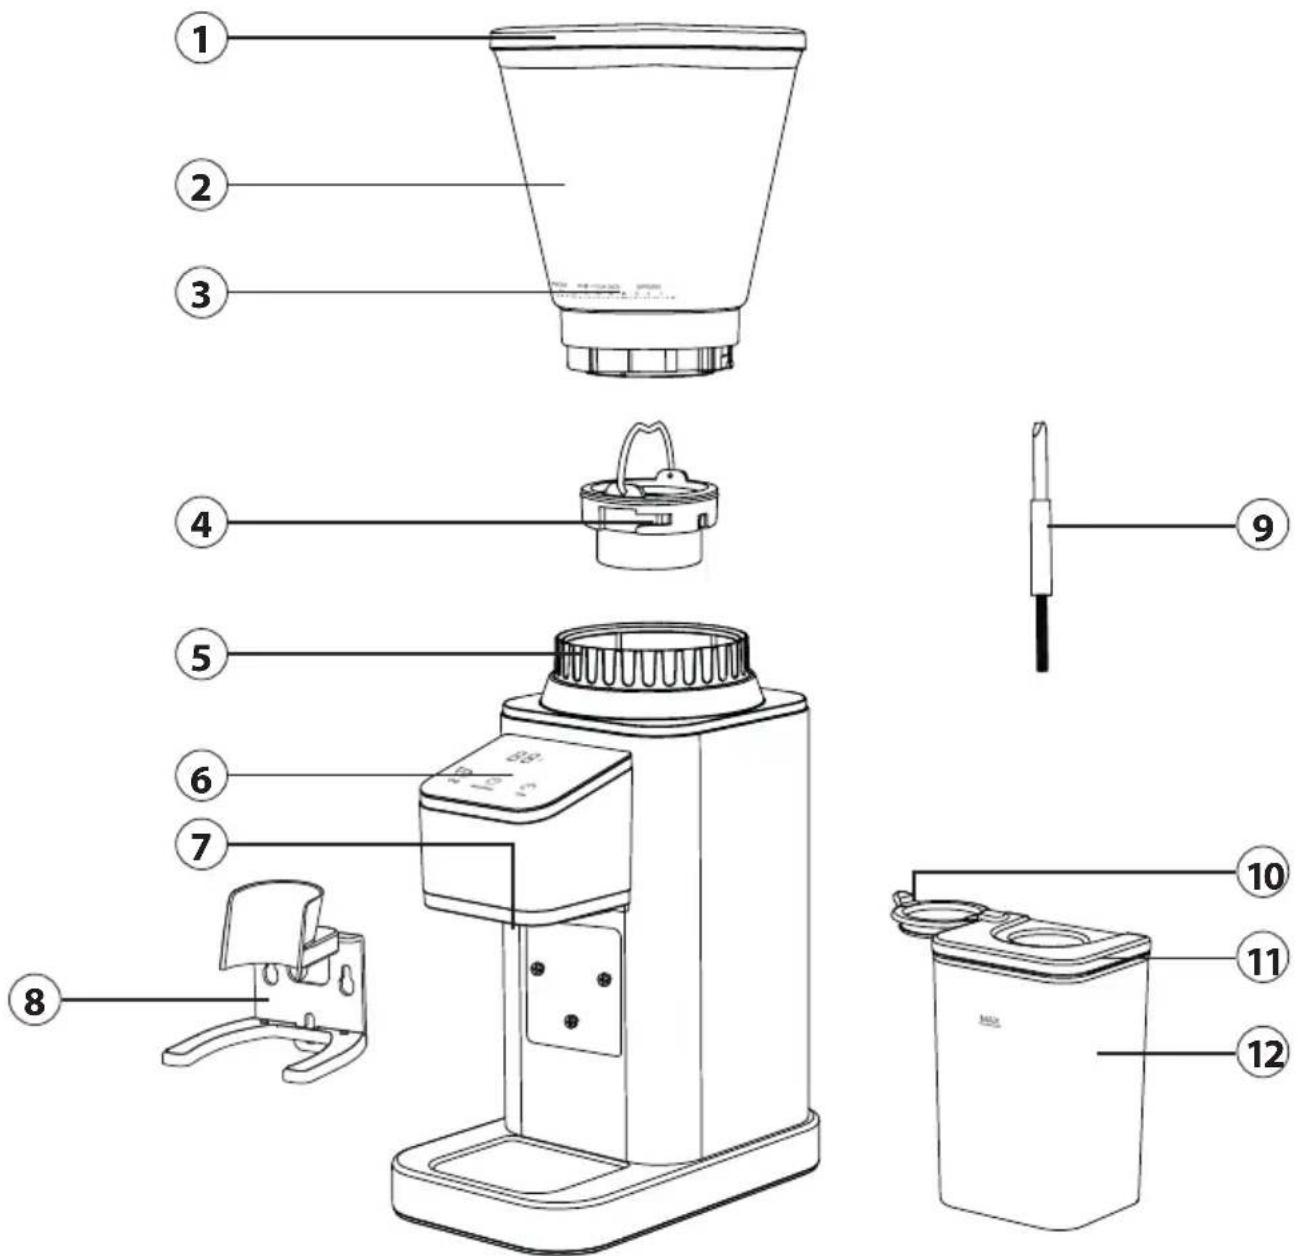
① Bean container lid
② Bean container
③ Control ring for coarseness
④ Grinding mechanism
⑤ Coarseness ring
⑥ Operating panel
⑦ Coff ee ground outlet
⑧ Portafi Iter holder
⑨ Cleaning brush
10 Silicone cover
⑪ Collection container lid
12 Collection container
4.2 Controlelements
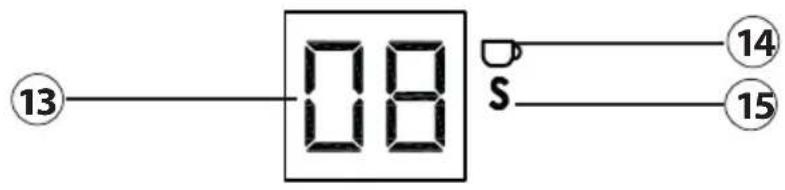

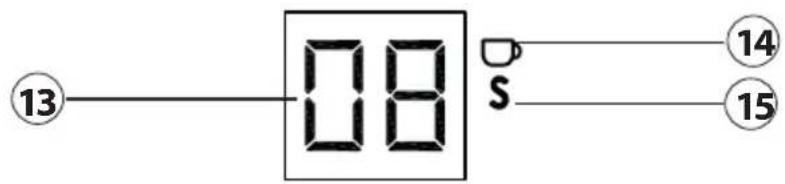
13 Display: Shows the number of cups or grinding time
⑭ "Cup" button has been selected
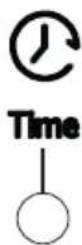
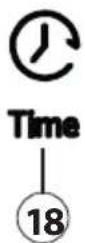
15 "Time" button has been selected
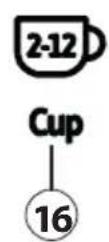
⑯ "Cup" button: To select the number of cups (2-12 cups)
⑰ "Start/Stop" button: To start and stop the device
18 "Time" button: To set the grinding time (1-40 seconds)
4.3Assembling
- Place the device on a fl at surface.
- Check that the grinding mechanism (4) is sitting correctly in the base of the device (see the illustration in the "Cleaning and care" section).
- Place the bean container (2) on the appliance. The arrow next to the control ring for coarseness (3) on the front should point to the symbol on the base of the device.
- Turn the bean container to tighten it. The arrow ▼ should point to the symbol and the bean container should click into place.
4.3.1 Assembly for use with the collection container
- Assemble the device as described above.
- Remove the silicone cover (10) from the collection container lid (11) and place the collection container (12) under the coffee ground outlet (7).
4.3.2 assembly for use with the portafi Iter holder
- Assemble the device as described above.
- Attach the portafi Iter holder (8) to the three screws on the base of the device by placing the holes in the holder over the screws on the base and then pushing the holder down onto the device.
- You can use portafi Iters with a diameter from 52 to 58 mm. Portafi Iters with a diameter of 58 mm can be placed directly on
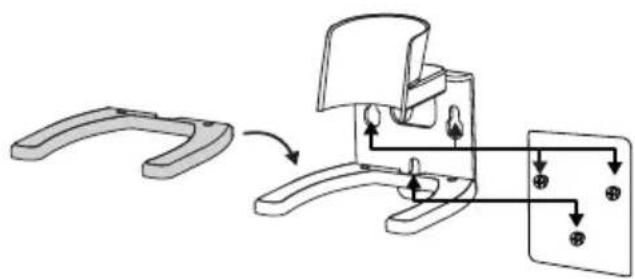
the stainless steel holder. If the portafi Iter has a small diameter (52 mm), then you must use the plastic attachment. Place the attachment directly onto the stainless steel holder.
4.4 Ratingplate
The rating plate with the connection and performance data can be founded beneath the device.
5 Operation and Handing
This chapter provides you with important notices with regard to operating the device. Observe the following notices to avoid dangers and damages:

WARNING
Do not leave the device unsupervised when it is in operation, so that you can intervene quickly in the event of dangers.
PLEASE NOTE
When using for the first time little smell occurs. This is harmless and disappears after a while.
▶ Device will not operate if parts are not assembled properly.
5.1 Before first use
Clean the device, see "cleaning".
5.2 Notesandgrindingtips
- The taste and strength of coffee are personal preferences. To get the taste you prefer, try changing the type of coffee bean; amount of coffee and the coarseness.
• Always grind the coff ee grounds freshly for the number of cups you want to make.
• Coffee beans should be stored in a cool, dry, dark place but not in the refrigerator. - Clean the grinding mechanism regularly. Coffee ground residues can impair flavour.
- Only use the device to grind coffee beans. It is not suitable for grinding of very wet, oily or extremely hard ingredients. Do not use the device to grind strong spices as this can impair the flavour of the coffee grounds.
• The flavour of coffee-based drinks depends on the quality of the coffee beans used.
5.3 Grinding coffee
- Pour the coffee beans into the bean container and place its lid on top of it.
- Either place the collection container under the coffee ground outlet or attach the portafilter holder to the base of the device.
- To set the desired coarseness, turn the coarseness ring (5) to the right (= fine coffee grounds) or the left (= coarser coffee grounds).
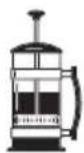
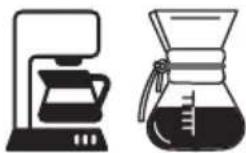
| Recommendation for coarseness | |||
| FRENCH PRESS 48 44 40 36 32 DRIP • POUR OVER ESPRESSO | |||
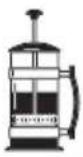 | 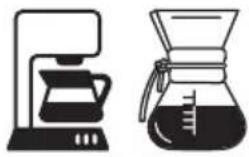 |  | |
| Coarse Medium Fine | |||
Grinding time: max. 40 sec. Grinding time: max. 40 sec. Grinding time: max. 10 sec.
- Plug the power socket into mains power.
- Press any one of the three buttons to turn on the device.
- Press the 📂 button to set the desired number of cups. You can select 2-12 cups in 2-cup increments.
- Alternatively, set the grinding time by pressing the Ⓐ -button until you reach the desired time. You can select a grinding time of 1-40 seconds. To set the seconds more quickly, keep the button pressed down.
- To start the grinding process, press the ⏻-button.
- The device will beep twice when the grinding process has finished.
- If you want to stop the grinding process earlier, press the ⏻ -button again.
- You can now remove the collection container or the portafi iter.
- Press the ⏻-button to turn off the device when you have finished using it.
Using the portafi Iter holder:
- Move the portafilter backwards and forwards to make sure that it is filled evenly.
- If necessary, stop the grinding process manually by pressing the -button.
- For exact portions, use a highly accurate weighing scale (1 g increments).
PLEASE NOTE
The device will automatically switch to standby mode if it is not used for more than 1 minute.
If you select coarse grinding and a long grinding time or a large number of cups, then the collection container will be too small. Place another container which is large enough under the coffee ground outlet.
Collection container capacity:

line
| Cup Quantity | Time (sec) | | ------------ | ---------- | | 2-6 cups | max. 26 | | 2-8 cups | max. 40 | | 2-10 cups | max. 40 | | 2-12 cups | max. 40 |▶ Use the settings described above as a starting point or recommendation. After just a short time using the device you will have no problems choosing your preferred setting.
6 Cleaning and Maintenance
This chapter provides you with important notices with regard to cleaning and maintaining the device. Please observe the notices to prevent damages due to cleaning the device incorrectly and to ensure trouble-free operation.
6.1 Safetyinformation

ATTENTION
Please observe the safety instructions, before cleaning your device:
▶ Unplug the device when not in use and before any cleaning.
▶ Never immerse the motor unit, cord or plug in water or other liquids and do not place in the dishwasher.
Do not use iron brush, abradant kitchen cleaner, or sharp cleaning tool for cleaning.
Do not use any aggressive or abrasive cleaning agents or solvents.
6.2Cleaning
PLEASE NOTE
▶ You can use the provided cleaning brush.
▶ Motor unit and cable should not come into contact with water. Wipe the motor unit and the cable only with a damp soft cloth.
- Remove the coffee beans from the bean container (2) and remove the container from the base of the device.
- If applicable, also remove the portafi Iter holder (8).
- Use warm soapy water to clean the bean container (2), the bean container lid (1), the portafi Iter holder (8), the collection container (12) and the collection container lid (11) and dry them thoroughly.
- If necessary, wipe the external surfaces of the base of the device with a clean, damp cloth before drying it thoroughly.
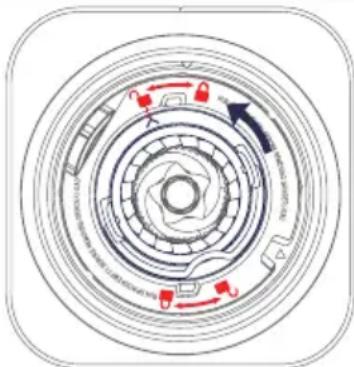
6.3 Cleaning the grinding mechanism
PLEASE NOTE
Handle the grinding mechanism and the grinding auger with care. They may be sharp. Risk of injury!
- Lift the grinding mechanism's handle, then turn it anti-clockwise to remove it from the grinder.
- Use the cleaning brush supplied with the grinder to clean the grinding mechanism and the grinding auger underneath it.
- Put the grinding mechanism back on the grinder and turn it clockwise until it clicks into place.
natural_image
Circular mechanical component diagram with concentric rings and directional arrows (no text or symbols)7Troubleshooting
This chapter provides you with important notices with regard to operating the device.
Observe the following notices to avoid dangers and damages:
7.1 Safetynotices

ATTENTION
Repairs of electrical appliances must be carried out by qualified person who are trained by the manufacturer.
Repairs performed by untrained persons may result in considerable hazards for the user and damage the machine.
7.2 Troubleshootingtable
Problem Solution
| The device does not start. Please check | whether the plug is properly plugged in. |
| The display shows “E1” and the buttons don’t work. | The device is overheated. Remove the plug from the socket. Let the device cool down 10 minutes before you try using it again. |
| The display shows “E3” and all the buttons flash. | The bean container is not correctly installed. Assemble the device correctly. |
| The motor starts but no coffee grounds come out of the coffee ground outlet or the device stops suddenly during the grinding process. | The device is blocked. Turn the appliance off and remove the bean container. Clean the grinding mechanism and the grinding auger. |
PLEASE NOTE
If you cannot solve the problem by carrying out the steps described above, our Customer Service will help you free of charge.
Clean the device before you send it to customer service.
8 Disposal of the Old Device
Old electric and electronic devices frequently still contain valuable materials. However, they also contain damaging substances, which were necessary for their functionality and safety. If these were put in the non-recyclable waste or were handled incorrectly, they could be detrimental to human health and the environment. Therefore, do not put your old device into the non-recyclable waste under any circumstances.
PLEASE NOTE
Utilise the collection point, established in your town, to return and recycle old electric and electronic devices. If necessary, contact your town hall, local refuse collection service or your dealer for information.
▶ Ensure that your old device is stored safely away from children until it is taken away.
8.1 Disposal of the packaging
The packaging protects the device against damages during transit. The packaging materials are selected in accordance with environmentally compatible and recycling-related
points of view and can therefore be recycled. Returning the packaging back to the material loop saves raw materials and reduces the quantities of accumulated waste. Take any packaging materials that are no longer required to "Green Dot" recycling collection points for disposal.

9Guarantee
We provide a 24-month guarantee for defects caused by production or material faults, beginning on the date of purchase. Our guarantee is valid for Germany, Austria and the Netherlands. For all other countries, please contact us.
Your legal guarantee claims as per Art. 437 ff . German Civil Code (BGB) will remain unaffected by this. You may exercise your statutory guarantee rights free of charge. The guarantee does not cover damage caused by improper handling or use of the product or defects which have only a minor impact on the product's functionality or value. In addition to this, the guarantee also excludes parts which are subject to wear and tear; transport damages insofar as we are not responsible for them and damages caused by repairs which were not carried out by us.
This product has been constructed for non-commercial use (domestic use) and its performance is designed to meet the corresponding needs. The guarantee only covers commercial use insofar as it is comparable to domestic use. The product is not intended for any other type of commercial use.
In the case of legitimate complaints we may either repair the defective product or replace it with a defect-free product at our discretion. Obvious defects must be notified to us within 14 days of the product's delivery. Any further claims are excluded.
When making a guarantee claim please contact us before you return the product (always with the purchase receipt!). Our contact details ("Guarantor") are provided at the beginning of this instruction manual.
Table des matières

natural_image
Diagram showing a mechanical assembly with a curved bracket and a rectangular component, no text or symbols present.4.4Plaquesignalétique
| FRENCH PRESS | DRIP • POUR OVER | ESPRESSO | |||||||||
| 48 | 44 | 40 | 36 | 32 | 28 | 24 | 20 | 16 | 12 | 8 | 4 |
| ● | ● | ● | ● | ● | ● | ● | ● | ● | ● | ● | ● |
12 Recipiente colector
4.2 Elementos operativos

natural_image
Mechanical assembly diagram showing a bracket and mounting bracket with directional arrows indicating motion (no text or symbols)natural_image
Circular mechanical component diagram with concentric rings and directional arrows (no text or symbols)
4.4Typeplaatje
| FRENCH PRESS | DRIP • POUR OVER | ESPRESSO | |||||||||
| 48 | 44 | 40 | 36 | 32 | 28 | 24 | 20 | 16 | 12 | 8 | 4 |
| ● | ● | ● | ● | ● | ● | ● | ● | ● | ● | ● | ● |
natural_image
Circular mechanical component diagram with concentric rings and directional arrows (no text or symbols)7Storingenverhelpen
natural_image
Diagram showing a mechanical assembly with a curved component and a separate panel with arrows indicating motion (no text or symbols)