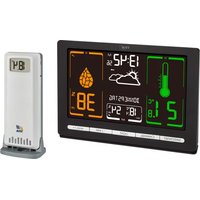
Meteochrome 35.1132.01 - Weather Station TFA - Free user manual and instructions
Find the device manual for free Meteochrome 35.1132.01 TFA in PDF.


User questions about Meteochrome 35.1132.01 TFA
0 question about this device. Answer the ones you know or ask your own.
Ask a new question about this device
Download the instructions for your Weather Station in PDF format for free! Find your manual Meteochrome 35.1132.01 - TFA and take your electronic device back in hand. On this page are published all the documents necessary for the use of your device. Meteochrome 35.1132.01 by TFA.
USER MANUAL Meteochrome 35.1132.01 TFA
www.tla-dostmann.de/en/service/downloads/instruction-manuals
TFA
text_image
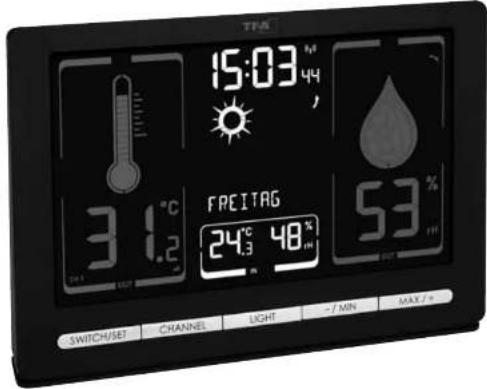
TPA 15:03 M 44 31.2 °C FACITAG 24.3 48 % 53 SWITCH/SAT CHANNEL LIGHT - / MIN MAX / +Kat. Nr. 35.1132.01
-0% RH 1025°C, 30%...80%RH
Escherichia
ca. 100 m [Freilfeld]
Wireless Weather Station
Thank you for choosing this product from TFA.
- Before you use this device
• Please make sure you read the instruction manual carefully.
• This product should only be used as described within these instructions.
- Following and respecting the instructions in your manual will prevent dam-
age in your instrument and loss of your statutory rights arising from defects due to incorrect use.
- We shall not be liable for any damage occurring as a result of non-following
of those instructions. Likewise, we take no responsibility for any incorrect
Readings of 30% of any consequences resulting from them. Please now particular attention to the orderly national
- Please keep this instruction manual sale for future referenc
2. Delivery contents
- Wireless weather station (base station)
• Thermo-hygro sensor (cat-no. 30.3000.02); • Power adaptor
• Instruction manual
- Range of application and all the benefits of your new instrument at a
glance
• Temperature and humidity for indoor and outdoor (via wireless outdoor transwiler, up to 100 ml with land cover)
- Large colour-changing display for temperature and humidity (optionally for
indoor or outdoor values)
- Indication of maximum and minimum values showing time and date of reporting
- Weather forecast with weather symbols and trend indicator
- Radio-controlled clock with entire date or weekday written in full letters (6 languages).
- Manual setting option and time zone correction
- Colour display with 4 brightness levels and auto-dim function (with mains
• Wall mounting or table stand
- Optional: Expandable up to 3 temperature humidity (transmitters sold separately)
rately, also for the climate control of remote rooms, e.g. children's room,
4. For your safety
• This product is exclusively intended for the range of application described
• This product should only be used as described within these instructions.

Caution!
Risk of electrocution!
- Plug the base station only into a main socket installed within your country's electricity safety regulations and with a correct valve voltage, less name
(1) 2017-2018: 10.00000000000000000000000000000000000000000000000000000000
- The mains socket must be located near the equipment and it must be easily accessible.
- Unplug the device immediately if any fault occurs.
- The base station and the power adapter must not come into contact with water or moisture. Suitable for indoor use only
- Do not use the device if the housing or the power adapter are damaged.
• Operas the device out of reach of persons (including children) who cannot
- Only appreciate the potential risks of handling electrical equipment. - Debt use the supplied smart adapac
- Do not pull the plug out of the socket
- Route the mains cable so it does not come into contact with sharp-edged or
not

devices and the
- Small parts can be swallowed by children (under three years
- Batteries contain harmful gases and may be hazardous if swallow
tery is swallowed, this can lead to serious internal burns and death within two hours. If you suspect a fallen could have been swallowed or otherwise
caught in the body, seek medical help immediately.
- Batteries must not be thrown into a fire, short-circulated, taken apart or
Recharged. Risk of explosion!
Wireless Weather Station
- Low batteries should be changed as soon as possible. In prevent damage caused by leasing, Make sure the potilities are correct. Never use a combination of old and new batteries together, nor batteries of different types. Remove the batteries if the device will not be used for an extended period of time. Avoid contact with skin, eyes and mucus membranes when handling leaking batteries. In case of contact, immediately rinse the affected areas with water and consult a doctor.
CAUTION
- Unauthorised repairs, alterations or changes to the devices are prohibited. - Do not expose the devices to extreme temperatures, vibrations or shocks. - Clean the devices with a soft clamp cloth. Do not use sovents or scouring agents.
- The base station is suitable for indoor use only. Protect it from moisture. - The transmitter is splashproof, but not watertight.
5. Elements
Base station (Receiver) A: LCD display (Fig. 1):
Colour-changing temperature display, optionally for indoor or outdoor values Selection: outdoor values Selection: indoor values
A 1: - foot indoor values A 2: Trend arrow for outdoor Trend arrow indoor temperature temperature
A 3: Reception symbol transmitter
A 4: Minimum value outdoor temperature Minimum value indoor temperature
A 5c Icon outdoor values -
A 6: Battery symbol transmitter Battery symbol base station
A 7: Maximum value outdoor temperature Maximum value indoor temperature
| A 8: Channel number 1 2 3 - | |
| A 9: Indication outdoor temperature | Indication indoor temperature |
| A 10: Thermometer symbol (scale varies with temperature value) | |
Element 2
Time, weather forecast and calendar – temperature and humidity optionally for indoor or outdoor values
Selection: indoor values
Selection: outdoor values
| A 11: | Time with seconds | |
| A 12: | DGF-reception symbol | |
| A 13: | Trend arrow atmospheric pressure | |
| A 14: | Weather symbol | |
| A 15: | Date/workday/Indicator for transmitter ID | |
| A 16: | Indication indoor humidity Indication outdoor humidity | |
| A 17: | – Reception symbol transmitter | |
| A 18: | Minimum value indoor humidity | Minimum value outdoor humidity |
| A 19: | Icon Indoor value (kV) | Icon outdoor value (OUT) |
| A 20: | Battery symbol base station | Battery symbol transmitter |
| A 21: | Maximum value indoor humidity | Maximum value outdoor humidity |
| A 22: | – Channel number 1 2 3 | |
| A 23: | Indication indoor temperature | Indication outdoor temperature |
Element 3
Colour-changing humidity display, optionally for indoor or outdoor values Selection: outdoor values Selection: indoor values
A 24: -Icon indoor values
-16--17-

GB
Wireless Weather Station
A 25: Trend arrow for outdoor humidity Trend arrow for indoor humidity
A 26: Drop symbol (scale varies with humidity value)
A 27: Indication outdoor humidity Indication indoor humidity
A 28: Minimum value soccer humidity Minimum value soccer humidity
A 29: Inco, guidance values –
A 30: Maximum value outdoor humidity Maximum value indoor humidity
B: Buttons (Fig. 2):
B.1: SWITCH/SET button
B 2: CHANNEL
B 3: LIGHT button
B 4: -7MM mm
# 21. MRSY: 60%
C: Housing (Fig. 3):
C1: Wall mounting box
C 2: Battery compartment
CS: Table stand (removable)
C4. Розяй старю жек
D: Display (Fig. 4):
D 1: Indicator for transmitter ID
D 2: Transmission symbol
D. 3. Temperature and humidity in solvents D. 4: Pulses to mind for the transportivity
D 0: Probe symbol (reserved for other models)
E. Housing (Fig. 4):
E1: TX Lulton
E 2: Transmitter ID
E 3: Ealtery homokrimem
E 4: Support for wall mounting of table stretching
E 3. (MUSCAHOLTA) in the other of the uniting
GB
6. Getting started
6.1 insert the batteries in the transmitter
- Place the base station and the transmitter on a table at a distance of about 1.5 meters from each other. Avoid being close to possible sources of interference such as electronic devices and radio equipment.
- Open the battery compartment of the transmitter and insert two new AA 1.5 V batteries, polarity as illustrated. At LCD segments will be displayed for a short moment. Then a version into appears briefly.
- Subsequently, the measured temperature and humidity appear alternately every 5 seconds.
- Close the battery compartment.
6.2 Getting the base station started
- The base station can be operated with a mains adapter and/or with 3 × 1.5 V AA batteries (not included). The batteries maintain the function in the event of a power failure, so that no readjustment has to be made and the memory values are retained. For a permanent backlight and to save battery life, use the supplied power adapter.
- Insert the power adapter pin into the device jack and connect the plug to a wall socket.
- All LCD segments will be displayed for a short moment. The indoor temperature and humidity appear on the middle display.
- Optional: Open the battery compartment and insert three new AA 1.5 V batteries, polarity as illustrated. Close the battery compartment.
5.3 Reception of outdoor transmitter
- The base station will scan the outdoor values for 5 minutes and the reception symbol hashes.
- If the reception is successful, the temperature and humidity appear on the left and right side of the base station display.
- If the reception of the holdour values fails, “-” remains on the base station display. Check the batteries and try it again.
- The transmitter has its own ID number (nine digits, alphanumeric). Thus ID number is printed on the transmitter. If you press and hold the TX button on the transmitter for 5 seconds, the ID number is shown on the display of the transmitter (three digits each in succession):
Wireless Weather Station
- To query the ID number of the received transmitter on the base station, press briefly the CHANNEL button.
6.3.1 Manual transmitter search
- You can also start the search for the transmitter manually. Press and hold the CHANNEL button for three seconds. The last registered transmitter (channel) will be cancelled and the transmitter search begins. The reception symbol for the transmitter will be flashing. Now briefly press the TX button in the battery compartment of the transmitter. The transmission of the data takes place immediately and if the reception is successful, the outdoor values appear on the base station display.
6.3.2 Loss of the transmitter signal
6.4 Radio-controlled time reception
- If the contact between the transmitter and receiver is lost at a later time after successful reception, the last transmitted values continue to be displayed for 30 minutes, then "..." appears. After 60 minutes without an update, a search for the registered transmitter is initiated automatically. If the reception fails, scanning will be repeated every 60 minutes.
- After the base station has completed searching for transmitters, the device starts scanning the DCF signal and the DCF reception symbol flashes.
- Note: To avoid interference, the illumination of the two colour-changing displays switches off briefly during DCF signal reception.
- When the time code is successfully received after 3-10 minutes, the radio-controlled time and the DCF symbol will be shown steadily on the middle display.
- The DOF reception always takes place at 1:00, 2:00 and 3:00 o'clock in the morning. If the signal is not successfully received, further attempts will be taken at 4:00 and 5:00 o'clock.
- You can also activate the DCF reception manually. Press and hold the—/MAIN button in normal mode for 5 seconds. The DCF reception symbol will be flashing.
- Press the -/MIN button again for 5 seconds during the active DCF signal reception to stop scanning the DCF time signal. The DCF reception symbol disappears.
GB
• There are 3 different reception states:
fashing symbol - reception is active
no symbol - no DCF reception
- if the clock cannot detect the DGF-signal (e.g. due to interference, transmitting distance, etc.), the time can be set manually.
• The clock will then work as a normal quartz clock (see: "Manual settings").
Note on radio-controlled time
- The time is transmitted from an atomic clock near Frankfurt am Main by a DEF-77 (27.5 kHz) frequency signal with a range of about 1,500 cm. Your radio-controlled clock receives the signal, converts it and always shows the exact time. The adjustment of Daylight Saving Time and Standard Time is also automatic.
- Avoid being close to possible sources of interference that may affect radio reception (see "Location and mounting").
- During night time, the atmospheric interference is usually less severe. A single daily reception is adequate to keep the accuracy deviation under 1 second.
7. Operation
- The device will automatically quit the setting mode if no button is pressed for 20 seconds.
- Press and hold the MAX/+ or -MIN button in setting mode for fast mode.
7.1 Manual settings
- Press and hold the SWITCH/SET button for three seconds to enter the setting mode.
- DEUTSCH (default) flashes on the display.
- Press the MAX/+ or -MIN button to set the day-of-the-week and menu language: DEUTSCH, ENGLISH, DUTCH, ESPANOL, ITALIANO, FRANCAIS.
- if you select EGLISH, the display will now appear in English.
• Commute with the SWITCHSET button and go in the next session
The sequence is shown as follows: - Language (default: DEUTSCH - German)
- DCF reception ON/OFF (default: DCF ON)
- Time zone -12/4/12 (default: III)
- Display DATE, WEEKDAY or ALERNATE (default: DATE)
Wireless Weather Station
- HOUR, MINUTES
- Year, month, day
7.1.1 DCF reception
- By default, the DCF reception is activated (DCF ON) and after successful reception of the DCF signal no manual time setting is necessary.
- In the setting time, you can choose (DAC-DIF) or action again the UDE-reception using the MAX(+ or -)/MIN button.
- Once the DGF time reception is deactivated the clock must be manually set. No time zone will appear.
- If the DCF reception is activated, the manually set time will be overwritten by the DCF time when the signal is received successfully.
7.1.2 Time zone setting
- In the selling mode you can make the time zone correction +12/-12).
- The time zone correction is needed for countries where the DGF signal can be received but the time zone is different from the DGF time (e.g. +1-one hour plus).
8. Temperature and humidity
8.1 Colour change display
- The wireless weather station has two large coloured display sections: On the left, the temperature and a thermometer symbol are displayed, on the right, the humidity and a drop symbol.
- The display colours and symbols change according to the measured values.
- As a default setting, the values measured by the outdoor transmitter are shown in the colour change display. The indoor values for temperature and humidity appear as a smaller display in write on the control display.
- With a short press on the SWITCH/SET button, you can switch the colour change display in normal mode from the outdoor values to the indoor values and vice versa.
Temperature Humidity
Colour change The display colour changes The display colour changes from blue (cool) to green from red (dry) to yellow and and yellow to red (warm) green to blue (root) in 17 steps. In 15 steps
GB
Symbol The scale of the thermo- The drop symbol changes its meter increases with the structure accordingly in temperature in 15 steps. 6 steps.
- The colour scaling of the temperature values is different for indoors and outdoors due to the different range.
• The colour scaling of the humidity values is the same for indoors and outdoors.
An overview of all gradations (colours and symbols) can be found here;

8.2 Maximum and minimum values
- Press the -JMIN button in normal mode. MIN flashes on the display.
- You can now see the lowest measuring value since the last reset with time and day of recording.
• The sequence is shown as follows: Outdoor temperature, outdoor humidity, indoor temperature, indoor humidity. - Press the -MIN button once more to go back to the current values display.
- Repeat the process by pressing the MAX/+ button to see the maximum value. MAX input on the display
- Press and hold the SWITCH/SET button for 3 seconds while the highest or lowest values are displayed. All values will be deleted and reset to the current state.
8.3 Trend arrows
- The trend arrows indicate whether the values for temperature and humidity of the last 15 minutes are increasing or decreasing. If the values remain the same, there is no display.

Temperature/humidity are increasing
Wireless Weather Station
| No symbol Temperature/humidity are steady(change < 0.5°C/2%) |
| Temperature/humidity are decreasing |
9. Forecast
9.1 Weather forecast symbols (Fig. 5)
- The weather station has 6 different weather symbols: sunny, slightly cloudy, cloudy, rainy, thunderstorm, snowfall.
- A snow crystal is shown if rain is forecasted and the outdoor temperature on channel 1 is under 0^ .
- The weather forecast relates to a range of 12 to 24 hours and indicates only a general weather trend. For example, if the current weather is cloudy and the rain symbol is displayed, it does not mean the product is faulty because it is not raining. It simply means that the air pressure has dropped and the weather is expected to get worse but not necessarily rain. The accuracy is about 70 - 75% .
Note!
- Please note that the forecast symbol will become more defined in the course of operation. The forecast symbol is active right from the start, however, the reliability of the forecasts increases with the amount of data collected. To begin with, the sensor must adapt initially to the reference level at the site.
9.2 Trend arrows
- The trend arrows on the display will show whether the atmospheric pressure of the last 3 hours is increasing, steady or decreasing.
Fast increase (>20Pa) Significant weather improvement
Increase (+1-2 hPa) Weather improvement

Steady (=1hPa) Stable weather conditions
Decrease (-1-2 hPa) Weather deterioration
Fast decrease ( >-2nPa ) Significant weather deterioration
10. Display light
- In mains operation: Press the LIGHT button in adjust the brightness in 4 levels (LVL 4-1) or to switch it off (OFF). The default setting is LVL 3.
- The last selected level will remain permanently active. - To temporarily activate the display light in pure battery operation, press the LIGHT button. Each button press will activate the backlight for 10 seconds.
10.1 Automatic dimming mode
(during permanent backlight in mains operation)
- if the auto-dim mode is activated, the weak backlight (LVL 1) turns on automatically for the set time.
- Press and hold the LIGHT button for 5 seconds. - By default, the automatic dimming function is disabled. AUTODIM appears on the display and OFF will be flashbox.
- To activate the function press the MAX/+ or -/MIN button (ON).
- Confirm with the LIGHT button - The start time flashes (DIM START 22:00 default). Press the MAX/+ or -DIM button to set the time (full hours).
- Contains with the LIGHT button. - The end time flashes (DIM STOP 6.00 AM default). Press the MAX/+ or -DIM button to set the time (full hours).
- Confirm the settings with the LIGHT button. The display returns to normal mode.
11. Location and mounting
- When placed outdoors, choose a shady and dry place for the transmitter. Direct sunlight may trigger incorrect measurement and continuous humidity damages the electronic components needlessly.
Wireless Weather Station
- Place the base station in any room of the house.
- Avoid being close to possible sources of interference that may affect radio reception. It is recommended to keep a distance of at least 2 metres to possibly interfering sources (TV, computer, microwave, wireless phones, baby monitors) and large metal objects (e.g. refrigerator). Within solid walls, especially ones with metal parts, the transmission range can be reduced considerably in extreme cases, please place the unit close to a window to improve reception.
- Check whether the transmission from the transmitter to the base station is possible and whether the DCF radio clock signal can be received.
- If necessary choose, another position for the outdoor transmitter and/or receiver.
- If the transmission is successful, you can place or wait mount the base station and the outdoor transmitter with the suspension device.
- To wall-mount the transmitter, screw the holder to the wall and click the outdoor transmitter into the border.
- Do not use the base station in the vicinity of radiators, other sources of heat or in direct sunlight.
12. Battery replacement
- As soon as the battery symbol will appear on a channel display of the base station or on the display of the transmitter, change the batteries of the transmitter.
- Change the batteries of the base station, when the battery symbol appears on the indoor values display. The instrument also works without batteries. Then the battery symbol for the base station is permanently shown on the display.
- Please note: When the batteries are changed, the contact between the outdoor transmitter and the base station must be restored - so always restart both devices or print a manual transmitter search.
13. Additional outdoor transmitters (optional)
- When having more than one outdoor transmitter (max. 3), insert two new AA 1.5 V batteries in all transmitters, polarity as illustrated. Start the base station operation or the manual search for the outdoor transmitters, (see "Manual transmitter search").
- The transmitters will be numbered on channel 1, 2 or 3 in the order of set-up automatically.

- Press the CHANNEL button to change between the channels 1 to 3. The ID number of the received transmitter appears for a short time and the outdoor values are indicated on the display of the base station.
- Press the MAX/+ or -MIN button, the maximum and minimum values for the displayed channels appear.
14. Troubleshooting
Problem Solution
No indication on the base station
→ Check the power adapter
Battery operation:
→ Ensure the batteries' polarities are correct
→ Change the batteries
No display on the transmicler
→ Ensure the batteries' polarities are portrock
→ Change the batteries
No transmitter reception
Display * - * for channel 1/2/3
→ No transmitter installed
→ Check the outdoor transmitter's batteries
(only use batteries/rechargeable batteries with 1.5V voltage)
→ Restart the transmitter and the base station according to the manual
→ Start the outdoor transmitter manual search
→ Choose another place for the transmitter and/or the base station
→ Reduce the distance between the transmitter and the base station
→ Check if there is any source of interference
No DCF operation
→ Activate DCF ON the DCF reaction in setting mode.
→ Press and hold the -TMEM button for 5 seconds to activate the reception
manuall
→ Wait for an attempt reception during the night
→ Choose another place for your device
→ Set the clinics manually
→ Check if there is any source of interference
Wireless Weather Station
→ Restart the base station according to the manual
No permanent backlight
→ Set the brightness with the LIGHT button
→ Connect the device in the power adapter
Incorrect indication
→ Restart the desire
Battery operation:
→ Change the batteries
If your device fails to work despite these measures, please contact the relation where you purchased the product from ice advice.
15. Waste disposal
This product and its packaging have been manufactured using high-grade materials and components which can be recycled and reused. This reduces waste and protects the environment.
Dispose of the packaging in an environmentally friendly manner using the collection systems that have been set up.

Disposal of the electrical device
Remove non-permanently installed batteries and rechargeable batteries from the device and dispose of them separately.
This product is labelled in accordance with the EU Waste Electrical and Electronic Equipment Directive (WEEE).
This product must not be disposed of in ordinary household waste. As a consumer, you are required to take end-of-life devices in a designated collection point for the disposal of electrical and electronic equipment, in order to ensure environmentally-compatible disposal. The return service is free of charge. Observe the current regulations in place:

Disposal of the batteries
Never dispose of empty batteries and rechargeable batteries with ordinary household waste. They contain pollutants which, if improperly disposed oil, can harm the environment and human health.
16. Specifications
Temperature
Measuring range indoor
1^ C + 50^ C
Measuring range outdoor
-40°C...+60°C
Resolution
0.1°C
docrace
+1°C [0...+50°C] =1.5°C (-40...0°C, +50...60°C)
Humidity
Measuring range
10.99% RH
Resolution
15% RH
ARCHITACY
+5% RH (425°C, 30% - 80%RH
5.
max 100 m/peno field
-
transmission frequency
and 1942
-22--23-

As a consumer, you are required by law to take them to your retail store or to an appropriate collection site depending on national or local regulations in order to protect the environment. The return service is free of charge.
The symbols for the contained heavy metals are:
Cd-cadmium, Hg-mercury, Pb-lead.
Wireless Weather Station
Maximum radio-frequency power
< 25mV
Base station
Power consumption
Power supply (included)
Input: 230-240V AC 50Hz 50mA
Output: 5.0V AC 0.18A 0.9W
Average active efficiency: >61%
No-load power consumption: ≥0.21%
Batteries 3 x AN 1.5 V (not Included)
Dimensions
192×30(46)×128mm
(Weight
350 g [device only]
Transmitter
Power consumption
2 x A6 1.5 V batteries (incl included)
We recommend Alkaline batteries
Dimensions
值(92)×23(38)×17/124 mm
Weight
55 o (device code)

No part of this manual may be reproduced without written consent of TFA Dostmann. The technical data are correct at the time of going to print and may change without prior notice.
The least technical data and information about this product can be found in our homepage by simply entering the product number in the search box.
EU Declaration of conformity
Hereby, TFA Doshmann declares that the radio equipment type 35.1132 is in compliance with Directive 2014/63-FU. The full text of the EU declaration of conformity is available at the following Internet address:
www.ha-doshman.desarledownloads
www.lfa-dostmann.de
E-Mail info@ta-dostmann.de
Zam Oursberg 12, 97877 Welheim, Germany
Commercial registration number: Reg. Gericht Manchheim HRA 570186
10/23
The Ground Truth image displays a single, continuous horizontal line, which is a stylistic or background element (like a ruled paper line). According to Rule 2, such lines must be ignored by the OCR result. The provided OCR content is "____", which consists of underscores. Underscores are not equivalent to a solid line and are not permitted under the “Stylistic/Background Lines (Ignore)” rule. Outputting underscores for a stylistic line is incorrect because it misinterprets the line as a fill-in-the-blank placeholder. Since the OCR output incorrectly rendered a stylistic line as underscores (which should be ignored), this violates the rule. Therefore, the OCR result is inconsistent with the Ground Truth.
Elément 2
R12. Symbol of reception DCF
C1: Ellist de suspensions
6.2: Commitment a miles
0.2: Symbol of transformation 0.3: Damping rate and humidity on silver flame
E2, Nomenclature E3: Compartment 1 cities
- Although DATE, JUN 18 is a Seminor that be ALTERNANCE (as default - DATE)
- HOUBES MINUTES
- Année, mois, jour
7.1.1 Réception DCF
Zil = Ohl:Chang 17, 5/87 (W.P. Riem, M. B. Nagme
Name: a 10.025 mmH z 10.350 V am conditioner.
Fig. 10. The text in the Source Image is a non-
13/22
F
C & Support (Innovable)
6.4.12.13.14.15.16.17.18.19.20.21.
Trasmethore
D: Display (Fig. 4):
- The following for the contents of VCO3: 20,21 W
Section 3 X M de 1,5 V (non include)
Dimensioni esterne
192×30(45)×129mm
Pecu
reg. clinical visit (them in HA-576130
10-23
-42--43-
Draadloze weerstation
- Display that has been held with support on such database solutions, not asp
C.3: Standard (weighminder)
2.4. Amulsoring methodology
Zender
D: Display (Fig. 4):
D 3: Temperature in thermoelectric heat
NL
Geen indicate on her basiestation
→ Stronomacianter controlco
Batterijvoeding:
→ Batterijen in de juiste poortending plassten
→ activation de DGF radio enhances in de instelling (DGF OFF)
→ Tlic handmatic instellen
→ Veraliger steerbronnen
The following summary
Gd-cadmium, Ho-kwlk, Pb-loot
+1°C (0...+50°C), +1,5°C [-40...0°C, +50...60°C]
Luchtvochtigheid
Hoebeare
10...99% RH
Resolutie
1% RH
Prensie
15% RH (325°C 30%...80%RH
Rekwildie
Maximal 100 meter (white veld)
- INSTRUCTIONS DE USC
→ Ringlin sensor installed
• comercializ imicamente piludivasarias con
sunny slightly cloudy cloudy rainy thunderstorm snowfall
② Instruction manual
The operating instructions are closed with the above or below indicated of
www.na-docnam.do/on-service/downloads/instruction-manuals
① Mode d'emploi
The following table is provided in the image:
www.the-destruo.de/en/servio/ downloada-tradecion-manuels
(1) 本报告标题:本次发行的公告
In hand to part in 2013, a general application of personal care for
- 本报告书(或本
Debrakavamjima
www.fta-dosnami.de/en/service/downloads/instruction-manuels
Subtotal amount