
60.4508 - Weather Station TFA - Free user manual and instructions
Find the device manual for free 60.4508 TFA in PDF.


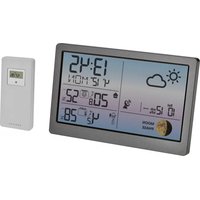
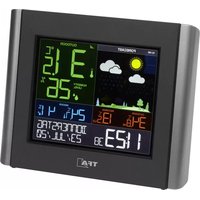
| Product Type | Weather Station |
| Brand | TFA |
| Model | 60.4508 |
| Dimensions (approx.) | 150 x 100 x 30 mm |
| Weight (approx.) | 250 g |
| Power Supply | 2 AA batteries (not included) or AC adapter (not included) |
| Display | LCD screen with backlight |
| Outdoor Sensor | Wireless sensor, range up to 100 m in open field |
| Indoor Measurements | Temperature and humidity |
| Outdoor Measurements | Temperature and humidity via sensor |
| Weather Forecast | Forecast icons (sunny, cloudy, rainy, snowy) |
| Clock | Time, date, alarm display |
| Trends | Trend arrows for temperature and humidity |
| Memory | Min/max value recording |
| Operating Temperature | 0°C to 50°C (indoor); -20°C to 60°C (outdoor) |
| Backup Power | Maintains settings during battery change |
| Maintenance | Clean with a soft, dry cloth. Do not use solvents. |
| Safety | Do not expose to excessive humidity or extreme temperatures. |
| Spare Parts | Additional outdoor sensor available as an option. |
| Repairability | Parts not user-repairable. Contact customer service. |
Frequently Asked Questions - 60.4508 TFA
User questions about 60.4508 TFA
0 question about this device. Answer the ones you know or ask your own.
Ask a new question about this device
Download the instructions for your Weather Station in PDF format for free! Find your manual 60.4508 - TFA and take your electronic device back in hand. On this page are published all the documents necessary for the use of your device. 60.4508 by TFA.
USER MANUAL 60.4508 TFA


Instruction manuals
www.tfa-dostmann.de/en/service/downloads/instruction-manuals
Kat. Nr. 60.4508
BS: ALARM/ON/OFF Taste
▼I°CI°F Taste
Gehäuse
Radio-controlled clock with automatic backlight

Thank you for choosing this instrument from TFA.
1. Before you start using it
- Please make sure to read the instruction manual carefully. This information will help you to familiarise yourself with your new device, to learn all of its functions and parts, to find out important details about its first use and how to operate it, and to get advice in the event of faults.
- Following and respecting the instructions in your manual will prevent damage to your instrument and loss of your statutory rights arising from defects due to incorrect use.
• We shall not be liable for any damage occurring as a result of non-following of these instructions. - Likewise, we take no responsibility for any incorrect readings and for any consequences which may result from them.
- Please take particular note of the safety advice!
- Please keep this instruction manual for future reference.
2. Scope of delivery
• Radio-controlled clock
- Batteries
• Instruction manual
3. Field of operation and all the benefits of your new instrument at a glance
• Radio-controlled clock with highest precision and manual setting option
• Alarm with snooze function
• Indication of the indoor temperature
• Indication of the date and day-of-the-week
- Backlight by pressing a key or permanent using a power adaptor (optional)
• Automatic night lighting with light sensor
- Ideal for home, office, waiting room, lobby or entrance hall and as a gift
• For wall mounting or table standing
4. For your safety
- This product is exclusively intended for the field of application described above. It should only be used as described within these instructions.
- Unauthorized repairs, modifications or changes to the product are prohibited.

Caution! Risk of injury:
- Keep this device and the batteries out of reach of children.
- Batteries contain harmful acids and may be hazardous if swallowed. If a battery is swallowed, this can lead to serious internal burns and death within two hours. If you suspect a battery could have been swallowed or otherwise caught in the body, seek medical help immediately.
- Batteries must not be thrown into a fire, short-circuited, taken apart or recharged. Risk of explosion!
- Low batteries should be changed as soon as possible to prevent damage caused by leaking. Never use a combination of old and new batteries together, nor batteries of different types.
- Wear chemical-resistant protective gloves and safety glasses when handling leaking batteries.
Please note the following when using the unit with an adapter. (adapter is not included)

Caution! Risk of electrocution!
- Plug the instrument only into a socket installed in regulation manner and with a mains voltage of 230V!
• The socket-outlet shall be installed near the equipment and shall be easily accessible. - Only use a suitable multi-function power supply which can be set to 4.5 V.
- The instrument and the mains adapter must not come into contact with water or moisture. Only suitable for operation in dry interiors.
- Do not use the unit if the housing or the mains adapter is damaged.
- Keep the unit out of the reach of persons (including children) who cannot fully appreciate the potential risks of handling electrical equipment.
Radio-controlled clock with automatic backlight

- Pull the plug out of the socket immediately if any fault occurs or if the unit is not used for a long period of time.
- Do not pull the plug out of the socket by its lead.
- Route the mains lead so that it does not come into contact with sharp-edged or hot objects.

Important information on product safety!
- Do not place your product near extreme temperatures, vibrations or shocks.
- Protect it from moisture.
5. Elements and buttons
LCD-Anzeige
A1: Time, seconds, symbols
A2: Date, day of the week and indoor temperature
Buttons (front)
B1: MODEISET button B2: SNOOZE button
B3: ▲/12/24 button B4:
BS: ALARM/ION/OFF button
▼/°C/°F button
Housing
C1: Light sensor C2: Wall mount holes
C3: ON/ECO/OFF switch C4: RESET button
C5: Battery compartment C6: Connection power supply (optional)
C7: Stand (fold out) C8: Cable holder
6. Getting started
- Open the battery compartment and insert the batteries (2 x 1,5 V AA and 3 x 1,5 V C).
• Make sure the polarities are correct. - Close the battery compartment again.
• The two 1.5 V AA batteries are required for the function of the clock.
• The three 1,5 V C batteries are required for the backlight. - For the backlight, the device can also be operated by an optional multi-function power supply which can be set to 4.5 V (not included), instead of the three batteries 1.5 V C.
- Insert the adapter into the jack. Connect the power adapter to a wall socket. The unit is ready for use. Important! Make sure that your household voltage is 230V! Otherwise your clock may be damaged. Important: Continuous backlight operation only works with power adaptor!
• The device will alert you with a beep and all LCD segments will be displayed for a short moment. - The clock will now scan the DCF frequency signal and the DCF symbol will be flashing on the LCD. When the time code is received successfully after 3-10 minutes, the radio-controlled time, the date and the DCF symbol are displayed steadily in the LCD.
- The DCF reception always takes place at 2:00 and 3:00 o'clock in the morning. If the reception is not successfully received at 3:00 clock, it shall be held further attempts until 5:00 clock.
- If there is no reception possible, manual initialization can be helpful.
- Press and hold ▼I°CI°F button for 3 seconds.
• The DCF symbol will be flashing.
• To deactivate the reception, press and hold ▼I°CI°F button for three seconds. The DCF symbol disappears
• There are three different reception symbols:

flashes - reception is active

stays - reception is good
No symbol – reception is deactivated
Radio-controlled clock with automatic backlight

- If the clock cannot detect the DCF-signal (for example due to disturbances, transmitting distance, etc.), the time can be set manually. The DCF symbol disappears and the clock will then work as a normal quartz clock. (see: Manual setting of the clock and calendar).
7. Radio-controlled time reception
The time base for the radio-controlled time is a caesium atomic clock operated by the Physikalisch Technische Bundesanstalt Braunschweig. It has a time deviation of less than one second in one million years. The time is coded and transmitted from Mainflingen near Frankfurt via frequency signal DCF-77 (77.5 kHz) and has a transmitting range of approximately 1,500 km. Changeover from summer time or winter time is automatic. In Daylight Saving Time DST is shown on the LCD. The quality of the reception depends mainly on the geographic location. Normally there should be no reception problems within a 1,500 km radius around Frankfurt.
Please take note of the following:
- The recommended distance to any interfering sources like computer monitors or TV sets is at least 1.5 - 2 metres.
- Inside ferro-concrete rooms (basements, superstructures), the received signal is naturally weakened. In extreme cases, please place the unit close to a window to improve the reception.
- During night-time, the atmospheric interference is usually less severe and reception is possible in most cases. A single daily reception is adequate to keep the accuracy deviation under 1 second.
8. Operation
- Press and hold ▲/12/24 or ▼/°C/°F button in the setting mode for fast running.
- The instrument will automatically quit the setting mode if no button is pressed within 15 seconds.
8.1 Manual setting of the clock and calendar
- Press and hold MODEISET button in normal mode for three seconds.
• The time zone correction (0 defaults) appears on the display. - The time zone correction is needed for countries where the DCF signal can be received but the time zone (+12/-12) is different from the DCF time (e.g. +1=one hour later).
- Press the ▲/12/24 or ▼/°C/°F button to adjust the time zone correction.
- Press the MODE/SET button again to make the settings in the following sequence: hours, minutes, seconds, year, month, day, and day-of-the-week language. Press the ▲12/24 or ▼1°C/F button to adjust it.
- Confirm with the MODEISET button.
- Day-of-the-week language: German (GER), English (ENG), French (FRE), Spanish (SPA), Dutch (DUT), Italian (ITA), Polish (POL) and Czech (CZE).
- The manually set time will be overwritten by the DCF time when the signal is received successfully.
8.2 24 and 12 hours display
- Press the ▲12/24 button in normal mode to choose between 24- and 12 HR system (AM or PM appears on the display).
- If the 12 HR system is chosen, the date display automatically moves from the European format (at first the day then the month) to the American format (at first the month then the day).
8.3 Temperature display
- Press the I°Cl°F button to change between °C (Celsius) or °F (Fahrenheit) as temperature unit.
8.4 Setting of the alarm
• To enter alarm mode, press MODE/SET button in normal mode.
- AL and 0:00 (default) or the last adjusted alarm time appear on the display.
- Press and hold MODEISET button for three seconds.
• The hour digits will be flashing.
- Press the ▲12/24 or ▼1°C/°F button to adjust hours.
- Confirm the setting with the MODE/SET button and set minutes in the same way.
- Confirm with the MODEISET button.
• The display shows the adjusted alarm time.
- Press the MODEISET button again to return to the current time.
Radio-controlled clock with automatic backlight

8.5 Activate and deactivate the alarm
• To activate and deactivate the alarm function press the ALARM/ON/OFF button in normal mode.
• The alarm symbol or no alarm symbol appears on the display.
- When the adjusted alarm time is reached, the alarm will ring.
• The alarm symbol will be flashing.
- Press any button and the alarm will stop.
- If the alarm is not stopped manually, the increasing alarm will automatically turn off after two minutes
and will be reactivated at the same time.
• The alarm symbol stays in the display.
- When the alarm rings, press the SNOOZE button and the snooze function will be activated.
- Once the snooze function will be activated, Zz will be flashing on the display.
• The alarm will be interrupted for 4 minutes.
- The snooze function can be activated up to eight times.
- To turn off the snooze function press the ALARMION/OFF button.
• The snooze symbol disappears.
8.6 Backlight
- The device is equipped with a backlight which is also visible in bright ambient light and a night lighting which enables the user to read the display in the dark.
8.6.1 Battery operation
- Press the SNOOZE button to activate the backlight for 5 seconds.
- Slide the ON/ECO/OFF switch to ECO or ON and the night lighting turns on automatically as soon as the light sensor registers darkness.
- To deactivate the night lighting slide the ON/ECO/OFF switch to the position OFF.
8.6.2 Adapter operation (optional)
- Note: Continuous backlight operation will only work with power adaptor!
• To activate the backlight permanently, slide the ONIECO/OFF switch to the position ECO or ON.
• In the position ON the backlight is permanently active (by daylight and darkness)
• In ECO position the night lighting will be activated at darkness.
• To deactivate the permanent backlight and the night lighting slide the ON/ECO/OFF switch to the
position OFF - Press the SNOOZE button to activate the backlight for 5 seconds.
Function of the backlight
| with battery with adaptor | ||||
| by daylight at darkness by daylight at darkness | ||||
| Switch at the No Night position "ON" backlight* | Night- Permanent Permanent lighting backlight* | backlight* | ||
| Switch at the No Night position "ECO" | Night- Permanent backlight* | Night-lighting* | backlight | lighting* |
| Switch at the position "OFF" | No backlight* | No backlight* | No backlight* | No backlight* |
* Backlight via SNOOZE button (5 seconds)
9. Positioning and fixing
- Hang the clock with one to three stable nails or screws with plugs using the wall mount holes.
- With the foldable leg the instrument can be placed onto flat surfaces.
- Note: If you operate the clock with an adapter, insert the cable into the provided cable holder on the back.
Radio-controlled clock with automatic backlight

10. Care and maintenance
- Clean your instrument with a soft damp cloth. Do not use solvents or scouring agents.
- Remove the batteries and pull out the plug of the socket, if you do not use the product for a long period of time.
- Keep the instrument in a dry place.
10.1 Battery replacement
- Change the three 1,5 V C batteries when the backlight becomes weak.
- Change the two 1,5 V AA batteries, when the battery symbol appears on the display.
- Fold in the stand.
- Open the battery compartment and insert the new batteries.
• Make sure the polarities are correct. - Close the battery compartment again.
11. Troubleshooting
Problems Solutions
| No display on the device | → Ensure that the battery polarity is correct (2 x 1,5 V AA)→ Change the batteries |
| No DCF reception → Press and hold | ▼I*CI*F button for three seconds to activate thereception→ Choose another place for your product→ Wait for attempted reception during the night→ Check if there is any source of interference→ Restart the device according to the manual→ Manual clock setting |
| Incorrect indication → Change the batteries (2 x 1,5 V AA)→ Use a pin to press the RESET button | |
| No backlight / night lighting | → Slide the switch ONIECO/OFF to the right position→ Change the batteries (3 x 1,5 V C)→ Ensure that the battery polarity is correct→ Check the adaptor (optional)→ Check whether shadow or light affect the light sensor |
If your device fails to work despite these measures contact the supplier from whom you purchased it.
12. Waste disposal
This product has been manufactured using high-grade materials and components which can be recycled and reused.

Never dispose of empty batteries and rechargeable batteries in household waste.
As a consumer, you are legally required to take them to your retail store or to an appropriate collection site depending on national or local regulations in order to protect the environment.
The symbols for the heavy metals contained are:
Cd=cadmium, Hg=mercury, Pb=lead

This instrument is labeled in accordance with the EU Waste Electrical and Electronic Equipment Directive (WEEE).
Please do not dispose of this instrument in household waste. The user is obligated to take end-of-life devices to a designated collection point for the disposal of electrical and electronic equipment, in order to ensure environmentally-compatible disposal.
Radio-controlled clock with automatic backlight

- Specifications
| Power consumption:Backlight: Batteries 3 x 1,5 V C (included)Multi-function power supply withthe adjustment to 4,5 volt (not included) |
| Power consumption:Clock function: Batteries 2 x 1,5 V AA (included) |
| Temperature range: -10°C ...+50°C / +14 °F...+122 °F |
| Indication LL.L / HH.H: Temperature is outside measuring range |
| Housing dimension: 230 x 31 (80) x 185 mm |
| Weight: 530 g (instrument only) |
No part of this manual may be reproduced without written consent of TFA Dostmann. The technical data are correct at the time of going to print and may change without prior notice. The latest technical data and information about this product can be found in our homepage by simply entering the product number in the search box.
EU declaration of conformity
Hereby, TFA Dostmann declares that the radio equipment type 60.4508 is in compliance with Directive 2014/53/EU. The full text of the EU declaration of conformity is available at the following Internet address: www.tfa-dostmann.delservice/downloadsice
www.tfa-dostmann.de


- GEHÄUSE
- RADIO-CONTROLLED CLOCK WITH AUTOMATIC BACKLIGHT
- BEFORE YOU START USING IT
- SCOPE OF DELIVERY
- FIELD OF OPERATION AND ALL THE BENEFITS OF YOUR NEW INSTRUMENT AT A GLANCE
- FOR YOUR SAFETY
- CAUTION! RISK OF INJURY
- PLEASE NOTE THE FOLLOWING WHEN USING THE UNIT WITH AN ADAPTER. (ADAPTER IS NOT INCLUDED)
- CAUTION! RISK OF ELECTROCUTION
- IMPORTANT INFORMATION ON PRODUCT SAFETY
- ELEMENTS AND BUTTONS
- LCD-ANZEIGE
- BUTTONS (FRONT)
- HOUSING
- GETTING STARTED
- RADIO-CONTROLLED TIME RECEPTION
- PLEASE TAKE NOTE OF THE FOLLOWING
- OPERATION
- 8.1 MANUAL SETTING OF THE CLOCK AND CALENDAR
- 8.2 24 AND 12 HOURS DISPLAY
- 8.3 TEMPERATURE DISPLAY
- 8.4 SETTING OF THE ALARM
- 8.5 ACTIVATE AND DEACTIVATE THE ALARM
- 8.6 BACKLIGHT
- 8.6.1 BATTERY OPERATION
- 8.6.2 ADAPTER OPERATION (OPTIONAL)
- POSITIONING AND FIXING
- CARE AND MAINTENANCE
- 10.1 BATTERY REPLACEMENT
- TROUBLESHOOTING
- WASTE DISPOSAL
- EU DECLARATION OF CONFORMITY
- WWW.TFA-DOSTMANN.DE
Brand : TFA
Model : 60.4508
Category : Weather Station