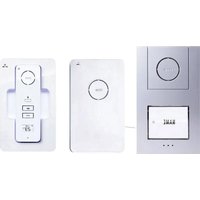
AERCOM AC-210 - Intercom m-e - Free user manual and instructions
Find the device manual for free AERCOM AC-210 m-e in PDF.


User questions about AERCOM AC-210 m-e
0 question about this device. Answer the ones you know or ask your own.
Ask a new question about this device
Download the instructions for your Intercom in PDF format for free! Find your manual AERCOM AC-210 - m-e and take your electronic device back in hand. On this page are published all the documents necessary for the use of your device. AERCOM AC-210 by m-e.
USER MANUAL AERCOM AC-210 m-e
1.10 Laut/Leise-Taster
text_image
Diagram of a digital display panel with labeled buttons and display indicatorsPOWERBOX
text_image
me 3.1 3.2 3.1 3.1 OUTDOCK ON OUT INDOCK - 1M - OUTDOCK - 1M - OUTDOCK - 1M - OUTDOCK - 1M - OUTDOCK - 1M - OUTDOCK - 1M - OUTDOCK - 1M - OUTDOCK - 1M - OUTDOCK - 1M - OUTDOCK - 1M - OUTDOCK - 1M - OUTDOCK - 1M - OUTDOK - 1M - OUTDOK - 1M - OUTDOK - 1M - OUTDOK - 1M - OUTDOK - 1M - OUTDOK - 1M - OUTDOK - 1M - OUTDOK - 1M - OUTDOK - 1M - OUTDOK - 1M - OUTDOK - 1M - OUTDOKAUSSENSTATION • OUTDOOR STATION • BOÎTIER EXTÉRIEUR • BUITENSTATION
text_image
2 NAME 1 ... 4 NAME 1 NAME 2 4.2 4.3 4.4 4.1 ... 4.6 4.5AerCom wireless intercom system models:
AC-210
AC-220
AC-10 EX

Thank you for purchasing this wireless intercom system from m-e. Please read these operating instructions carefully and retain the instructions for any later use.
SCOPE OF DELIVERY
MODELL AC-210
1x Outdoor station
1x Power box
1x Indoor station
1x Charging cradle
1x Mains power supply for charging cradle
1x Mains power supply for power box
1x Mounting material
1x Assembly and operating instructions
1x Drilling template for outdoor station
MODELL AC-220
1x Outdoor station
1x Power box
2x Indoor station
2x Charging cradle
2x Mains power supply for charging cradle
1x Mains power supply for power box
1x Mounting material
1x Assembly and operating instructions
1x Drilling template for outdoor station
MODELL AC-10 EX
1x Indoor station
1x Charging cradle
1x Mains power supply for charging cradle
1x Mounting material
1x Assembly and operating instructions
KEY
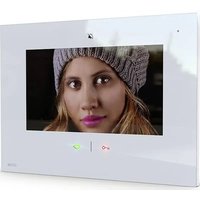
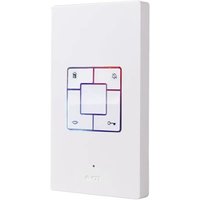
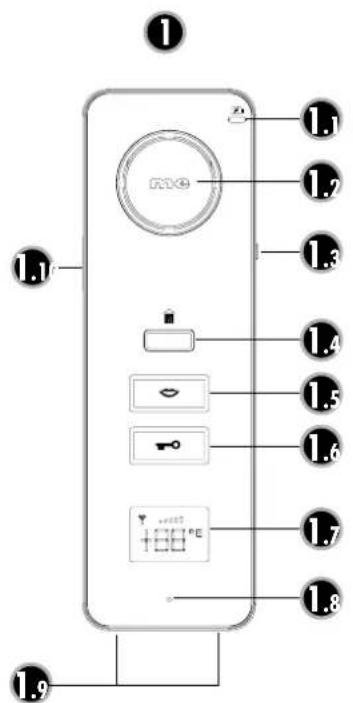
1 Mobile indoor station
1.1 Power-LED
1.2 Loudspeaker
1.3 ON/OFF switch
1.4 Intercom button
1.5 Talk button
1.6 Door release button
1.7 LC display
1.8 Microphone
1.9 Charging contacts
1.10 Volume button
1.11 Reception indicator
1.12 Volume indicator
1.13 Storage battery indicator
1.14 Temperature indicator
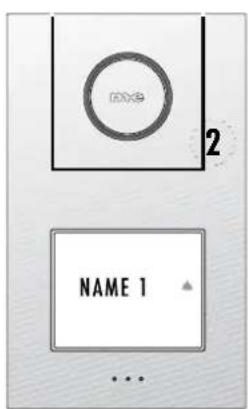
2 Charging cradle
2.1 Power-LED
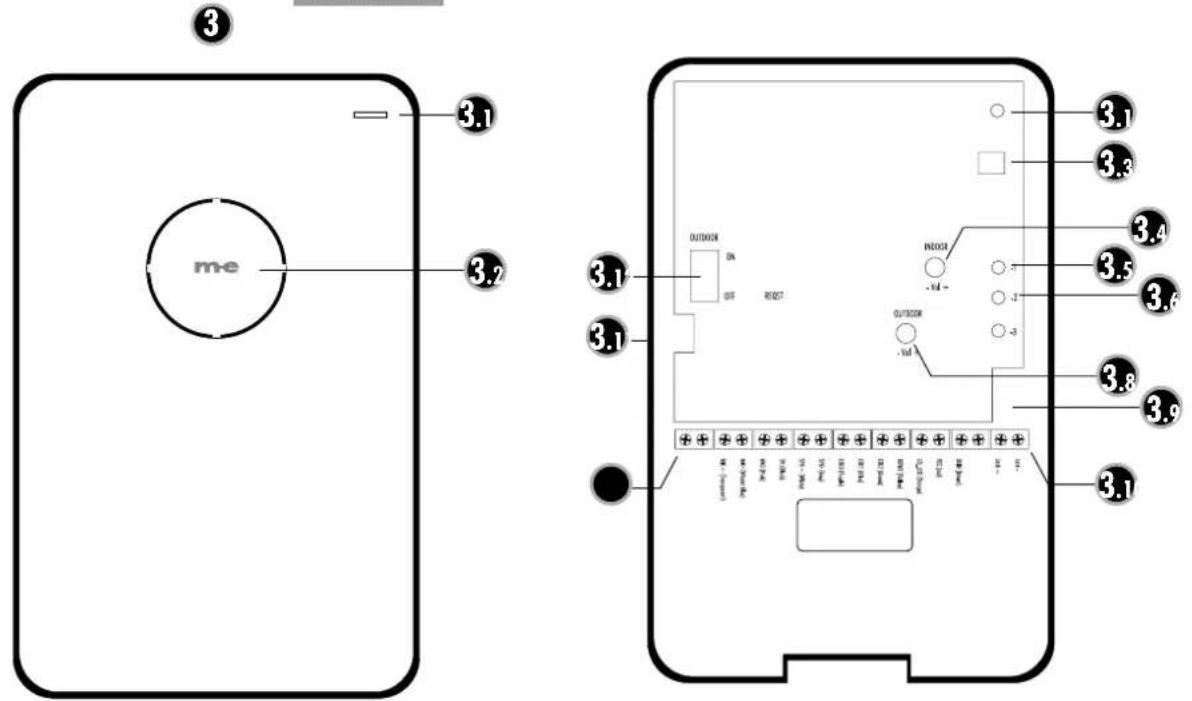
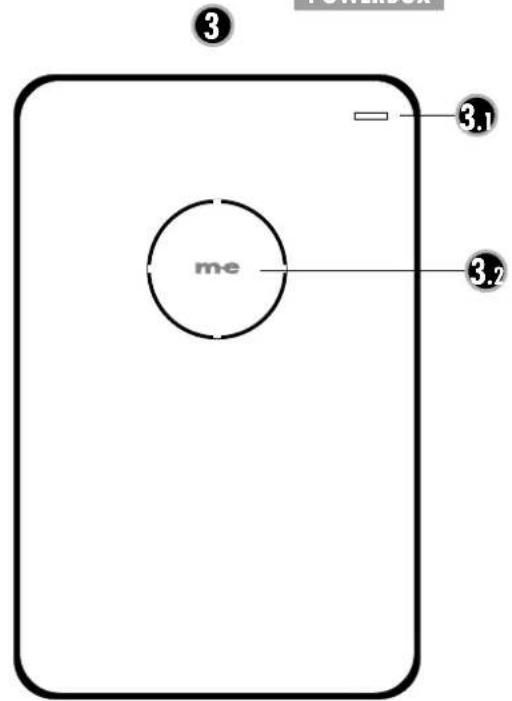
3 Power box
3.1 Power-LED
3.2 Loudspeaker
3.3 Loudspeaker contact
3.4 Ringer volume power box
3.5 Code button Family 1
3.6 Code button Family 2 (only on the 2-family version)
3.8 Ringer volume on outdoor station
3.9 Switch for door opener
3.10 Connection terminal
3.11 ON/OFF ringer on power box
3.12 ON/OFF ringer on outdoor station
3.13 Socket for 12 volt operating voltage
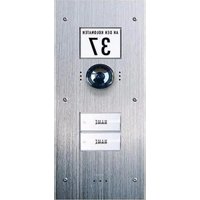
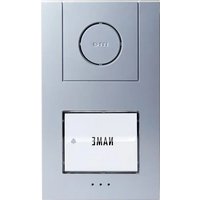
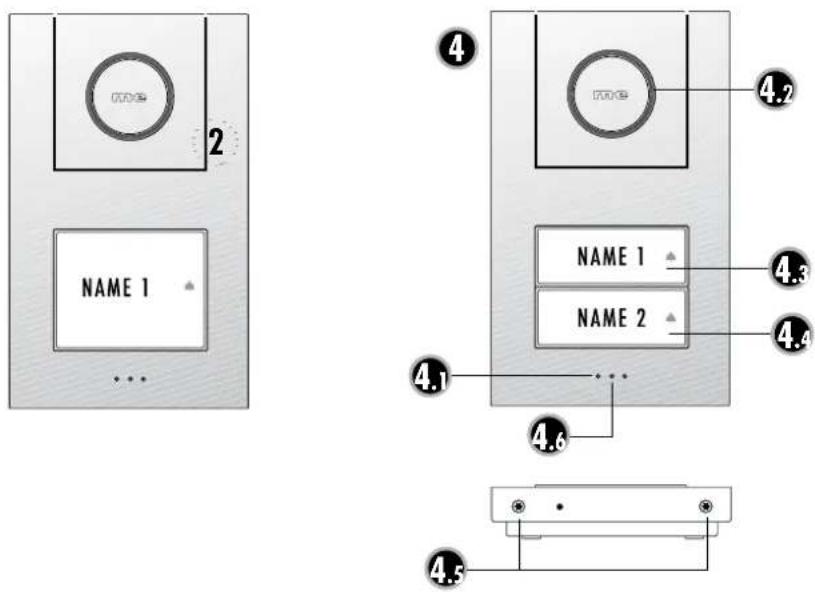
4 Outdoor station
4.1 Brightness sensor
4.2 Loudspeaker
4.3 Ringer button Family 1
4.4 Ringer button Family 2 (only on the 2-family version)
4.5 Casing screws
4.6 Microphone
ASSEMBLY

Please trial the system before final assembly and test whether there is sufficient wireless range. To do this simply connect the mains power supply to the power box and position the power box at approximately the location where you plan the final assembly.
OUTDOOR STATION
The outdoor station is splash-proof in accordance with IP44 but should not be exposed to heavy rain. Thus a somewhat protected assembly location is advantageous.
The wire between the power box and the outdoor station is connected with screw terminals. The wire can be disconnected from the power box by releasing all the screw terminals. The connection terminal is marked with the cable colours but you should still note or photograph how the wires are connected.
1) Find a suitable location for the outdoor intercom unit.
2) Drill the mounting holes with a diameter of 6 mm using the drilling template and also drill an 8 mm hole to insert the cables through the wall.

CAUTION: Only drill the 8 mm hole here if you are mounting the power box exactly opposite the outdoor intercom unit. Otherwise find a suitable location to lay the cable and then lay it to the power box (maximum wire length 10 m).
3) Place a dowel in each of the 6 mm holes.
4) Remove both the screws (4.5) from the outdoor station in order to be able to lift the front casing section from the lower section (please ensure that the wire for the loudspeaker and brightness sensor is not ripped out).
5) Push the cable from the outdoor station through the 8 mm hole or lay it to the power box and screw the back casing section to the wall with four screws.

6) Adapt nameplate
- Remove the nameplate from the front casing section (it is held only by magnets).
- Remove both the screws from the nameplate and open it up.
a) Remove the strip of paper and write your name on it. You can also make a nameplate on your PC and print it out. The dimensions of the paper strip are 15mm x 70mm.
b) Re-mount the outdoor speaker unit by repeating the steps 6.1 and 6.2 in reverse order.
7) Hang the front casing section over the back casing section and replace the two screws (4.5).

NOTE: In order not to have to lay the wire from the outdoor speaker unit visibly please drill the hole for the wire penetration through the wall directly behind the outdoor speaker unit where possible (as shown on the drilling template). This is easiest if the power box is mounted directly opposite.
POWER BOX
The power box is only suitable for indoor assembly and is simply hung on a screw. Drill a 6 mm hole in a suitable position of the wall, insert a dowel and insert the screw until the head protrudes by approximately 3 mm. The power box then hangs on the screw.
If the power box is too loose, please turn the screw a little further into the wall.
The connection cable to the outdoor station can be fed into the power box from the back. When laying the wire please ensure that the wire comes out of the wall at the right position behind the power box. If the wire was laid on the plaster then the power box has a small cable channel on the back, through which you can lead the cable into the power box. The power box then lies flush against the wall.
CHARGING CRADLE
The charging cradle is simply hung on a screw, like the power box.
INITIAL OPERATION

Charge the mobile indoor station(s) completely before initial operation.
- Insert the mains power supply for the charging cradle into the socket and connect using the hollow plug on the charging cradle. The red power LED will light up.
- Insert the mobile Indoor station into the charging cradle, the Power LED (1.1) will indicate the charging process by lighting red. When the charging process is complete the LED colour will turn to green.
- Re-connect the wire from the outdoor station to the power box if you have detached it.
- Plug the mains power supply for the power box into a socket and connect the hollow plug with the socket (3.13) in the power box. The power LED will light after a few seconds and a short tone will sound on the outdoor station.
- Switch the mobile indoor station on using the switch (1.3), the reception indicator (1.11) will flash for a few seconds. Once the connection is made the LC display will show the temperature and the reception indicator will be constant.
The intercom is now ready for use.
SETTINGS
POWER BOX
To open the power box press against the latch from below and lift the front cover up and forwards with care. Make sure that the cables between the main board and the loudspeaker are not broken. The loudspeaker is connected to the main board with a plug.
Ringer volume on the power box
You can use the potentiometer (3.4) to set the volume on the ringer for the power box. Turn clockwise to increase and turn anti-clockwise to reduce the volume.
Ringer and call volume on the outdoor station
You can use the potentiometer (3.8) to set the volume on the outdoor station. Turn clockwise to increase and turn anti-clockwise to reduce the volume.
Door opener switch
Use the slider switch (3.9) to set whether 12V activation of the door opener is on or off. Normally the switch should be switched upwards (away from the terminal).
Switching the ringer on the power box ON/OFF
Use the slider switch (3.11) to switch the ringer on the power box ON or OFF.
Switching the ringer on the outdoor station ON/OFF
Use the slider switch (3.12) to switch the ringer on the outdoor station ON or OFF.

NOTE: The ringer on the outdoor station and the power box is fixed and cannot be changed.
MOBILE INDOOR STATION
Switch on
Use the slider switch (1.3) to switch the mobile Indoor station ON or OFF.
Set the ring tone
- Press and hold the ' - ' volume button (1.10) for five seconds until the indoor station sounds with the set ring tone. Then release the button.
- Press the ' - ' volume button (1.10) briefly to hear the next ring tone.
- Press briefly on the intercom button (1.4) to set the ring tone.
Set ringer volume
- Press the ' - ' volume button (1.10) briefly to decrease the volume and the '+' button to increase the volume.
- Press the intercom button (1.4) to save the change in volume.
Set call volume
Use the volume button to set the call volume while carrying out a conversation with the outdoor station. Pressing on the ' - ' button decreases the volume and pressing the ' + ' button increases the volume.
Switch temperature indicator °C/°F
- Press and hold the ‘+’ volume button (1.10) for five seconds until the indoor station emits a tone. Then release the button.
- Press the ' + ' volume button (1.10) briefly to switch between °C and °F.
- Press the intercom button (1.4) to save the -° display permanently.
CODING

If you have purchased a mobile indoor station with your system then this needs to be coded to the system. AC-210 can be expanded to a total of 4 mobile indoor stations, AC-220 to 2 mobile indoor stations for each ringer button. Proceed as follows:
- Press and hold the code button (3.5 or 3.6*) for five seconds until the outdoor station emits a confirmation tone. Then release the button.
- Press and hold the intercom button (1.4) on the mobile indoor station for five seconds until 'RE' appears on the display. Then release the button.
- Once coding is successful the outdoor station will first emit a confirmation tone, followed immediately by the indoor station. The display will also show the outdoor temperature after coding is successful.

This process must be repeated for each indoor unit.
*Model AC-210 only has the code button 3.5, while model AC-220 has both; code button 3.5 is for the upper ringer button while 3.6 is for the lower ringer button. The relevant code button should be used depending on whether you wish to configure an indoor station on the upper or lower ringer button.
Resetting the coding on the power box
If the mobile Indoor station is exchanged because of a defect, it will be necessary to completely delete the coding on the power box. To do this please carry out the following steps on the power box:
- Press and hold the code button (3.5 or 3.6*) for five seconds until the outdoor station emits a confirmation tone. Then release the button.
- Press 5 times briefly on the code button (you will hear a tone at the outdoor station the first four times and a somewhat different tone on the fifth depression) and wait for approximately 30 seconds (the power LED on the power box will go out briefly while the power box restarts).
- If an indoor station was registered on the ringer button then this will now display 'UN'.
The code has now been deleted and the (new) indoor station can be registered (again) as described in the 'coding' section.
*AC 210 only has the code button 3.5 while AC-220 has both; code button 3.5 is for the upper ringer button while 3.6 is for the lower ringer button.
OPERATION
Talk function
- To call press the nameplate on the outdoor station. Depending on the settings, this will cause the outdoor station, the power box and the mobile indoor station to ring. *
The illuminated frame around the talk button will also flash on the mobile indoor station.
- Press briefly on the talk button within one minute** in order to speak to the visitor (it will be approximately 2 seconds until the connection is made). The display will show 'CA' while the call is active.
- You can activate the door opener with the door release button while the connection is established. The door opening will be indicated optically and acoustically on the outdoor unit. If the visitor has not entered then the door opener can be activated again by pressing the door release button again.
- End the call by pressing the talk button briefly. The illuminated frame around the talk button is then off and the listening function is back on standby.

*Note AC-220: if one of the two ringer buttons has been pressed then the other ringer button is blocked for approximately 1 minute or until a call is connected and ended.
**The ring tone sounds for this time. If the listening function has stopped ringing, it is no longer possible to connect a call without ringing again.
Intercom function
(only possible within one residence, not between residences)
If 2 mobile indoor stations have been configured on one ringer button then it is possible to call from one listening unit to the other.
- Press the intercom button (1.4) on the indoor station.
- The second indoor station will ring.
- Press the intercom button on the second indoor station to accept the call.
- Press the intercom button on one of the two indoor stations to place the listener unit back to standby.
TECHNICAL DATA
Frequency (DECT): 1.8GHz
Range: up to 250m (open space)
Mobile indoor station
Power supply: 3.7V /650mAh Lilon
Standby time: approx. 24h
Charging cradle
Power supply: 6V DC / 300mA
Power box
Power supply: 12 volt DC / 2000mA
Power consumption on standby: ca. 60mA / ca. 1W

NOTES
Strong static, electrical or high frequency fields (discharges, mobile telephones, radio systems, and microwaves) can cause the appliance(s) to malfunction.
Cleaning and care
Disconnect mains-powered appliances before cleaning (remove the plug). The surface of the casing can be cleaned using a soft cloth dampened in a soap solution. Do not use scouring agents or chemicals. Release collected dust from ventilation slits using a brush and a vacuum cleaner if necessary. Do not hold the vacuum nozzle directly on the appliance.

SAFETY NOTES
The guarantee lapses for damage caused by non-adherence to these operating instructions. We do not accept liability for consequential damage.
We do not accept liability in the event of damage to property or persons that is caused by inappropriate use or non-adherence to the safety notes. Any guarantee lapses in such cases.
Unauthorised conversion and/or modification of the product are not permitted for reasons of safety and certification (CE).

Do not dismantle the product!
Do not leave the packaging materials lying around unattended. Plastic foil/bags, polystyrene sections etc. could be a dangerous toy for a child.
Power box, charging cradle, mobile indoor unit and mains power unit are only suitable for dry rooms (no bathrooms or damp rooms). Avoid letting the units become wet or damp.
Handle the product carefully - it will be damaged by shocks, impacts or a fall from even a small height.
2-YEAR LIMITED GUARANTEE
We guarantee for a period of 2 years from the date of purchase that this product will be free of defects in its materials or design. This is only valid if the appliance is used in the usual manner and is regularly maintained. The obligations in this guarantee are limited to the repair or replacement of any part of the appliance and are only valid given that no unauthorised modifications or attempted repairs have been carried out. Your statutory rights as a customer are not restricted in any way by this guarantee.

Please note:
No claim can be made under the guarantee in the following circumstances:
- Operating errors
- Incorrect coding / channel choice
• Defects caused by other radio systems (e.g. mobile phone operation)
• Interference or impact by a third party - Mechanical damage
- Moisture damage
- Lack of proof of guarantee (purchase receipt)
The guarantee is void in the event of damage caused by non-adherence to these operating instructions. We do not accept liability for conse-
quential damage. We do not accept liability for damage to property or persons caused by inappropriate handling or non-adherence to the safety notes. No claims can be made on the guarantee in such cases.
Liability limitations
The manufacturer is not liable for the loss or damage of any kind, including incidental or consequential damage that results directly or indirectly from the defect in this product.
GB
These operating instructions are a publication of m-e GmbH modern-electronics,
These operating instructions conform to the technical status at the time of printing. Subject to changes in technology and equipment.
INNENSTATION • INDOOR STATION • BOÎTIER INTÉRIEUR • BINNENSTATION
text_image
1 1.1 1.2 1.3 1.4 1.5 1.6 1.7 1.8 1.9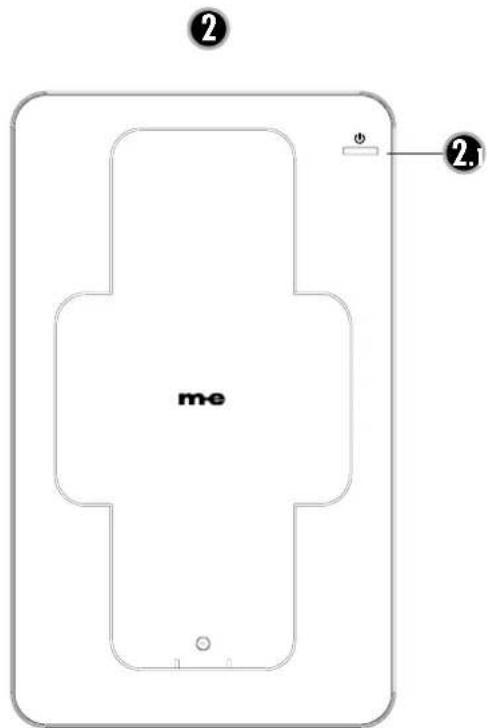
text_image
me ② ②.1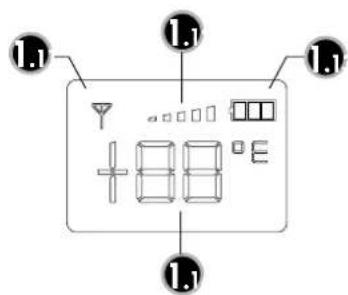
text_image
1.1 1.1 1.1 800 EPOWERBOX
text_image
me 3 3.1 3.2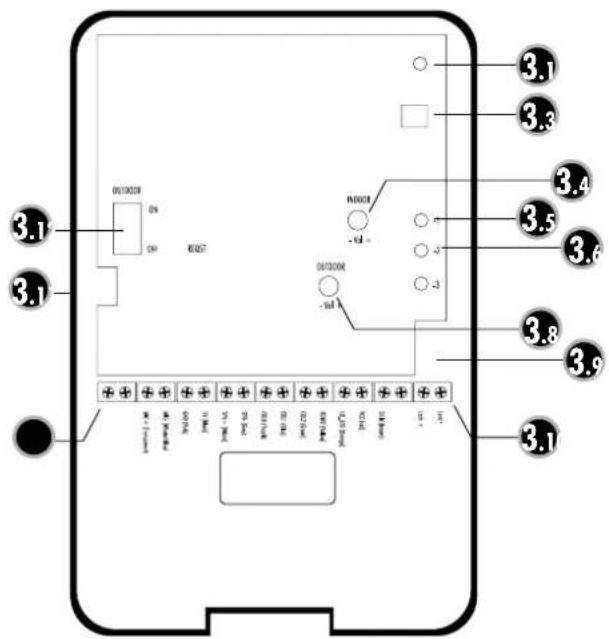
text_image
OUTDOOR N000T OUTDOOR 3.1 3.1 3.1 3.3 3.4 3.5 3.6 3.8 3.9 3.1AUSSENSTATION • OUTDOOR STATION • BOÎTIER EXTÉRIEUR • BUITENSTATION
text_image
MODE 2 NAME 1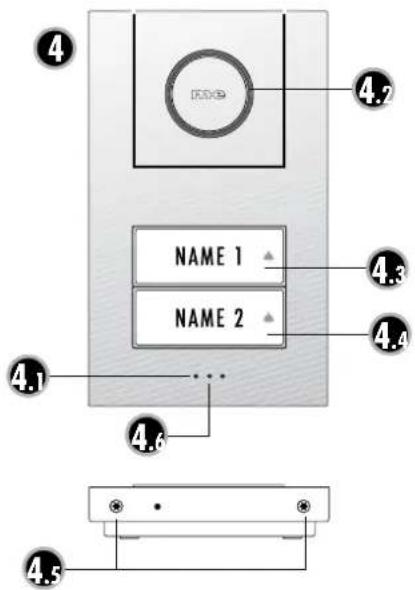
text_image
4 4.7 NAME 1 ▲ 4.3 NAME 2 ▲ 4.4 4.1 ... 4.6 4.5text_image
me 2 NAME 1 ...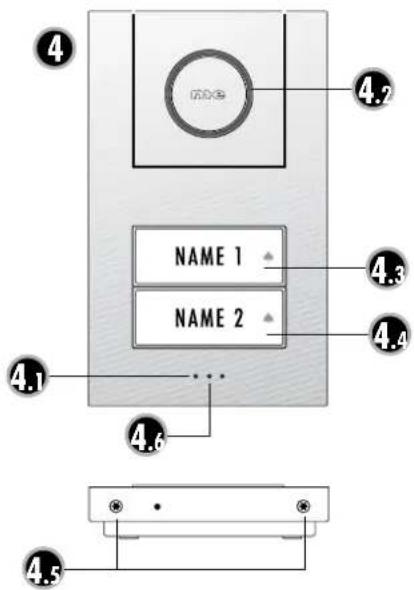
text_image
4 NAME 1 NAME 2 4.7 4.3 4.4 4.1 4.6 4.5AerCom draadloze deurintercom modellen:
AC-210
AC-220
AC-10 EX