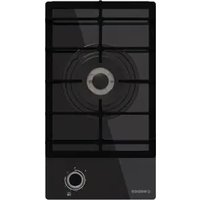
NorCook IV N7503 BK - Cooker NODOR - Free user manual and instructions
Find the device manual for free NorCook IV N7503 BK NODOR in PDF.

User questions about NorCook IV N7503 BK NODOR
0 question about this device. Answer the ones you know or ask your own.
Ask a new question about this device
Download the instructions for your Cooker in PDF format for free! Find your manual NorCook IV N7503 BK - NODOR and take your electronic device back in hand. On this page are published all the documents necessary for the use of your device. NorCook IV N7503 BK by NODOR.
USER MANUAL NorCook IV N7503 BK NODOR
natural_image
Black-and-white photo of a modern kitchen appliance with a grid-patterned screen and a small stand (no visible text or symbols)
NODOR
always innovating
ES MANUALADENSISTUBICIONEES
EN INSTERECTIONS FOR USE
FR MAMMELED' D'ULISATION
natural_image
Illustration of a hand using a paintbrush to brush residue in liquid (no text or symbols)Fig.4 - Abb.4
text_image
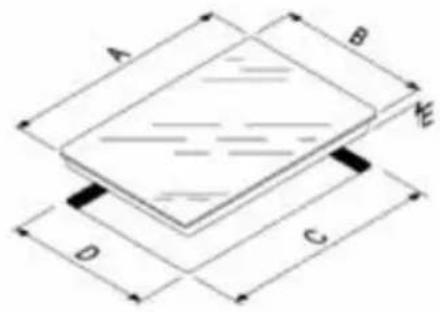
A B E D C| ABCDE | ||||
| 750450 | 71041068 |
natural_image
Pure technical line drawing of a structural joint or connection (no text or symbols)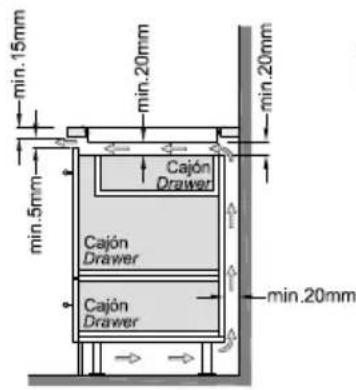
text_image
min. 15mm min. 20mm min. 20mm min. 5mm Cajón Drawer Cajón Drawer Cajón Drawer min. 20mm
THIS APPLIANCE IS CONCEIVED FOR DOMESTIC USE ONLY. THE MANUFACTURER SHALL NOT IN ANY WAY BE HELD RESPONSIBLE FOR WHATEVER INJURIES OR DAMAGES ARE CAUSED BY INCORRECT INSTALLATION OR BY UNSUITABLE, WRONG OR ABSURD USE.
The manufacturer declares that this product meets all the essential requirements for low voltage electrical material set out in European directive 2014/35/EU and for electromagnetic compatibility as required by European directive 2014/30/EU.
PRECAUTIONS
- When one makes use of heating elements, we advise receptacles with flat bottom having same diameter or lightly higher than that of the hot area.
- Avoid overflows of liquid, therefore when boiling has happened, or in any case when liquid is heated, reduce the heat supply.
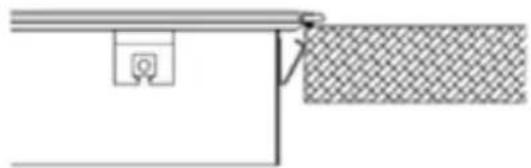
- If once the appliance is installed there is access to the lower part, a protection panel (wooden or something similar) ought to be placed at the distance indicated in the figure.
- Don't leave the heating elements on without receptacles on the top or with void pots and pans.
- Do not use any alluminium foil or place any foodstuffs wrapped in alluminium foil directly on the hob - do not place any metal objects such as knives, forks, spoons and lids on the hob surface as they will heat up.
- When cooking in a non-stick pan without seasoning, do not exceed 1-2 mi-
nutes' pre-heating time.
- When cooking food that may easily stick, start at a low power output level and then slowly increase while regularly stirring.
- If the surface of the hob is damaged, immediately disconnect the appliance from the mains to prevent the possibility of electric shock.
- Never use a steam cleaner to clean the hob.
- The appliance and accessible parts may be hot during operation.
- Take care to avoid touching the heating elements.
- Children less than 8 years of age should be kept at a safe distance unless continuously supervised.
- This appliance may be used by children aged 8 or over and by persons with reduced physical, sensory or mental capabilities or lack of experience and knowledge, if they are supervised and have received suitable instructions on safe use of the appliance and understand the dangers involved. Children must not play with the appliance. User maintenance and cleaning should not be carried out by children except under constant supervision.
- Cooking with grease or oil may be dangerous and cause a fire if left unattended. NEVER try to extinguish a fire with water. Rather, disconnect the appliance and then cover the flames with a cover or fire blanket, for example.
- The cooking process has to be supervised. A short term cooking process has to be supervised continuously.
- Unattended cooking on a hob with fat or oil can be dangerous and may result in a fire.
- Fire hazard: do not store elements on cooking surfaces.
- Only counter top protectors designed for use with the cooking appliance and listed in the manufacturer's instructions should be used as suitable protection for the counter top incorporated in the appliance. Use of unsuitable protectors may cause accidents.
- When the hob is in use keep all magnetizable objects away (credit cards, floppy disks, calculators and so on).
- After cooking is finished, switch c using the control provided (turn down to "0"), and do not rely on the pan sen-sor.
- WARNING: Accessible parts will become hot when in use. To avoid burns and scalds children should be kept away. Insert in the fixed wiring a mean for disconnection from the supply mains having a contact separation in all poles that provide full disconnection under overvoltage category III conditions, in accordance with the wiring rules. The plug or omnipolar switch must be easily reached on the installed equipment.
This appliance is not intended to be used via an external timer or a remote control system.
The manufacturers decline any responsibility in the event of non-compliance with what is described above and the accident prevention norms not being respected and followed.
To avoid all risk, if the power cable becomes damaged, it must only be replaced by the manufacturer, by an authorised service centre, or by a qualified electrician.
OPERATING PRINCIPLE (Fig. 1)
It exploits the electromagnetic properties of most cooking vessels.
The coil (inductor) which produces the electromagnetic field is operated and controlled by the electronic circuit.
The heat is transmitted to food by the cooking vessel itself.
The cooking process takes place as described below.
- loss of heat is minimum (high efficiency)
- the system stops automatically when the vessel is removed or even just lifted from the hob
- the electronic circuit guarantees maximum flexibility and fine adjustments.
Fig. 1)
1 Vessel
2 Induced current
3 Magnetic field
4 Inductor
5 Electronic circuit
6 Power supply
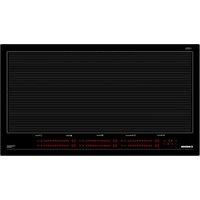
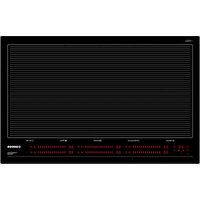
User's Instructions (Fig. 2)
1 Power ON / Power OFF
2 Slider sensor
3 Double / Triple Circuit
4 Lock function
5 ON/OFF LED
6 Slider LED
7 Lock LED
8 Heating zone and setting display
9 Timer indicator zone
10 Timer
11 Double / Triple Circuit LED
Installation
All operations relative to installation (electric connection) should be carried out by skilled personnel in conformity with the rules in force.
As for the specific instructions see part pertaining to installer.
Functionality Slider TC:
Slider: sensor technology of the novel Slider TC a llow s as well an adjustment of the cooking levels (1 - 9) as the tim er value (1-99) by touching and pulling the finger over the designated area. Pulling to the right is increasing and to the left is decreasing accordant value.
Moreover a direct selection of the designated value is also possible on the slider area.
ON/OFF Touch Control
After connecting to the mains the TC unit takes 1 second to prepare for operation. After a reset all displays and LEDs flashes up for 1 second. After 1 second all displays and LEDs are switched off again.
The TC unit may now be switched ON by pressing the ON/OFF key (1). Displays show a steady "0". Possible optic warnings
for hot cooking zones “H” are displayed in alternation with “0” and the synchronously display dot. The display dots on the cook top displays flashes up every second (0.5 sec.off, 0.5 sec. on). Electronics remains activated for 20 seconds. If there is no cooking level or timer selection done in this period the electronics automatically resets to the Off-mode by releasing a signal tone.
The TC may only be switched on by pressing the power key as sole input In case of an other key is pressed (single or in parallel with the power key), the control unit is not switched on.
In case of an active “Child Lock Function” when switching POWER ON, all cooking zone displays show “L” for LO CKED. Possible optic warnings for hot cooking zones [H] are displayed in alternation with [L] (H-ON=0.5 sec; L-ON=1.5sec).
By pressing the ON/OFF key (1) of the control unit in ON-Mode, the Touch Control may be switched off at any time. This is also applicable for locked control units (active child lock). The ON/OFF key takes always priority with the POWER-OFF function.
Automatic Switch Off
The TC switches from Power ON to OFF after 20 sec., provided that no cooking zone is activated or a select key is pressed during that time.
In case of a selected cooking zone (with cooking stage is "0") this Auto Power off time is composed of a 10 sec deselection time and 10 sec Power off time.
ON/OFF Cooking Zone
In case of On-state of the TC a cooking zone may be selected by touching the dedicated display (Select-Sensors (8)). The respective display changes to a steady display dot and "0" instead of "H" – in case of a hot cooking zone-. On all other cooking zone displays the dot expires.
That followed a cooking level may be set by using the Slider area. Thus switches the respective cooking zone on. End stops are "9" (right side) and "0" (left side).
First place the pan in the chosen cooking zone. If the pan is not present, the system cannot be switched on the correspondent zone and the display shows the following symbol:

Switching Off a single cooking zone:
A single cooking zone may be switched off by selecting and setting cooking level to "0". In case of an optic warning for hot cooking zones "H" this is displayed in alternation with "0" and the synchronously display dot.
After the TC is switched Off the display remains black respectively “H” is displayed for an optic warning for hot cooking zone.
Switching Off all cooking zones:
Immediately switching off all cooking zones is always possible by using the ON/OFF key. "H" possibly appears on all hot cooking zones. All other cooking zone displays remain black.
Power Stages
The power of the cooking zone is adjustable in 9 different stages; the respective stage is displayed (“1” to “9”) via LED-seven-segment-displays.
Booster Function
The Booster function can be selected by pressing the far right of the sliding control (2). With this function, all the cooking zones are able to receive a power supply above the nominal power (the number of zones with booster at the same time will depend on the power provided to the different zones, which must always be less than the maximum power of the hob).
The booster activation time is limited to 5 minutes to protect cooking utensils. After the booster has automatically switched off, the cooking zone continues to operate at setting level "9".
The booster can be reactivated after a few minutes.
If the pan is removed from the cooking zone during boosting, the booster function remains active and the disabling time continues its countdown.
Power management is based on the principle that the last modification to the setting level in the different zones has top priority. This means that the setting levels previously configured in the other zones may be automatically decreased
- If the induction detects that any of the cooking zones requires a reduction, the display for this zone flashes for 3 seconds to time for correction prior to modification.
- If the selected zone is re-adjusted within the correction period, power management analyses the power distribution again. If a reduction in power is not required the flashing stops and the original setting level remains on the corresponding display.
- Should power distribution be changed again by the user, the setting level will under no circumstances automatically increase in the zones where it has been automatically reduced.
Residual heat indicator
This informs the user that the glass is at a dangerous temperature should the area around the cooking zone be touched. The temperature is determined by a mathematical model and any residual heat is indicated by an “H” on the corresponding 7-segment display.
Heating and cooling are calculated based on:
· The selected setting level (between "0" and "9")
- The ON/OFF time.
After switching off the cooking zone, the corresponding display will
indicate "H" until the temperature in the zone has dropped below the critical level
(≤ 60^) according to the mathematical model.
Automatic Switch-off (Operating Time Limitation)
For each activated cooking zone a max. operating time is defined. The max. operating time is depending on the selected cooking stage. After the expiration of the max. operating time the cooking zone is automatically switched off.
Each actuation of the cooking zone status (changing the cooking level etc.) resets the count-down timer to the initial starting value.
Timer settings takes priority vs. operating time limitations for high
cooking s tage setting.
Protection against uninte ntional activation
The electronic system cuts of f automatically in case of an identified permanent use of keys for about 10 seconds. The control unit releases an audible signal for 10 sec of the malfunction (period: 1000 msec, 500 msec ON) and the error code "E R 0 3" flashes on the display (0.5 s ON 0.5s OFF). If the permanent actuation exceeds 10sec, alone the error code "ER 03" keeps flashing as long as the malfunction occurs and is identified
as such. In case the cooking zone is at stage "hot" the [H] symbol alternates with the error code (0.5 sec Symbol 0.5 sec "H").
Water sprinkled on the glass surface does not always lead to a key actuation and cannot be surely detected. ( After wiping the glass covering the keys, all keys are ready for operation in no time).
If no cooking zone is activated within 20 sec after pressing POWER ON, the control unit is reset to Off-mode (black displays).
Key Lock (Optional)
The actuation of the key lock key "4" in the wait or active mode locks the keyboard and the assigned key-lock LED "7" is statically illuminated. Here, the actuation times of the key-lock key have to be taken into account. The control continues to work in the set mode, but may no longer be operated with any key, except the key-lock key itself or the on/off key "1".
The switching OFF with the on/off key “1” is also possible in the locked condition. The assigned key-lock LED “7” fades when switching off the control The key-lock function included LED is active again when switching on (in wait mode 10 s) until this is deactivated by a repeated actuation of the key-lock key. The activation/deactivation of the key-lock function in the off mode is not possible.
When programmed timers expire the respective timer alarms may be confirmed by actuating any key without needing to unlock the control.
The repeated actuation of the key-lock key in the wait or active mode unlocks the keyboard and the assigned key-lock LED fades. All sensor keys may be operated as usual again.
Control of multiple circuits
When a dual / triple cooking zone is activated, the 3 circuits are switched on at the same time. The activation / deactivation of each circuit is done with button 3 and it is indicated with an illuminated segment (11).
Acoustic Feedback (Buzzer)
The following activities occurring during operation of the TC unit are fed back audibly via a buzzer:
-Short single tone for regular actuation of a key
-Longer, intermittent tone for permanent use of keys over a longer period of time ( ≥ 10 sec)
-Expiry of the timer
Timer-function (optional)
The timer function is available in two types:
-Stand-alone-timer 1..99 min: Audible signal with timing. This function can only be activated as long as no cooking zone is in operation (all stages = 0). Is any cooking zone started with operation (level >0) than the stand alone timer keeps in operation. If the timer shall be used to cut off a cooking zone (see cooking zone timer) then the control must first be switched off (power sensor) and switched on again.
-Cooking zone timer 1..99 min: This function can only be activated as long as a cooking is active (stage >0; display dot). Audible signal with timing, four cooking zones to be cut off are freely programmable.
Setting a timer value:
By adjustment with the slider area.
Primarily the adjustment of the first digit takes place and thereafter the adjustment of the second digit.
In case of an active timer display the timer value may be set to [0] directly by pressing [0] on the slider area (left side)
Switching off an active timer:
A timer can be switched of by setting its value to "0".
A stand alone timer can be switched of by a double actuation of the power key "1".
Timer Stand-Alone:
If the control unit is switched on (all cooking zone displays show "0"), the stand-alone timer may be activated by pressing the timer select key. The timer display show "00. The timer is cut off after 10 sec (black display) if no further settings are made. In case of a timer value is set with no activation of a cooking zone within
10sec, the cooking zone displays are cut off (interposing relays are also cut off). Possible optic warnings for hot cooking zones [H] are displayed permanently
The setting range is 0 -99 minutes in single steps; by Slider area. Directly after the timer value is set countdown starts with the last set value. After expiring of the set time an acoustic signal is given and the timer display flashes "00".
The acoustic signal is terminated
-after 2 min and/or
-by actuating any key.
Thereafter timer display stops blinking and extinguishes. Possible optic warnings for hot cooking zones "H" are displayed permanently
By pressing the ON/OFF key "1", the control unit may be switched from "purely timer operation" to cooking zone at any time -with or without an activated Stand-Alone timer -.
Cooking zone specific timer programming
By actuating a cooking zone (cooking zone stage > 0) followed by selecting the timer display (within 10 sec) a timer value may be assigned to the cooking zone as a cut-off function. The LED around the timer "9" indicates which cooking zone the timer had been activated for.
As soon as the timer is selected the according LED is blinking. In case of a cooking zone is selected thereafter, the dot extinguishes and the LED stops blinking.
When s witching from one cooking zone to another, the timer display indicates the current timer value of the respective cooking zone. Timer settings of other cooking zones stay active. Further setting is like with the stand-alone timer
In case of more than one active timer the display indicates the lowest timer value (after 10s deselection time).
After expiring of the set time an acoustic signal is given and the timer display flashes "00". The related timer LED is blinking synchronously. The programmed cooking zone is cut-off, a permanent "0" is. After 10 sec (deselection time) a permanent "H" is displayed on a "hot" cooking zone. Otherwise, the symbol "0" is indicated.
The acoustic signal and the blinking of the cooking zone timer Led is terminated
- after 2 min and/or
- by actuating any key.
Thereafter timer display stops extinguishes and the cooking zone stays unselected.
Behaviour of the cooking zone specific timer is similar to the stand alone timer.
In case of a timer is programmed for a cooking zone the operating time limitation is dependent of the timer value and not of the standard table value.
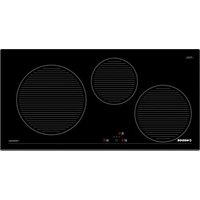
Cooking vessels (Fig. 3)
- a magnet-attracting vessel may be a suitable vessel for induction cooking
- prefer vessels which are especially declared to be suitable for induction cooking
- flat- and thickbottomed vessels
- a vessel with the same diameter as zones ensures the maximum exploitation of power
- a smaller vessel reduces power exploitation, but does not cause any energy loss. We would anyhow not recommend the use of vessels with diameters smaller than 10 cm.
- stainless-steel vessels with multi-layer or ferritic stainless-steel bottoms when specifically suited for induction cooking
- cast-iron preferably enamel-bottomed vessels to avoid scratching the pyroceram surface
- we do not recommend the use of any glass, ceramic, earthenware, alluminium, copper or non-magnetic (austenitic) stainlesssteel vessels.
Maintenance (Fig. 4)
By means of a scraper immediately remove any alluminium foil bits, food spills, grease splashes, sugar marks and other high sugar content food from the surface in order to avoid damaging the hob.
Subsequently clean the surface with some towel and appropriate product, rinse with water and dry by means of a clean cloth. Under no circumstance should sponges or abrasive cloths be used; also avoid using aggressive chemical detergents such as oven sprays and spot removers.
Installer's Instructions
Installation
These Instructions are for the qualified technician, as a guide to installation, adjustment and maintenance, according to the laws and standards in force. These operations must always be carried out when the appliance has been disconnected from the electric system.
Positioning (Fig. 5)
The fixture is especially designed for fitting into a work-top as shown in the corresponding figure.
Place the supplied sealing agent along the hob perimeter.
Do not install the hob over an oven; in case you do, make sure of the following:
- the oven is equipped with an appropriate cooling system
- there is no warm-air leakage from the oven towards the hob
- suitable air-inlets are provided as shown in the figure.
Electrical connection (Fig. 6)
Prior to carrying out the electrical connection, please ensure that:
- the plant characteristics are such as to follow what is indicated on the matrix plate placed at the bottom of the working area;
- that the plant is fitted with an efficient earth connection, following the standards and law provisions in force.
The earth connection is compulsory in terms of the law.
Should there be no cable and/or plug on the equipment, use suitable absorption material for the working temperature as well, as indicated on the matrix plate. Under no circumstance must the cable reach a temperature above 50^ C of the ambient temperature.
FR
CE PRODUIT EST CONÇU EXCLUSIVE-MENT POUR USAGE DOMESTIQUE. LE CONSTRUCTEUR DÉCLINE TOUTE RES-PONSABILITÉ POUR DOMMAGES ET BLESSURES CAUSÉES PAR UNE INSTA-LLATION INCORRECTE OU PAR UN USA-GE IMPROPRE, ERRONÉ OU ABSURDE.