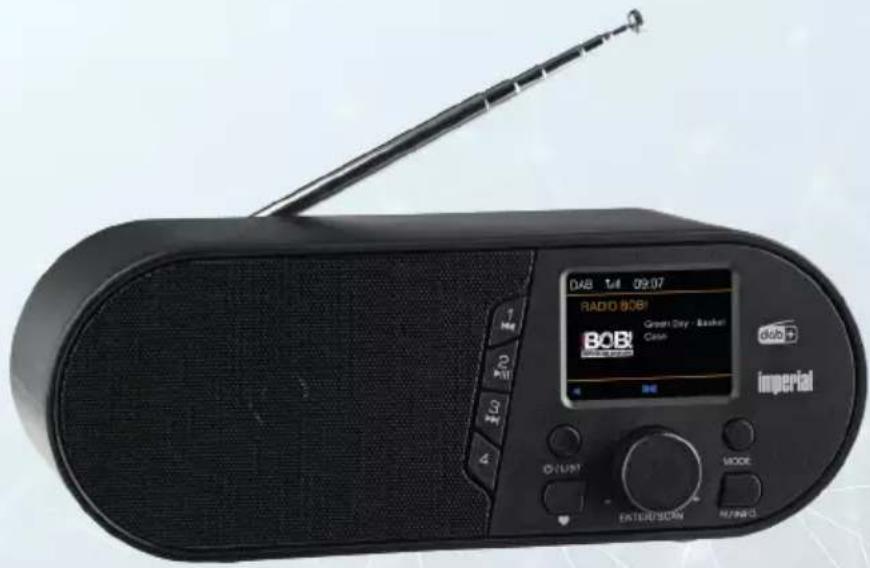
DABMAN d105 - Radio Imperial - Free user manual and instructions
Find the device manual for free DABMAN d105 Imperial in PDF.


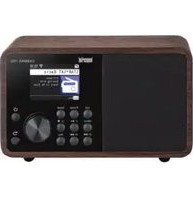
| Product type | Digital alarm clock radio with DAB+, FM, Bluetooth and USB |
| Brand | Imperial |
| Model | DABMAN d105 |
| Dimensions (W x H x D) | 24 x 9.2 x 11 cm |
| Weight | 0.5 kg |
| Power supply | USB mains adapter 5V/2A (100-240 V, 50/60 Hz) |
| Frequency ranges | DAB+: 174 – 240 MHz; FM: 87.5 – 108 MHz |
| Bluetooth | Version 5.1, range up to 10 m |
| Display | Backlit, adjustable in 3 levels, auto-off timer |
| Headphone jack | 3.5 mm stereo jack |
| Station memory | 30 DAB+ favourites, 4 direct buttons (1-4) |
| Main functions | DAB+/FM radio, Bluetooth streaming, USB MP3 playback, 2 alarms, snooze, sleep timer, DAB+ information display |
| Connections | USB-A (MP3 playback), USB-C (power), telescopic antenna |
| Package contents | Radio, USB mains adapter, USB/USB-C cable, user manual |
| Menu languages | French, German, English, Dutch, Polish and others |
| Safety | Protection class II, indoor use only, do not open the casing |
| Maintenance and cleaning | Unplug before cleaning; use a soft dry cloth; no solvents or liquids |
| Spare parts and repairability | After-sales service by TELESTAR Digital GmbH; no specified spare parts |
| General information | CE marking, compliant with RED, RoHS, REACH, ErP directives; statutory warranty |
Frequently Asked Questions - DABMAN d105 Imperial
User questions about DABMAN d105 Imperial
0 question about this device. Answer the ones you know or ask your own.
Ask a new question about this device
Download the instructions for your Radio in PDF format for free! Find your manual DABMAN d105 - Imperial and take your electronic device back in hand. On this page are published all the documents necessary for the use of your device. DABMAN d105 by Imperial.
USER MANUAL DABMAN d105 Imperial
Scan the QR code to get a multilingual manual as a pdf file.
- DAB/DAB+ Radio....20
TELESTAR Service Center,
Am Weiher 14,
56766 Ulmen
e-mail: service@telestar.de
IMPERIAL DABMAN d105
USB Steckernetzteil
DABMAN d105
6. DAB/DAB+ RADIO
natural_image
Abstract network diagram with interconnected nodes on a light background (no text or symbols)DABMAN d105
User manual
imperial®
V1_11_23
Scan the QR code to get a multilingual manual as a pdf file.
- DAB/DAB+ Radio....20
DAB Mode 20
Selecting Stations....20
Saving DAB Radio Stations to Favorites List 21
Accessing DAB Radio Stations from Favorites List .....22
DAB/DAB+ Station Information 23
DAB/DAB+ Station Search 24
Assigning DAB+/DAB Stations to Preset Buttons .....25
- FM Radio 26
FM Mode....26
FM Station Search 27
Accessing FM Stations from Favorites List 28
Modifying FM Search Settings....28
FM Audio Settings 29
- Alarm Clock 30
Setting the Alarm 30
Snooze Function 31
Stopping the Alarm....31
- Sleep Timer....32
Setting the Sleep Timer 32
User manual
CONTENT
-
Bluetooth....33
Establishing Bluetooth Connection 33 -
Playing USB Media 34
Playing USB Media 34
- System Settings ...... 35
System Settings 35
Language....36
Backlight 38
Factory Reset. 39
-
Troubleshooting....40
-
Storage 41
-
Disposal Notice....41
Disposal of Packaging 41
-
Technical Specifications 42
-
CE Marking....43
1. FOREWORD
Dear Customer,
Thank you for choosing our product. Our product complies with legal requirements and has been manufactured under constant quality control. The technical specifications are current as of the time of printing, and changes may occur.
GB
The warranty period for the device corresponds to the legal provisions in effect at the time of purchase. We also offer our telephone HOTLINE service with professional assistance. In our service department, professional experts are at your disposal to answer any questions you may have about our products and provide tips for troubleshooting.
Our technicians are available from Monday to Friday, from 8:00 AM to 4:45 PM, at the following phone number:
Technical Hotline:
02676/9520101
or by email at: service@telestar.de
If you do not receive the assistance you need from the service hotline, please send the device, preferably in its original packaging and securely packed, to the following address:
TELESTAR - DIGITAL GmbH
Service Center
Am Weiher 14 [Industrial Area]
56766 Ulmen
Please read these instructions carefully and keep them for future reference. If you sell or pass on the device, be sure to include this user manual.
User manual
2. SAFETY INSTRUCTIONS
2.1 Symbol Explanation
SYMBOL MEANING

DANGER!
This signal word indicates a hazard with a high degree of risk that will result in death or serious injury if the warning is ignored.

WARNING!
This signal word indicates a hazard with a medium level of risk which, if not avoided, could result in death or serious injury.

CAUTION!
This signal word indicates a hazard with a low level of risk which, if not avoided, may result in minor or moderate injury.

NOTE!
This signal word warns of possible material damage.

This symbol warns of danger.
DABMAN d105
2. SAFETY INSTRUCTIONS
2.1 Symbol Explanation
SYMBOL MEANING
GB

Protection class II
Electrical appliances with protection class II have reinforced or double insulation in the amount of the rated insulation voltage between active and touchable parts (VDE 0100 Part 410, 412.1). They usually have no connection to the protective conductor. Even if they have electrically conductive surfaces, these are protected from contact with other live parts by reinforced or double insulation.

The products marked with this symbol fulfill the requirements of the European Community directives.

Appliances with this symbol may only be operated indoors in a dry environment.
2. SAFETY INSTRUCTIONS
2.2 Intended use
The device serves as a receiver for DAB+ FM radio and for playing audio files from a USB data carrier or Bluetooth playback device. Any other operation or use of the device is considered improper and may result in personal injury or property damage.
Do not use the appliance for any other purpose. Only operate the device indoors.
The device is intended for private use only and not for commercial use. We assume that the user of the device has general knowledge of handling consumer electronics devices. Liability expires in the event of improper use.
Only use spare parts and accessories supplied or approved by us.
Do not modify the appliance and do not use any accessories or spare parts that have not been explicitly approved or supplied by us.
Do not use the appliance in potentially explosive atmospheres.
These include, for example, fuel storage areas, tank facilities or areas where solvents are stored or processed.
Do not operate the appliance in areas with particle-laden air (e.g. flour or wood dust)
Do not expose the device to extreme conditions, e.g. direct sunlight, high humidity, moisture, extremely high or low temperatures, naked flames.
2. SAFETY INSTRUCTIONS
2.3 Safety instructions
Check the device before use.
In the event of damage or a defect, the appliance must not be put into operation. Risk of injury!
Risk of injury for children and persons with reduced physical, sensory or mental capabilities (e.g. partially disabled persons, elderly persons with reduced physical and mental capabilities) or lack of experience and knowledge.
Please only store the device in places that are inaccessible to children.
This appliance can be used by children aged from 8 years and above and persons with reduced physical, sensory or mental capabilities or lack of experience and/or knowledge if they have been given supervision or instruction concerning use of the appliance in a safe way and understand the hazards involved.
Never allow children to use the appliance unsupervised.
Please do not store the packaging materials used (bags, polystyrene pieces, etc.) within the reach of children. Children must not play with the packaging as there is a risk of suffocation, especially with packaging films.
2. SAFETY INSTRUCTIONS
2.4. Operational safety

DANGER!
Risk of injury!
Risk of injury due to electric shock from live parts.
There is a risk of electric shock or fire due to an unintentional short circuit.
Please check the appliance for damage before each use; if you notice any visible damage or the appliance is visibly damaged, please do not use it.
If you notice a technical or mechanical problem, please contact TELESTAR Service.
Only use the power supply unit included in the scope of delivery!
Never open the housing of the appliance.
In the event of malfunctions, disconnect the appliance from the power source immediately
If you move the appliance from a cold to a warm environment, moisture may condense inside the appliance. In this case, wait about an hour before operating it.
Unplug the appliance from the socket if you are going to be away for a long time or during a thunderstorm.
If foreign bodies or liquid get into the appliance, unplug the power supply unit from the socket immediately.
Have the appliance checked by qualified personnel before putting it back into operation. Otherwise, there is a risk of electric shock.
2. SAFETY INSTRUCTIONS
2.5. Connect the device
Only connect the appliance to a properly installed, earthed and electrically fused socket.
Please ensure that the power source (socket) is easily accessible.
Do not kink or crush any cable connections.
Before putting the appliance into operation, check that the voltage information on the appliance corresponds to the local mains voltage.
2.6. Protect device from defects

NOTE!
Unfavorable ambient conditions such as humidity, excessive heat or lack of ventilation can damage the device. Only use the device in dry rooms. Avoid direct proximity to: Heat sources, such as radiators, open flames, such as candles, devices with strong magnetic fields, such as loudspeakers. Ensure a sufficient distance from other objects so that the device is not covered, so that adequate ventilation is always guaranteed Avoid direct sunlight and places with an unusually high level of dust. Ensure that contact with moisture, water or splashing water is avoided and that no objects filled with liquid - e.g. vases - are placed on or near the appliance. Do not place any heavy objects on the appliance and ensure that the appliance is not exposed to dripping or splashing water and that there are no open sources of fire (e.g. burning candles) near the appliance.
User manual
2. SAFETY INSTRUCTIONS
2.7. Risk of injury

WARNING!
Excessive sound pressure when using earphones or headphones can lead to damage or loss of hearing.
Listening with earphones or headphones at an increased volume over a longer period of time can cause damage to the user. Please check the volume before inserting earphones or headphones into your ears or putting them on.
Set the volume to a low level and only increase the volume to a level that is still comfortable for you.
2.8. Cleaning the device
Disconnect the appliance from the power supply before cleaning. Use a dry, soft cloth to clean the appliance. Please do not use any liquids to clean the appliance. Do not use any solvents or cleaning agents, as these can damage the surface and/or labels of the appliance.
2.9. Behavior in the event of malfunctions
If the device malfunctions, disconnect it from the power supply and wait a few seconds. Reconnect the device to the power supply.
It may be necessary to reset the device to the factory settings. If this is not successful, please contact your dealer or contact TELESTAR Digital GmbH directly. You can also find more information on page 6.
3. SCOPE OF DELIVERY
Please remove all parts from the packaging and completely remove all packaging materials. If one or more of the specified parts are missing, please contact:
TELESTAR Service Center,
Am Weiher 14,
56766 Ulmen
e-mail: service@telestar.de
IMPERIAL DABMAN d105
USB plug-in power supply
USB/USB-C connection cable
Operating instructions
4. DEVICE OVERVIEW
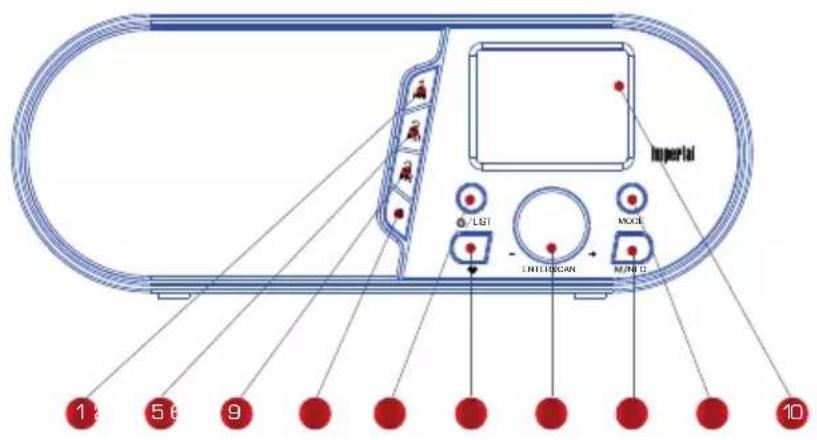
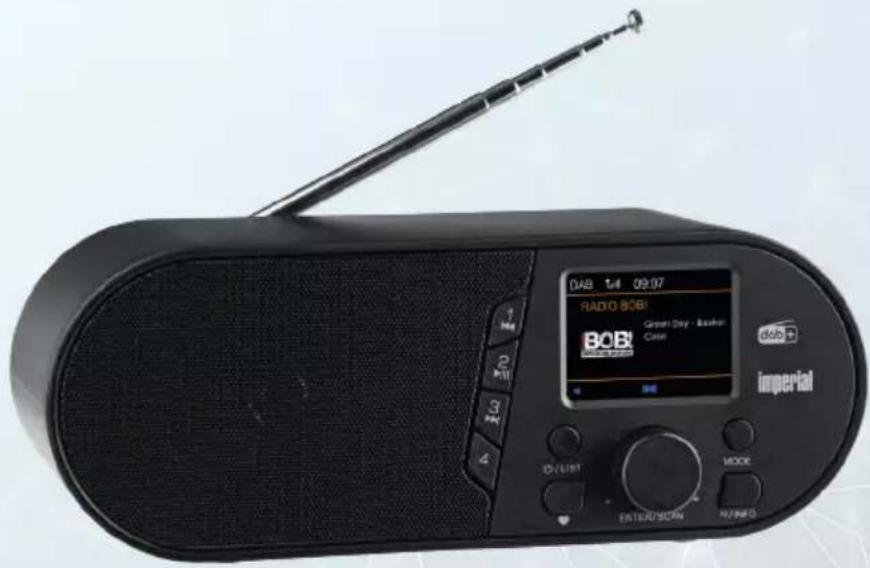
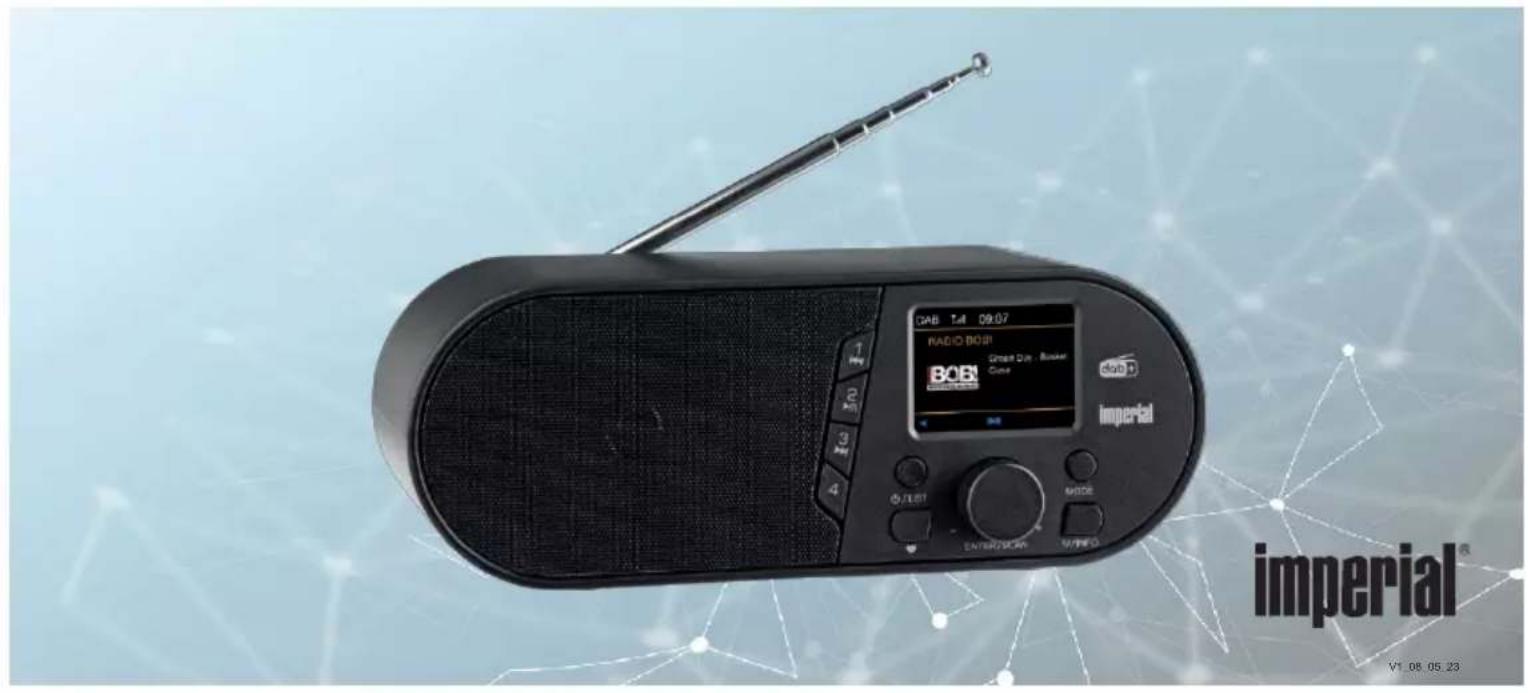
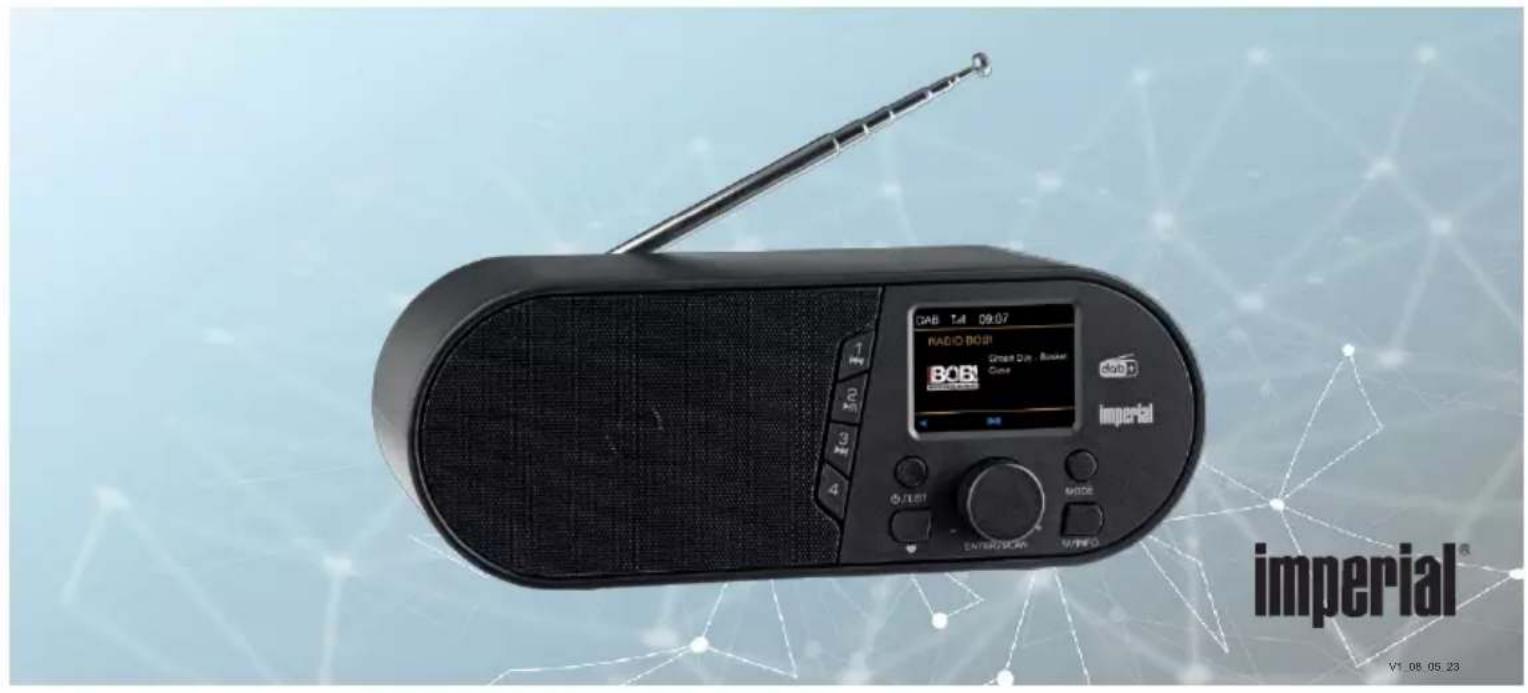
1 Station memory button 1/Multimedia controls
Use these buttons to switch to program memory location 1 in radio mode. Use this button to select the previous track in USB mode.
2 Station memory button 2/Multimedia controls
Use these buttons to switch to program memory location 2 in radio mode.
▶II Starts or pauses the playback of music tracks on a connected USB data carrier.
3 Station memory button 3/Multimedia controls
Use these buttons to switch to program memory location 4 in radio mode.
▶▶ Press this button to select the next track in USB mode.
4. DEVICE OVERVIEW
4 Station memory button 4
Use these buttons to switch to program memory location 4 in radio mode.
Use this button to select the previous track or perform a fast rewind in USB/media mode. Calls up a list of the last 10 radio stations selected.
5 Power button on-off/LIST
Press this button to switch the device on or to standby.
Pressing this button during radio operation calls up the program list.
6 Favorites button
Pressing this button during radio operation calls up the Favorites program list.
7 Volume control/ Confirmation button/ Navigation wheel for navigating the menu
Use the rotary control to change the volume, navigate through the device menu using the rotary control or confirm menu entries by pressing this button.
8 Menu/INFO
Press and hold the button for longer than 2 seconds to call up the main menu of the device.
Pressing this button during radio operation displays additional program information.
9 Mode
witches between the different operating modes (FM, DAB+, USB, Bluetooth) of the radio.
10 Display
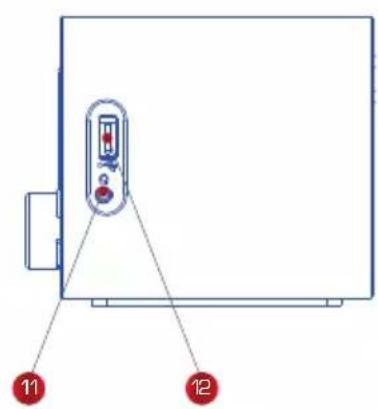
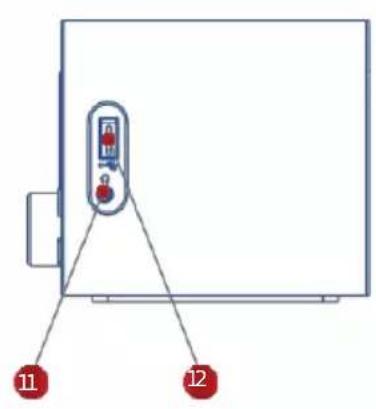
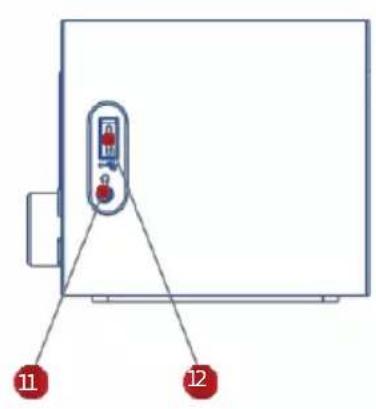
11 Headphone connection
Plug in headphones here to listen to the music played by the radio via headphones. When headphones are connected, the music playback via the device's speakers is interrupted.
12 USB connection
If desired, you can connect a USB stick here to play music files from it.
User manual
5. FIRST COMMISSIONING
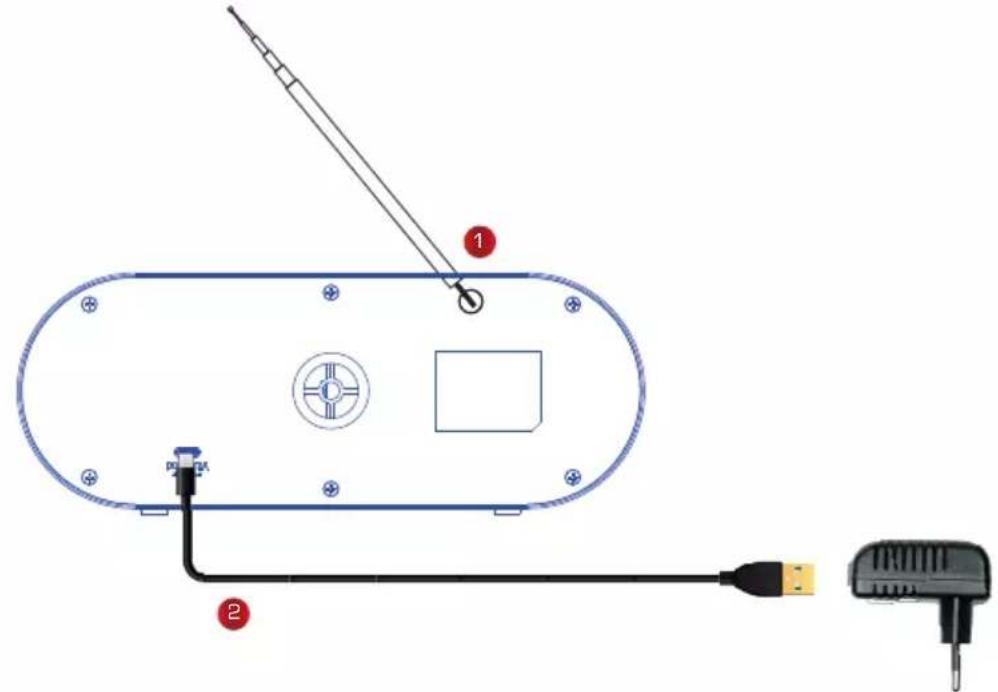
1 Pull out the telescopic antenna completely.
2 Connect the supplied USB cable between the radio and the USB power adapter included in the scope of delivery.
DABMAN d105
5. FIRST COMMISSIONING
Press the button ⏻ button to start the radio.
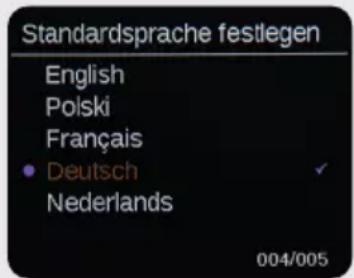
Sprache festlegen
Use the navigation wheel to select the desired menu language and confirm your selection by pressing the navigation wheel. The device switches to the time display.
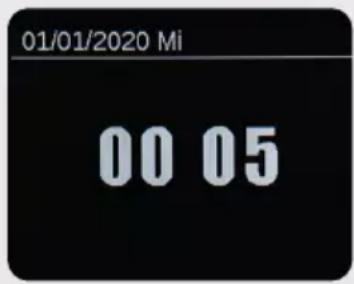
Time
The time synchronizes automatically as soon as a DAB station search has been performed.
(See DAB+ station search)
It is therefore not usually necessary to set the time and date manually.
The changeover between summer and winter time is automatic if the radio at your location can receive DAB+ signals.
5. FIRST COMMISSIONING
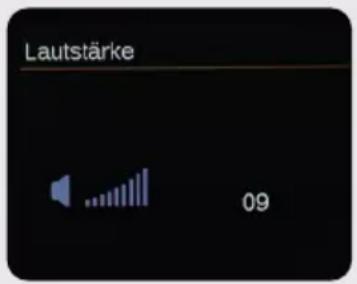
Setting the volume
To increase the volume, turn the rotary control clockwise. To decrease the volume, turn the rotary control anticlockwise.
Press the button ⏻ button to start the radio.
DAB + search at first start-up
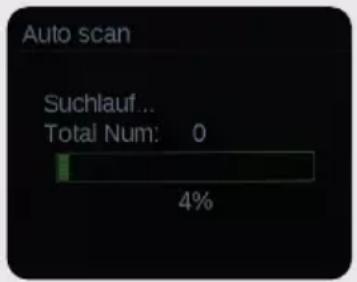
When you use the radio for the first time or when the station list is empty, your radio will automatically start searching for DAB radio stations.
The progress of the search and the number of stations found during the search are also displayed.
After switching on, the device starts with the last DAB+ radio station listened to.
6. DAB/DAB+ RADIO
DAB Mode
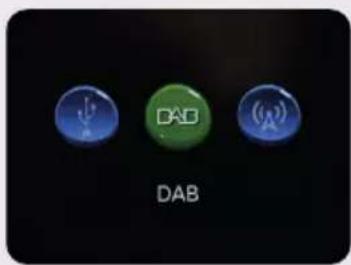
Press the MODE button repeatedly until DAB is selected. Confirm your selection by pressing the navigation wheel. The radio starts with the last DAB radio station you listened to.
Channel selection
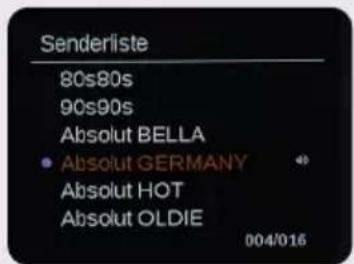
To call up a saved radio station in the program list, proceed as follows: Briefly press the ⏻/LIST.
Select the desired station using the navigation wheel. Press the navigation wheel to confirm
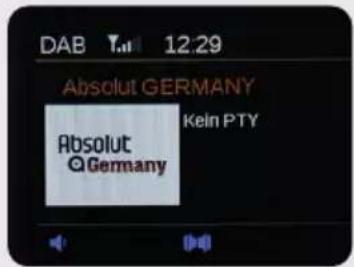
The selected radio station is now played.
6. DAB/DAB+ RADIO
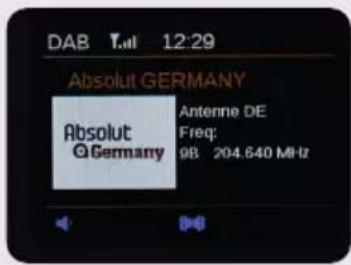
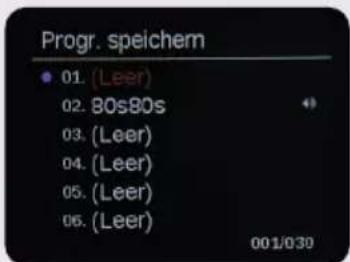
Save DAB radio stations in the favorites list
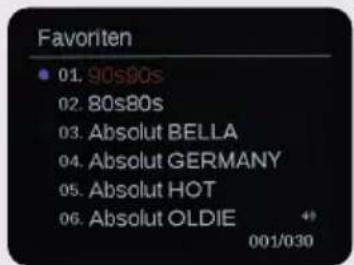
Your radio can store up to 30 DAB+ radio stations in a favorite memory for immediate access.
Tune your radio to the station that you want to store in a memory location.
Press and hold the ♥ button pressed. The favorites list appears. Use the navigation wheel to select the memory location to which the station is to be saved.
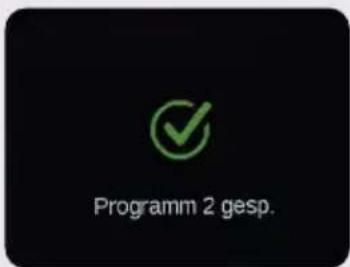
Press the navigation wheel to confirm.
The station is stored in the desired program position.
Call up DAB radio stations from the favorites list
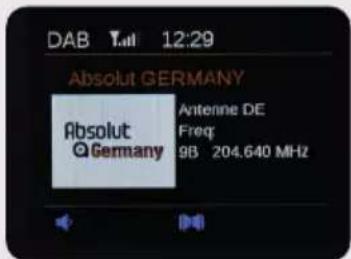
To call up a station from the favorites list, please proceed as follows:
Press the ♥ button. The favorites list appears.
Use the navigation wheel to select the desired radio station. Press the navigation wheel to confirm.
The desired radio station will now be played.
6. DAB/DAB+ RADIO
DAB/DAB+ station information
If you are listening to a DAB station, you can change the information shown on the display become.
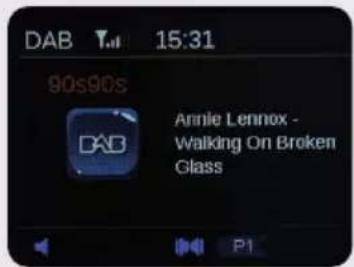
Briefly press the Menu/Info button to obtain station information. There are different types of information sent by the transmitter.
- Program type (PTY) - such as „Rock“, „Pop“, „Talk“ or „News“
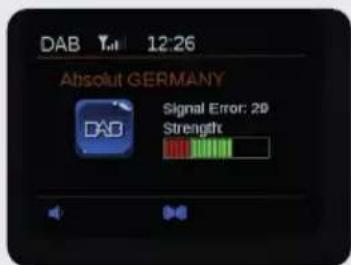
• Channel and frequency - Signal strength
The signal strength display provides information about the reception strength of the radio station at your location. The stronger the signal, the longer is the bar of the filled rectangles.
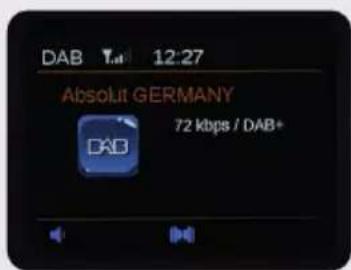
- Bit rate of the transmitter
• Dynamic Label Segment (DLS) -
Text information displayed in the scrolling text.
This can be information such as the name of an artist or music title, contact details of the radio station, etc.

6. DAB/DAB+ RADIO
DAB/DAB+ station search
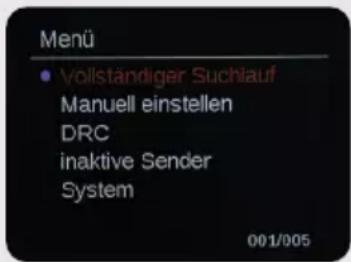
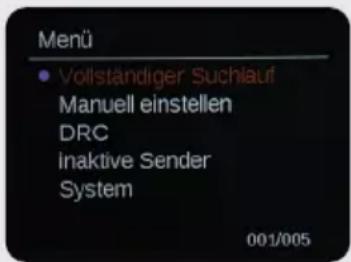
n some cases, it can be helpful to start a new DAB+ station search. This is advantageous if new radio stations are tuned in via the transmitter or if you move to a different reception area with the radio. Use the Mode button to switch to DAB reception. Press and hold the M/INFO button to access the menu. Use the navigation wheel to select the Complete search line and confirm by pressing the navigation wheel.
The search starts. A progress bar shows the progress of the search and the number of stations found during the scan.
Set DAB+/DAB station to direct memory button
You can store 4 radio stations on the direct memory buttons 1-4 on the device.
If you save DAB radio stations, this will not overwrite your FM station presets.
Select a DAB station that you want to store on a direct memory button.
Press and hold the desired memory button [1-4] for 2 seconds.
The transmitter is saved.
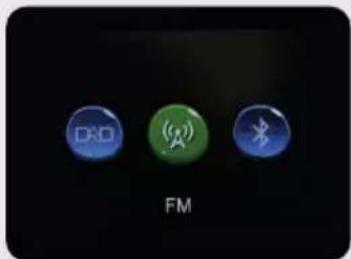
Press the MODE button repeatedly until FM is selected. Confirm your selection by pressing the navigation wheel. The radio starts with the last FM radio station you listened to.
![FM Tall 11:42 93.60MHz [Kein Radiotext] P2](/content/2026/04/662331/images/0885572a241895154b2a99a9974b141e13751c2b7b255f3d30ba5c71e05c78a3.jpg)
7. FM RADIO
FM station scan
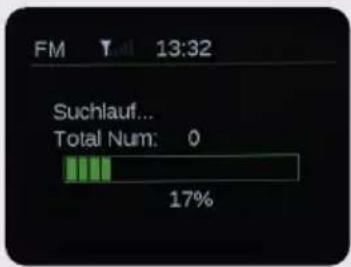
In FM mode, press and hold the M/INFO button.the menu appears.use the navigation wheel to select Auto Scan.press the navigation wheel to confirm.the device performs a scan of the entire FM reception range.
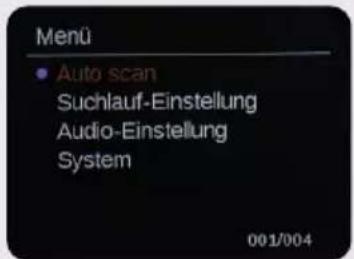
All stations found are saved in the favorites list.
7. FM RADIO
Calling up FM stations from the favorites list
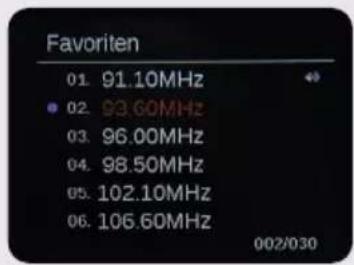
Press the button ♥ in FM mode. Use the navigation wheel to select the desired radio station. Press the navigation wheel to confirm and the desired radio station will now be played.
Change FM search settings
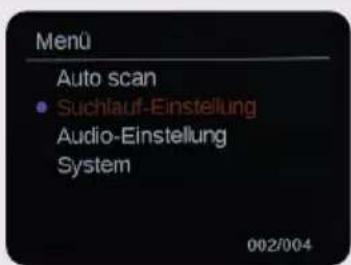
In FM mode, press and hold the M/INFO button. The menu appears.
Use the navigation wheel to select Search settings. Press the navigation wheel to confirm.
There are two different options to choose from:
- Only strong transmitters.
Only stations with strong reception are included in the search run.
- All channels
The scan takes all receivable stations into account, even if the signal strength is poor.
The radio automatically switches between stereo and mono depending on the quality of the signal received.
However, you can override this function and switch manually between stereo and mono.
The Stereo setting is recommended if you want to play the sound via connected headphones.
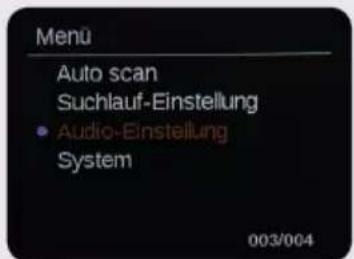
In FM mode, press and hold the M/INFO button. The menu appears. Use the navigation wheel to select Audio settings. Press the navigation wheel to confirm.
Use the navigation wheel to select from the two available options and confirm your selection by pressing the navigation wheel.
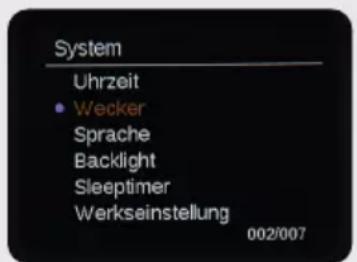
Setting the alarm clock
In FM mode, press and hold the M/INFO button. The menu appears. Use the navigation wheel to select System. Press the navigation wheel to confirm.
Use the navigation wheel to select Alarm clock. Press the navigation wheel to confirm.
Select Alarm 1 or Alarm 2.
Press the navigation wheel to confirm.
Use the navigation wheel to change each setting and press the navigation wheel to confirm.
Check whether you have switched on the alarm clock before leaving the menu.
If an alarm clock has been set, an alarm clock symbol appears at the bottom of the display.
In standby mode, the display shows the alarm time ( Alarm 1 and / or Alarm 2 ).
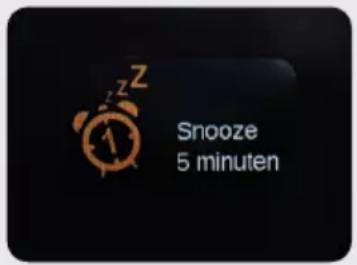
Snooze function/Snooze
You can use the snooze function to temporarily pause an active alarm. press the navigation wheel during an active alarm to activate the snooze function. this pauses the alarm for 5 minutes.
GB
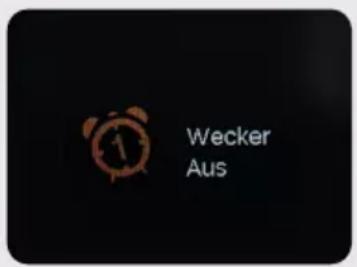
Stop alarm clock
When an alarm sounds, briefly press the ⏻ button to stop the alarm. ,Alarm off is displayed.
9. SLEEP TIMER
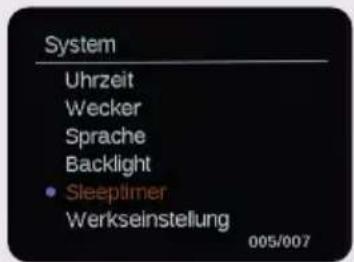
Set the sleep timer
You can set a time period after which the radio automatically switches from operation to standby.
You can choose between 15, 30, 45, 60 and 90 minutes.
In FM mode, press and hold the M/INFO button. The menu appears.
Use the navigation wheel to select System. Press the navigation wheel to confirm.
Use the navigation wheel to select the Sleep timer item. Select the desired time after which the radio should switch off automatically. Press the navigation wheel to confirm.
The radio can be connected to an external device (e.g. smartphone/tablet) via Bluetooth. Media (locally stored MP3 files, streamed music, web radio) can then be played from the mobile device via the radio using the Bluetooth connection.
Establish Bluetooth connection
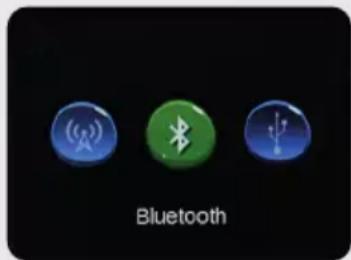
A Bluetooth connection must be established so that you can send audio files to the radio via Bluetooth. Press the MODE button repeatedly until Bluetooth is selected. Confirm your selection by pressing the navigation wheel.
Now activate the Bluetooth function of the mobile device to be connected.
[For more information, please also refer to the operating instructions for the device to be connected].
In the overview of available devices, search for
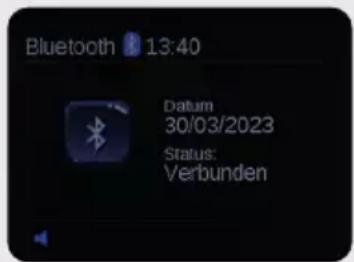
„DABMAN d105“, select it and establish the connection. When the connection is established, the Display in the radio shows the status „Connected“.
11. PLAY USB MEDIA
You can play MP3 music files from a USB data carrier.
To do this, insert a USB data carrier with music files into the USB socket on the side.
Play USB media
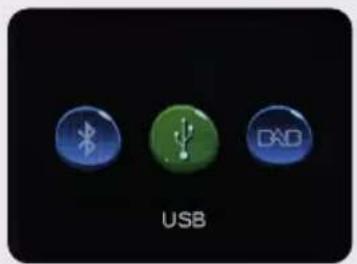
Press the MODE button repeatedly until USB is selected. Confirm your selection by pressing the navigation wheel.
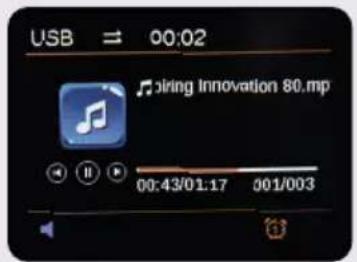
Use the I◄◄ button to select the previous track in USB mode. The ►ll button starts or pauses the playback of a music track. Use the ►►I button to select the next track in USB mode.
12. SYSTEM SETTINGS
Various settings can be made in the „System" menu item.
Set the time and date
The device is configured at the factory for automatic time setting. As soon as the radio receives DAB/DAB+ stations, the time and date are automatically synchronized. It is then not necessary to set the time. The time and date can also be set manually. Press and hold the M/INFO button.
The menu appears.
Use the navigation wheel to select System. Press the navigation wheel to confirm.
Use the navigation wheel to select Time. Press the navigation wheel to confirm.
The time and date can be set in this menu.
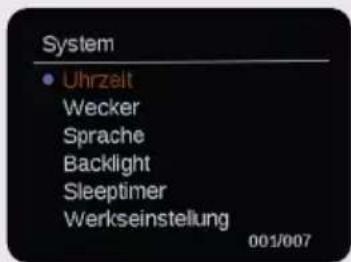
To change the menu language of the device, press and hold the M/INFO button. The menu appears.
Use the navigation wheel to select System. Press the navigation wheel to confirm.
Use the navigation wheel to select Language. Press the navigation wheel to confirm.
Use the navigation wheel to select the desired language. Press the navigation wheel to confirm.
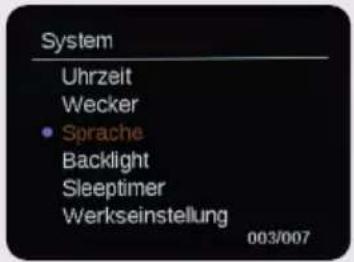
To change the menu language of the device, press and hold the M/INFO button. The menu appears.
Use the navigation wheel to select System. Press the navigation wheel to confirm.
Use the navigation wheel to select Language. Press the navigation wheel to confirm.
Use the navigation wheel to select the desired language. Press the navigation wheel to confirm.
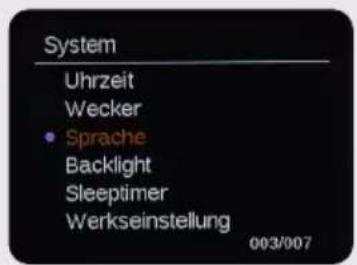
To make changes to the display backlighting, press and hold the M/INFO button. The menu appears.
Use the navigation wheel to select System. Press the navigation wheel to confirm.
Use the navigation wheel to select Backlight. Press the navigation wheel to confirm.
Use the navigation wheel to select the desired language. Press the navigation wheel to confirm.
Time switch-off
Decide here whether or after what time after an operation the display brightness is dimmed.
-AN setting
Here you can set the display brightness in 3 levels.
-Dim setting
If you have selected a time period under Time switch-off, you can decide here how much the display is dimmed after this period.
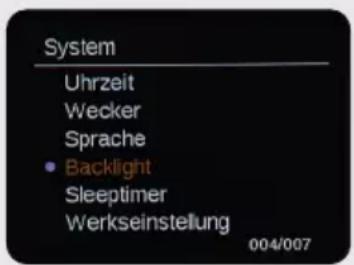
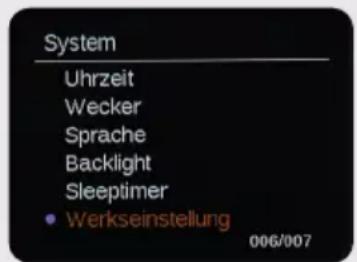
You can reset all settings that you have made to the radio to their original state using the factory settings. This is useful if you have made changes that subsequently lead to the device not functioning optimally. To carry out the factory setting, press and hold the M/INFO button. The menu appears.
Use the navigation wheel to select System. Press the navigation wheel to confirm.
Use the navigation wheel to select Factory settings. Press the navigation wheel to confirm.
Select „Yes“ using the navigation wheel and press the navigation wheel to confirm. The device restarts.

NOTE
If you activate the factory settings, the device is reset to the factory settings. All saved channels and favorite lists will be lost.
SYMPTOM POSSIBLE CAUSE AND REMEDY
| No display, radio does not respond to operation | Establish the power connection via the mains adapter included in the scope of delivery to start the charging process. |
| The device does not emit any sound. All other functions OK. | Headphones plugged into the device. Remove the headphones. Adjust the volume setting. |
| DAB+ reception disrupted. FM reception disrupted. | No channels available. Carry out a search. Poor location. Change the location of the radio (closer to the window if necessary), perform a search again.Fully extend the antenna.Make sure that there are no other electronic devices in the vicinity of the radio that could cause electromagnetic interference |
| Alarm clock does not work properly | Time not read in. Switch on the device and select a DAB + station. After a short time, the time is synchronized via DAB Check the time and set it manually if necessary if synchronization via DAB+ does not work. |
USB data carrier is not recognized Make sure that the USB data carrier is formatted FAT32.
14. STORAGE
When not in use, please unplug the mains adapter from the socket, disconnect the mains adapter cable from the radio and store the device in a dry place protected from dust.
15. DISPOSAL NOTE
Disposal of the packaging
The packaging of your device consists exclusively of recyclable materials. Please sort them accordingly and return them to the „Dual System“.

Disposal of the device
The symbol of a crossed-out wheeled garbage can shown on the right
indicates that this appliance is subject to Directive 2012 / 19 / EU.
This guideline states that you should not use this device at the end of its service life with
The waste must be disposed of in specially equipped collection points, recycling centers or waste disposal companies.
This disposal is free of charge for you. Protect the environment and dispose of it properly.
For more information, please contact your local waste disposal company or the city or municipal administration.
16. TECHNICAL DATA
USB power supply unit
| Manufacturer Type designation | Donguan Yingna Electronic Technology Co.,Ltd |
| YNQX12T050200VU | |
| Input voltage | 100-240V AC |
| Input AC frequency | 50/60Hz |
| Output voltage | 5V |
| Output current | 2A |
| Output power | 10W |
| Average efficiency during operation | 78.70% Min |
| Power consumption at no load | 0,09W max |
Headphone connection
| Handle 3,5 mm Stereo |
Bluetooth
| Bluetooth version V5.1 |
Radio
| Frequency range DAB+: 174 MHz - 240 MHz |
| FM: 87.5 MHz - 108 MHz |
Dimensions and weight
| Dimensions (cm) WxHxD 24 x 9,2 x 11 |
| Weight 0,500 Kg |
User manual
17. CE LABELING
Your appliance bears the CE mark and complies with all required EU standards.
TELESTAR DIGITAL GmbH hereby confirms the conformity of the IMPERIAL DABMAN d105
with the essential protection requirements of the Radio Equipment Devices Directive 2014/53/EU (RED), the
RoHS Directive [2011/65/EU], the REACH Regulation 1907/2006,
and the ErP Directive (2009/125/EU). You can find the declaration of conformity for this product at:
natural_image
Abstract network diagram with interconnected nodes on a light background (no text or symbols)DABMAN d105
Gebruiksaanwijzing
imperial®
V1_11_23
Scan the QR code to get a multilingual manual as a pdf file.
TELESTAR Service Center,
Am Weiher 14,
56766 Ulmen
e-mail: service@telestar.de
IMPERIAL DABMAN d105
USB-voeding
DABMAN d105
6. DAB/DAB+ RADIO
Selecteer Alarm 1 of Alarm 2.
natural_image
Abstract network diagram with interconnected nodes on a light background (no text or symbols)DABMAN d105
Mode d'emploi
DABMAN d105
5. PREMIÈRE MISE EN SERVICE
6. RADIO DAB/DAB
natural_image
Abstract network diagram with interconnected nodes and lines on a light blue gradient background (no text or symbols)DABMAN d105
Mode d'emploi
DABMAN d105
5. PREMIÈRE MISE EN SERVICE
6. RADIO DAB/DAB
natural_image
Abstract network diagram with interconnected nodes and lines on a light blue gradient background (no text or symbols)
- DAB/DAB+ RADIO
- DABMAN d105
- CONTENT
- FOREWORD
- SAFETY INSTRUCTIONS
- Symbol Explanation
- SYMBOL MEANING
- DANGER!
- WARNING!
- CAUTION!
- NOTE!
- Intended use
- Safety instructions
- Operational safety
- Connect the device
- Protect device from defects
- Risk of injury
- Cleaning the device
- Behavior in the event of malfunctions
- SCOPE OF DELIVERY
- DEVICE OVERVIEW
- Station memory button 4
- Power button on-off/LIST
- Favorites button
- Volume control/ Confirmation button/ Navigation wheel for navigating the menu
- Menu/INFO
- Mode
- Display
- Headphone connection
- USB connection
- FIRST COMMISSIONING
- Sprache festlegen
- Time
- Setting the volume
- DAB + search at first start-up
- DAB Mode
- Channel selection
- Save DAB radio stations in the favorites list
- Call up DAB radio stations from the favorites list
- DAB/DAB+ station information
- DAB/DAB+ station search
- Set DAB+/DAB station to direct memory button
- FM RADIO
- FM station scan
- Calling up FM stations from the favorites list
- Change FM search settings
- Setting the alarm clock
- Snooze function/Snooze
- Stop alarm clock
- SLEEP TIMER
- Set the sleep timer
- Establish Bluetooth connection
- PLAY USB MEDIA
- Play USB media
- SYSTEM SETTINGS
- Set the time and date
- NOTE
- STORAGE
- DISPOSAL NOTE
- Disposal of the packaging
- Disposal of the device
- TECHNICAL DATA
- CE LABELING
- Mode d'emploi
- PREMIÈRE MISE EN SERVICE
- RADIO DAB/DAB
Brand : Imperial
Model : DABMAN d105
Category : Radio