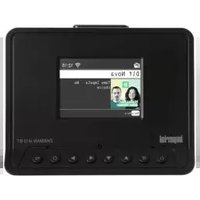
DABMAN i410 BT - Radio Imperial - Free user manual and instructions
Find the device manual for free DABMAN i410 BT Imperial in PDF.


| Product type | DAB+/FM/Internet radio with Bluetooth and USB player |
| Brand | Imperial |
| Model | DABMAN i410 BT |
| Dimensions (W x H x D) | 150 mm x 110 mm x 110 mm |
| Weight | Approximately 230 g |
| Power supply | External mains adapter 5 V DC, 2.0 A (supplied) |
| Standby consumption | Less than 0.1 W (eco standby mode) |
| Display | 2.4-inch TFT colour screen |
| Radio reception | DAB+ (Band III 174-240 MHz), FM 87.5-108 MHz, Internet radio |
| Connectivity | Wi-Fi 802.11 b/g/n (2.4 GHz), Bluetooth, USB 2.0, AUX IN (3.5 mm), line out (RCA), optical out (Toslink) |
| Supported audio formats | MP3, AAC/AAC+, WMA (up to 320 kbps) |
| Main functions | DAB+, FM, Internet radio, Bluetooth, UPnP, USB player, USB recording, alarm/wake-up, equalizer, weather, music cloud (Amazon Music, Deezer, etc.) |
| Remote control | Yes, with CR2025 battery included |
| Antenna | Dedicated telescopic antenna (supplied) |
| Maintenance and cleaning | Unplug before cleaning, use a dry soft cloth. Do not use solvents. |
| Safety | Do not open the casing, use only the supplied adapter, keep away from moisture and heat sources. |
| Spare parts and repairability | Contact TELESTAR after-sales service (service@telestar.de). No consumer spare parts. |
| General information | Indoor use only. Complies with CE standards. Warranty according to legal provisions. |
Frequently Asked Questions - DABMAN i410 BT Imperial
User questions about DABMAN i410 BT Imperial
0 question about this device. Answer the ones you know or ask your own.
Ask a new question about this device
Download the instructions for your Radio in PDF format for free! Find your manual DABMAN i410 BT - Imperial and take your electronic device back in hand. On this page are published all the documents necessary for the use of your device. DABMAN i410 BT by Imperial.
USER MANUAL DABMAN i410 BT Imperial
Scan the QR code to get a multilingual manual as a pdf file.
5. Navigantion links
6. Navigantion links
7. EINSTELLUNGEN

8.13. Wetter
Wiedergabe Funktion
6, 9, 12, 18, 24, 36, 48, 54 Mbps
HT20 bis 72,2 Mbps
HT40 bis 150 Mbps

imperial®
DABMAN i410 BT
User Manual
DAB+ / FM / Internetradio - Adapter
Scan the QR code to get a multilingual manual as a pdf file.
2.1 Explanation of symbols 8
2.2. Safety note....10
2.3. Operational safety 11
2.4. Connect device....13
2.5. Protect device from defects....13
2.6. Risk of injury....14
2.7. Notes on the radio interface....15
2.8. Handling batteries 15
2.9. Cleaning the appliance....18
2.10. Legal information 18
- SCOPE OF DELIVERY 19
- OVERVIEW OF THE OPERATING ELEMENTS ..... 20
-
REMOTE CONTROL....23
-
INSTALLATION 26
6.1 General operating instructions....26
6.2. Prepare remote control....26
6.3 Antenna connection 27
6.4. Power connection....27
6.5. Language selection....28
6.6. Date Time Mode....28
6.6. Date Time Mode....29
6.7. GMT Timezone....29

1. INDEX
6.8.Summertime....30
6.9. Settings Location 30
6.10. Network selection....31

7. SETTINGS 31
7.1. Basic operation....32
7.1.1. MENU button 32
7.1.2. BACK button....33
7.1.3. List button.... 33
7.1.4. Mode button. 33
7.2. System 33
7.2.1 Language 34
7.2.2 Date Time....34
7.2.3. Network 35
7.2.3. Network 36
7.2.4. Alarm/Alarm clock 36
7.2.5. Edit timer....38
7.2.6. Standby Mode....39
7.2.7. Sleeptimer 40
7.2.8. Backlight 40
7.2.8. Backlight 41
7.2.9. Setting location 41
7.2.10. Softwareupdate....42
7.2.11. Factory settings 42
7.2.11. Factory settings .....43
7.2.12.Version 43
1. INDEX
8. OPERATION 43
8.1. DAB+ Radio 43
8.1.1. Channel list 44
8.1.2. DAB+ Channel search 44
8.1.2. DAB+ Channel search 45
8.1.3. DAB+ Manual search.....45
8.2. Select Internet radio station .....46
8.3. Searching for an Internet radio station .....47
8.4. Saving radio stations....48
8.5. Saving radio stations in favourites list .....48
8.6. Local radio stations....49
8.7. Changing volume 50
8.8. Switching operating mode 50
8.9. AUX IN 50
8.10. UPnP 52
8.11. USB playback 53
8.12. EQ (Equalizer) 53
8.12. EQ (Equalizer) 54
8.13. Weather 55
8.14. Recording radio programmes 56
8.15. Bluetooth 58
8.15.1. Establishing a Bluetooth connection .....58
8.15.2. Playing media via Bluetooth....59
8.16. FM ANALOG Radio....59
8.17. Cloud Music 60
8.18. Operation via app....61

1. INDEX
- TROUBLESHOOTING 65
- STORAGE 67

- DISPOSAL INSTRUCTIONS....67
11.1. Disposal of the packaging....67
11.2. Disposal of the appliance 67
11.3. Disposal of batteries....68
-
PROPERTIES AND TECHNICAL DATA 69
-
SERVICE AND SUPPORT 72
-
CE MARKING 73
1. INTRODUCTION
Dear customer, thank you for purchasing this product, please read these instructions carefully and keep them for future reference. These operating instructions are an integral part of the appliance! If you sell or pass on the appliance, please also hand over these operating instructions.
1.2. Intended use
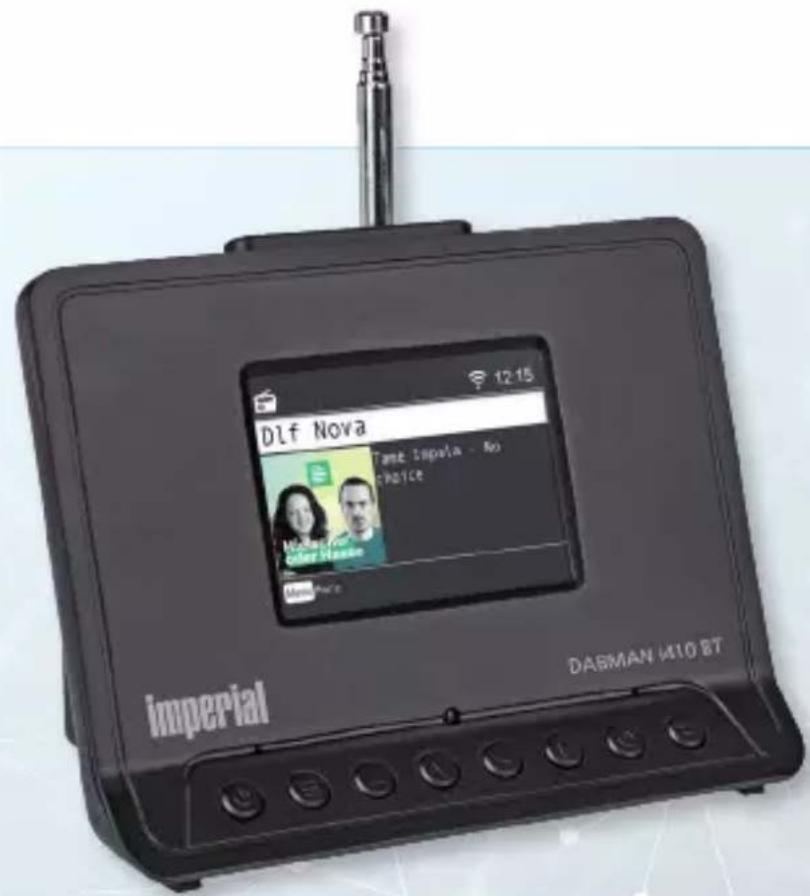
This product is a consumer electronics device that serves as a receiver for DAB+ FM and Internet radio signals, for playback and recording of audio files from a USB data carrier and as a Bluetooth playback device. Any other operation or use of the device is considered improper and may result in personal injury or damage to property.do not use the device for any other purpose. Only operate the device indoors. The appliance is intended for private use only and not for commercial use.we assume that the operator of the appliance has general knowledge of handling consumer electronics devices. Liability expires in the event of improper use.

2. SAFETY INSTRUCTIONS
2.1 Explanation of symbols
SYMBOL MEANING


GEFAHR!
This signal word indicates a hazard with a high degree of risk that will result in death or serious injury if the warning is ignored.

WARNUNG!
This signal word indicates a hazard with a medium level of risk, which, if the warning is ignored, can result in death or serious injury.

VORSICHT!
This signal word indicates a hazard with a low level of risk that may result in minor or moderate injury if the warning is ignored.
HINWEIS!
This signal word warns of possible material damage.

This symbol warns of danger.
2. SAFETY INSTRUCTIONS
2.1 Explanation of symbols
SYMBOL MEANING

Protection class II
Electrical appliances with protection class II have reinforced or double insulation in the amount of the rated insulation voltage between active and touchable parts (VDE 0100 Part 410, 412.1). They usually have no connection to the protective conductor. Even if they have electrically conductive surfaces, these are protected from contact with other live parts by reinforced or double insulation.

Products marked with this symbol fulfil the requirements of the European Community directives
Fig. 1
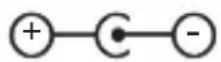
Fig. 2
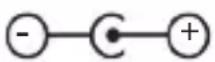
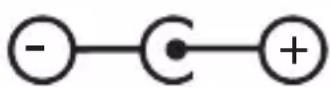
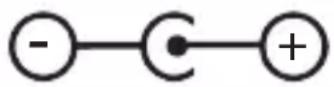
For devices with hollow plugs, these symbols indicate the polarity of the plug. A distinction is made between 2 variants
Fig. 1: Outside plus / inside minus
Fig. 2: Inside plus / outside minus

Appliances with this symbol may only be operated indoors in a dry environment
2. SAFETY INSTRUCTIONS
2.2. Safety note


Check the appliance before use and do not use it if it is damaged or defective.
Risk of injury!
Risk of injury to children and persons with reduced physical, sensory or mental capabilities (e.g. partially disabled persons, elderly persons with reduced physical and mental capabilities) or lack of experience and knowledge. Keep the appliance only in places inaccessible to children. This appliance can be used by children aged from 8 years and above and persons with reduced physical, sensory or mental capabilities or lack of experience and/or knowledge if they have been given supervision or instruction concerning use of the appliance in a safe way and understand the hazards involved. Never leave children unattended when using the appliance.
Choking hazard!
Packaging material is not a toy! Do not store the packaging materials used (sacks, polystyrene pieces etc.) within the reach of children and do not allow children to play with the packaging. There is a risk of suffocation, especially with packaging film.
2. SAFETY INSTRUCTIONS
2.3. Operational safety

GEFAHR!
Risk of injury!
Risk of injury due to electric shock from live parts. There is a risk of electric shock or fire due to unintentional short circuits. Check the device for damage before each use. If you notice any visible damage or the device is visibly damaged, do not use it. If you notice a technical or mechanical problem, please contact TELESTAR Service. Only use the power supply unit supplied! Never open the housing of the device and disconnect the device from the power source immediately in the event of malfunctions. Only use spare parts and accessories supplied or approved by us. Do not modify the appliance and do not use any additional devices or spare parts that have not been explicitly approved or supplied by us. Do not use the appliance in potentially explosive atmospheres. This includes, for example, fuel storage areas, tank systems or areas where solvents are stored or processed.
2.3. Operational safety
Do not operate the appliance in areas with particle-laden air (e.g. flour or wood dust). Malfunctions may be noticeable in the form of the appliance heating up or smoke developing from the appliance or the appliance's power supply unit. loud or atypical noises may also be a sign of a malfunction. in this case, unplug the power supply unit from the mains socket immediately. Only hold the power supply unit by the housing. Never pull the power supply unit out of the socket by the cable.
The appliance must not be used after a malfunction until it has been checked or repaired by an authorised person. If you move the appliance from a cold to a warm environment, moisture may condense inside the appliance; in this case, wait about an hour before operating it. If you are going to be away for a longer period of time or during a thunderstorm, unplug the device from the socket and ensure that it does not come into contact with moisture, water or splash water and that no objects filled with liquid - e.g. vases - are placed on or near the device or the power supply unit. If foreign bodies or liquid get into the appliance or the mains adapter, unplug the mains adapter from the socket immediately. Have the appliance checked by qualified specialists before putting it back into operation. Otherwise there is a risk of electric shock. Ensure that the appliance or the mains adapter is not exposed to dripping or splashing water and that there are no open sources of fire (e.g. lighted candles) near the appliance or the mains adapter and that the mains adapter is never touched or handled with wet or damp hands.
2. SAFETY INSTRUCTIONS
2.4. Connecting the device
Only connect the appliance to a properly installed, earthed and electrically fused socket outlet. Please ensure that the power source (socket outlet) is easily accessible. Do not kink or crimp any cable connections. Before operating the appliance, check that the voltage information on the appliance corresponds to the local mains voltage. The information on the power supply unit must correspond to the local mains supply.
Only connect the radio to a properly installed 220-240 V AC, 50-60 Hz mains socket and place the radio on a firm, level surface. The appliance draws power in standby mode. To disconnect the device completely from the mains, the power supply unit must be unplugged from the socket.
2.5. Protect device from defects
HINWEIS!
Unfavourable ambient conditions such as humidity, excessive heat or lack of ventilation can damage the device. Use the device only in dry rooms. Avoid direct proximity to heat sources such as radiators, open flames such as candles, devices with strong magnetic fields such as loudspeakers: Heat sources such as radiators, open flames such as candles, devices with strong magnetic fields such as loudspeakers. Do not expose the device to extreme conditions such as direct sunlight, high humidity, moisture, extremely high or low temperatures, open flames.

2. SAFETY INSTRUCTIONS
2.5. Protect device from defects

Ensure a sufficient distance from other objects so that the device is not covered, so that sufficient ventilation is always guaranteed. avoid direct sunlight and places with an unusually high level of dust. do not place any heavy objects on the device or the power supply unit.
2.6. Risk of injury

WARNUNG!
Excessive sound pressure when using earphones or headphones can lead to damage or loss of hearing, and listening with earphones or headphones at an increased volume over a longer period of time can cause damage to the user.
Please check the volume before inserting or putting on earphones or headphones. Set the volume to a low level and only increase the volume to a level that is still comfortable for you.
2. SAFETY INSTRUCTIONS
2.7. Notes on the radio interface
The device generates an electromagnetic field. Please pay attention to signs in your surroundings that prohibit or restrict the operation of electronic devices. This may be the case, for example, in hospitals, at petrol stations and filling stations or at airports. If such warnings are present, disconnect the device from the power supply immediately. The components contained in the device generate electromagnetic energy and magnetic fields. These can affect medical devices such as pacemakers or defibrillators. Therefore, please keep a safe and sufficient distance between medical devices and the radio. If you have reason to believe that the radio is causing interference with a medical device, switch off the radio immediately or disconnect it from the power supply.
2.8. Handling batteries
Only use the battery type of the battery included in the scope of delivery.

GEFAHR!
Risk of injury!
There is a risk of injury from improper handling of batteries! Never open, short-circuit or throw batteries into open flames.
2.8. Handling batteries
Never charge batteries.
There is a risk of explosion when attempting to charge batteries. polarity must be observed! Ensure that the plus (+) and minus (-) poles are inserted correctly to avoid a short circuit.
Only use the batteries specified for this product. Remove batteries from the appliance if they are not to be used for a long period. Remove exhausted or leaking batteries from the appliance immediately. There is a risk of skin burns from leaking batteries. Keep both new and used batteries out of the reach of children. There is a risk of internal injury if batteries are swallowed. The battery acid contained in the batteries can cause injuries if it comes into contact with the skin. After accidental ingestion or if there are signs of skin burns, rinse the affected areas with plenty of clean water and seek medical help immediately.
Batteries are not toys!
Always keep new and used batteries away from children, remove leaking batteries from the appliance immediately and clean the contacts before inserting new batteries.
2. SAFETY INSTRUCTIONS
2.8. Handling batteries

WARNUNG!


There is a risk of explosion if batteries are used incorrectly!
Only use new batteries of the same type; never use new and old batteries together in the same device. Ensure that the batteries are correctly polarised when inserting them.
Never charge batteries.
Batteries should only be stored in cool and dry places.
Never throw batteries into a fire.
If the device is not to be used for a longer period of time, please remove the batteries from the device.
Never expose batteries to extreme heat or direct sunlight.
Batteries must not be deformed or opened; do not use the remote control if the battery door no longer closes properly.

2. SAFETY INSTRUCTIONS
2.9. Cleaning the appliance
Before cleaning, unplug the appliance from the socket. Use a dry, soft cloth to clean the appliance. Please do not use any liquids to clean the appliance. Do not use any solvents or cleaning agents as these may damage the surface and/or labelling of the appliance. Cleaning must not be carried out by children.
2.10. Legal information
This device is intended for use in all countries of the European Union as well as in Switzerland, Norway, Liechtenstein and Iceland.
The radio reception range complies with the legal regulations for these countries; if the device is operated in another country, the laws of the country of use must be observed and complied with.
3. SCOPE OF DELIVERY
Please remove all parts from the packaging and completely remove all packaging materials. If one or more of the specified parts are missing, please contact us:
TELESTAR Service Center, Am Weiher 14, 56766 Ulmen
e-mail: service@telestar.de
E
QUANTITY EXPLANATION
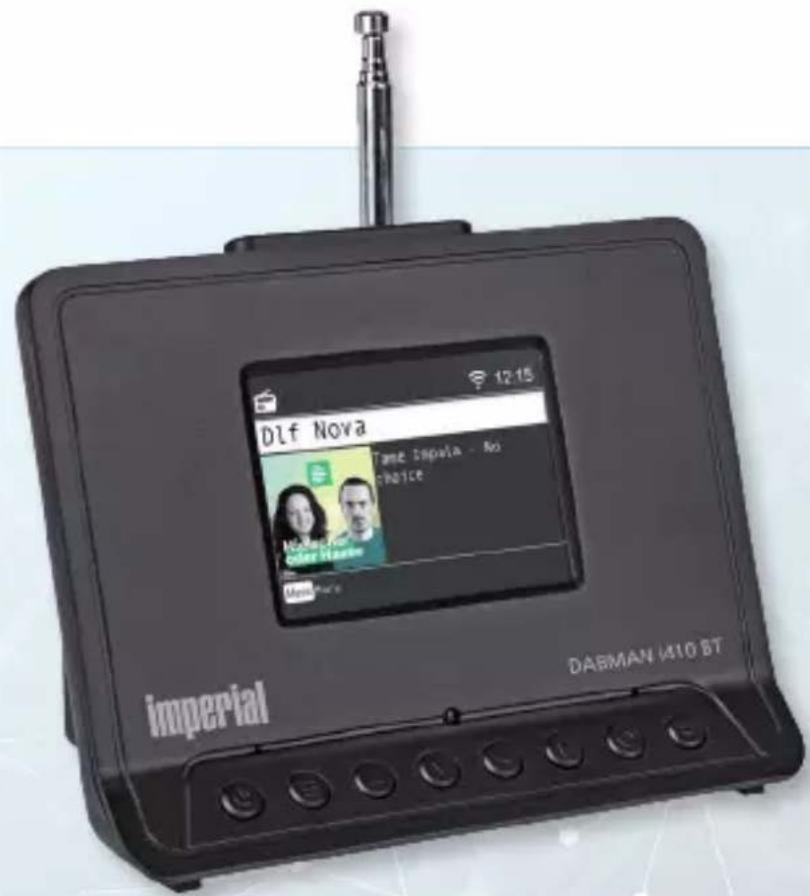
1 DABMAN i410 BT
1 Remote control
1 External power supply unit
1 Instruction manual
1 Cinch cable (R/L)
1 Cinch to 3.5 mm jack stereo cable
1 Battery for remote control type CR 2025 / 3 V (already inserted in remote control)
1 Telescopic antenna
1 Fibre optic cable (optical/Toslink)
Press this button to switch the appliance on or to standby.
2. Menu
Press and hold the button for longer than 2 seconds to call up the main menu of the device.
3. Navigation up
Use this button to navigate upwards in the menu.
4. Navigation down
Use this button to navigate downwards in the menu.
5. Navigantion left
Use this button to navigate to the left in the menu.
6. Navigantion right
Use this button to navigate to the right in the menu.
7. Confirmation button (OK button)
Confirm menu entries by pressing this button.
8. Back
Press this button to go back one step in the menu.
9. Volume +
Increases the volume.
10. Snooze
Press this button to mute an alarm clock alarm for a certain period of time.
11. Volume -
Reduces the volume.
12. Antenna connection
Screw on the telescopic aerial included in the scope of delivery here.

Connect the device to a USB data carrier here to update the firmware if required. Or connect a USB data carrier such as a USB hard drive or USB stick here to play back music files or record radio programmes.
14. LINE OUT
Analogue audio output right/left
Connect the radio here to the analogue audio input of a hi-fi amplifier or to active loudspeakers to forward the music received from the radio to a sound system.
15. Optical digital audio output (TOSLINK)
Connect the radio here to the optical audio input of a hi-fi amplifier or to active loudspeakers in order to forward the music received from the radio to a sound system.
17. Power supply connection
Connect the device to the power supply unit (included in the scope of delivery) at this socket.
18. Mains switch
The mains switch is used to completely disconnect the appliance from the power supply. Use this switch to switch the appliance on or off.

5. REMOTE CONTROL
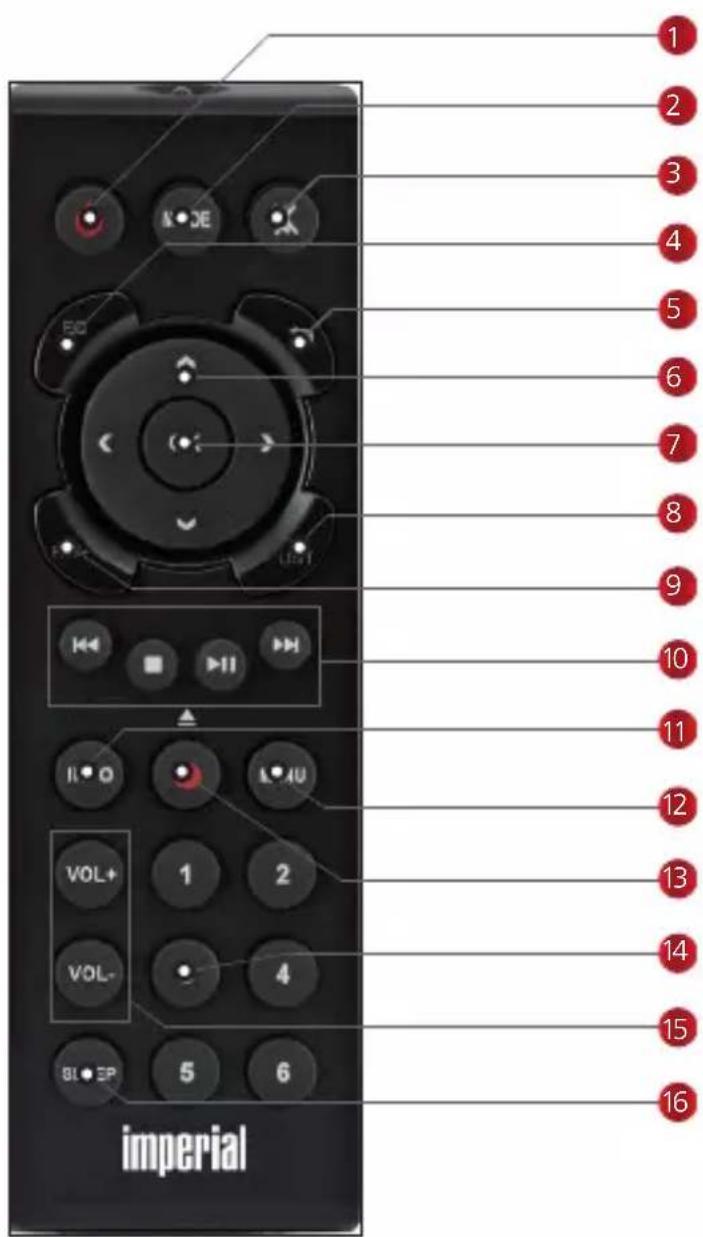
The radio can be controlled using both the device buttons and the remote control. Using the remote control is the more convenient and simpler way to operate the device.
Notice:
You can use the Sappmto operate your compatible Internet radio via tablet or smartphone. The app is suitable for both iOS and Android operating systems. (See also chapter 8.18)

5. REMOTE CONTROL
1. Standby Button
Use this button to switch the appliance on or off.
2. Mode
Switch the various operating modes here.
3. Mute
Switches the sound of the device to silent.
4. EQ Equalizer function
You can use this button to activate the equaliser function and make individual sound settings.
5. Back
Press this button to go back one step in the menu.
6. Navigation up/down - right/left / Volume VOL+ -
Use these buttons to navigate through the menu.
Use those buttons ◀ ▶ to increase or decrease the volume
7. OK
Press this button to confirm an input.
8. LIST/Programme list
Opens the radio programme list.
9. FAV+
You can use this button to add a selected radio station to the favourites list.
10. Control and selection of music tracks via USB, UPnP, media or CD
I◄◄ Select previous title / Fast rewind
Stops playback
▶II Starts or pauses a playback
▶▶I Select next title / Fast forward

5. REMOTE CONTROL
11. INFO
Shows information about the current radio programme.
12. Menu
Activate the device menu using this button.
13. ● Rec/ Eject
Starts a recording of the current radio programme on a connected USB data carrier. Press and hold the button for longer than 2 seconds to activate the timer menu for recording a radio programme. Press this button in the CD player function to eject an inserted CD.
14. Numeric keypad
15. VOL + / VOL -
Use these buttons to increase or decrease the volume.
16. SLEEP
Press this button to set a sleep timer. The radio switches off after the time period you have set.
6. INSTALLATION
6.1 General operating instructions
Switch the device on or off using the standby button on the remote control.
Use the VOL+ button on the remote control to increase the volume.
Use the VOL-button on the remote control to reduce the volume.
The menu items can be selected using the ▼▲ buttons.
You can confirm a selection with the OK button
6.2. Preparing the remote control
Remove the battery transport lock on the remote control. To do this, pull out the plastic tab on the battery housing of the remote control. This establishes the battery contact.
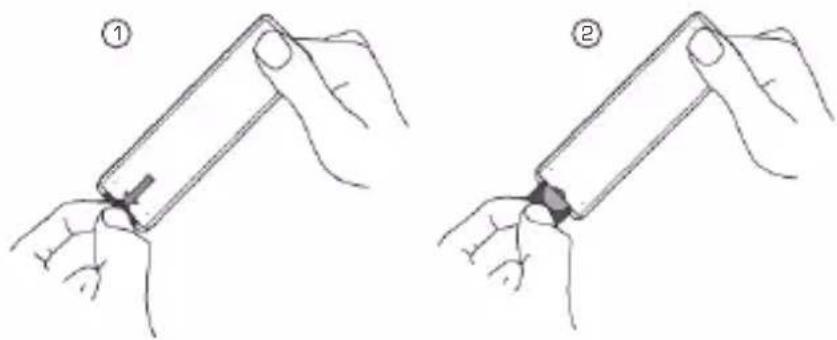
To replace the remote control battery, open the battery compartment on the back of the remote control. Pull the battery compartment out of the remote control.
6. INSTALLATION
6.2. Preparing the remote control
Remove the battery and insert a new battery of the same type.

There is a risk of explosion if batteries are used improperly! Read the safety instructions in chapter 2.8 and ensure that the battery polarity is correct! Then replace the battery compartment.
6.3 Antenna connection
Screw the telescopic aerial supplied to the aerial connection on the back of the device.
6.4. Power connection
Connect the power supply unit included in the scope of delivery to the corresponding socket on the back of the device. Now plug the mains adapter into a 230 V socket. Switch on the device using the mains switch on the rear panel and switch on the radio using the standby button on the remote control or on the device. The device starts up.
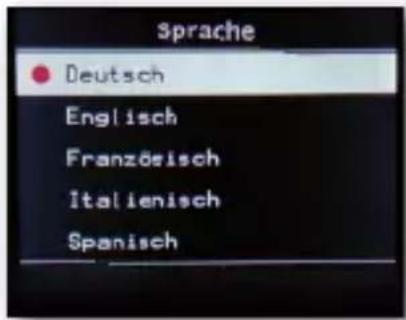
6.5. Language selection
You can select the menu language using the ▼▲ buttons on the remote control. Confirm the desired menu language with the OK button on the remote control.

6. INSTALLATION
Confirm the desired menu language with the OK button on the remote control.
Select here how the radio should synchronise the time. You can make the selection using the ▼▲ buttons on the remote control. Confirm with the OK button on the remote control or on the device.
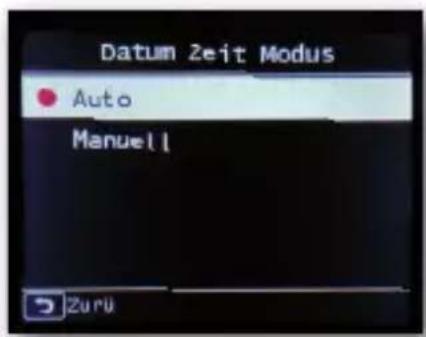
The device is configured at the factory for automatic time setting and if the device is connected to the Internet via a network, the time and date are synchronised automatically.

6. INSTALLATION
6.6. Date Time Mode
It is then not necessary to set the time. You can change these settings at any time in the main menu under System.
6.7. GMT Timezone
Select here which time zone you are in. For Germany and most of Europe, select GMT + 1:00.
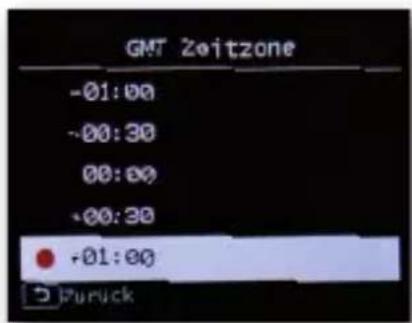
You can make the selection using the ▼▲ buttons on the remote control. Confirm with the OK button on the remote control or on the device.


6. INSTALLATION
6.8. Summertime
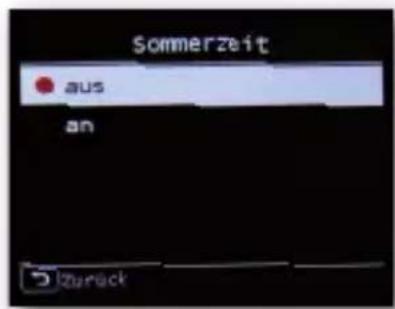
Switch on summer time here if summer time is currently in effect. You can make the selection using the ▼▲ buttons on the remote control. Confirm with the OK button on the remote control or on the appliance.
Select the location you are in here. Select the continent and, in the next step, the country in which you are located.
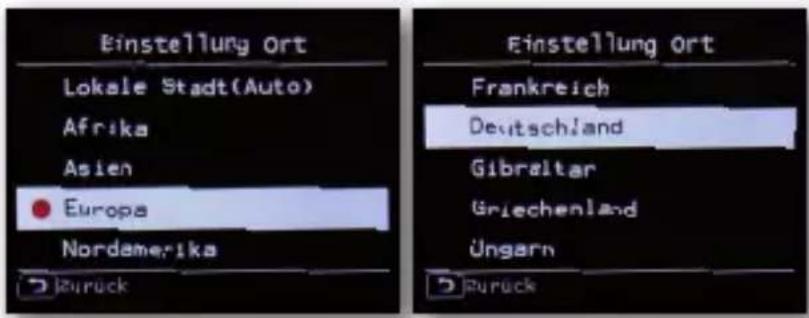
You can make the selection using the ▼▲ buttons on the remote control. Confirm with the OK button on the remote control or on the device.
7. SETTINGS
In the next step, all available Wi-Fi networks within range of the device are displayed. Select the network you want to connect to and confirm by pressing the OK button.

Enter the W-LAN key. Use the ▼▲ buttons aon the remote control or on the device to select a character and press the ▶ button to continue. Confirm the entry using the OK field.
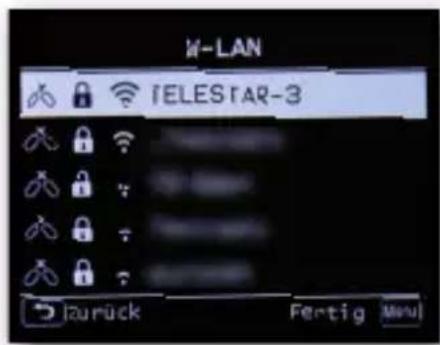
Please note that the registration process on the router may take some time.
7. SETTINGS
7.1. Basic operation
7.1.1. Button MENU

Press and hold the Menu button on the appliance or on the remote control for approx. 2 seconds. This always takes you to the main menu of the appliance, regardless of the current setting of the appliance. The main menu is navigated using the ▶◀ buttons.
The main menu of the device consists of the following menu items:
 Internetradio Internetradio |  Weather Weather |  Equalizer Equalizer |  Local Radio Local Radio |
 USB USB |  UPnP UPnP |  System System |  DAB+ Radio DAB+ Radio |
 FM Radio Bluetooth Cloud Musik FM Radio Bluetooth Cloud Musik |  |  |
You can select the individual menu items using the arrow buttons ▶◀. Confirm the selection with the OK button on the remote control or by pressing the confirmation button on the device.
7. SETTINGS
7.1.2. Back button
The Back button always takes you back one step in each setting.
7.1.3. List button
Press the List button in radio mode to display an overview of the most recently tuned-in radio stations.
7.1.4. Mode button
You can switch the various operating modes of the radio using the Mode button.
7.2. System
Under this menu item, you can make individual settings for the device: Press the MENU button and select the System menu item using the ▶◀ buttons don the remote control or on the device. Confirm the selection with the OK button on the remote control or by pressing the o button on the device.
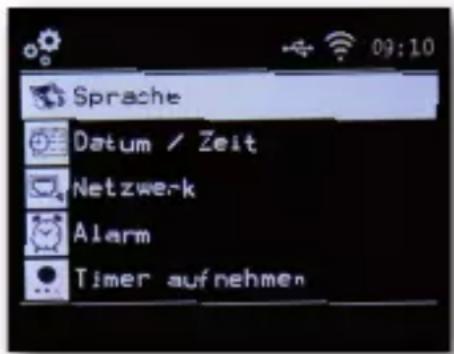
You can select the menu language using the ▼▲ buttons on the remote control. Confirm the desired menu language with the OK button on the remote control.
7.2.2 Date Time
You can make the selection using the ▼▲ buttons on the remote control. Confirm with the OK button on the remote control or by pressing the o button on the device.
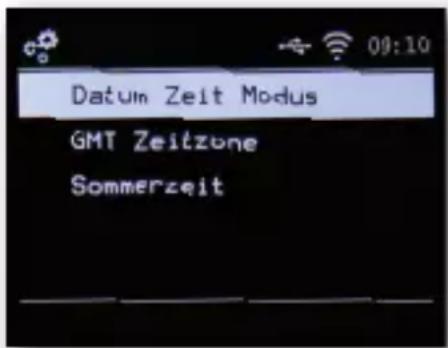
The device is configured at the factory for automatic time setting. If the device is connected to the Internet via a network, the time and date are synchronised automatically. It is then not necessary to set the time. Select here how the radio should synchronise the time.
7. SETTINGS
7.2.3. Network
In order for the device to function as an Internet radio, the radio must be integrated into a network with Internet access; if you have not already done this during the initial installation, you can establish the network connection in this menu item.
Press the MENU button on the remote control or on the device and use the ▶◀ buttons on the remote control or on the device to select the System menu item.
Confirm the selection with the OK button on the remote control or by pressing the o button on the device. Use the ▼▲ buttons on the remote control to select the Network menu item.
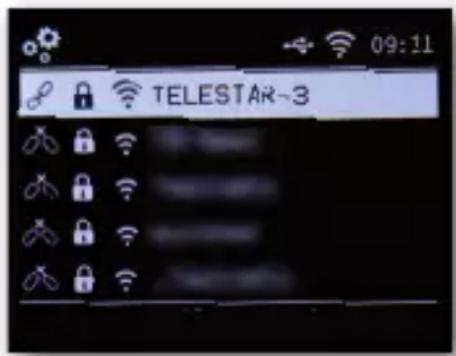
Confirm the selection with the OK button on the remote control or by pressing the o button on the device. Use the ▼▲ buttons on the remote control to select the network to which a connection is to be established and confirm with OK. Enter the W-LAN key. Use the ▼▲ buttons on the remote control or on the device to select a character and press the ▶ button to move on. Confirm the entry using the OK field.
7.2.3. Network
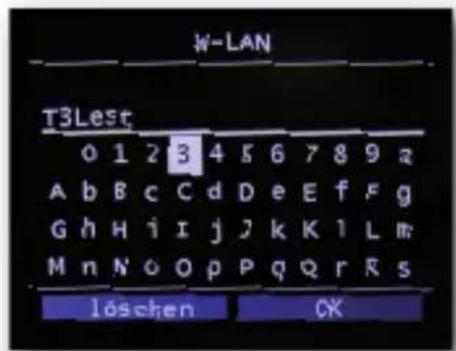
Please note that the registration process may take some time.
7.2.4. Alarm/alarm clock
The device can be used as a radio alarm clock. In this menu item, you can set up to 2 alarm times and you can also set whether the alarm clock wakes you up with a sound or an Internet radio station.
To set an alarm time, please proceed as follows:
Press the MENU button on the remote control or on the device and use the ▶◀ buttons on the remote control or on the device to select the System menu item. Use the ▼▲ buttons on the remote control or the rotary control on the device to select the Alarm menu item and press the OK button on the remote control or confirm by pressing the o button on the device.
7. SETTINGS
7.2.4. Alarm/alarm clock
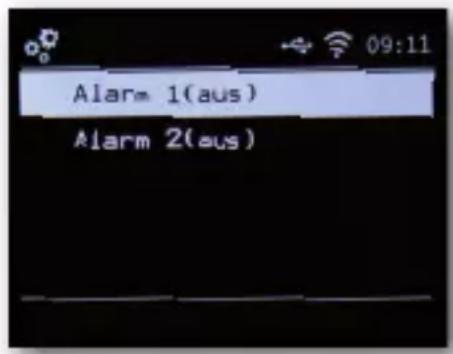

Select Alarm clock 1 or Alarm clock 2 and confirm by pressing the o button on the device or the OK button on the remote control.
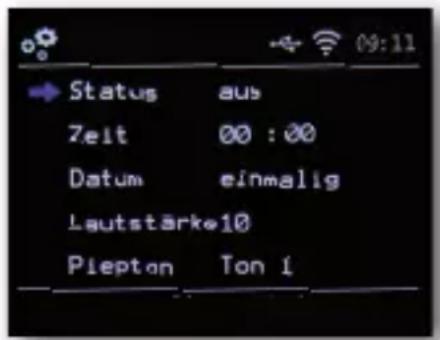
Activate the alarm clock via the Status line. In the next line, set the time at which the alarm clock should be activated. To do this, use the numeric keypad on the remote control or on the device. To confirm the individual entries, they must be saved using the OK button.
You can decide whether the alarm clock is activated once, daily, on weekdays or only at weekends at the set time. set the volume at which the alarm clock is to be activated in the next line.
7.2.4. Alarm/alarm clock
In the Beep line, you can decide whether the alarm should be triggered by a signal tone or whether the device should switch on an Internet radio station, DAB radio station or FM station in the event of an alarm. Please note that when selecting FM, DAB/DAB+ or Internet radio stations, at least one favourite station of the respective reception type must be stored in memory To stop an alarm, press the standby button on the remote control or on the device. To activate a snooze function, press the Snooze button on the device when an alarm sounds. This pauses the alarm for 5 minutes and reactivates it after 5 minutes. To deactivate the alarm until the next day, press the Standby/Power button on the device.
7.2.5. Edit timer
You can edit a set recording timer in this menu. Please read chapter 8.14 for more information.
7.2.6. Standby Mode
You can use this function to customise the display in standby mode use the ▼▲ buttons on the remote control or the rotary control on the device to select the Standby mode menu item and press the OK button on the remote control or confirm by pressing the o button on the device.
7. SETTINGS
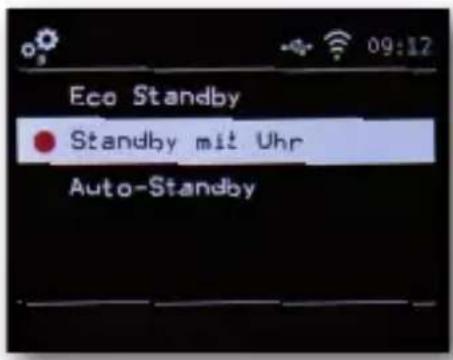
Select the desired function here and confirm by pressing the o button on the device or the OK button on the remote control.
Eco Standby
In this mode, the device has a very low power consumption in standby mode. The time is not displayed in standby mode.
Standby with clock
In this mode, the time is displayed in standby mode when you switch off the device using the standby button. The power consumption increases slightly. If you press and hold the Standby button, Eco Standby mode is activated.
Auto-Standby
In this mode, the appliance automatically switches to standby after a pre-set time if no operation has taken place during this period.
7.2.7. Sleeptimer
The radio automatically switches to standby mode using the sleep timer function. Here you can set the time after which the device switches off automatically. Use the ▼▲ buttons on the remote control or the rotary control on the device to select the Sleep timer menu item and press the OK button on the remote control or confirm by pressing the o button on the device.

7. SETTINGS
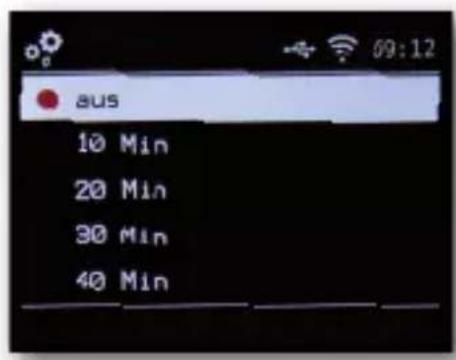

Select Off to deactivate this function or select a preset time between 10 and 120 minutes. Confirm your entry with OK on the remote control or confirm by pressing the o button on the appliance.
7.2.8. Backlight
You can use this function to change the brightness of the display. Use the ▼▲ buttons on the remote control or the rotary control on the device to select the Backlight menu item in the System menu and press the OK button on the remote control or confirm by pressing the o button on the device.
7.2.8. Backlight
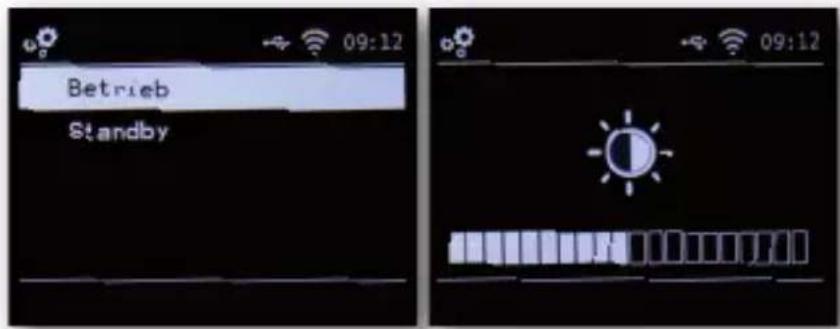
You can adjust the backlight for both operation and standby mode. To do this, use the ▶◀ or buttons on the device and confirm with OK.
7. SETTINGS
7.2.9. Location setting
This setting allows you to set the region in which you are located. With this setting, the radio selects radio stations in your area using the Local Radio function. use the ▼▲ buttons on the remote control or the rotary control on the device to select the Location setting menu item in the System menu and press the OK button on the remote control or confirm by pressing the o button on the device. Then select the continent and the country in which you are located.
To improve the functions of the device, it may be necessary to update the operating software. You can use the USB interface to update the operating software of your radio, which can be downloaded from www.telestar.de if necessary. The software provided on the website must be unpacked. The unzipped file is then copied to a suitable storage medium and connected to the radio via the USB port. Please refer to the description in the software download for the software update procedure.
7.2.11. Factory settings
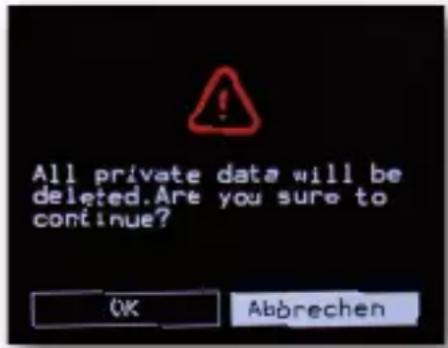
In this menu item, you can reset the device to the factory settings. The device then starts up for the first time.
7. SETTINGS
Use the ▼▲ buttons on the remote control or the rotary control on the device to select the Factory settings menu item in the System menu and press the OK button on the remote control or confirm by pressing the o button on the device.
7.2.11. Factory settings
Confirm with OK if you want to call up the factory settings. Select Cancel if you want to cancel this action. If you activate the factory settings, the device is reset to the factory settings. All saved channels and favourite lists will be lost.
7.2.12. Version
In this menu item, you can view information on the firmware version installed on the device. use the ▼▲ buttons on the remote control or the rotary control on the device to select the Version menu item in the System menu and press the OK button on the remote control or confirm by pressing the o button on the device.
8. OPERATING
8.1. DAB+ Radio
In this radio mode, you can receive digitally transmitted radio stations.
Press and hold the MENU button on the remote control or on the device and use the ▶◀ buttons to select the DAB/DAB+ menu item. Confirm the selection by pressing the o button on the device or by pressing the OK button on the remote control.
8.1.1. Channel list
Press the List button to call up the DAB station list in the device. You can now call up a desired station via this station list. Please note that a DAB+ station list is only available if a DAB+ station scan has been carried out successfully beforehand, please also read chapter 8.1.2.
8.1.2. DAB+ scan
To start an automatic station search in DAB+ reception mode, press the Back button several times if necessary. If the radio has not yet stored any programmes in DAB+ mode, a search will start automatically as soon as the radio is switched to DAB+ reception mode.

8. OPERATING
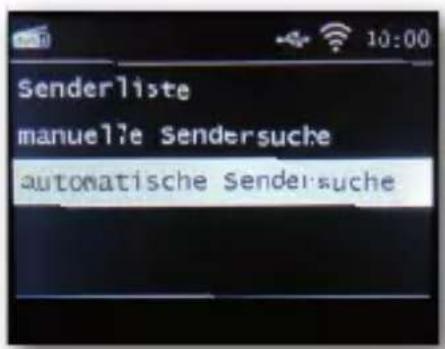
Switch to the automatic station search line and confirm with the OK button on the remote control or by pressing the o button on the device. The radio now automatically searches for all receivable digital radio stations and then saves them in a station list. You can call up this list as described in chapter 8.1.1.
8.1.2. DAB+ scan
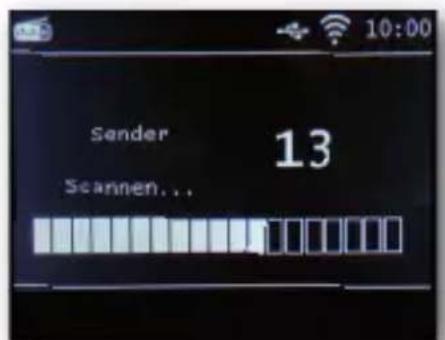
The number on the right-hand side shows the number of radio stations found. After a successful search, the radio starts playing the first station found.
8. OPERATING
8.1.3. DAB+ Manual search
You can also search for DAB+ radio stations manually. To do this, you have to know the transmission frequency. Select the desired transmission frequency via this menu item and confirm with OK.

8.2. Select Internet radio station
Use the arrow buttons ▶◀ to select Internet radio in the main menu of the device and confirm the selection with the OK button on the remote control or by pressing the OK button on the device.
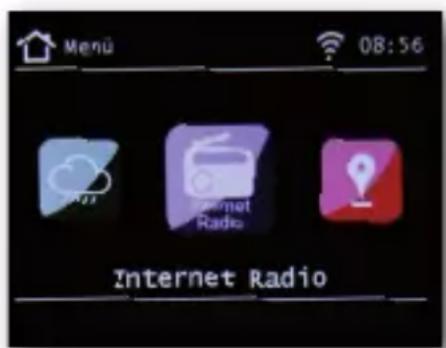
As soon as you have switched to Internet radio mode, the radio switches to the last radio station you tuned into. If no Internet radio station has been selected yet, you will be taken to the overview.
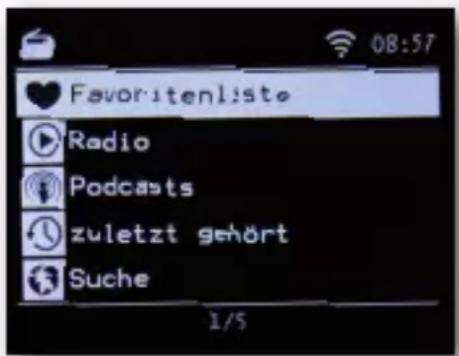
8.2. Select Internet radio station
Various lists are available to you here.
Favourites list
This list shows you all individually saved radio stations. To save a radio station, please also read chapter 8.4.
Radio
This item provides you with various radio programme lists.
Podcasts
Here you can choose from a range of radio podcasts.
History
This list contains the 10 radio stations that were last selected.
Search
This function allows you to search for a specific radio station.
8.3. Searching for an Internet radio station
Select the Search line and confirm with the OK button on the remote control or the o button on the device.
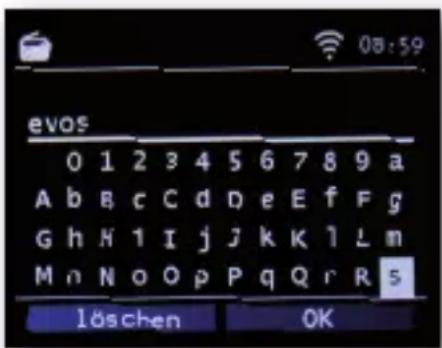
Use the keypad on the remote control to enter the name of the radio station in the search field. To do this, use the ▼▲▶◀ button.
8. OPERATING
8.3. Searching for an Internet radio station
Confirm the entry with OK. The radio will now search for all stations that match this entry. Select a station using the ▼▲ buttons and confirm by pressing the o button on the device.
8.4. Saving radio stations
You can store up to 4 radio stations on one preset button. Select a radio station that you want to store and press and hold the preset button on the device on which you want to store the radio station for approx. 3 seconds. The radio station is stored. The radio station can now be called up using this button.
8.5. Saving radio stations in the favourites list
Radio stations can be saved in a favourites list, which you can call up quickly using the favourites button on the remote control. 10 favourite radio stations can be saved in this list. Select a radio station that you would like to add to the favourites list. Press the FAV+ button on the remote control and select a memory location number where you would like to save the radio station. Press and hold the FAV+ button on the remote control for approx. 2 seconds. The radio station is stored in the selected position.
8.6. Local radio stations
To make it easier for you to search for stations in your area in Internet radio mode, you can search for specific radio stations from your region in the menu of the device. Select Local Radio in the main menu of the device using the ▶◀ buttons on the remote control or on the device.
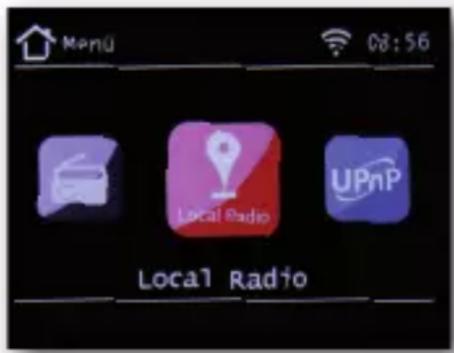
This menu item contains a selection of different Internet radio stations sorted by country region, which can be accessed more easily in this way. Select a desired programme list in this menu item using the ▼▲ buttons.
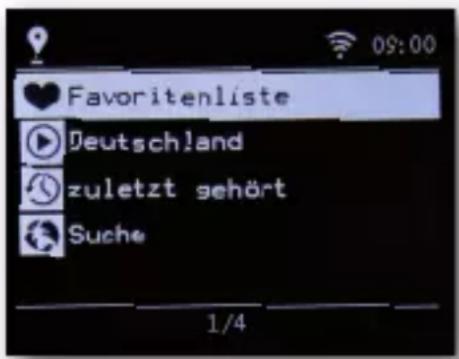
Confirm the entry with OK.
8. OPERATING
8.7. Change volume
Change the volume using the VOL+/VOL- buttons on the remote control or on the device.
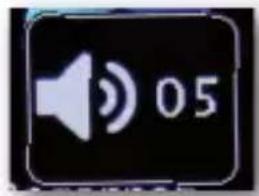

To mute the sound of the radio, press the Mute button on the remote control.
8.8. Switch operating mode
Press the MODE button on the remote control to switch between AUX, Internet radio or UPnP operating modes.
8.9. AUX IN
You can connect an external music playback device, such as an MP3 player, to the radio. To do this, connect an external device to the back of the radio using a suitable cable and switch this device on. Press the MENU button on the remote control or on the device and select AUX using the ▶◀ buttons on the remote control or on the device. Confirm with OK on the remote control or by pressing the o button on the device.
8.9. AUX IN
Alternatively, you can switch to AUX mode by pressing the MODE button on the device repeatedly until AUX mode is activated.
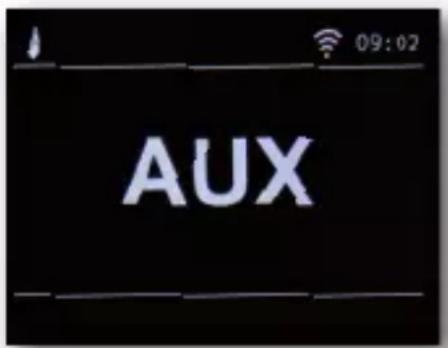
You can now play music from the external device. The control (track forward, back, stop, play) is carried out via the connected device, the play-back volume can be controlled via the VOL+/VOL- buttons or the rotary control of the radio or via the external device. please note that you need a suitable cable to connect the external device. The AUX IN input on the radio is prepared for a 3.5 mm jack stereo plug.
8.10. UPnP
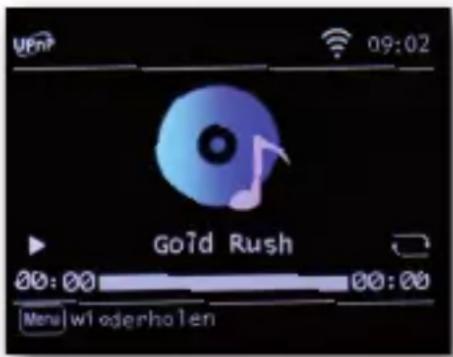
If the radio is connected to a wireless network, it can also be used as a media player to play music files from devices connected to the network, such as PCs or smartphones, via UPnP.
8. OPERATING
This requires the devices to be integrated into the same home network on the one hand and the corresponding media content to be shared in this network on the other. To select the UPnP, proceed as follows:
Press the MENU button on the remote control or on the device and select UPnP using the ▶▶ UPnP on the remote control or on the device. Confirm with OK on the remote control or by pressing the o button on the device. Select a track that you want to play and confirm with the o button on the device.
8.11. USB playback
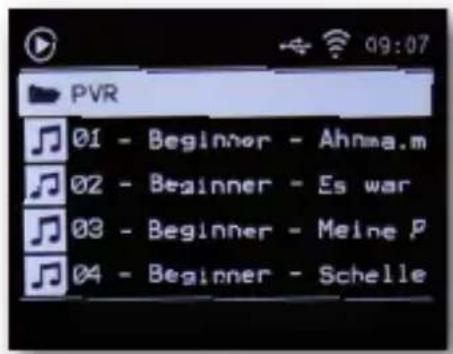
You can play MP3 music files from a USB data carrier. To do this, insert a USB data carrier with music files into the USB socket on the back of the device, press the MENU button on the remote control or on the device and select Multimedia using the ▶◀ buttons on the remote control or on the device. Confirm with OK on the remote control or by pressing the o button on the device. Select a track that you want to play and confirm by pressing the o button on the device.

8. OPERATING

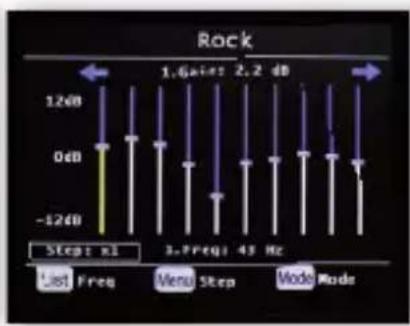
8.12. EQ (Equalizer)
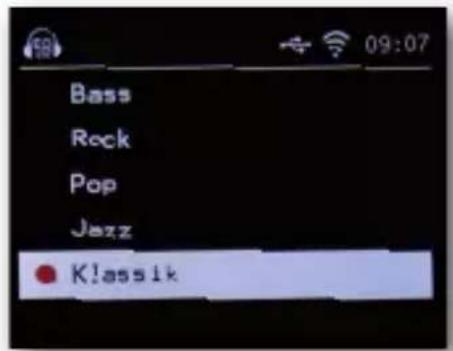
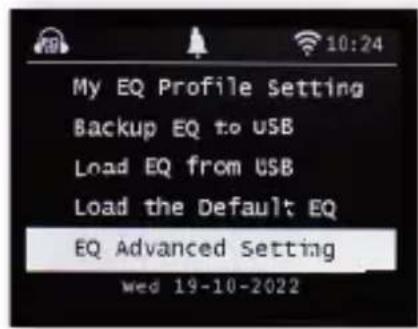
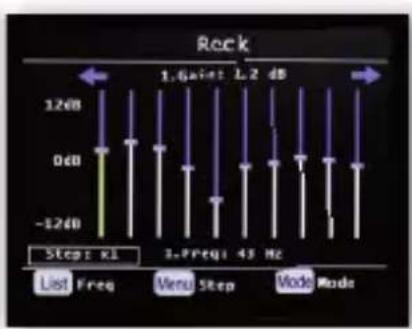
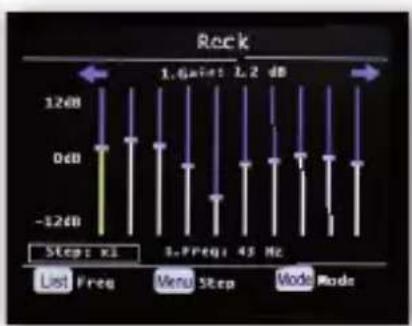
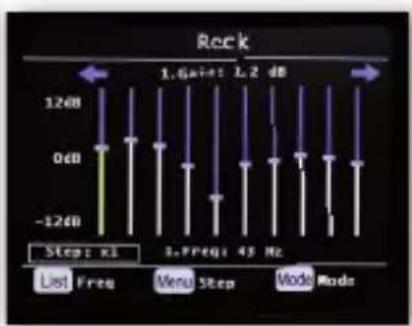
You can select specific sound presets in this area. In addition to several sound presets, you can also customise the sound of your radio and save this setting under My EQ.
8.12. EQ (Equalizer)
Use the ▼▲ buttons on the remote control or the rotary control on the device to select the Equalizer menu item in the main menu and press the OK button on the remote control or confirm by pressing the o button on the device.
8. OPERATING
Use the ▼▲ buttons on the remote control or the rotary control on the device to select a sound preset and confirm with OK on the remote control or by pressing the o button on the device.

8.13. Weather
The device can display current weather information from your location. To call up the weather information, select the Weather menu item in the radio's main menu and confirm with OK.
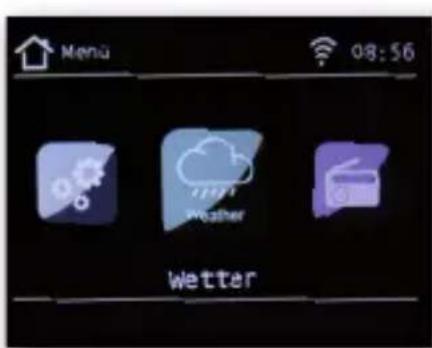
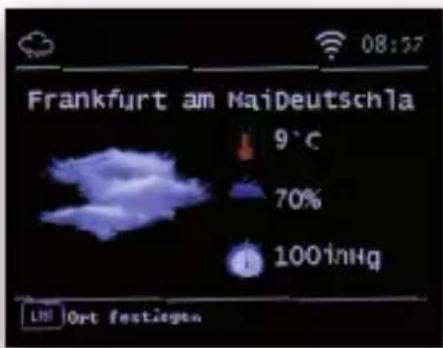
You can change the location for the weather report using the LIST button on the remote control or on the device. To do this, enter the name of the city from which you would like to retrieve the current weather information. If the device is connected to the Internet, you can view weather information on the device display.

8. OPERATING
Please note: For the weather forecast, the device accesses an Internet server on which the weather information is stored. Therefore, the weather data displayed may differ from the actual weather data at your location.

8.14. Recording radio programmes
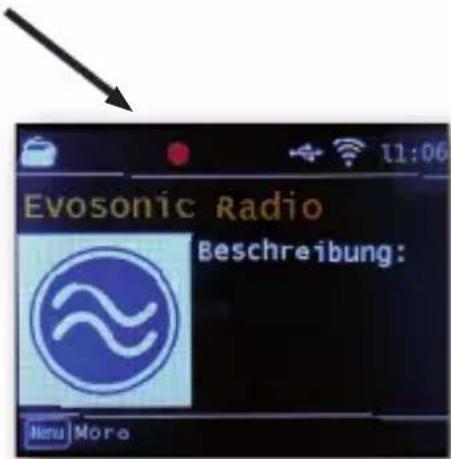
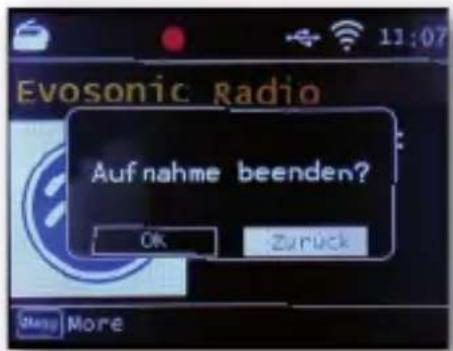
The device can be used to record radio programmes on a USB data carrier. The radio creates a folder on the connected USB data carrier in which all recordings are saved. The folder is labelled PVR. The files are saved in MP3 format. You can record a programme directly during operation if you have connected a USB data carrier to the radio. During a programme, press the Record button (Rec) on the device or on the remote control. A red recording symbol appears on the display.
8. OPERATING
To stop recording, press the Stop button and confirm the prompt with OK.
8.14. Recording radio programmes
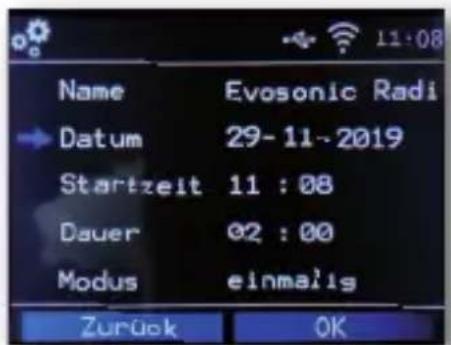
Similar to a video or DVD recorder, you can also programme timer recordings with the radio to record radio programmes when you are not at home, for example. To do this, press and hold the Record button on the device or on the remote control for longer than 2 seconds. Alternatively, select Record timer in the System menu.

8. OPERATING
Name:
Select the radio programme to be recorded here.
Datum:
Enter the date on which the timer should start here.
Starting time:
Select the Start time line, press the OK button and enter the time at which the timer is to be activated using the up/down arrow
buttons on the remote control or the rotary control.
Duration:
Set the recording duration in hours and minutes here.
Mode:
Specify here whether the recording should take place once or daily.
8.15. Bluetooth
The radio can optionally be connected to an external device (e.g. smartphone/tablet) via Bluetooth. Media (locally stored MP3 files, streamed music, web radio) can then be played back from the external device via the radio using the Bluetooth connection. Select Bluetooth from the menu. A Bluetooth connection must be established before you can send audio files to the radio via Bluetooth.
8. OPERATING
8.15.1. Establishing a Bluetooth connection
If you have selected Bluetooth mode on the radio, it is in pairing mode and is searching for Bluetooth devices to be connected. Now activate the Bluetooth function of the external device to be connected (for more information, refer to the operating instructions of the device to be connected). Search for „DABMAN i410 BT“ in the overview of available devices, select it and establish the connection. You will hear a beep.
8.15.2. Playing media via Bluetooth
If you have established a Bluetooth connection as described in chapter 8.15.1, you can play music files stored on the external device via the radio.
To do this, proceed as follows: Start playing the music on the external device by switching on the corresponding playback function (MP3 player, etc.) or select a track from the respective playlist and start playback.
8.16. FM (UKW) ANALOG Radio
In this menu item, you can receive analogue FM radio stations; when the radio is switched to FM/AM mode for the first time, a station search must be performed. An automatic and a manual search function are available for this purpose. After you have switched to FM, press the List button on the device. Press and hold the OK button until the search starts.
8. OPERATING
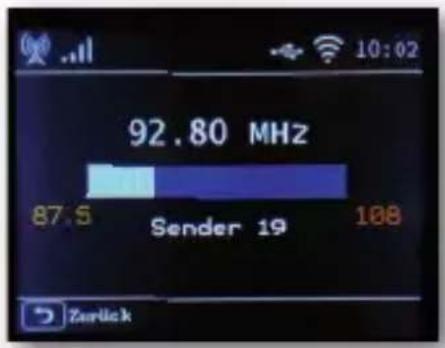

The device starts the automatic station search and saves all frequencies on which a radio station was found.
8.16. FM (UKW) ANALOG Radio
Please note that the sensitivity of the reception and the associated number of radio stations found depends on the search sensitivity settings. To change the search sensitivity, press the Menu button in FM mode. Select between „All stations“, „Weak stations“ and „Strong stations“.
8.17. Cloud Music
With the DABMAN i410 BT, you can listen to FM, Internet and DAB radio stations as well as numerous Internet music streaming services. The radio supports the following streaming providers:
8. OPERATING
Amazon Music, Deezer Napster, Palco MP3, Qobuz, Soundmachine, TIDAL HIGHRESAUDIO*
(*At the time of going to press, subject to change at any time.)
If you would like to use one or more streaming services, you will need to register with the respective provider. You can find more information about registration on the homepage of the respective provider. Select your music streaming provider in the main menu and confirm with OK. Enter the access data for your account in the corresponding mask. If you have entered all the data correctly, you should have direct access to the music service.
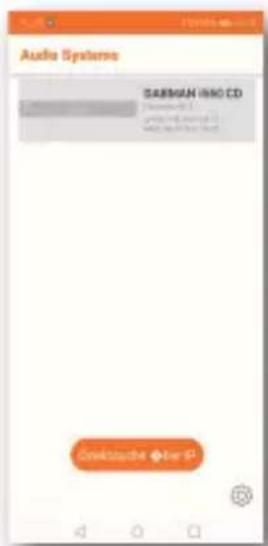
8.18. Operation via app
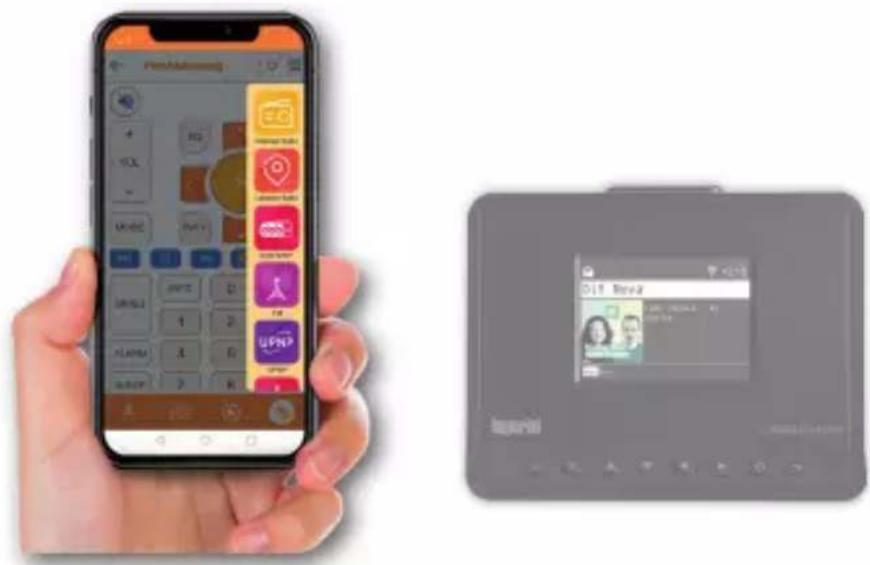
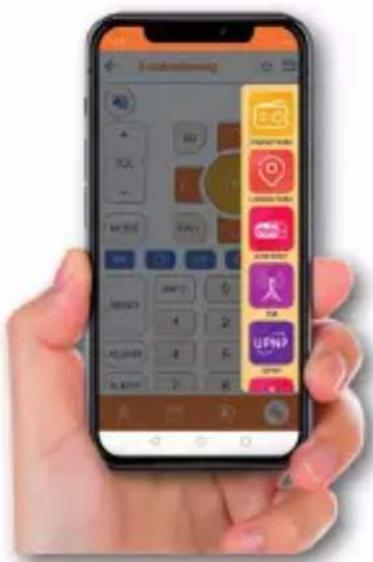
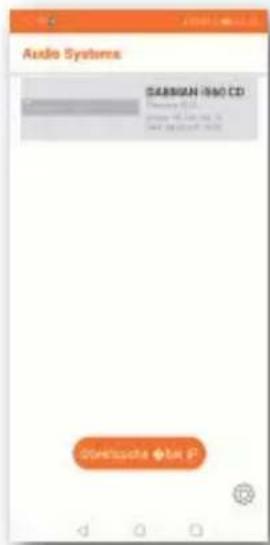
With the application you can operate your compatible Internet radio via tablet or smartphone and the app is suitable for both iOS and Android operating systems.
Note:
This description corresponds to the app as of 11/2022. In the course of software updates to the app, functions or the appearance may change. download the application from the Google Play Store® for Android ® operating systems, or via the itunes Store for iOS ® operating systems and install the app on your smartphone.

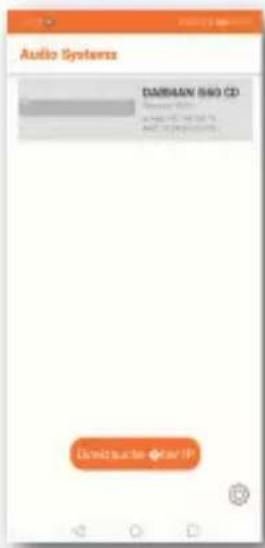
Start the application
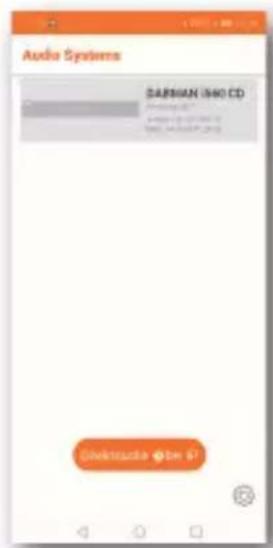
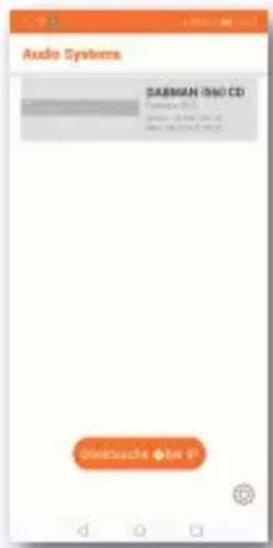
When the app is started, it automatically recognises the radio, provided it is registered in the same network. The main menu of the app is structured in the same way as the menu of the radio and the icons used in the app are comparable to the icons in the menu of the radio; tap on the radio found to start the app.
8. OPERATING
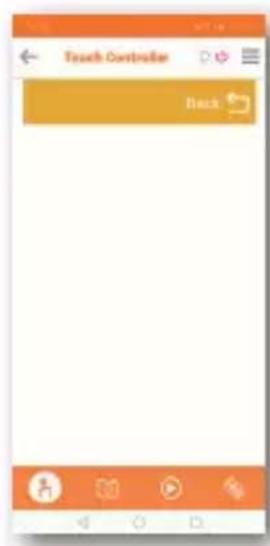
Touch Controller
Using the touch controller, you can control various functions such as changing the volume or selecting a programme by swiping to the right or left/up or down.

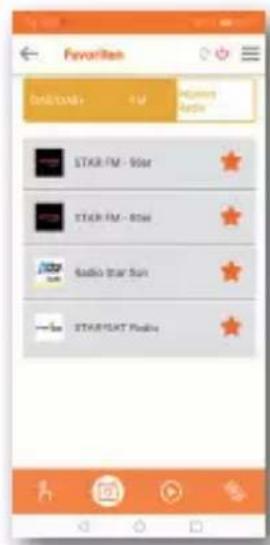
Call up favourite stations
You can use this function to call up your saved favourite radio stations. Select a desired favourite radio station from the list. You can save favourite radio stations in the radio as described in the operating instructions for the radio.
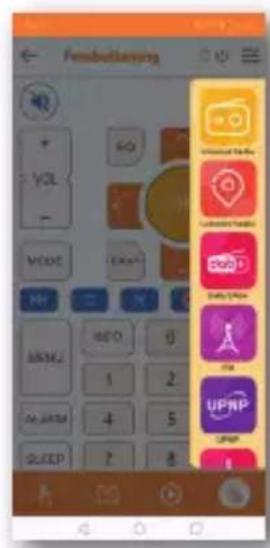
Switch operating mode
You can use this field to select the various operating modes of the radio. The operating mode selection options depend on the functions of the connected radio.
8.18. Operation via app

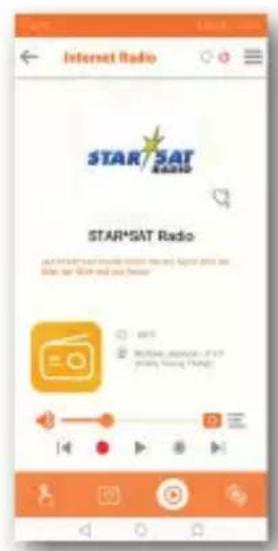
Playback function
Use this button to call up the current playback. Here you can select radio stations via the Internet, DAB+ or FM. You can also change the playback volume here. You can also start a recording to a USB data carrier here. In addition to the radio station that is switched on, information transmitted by the radio station about the current programme is also displayed.
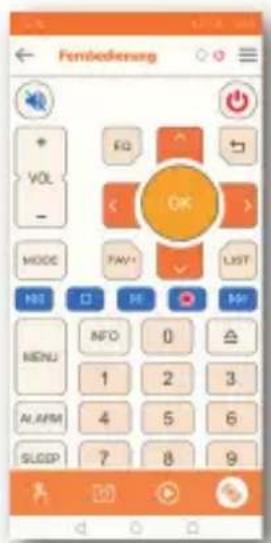
Remote control
The remote control function allows you to control the radio with a virtual remote control. To do this, tap the remote control symbol in the lower area and you can now control all the functions of the radio using the virtual remote control.
9. TROUBLESHOOTING
SYMPTOM POSSIBLE CAUSES AND REMEDIES
| No display, radio does not respond to operation | Establish the power connection using the power supply unit included in the scope of delivery. |
| Operation via remote control is not possible | Battery empty or not inserted correctly. Please check that the batteries are inserted in the correct direction. Point the remote control at the appliance. |
| Poor audio quality when playing music | File with low bit rate. Check the audio file. Tip: For MP3 files, the bit rate should be 192Kbit/s or higher. |
| Volume too low Check the volume setting on the DABMAN i410 BT radio and, if necessary, the volume setting of a paired device. |
| Network connection cannot be established | Check the W-LAN function and activate the DHCP function of the router to which the radio is to be registered; a firewall may be active in the network. |

SYMPTOM POSSIBLE CAUSES AND REMEDIES
| WiFi connection can-not be established | Check the availability of wireless networks, reduce the distance between the wireless router and the radio and ensure that you use the correct WEP/WPA password when logging on to a wireless router. |
| No Internet radio stations available | Check the access points of the network. The radio station is currently not available. The station's link has been changed or is currently no longer transmitting. |
| USB data carrier is not recognised | Make sure that the USB data carrier is formatted FAT32 or NTFS. |
| The device does not emit any sound. All other functions OK. | Cinch cable or optical TOS link cable to the audio playback device not plugged in correctly Check the connection. |
| DAB+ reception interference | No stations availablePerform a search.Antenna not fully extended. Change the position of the radio (closer to the window if necessary), perform a search again. |
10. STORAGE
When not in use, please unplug the mains adapter from the socket, disconnect the mains adapter cable from the radio and store the device in a dry place protected from dust. The battery must be removed from the remote control if it is not to be used for a longer period of time.
11. DISPOSAL INSTRUCTIONS
11.1. Disposal of the packaging
The packaging of your appliance consists exclusively of recyclable materials. Please sort them accordingly and return them to the „Dual System“.
11.2. Disposal of the appliance
The symbol of a crossed-out wheeled bin shown on the right indicates that this appliance is subject to Directive 2012 / 19 / EU. This directive states that you may not dispose of this appliance with normal household waste at the end of its service life, but must dispose of it at specially designated collection points, recycling centres or waste disposal companies. This disposal is free of charge for you. Protect the environment and dispose of it properly. For more information, please contact your local waste disposal company or the city or municipal administration.

11. DISPOSAL INSTRUCTIONS
11.3. Disposal of batteries
Batteries and rechargeable batteries must not be disposed of with household waste. The symbol shown on the right means that you as a consumer are obliged to dispose of all batteries and rechargeable batteries separately. Appropriate collection containers are available in specialised shops and numerous public facilities. Information on the disposal of old batteries and rechargeable batteries can also be obtained from specialised waste disposal companies and municipal and local authorities. This disposal is free of charge for you. Protect the environment and dispose of them properly. An additional chemical symbol Pb (lead) or Hg (mercury) under the crossed-out waste bin means that the battery/rechargeable battery contains more than 0.0005% mercury or 0.004% lead.
12. PROPERTIES AND TECHNICAL DATA
Internetradio
Audiocodecs MP3 (bit rate up to 320 Kbits/s,
sampling rate up to 48 KHz)
AAC/AAC+ (bit rate up to 320 Kbits/s,
sampling rate up to 48 KHz)
WMA (bit rate up to 320 Kbits/s,
sampling rate up to 48 KHz)
DAB/DAB+/FM
Reception area DAB Band III 174 MHz - 240 MHz
FM 87,5 MHz -108 Mhz
Display
TFT Color Display 2,4inch
Connections
Headphones
AUX IN
3,5 mm Jack socket Stereo
3,5 mm Jack socket Stereo
Polarity
Power supply connection
USB socket
USB 2.0 Standard
12. PROPERTIES AND TECHNICAL DATA
Operating conditions
Temperature range 0
0 C - 45 0 C
E
Air humidity 20% - 80% Relative humidity
WiFi Interface
Frequency range
Modulation
IEEE Standards
2,412 GHz - 2,4835 GHz
CCK, DQPSK, DBPSK,
64-QAM, 16-QAM, QPSK, BPSK,
IEEE 802.11b/g /n
W-LAN Data rate
802.11b:
802.11g:
802.11n
Transmission power 18,5dBm (Max)
1, 2, 5.5, 11Mbps
6, 9, 12, 18, 24, 36, 48, 54 Mbps
HT20 bis 72,2 Mbps
HT40 bis 150 Mbps
Storage conditions
Only store in dry rooms.
Dimensions and weight
Width x height x depth
Weight
150 mm x 110 mm x 110 mm
ca. 230 g
12. PROPERTIES AND TECHNICAL DATA
Battery remote control
Type CR 2025 / 3 V
Power supply unit DABMAN i410 BT
| Manufacturer | Dongguan KEZHEN Electronics Technology C |
| Type designation | o.,Ltd. |
| Input voltage | KZ0502000V |
| Input frequency | 100-240V |
| Output voltage | 50/60Hz |
| Output current | 5V DC |
| Output power | 2,0 A |
| Average efficiency during operation | 10W |
| Average efficiency at 10% | 78,01 % |
| power consumption | |
| Power consumption at no load | 78,56 % |
| < 0,1W |

13. SERVICE AND SUPPORT
Dear customer,
thank you for choosing a product from our company. Our product fulfils the legal requirements and has been manufactured under constant quality control. The technical data correspond to the current status at the time of printing. Subject to change without notice. The warranty period for the IMPERIAL DABMAN radio corresponds to the statutory provisions at the time of purchase. We also offer you our telephone HOTLINE service with professional help. In our service area, professional experts are available to answer your questions. Here you can ask any questions you may have about IMPERIAL products and get tips on localising the cause of a possible fault.
Our technicians are available from Monday to Friday
from 8.00 am to 4.45 pm
on the following telephone number:
02676 / 95 20 101
or by e-mail at: service@telestar.de
Falls If you cannot be helped on the service hotline, please send your IMPERIAL DABMAN radio to the following address, preferably in the original packaging, but always packed securely for transport:
TELESTAR - DIGITAL GmbH
Service Center
Your device bears the CE mark and fulfils all required EU standards. Hereby, TELESTAR DIGITAL GmbH declares that the device IMPERIAL DABMAN 410 BT is in compliance with the essential requirements and other relevant provisions of the RoHS Directive 2011/65/EU, the RE Directive 2014/53/EU and the ErP Directive 2009/125/EC The Declaration of Conformity for this product is available at the following link:

imperial®
DABMAN i410 BT
Scan the QR code to get a multilingual manual as a pdf file.
6. INSTALLATIE....26
8.16. FM (VHF) ANALOG radio 59
6. INSTALLATIE
7.2.11. Fabrieksinstellingen
8.13. Weer
8.18. Bediening via app
Met de applicatie kon jeje natibele internetradio bedienen via tablet of smartphone.
Als je de app start.
Schakel de bedieningsmodus
6, 9, 12, 18, 24, 36, 48, 54 Mbps
HT20 bis 72,2 Mbps
HT40 bis 150 Mbps
Opslagomstandigheden

imperial®
DABMAN i410 BT
Scan the QR code to get a multilingual manual as a pdf file.

8.13. Météo
6, 9, 12, 18, 24, 36, 48, 54 Mbps
802.11g:
HT20 bis 72,2 Mbps
802.11n
HT40 bis 150 Mbps

imperial®
DABMAN i410 BT
Istruzioni d'uso
Scan the QR code to get a multilingual manual as a pdf file.

7. IMPOSTAZIONI
8.13. Il tempo
8.16. Radio FM (VHF) ANALOGICA
8.16. Radio FM (VHF) ANALOGICA
Controllore tattile
Area reception DAB Band III 174 MHz - 240 MHz
FM 87,5 MHz -108 Mhz
Display
Display a colori TFT 2,4Zoll
12. PROPRIETÀ E DATI TECNICI
Connessioni
Cuffie
AUX IN
3,5 mm Presa jack stereo
3,5 mm Presa jack stereo
Polarità
Collegamento
alimentazione Presa
USB
USB 2.0 Standard
6, 9, 12, 18, 24, 36, 48, 54 Mbps

- Navigantion links
- Einstellungen
- Wetter
- Wiedergabe funktion
- Imperial®
- Dabman i410 bt
- Index
- Settings 31
- Operation 43
- Introduction
- Intended use
- Safety instructions
- 2.1 Explanation of symbols
- Symbol meaning
- Gefahr
- Warnung
- Vorsicht
- Hinweis
- Safety note
- Risk of injury
- Choking hazard
- Operational safety
- Connecting the device
- Protect device from defects
- Notes on the radio interface
- Handling batteries
- Never charge batteries
- Batteries are not toys
- Never throw batteries into a fire
- Never expose batteries to extreme heat or direct sunlight
- Cleaning the appliance
- Legal information
- Scope of delivery
- Quantity explanation
- Menu
- Navigation up
- Navigation down
- Navigantion left
- Navigantion right
- Confirmation button (ok button)
- Back
- Volume
- Snooze
- Antenna connection
- Line out
- Analogue audio output right/left
- Optical digital audio output (toslink)
- Power supply connection
- Mains switch
- Remote control
- Notice
- Standby button
- Mode
- Mute
- Eq equalizer function
- Navigation up/down - right/left / volume vol
- Ok
- List/programme list
- Fav
- Control and selection of music tracks via usb, upnp, media or cd
- Info
- ● Rec/ eject
- Numeric keypad
- Vol + / vol
- Sleep
- Installation
- 6.1 General operating instructions
- Preparing the remote control
- 6.3 Antenna connection
- Power connection
- Language selection
- Date time mode
- Gmt timezone
- Summertime
- Settings
- Basic operation
- Button menu
- Back button
- List button
- Mode button
- System
- 7.2.2 Date time
- Network
- Alarm/alarm clock
- Edit timer
- Standby mode
- Eco standby
- Standby with clock
- Auto-standby
- Sleeptimer
- Backlight
- Location setting
- Factory settings
- Version
- Operating
- Dab+ radio
- Channel list
- Dab+ scan
- Dab+ manual search
- Select internet radio station
- Favourites list
- Radio
- Podcasts
- History
- Search
- Searching for an internet radio station
- Saving radio stations
- Saving radio stations in the favourites list
- Local radio stations
- Change volume
- Switch operating mode
- Aux in
- Upnp
- Usb playback
- Eq (equalizer)
- Weather
- Recording radio programmes
- Name
- Datum
- Starting time
- Duration
- Bluetooth
- Establishing a bluetooth connection
- Playing media via bluetooth
- Fm (ukw) analog radio
- Cloud music
- Operation via app
- Note
- Start the application
- Touch controller
- Call up favourite stations
- Playback function
- Troubleshooting
- Storage
- Disposal instructions
- Disposal of the packaging
- Disposal of the appliance
- Disposal of batteries
- Properties and technical data
- Internetradio
- Dab/dab+/fm
- Display
- Connections
- Operating conditions
- Wifi interface
- Storage conditions
- Dimensions and weight
- Battery remote control
- Service and support
- INSTALLATIE....26
- Installatie
- Fabrieksinstellingen
- Weer
- Bediening via app
- Als je de app start
- Schakel de bedieningsmodus
- Opslagomstandigheden
- Météo
- Impostazioni
- Il tempo
- Radio fm (vhf) analogica
- Controllore tattile
- Proprietà e dati tecnici
- Connessioni
Brand : Imperial
Model : DABMAN i410 BT
Category : Radio