
Easy Fry AL6058 - Cooker MOULINEX - Free user manual and instructions
Find the device manual for free Easy Fry AL6058 MOULINEX in PDF.
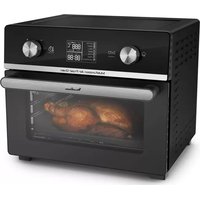


| Product Type | Air Fryer (Oil-free fryer) |
| Brand | Moulinex |
| Model | Easy Fry AL6058 |
| Cooking Modes | Air Fry, Roast, Grill, Bake, Pizza, Toast, Bagel, Dehydrate, Reheat, Auto Keep Warm |
| Capacity | Up to 700 g frozen fries (model dependent: two baskets) |
| Included Accessories | Frying basket (x1 or x2 depending on model), reversible grill, drip pan, crumb tray |
| Temperature Range | 60°C to 230°C (max 200°C for Air Fry and Grill modes) |
| Timer | 1 min to 12 h (max 2 h for Grill mode) |
| Audible Alert | 3 beeps at end of cooking |
| Display | Digital temperature and time display |
| Interior Light | Yes, turns on during cooking |
| Auto Shut-off | Yes, at end of cooking |
| Door | Glass door |
| Care and Cleaning | Accessories hand washable (hot water + mild detergent). Do not put in dishwasher. Removable crumb tray. |
| Safety | Do not place in a corner or under a cabinet. Leave 15 cm clearance around for air circulation. |
| Warranty | Refer to the global warranty booklet or brand website |
| After-Sales Service | Contact the customer service in your country (details in warranty booklet) |
Frequently Asked Questions - Easy Fry AL6058 MOULINEX
User questions about Easy Fry AL6058 MOULINEX
0 question about this device. Answer the ones you know or ask your own.
Ask a new question about this device
Download the instructions for your Cooker in PDF format for free! Find your manual Easy Fry AL6058 - MOULINEX and take your electronic device back in hand. On this page are published all the documents necessary for the use of your device. Easy Fry AL6058 by MOULINEX.
USER MANUAL Easy Fry AL6058 MOULINEX
AIR FRYER OVEN
www.tefal.com
www.moulinex.com
Online recipes

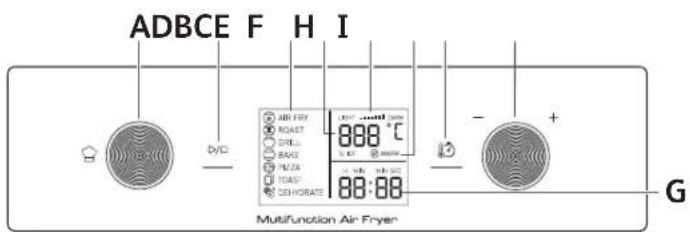
DESCRIPTION
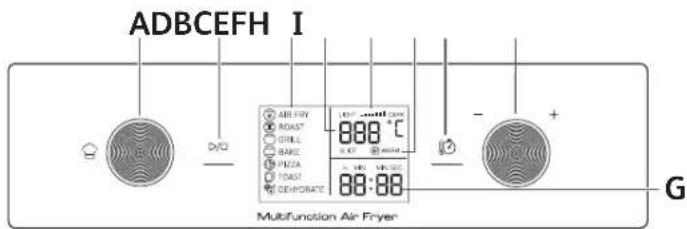
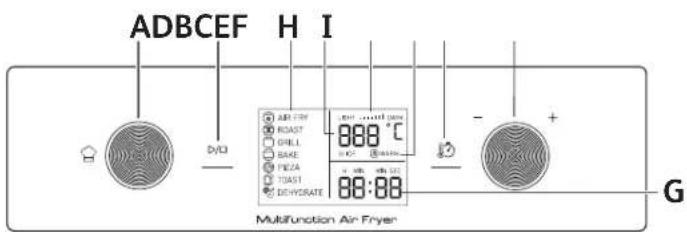
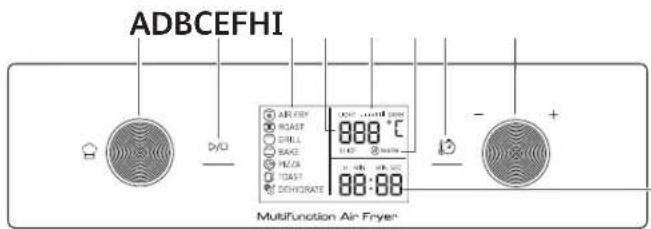
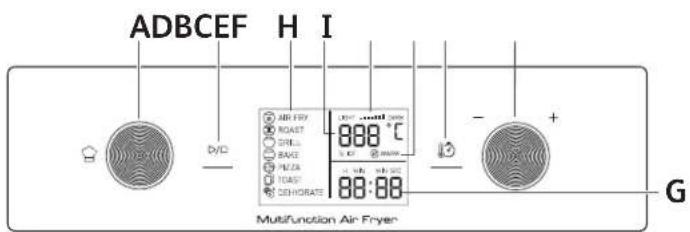
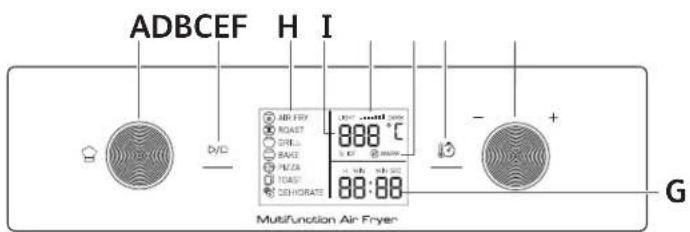
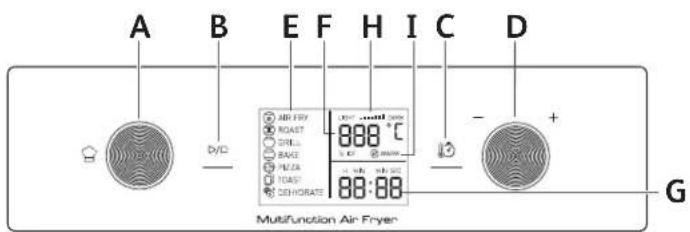
- Control panel
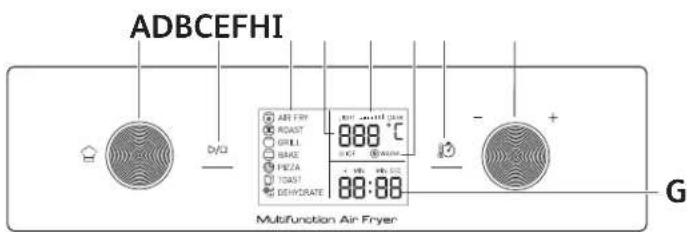
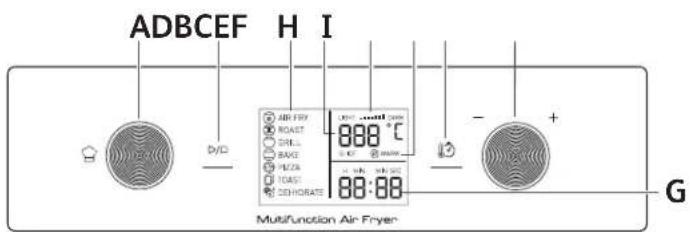
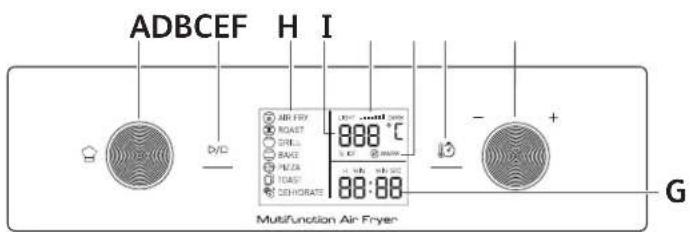
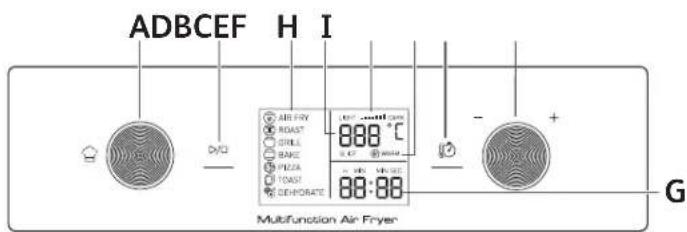
A. Rotating knob for cooking menus B. Start / stop button C. Temperature / time button D. Rotating knob for selecting cooking temperature or time
- Digital display
E. Cooking modes F. Temperature display G. Cooking time display
H. Toast and bagel browning control
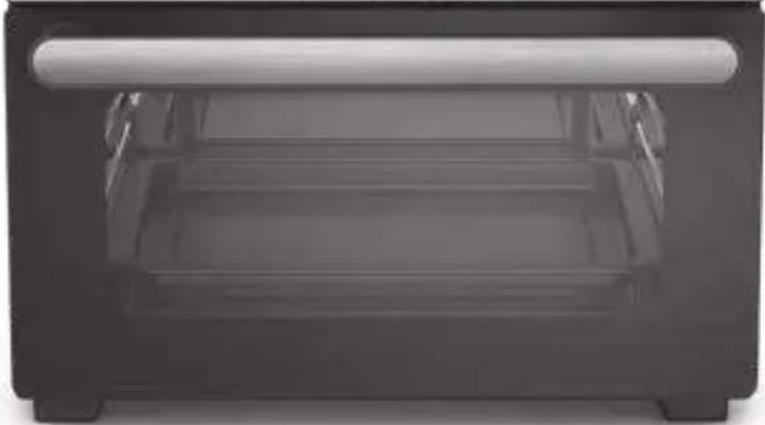
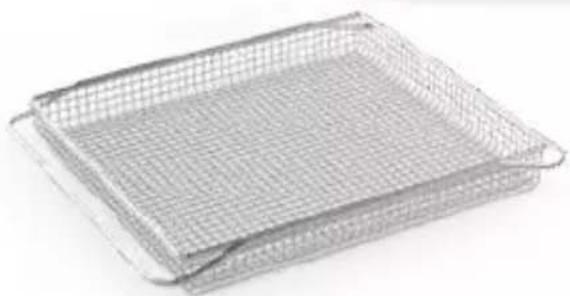
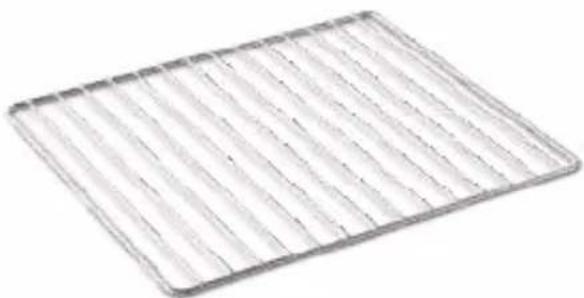
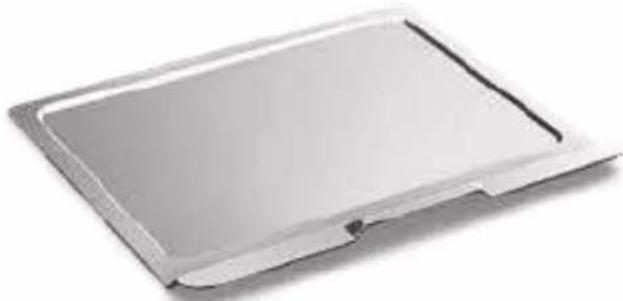
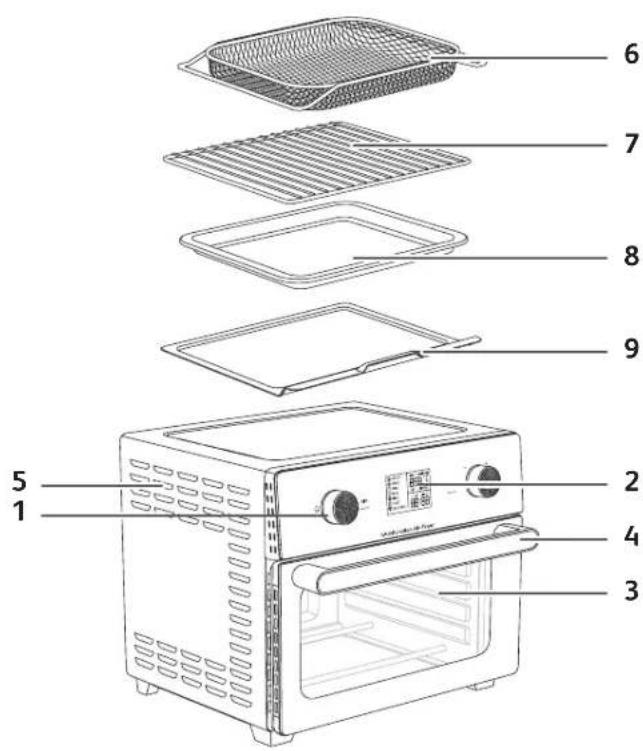
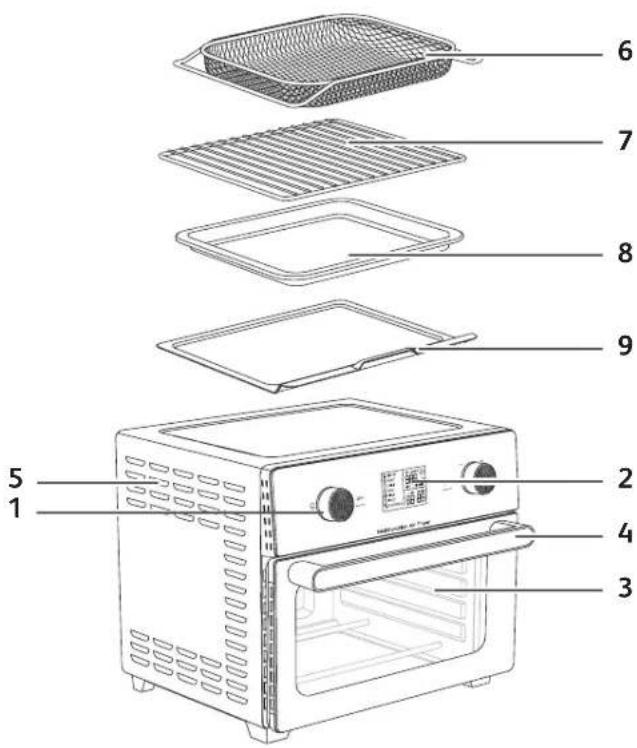
I. Automatic keep warm 3. Glass door 4. Door handle 5. Ventilation slots 6. Airfry basket (2 depending on model) 7. Wire rack 8. Baking tray 9. Crumb tray
COOKING MODES
- Air Fry
- Roast
- Grill
- Bake
- Pizza
- Toast
- Dehydrate

BEFORE FIRST USE
- Keep your guarantee card. Read the safety instructions and manual first and keep them in a safe place. Check that the appliance is not damaged. If it is, immediately contact the seller or after-sales service.
- Place the appliance on a flat, stable, heat-resistant work surface away from water splashes and any sources of heat. Do not put anything on top of the appliance. This disrupts the airflow and affects the hot air frying result. Remove all stickers and protection both inside and outside of the appliance.
IMPORTANT: To prevent the appliance from overheating, do not place it in a corner or below a wall cupboard. A gap of at least 15cm should be left around the appliance to allow air to circulate.
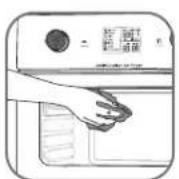
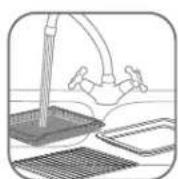
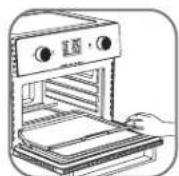
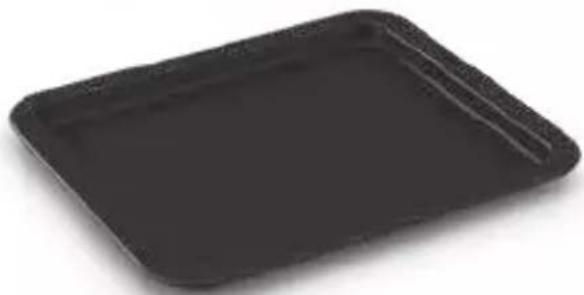
- Wire rack, Baking tray, AirFryer Basket and Crumb Tray should be hand-washed in hot, soapy water and with a non-abrasive sponge.
Warning: Accessories included are not dishwasher safe. 4. Thoroughly dry all parts before placing them back in the oven. Place crumb tray below lower heating elements. 5. Wipe the inside and outside of the appliance with a damp cloth. The appliance works by producing hot air. Do not fill the accessories with oil or frying fat.
FIRST USE EMPTY
Operate the appliance empty (without the accessories inside) in order to eliminate any manufacturing residue and new odours.
- Connect the power supply cord to an electrical socket.
- Turn the menus rotating knob to ☐ BAKE. • Turn the temperature/time knob to 220°C.
- Press on 🔒 key to select the timing. • Turn the temperature/time knob to 45 minutes.
- Press on to start the appliance.
IMPORTANT: Smoke may appear, this is quite normal and will disappear quickly after use.
- The appliance can be stopped before the end of the cooking time by pressing the key. • The appliance beeps 3 times at the end of the cooking.
4
GENERAL ADVICE
1. The dishes
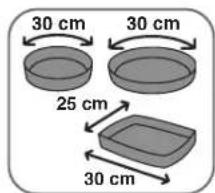
To choose dishes and tins: consider the internal dimensions of the appliance
For a round/oval dish, the diameter should not exceed 30 cm. For a rectangular dish, it should not exceed 30 cm.
2. Cooking time: ⏻
It can vary from 1 minute to 12 hours depending on the cooking modes. For safety reasons, the grill mode cannot be used for more than 2 hours.
3. Setting the Rotating Knob (selector)
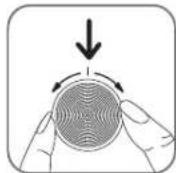
- The knob will facilitate the choice of automatic menus, cooking methods or settings (temperature, timer, browning level for toast mode).
- The knob may be used in both directions of rotation. Rotate clockwise for increasing the temperature or cooking time, rotate anticlockwise for decreasing the temperature or cooking time.
4. Internal lighting and sound
• During cooking, the internal light is turned on. The remaining cooking time appears on the screen and progresses second by second. For DEHYDRATE mode, the displayed time decreases by 1 minute at a time, and during the last 59 minutes 59 seconds, it decreases by 1 second at a time. - 3 beeps indicate the end of the cooking time. The internal light turns off immediately and the oven stops automatically.
5. Rack position
The position of the accessories can affect the cooking results. Please refer to the diagrams below for oven rack positions.
5
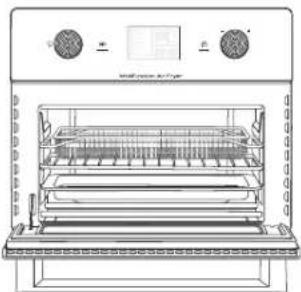
| Top position for AIR FRY & GRILL | 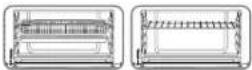 |
| Middle position for PIZZA, TOAST, DEHYDRATE & BAGEL | 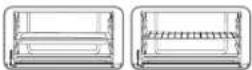 |
| Bottom position for ROAST, BAKE & REHEAT.Note: For chicken or other large items, the rack should be in the bottom position. For smaller items, the basket or the rack can be in the middle position. | 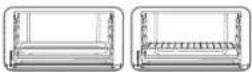 |
COOKING MODES
| Modes Application | Suggested | accessory | Suggested rack position | Pre-settings |
| Fry foods like fries, potato wedges, chicken nuggets, chicken wings with little to no added oil. | Air fry basket | Top *Depending on model : the 2nd basket in the middle | 200°C 25 min | |
| Cook crispy outside and perfectly cooked inside. Use for roasted vegetables and roast meats, such as chicken, beef, lamb and pork. | Wire rack + baking tray | Bottom | 190°C 30 min | |
| Grill meats, fish and brown the tops of casseroles. | Wire rack Top | 200°C 10 min | ||
| Cook as a conventional oven for traditional baking for sweet or savoury pies, quiches, cakes, muffins, pastries, souffles. | Dish on wire rack | Bottom | 180°C 20 min | |
| Cook frozen or homemade pizzas. | Wire rack Middle | 220°C 15 min | ||
| Toast slices of bread, crumpets, toasted sandwiches and bacon to the desired level of browning. | Wire rack Middle | 230°C Browning level 4 4 min 45 Slices 4 | ||
| Dehydrate meats, fruits and even vegetables. | Air fry basket | Middle *Depending on model : the 2nd basket in the top | 60°C 6h | |
| BAGEL TOAST | Toast halves when they're placed cut-side up on the wire rack. | Wire rack Middle | TOAST 230°C Browning level 2 3 min 55 | |
| REHEAT ROAST | Heat leftovers without over cooking. | Wire rack Bottom | ROAST 160°C 10 min |
USING THE APPLIANCE
The appliance can cook a large range of recipes. Cooking times for the main types of food are given in the section 'Cooking Guide'. Online recipes help you get to know the appliance.
- Connect the power supply cord to an electrical socket.
- Place the food in the air fry basket, the wire rack, or the baking tray.
Note: Never exceed the maximum amount indicated in the table (see section 'Cooking Guide'), as this could affect the quality of the end result.
- Put the air fry basket, the wire rack, or baking tray back into the appliance.
- To begin cooking, you can select between the automatic cooking mode and the manual settings.
Using automatic cooking modes
The appliance has pre-programmed menus which determine temperature and time.
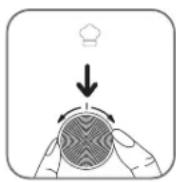
- Turn the menus rotating knob ⏻ to reach the desired cooking mode. (These modes are described in detail in the “Cooking guide” section.)
- To change the temperature pre-setting, rotate the selector knob to increase or decrease the temperature. To change the cooking time, press the button to switch to TIME selection mode. Then, rotate the control knob to increase or decrease the cooking time.
- Launch the cooking process by pressing the Start button. Cooking starts. The selected temperature and remaining cooking time will display on the screen.
Manual settings
- Temperature control
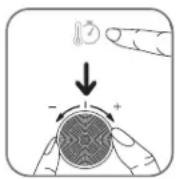
Press the ⓑ key. Set the desired temperature by turning the control knob to the desired temperature from 60°C to 230°C.
Temperature setting depends on the modes. For AIR FRY & GRILL modes, the maximum temperature is 200°C.
8
- Time control
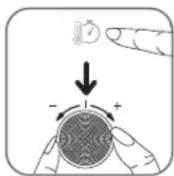
Press the Ⓞ key. Set the duration of cooking by turning the selector until the desired time. The digital display shows the time in hours and minutes (e.g., 0:45).
- Cooking
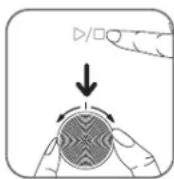
Once settings are done, press the DVD key. The appliance starts up. The internal light switches on.
The displayed time will decrease by one second every second until the cooking process is completed. At the end of the scheduled time, 3 beeps indicate the end of cooking. The oven stops heating. The internal light switches off immediately.
Note: For dehydrate mode, the displayed time will decrease by 1 minute every minute. During the last 59 minutes and 59 seconds, the displayed time will decrease by 1 second every second.
NOTE: The cooking time and temperature may be adjusted at any time during the cooking process.
- Stop cooking
The appliance can be stopped before the end of the cooking time. To do this, press the key.
- Excess oil from the food is collected in the baking tray.
- Some foods require shaking halfway through the cooking time (see section 'Cooking Guide'). To shake the food, pull the air fry basket or wire rack out with an oven glove and turn the food with cooking tongs. Then put the air fry basket or wire rack back into the appliance. The appliance restarts automatically.
- When you hear the beeps, the set cooking time has finished. Pull the air fry basket or wire rack out of the appliance and place it on a heat-resistant surface.
- Check if the food is ready. If the food is not ready yet, simply put the basket or rack back into the appliance and set the timer for a few extra minutes.
- When the food is cooked, take out the basket or rack. To remove food, use a pair of tongs. Caution: Do not touch the appliance and the accessories during use and for some time after use, as they get very hot. Only hold them with an oven glove or by the handle. After cooking, the accessories and the food are very hot.
- When a batch of food is ready, the appliance is instantly ready for preparing another batch.
TOAST
- Rotate the function knob to access TOAST mode.
- TOAST mode is pre-set at browning level 4 (4:45 min, 4 slices).
- Rotate the knob to increase or decrease the browning level.
- Press ⑫ to select the number of slices.
- Rotate the knob to increase or decrease the number of slices.
- Press the 📋 button once to start cooking.
COOKING GUIDE
The table below helps you to select the basic settings for the food you want to prepare. Note: The cooking times below are only a guide and may vary according to the variety and batch of foods used. For other foods the size, shape and brand may affect results. Therefore, you may need to adjust the cooking time slightly.
| Cooking mode Recipe Quantity Approx | Time | Temperature | Shake* | Extra information | ||
| Pre-set modes | ||||||
| AIR FRY | Frozen fries | 300 - 700 g | 20 - 35 min | 180°C Yes | ||
| 1200 - 1300 g (600- 650 g on each basket)*** | 35 - 40 min | 180°C Yes | Depending on model: At mid-cooking, turn the position of the baskets | |||
| Homemade fries | 500 - 700 g | 25- 35 min | 180°C Yes | Add 1 tbsp of oil** | ||
| Frozen chicken nuggets | 300 - 400 g | 15 - 18 min | 200°C Yes | |||
| ROAST | Chicken (whole) | 1200 - 1500 g | 45 - 55 min | 200°C | ||
| Salmon fillet 400 - 600 g | 15 - 20 min | 170°C | ||||
| GRILL | Macaroni Cheese | 400 - 500 g | 10 - 15 min | 200°C | ||
| BAKE | Chocolate cake | 300 - 600 g | 20 - 30 min | 180°C | ||
| Cookies | 10 - 12 pieces | 10 - 12 min | 180°C | |||
| PIZZA | Pizza 26 - 30 cm | 10 - 15 min | 180°C | |||
| TOAST | Soft bread 4 slices | 4 min 45 | 230°C Browing level | 4 | ||
| DEHYDRATE | Apples | 2 - 4 pieces (using both baskets)*** | 8h | 60°C | Cut in fine slices. Turn the baskets at mid-cooking.** | |
| Bananas | 2 pieces (using both baskets)*** | 8h | 60°C | Slices of 1 cm thick. Turn the baskets at mid-cooking.** | ||
| Manual modes | ||||||
| BAGEL TOAST | Bagel bread 2 pieces 3 - 4 min | 230°C | Browning level 2 | |||
| REHEAT ROAST | 10 - 15 min | 175°C | ||||
*Turn the food with tongs halfway through cooking. ** Ingredients need to be mixed with the oil in a bowl before cooking. ** Depending on model.
IMPORTANT: To avoid damaging your appliance, never exceed the maximum quantities of ingredients and liquids indicated in the instruction manual and in the recipes.
When you use mixtures that rise (such as with cake, quiche or muffins) the oven dish should not be filled more than halfway.
KEEP WARM (AIR FRY MODE ONLY)
- When the AIRFRY cooking process is completed, Keep warm mode will be started automatically. 'WARM' appears on the display.
- Keep warming is preset 10 minutes at 60°C. • After 10 minutes, the appliance beeps and keep warm stops automatically.
TIPS
- Smaller food usually requires a slightly shorter cooking time than larger size food.
- A larger amount of food only requires a slightly longer cooking time, a smaller amount of food only requires a slightly shorter cooking time. If you are unsure, you can open the drawer at any point of cooking to check progress.
- Shaking food halfway through the cooking time improves the end result and can help prevent uneven cooking.
- To make your potatoes extra crispy, try adding a small amount of oil before cooking and shake to evenly cover. We recommend using 1 tablespoon of oil. • Snacks that can be cooked in an oven can also be cooked in the appliance. • The optimal recommended quantity for cooking frozen fries is 500 grams. • Use ready made puff and shortcrust pastry to make filled snacks quickly and easily.
- Place an oven dish on the wire rack if you want to bake a cake or quiche or if you want to fry delicate ingredients or filled ingredients. You can use an oven dish in silicon, stainless steel, aluminium, terracotta.
- You can also use the appliance to reheat food. To reheat food, set the temperature to 175°C for up to 15 minutes. Cooking time may be adjusted depending on the quantity of food to ensure the core is well reheated.
MAKING HOME-MADE FRIES
To make home-made fries, follow the steps below.
- Choose a variety of potato recommended for making fries. Peel the potatoes and cut them into fries of equal thickness.
- Soak the potato fries in a bowl of cold water for at least 30 minutes, then drain and dry them with a clean, highly absorbent tea towel. Then pat them with paper kitchen towel. The fries must be thoroughly dry before cooking.
- Pour 1 tablespoon of oil (vegetable, sunflower, or olive) into a dry bowl, add the fries, and mix until they are coated with oil.
- Remove the fries from the bowl with your fingers or a kitchen utensil so that any excess oil stays behind in the bowl. Place the fries in the air fry basket. Note: Do not tip the container of oil-coated fries directly into the basket in one go, otherwise excess oil will end up in the basket.
- Fry the fries according to the instructions in the section "Cooking guide".
CLEANING
Clean the appliance after every use.
The baking tray has a non-stick coating.
Do not use specific metal-based maintenance products for cleaning (copper, stainless steel, etc.). Do not use abrasive maintenance products (including corrosive soda-based ones) or abrasive sponges or buffers.
- Remove the mains plug from the wall socket and let the appliance cool down.
- After each use, slide out the crumb tray and discard crumbs. NOTE: Empty the crumb tray frequently. Hand-wash when necessary.
- Clean the accessories with hot water, some washing-up liquid, and a non-abrasive sponge. You can use a degreasing liquid to remove any remaining grease or food residue.
Warning: Accessories included are not dishwasher safe.
Tip: For stubborn food residues fill the accessory with hot water and some washing-up liquid.
Let them soak for approximately 10 minutes. Then rinse clean and dry.
- Clean the door, interior surfaces and translucent parts with a damp sponge and a mild detergent.
- Clean the heating element with a dry, cleaning brush to remove any food residues.
- Wipe the outside of the appliance with a damp cloth.
- Do not immerse the appliance in water or any other liquid.
STORAGE
- Unplug the appliance and let it cool down.
- Make sure all parts are clean and dry.
GUARANTEE AND SERVICE
If you need service or information or if you have a problem, please visit the brand website or contact the brand Consumer Care Centre in your country. You can find the phone number in the worldwide guarantee leaflet. If there is no Consumer Care Centre in your country, go to your local brand dealer.
TROUBLESHOOTING
If you encounter problems with the appliance, visit the brand website (see cover of these instructions for use) for a list of frequently asked questions or contact the Consumer Care Centre in your country.
12
13
DESCRIPTION
- Control panel
24
DESCRIPTION
- Control panel
nl
DESCRIPTION
- Control panel
KEEP WARM (WARM HOLD) (ONLY IN AIRFRYER MODE)
46
G
DESCRIPTION
68
DESCRIPTION
DESCRIPTION
- Control panel
DESCRIPTION
| Gornji položaj za prženje vrelim vazduhom i pečenje na roštilju (Režimi PRŽENJE VRELIM VAZDUHOM i PEČENJE NA ROŠTILJU) | 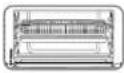 | 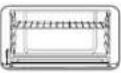 |
| Srednji položaj za pice, tost, peciva i dehidratacija (Režimi PICA, TOST i DEHIDRATACIJA) | 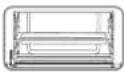 |  |
| Donji položaj za kuvanje i pečenje (Režimi PEČENJE MESA, PEČENJE i PODGREVANJE).Napomena: Za piletinu ili druge velike stavke, stalak treba da bude na donjem položaju. Za manje stavke, korpa ili stalak mogu da budu u srednjem položaju. | 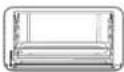 | 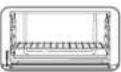 |
COOKING MODE
| Režim Primena Predloženi | dodatak | Položaj dodataka | Prethodne postavke | |
 AIR FRY(PRŽENJE NA VRUČEM VAZDUHU) AIR FRY(PRŽENJE NA VRUČEM VAZDUHU) | Pržite hranu kao što su pomfrit, pekarski krompir, pohovana piletna, pileća krilca sa malo ili nimalo ulja. | Korpa za prženje na vrućem vazduhu | Vrh°U zavisnosti od modela : 2. korpa u sredini | 200°C 25 min |
 ROAST(PECENJE MESA) ROAST(PECENJE MESA) | Spremite hrskavo spolja i savršeno lspečeno iznutra. Koristite za pečenje povrća i pečenje mesa, kao što je piletna, govedina, jagnjetina i svlnjetina. | Rešetka + Pleh | Donji | 190°C 30 min |
| [604W] GRILL(PROGRAM ZA ROŠTILJ) | Pecite na roštilju meso, ribu i zapecite vrhove složenaca. | Rešetka Vrh | 200°C 10 min | |
 BAKE(PECENJE) BAKE(PECENJE) | Tradicionalno pecite kao u konvencionalnoj rerni slatke ili slane pite, kiševe, kolače, mafine, peciva, suflée. | Jela sa rešetke | Donji | 180°C 20 min |
| [IMAGE] PIZZA(PICA) | Spremajte smrznute ili domaće pice. | Rešetka Srednji | 220°C 15 min | |
| [2D7A] TOAST(TOST) | Tostirajte kriške hleba, škotske palačinke, tostirane sendviče i slaninu do željenog nivoa zapečenosti. | Rešetka Srednji | 230°C Nivo z apeče- nosti 4 4 min 45 kriške 4 | |
| [4324] DEHYDRATE(DEHIDRATACIJA) | Isušite meso, voće, pa čak i povrće. | Korpa za prženje na vrućem vazduhu | Srednji U zavisnosti od modela : 2. korpa u vrhu | 60°C 6h |
| PECIVO[2KK6] TOAST | Tostirajte polovine kada su postavljene na žičanu rešetku isečenom stranom prema gore. | Rešetka Srednji | TOAST 230°C Nivo z apečenosti 2 3 min 55 | |
PODGREVANJE ROAST ROAST | Zagrejte ostatke bez preku- vavanja. | Rešetka Donji | ROAST 160°C 10 min | |
USING ONLY ONE DRAWER OF THE APPLIANCE
This appliance can cook various types of recipes. Cooking times for basic foods are given in the "Cooking Guide" section. Recipes from the internet help you get to know the appliance.
| Gornja pozicija za pečenje na vrući zrak i grilovanje (načini rada AIR FRY i GRILL) | 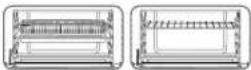 |
| Srednja pozicija za pizzu, tostiranje, peciva i dehidraciju (načini rada PIZZA, TOAST i DEHYDRATE) | 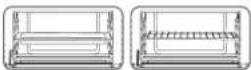 |
| Donja pozicija za kuhanje i pečenje (načini rada ROAST, BAKE i REHEAT).Napomena: Ako pripremate pile ili druge velike komade, rešetka treba biti na donjoj poziciji. Za manje komade korpa ili rešetka mogu biti na srednjoj poziciji. | 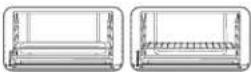 |

127
COOKING METHOD
| Način Namjena | Predloženi | dodatak | Pozicija dodataka | Podešene postavke |
| AIR FRY | Pečenje namirnica kao što su krompirići, ploške krompira, pileći medaljoni, pileća krilca sa malo ulja ili bez ulja. | Korpa za pečenje na vrući zrak | Gore *U zavisnosti od modela: 2. korpa na sredini | 200°C 25 min |
| ROAST | Hrskavo izvana i savršeno pečeno iznutra. Koristite za pečeno povrće i meso, na primjer za piletinu, govedinu, jagnjetinu i svinjetinu. | Rešetka + Pleh za pečenje | Donja | 190°C 30 min |
| GRILL | Grilovano mesa, riba i dobivanje zapečenog gornjeg sloja na složencima. | Rešetka Gore | 200°C 10 min | |
| BAKE | Pečenje kao u normalnoj pečnici za tradicionalne slatke ili slane pite, quiche, torte, mafine, kolače, soufflé. | Posuda na rešetki | Donja | 180°C 20 min |
| PIZZA | Pečenje zamrznute ili domaće pizze. | Rešetka sredini | 220°C 15 min | |
| TOAST | Tostiranje komada hljeba, pogačica, tostiranih sendviča i slanine do željenog nivoa zapečenosti. | Rešetka sredini | 230°C Nivo zapečenosti 4 4 min 45 kriške 4 | |
| DEHYDRATE | Dehidriranje mesa, voća i povrća. | Korpa za pečenje na vrući zrak | Srednja *U zavisnosti od modela : Druga korpa na vihu | 60°C 6h |
| BAGEL TOAST | Tostiranje prepolovljenog peciva postavljenih sa prerezanom stranom prema gore na rešetku. | Rešetka sredini | TOAST 230 °CNivo zapečenosti 2 3 min 55 | |
| REHEAT ROAST | Podgrijavanje ostataka bez prekuhavanja. | Rešetka Donja | ROAST 160°C 10 min |
USING ONLY ONE DRAWER OF THE APPLIANCE
The appliance can prepare many recipes. Cooking times for the main food groups are listed in the "Cooking Guide" section. Recipes on the internet help you get familiar with the appliance.
DESCRIPTION
- Control panel
DESCRIPTION
- Control panel
DESCRIPTION
- Control panel
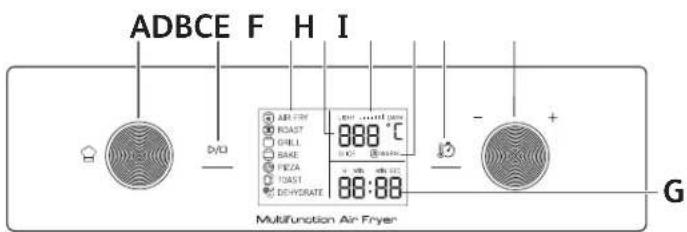
DESCRIPTION
- Control panel
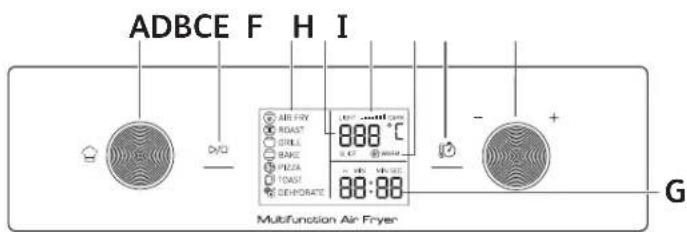
A. Rotary knob for food preparation menus
B. Start/stop button
C. Temperature/time button
D. Rotary knob for selecting temperature or food preparation time
- Digital display
E. Food preparation modes
F. Temperature display
| Gornji položaj za pečenje na vrući zrak i roštiljanje (načini AIR FRY (Pečenje na vrući zrak) i GRILL (Roštilj)) | 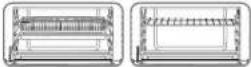 |
| Srednji položaj za pizzu, tost, pecivo i dehidraciju (načini PIZZA, TOAST (Tost) i DEHYDRATE (Dehidracija)) | 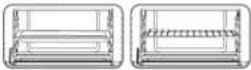 |
| Donji položaj za kuhanje i pečenje (načini ROAST (Pečenje), BAKE (Pečenje kolača i kruha) i REHEAT (Podgrijavanje)).Napomena: ako je riječ o piletini ili drugim većim namirnicama, rešetku je potrebno staviti u donji položaj. Ako je riječ o manjim namirnicama, košarica ili rešetka mogu biti u srednjem položaju. | 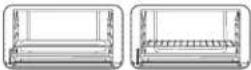 |

193
PREPARATION MODE
| Način Primjena | Predloženi | dodatak | Položaj dodataka | Postavljanje |
| [13X4] AIR FRY (Pečenje na vruči zrak) | Hranu kao što su krumpirki, kriške krumpira, pohani pileći medaljoni, pileća krilca možete ispeći s vrlo malo ili nimalo dodatnog ulja. | Košarica za pečenje na vrući zrak | Gornji °Ovisno o modelu: 2. košarica u sredni | 200°C 25 min |
| [16X33] ROAST enje) | Izgleda hrskavo izvana i savršeno pečeno iznutra. Rabite za pečeno povrće i meso, kao što su piletina, gove-dina, janjetina i svinjetina. | Rešetka + Pekač | Donji | 190°C 30 min |
| [180X4] GRILL tilj) | Ispecite meso i ribu na roštilju te popržite gornji sloj složenaca. | Rešetka Gornji | 200°C 10 min | |
| [17862] ROAST enje kolača i kruha) | Služi za pečenje kao klasična pečnica za tradicionalno pečenje slatkih ili slanih pita, quicheova, kolača, mulfina, peciva i souffleja. | Posuda na rešetki | Donji | 180°C 20 min |
| [258-7] PIZZA | Ispecite zamrznute ili domaće pizze. | Rešetka sredina | 220°C 15 min | |
| [30X2] TOAST t) | Zapecite kriške kruha, lisnato ti-jesto, tostirani sendvič i slaninu do željene razine zapečenosti. | Rešetka sredina | 230°C Razina zapečenosti 4 4 min 45 kriške 4 | |
| [17862] DEHYDRATE dracija) | Dehidrirajte meso, voće, pa čak i povrće. | Košarica za pečenje na vrući zrak | sredina °Ovisno o modelu: 2. košarica u Gornji | 60°C 6h |
| BAGEL (PECIVO) [2Y75] TOAST | Tostirajte polovice peciva kada ih stavite okrenute prema gore na žičanu rešetku. | Rešetka sredina | TOAST 230°C Razina zapečenosti 2 3 min 55 | |
| EAT [32X1] OGRIJA-JE) ROAST | Podgrijte ostatke hrane bez pečenja. | Rešetka Donji | ROAST 160°C 10 min |

USING ONLY ONE DRAWER OF THE APPLIANCE
The appliance can be used to prepare numerous recipes. The cooking times for main foods are listed in the "Food Preparation Guide" section. Online recipes will help you become familiar with the appliance.
- Plug the power cord into a wall outlet.
- Place food in the basket, on the rack, or in the baking pan.
Note: never exceed the maximum quantity indicated in the table (see the "Food Preparation Guide" section) as this may affect the quality of the final result.
- Place the basket, rack, or baking pan back into the appliance.
- To start food preparation, you can choose between the automatic food preparation mode or manual settings.
Using automatic food preparation modes
The appliance has pre-programmed menus that determine the temperature and time.
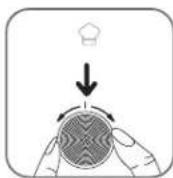
- Turn the rotary knob for menus to reach the desired food preparation mode (the modes are described in detail in the "Food Preparation Guide" section).
- To change the preset temperature, turn the selection knob to increase or decrease the temperature value. To adjust the preparation time, press the button to switch to TIME selection mode. Then turn the selection knob to increase or decrease the food preparation time.
- Start the preparation process by pressing the start button. Food preparation will begin. The screen will alternately display the temperature and the remaining preparation time.
Manual settings
• Temperature control
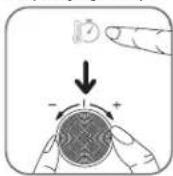
Press the button. Set the temperature by turning the selection knob to the desired temperature between 60 °C and 230 °C. The temperature setting depends on the mode. For AIR FRY / GRILL modes, the maximum temperature is 200°C.
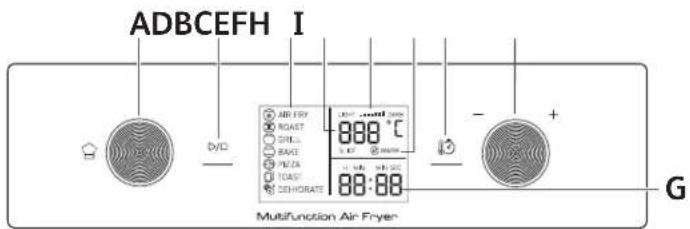
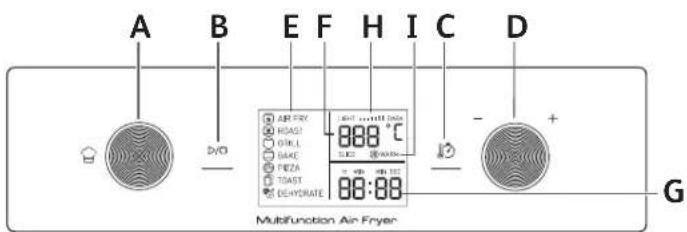
DESCRIPTION
- Control panel
DESCRIPTION
- Control panel
- Air Fry
- Roast
- Grill program
- Bake
- Pizza
- Toast
- Dehydrate
BEFORE FIRST USE
- AIR FRYER OVEN
- DESCRIPTION
- COOKING MODES
- BEFORE FIRST USE
- FIRST USE EMPTY
- GENERAL ADVICE
- THE DISHES
- COOKING TIME: ⏻
- SETTING THE ROTATING KNOB (SELECTOR)
- INTERNAL LIGHTING AND SOUND
- RACK POSITION
- USING THE APPLIANCE
- USING AUTOMATIC COOKING MODES
- MANUAL SETTINGS
- TOAST
- COOKING GUIDE
- KEEP WARM (AIR FRY MODE ONLY)
- TIPS
- MAKING HOME-MADE FRIES
- CLEANING
- STORAGE
- GUARANTEE AND SERVICE
- TROUBLESHOOTING
- KEEP WARM (WARM HOLD) (ONLY IN AIRFRYER MODE)
- USING ONLY ONE DRAWER OF THE APPLIANCE
- USING AUTOMATIC FOOD PREPARATION MODES
Brand : MOULINEX
Model : Easy Fry AL6058
Category : Cooker