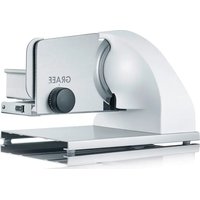
SKS901 - Slicer GRAEF - Free user manual and instructions
Find the device manual for free SKS901 GRAEF in PDF.

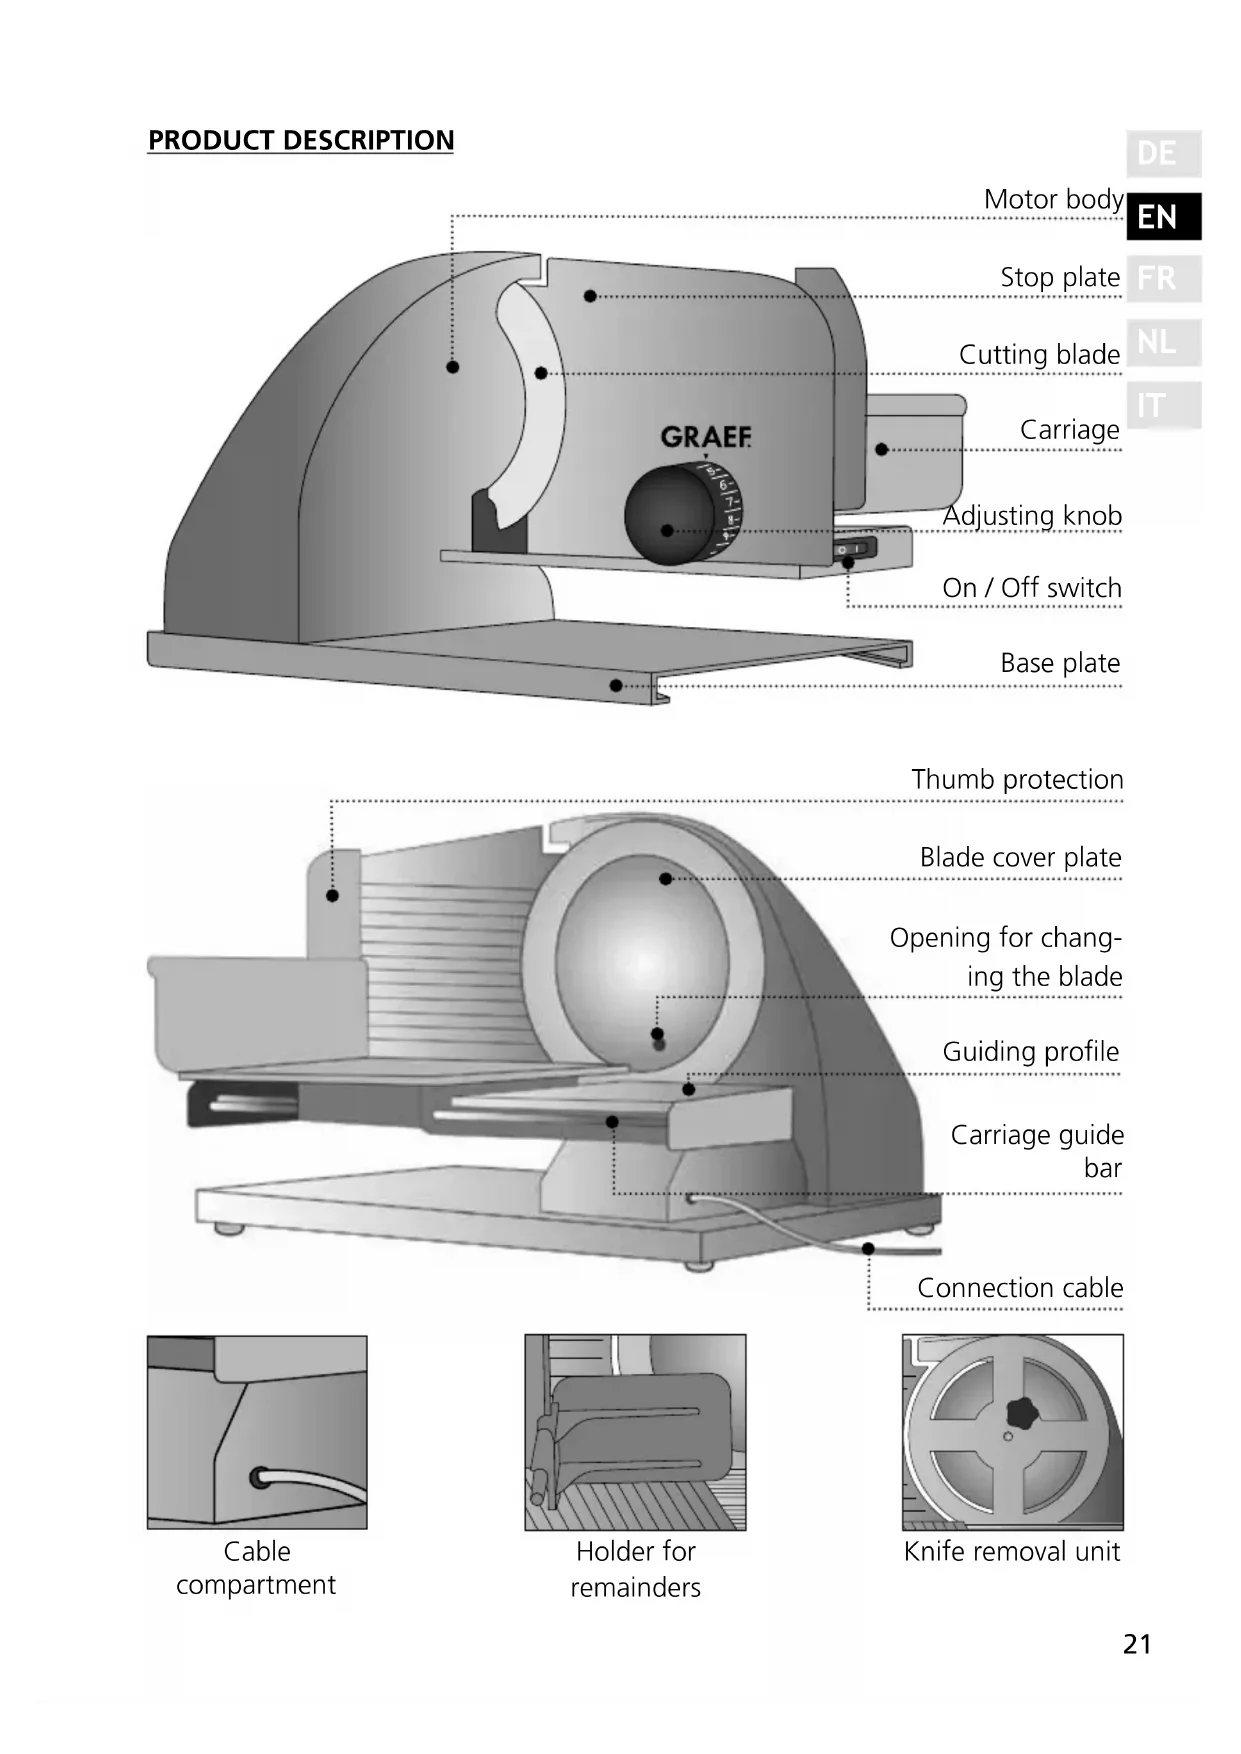


| Product Type | Professional Universal Slicer |
| Brand | Graef |
| Model | SKS901 |
| Power Supply | 230 V~, 50 Hz |
| Power | 185 W |
| Insulation Class | B |
| Intermittent Operation | 15 minutes of continuous operation, then 1 hour of cooling |
| Cutting Thickness | Continuously adjustable from very thin to thick |
| Suitable Foods | Bread, ham, sausage, cheese, carrots, cucumbers, fruits, vegetables |
| Unsuitable Foods | Frozen foods, bones, wood, metal, any hard object |
| Safety | Blade cover plate, thumb guard, blade removal device, emergency stop |
| Blade Material | Stainless steel |
| Country of Manufacture | Germany |
| Dimensions (approx.) | 30 x 25 x 25 cm (L x D x H) |
| Weight (approx.) | 5 kg |
| Included Accessories | Food pusher, blade removal device, screwdriver, recommended lubrication oil (ref. 195) |
| Cleaning | Hand-wash blade, do not put in dishwasher, housing cleanable with a damp cloth |
| Maintenance | Regular lubrication with Graef-Plastilube (ref. 195) on moving parts |
| Warranty | 2 years (according to applicable legislation) |
Frequently Asked Questions - SKS901 GRAEF
User questions about SKS901 GRAEF
0 question about this device. Answer the ones you know or ask your own.
Ask a new question about this device
Download the instructions for your Slicer in PDF format for free! Find your manual SKS901 - GRAEF and take your electronic device back in hand. On this page are published all the documents necessary for the use of your device. SKS901 by GRAEF.
USER MANUAL SKS901 GRAEF
natural_image
Red and white GRAEF electric shaver on a stand with glass of wine nearby (no text or symbols visible on device body)Graef- Allesschneider

natural_image
Top-down view of a kitchen grater with chopped carrots and vegetables, surrounded by fresh ingredients (no text or symbols visible)
natural_image
Assorted seafood and processed snacks arranged on a wooden cutting board, including sausages, deli meats, and olives (no text or symbols visible)natural_image
Simple line drawing of a mechanical component with a cable (no text or symbols)Kabelfach
natural_image
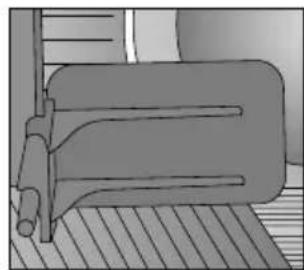
Illustration of a mechanical component with a cylindrical shaft and threaded rod, resting on a textured surface (no text or symbols)Restehalter
natural_image
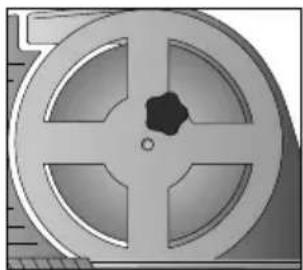
Close-up of a mechanical component with four circular features and central hole (no text or symbols visible)natural_image
Illustration of a hand using a tool to press or clean a circular object (no text or symbols visible)natural_image
Pure electrical circuit lines without any symbolsnatural_image
Diagram of a door with a doorbell and three oval cutouts, no text or symbols presentnatural_image
Simple diagram of a button labeled 'O' and 'I' inside a rectangular frame (no text or symbols beyond basic labels)natural_image
Diagram showing a hand pressing down on a device with a red upward arrow indicating motion (no text or symbols present)natural_image
Simple diagram of a switch mechanism with no text or symbolsnatural_image
Diagram of a door with a door handle and ventilation slots, no text or symbols presentnatural_image
Simple diagram of a button labeled 'O' and '1' inside a rectangular frame (no text or symbols beyond basic labels)natural_image
Simple diagram of a button with a circular indicator and 'I' label, no text or symbols presentnatural_image
Pure electrical circuit lines without any symbolsnatural_image
Illustration of a hand using a tool to insert or install a cylindrical component, with a red arrow indicating direction (no text or symbols present)natural_image
Illustration of a hand holding a tool inside a circular mechanical component with a red curved arrow indicating rotation (no text or symbols)natural_image
Mechanical assembly diagram showing a rotating wheel and a flat plate (no text or symbols)natural_image
Illustration of a hand operating a film reel with a circular head and screw base (no text or symbols)natural_image
Close-up of a hand operating a mechanical component with red arrows indicating direction (no text or symbols visible)natural_image
Illustration of a mechanical component with a central hole and four circular grooves (no text or symbols)natural_image
Hand holding a tool interacting with a mechanical component, showing red curved arrows indicating rotation (no text or symbols)natural_image
Illustration of a hand holding a film reel, no text or symbols presentnatural_image
Cross-sectional diagram of a mechanical component with internal structure (no text or symbols)natural_image
Illustration of hands assembling a mechanical gear component (no text or symbols visible)natural_image
Illustration of a hand operating a mechanical device with a circular component and a pointer (no text or symbols visible)natural_image
Illustration of a hand holding a black rectangular object with a circular ring, no text or symbols presentnatural_image
Illustration of a hand holding a mechanical component inside a circular housing (no text or symbols visible)natural_image
Illustration of a hand operating a mechanical device with a tool inserted (no text or symbols visible)natural_image
Illustration of a hand holding a paper labeled 'plasty' inside a mechanical component (no text or symbols on the diagram itself)natural_image
Close-up of a mechanical component with a red arrow indicating direction, partially enclosed by a hand holding a film reel (no text or symbols visible)natural_image
Hand turning a mechanical component with red arrow indicating rotation (no text or symbols)natural_image
Illustration of a hand reaching toward a circular object with a dot, no text or symbols presentnatural_image
Illustration of a hand holding a tool inside a circular mechanical component with a red curved arrow indicating rotation (no text or symbols)natural_image
Pure electrical circuit lines without any symbolsnatural_image
Close-up of a hand using a pipette to apply liquid onto a surface (no text or symbols visible)natural_image
Illustration of a hand holding a small object near a spherical object (no text or symbols visible)natural_image
Mechanical component with a circular housing and lever mechanism (no visible text or symbols)Artikel-Nr. 1009
natural_image
Black metal bracket component with angled cut (no text or symbols visible)Artikel-Nr. 1050
- MiniSlice-Aufsatz
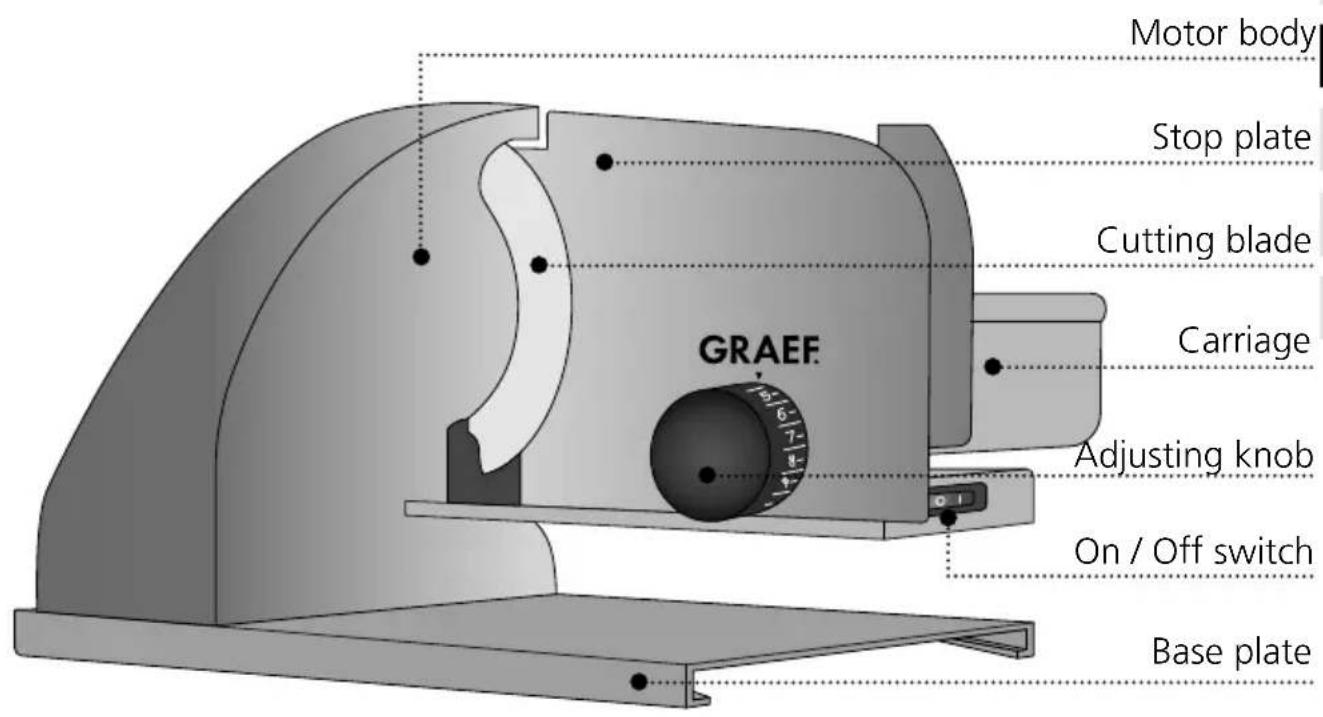
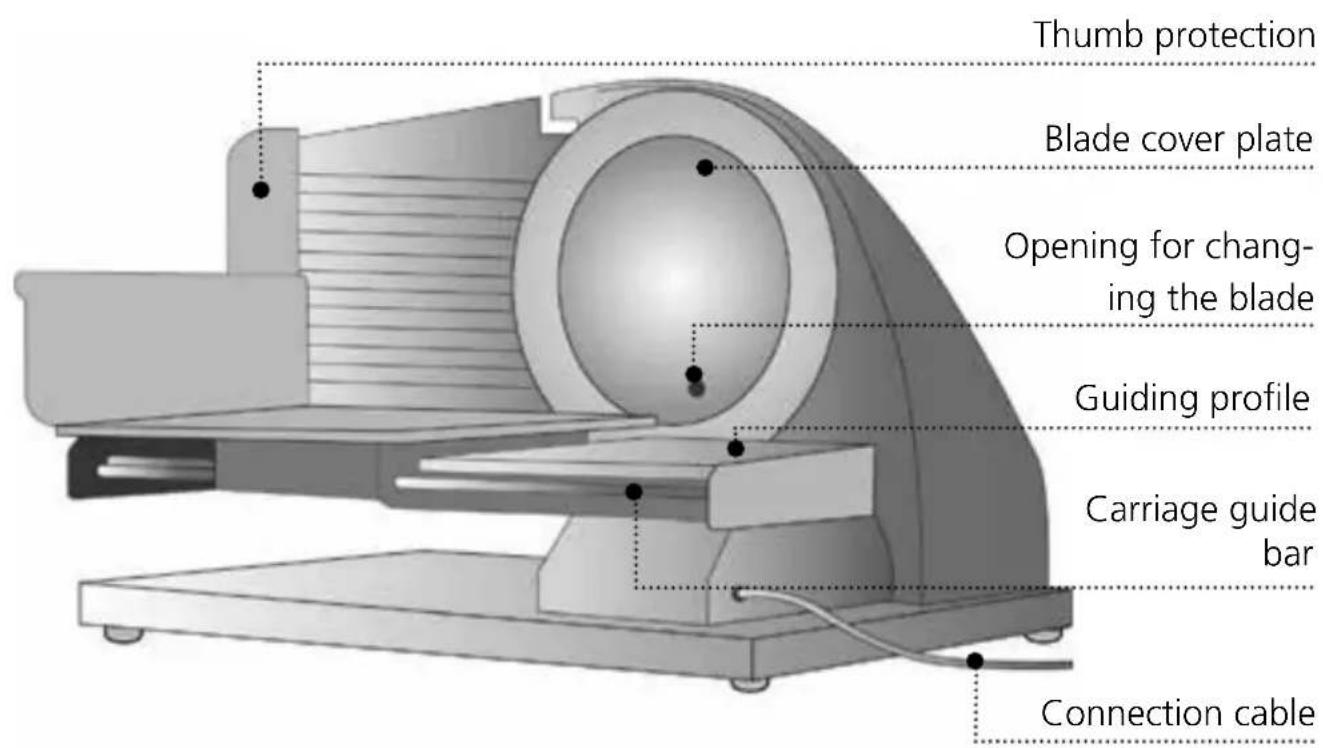
natural_image
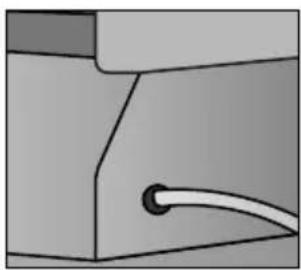
Simple line drawing of a mechanical component with a curved cable or wire (no text or symbols)Cable compartment
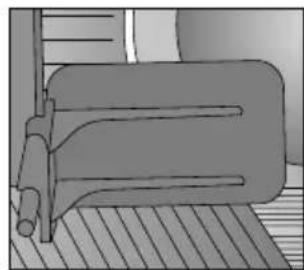
natural_image
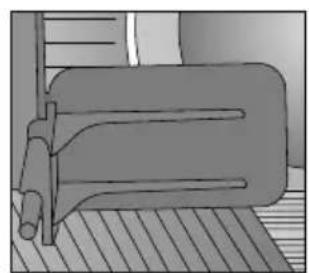
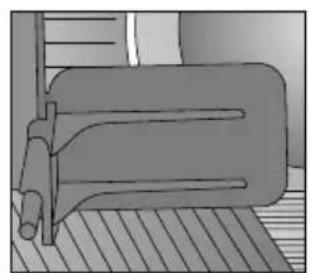
Illustration of a bed with a ladder and seat, placed on a striped floor (no text or symbols)Holder for remainders
natural_image
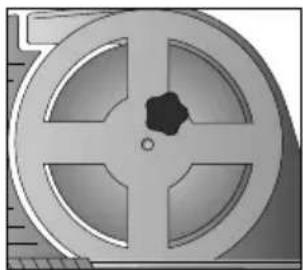
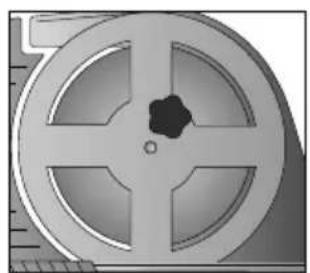
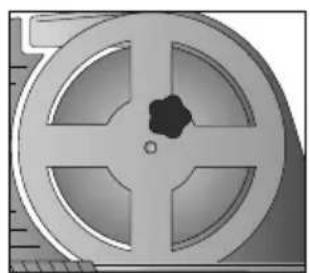
Close-up of a mechanical component with a central hole and four circular features (no text or symbols visible)Knife removal unit
PREFACE
Dear Customer, You have made a good choice by buying this professional universal cutter. You have purchased a recognised quality product. Thank you very much for buying our product. We wish you a lot pleasure with your new universal cutter.
INFORMATION ON THESE OPERATING INSTRUCTIONS
These operating instructions provide important information on putting into operation, safety, intended use and the care of the universal cutter (hereinafter referred to as unit). The operating instructions shall have to be available at the unit at all times. The instructions have to be read and applied by every person who deals with
- initial operation,
- operation,
- troubleshooting and/or
- or is instructed to clean the unit.
Keep these operating instructions and pass them on to the next owner along with the unit. These operating instructions cannot take into consideration every conceivable use. For further information or in case of problems which are not dealt with or not dealt with sufficiently in these instructions, please get in touch with Graef customer service or your specialist dealers.
WARNING MESSAGES
In these operating instructions, the following warning messages and signal words are used:

WARNING
This warns against potentially hazardous situations. Failure to observe this warning may result in serious injury or even death.
CAUTION
This refers to a potentially dangerous situation. In case of non-observation of this warning message, material damage may occur.
IMPORTANT!
This refers to application tips and other especially important information!
GENERAL SAFETY INSTRUCTIONS
This device conforms to the relevant safety regulations.
For safe handling of this unit, please observe the following safety instructions:
• However, incorrect handling may lead to injury and damage.
- Before using this device for the first time, check it for visible outer damages on the housing, connection cable and plug. Do not operate a damaged unit.
- If the connection cable is damaged, it must be replaced by the manufacturer, the after-sales service or a similarly qualified person in order to prevent danger.
- Repairs may be carried out only by an expert or by Graef after-sales service. Incorrect repairs may cause considerable hazards for the user. In addition, any claim under guarantee is forfeited.
- Defective parts must be replaced by original spare parts only. It is only with these parts that the safety requirements are met.
• This unit must not be used by children.
- Keep the unit and its connection cable away from children.
- This unit may be used by persons with reduced physical, sensory or mental abilities or deficiencies in experience and knowledge, if they are supervised or have been instructed in the safe use of the unit, and in addition understand the resulting dangers.
• Children must not play with this unit.
- The unit is not intended to be used with an external timer or a separate remove control.
- Always disconnect the connection cable by using plug; do not pull the connecting cable.
- Be careful not to let the power cord hang freely, this could cause the fall of the appliance.
- Packaging materials must not be used for playing. There is a danger of suffocation.
- In the absence of supervision and prior to assembly, disassembly or during cleaning, always disconnect the unit from the mains.
WARNING!
Mortal danger is caused by contact with energised cables or components!
Please observe the following safety instructions in order to prevent an exposure to electric current:
- Do not use the unit if the mains cable or plug are damaged.
- In this case, you should let the Graef Customer Service install a new connection cable before using the appliance again. This may be done also by an authorised specialist.
• - Do not open the housing under any circumstances. If live connections are touched or the electrical and mechanical construction are modified, there is the danger of electric shock.
- Never touch live parts. This can cause an electric shock and may cause even death.
INTENDED USE
This unit is not intended for commercial use. Use the universal cutter in closed-up rooms only. It can be used to cut bread, ham, sausage, cheese, carrots, cucumber, fruit, vegetables, et cetera. By no means cut hard matter, such as frozen foodl, bones, wood, sheet metal, or the like. Another or any exceeding use shall not be considered intended. This unit is intended for use in a household.
CAUTION!
The appliance can cause dangers, if is not used as intended.
- Use the unit exclusively as intended.
- Observe the procedures described in these operating instructions.
Claims of any kind caused by damage by unintended use shall be excluded. The risk shall be borne sole by the operator.
LIMITATION OF LIABILITY
All technical information, data and notes on the installation, the operation and the care contained in these operating instructions correspond to the last status before printing, and are rendered under consideration of our previous experience and to the best of knowledge. No claims may be derived from the particulars, illustrations and descriptions in these instructions.
The manufacturer shall not assume any liability for damage caused by:
• non-observation of the instructions
- unintended use
- incorrect repairs
- technical modifications
- use of unapproved spare parts
Translations shall be carried out to the best of knowledge. We shall not assume any liability for translation mistakes. The original German text only shall be binding.
TECHNICAL DATA
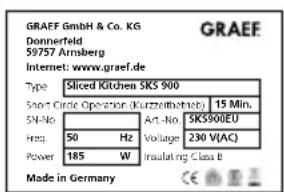
![GRAEY GmbH & Co. KG. Domeinfeld 90157 Kaimlerg Internal: www.graef.de Type: Wood Kitchen 183-183 Student: 124 (Student Development) 15 Mo. 20 Mo. Frag: 50 mg (Institute) [20 WACC] Power: 150 V Made in Germany](/content/2026/04/661120/images/129b47e27c6a077bf596c1596892601713c387cb6a1d3724b99b9bcc0eb72c8e.jpg)
AFTER-SALES SERVICE
If your unit is defective, please contact your specialist dealer or the Graef customer service on +49 (2932) 9703677 or write an e-mail to service@graef.de
IMPORTANT!
If possible, keep the original packaging during the guarantee period of the unit in order to be able to pack the unit correctly in case of guarantee.
UNPACKING
When unpacking the unit, proceed as follows:
- Remove the unit from the box.
- Remove the packaging parts.
- Remove any stickers on the unit (do not remove the type plate).

DISPOSAL OF THE PACKAGING
The packaging protects the unit against transport damage. The packaging materials are selected according to the environmental compatibility and disposal-related aspects and can therefore be recycled. The return of packaging into the material cycle saves raw material and reduces the waste volume. Dispose of the packaging material no longer needed at collection points for the “Green Dot” recycling system (in Germany).
IMPORTANT!
If possible, keep the original packaging during the guarantee period of the unit in order to be able to pack the unit correctly in case of guarantee.

DISPOSAL OF THE UNIT
At the end of its service life, this product cannot be disposed of in normal domestic waste. The symbol on the product and in the operating instructions point out to this fact. Reuse the materials according to their marking. With the reuse, recycling
or other forms of recycling of old equipment, you make an important contribution to the protection of our environment. Please ask your municipal administration for the disposal point.
REQUIREMENTS ON THE INSTALLATION LOCATION
For safe and fault free operation of the unit, the following requirements of the installation location have to be met:
- The unit has to be placed on a solid, flat, horizontal, and non-slipping surface with a sufficient weight-carrying capacity.
- Make sure that the unit cannot topple over.
- Choose the location in such a way that children cannot reach the blade of the unit or the supply lines.
- Never use the appliance outdoors, and always keep it in a dry place.
- The unit is not designed for installation in a wall or a built-in cupboard.
- Do not set up the unit in a hot, wet or moist environment.
- The socket has to be easily accessible so that the power cable can be removed easily in case of emergency.
CAUTION!
Observe the following safety instructions to prevent hazards and material damage:
- The very sharp blade can cut off body parts. Your fingers are especially at risk.
- For this reason never reach into the space between the stop plate and blade as long as the stop plate is not completely closed, i.e. set to ■ (below „0“).
ELECTRICAL CONNECTION
For safe and fault-free operation of the unit, the following requirements have to be met during the electrical connection:
- Before connecting the unit, compare the connecting data (voltage and frequency) on the type plate with those of your energy network. These details must correspond so that no damage occurs to the unit. In case of doubt ask your trained electrician.
- The socket has to be protected at least by a 10 amps circuit breaker.
- Make sure that the power cable is not damaged and is not laid across hot surfaces or sharp edges.
- The connecting cable must not be stretched tightly.
- The electric safety of the unit is ensured only when it is connected to a socket with protective conductor installed correctly. Operation on a socket without protective conductor is forbidden. If in doubt, let the house installation checked by a trained electrician. The manufacturer shall not assume responsibility for damage which has been caused by absent or interrupted protective conductor.
PRIOR TO FIRST USE
Prior to first use, use a moist cloth to wipe the blade of the machine in order to remove any production residue. See cleaning.
CAUTION!
- Sharp blade!
- Proceed with caution when wiping the blade.
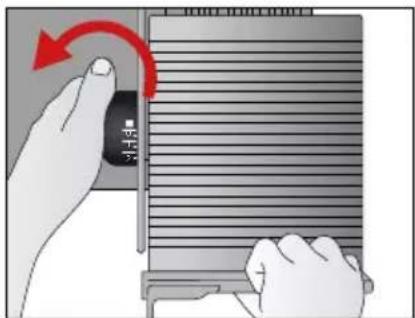
natural_image
Illustration of a hand inserting a device into a rack with a red arrow indicating rotation (no text or symbols)- Set the slicing thickness to below "0").
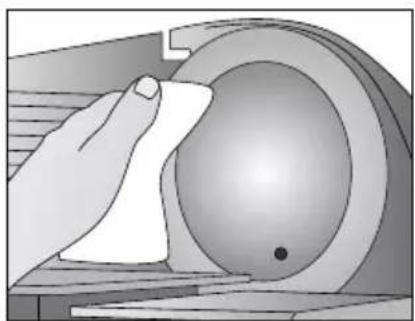
natural_image
Illustration of a hand using a tool to press or clean a circular object (no text or symbols visible)- Wipe the blade with the cloth.
INITIAL OPERATION
CAUTION!
Observe the following safety instructions to prevent hazards and material damage:
- Do not touch the blade with your fingers. This is very sharp and can cause several injuries.
- The rotating blade can cut off body parts.
- Your fingers are at risk, especially your thumb.
- Check whether the blade cover plate is attached to the machine properly.
USE OF THE UNIVERSAL CUTTER
IMPORTANT!
- The unit must not be used without the end-piece holder, unless the size and shape of the slicing material permits.
CAUTION!
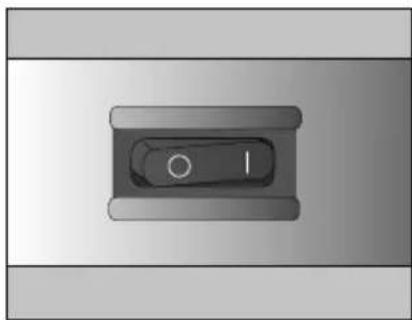
- Before inserting the plug into the socket, check whether the switch has been set to zero / off ☐ because otherwise the machine could starting running directly.
CAUTION!
- Sharp blade!
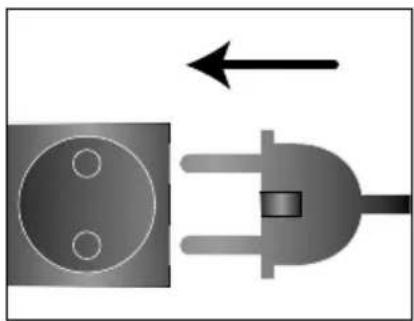
natural_image
Pure electrical circuit lines without any symbols- Insert the plug into the socket.
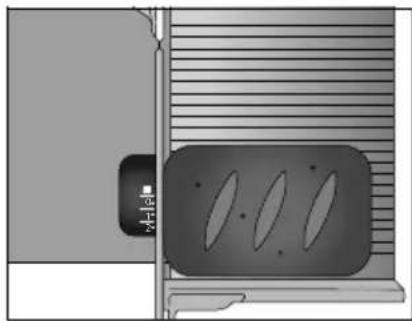
natural_image
Diagram of a door with three oval cutouts and a small labeled component on the left (no text or symbols)- Place the slicing material on to the slide.
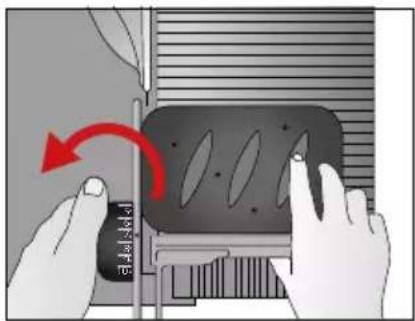
- Set the requested cutting thickness.
natural_image
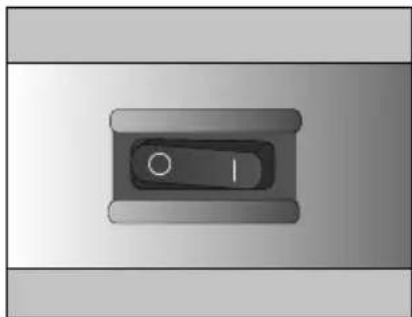
Simple diagram of a button labeled 'O' and 'I' inside a rectangular frame (no text or symbols beyond basic labels)- Switch the unit on □
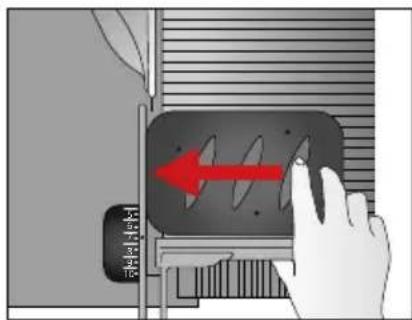
- Press the slicing material lightly to stop.
natural_image
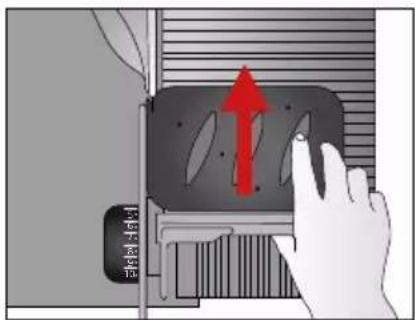
Diagram showing a hand pressing down on a device with a red upward arrow indicating motion (no text or symbols present)• Evenly move the slide towards the blade.
natural_image
Simple diagram of a switch mechanism with no text or symbols- Switch the unit off after use 🔒
TIP
- Soft slicing material (such as cheese or ham) can be cut best when chilled.
- Soft slicing material can be cut better when moved forward slowly.
- Cucumbers or carrots should be brought to uniform size before cutting.
USE OF THE UNIVERSAL CUTTER ONLY WITH END-PIECE HOLDER
The end-piece holder allows you to cut smaller slicing material, such as mushrooms or tomatoes. It has to be used as soon as the size and shape of the slicing material permits the use.
CAUTION!
- Sharp blade!
natural_image
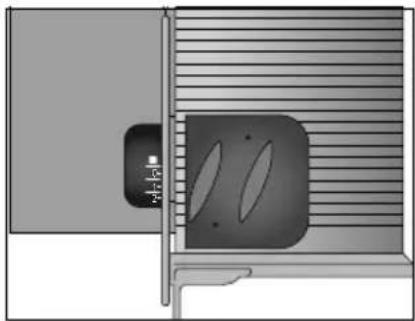
Diagram of a door with a slot and ventilation slots, no text or symbols present- Place the remaining slicing material on to the slide.
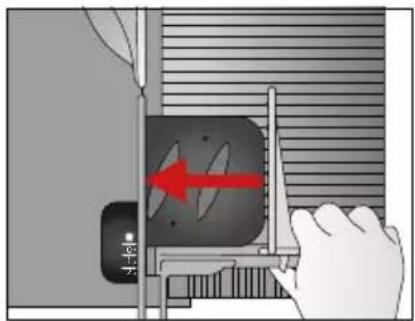
- Place the end-piece holder on the rear wall of the slide at the slicing material.
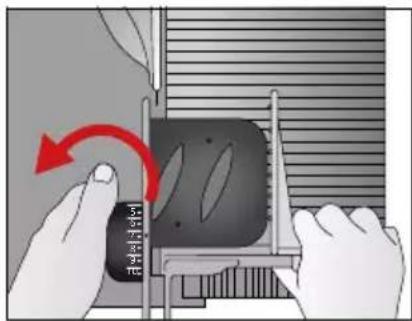
- Set the requested cutting thickness.
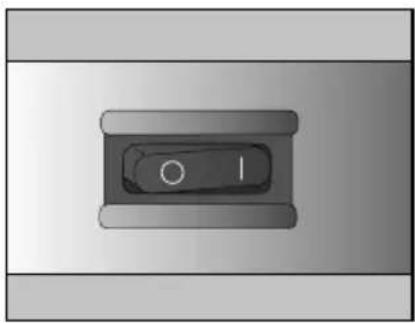
natural_image
Simple diagram of a button labeled 'O' and 'I' inside a rectangular frame (no text or symbols beyond basic labels)- Switch the unit on □
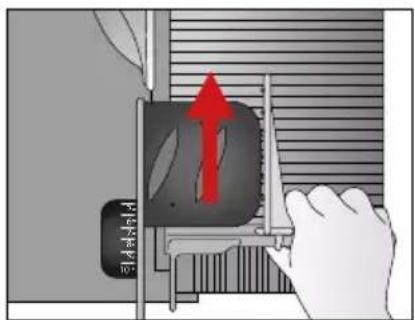
• Evenly move the slide towards the blade.
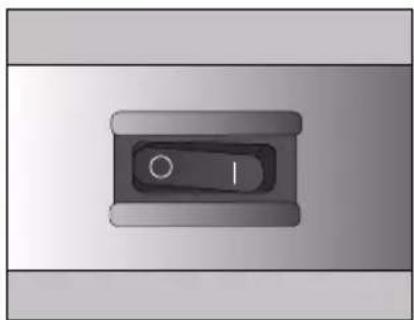
natural_image
Simple diagram of a switch with one circular mark and number 1 inside, no text or symbols present- Switch the unit off after use ☐.
IMPORTANT!
• After a continuous operation of 15 minutes, let the motor cool down for an hour.
CLEANING OUTSIDE
CAUTION!
Watch the following safety instructions before starting to clean the unit:
- Switch the unit off before cleaning and pull the power cord from the electric socket.
- Let the unit cool down before cleaning.
- Do not use any aggressive or abrasive detergents and no solvents.
- Do not scratch off stubborn soiling with hard objects.
- Do not put the unit in the dishwasher and do not use it under running water.
Use a soft and moist cloth to clean the outer surfaces of the unit. Use a mild detergent in case of heavy soiling.
VALUE PRESERVATION OF THE BLADES
For long-lasting sharpness and value retention of your Graef blade, we
recommend to clean it in regular intervals, especially after cutting up salted meat and/or ham. These foodstuffs contain salts, when they stay on the surface of the blade for a longer period of time, may even form a rust film (even on “stainless” steel). When cutting up slicing material which contains a lot of water, such as tomatoes or cucumbers, lacking or wrong (too “wet”) cleaning may also lead to a rust film on the blade surface. For this reason we recommend to use a moist cloth, and if necessary some washing-up liquid, to clean the blade directly after use.
IMPORTANT!
- Never put the blade into the dishwasher which may affect the sharpness and the corrosion resistance (salt attacks the blade). Handling the blade when loading and unloading from the dishwasher is another danger point.
From time to time, unscrew the blade and clean the unit on the inside, especially, when “juicy” slicing material (vegetables, fruit, roasts, et cetera) have been cut. Treat the blade with the upmost of care.
CLEANING AND MAINTENANCE
IMPORTANT!
Watch the following safety instructions before starting to clean the unit:
- Make sure that the unit is switched off and is not connected to the power supply.
- Check whether the stop has been closed (the blade edge must be covered).
- Do not use any aggressive or abrasive detergents and no solvents.
- Do not scratch off stubborn soiling with hard objects. Do not rinse the unit with water or immerse in water.
REMOVAL OF THE BLADE COVER PLATE
CAUTION!
- Sharp blade!
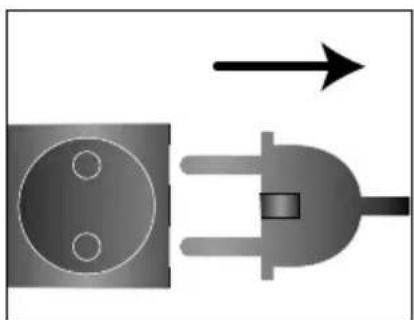
natural_image
Pure electrical circuit lines without any symbols- Remove the plug from the socket.
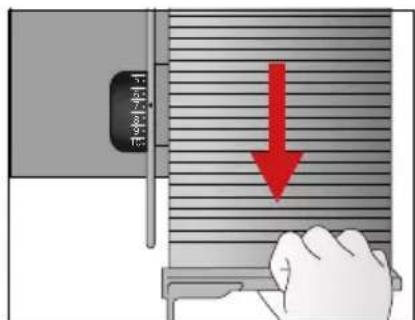
- Pull the slide right up to yourself (in direction of the On / Off switch).
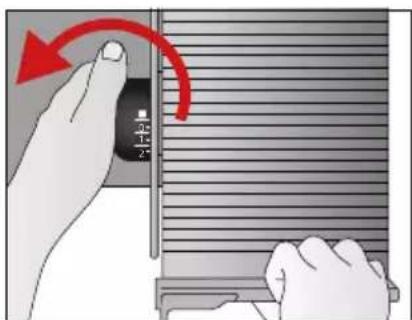
- Set the slicing thickness to ■(below "0").
natural_image
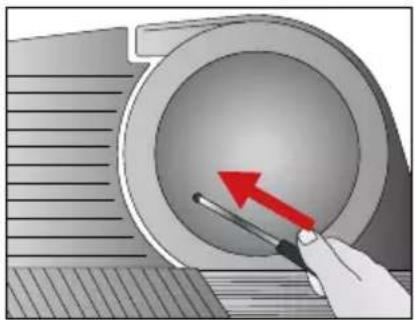
Illustration of a hand using a tool to interact with a circular mechanical component, showing a red arrow indicating direction (no text or symbols present)- Push a screwdriver or metal pin without edges into the opening.
natural_image
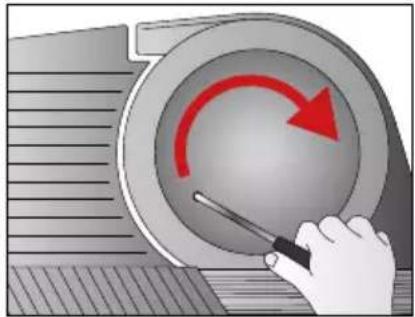
Illustration of a hand using a screwdriver to interact with a circular mechanical component, featuring a red arrow indicating rotation (no text or symbols present)- Turn the blade cover plate clockwise.
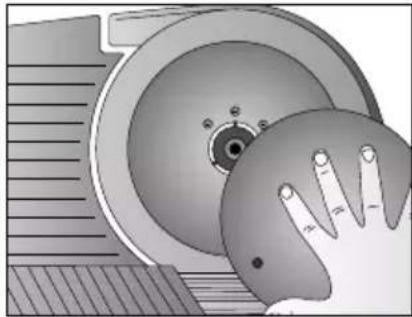
natural_image
Mechanical assembly diagram showing a hand pressing down on a circular component (no text or symbols visible)- Remove the blade cover plate.
REMOVING THE BLADE
CAUTION!
- Sharp blade!
- Proceed with caution when wiping the blade.
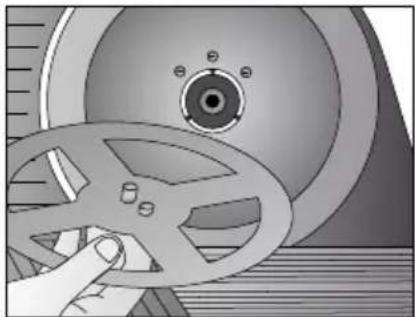
natural_image
Illustration of a hand operating a mechanical gear with a wheel and screw (no text or symbols)• Take the blade removal unit enclosed.
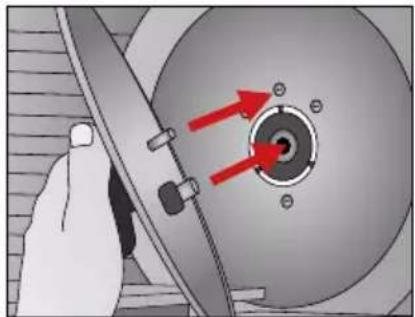
natural_image
Mechanical assembly diagram showing a hand operating a rotating component with red arrows indicating direction (no text or symbols)- Place the blade removal unit in the borehole for the blade bolt.
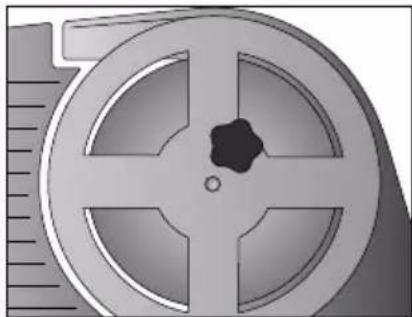
natural_image
Cross-sectional view of a mechanical component with no visible text or symbols- The blade removal unit is attached to the blade.
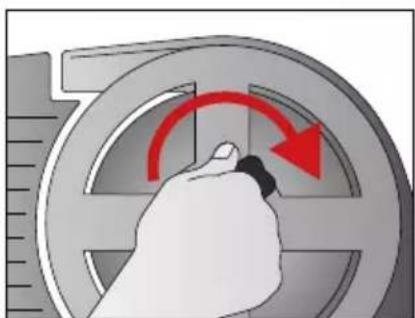
natural_image
Hand holding a mechanical component with red circular arrow indicating rotation (no text or symbols)- Tighten the knob of the blade removal device.
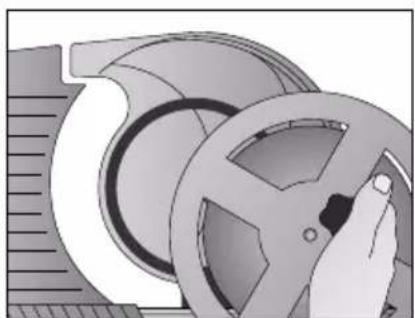
natural_image
Illustration of a hand operating a film reel (no text or symbols visible)• Pull of the blade removal device with the blade.
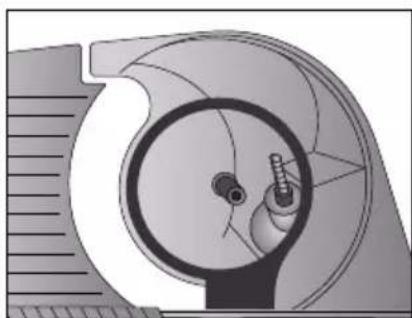
natural_image
Cross-sectional diagram of a mechanical component with internal structure (no text or symbols)- Undo the blade from the machine.
CAUTION!
- Sharp blade!
• Proceed with caution when wiping the blade.
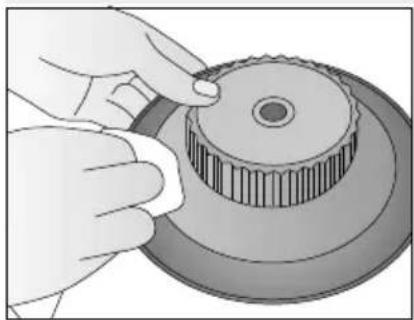
natural_image
Illustration of hands adjusting a mechanical gear component (no text or symbols visible)- Clean the inside of the blade using a damp cloth.
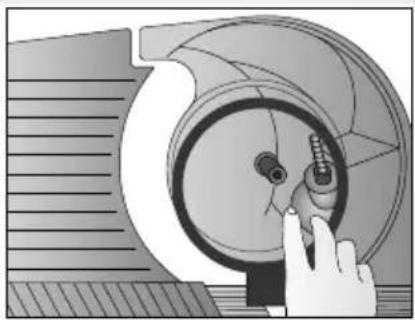
natural_image
Illustration of a hand operating a mechanical component with no visible text or symbols- Remove the black wiper ring from the machine.
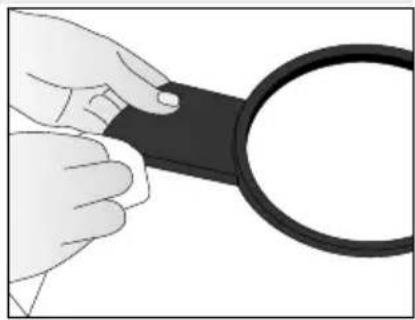
natural_image
Illustration of a hand holding a black cable with a circular ring (no text or symbols)- Clean the wiper ring using a damp cloth.
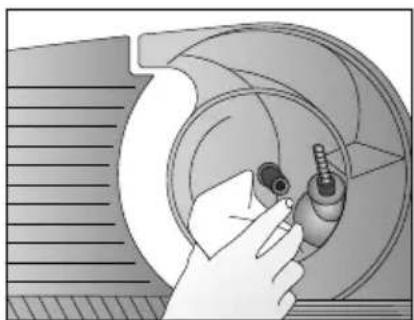
natural_image
Illustration of a hand holding a mechanical component inside a circular housing (no text or symbols visible)- Clean the inside of the machine using a damp cloth.
IMPORTANT!
- Never put the blade into the dishwasher which may affect the sharpness and the corrosion resistance (salt attacks the blade). Handling the blade when loading and unloading from the dishwasher is another danger point.
GREASING THE BLADE ON THE INSIDE
Regular greasing will increase the service life of your unit.
For this purpose, exclusively use Graef Plastiluben which is matched to our units. You can obtain them from our online shop on haushalt.graef.de/shop under article number 195.
CAUTION!
- Sharp blade!
- Proceed with utmost care when greasing the blade.
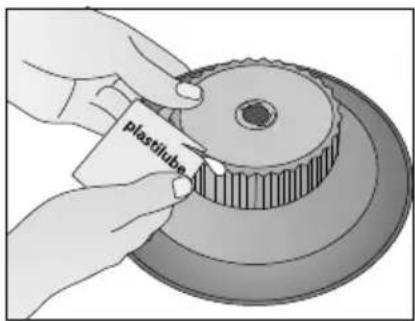
- Grease the gearwheel with Plastitube (article No. 195).
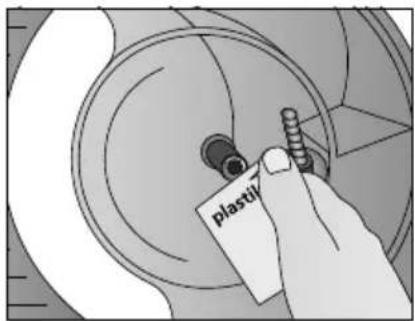
- Grease the blade bolt with Plastitube (article No. 195).
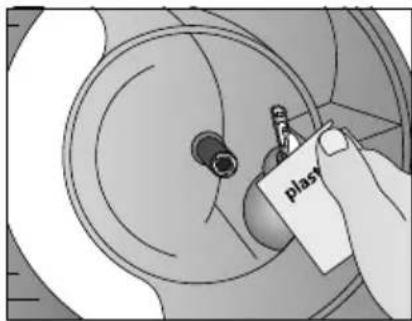
- Also grease the blade screw with Plastitube (article No. 195).
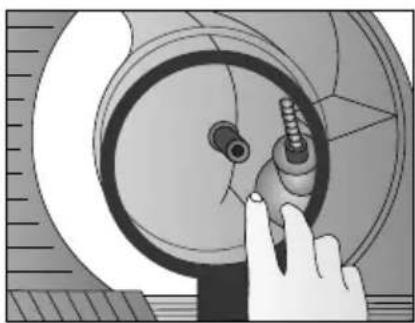
natural_image
Illustration of a hand adjusting a mechanical component with a tool (no text or symbols visible)- Place the wiper ring in the unit again.
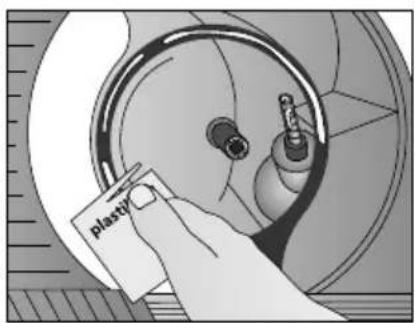
- Grease the wiper ring with Plastitube (article No. 195).
natural_image
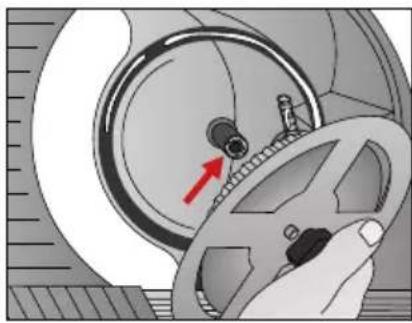
Close-up of a mechanical component with a red arrow indicating direction, no visible text or symbols- Return the blade with the blade removal unit back on to the blade bearing bolt.
natural_image
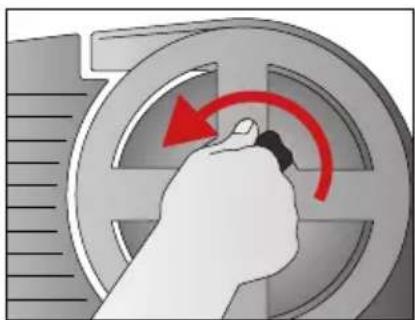
Hand turning a circular mechanical component with red arrow indicating rotation (no text or symbols)- Unscrew the blade removal unit; the knife is attached to the machine again.
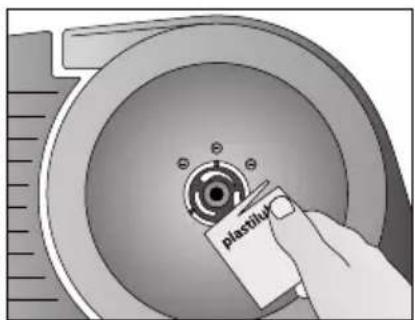
- Important! Grease the black pressure ring with Plastitube (article No. 195).
IMPORTANT!
Before screwing the blade cover plate back on the unit, the black pressure ring on the blade has to be greased with Plastilube (article No. 195) in order to prevent the following:
- Heating and deformation of the blade cover plate; in this case it can be unscrewed with difficulties only.
- When the machine runs for a longer period, the motor blows and does not start any more. The blade does not move any more.
- The machine turns warm; the wiper ring gets soft and deforms. For this reason, the machine has to be greased in regular intervals.
IMPORTANT!
Grease the machine in regular intervals:
- In case of frequent use, every two to three days.
- When the machine runs for 15 minutes every day, every fortnight.
- Use Graef Plastilube (Art. No. 195) only.
SCREWING ON THE BLADE COVER PLATE
CAUTION!
- Sharp blade!
natural_image
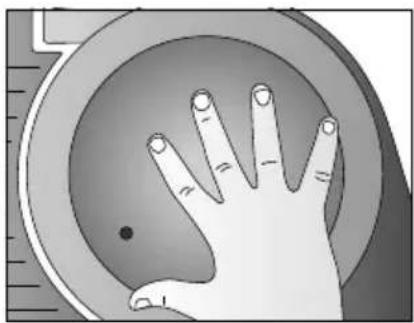
Illustration of a human hand reaching toward a circular object with a dot, no text or symbols present• Re-insert the blade cover plate.
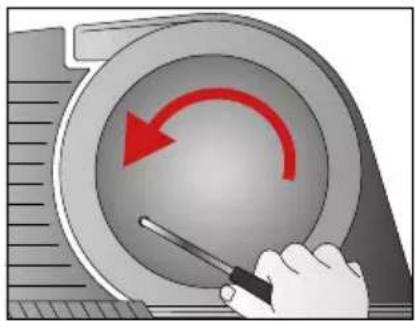
natural_image
Illustration of a hand holding a tool inside a circular mechanical component with a red curved arrow indicating rotation (no text or symbols)- Screw the blade cover plate really tight using the pin counter clockwise (left-hand thread).
IMPORTANT!
- Before restarting the machine, make sure that the blade cover plate is screwed on to the blade correctly.
- Switch on the machine only when the blade cover plate has been attached.
- When the blade is run without blade cover plate, it will audibly jerk.
- When the slide is set to the height of the blade, the blade will scratch along the side of the slide. It runs unstably on its axis and could drop down.
CAUTION!
- Before inserting the plug into the socket, check whether the switch of the machine has been set to zero / off ☐ because otherwise the machine could starting running directly.
GREASING THE SLIDE
CAUTION!
- For cleaning, fold up the slide and hold, otherwise there is the risk of bruising or squashing.
Please add some drops of resin-free oil on to the slide guidance once a month. Remove excess oil with a soft cotton cloth.
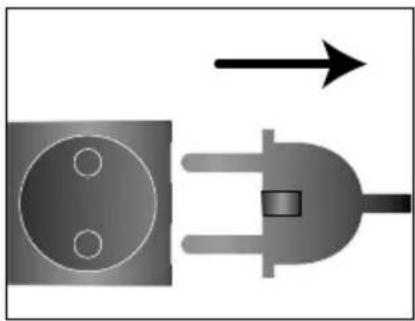
natural_image
Pure electrical circuit lines without any symbols- Remove the plug from the socket.
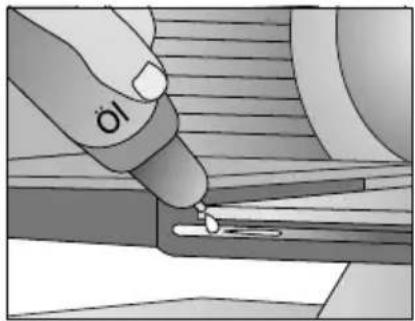
natural_image
Close-up of a hand using a tool to apply material or procedure on a mechanical component (no visible text or symbols)- Please add some drops of resin-free oil on to the slide guidance.
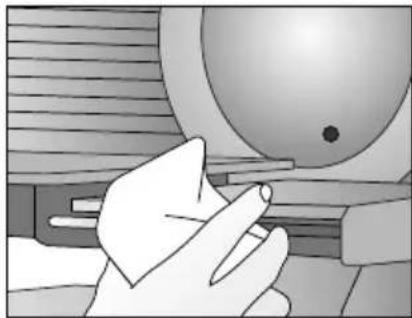
natural_image
Illustration of a hand operating a computer mouse with a screen (no text or symbols visible)- Use a cloth to remove excess oil.
DESCRIPTION DU PRODUIT
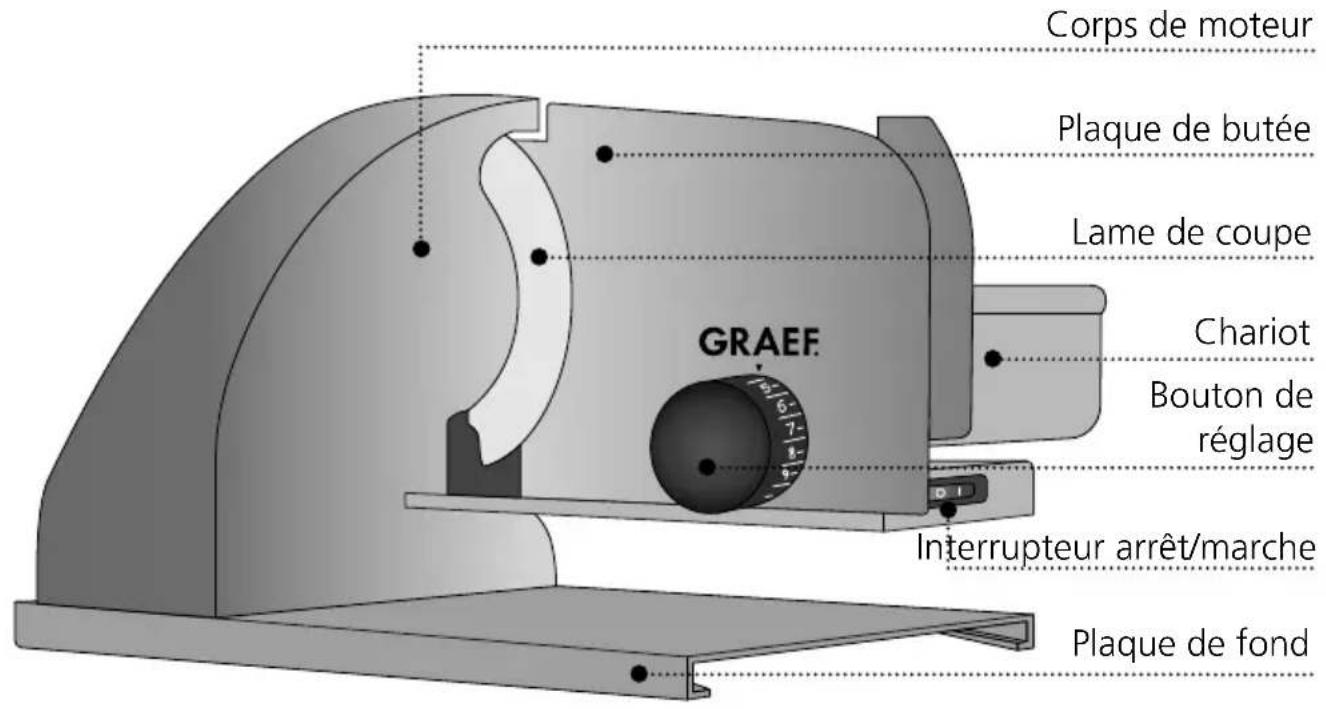
natural_image
Diagram of a presser machine with labeled components, showing internal structure and base plate (no text or symbols on the diagram itself)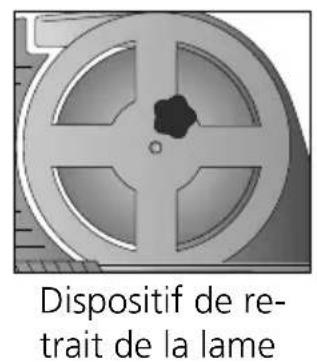
natural_image
Simple line drawing of a mechanical component with a cable (no text or symbols)Kabelvak
natural_image
Diagram of a mechanical component with a curved housing and shaft, resting on a striped floor (no text or symbols)Resthouder
natural_image
Close-up of a mechanical component with a central hole and four circular features (no text or symbols visible)Mesafneeminrich- ting
VOORWOORD
KLANTENDIENST
natural_image
Simple line drawing of a mechanical component with a cable (no text or symbols)Vano cavi
natural_image
Diagram of a mechanical component with a lever and base, placed on a textured surface (no text or symbols)Pressamerce
natural_image
Close-up of a mechanical component with a central hole and four circular features (no text or symbols visible)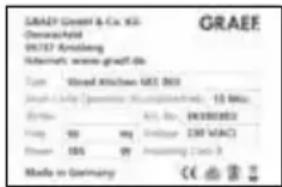


- Graef- Allesschneider
- PREFACE
- INFORMATION ON THESE OPERATING INSTRUCTIONS
- WARNING MESSAGES
- WARNING
- CAUTION
- IMPORTANT!
- GENERAL SAFETY INSTRUCTIONS
- WARNING!
- INTENDED USE
- CAUTION!
- LIMITATION OF LIABILITY
- TECHNICAL DATA
- AFTER-SALES SERVICE
- UNPACKING
- DISPOSAL OF THE PACKAGING
- DISPOSAL OF THE UNIT
- REQUIREMENTS ON THE INSTALLATION LOCATION
- ELECTRICAL CONNECTION
- PRIOR TO FIRST USE
- INITIAL OPERATION
- USE OF THE UNIVERSAL CUTTER
- TIP
- USE OF THE UNIVERSAL CUTTER ONLY WITH END-PIECE HOLDER
- CLEANING OUTSIDE
- VALUE PRESERVATION OF THE BLADES
- CLEANING AND MAINTENANCE
- REMOVAL OF THE BLADE COVER PLATE
- REMOVING THE BLADE
- GREASING THE BLADE ON THE INSIDE
- SCREWING ON THE BLADE COVER PLATE
- GREASING THE SLIDE
- DESCRIPTION DU PRODUIT
- VOORWOORD
- KLANTENDIENST
Brand : GRAEF
Model : SKS901
Category : Slicer