R810 - Radio Ruark Audio - Free user manual and instructions
Find the device manual for free R810 Ruark Audio in PDF.
User questions about R810 Ruark Audio
0 question about this device. Answer the ones you know or ask your own.
Ask a new question about this device
Download the instructions for your Radio in PDF format for free! Find your manual R810 - Ruark Audio and take your electronic device back in hand. On this page are published all the documents necessary for the use of your device. R810 by Ruark Audio.
USER MANUAL R810 Ruark Audio
Designed to be seen Engineered to be heard
R810
R810 High Fidelity Radiogram
Quick start guide
DA Hurtig start guide
natural_image
Simple line drawing of a rectangular room with horizontal striped walls and a vertical door, no text or symbols present.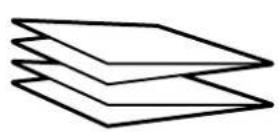

natural_image
Simple line drawing of a cord with two connectors and label '250VAC' below (no other text or symbols)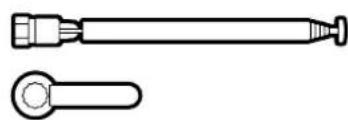
natural_image
Technical line drawing of two mechanical components: a cylindrical tool and a flanged tool (no text or symbols)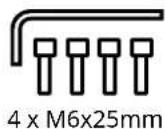
natural_image
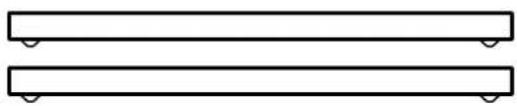
Two parallel horizontal rectangular shapes with small circular cutouts at the top (no text or symbols)EN Included items
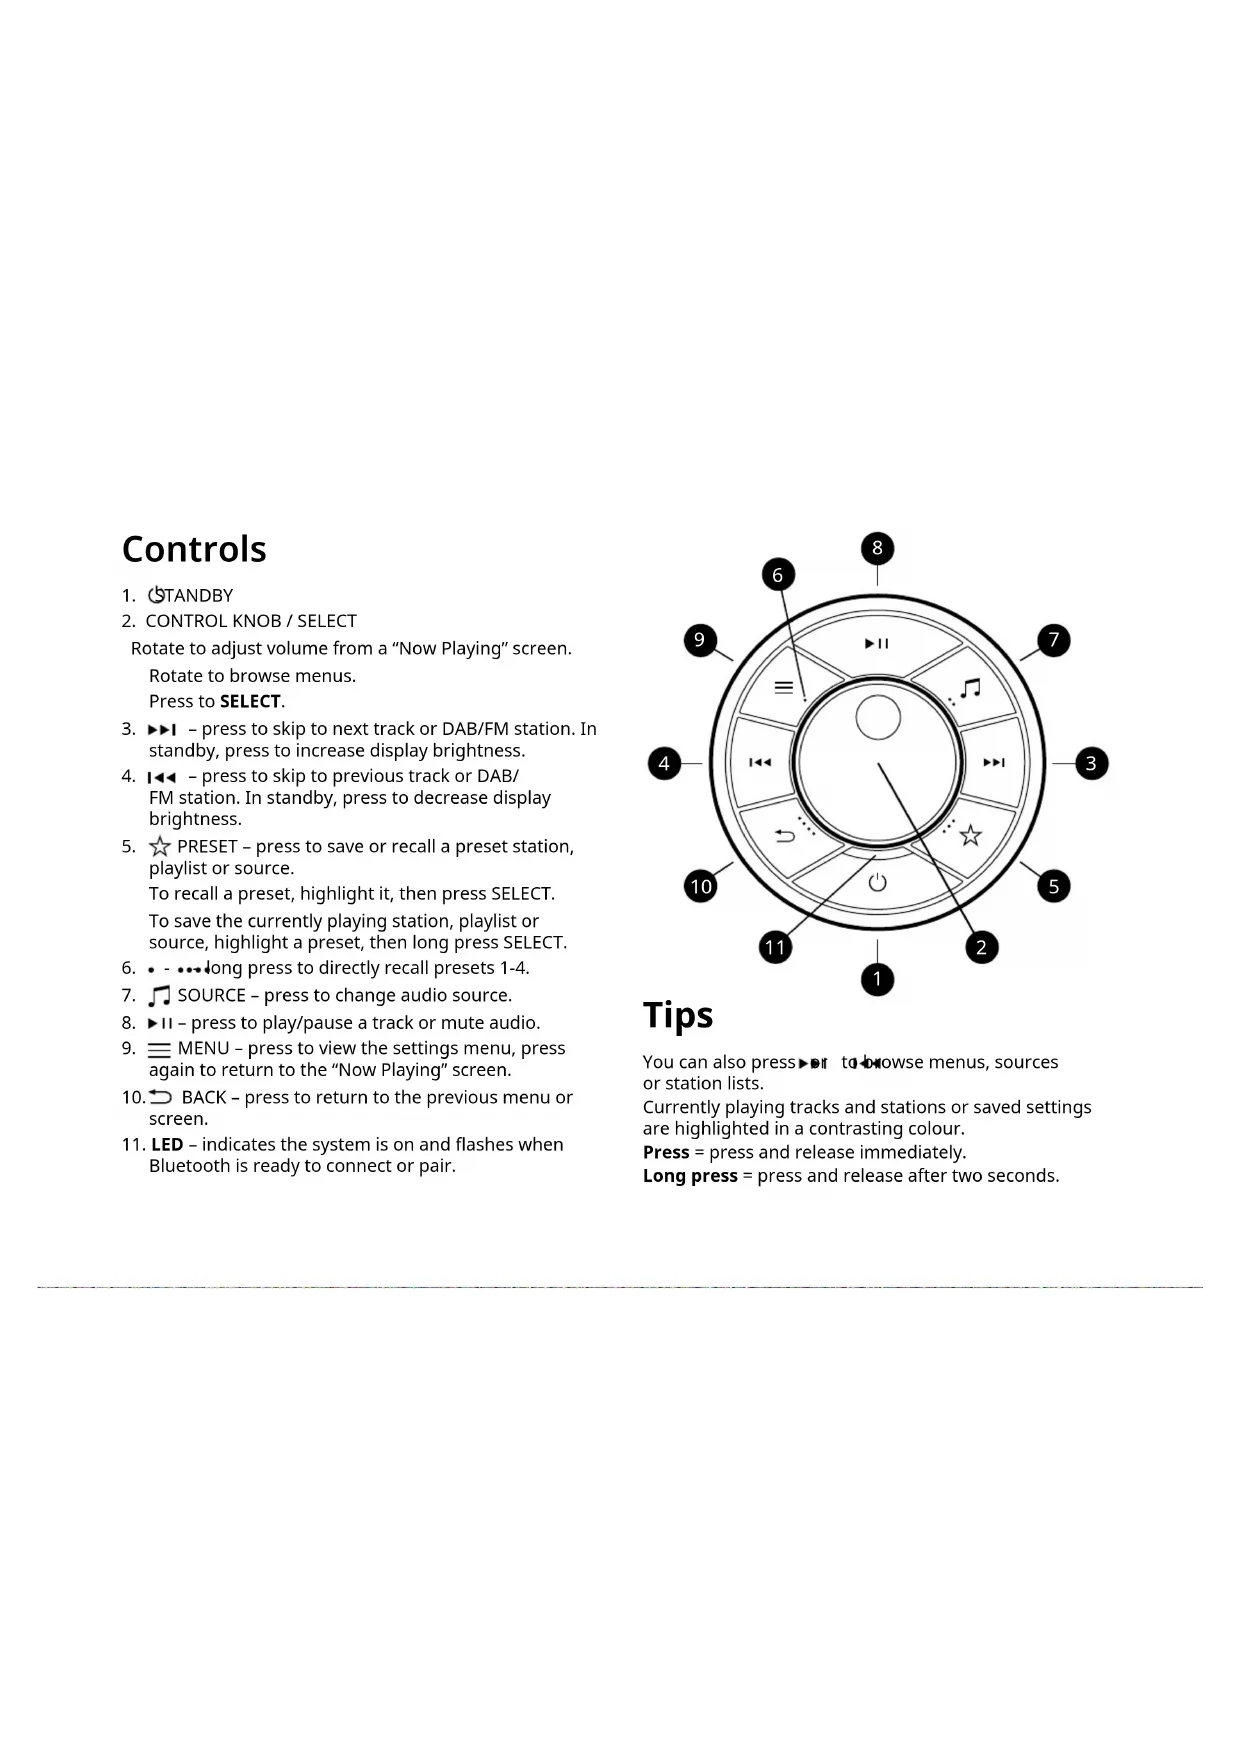
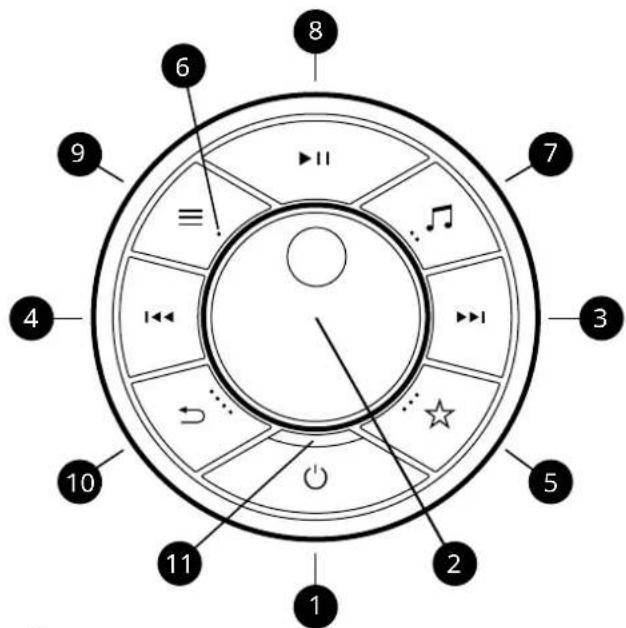
Rotate to adjust volume from a "Now Playing" screen.
Rotate to browse menus.
Press to SELECT.
- ▶▶I - press to skip to next track or DAB/FM station. In standby, press to increase display brightness.
-
- press to skip to previous track or DAB/FM station. In standby, press to decrease display brightness.
- ☆ PRESET – press to save or recall a preset station, playlist or source.
To recall a preset, highlight it, then press SELECT.
To save the currently playing station, playlist or source, highlight a preset, then long press SELECT.
- • - •••long press to directly recall presets 1-4.
- ♪ SOURCE – press to change audio source.
- ▶II - press to play/pause a track or mute audio.
- ≡ MENU - press to view the settings menu, press again to return to the "Now Playing" screen.
- BACK - press to return to the previous menu or screen.
- LED – indicates the system is on and flashes when Bluetooth is ready to connect or pair.
Tips
You can also press ▶ or to browse menus, sources or station lists.
Currently playing tracks and stations or saved settings are highlighted in a contrasting colour.
Press = press and release immediately.
Long press = press and release after two seconds.
Specifications
Amplifiers and drivers
2 x 100mm fibre composite bass/mid woofers
2 x 30mm silk dome tweeters
1 x 205mm subwoofer
200W 5-channel Class AB power amplifier
Stereo+ 3D audio
Digital and streaming audio
Apple AirPlay 2 (requires iOS 11.4 or later)
Google Chromecast built-in
Spotify Connect, TIDAL Connect, Internet radio
MP3 48kHz 320kbps
AAC/AAC-LC/HE-AAC/HE-AAC v2 96kHz 320kbps
FLAC, AIFF, WAV 32-bit 384kHz
Tuner
DAB, DAB+ and FM Tuner with RDS
75Ω F-type DAB/FM connector with telescopic aerial
Connectivity
Wi-Fi 802.11 a/b/g/n/ac/ax, WEP, WPA, WPA2
Ethernet RJ45 10/100Mbps
Bluetooth V5.1, aptX HD, SBC, AAC, BLE, A2DP
MM Phono input (RCA) 8mV
Line input (RCA) 2.3Vrms
Subwoofer mono output (RCA) 2.0Vrms
Optical input 24-bit 192kHz TOSLINK
HDMI ARC and eARC
USB 2.0, FAT32, 5W (5V 1A)
Power
AC mains: 100-240VAC 50/60Hz 400W
Fuse: T6.3AL 250V
Idle consumption: 20W
Standby consumption: 2W (USB not connected)
Dimensions
H152 x W1000 x D400mm (cabinet only, excluding stand or legs)
27.5kg
Specifications subject to change without notice.
Need more help?
For help with your product, please refer to the FAQ (Frequently Asked Questions) page in the support area of our website. For more information and complete user guides, visit www.ruarkaudio.com/support

Factory reset
If you accidentally select the incorrect language you can factory reset your radio by pressing and holding the STANDBY key for 10 seconds.
System updates
Ruark will occasionally release software updates to provide your system with the latest features, bug fixes and security patches.
These updates are Over-The-Air (OTA) so you won't need to do anything. To avoid possible damage to your system, please do not power off your system during an installation.
Setting up your system
1 Position your R810
To use your R810 on a sideboard or cabinet, fit the supplied bar legs.
To use your R810 on its stand, assemble the stand and carefully place the R180 on top, ensuring the rubber pads on the stand fit into the dimples on the underside of the cabiet.
Place your R810 on a level, firm surface, avoiding direct sunlight and sources of heat or damp.
2 Fit the DAB/FM aerial
Fit the telescopic aerial to the DAB/FM aerial socket on the back of your R810 and gently tighten it using the supplied spanner.
NOTE: you do not need to fit the DAB/FM aerial if you do not plan to listen to DAB or FM radio.
3 Connect to AC mains power
Plug the supplied mains power cord into the AC mains inlet socket on the back of your R810 and then plug it into an AC mains outlet.
If the supplied power cord does not fit your mains socket, contact your Ruark dealer.
4 Setup wizard
If you're powering up your R810 for the first time or it
has not yet been set up, it will launch the setup wizard to guide you through the setup.
Start by selecting your language and then follow the on-screen instructions to configure your R810 and connect it to your network.
To connect it to a network using Ethernet, simply plug a network cable into the RJ45 Ethernet port on the back panel.
To connect it to a Wi-Fi network, follow the setup wizard.
NOTE: if you connect your R810 to your network with Ethernet, the setup wizard will skip Wi-Fi setup.
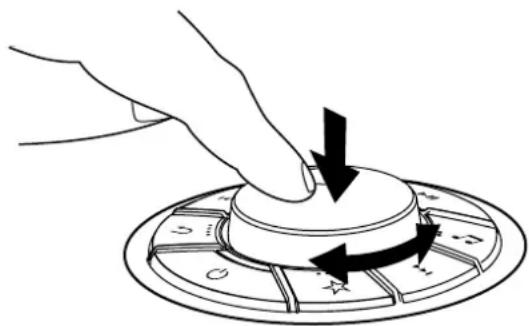
5 Navigate menus
To navigate menus and select options, rotate the CONTROL KNOB until your preferred option is highlighted, then press it to select the option.
natural_image
Hand pressing a button on a circular device with directional arrows (no text or symbols)6 Select a source
When your setup is complete, your R810 will display a list of the available sources. Select one and enjoy your music.
7 Adjust volume
Rotate the CONTROL KNOB from any "Now Playing" screen.
NOTE: rotating the CONTROL KNOB when a menu or track/station list is displayed will scroll through the list and not change the volume.
8 Pair your remote
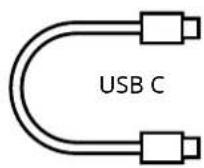
We recommend you first charge your remote for at least 10mins before first use. Simply plug the supplied USB-C cable into the socket on the side of your remote and the USB socket on the back of your R810.
To pair your remote, press MENU on the dial on your R810 and select System > Remote > Pair remote and follow the instructions.
You will need to hold your remote near your R810 and press and hold the skip back (1◀◀) and skip forward (▶▶keys on your remote until the LED on the remote flashes to indicate it is in pairing mode.
You will see a confirmation message on the R810 display when your remote has successfully paired.
NOTE: for more information refer to the User Guide supplied with your remote.
Streaming audio

Use your phone, tablet or computer as a remote control for Spotify. Go to spotify.com/connect to learn how.

For more details on TIDAL Connect, visit www.tidal.com.
Chromecast built-in
This system comes with Chromecast built-in. Stream all your favourite audio from any compatible device. For more info, visit www.google.com/chromecast/built-in.

Stream all your favourite audio using AirPlay from any compatible device.
For more info visit www.apple.com/airplay.
The range of supported streaming services may change without notice.
Safety information
- Read this user guide and follow all instructions, it will help you set up and operate your product properly.
- Heed all warnings and keep this user guide for future reference.
- Do not attempt to use a damaged device as this could result in a dangerous electric shock.
- Do not open the unit or remove any panels to expose the electronics. No user serviceable parts inside.
- Refer all servicing to qualified service personnel. Servicing is required when the device has been damaged in any way, such as when any power cord, or power plug is damaged, liquid has been spilled or objects have fallen into the device, the device has been exposed to rain or moisture, does not operate normally, or has been dropped.
- This device is intended to be operated ONLY from the AC voltages listed on the back panel or included AC mains adapter. Operation from voltages other than those indicated may cause irreversible damage to the device and void the product warranty.
- Ensure that the mains plug or mains connector into the unit is readily accessible in case disconnection from the mains is required.
- The AC mains adapter, mains plug, or mains connector must be removed from the socket to completely disconnect the system from AC mains power.
-
Do not place any naked flame sources, such as lighted candles, on or near the device. Do not install near any heat sources such as radiators, stoves, or other devices that produce heat.
-
Avoid exposure to extreme heat or cold.
- Only use attachments/accessories specified for this device. Make no modifications to the system or accessories. Unauthorised alterations may compromise safety, regulatory compliance, and system performance.
- Only use the supplied aerial or an approved replacement.
- To reduce the risk of fire or electrical shock, do not expose the device to rain or moisture. Do not expose this device to dripping or splashing, and do not place objects filled with liquids, such as vases, on or near the device. As with any electronic products, use care not to spill liquids into any part of the system. Liquids can cause a failure and/or a fire hazard.
- Disconnect this device from AC mains power during lightning storms or when unused for long periods of time to prevent damage to this device.
- To prevent risk of fire or electric shock, avoid overloading AC mains power outlets or extension cords.
- Long-term exposure to loud music may cause hearing damage. It is best to avoid extreme volume when using headphones, especially for extended periods.
- Do not install this device in a confined space. Always leave a space of at least 10cm around the device for ventilation and ensure that curtains or other objects never cover ventilation openings on the device.
Regulatory information

This device is labelled in accordance with European Directive 2012/19/EU concerning waste electrical and electronic equipment. This symbol indicates that the product or associated batteries should not be disposed of as general household waste. As with any electrical equipment, please dispose of it according to local tions.

CE COMPLIANCE INFORMATION
This product conforms to all EU Directive requirements as applicable by law. Hereby, Ruark Audio, declares that this device complies with the essential requirements and other relevant provisions of the European Radio Equipment Directive 2014/53/EU. You can download the full CE Declaration of Conformity at www.ruarkaudio.com/doc/R810doc.pdf

UK Conformity Assessment information
This product conforms to all UK Conformity Assessment regulations as applicable by law. You can download the full UKCA Declaration of Conformity at www.ruarkaudio.com/doc/R810UKCA.pdf
Guarantee
Register your product to get an extended three-year guarantee.
As standard, this product is guaranteed to be free from defects for a period of two years from date of purchase, but this is extended to three years if you register your product at www.ruarkaudio.com.
This guarantee remains valid providing this product has been treated with due care and attention.
Product failure through accidental damage, excessive wear and tear, negligence or unauthorised modification will void this guarantee.
If this product was purchased in the UK and it develops a fault, please contact the retailer from which it was purchased, or contact us directly via our website www.ruarkaudio.com/support.
For products purchased outside the UK the distributor in the country of purchase guarantees the product. For details, please contact the local Ruark distributor or outlet.
If returning this product, please ensure it is packed in its original packaging and a proof of purchase is included.
This guarantee in no way varies or removes the purchaser's statutory rights.
Errors and omissions excepted.
General care
- Clean with a soft, lint-free duster or slightly dampened cloth. Do not use wax sprays or other substances as these may damage the surface finish or impair performance.
- Do not expose your unit to direct sunlight, high humidity, dust, excessive vibration or extreme temperatures, all of which can affect the finish, performance and reliability of the unit.
- Recommended operating temp. range is 5°C to 40°C.
- Natural wood finishes will vary and lighten or darken with age, particularly when exposed to sunlight.
Copyright and trademarks
© Ruark Audio. All rights reserved. Ruark Audio, the Ruark logo, and other Ruark Audio marks are owned by Ruark Audio and may be registered. Ruark Audio assumes no responsibility for any errors that may appear in this manual and the information contained in it may change without notice.
Bluetooth® and associated logos are registered trademarks owned by Bluetooth SIG, Inc.
The Spotify Software is subject to third party licenses found here: www.spotify.com/connect/third-party-licenses
TIDAL terms and conditions: tidal.com/terms
Apple, AirPlay and the AirPlay logo are trademarks of Apple Inc., registered in the U.S. and other countries.
Google, Chromecast built-in, and other related marks are trademarks of Google LLC
All other trademarks are the property of their respective owners.
Knapper
Google Chromecast built-in
Spotify Connect, TIDAL Connect, internetradio
MP3 48kHz 320kbps
AAC/AAC-LC/HE-AAC/HE-AAC v2 96kHz 320kbps
FLAC, AIFF, WAV 32bit 384kHz
Tuner
Ethernet RJ45 10/100Mbps
Bluetooth V5.1, aptX HD, SBC, AAC, BLE, A2DP
MM Phono indqang (RCA) 8mV
Linjeindgang (RCA) 2,3Vrms
Subwoofer mono udgang (RCA) 2,0 Vrms
natural_image
Hand pressing down on a circular mechanical knob with directional arrows (no text or symbols)6 Vælg en kilde
Spotify Connect, TIDAL Connect, Internetradio
MP3 48kHz 320kbps
AAC/AAC-LC/HE-AAC/HE-AAC v2 96kHz 320kbps
FLAC, AIFF, WAV 32-bit 192kHz
Tuner
Ethernet RJ45 10/100Mbps
Bluetooth V5.1, aptX HD, SBC, AAC, BLE, A2DP
natural_image
Hand pressing down on a circular mechanical component with arrows indicating rotation (no text or symbols)www.spotify.com/connect/third-party-licenses
Google Chromecast built-in
Spotify Connect, TIDAL Connect, radio por Internet
MP3 48kHz 320kbps
AAC/AAC-LC/HE-AAC/HE-AAC 96kHz 320kbps
FLAC, AIFF, WAV 32-bit 384kHz
Sintonizador
Ethernet RJ45 10/100Mbps
Bluetooth V5.1, aptX HD, SBC, AAC, BLE, A2DP
natural_image
Hand pressing down on a circular control knob with directional arrows (no text or symbols)Google Chromecast built-in
Spotify Connect, TIDAL Connect, radio Internet
MP3 48kHz 320kbps
AAC/AAC-LC/HE-AAC/HE-AAC v2 96kHz 320kbps
FLAC, AIFF, WAV 32-bit 384kHz
Tuner
Ethernet RJ45 10/100Mbps
Bluetooth V5.1, aptX HD, SBC, AAC, BLE, A2DP
Entrée phono MM (RCA) 8mV
natural_image
Hand pressing a button on a circular device with directional arrows (no text or symbols)CE INFORMATIONS SUR LA CONFORMITÉ À LA CE
www.spotify.com/connect/third-party-licenses
Termes et conditions de TIDAL : tidal.com/terms
Suggerimenti
Google Chromecast built-in
Spotify Connect, TIDAL Connect, Radio internet
MP3 48kHz 320kbps
AAC/AAC-LC/HE-AAC/HE-AAC v2 96kHz 320kbps
FLAC, AIFF, WAV 32-bit 384kHz
Sintonizzatore
Ethernet RJ45 10/100Mbps
Bluetooth V5.1, aptX HD, SBC, AAC, BLE, A2DP
natural_image
Hand pressing down on a circular mechanical component with directional arrows (no text or symbols)Google Chromecast built-in
natural_image
Hand pressing a button on a circular device with directional arrows (no text or symbols)6 ソースを選択する
www.spotify.com/connect/third-party-licenses
Google Chromecast built-in
Spotify Connect, TIDAL Connect, Internet radio
MP3 48kHz 320kbps
AAC/AAC-LC/HE-AAC/HE-AAC v2 96kHz 320kbps
FLAC, AIFF, WAV 32-bit 384kHz
튜너
natural_image
Hand pressing down on a circular mechanical component with directional arrows (no text or symbols)6 소스 선택
www.spotify.com/connect/third-party-licenses
TIDAL 약관: tidal.com/terms
Google Chromecast built-in
Spotify Connect, TIDAL Connect, internetradio
MP3 48kHz 320kbps
AAC/AAC-LC/HE-AAC/HE-AAC v2 96kHz 320kbps
FLAC, AIFF, WAV 32-bit 384kHz
Tuner
Bluetooth V5.1, aptX HD, SBC, AAC, BLE, A2DP
MM Phono-ingang (RCA) 8mV
Lijningang (RCA) 2,3 Vrms
Subwoofer mono-uitgang (RCA) 2,0Vrms
Optische ingang 24-bit 192kHz TOSLINK
HDMI ARC en eARC
USB 2.0, FAT32, 5W (5V 1A)
Stroom
Netspanning: 100-240VAC 50/60Hz 400W
natural_image
Hand pressing a button on a circular device with directional arrows (no text or symbols)Google Chromecast built-in
Spotify Connect, TIDAL Connect, Internett-radio
MP3 48kHz 320kbps
AAC/AAC-LC/HE-AAC/HE-AAC v2 96kHz 320kbps
FLAC, AIFF, WAV 32-bit 384kHz
Tuner
Ethernet RJ45 10/100Mbps
Bluetooth V5.1, aptX HD, SBC, AAC, BLE, A2DP
MM Phono-inngang (RCA) 8mV
Linjeinngang (RCA) 2,3Vrms
Subwoofer mono-utgang (RCA) 2,0Vrms
Optisk inngang 24-bit 192kHz TOSLINK
HDMI ARC og eARC
USB 2.0, FAT32, 5W (5V 1A)
Strømforsyning
Strømnett: 100-240VAC 50/60Hz 400W
natural_image
Hand pressing down on a circular mechanical component with arrows indicating motion (no text or symbols)6 Velg en kilde
Google Chromecast built-in
Spotify Connect, TIDAL Connect, radio internetowe
MP3 48kHz 320kbps
AAC/AAC-LC/HE-AAC/HE-AAC v2 96kHz 320kbps
FLAC, AIFF, WAV 32-bit 384kHz
Tuner
Tuner DAB, DAB+ i FM z RDS
Ethernet RJ45 10/100Mbps
Bluetooth V5.1, aptX HD, SBC, AAC, BLE, A2DP
natural_image
Hand pressing down on a circular mechanical component with directional arrows (no text or symbols)6 Wybierz źródło
Regulamin TIDAL: tidal.com/terms
Google Chromecast built-in
DAB, DAB+ μα: FM ἐμ RDS
Ethernet RJ45 10/100Mbps
Bluetooth V5.1, aptX HD, SBC, AAC, BLE, A2DP
natural_image
Hand pressing a button on a circular device with directional arrows (no text or symbols)www.spotify.com/connect/third-party-licenses
natural_image
Hand pressing down on a circular mechanical component with arrows indicating rotation (no text or symbols)6 选择音源
www.spotify.com/connect/third-party-licenses
TIDAL 条款和条件:tidal.com/terms
Ruark, 59-60 Tailors Court, Temple Farm Industrial Estate.
Southend on Sea, Essex, SS2 5TH, UK www.ruarkaudio.com

GREAT BRITISH DESIGN
20231003.1