DH20 - Dehumidifier Duronic - Free user manual and instructions
Find the device manual for free DH20 Duronic in PDF.
User questions about DH20 Duronic
0 question about this device. Answer the ones you know or ask your own.
Ask a new question about this device
Download the instructions for your Dehumidifier in PDF format for free! Find your manual DH20 - Duronic and take your electronic device back in hand. On this page are published all the documents necessary for the use of your device. DH20 by Duronic.
USER MANUAL DH20 Duronic
Creative Consumer Products
natural_image
White DURONIC air purifier device with control panel and digital display (no visible text or symbols on body)DH20 Dehumidifier


DURONIC
Contents
English Manual 5
Do not use with wet hands

Follow the instructions

Disconnect from outlet after use

Do not open

Do not touch

Warning/Caution
Power Supply
• Always hold the plug and pull to disconnect from the wall outlet.
- Do not touch the plug with wet hands in order to avoid electric shock.
• The appliance must be plugged specifically into a 220v socket.
- Do not use with extension cords.
- Do not attempt to change the power cord.
- If there is an electrical problem, please contact your seller/original place of purchase.
Installation
• Always place the appliance on a solid, flat and stable surface.
• Make sure the water tank is correctly installed into its compartment.
- Do not put flammable or explosive objects near the appliance in order to avoid fire hazards.
Operation
- Children must be supervised near the appliance to ensure their safety.
- Elderly must be supervised near the appliance to ensure their safety in order to avoid a lack of oxygen near the air outlet.
- Do not put hands on the air outlet in order to prevent injury or malfunction.
- Do not put clothes on the air outlet in order to prevent malfunction.
- Do not push the appliance over or let the appliance be exposed to high impacts in order to prevent damage/malfunction.
• Do not put any heavy objects or cover the appliance.
Cleaning
- Do not pour water into the appliance, always use a damp cloth.
- Clean the air filter regularly with a damp cloth and mild cleaning fluid to avoid dust build-up.
- Do not put chemicals on the appliance in order to avoid fire.
DURONIC
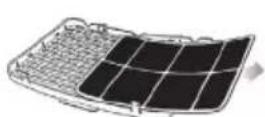
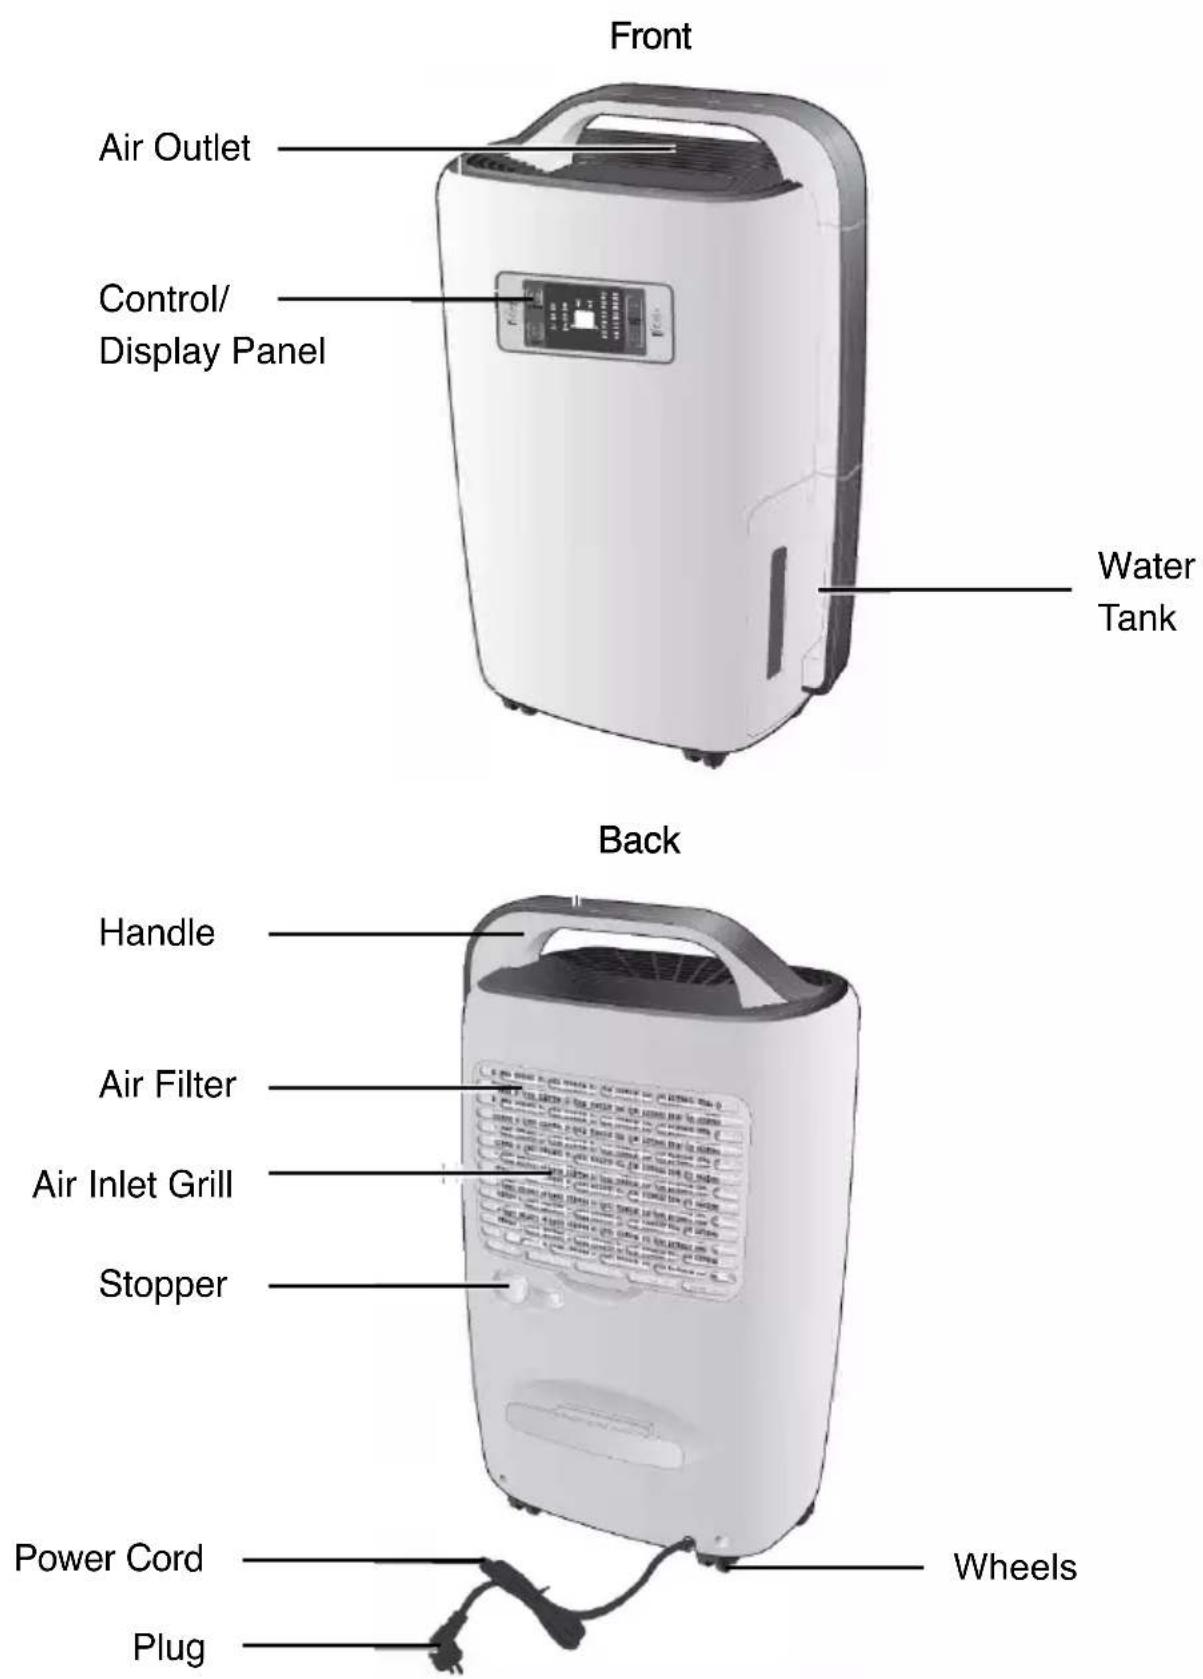
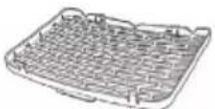
Parts List
text_image
Front Air Outlet Control/ Display Panel Water Tank Back Handle Air Filter Air Inlet Grill Stopper Power Cord Plug WheelsControl & Display Panel
text_image
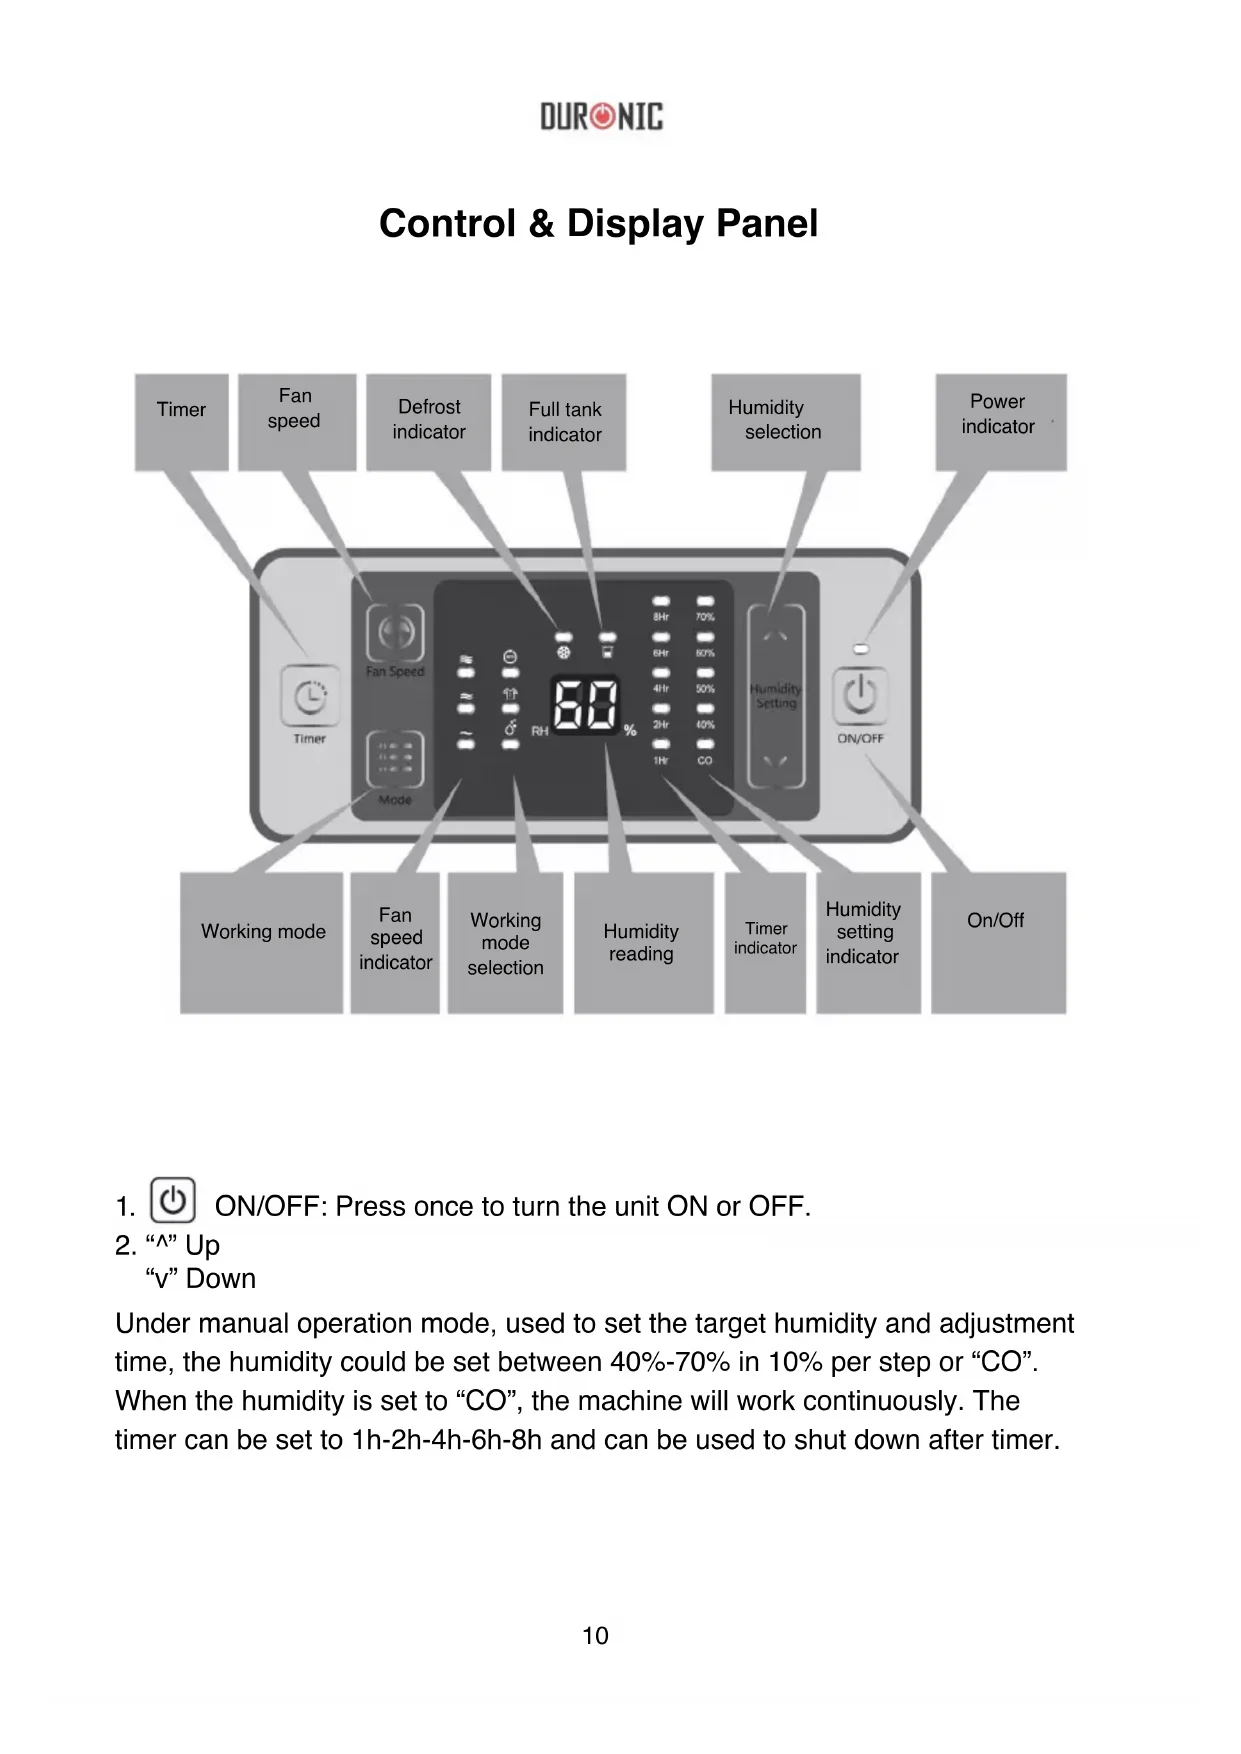
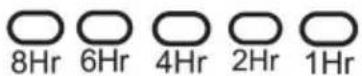
Timer Fan speed Defrost indicator Full tank indicator Humidity selection Power indicator Timer Fan Speed Mode 80% 8Hr 70% 6Hr 60% 4Hr 50% 2Hr 40% 1Hr CO Humidity Setting ON/OFF Working mode Fan speed indicator Working mode selection Humidity reading Timer indicator Humidity setting indicator On/Off- ON/OFF: Press once to turn the unit ON or OFF.
- “^” Up “v” Down
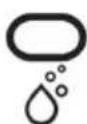
Under manual operation mode, used to set the target humidity and adjustment time, the humidity could be set between 40%-70% in 10% per step or “CO”.
When the humidity is set to “CO”, the machine will work continuously. The timer can be set to 1h-2h-4h-6h-8h and can be used to shut down after timer.
DURONIC
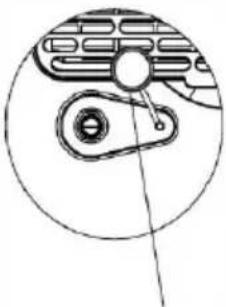
Note: A keylock program is designed for this unit, press “^” and “v” at the same time for 2 seconds and all the keys on the panel will be locked. To release the lock, repeat the same action.
-
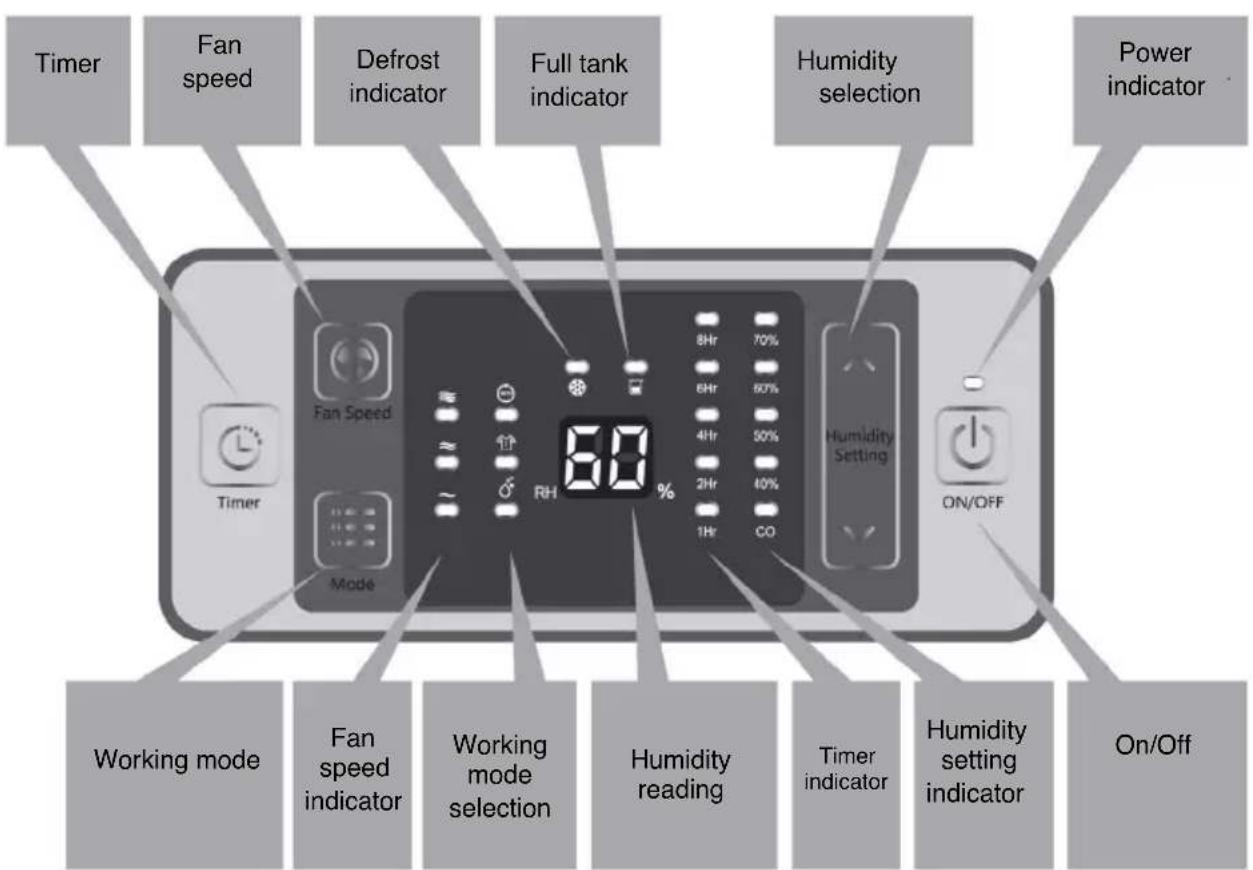
Key: Used to change the different working modes, press once to change the mode among automatic dehumidifying - clothes drying and dehumidifying.
-
Key: Used to change the fan speed from high, medium and low.
Note: In automatic mode, this key is invalid.
- key: Used to set the timing shutdown. To use, please read the operation instructions.
LED Indicator
-
Fan speed indicator: When the unit runs at high speed, “ ” will be on. When the unit runs at medium speed, “ ” will be on. When the unit runs at low speed, “ ” will be on.
-
Working mode indicator: When the unit works at different modes, the relative indicator will be on:

- Defrosting indicator:
When the unit begins to defrost, "

"will be on.
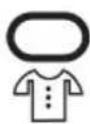
- Water tank full indicator:
When the water tank is full, the unit will go into standby mode. flash at a high frequency.

will begin to
- Humidity setting indicator:
When you set the humidity, the corresponding indicator lights will appear:
- Timing shutdown:
When you set the time, the corresponding indicator lights will appear:
- Operating Indicator:
When you turn the appliance on, the indicator will stay on. When you turn the appliance off, the indicator will slowly flash before turning off completely.
Before Use
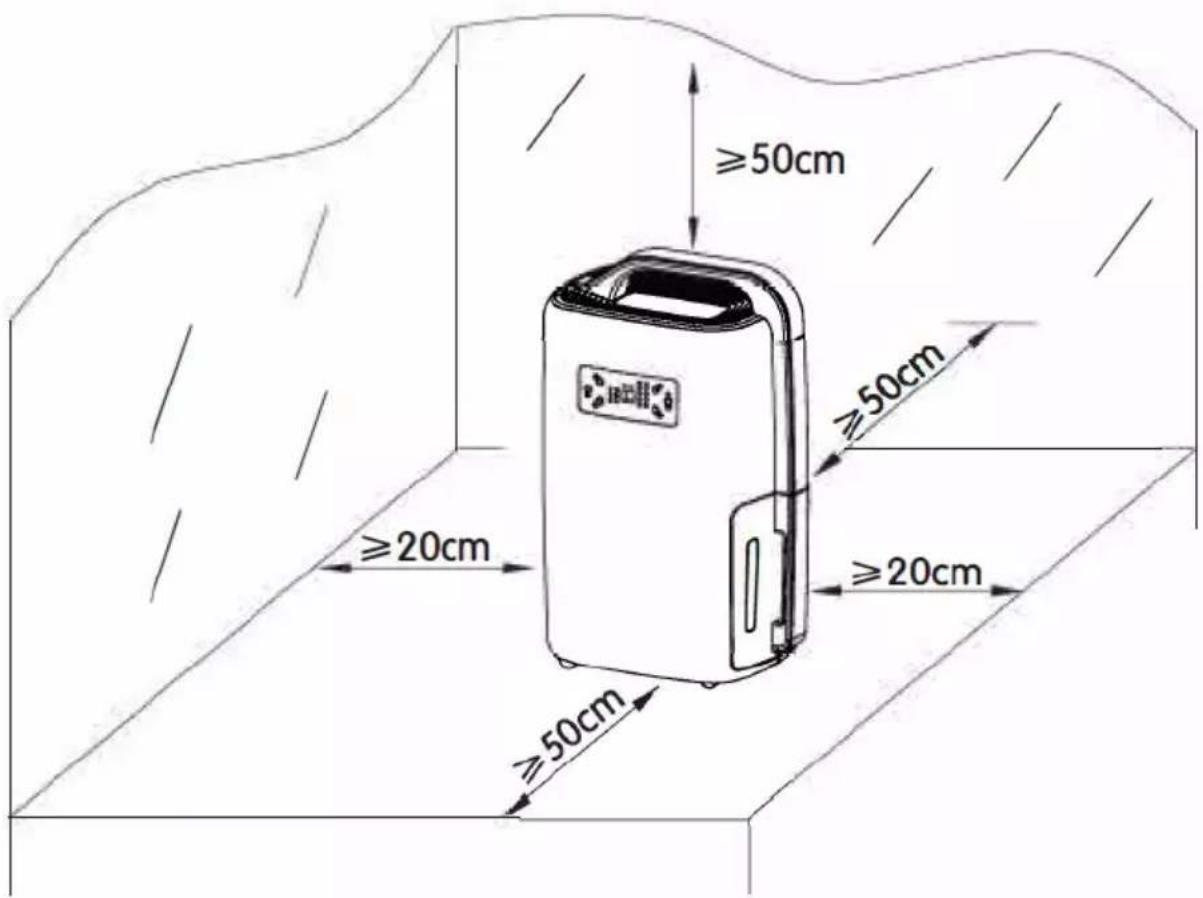
- Place the unit in a suitable location for best operating conditions.
text_image
≥50cm ≥20cm ≥50cm ≥20cm ≥50cm- Please make sure your household voltage corresponds with the rating label of the dehumidifier.
- Check and make sure the inlet and outlet are not blocked by other objects.
- If you wish to use the dehumidifier for a long period of time, use the drainage pipe, so you do not have to continuously empty the water tank.
natural_image
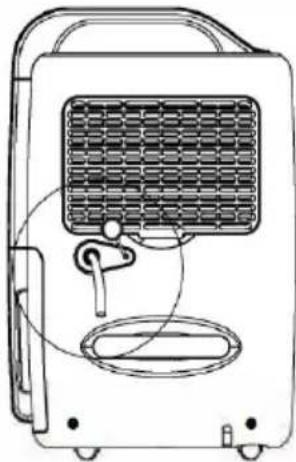
Line drawing of a portable air conditioner unit with ventilation grille and control panel (no text or symbols)Figure 1
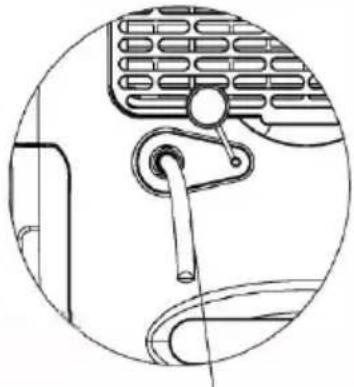
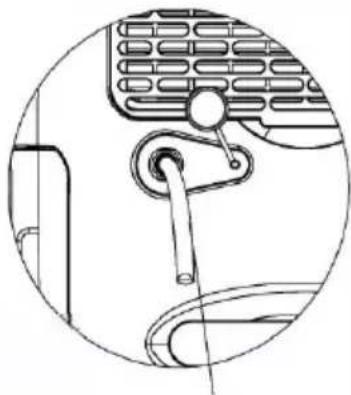
text_image
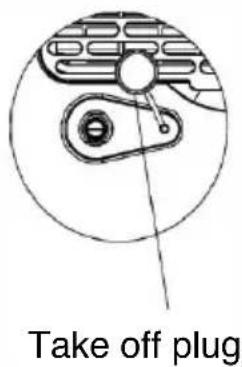
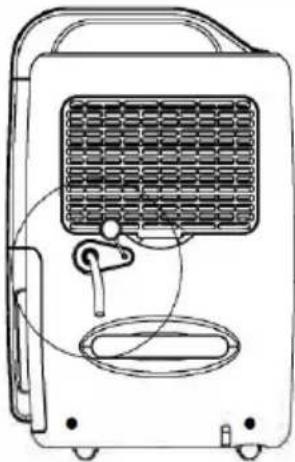
Take off plug
natural_image
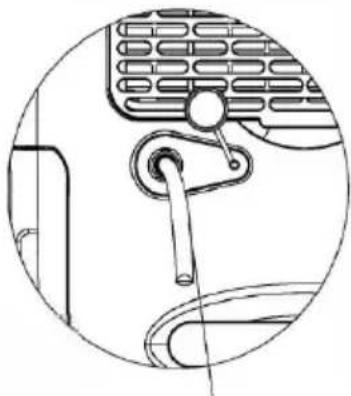
Line drawing of a portable air conditioner unit with ventilation grille and earplugs (no text or symbols)Figure 2

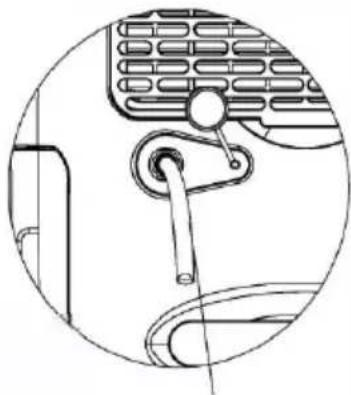
natural_image
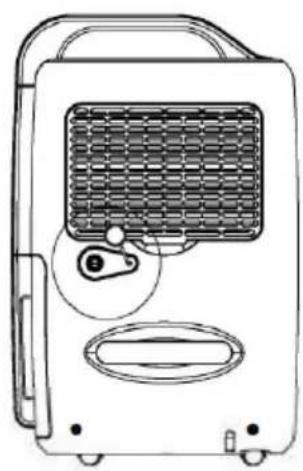
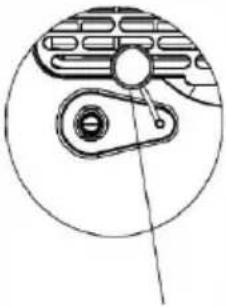
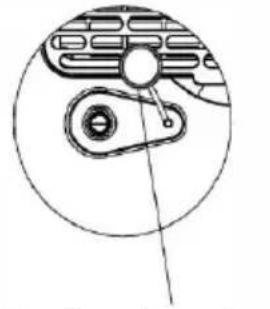
Technical line drawing of a mechanical component with no visible text or symbolsPlug drainage pipe with 14mm inner diameter in the hose connector
Note: Gently stretch the drainage pipe if it is squashed or twisted, otherwise drainage will be restricted and the unit will not work normally. During the operation, drainage pipe should never be in a higher position than the hose connector.
How To Use
- ON/OFF: Press once to turn unit ON or OFF.
a. Press "ON/OFF" once and the unit will begin to work.
b. Press "ON/OFF" once again after use and the unit will shut down.
Note: Let the unit rest for about 3 minutes after turning off, so that residual water on condenser can flow into the tank. Pull out the plug when the unit is off for power saving and safety.
2. “^” Up
"v" Down
Humidity can be set by pressing keys “^” and “v” (40%-50%-+ 60%-70%-CO) press “Up” or “Down” once, the set value will increase or reduce 10%, “CO” will then appear on the panel and the unit will operate continuously. When the humidity setting has finished and there is no operation, the unit will accept the setting and the indicator light will stay illuminated.
3. . “Timer
The time can be set among 1h-2h-4h-6h-8h. If you wish to cancel the timer, press and hold the timer button for 3 seconds and it will cancel.
4. “Fan speed
You can adjust the speed of the fan by pressing the 'fan speed' button. You can choose between high, medium and low. If the dehumidifer mode is set to automatic, the speed cannot be adjusted.
5. “ :”Mode”
During operation, press this key to change the working mode, as follows: automatic dehumidifying > clothes drying > dehumidifying.
Dehumidifying mode: can set humidity manually.
Automatic mode:
Rh>60%, high speed fan and dehumidifying;
60%>RH>55%, medium speed fan and dehumidifying;
Rh<55%, low speed fan and no dehumidifying.
Clothes drying mode; under the default of high speed wind state, the unit will automatically shut down after 6 hours of continuous operation.
Care & Maintenance
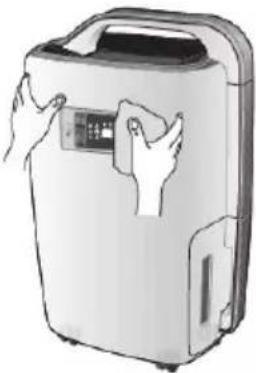
Cleaning Machine Body
Clean the machine body with a soft, dry cloth. If the device is extremely dirty, use a mild cleaning agent. Wipe the dehumidifer with a slightly damp cloth. Never spray water on the device.
natural_image
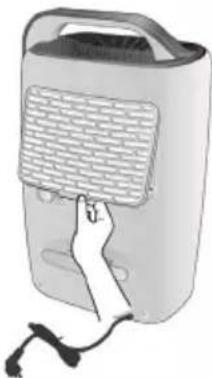
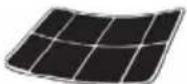
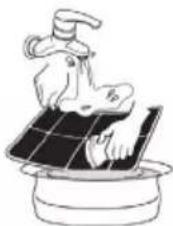
Illustration of a portable air purifier with hands holding the control panel (no text or symbols visible)Cleaning Air Filter
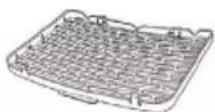
Remove the filter. Clean the filter with a vacuum cleaner or damp cloth (no warmer than 40^ C). Rinse and dry completely before inserting back into the dehumidifier.
natural_image
Illustration of a hand touching a portable electronic device with a mesh grille (no text or symbols visible)


natural_image
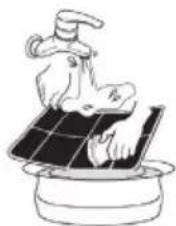
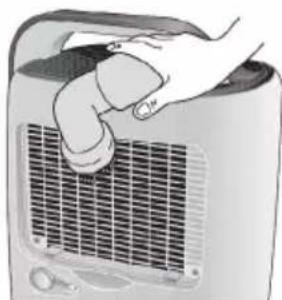
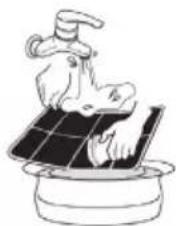
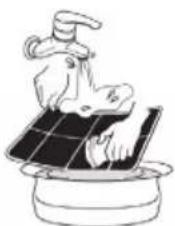
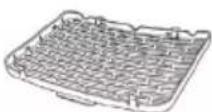
Illustration of a hand washing a shoe on a solar panel (no text or symbols)Cleaning Air Inlet
Please remove the air filter first. Then, clean the air inlet with a vacuum cleaner or a soft, dry cloth.
natural_image
Hand holding a portable air conditioner unit with a grid grille (no text or symbols visible)Troubleshooting
| Problem Cause Solution | ||
| Unit does not operate | Unit power cord is unplugged | Disconnect the plug and connect it again or please check if outlet is properly functioning. |
| Unit has not been turned on. Turn on the switch. | ||
| The water light is flashing. | Water tank is full, empty the tank; make sure the tank is correctly placed back into the compartment. | |
| Dehumidifying capacity is low | Runtime is too short. | Increase the operation time using the timer function. |
| Air filter is dirty and/ or obstructed. | Use water and a damp cloth to clean the filter. | |
| Ambient room temperature or humidity is too low. | Dehumidifying capacity is normally lower if the room temperature is below 18°C. please try to increase the room temperature. | |
| Humidity setting is higher than the ambient humidity | Set the humidity down and lower than the ambient humidity. | |
| Drainage water pipe is blocked or flat. | Check the water pipe and replace it if necessary. | |
| Relative Humidity setting not reached after long period of operation. | Windows and doors are not closed or sealed. | Close the door and window or enclose the space. |
| Water is leaking | The unit is not placed on a flat stable surface. | Place the unit on a flat and stable surface. |
| Outlet air is warm Heat exchanging process | This is normal | |
| Water noise Refrigerating fluid is flowing. | This is normal | |
DURONIC
Warranty
1 Year Guarantee from Shine-Mart Ltd, Trademark owners of Duronic Products. NOTE: THESE STATEMENTS DO NOT AFFECT YOUR STATUTORY RIGHTS AS A CONSUMER
This product has been manufactured under the strictest or quality control procedures, and using the highest quality of materials, to ensure excellent performance and reliability. It will give very good and long lasting service, provided it is properly used and maintained. The product is guaranteed for 1 years from the date of original purchase. If any defect arises due to a faulty materials or poor workmanship, the faulty product must be returned to the original place of purchase. Refund or replacement is at the discretion of that company.
Duronic Products are offered with a 1 year guarantee under the following conditions:
- The product must be returned to the retailer with original proof of purchase.
- The product must be installed and used in accordance with the instructions contained in this operating manual.
- It must be used only for domestic purposes.
- It does not cover wear and tear, malicious damage, misuse, neglect, inexpert repairs or consumable parts.
- Shine-Mart Ltd has no responsibilities for accidental or consequential loss or damage.
- Shine-Mart Ltd are not liable to carry out any type of servicing work, under the guarantee
- Valid in the UK only
This product is fitted with CE:1363 plug and fuse Imported by Shine-Mart Ltd, RM3 8SB

Information on waste Disposal for Consumers of
Electrical & Electronic Equipment.
This mark on a product and/or accompanying documents indicates that when it is to be disposed of, it must be treated as Waste
Electrical & Electronic Equipment, (WEEE).
Any WEEE marked products must not be mixed with general household waste, but kept separate for the treatment, recovery and recycling of the materials used.
For proper treatment, recovery and recycling; please take all WEEE marked
waste to your Local Authority Civic waste site,
where it will be accepted free of charge.
If customers dispose of Waste Electrical & Electronic Equipment correctly, they will be helping to save valuable resources and preventing any potential negative effects upon human health and the environment, of any hazardous materials that the waste may contain.
Follow Us

duronic.com

duronic

@duronicmedia

Duronic

@duronicmedia
DURONIC
natural_image
Line drawing of a portable air conditioner unit with ventilation grille and control buttons (no text or symbols)Figure 1
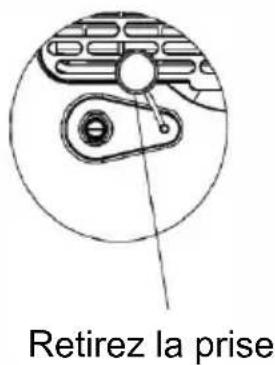
text_image
Retirez la prise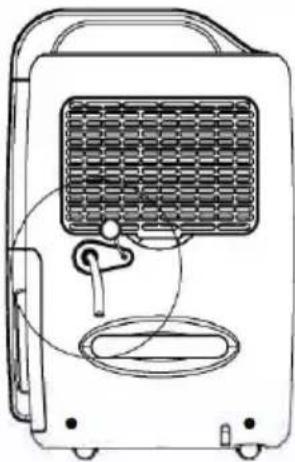
natural_image
Line drawing of a portable air conditioner unit with ventilation grille and speaker port (no text or symbols)Figure 2
natural_image
Technical line drawing of a mechanical component with no visible text or symbolsnatural_image
Illustration of a portable air purifier with hands holding the control panel (no text or symbols visible)natural_image
Illustration of a hand touching a portable electronic device with a mesh grille (no text or symbols visible)

natural_image
Illustration of a hand washing a shoe on a solar panel (no text or symbols)natural_image
Illustration of a hand gripping a small electric heater panel (no text or symbols visible)Dépannage
natural_image
Line drawing of a portable air conditioner unit with ventilation grille and control buttons (no text or symbols)Abb. 1
natural_image
Pure mechanical diagram showing a gear and shaft assembly without any text or symbolsnatural_image
Line drawing of a portable air conditioner unit with ventilation grille and speaker (no text or symbols)Abb. 2

natural_image
Technical line drawing of a mechanical component with no visible text or symbolsnatural_image
Illustration of a portable air purifier with hands cleaning the lid (no text or symbols visible)natural_image
Illustration of a hand inserting a grid into a portable electronic device (no text or symbols visible)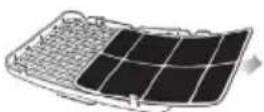
natural_image
Illustration of a hand washing a small solar panel with a faucet (no text or symbols)natural_image
Illustration of a hand opening a car air conditioner cover (no text or symbols visible)Fehlerbehebung
natural_image
Line drawing of a portable air conditioner unit with ventilation grille and control panel (no text or symbols)Figura 1
natural_image
Pure mechanical diagram showing a gear and belt system without any text or symbolsTapón
natural_image
Line drawing of a portable air conditioner unit with ventilation grille and earplugs (no text or symbols)Figura 2
natural_image
Technical line drawing of a mechanical component with no visible text or symbolsnatural_image
Illustration of a portable air purifier with hands cleaning the interior (no text or symbols visible)natural_image
Illustration of a hand inserting a grid into a portable electronic device (no text or symbols visible)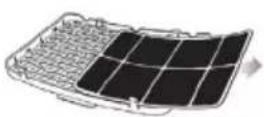
natural_image
Illustration of a hand washing a shoe on a solar panel (no text or symbols)natural_image
Illustration of a hand holding a flexible hose inside a car air conditioner unit (no text or symbols visible)natural_image
Line drawing of a portable air conditioner unit with ventilation grille and control panel (no text or symbols)Figura 1
natural_image
Pure mechanical diagram showing a gear and shaft assembly without any text or symbolsTogliere la spina
natural_image
Line drawing of a portable air conditioner unit with ventilation grille and control knobs (no text or symbols)Figura 2
natural_image
Technical line drawing of a mechanical component with no visible text or symbolsnatural_image
Illustration of a portable air purifier with hands cleaning the front panel (no text or symbols visible)natural_image
Illustration of a hand pressing down on a portable electronic device with a grid-patterned cover (no text or symbols visible)
natural_image
Four-step diagram showing solar panel installation: heating, grid expansion, heat dissipation, and boiling (no text or symbols)natural_image
Illustration of a hand opening a portable air conditioner unit (no text or symbols visible)natural_image
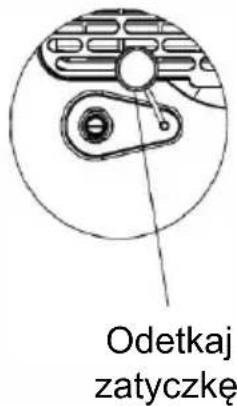
Line drawing of a portable air conditioner unit with ventilation grille and control buttons (no text or symbols)Rys. 1
natural_image
Line drawing of a portable air conditioner unit with ventilation grille and earplugs (no text or symbols)Rys. 2
natural_image
Technical line drawing of a mechanical component with no visible text or symbolsnatural_image
Illustration of a portable air purifier with hands cleaning the lid (no text or symbols visible)natural_image
Illustration of a hand inserting a device into a power supply unit (no text or symbols visible)