HP130 - Heating Bimar - Free user manual and instructions
Find the device manual for free HP130 Bimar in PDF.

User questions about HP130 Bimar
0 question about this device. Answer the ones you know or ask your own.
Ask a new question about this device
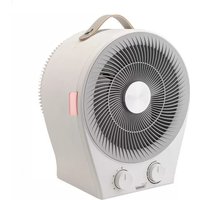
Download the instructions for your Heating in PDF format for free! Find your manual HP130 - Bimar and take your electronic device back in hand. On this page are published all the documents necessary for the use of your device. HP130 by Bimar.
USER MANUAL HP130 Bimar
- This appliance is designed to only heat indoor domestic and similar environments, as specified in these instructions; furthermore the fan heater is to be considered an additional heating unit, and not a source of primary / central heating. Examples of appliances for domestic use are those used for common domestic purposes, in domestic environments and that can be used by non-experts: - in shops, offices and other similar places of work; - in farming businesses or similar businesses; - by guests in hotels, motels and other residential type environments; - in bed and breakfast accommodation.
- This fan heater is a radio device which intentionally emits and/or receives radio waves for radiocommunication and/or radiodetermination purposes.
- The appliance should not be used in dusty areas or in areas with airborne particles/materials (which may block the grids), or in areas
This symbol indicates that these instructions should be read carefully before using the appliance, and that other users should also be informed of them, if necessary. Store this booklet for future reference and for the entire lifetime of the device. If any parts of these instructions are difficult to understand or when in doubt, contact the manufacturer at the address found on the last page before using the product. This symbol highlights instructions and precautions for safe use. Warnings and appliance installation, use, cleaning and maintenance procedures may be updated slightly from those described in this manual; for further details, please consult the updated on-line manual at www.bimaritaly.it
This symbol indicates that the appliance is class II. This symbol indicates:WARNING: in order to avoid overheating, do not cover the appliance.17 with high humidity, or with flammable products, or outdoors. Any other use should be considered inappropriate and dangerous. The manufacturer cannot be held responsible for any damages caused by improper, incorrect or irresponsible use and/or by repairs done by an unqualified person.
- The fan heaters gets hot when in use. Only touch the plastic handle and knobs. Avoid touching the grid since it becomes very hot. Do not insert fingers and/or any object through the front grid, in order to prevent abrasions, electric shocks or damage to the appliance.
- The grille does not provide complete protection to children or to people with reduced physical, sensory or mental capacity. WARNING!
Parts of this product can become hot and cause burns. Special care should be taken in the presence of children and vulnerable people.
- when using electrical appliances, always adhere to basic safety precautions to prevent the risk of fire, electric shocks and physical injury. - Do not use this appliance in a room with an area of less than 4m².
- The appliance can be used by children over 8 and by people whose physical, mental or emotional capacity is limited or compromised, or who lack the appropriate experience or knowledge, only if they are supervised after receiving instructions about safe use of the appliance and they understand the hazards. Children must not play with the appliance. Cleaning and maintenance that must be carried out by the user must not be done by children unless they are supervised.
- Children younger than 3 years of age must be kept away from the appliance unless they are being constantly supervised. Children between the ages of 3 and 8 years should only turn on / off the appliance as long as it has been placed or installed in its normal18 operating position, and as long as they are supervised or receive instructions concerning the safe use of the appliance and understand the hazards involved. Children between the ages of 3 and 8 years should not plug it in, adjust or clean the appliance or perform user maintenance.
- Make sure the fan heater does not come into contact with water or any other liquid. If water or any other liquid comes into contact with the appliance, first turn off the power by switching it off at the distribution board, and only then remove the plug from the socket. Carefully dry both the plug and the socket before restoring power. Plug into the mains and then continue using the appliance. If in doubt consult a qualified professional.
- The appliance must not be placed directly beneath a plug point. - The plug point must be accessible so as to easily remove the plug in case of an emergency. - Do not use the appliance near a bathtub, a shower, swimming pool or basin/sink, etc. - If the power cord is damaged, it must be replaced by the manufacturer or its technical assistance centre or by someone who is similarly qualified, in order to prevent any risks. - This appliance is not to be used with an external timer or with a separate distance control unit. This serves to prevent fire hazards should the appliance be covered or incorrectly positioned. Check that other devices with high power consumption are not connected on the same circuit.
- In order to prevent electric shocks, never immerse the plug, the power cord or the appliance in water or any other liquid.
- If the appliance is not being used, unplug it from the plug point.
- Do not touch the appliance with wet hands or feet.19
- Do not move the appliance when it is running.
- Do not allow the appliance to be exposed to the weather (sun, rain, etc.).
- Should the appliance fail or not work correctly, disconnect the power cord immediately. Check that it is not damaged, and thereafter turn it back on: if in any doubt, consult a qualified professional.
- Do not pull on the power cord or the appliance itself to unplug the appliance from the plug point.
- Do not pull on the power cord to move the appliance.
- Do not use the appliance if it does not work properly or if it appears damaged; when in doubt, contact a qualified technician.
- Ensure the heating element is free of dust, lint, or any similar material: this improves the fan heater's performance, and prevents overheating. Periodically check that the aspiration grille does not become obstructed by objects, fabrics or other materials to prevent overheating or breaking the appliance.
- After unpacking, check that all parts of the appliance are present; if in doubt, do not use and contact a qualified technician. The packaging materials (plastic bags, polystyrene, metal staples, etc.) must not be left within reach of children, as they are potentially hazardous. All packaging elements must be disposed of according to their raw material (see the symbol stamped on each one) and according to the provisions of their municipality. The secondary elements of the packaging with low weight (es: packing tape) are unmarked as are its small size packing materials, the protective film of surfaces: therefore you have to follow the procedures for the disposal in force in your municipality.
- Before connecting the appliance, check that the voltage on the data plate matches that of the electric system. In the event of incompatibility between the plug point and the appliance's plug, have the plug replaced with a suitable model by a qualified professional, who should ensure that the cord is suitable for the power rating of the appliance (10A). Check that other appliances with high absorption are not connected to the power line to avoid overloading and fire hazards. The use of adaptors or extensions is generally not advisable; if it is necessary to use them, they must comply with safety regulations and the total current (amps) must not be rated lower than the maximum current of the appliance.
- Before each use, check that the appliance is in good condition and that the power cord is not damaged: if in doubt consult a qualified professional.
- Ensure that the power cord is correctly positioned and does not come into contact with hot parts or sharp edges, or become wound around the appliance itself and is not twisted.
- Do not hang or even lean the appliance against any walls.
- Place the fan heater far from any other source of heat, from flammable material (curtains, tapestries, etc.), from flammable gases or explosive objects (spray cans) and from materials that20 can be deformed by heat. Make sure there is 120 cm of free space in front of the fan heater and 50cm free space on both sides and behind it.
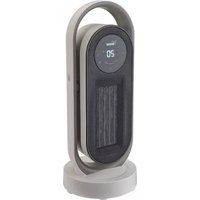
- The surface where the appliance is used must be stable, spacious (do not use on shelves), level (since the appliance could tip over) and heat resistant. Use The fan heater is equipped with electronic controls for regulation and programming: Panel with touch keyboard, remote control, and through the Smartphone APP. - Control panel. The panel is on the top of the fan heater, it has a touch keyboard, a display and backlit symbols that show each operation in use. Below there's the list of functions:
O/I switch. It's back part, it switches on (pos. I) or switches off (pos. 0) the appliance.
Standby/OFF The key (ON) switche on the appliance or puts it in standby. -Note: the last selected mode is activated Heating Mode When "ON", the key selects the following modes one after the other: Hi -> Low -> Eco. HI=2000W= very hot air LO=1000W= hot air “ECO“: depending on the difference between the set and room temperatures (∆T), the programme activates the HI (2000W) or LO (1000W) power or the fan only. When the temperature set is: (∆T) > 4°C degrees from the room temperature, the HI function is activated; 4°C > (∆T) > 2°C degrees from the room temperature, the LO function is activated; (∆T) < 4°C degrees from the room temperature, the fan function is activated. Once the required temperature has been reached, ventilation only continues for a few seconds and then switches off. Furthermore, if the key is pressed for 3 seconds, the Right-Left automatic swing is activated and/or deactivated.
Temperature and Time Setting. Key diminishes, key increases. With the convection heater switched on, adjust the room temperature (5 - 45°C) with the two keys, and once the value is reached the thermostat will interrupt the heating. When the temperature decreases, the thermostat will turn the resistance back on for the time necessary to restore the value.
Timer. In the “ON " state, the key activates the Timer and its "Countdown". Once it expires the convection heater will go into Standby. The time can be adjusted from 1h to 24h using the keys . To reset the Timer, press the button for about 3 seconds to put it in standby. NOTE. The timer is subject to programming (daily/weekly) carried out via the APP: if this is in progress, suspend it for the period in which the timer will be active.
Wi-Fi Key Once the Wi-Fi configuration has been performed (see below), the functions of the convection heater and the weekly programming can be controlled with the smartphone and the “Bimar Live Smart” APP. The key activates the Reset of the Wi-Fi configuration. Some functions are manageable with the Alexa and Google Assistant voice control.21 The appliance is equipped also these functions:
Auto Dim . It darkens the display if you don't perform any operation within 1 minute of switching it on: touching any key turns the display back on. - Anti-tip switch . In the event of tipping over, it deactivates the device. - Acoustic warning: an acoustic signal is emitted for each key selection - Remote In addition to the control panel, the convection heater is equipped with a remote control for controlling the functions described on the side: it must be pointed (upper side) towards the control panel, within a 4m distance making a 20 degrees angle. The remote control is powered only by (one) CR2025 button coin cell battery, which is not supplied. To enter it follow the procedures and warnings described here:
3. Decrease the Temperature
4. Increase the Temperature
1. Press the lock button and hold it down
to take out the battery holder.
2. Replace the battery with one of the
same type, making sure the (+) polarity is facing up.
3. Push the battery holder in, until it's
locked in place securely.
3. : Flashes if set temperature is reached
WARNING: Do Not Ingest Battery. Chemical Burn Hazard.
This product contains a coin / button cell battery. If the coin / button cell battery is swallowed, it can cause severe internal burns in just 2 hours and can lead to death. Keep new and used batteries away from children. If the battery compartment does not close securely, stop using the product and keep it away from children. If you think batteries might have been swallowed or placed inside any part of the body, seek immediate medical attention. The batteries contain materials, which are hazardous to the environment; they must be removed from the appliance before it is scrapped and that they are disposed of safely.
-Smartphone. In addition to the control via the control panel and the remote control, the convection heater can be controlled via smartphone. Description Wifi Fan heater, usable via Smartphone via application with Android
iOS operating systems.
- Adjustable selections via the Bimar Live Smart APP.
- The APP installation and configuration procedure may be slightly different from what is described in this manual; proceed as indicated in the APP.
- We are not responsible for problems caused by the internet line, the Wi-Fi router and other smart devices.
- Check that the router is for domestic use, that the WiFi network has no access restrictions other than the password, and the presence of a strong and uniform WiFi signal in the room where the appliance is to be installed and used. In general, routers have set up dual-band, i.e. based on dual frequency (2.4 and 5)GHz. To activate and configure the device, you only need to set the fixed frequency at 2.4GHz (access the IP address of the router and search for the network settings section (image on the side, refer to it as an example; if in doubt, contact professionally qualified personnel). For subsequent uses of the device, if desired, reset the router to dual frequency.
- Make sure that the smartphone is connected to the wi-fi network to be used for the appliance. First Installation/Setup
scan the QR code provided here. For Android For iOS
1.2 Once installed, the app icon appears.
Click the “Bimar Live Smart” icon to run the app.
1.3 At the first access, register and fill in your credentials:23
- click on "Create a new account", confirm "I agree" for the data relating to the Privacy Policy (by pressing: " " the text of the informative report pursuant to Article 13 of the 2016/679 European Regulation appears, while by selecting " User Agreement " the Bimar srl Service Agreement appears) - if you want also click on: "I consent to the processing of my data for receiving commercial and marketing communications" - enter your email address (select the desired country) - click on the writing "Get the verification code", wait for a few seconds and then enter the code received in the "Verification code" part using your registration email address (possibly also check the Junk e-mail folder, if you don't receive it in the inbox folder).
1.4 Enter your personalized password and click “Done”.
If the procedure is carried out correctly, the control panel screen for using the application appears.
2. Configuration via Bluetooth
(activate the phone's Bluetooth connection)
2.1 Insert the plug into the socket, press the 0/I switch to pos. I (a “Beep” acoustic signal will be
heard, with display will light on and flash light “ ”symbol).
2.2 Press the " " button for active the appliance.
2.3 Press the " " button for about five seconds: a "Beep" acoustic signal will be heard and “
”symbol on the display will flash quickly; release the button.
2.4 Open the APP on your smartphone: on the first screen click on "ADD DEVICE" or optionally click
on " " at the top right and press the writing: " ".
2.5 Wait for the device to load, then click on the
of your Wi-Fi network, and click on the "Next" symbol to activate the connection.24
2.8 Wait for the device to
connect to the Wi-Fi network and press the word "Finish".
3.1 Follow the procedure in the previous paragraph 2.1. to turn on and reset the device.
3.2 Open the APP on your smartphone: on the first screen click on "ADD DEVICE" or optionally
click on " " at the top right and press the writing: " ".
"Set up Wi-Fi": enter: NAME and PASSWORD your Wi-Fi network, and click on the “next” symbol to activate the connection.
3.5 On the next screen: click on the writing “Confirm” to activate, then the LED will flash quickly;
after this press on the "Next" symbol.
The countdown will start: Scanning devices ⇒ Register the device on Cloud ⇒ Start the device that stops when the connection between your device and the smartphone has occurred ⇒ End
It's also possible to pair the device via the "AP Mode", press the button at the top right, hold down the " " button, you will hear a "Bip" acoustic signal and and will flash , open the WI-FI phone settings and connect to the "Bimar" network Live Smart xxx” or “Smart Life xxx” and then press “connect now”.
If the operations described above do not proceed correctly or the device is "Offline", the device must be reset, operating as follows: remove the plug from the socket, and leave the fan heater disconnected for 30 seconds. Re-insert the plug into the socket of the fan heater, press the main switch to pos. I, and the " " button. Press the " " button for about five seconds: a "Beep" acoustic signal will be heard and “ ”symbol on the display will flash quickly; release the button. Settings and customisations Open the smartphone screen and press in the bottom right corner to customise the following functions: Home management, Message centre, Assistance centre, Configure, In-APP purchases.26 Press in the bottom centre to customise operation of the device to suit the various scenarios or operating situations provided by the APP (for example: Back home, Leaving home, Dawn, Goodnight, Temperature, Humidity, Weather, Air quality, Dawn/dusk) or in combination with other devices. Press in the bottom left corner and then in the top of the screen, for example: to customise (update and/or change where permitted) the appliance's position or the outdoor wind speed, air pressure, humidity and temperature (see right). Press top right to customise the following: Change Device name, Device position, Check Network, Third-party devices supported: Amazon Alexa, Google Assistant, Device sharing, Create a Comment group, Device Info, Feedback, Update Firmware, Remove device, Reset to factory settings. The smartphone must be connected to Wi-Fi or cellular data network for remote control.
Voice control The device is compatible with Amazon Alexa and Google Assistant voice controls. Open the corresponding App/connect the Skill (make sure that the account and password used are the same as those of the “Bimar Live Smart” app) and follow the settings.
Google Home : some basic vocal commands are: - “OK Google” or “Hey Google”, turn on XX (name of the device) - “OK Google” or “Hey Google”, turn off XX (name of the device) - etc. Amazon Alexa : some basic vocal commands are: - “Alexa”, turn on XX (name of the device) - “Alexa”, turn off XX (name of the device) - etc. Note: the voice control has defined functions. First use: run the appliance to eliminate the "new smell" and any oil residue from the manufacturing process for at least 10/15 minutes: insert the plug inside socket, pos. mode HI and ajust the thermostat at 30°C. During this operation, ventilate the room well to eliminate the "new smell" that is given off by the appliance.
Follow these steps to use the appliance correctly:
1) Before to insert the plug into the power socket, check that the main switch to pos. “0”.
2) Insert the plug into the power socket.
3) Press the main switch to pos. “I”, press the switch “ ” to active the heater and select the
Weekly programming: ( only activated via Smartphone ): sets: the on/off periods for each day of the week and the temperature required. Programming may be: timer ON, timer OFF or timer ON/OFF, in which the on-off periods are set for just once or for every day of the week, mode and the temperature is selected. Save.
5) Press the switches to: “ ” and main switch to“0” position to turn off the appliance, and
remove the plug from the power socket. At each use, check that the air intake and dissipation grilles cannot become blocked; furthermore, to avoid the risk of fire or overheating of the appliance, do not cover it or use it to dry laundry. Never leave the appliance connected to the socket if it is not in use, especially for long periods.
In the event of a breakdown or malfunction, switch off the appliance and have it checked by professionally qualified personnel; repairs carried out by unqualified personnel can be dangerous and void the guarantee27
CLEANING AND MAINTENANCE
before cleaning the appliance, turn it off, remove the plug from the plug point and wait until it cools down.
- To ensure proper operation of the appliance, periodically check that the rear ventilation grille is not blocked by fluff or threads: this should be done after removing the plug from the mains; If necessary, use a vacuum cleaner, taking care not to damage the element.
- To clean the main outer casing using a soft, damp cloth; do not use steel wool or abrasive products.
- If the fan heater is not used for long period of time, cover it and store it in a dry place; it is advisable to place it in the original packaging to protect it from dust and moisture.
- Do not immerse the appliance in water or another liquid. Do not wash it with running water or in the dishwasher.
- If you decide to no longer use the appliance, it is recommended that it is made inoperative by cutting the power cord (first ensure that the appliance has been unplugged from the power supply), and ensure that any parts that could represent a risk to playing children are put away.
BATTERY - Remove the battery from the remote control before its disposal. Do not dispose the battery with domestic waste. The battery must be disposed of in the appropriate containers or in the specific collecting centre. Suitable segregated collection helps prevent damage to the environment and to human health. To remove battery, refer to Instructions for use.
Correctly disposing of the product as per European Directive 2011/65/UE
At the end of its lifespan, the product must not be disposed of as part of ordinary waste. It can be handed in to specific collection points set up by the local authority, or to retailers who provide such a service. Disposing of a household appliance separately avoids possible negative consequences for the environment and human health resulting from inappropriate disposal and allows to recover the materials from which it is made in order to obtain significant savings in energy and resources. As a reminder of the obligation to dispose of appliances separately, the product is marked with a crossed- out wheelie bin symbol. Incorrect disposal of the product by the user will lead to sanctions according to current law.28
GUARANTEE: it is advised to register the appliance on the website https://www.bimaritaly.it/it/garanzia or to scan the QR code on the side to properly register the warranty (fill out the form to acivate the warranty on the product you purchased).
General guarantee terms
Guarantee coverage starts from the moment of purchase of the appliance as indicated by a fiscally mandatory delivery document (bill or tax receipt or shipping document). Guarantee coverage lasts 24 months and terminates after the prescribed term. Guarantee coverage covers all replacements or repairs that become necessary due to defects in material or manufacture. Guarantee coverage does not cover all those parts which become defective due to failure to comply with installation, operating or maintenance instructions, shipping damage, operating neglect or negligence, improper use or any circumstances which are not due to manufacturing defects of the appliance. Guarantee coverage is also excluded for replacement or repair of all parts subject to fair wear and tear or to expiry, as well as removable parts, light bulbs, glass components, ceramic parts, external tubes, batteries and disposable (throw-away) accessories. Replacements or repairs that come under guarantee coverage are performed free of charge for goods delivered free the Manufacturer’s factory or to one of our Technical Service Centres. The Customer must only pay for shipping costs. Guarantee coverage is not granted if repairs are performed by personnel not belonging to authorized Technical Service Centres or when non-genuine spare parts are used. This warranty is governed by and construed in accordance with applicable laws in force in the country where the product is purchased. For details, contact the Customer Support in your country or the Bimar website. (www.bimaritaly.it).The Manufacturer declines all responsibility for any direct or indirect harm to persons, pets or property consequent to failure to comply with all the provisions specified in the appliance instruction booklet and especially those regarding appliance maintenance, operation, installation or warnings.41