Timmy - Scooter Lionelo - Free user manual and instructions
Find the device manual for free Timmy Lionelo in PDF.
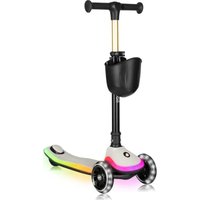
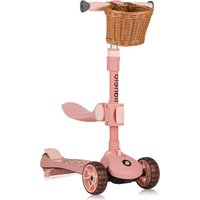
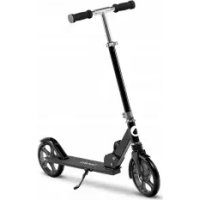
| Product type | Children's scooter |
| Brand | Lionelo |
| Model | Timmy |
| Recommended age | 3 years and up |
| Maximum load | 50 kg |
| Weight (approximate) | 3.5 kg |
| Dimensions (L × W × H) folded | Approx. 85 × 35 × 25 cm |
| Dimensions (L × W × H) unfolded | Approx. 85 × 35 × 70-95 cm (adjustable height) |
| LED power supply | 3 AA 1.5 V batteries (not included) |
| Frame material | Aluminum |
| Wheel type | PVC / PU, diameter approx. 120 mm |
| Main functions | Folding, adjustable handlebar height, LED lighting on deck and front wheels, rear brake |
| Safety | Rear brake, locking system, need to wear protective equipment (helmet, knee pads, elbow pads, gloves) |
| Care and cleaning | Clean with a damp cloth and mild detergent; do not use caustic or abrasive products |
| Installation | Requires an adult for assembly and adjustment |
| Usage environment | Flat surfaces away from traffic, recreational areas, playgrounds |
| Weather conditions | Do not use in rain, snow, frost or icy conditions |
| Storage | In a dry place, out of reach of children |
| Warranty | See detailed terms on the manufacturer's website |
| Manufacturer | BrandLine Group Sp. z o. o. |
| Compliance | European directives; recycling according to WEEE |
Frequently Asked Questions - Timmy Lionelo
User questions about Timmy Lionelo
0 question about this device. Answer the ones you know or ask your own.
Ask a new question about this device
Download the instructions for your Scooter in PDF format for free! Find your manual Timmy - Lionelo and take your electronic device back in hand. On this page are published all the documents necessary for the use of your device. Timmy by Lionelo.
USER MANUAL Timmy Lionelo
natural_image
Line drawing of a lionelo scooter with wheels and handle (no text or symbols)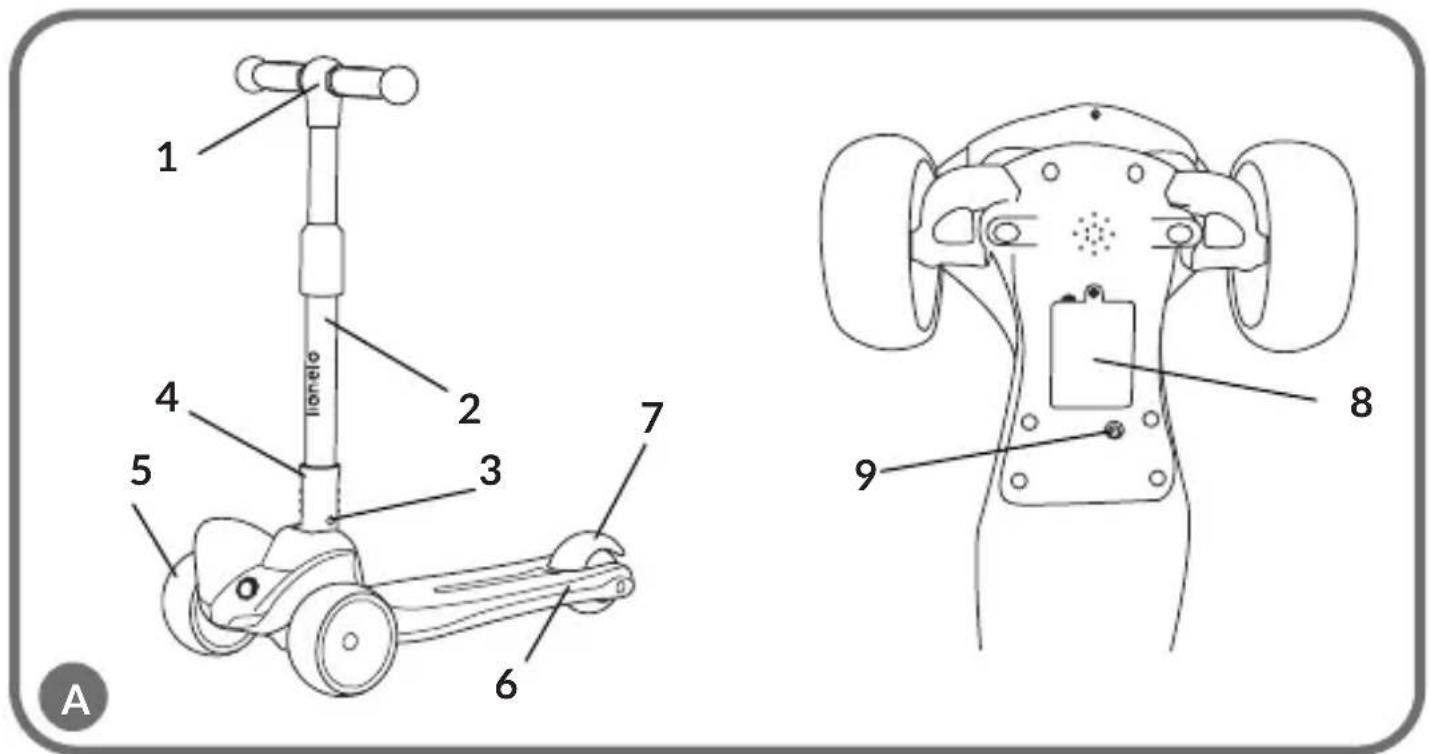
text_image
1 2 3 4 5 6 7 8 9 A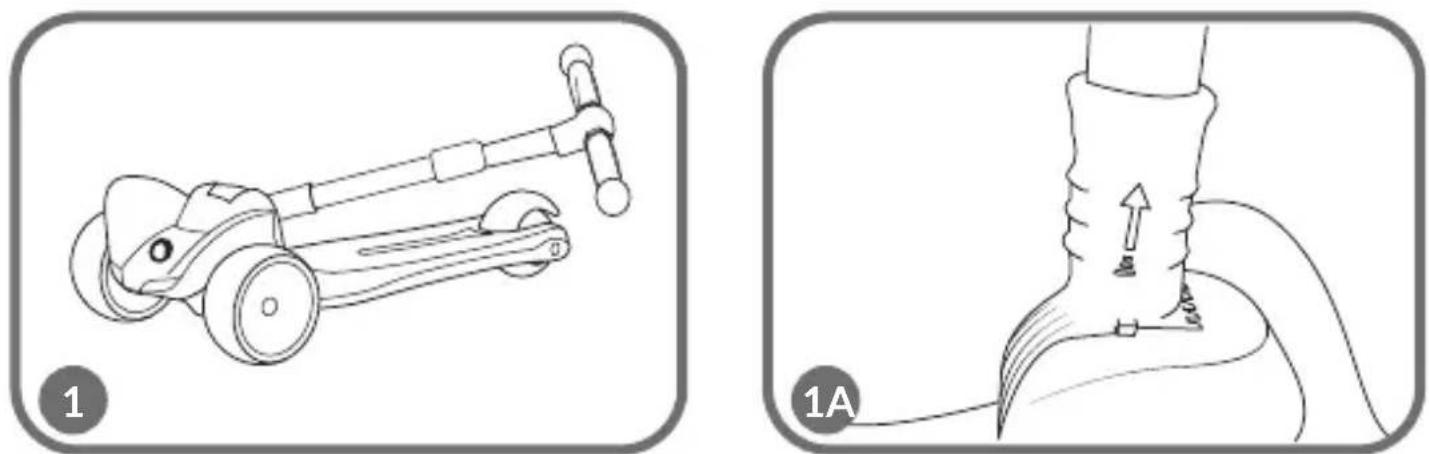
natural_image
Two technical diagrams showing a scooter handle and a foot with a rope, labeled 1 and 1A (no text or symbols on the diagrams themselves)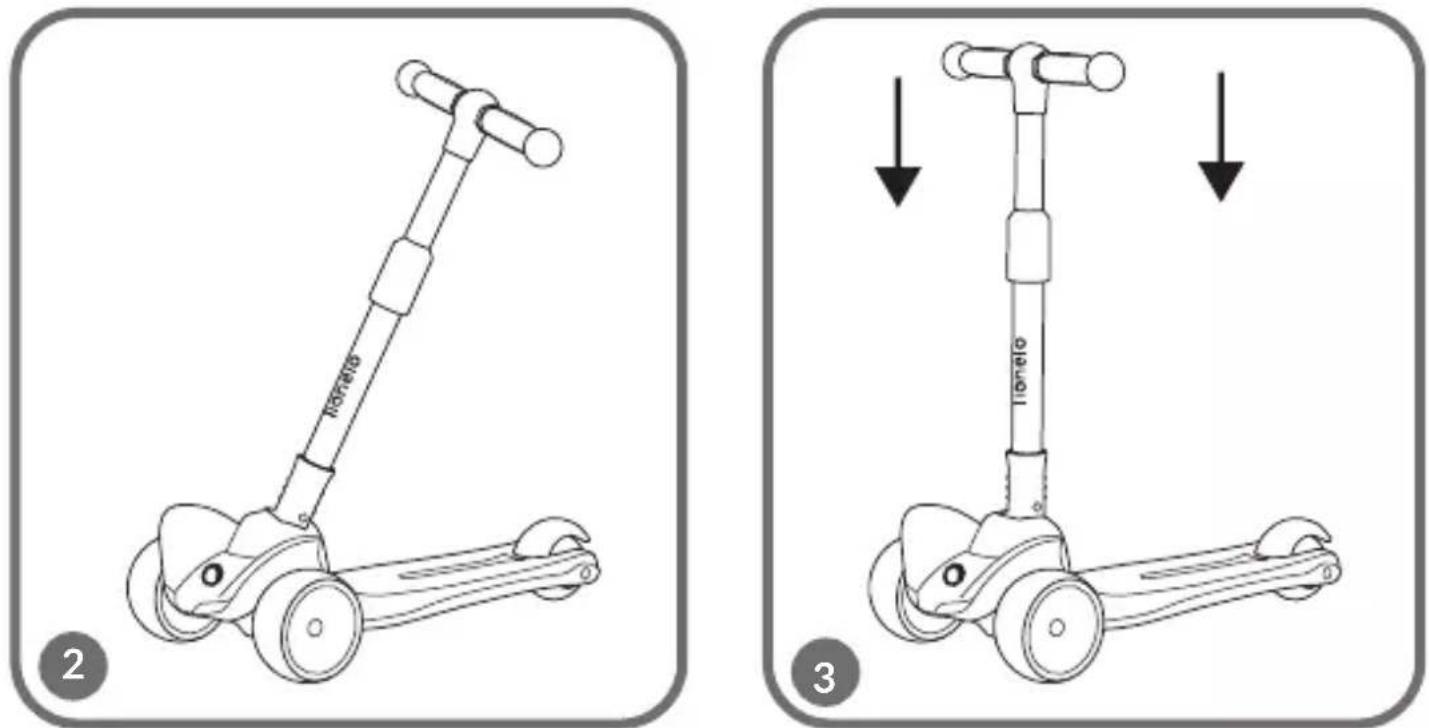
text_image
HOTATO 2 TONIO 3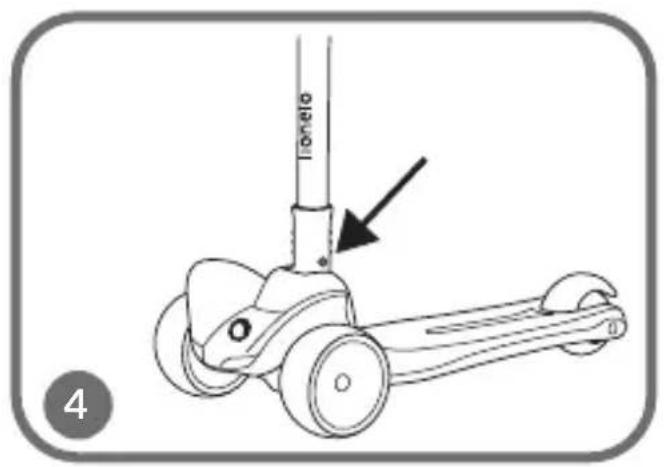
text_image
Tonelo 4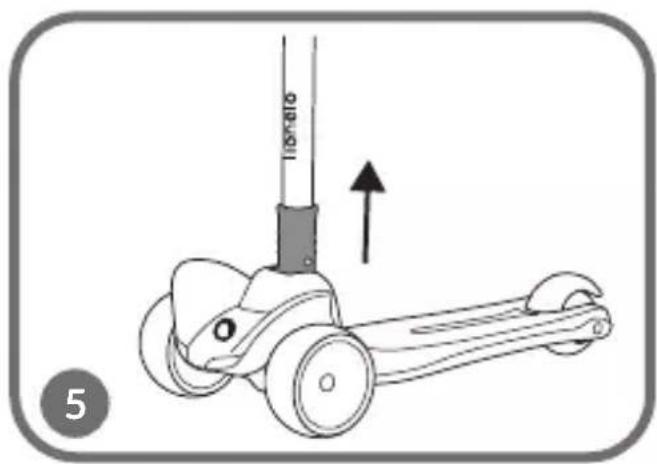
natural_image
Illustration of a bicycle steering wheel with an upward arrow indicating motion (no text or symbols)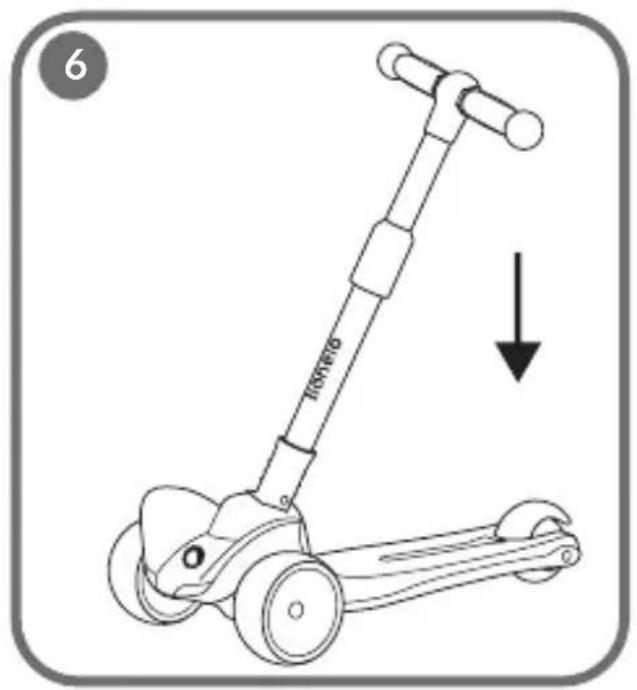
text_image
6 100000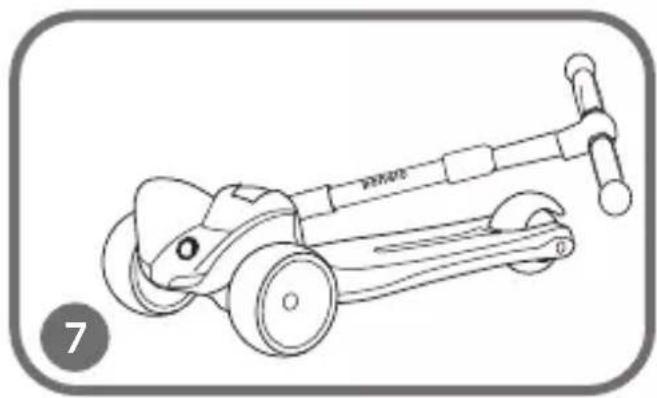
natural_image
Line drawing of a scooter with wheels and a handle, no text or symbols present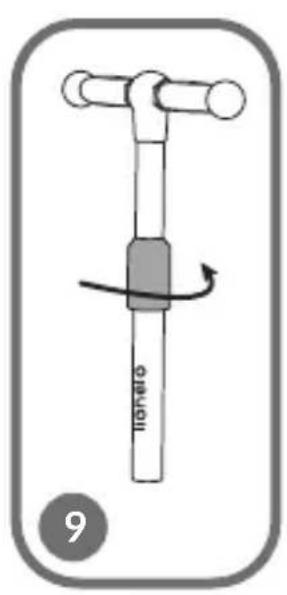
text_image
tonato 9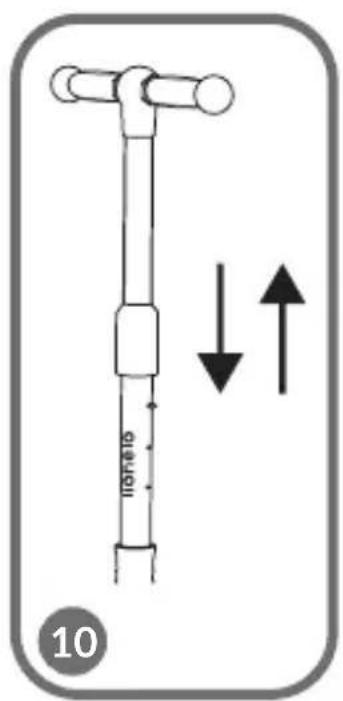
text_image
10 TOMATO 10 10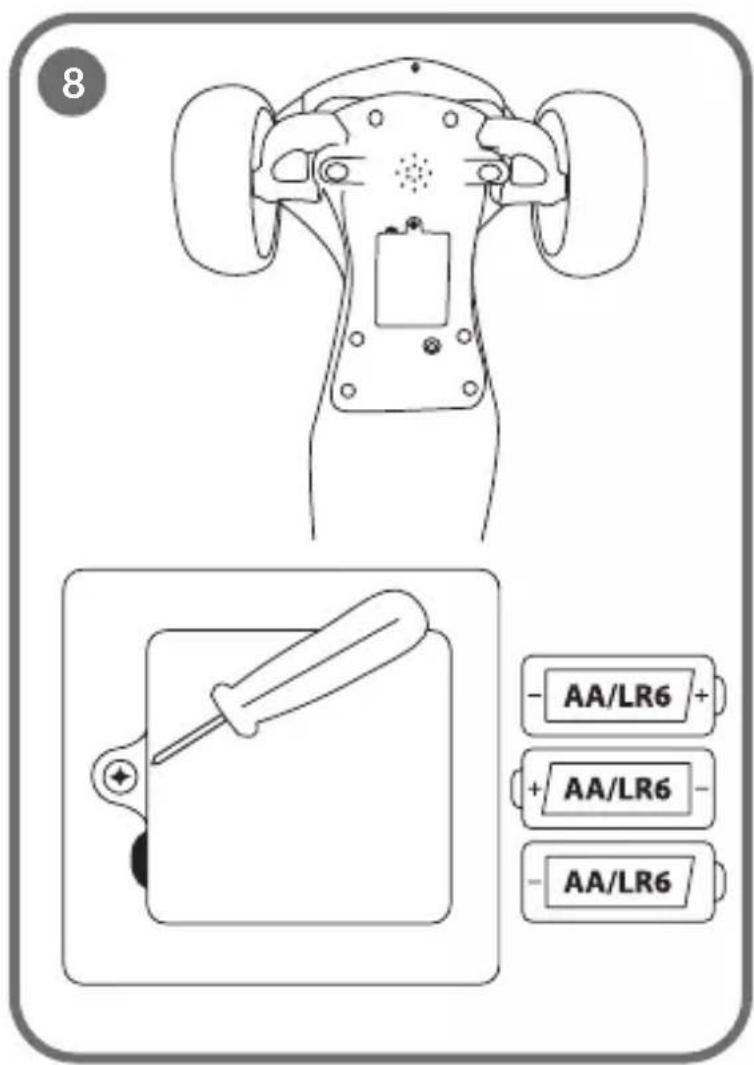
text_image
8 - AA/LR6 + + AA/LR6 - - AA/LR6Dear customer!
Should you have any remarks or questions concerning the product, please do not hesitate to contact us: help@lionelo.com
Producer:
BrandLine Group Sp. z o. o.
-
Warning: Protective equipment should be worn. Not to be used in traffic. 50 kg max.
-
Wear protective equipment (helmet, elbow and knee pads, gloves) when using the scooter.
-
Make sure all locking devices are switched on before use.
-
The scooter is designed for children aged 3 and over.
-
The scooter is designed for one person.
-
The scooter should only be installed, dismantled and adjusted by an adult and away from children.
-
Do not use the scooter on a sloping or uneven surface.
-
Do not use the scooter near traffic.
-
The product should not be used during unfavorable weather conditions (e.g. freezing temperatures, rain, snow, icy conditions).
-
Do not use the scooter near potentially dangerous areas (e.g. a swimming pool).
-
The safest areas to ride the scooter are areas with limited or no motorized traffic, such as private areas, recreational areas, playgrounds and school playing fields.
-
A child using the scooter should be supervised by an adult.
-
A child using the scooter should wear footwear.
-
The product should be handled with care. The user is required to have the skills to avoid falls or collisions that cause injury to the user or others.
-
Before each use, check the scooter for damage, loose connections or missing components. Do not use the product if a component is missing or damaged. In this case, contact the manufacturer's authorised service centre.
-
Do not pull the scooter behind a car or other vehicle.
- Keep the product away from heat sources, high temperatures, hot surfaces, sources of spark, open flames, oil and sharp edges.
- Store the product in a dry place.
- Keep plastic packaging away from children, as it poses a strangulation risk.
BATTERY WARNINGS
- Disposable, non-rechargeable batteries should not be charged.
- Do not insert different types of batteries or new and used batteries into the device.
- Batteries must be inserted with the correct polarity.
- Dead batteries should be removed from the toy.
- The power supply terminals should not be short-circuited.
- If the product is not used for a long time, remove the batteries from the compartment.
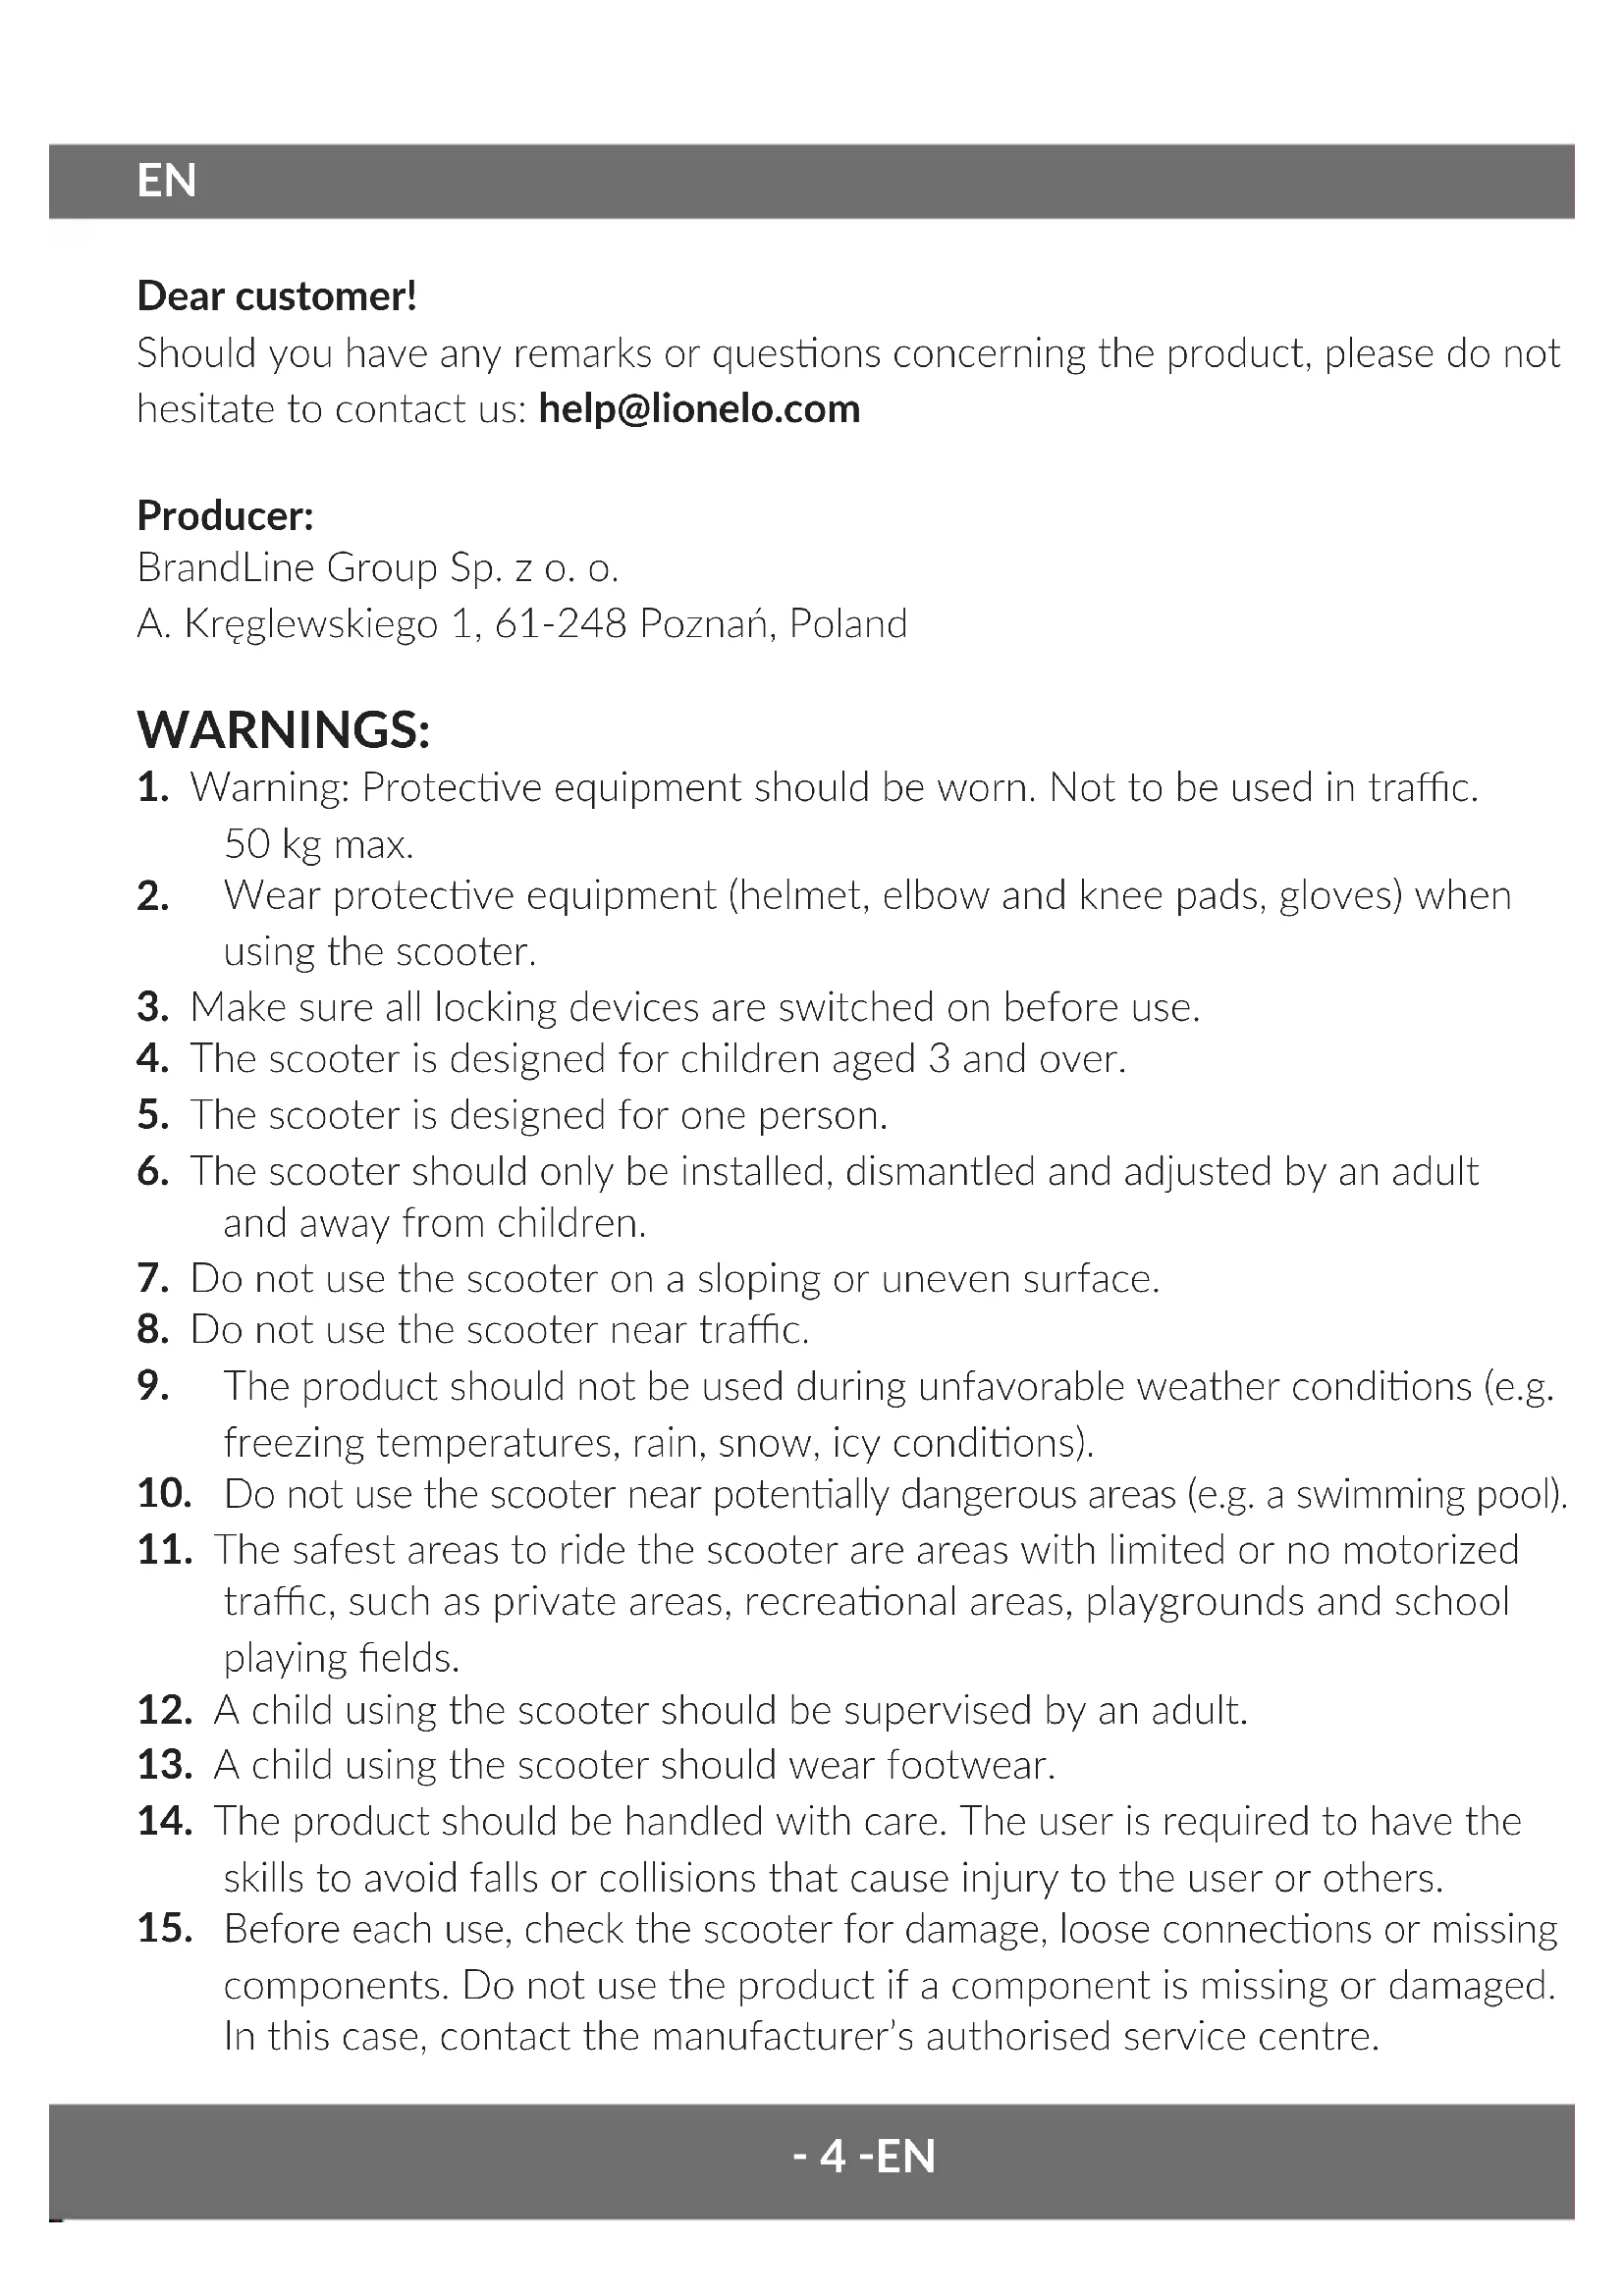
DESCRIPTION OF THE PARTS (FIG. A)
- Handlebars
- Height adjustment button
- Fold button
- Locking mechanism
-
Wheels
-
LED light
- Brake
- Battery compartment
- LED light button
BATTERY INSTALLATION IN THE PRODUCT
- Loosen the battery cover screw with a screwdriver. Remove the battery cover (fig. 8).
- Insert three AA 1.5 V batteries. Pay particular attention to the correct polarity of the batteries.
- Put the cover back on. Tighten the screw with a screwdriver.
USE
Unfolding
To unfold the scooter, pull the locking mechanism (fig. 1) in the direction indicated by the arrow (fig. 1a) and then lift the handlebars upwards (fig. 2). Make sure the scooter is correctly unfolded by gently pressing down on the handlebars (fig. 3).
Correct unfolding will be signaled by a click.
Folding
To fold the scooter, press the fold button (fig. 4) and then pull the locking mechanism (fig. 5) in the direction indicated by the arrow (fig. 1a). Then lower the handlebars down (fig. 6) and fold the scooter (fig. 7).
LED light function
To activate the LED light in the platform of the scooter, press the button on the bottom of the platform (9, fig. A).
Activation of the LED light in the front wheels is triggered by movement.
Braking
Braking takes place by pressing with your foot the brake located on the rear axle of the scooter (7, fig. A).
Handlebars height adjustment
To adjust the height of the handlebars:
- Loosen the locking mechanism by turning it in a counterclockwise direction (fig. 9).
- Press the height adjustment button (2, fig. A) and then set the selected height of the handlebars (fig. 10).
- Make sure the height adjustment button has changed to a higher or lower position. The correct position will be signaled by a click.
- Tighten the lock by turning it clockwise.
CLEANING AND MAINTENANCE
Clean the frame and all parts of the scooter with a damp cloth and a mild detergent. After cleaning, wipe the scooter dry.
Do not use caustic or abrasive products to clean the product.
The photos are for illustrative purposes only, the actual appearance of the products may differ from those shown in the images.
Drogi Kliencie!
EN: The product complies with requirements of EU directives.
Pursuant to the Directive 2012/19/EU, this product is subject to selective collection. The product must not be disposed of along with domestic waste as it may pose a threat to the environment and human health. The worn-out product must be handed over to the electrics and electronics recycling center.
Detailed warranty conditions are available on the website: