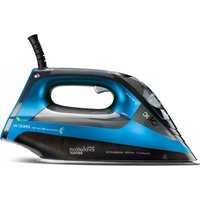
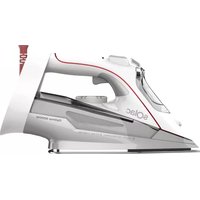
Great Lakes PC1502 - Iron SOLAC - Free user manual and instructions
Find the device manual for free Great Lakes PC1502 SOLAC in PDF.
| Brand | Solac |
| Model | Great Lakes PC1502 |
| Category | Vertical steam iron |
| Product type | Cordless steam garment steamer with removable tank |
| Power supply | 220-240 V ~ 50/60 Hz |
| Power | 1500 W (estimated) |
| Tank capacity | 250 ml (estimated) |
| Heat-up time | About 2-3 minutes |
| Functions | Vertical ironing, garment steaming, curtains and upholstery fabrics |
| Included accessories | Removable fabric brush, storage bag, filling glass |
| Folding handle | Yes, for easy storage and transport |
| Removable tank | Yes, with lock |
| Indicator light | Red (heating) / Green (ready) |
| Safety | Thermal safety device against overheating |
| Maintenance and cleaning | Clean with a damp cloth; do not immerse; descale regularly with white vinegar |
| Descaling | Recommended with a solution of 1/3 white vinegar + 2/3 water |
| Material | Heat-resistant plastic (estimated) |
| Weight | Approximately 1.2 kg (estimated) |
| Dimensions (L × W × H) | Approximately 30 × 15 × 25 cm (estimated) |
| Cable length | 2 meters (estimated) |
| Spare parts and repairability | Accessories available separately; Solac authorized technical service |
Frequently Asked Questions - Great Lakes PC1502 SOLAC
User questions about Great Lakes PC1502 SOLAC
0 question about this device. Answer the ones you know or ask your own.
Ask a new question about this device
Download the instructions for your Iron in PDF format for free! Find your manual Great Lakes PC1502 - SOLAC and take your electronic device back in hand. On this page are published all the documents necessary for the use of your device. Great Lakes PC1502 by SOLAC.
USER MANUAL Great Lakes PC1502 SOLAC
natural_image
Exterior view of a Great Lakes solar-powered charging station with attached cable (no text or symbols visible)EN) Vertical Ironing Instructions for use
text_image
Technical diagram of a hair dryer with labeled parts including blender, holder, and beaker
natural_image
Technical line drawings of a handheld device with multiple stages of tool manipulation (no text or symbols)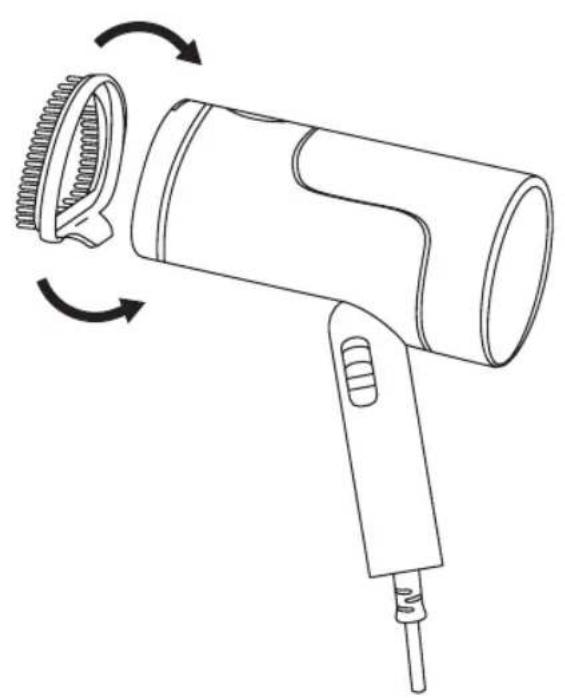
natural_image
Line drawing of a handheld hair dryer with gear shift and motion arrows indicating rotation (no text or symbols)Fig. 2

natural_image
Line drawing of a handheld hair dryer with directional arrows indicating motion (no text or symbols)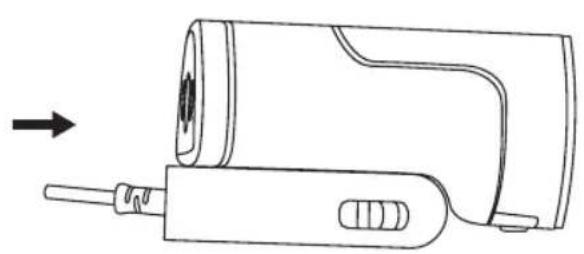
natural_image
Line drawing of a handheld electric shaver with a power cord and handle, showing internal components and an arrow indicating motion (no text or symbols)Fig. 3
ESPAÑOL ES
DESCRIPCIÓN
A Tanque de agua
G Water tank release button
H Fold button
I Fabric brush (accessory removable)
J Bag
K Cup
If the model of your appliance does not have the accessories described above, they can also be bought separately from the Technical Assistance Service.
USE AND CARE:
- Fully extend the appliance's power cable before each use.
- Do not start the appliance without water.
- Use the handle to hold or transport the appliance.
- L Do not use the appliance tilted, or turn it over.
- Do not turn the appliance over while it is in use or connected to the network.
- Do not force the appliance's work capacity.
- □ Unplug the appliance from the mains before refilling the water tank.
- □ Unplug the appliance when not in use and before carrying out any cleaning, adjusting, loading or changing accessories.
- Store this appliance out of reach of children and/or persons with physical, sensory or reduced mental or lack of experience and knowledge.
- □ Do not store the appliance if it is still hot.
- Use the appliance and its accessories and tools in accordance with these instructions, taking into account the working conditions and the work to be performed. Use the appliance for operations
different from those intended could result in a hazardous situation.
- It is advisable to use distilled water, especially if the water in your area contains clay or if it is "hard" (containing lime or magnesium).
- Never leave the appliance connected and unattended if is not in use. This saves energy and prolongs the life of the appliance.
- Do not use the appliance on any part of the body of a person or animal.
- CAUTION: Water condensation may appear on the surfaces and objects around this appliance.
INSTRUCTIONS FOR USE
BEFORE USE:
- Make sure that all products' packaging has been removed.
- Some parts of the appliance have been lightly greased. Consequently, the first time the appliance is used a light smoke may be detected. After a short time, this smoke will disappear.
- To eliminate the smell given off by the appliance when used for the first time, it is recommended to have it on at full power for 2 hours in a well-ventilated room.
- Prepare the appliance according to the function you wish to use:
- When operating the garment steamer for the first time, allow it to steam for a few minutes, this will remove any impurities and odours that might have been left by the manufacturing process.
- When operating the steam garment for the first time, you may want to try the steamer on an old piece of fabric before steaming your fabric.
FILLING WITH WATER: (FIG 1)
- You must fill the water compartment before turning on the appliance.
- Open the tank by pressing the opening button.
- Open silicone cover.
- Fill the tank with water till MAX.
- Close the cover
- Put the tank back into its place by pressing the opening button, and fill the guides.
EN
USE:
- Extend the cable completely before plugging it in.
- Connect the appliance to the mains.
- The pilot light comes on in red color.
- Leave to heat up for a few Minutes.
- Wait until the pilot light change to green will indicate that the appliance has reached an adequate temperature.
- During the appliance's use the pilot light will come on and off automatically, indicating the heating elements are working, and therefore maintaining the desired temperature.
- Push the Steam button to start working
- Orient the appliance to direct the steam flow in the desired direction
STEAM GARMENT:
- The steam garment is easy to use and is perfect for removing wrinkles/creases from garments and curtains as well as refreshing furnishings fabrics.
- It can be used on most fabric as long as the fabric is hanging or where the garment steamer can be easily used in an upright position moving over the fabric in an up and down motion.
- NOTE: the garment steamer is designed to be used in an upright position on hanging garments, refrain from using the steamer in or on garments in a horizontal position.
- Hang the garment from a hanger and stretch the fabric slightly with one hand.
- Check that there is ventilation behind the fabric.
- Check garment pockets are empty.
- NOTE: we recommend you do not steam over metal accessories, use caution and steam around the metal accessories.
ONCE YOU HAVE FINISHED USING THE APPLIANCE:
- Unplug the appliance from the mains.
- Remove the water from the water tank.
- Let the product cool down
- Clean the appliance.
ASSEMBLE THE ACCESSORIES (FIG 2)
- Attention: Always let the steamer cool down before assembling or removing the attachments.
- Assembly of fabric brush:
- 1 Align the bottom protruding part of the fabric brush into the bottom groove of the steam head.
- 2 Push the head of the fabric brush until the top protruding part also clicks in the top groove of the steam head.
HANDLE FOLDING (FIG 3)
- This machine is with well-designed handle folding function, the handle can be folded, stretchable, convenient collection and travel.
- Fold: Slide the button down to the bottom, then fold forward, press the handle to the bottom and fold:
- Stretch: Stretch the handle backward, lock button "click", stretch is done.
SAFETY THERMAL PROTECTOR:
- The appliance has a safety device, which protects the appliance from overheating.
- If the appliance turns itself off and does not switch itself on again, disconnect it from the mains supply, and wait for approximately 15 minutes before reconnecting. If the machine does not start again seek authorised technical assistance.
DECALCIFICATION
- If the appliance begins to begins to produce steam more slowly than, or stops producing steam and then starts again, you may need to decalcify your steamer. Decalcification refers to removing the calcium deposits that form over time on the metal parts of the steamer. For best performance from the Garment Steamer, please decalcify the unit from time to time. The frequency depends upon the hardness of the water being used and how often you use the steamer.
- Method:
-
- To decalcify, use a solution of 1/3 white vinegar 2/3 water in the water tank.
- 2.Plug the unit into electrical outlet. Wait until the red light goes off then push the steam button, and run until all amount has steamed. Release the steam button, unplug from electrical outlet, and allow to cool for 30 minutes.
- Repeat the above procedure as many times as necessary until a normal steam rate returns, usually 2 to 3 times. With each repeated cycle, use a fresh solution of
EN
vinegar and water.
- Run one cycle of distilled water through the unit at the completion of decalcification before using the product again.
CLEANING
- Disconnect the appliance from the mains and allow it to cool before undertaking any cleaning task.
- Clean the electrical equipment and the mains connection with a damp cloth and dry. DO NOT IMMERSE IN WATER OR ANY OTHER LIQUID.
- Clean the equipment with a damp cloth with a few drops of washing-up liquid and then dry.
- Do not use solvents, or products with an acid or base pH such as bleach, or abrasive products, for cleaning the appliance.
- Never submerge the appliance in water or any other liquid or place it under running water.
TROUBLESHOOTING THE STEAMER
| PROBLEM | CAUSE SOLUTION | |
| No steam | Steamer is not turned on | Press the steam on button |
| Steamer fails to heat | Steamer is not plugged in | Plug into electrical outlet |
| NO steam | Water level is low | Unplug the steamer and refill water tank |
| Poor steam performance | Sediment in tank | Decalcify water tank |
FRANÇAIS FR
DESCRIPTION
A Réservoir d'eau
I Raspall (accessori extraïble)
ACOBLEU-HI L'ACCESSORI (FIG. 2)
NANSA PLEGABLE (FIG. 3)
MONTÁŽ PŘÍSLUŠENSTVÍ (FIG 2)
A TARTOZÉKOK FELHELYEZÉSE (FIG 2)
This product enjoys the recognition and protection of the legal guarantee in accordance with current legislation. To enforce your rights or interests you must go to any of our official technical assistance services.
You can find the closest one by accessing the following web link: http://solac.com
You can also request related information by contacting us by phone.
You can download this instruction manual and its updates at http://solac.com
DE) GARANTIE UND TECHNIS- CHER SERVICE
Big distribution society
4 Rue 13 Lot Smara, Oulfa,
Casablanca
(+212) 522 89 40 21
ME) MONTENEGRO - EUROPE
Rastovac bb, 81400
Niksic
+382 40 217 055
Unit 25 & 26, San Croy Office Park, Die Agora
Road, Croydon, Kempton Park, 1619
Johannesburg
(+27) 011 392 5652
_
| _
一
1

text_image
Great Lakes - PC1502 Rated power: 220-240V~50/60Hz 1200W www.solac.comGreat Lakes - PC1502
Rated power: 220-240V\~50/60Hz
1200W
www.solac.com