Deluxe spa - Above-ground pool Exit Toys - Free user manual and instructions
Find the device manual for free Deluxe spa Exit Toys in PDF.

User questions about Deluxe spa Exit Toys
0 question about this device. Answer the ones you know or ask your own.
Ask a new question about this device
Download the instructions for your Above-ground pool in PDF format for free! Find your manual Deluxe spa - Exit Toys and take your electronic device back in hand. On this page are published all the documents necessary for the use of your device. Deluxe spa by Exit Toys.
USER MANUAL Deluxe spa Exit Toys
natural_image
Black cylindrical hot water bath with a white top and blue interior (no text or symbols visible)Important safety rules: Before installing and using this product read, understand, follow all instructions carefully and keep it for future reference!
natural_image
Black crossed hammer and wrench icon (no text or symbols)Instructions 4
English 5
Deutsch 20
Nederlands 35
Français 50
Slovenský 65
| 4 persons 6 persons | ||
| Model 17618XX 17691XXCapacity 4 persons 6 personsDimension (outer) 156 cm × 70 cm 184 cm × 73 cmDimensions (inner) 140 cm × 70 cm 160 cm × 73 cmWater capacity 860 L (227 gal) 1200 L (317 gal)Power supply 220-240 V, 50 Hz, 2040 W 220-240 V, 50 Hz, 2040 WMax heat temperature 40°C 40°CTest certificateCE / GS CE / GSHeating efficiency1.5 - 2.5 °C/hAmbient temperature : 20°C | ||
1.0 Part reference
natural_image
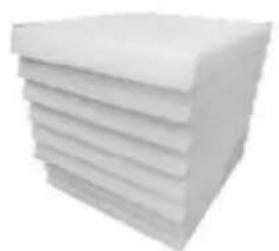
Stack of white paper sheets with no visible text or symbols- 2.
natural_image
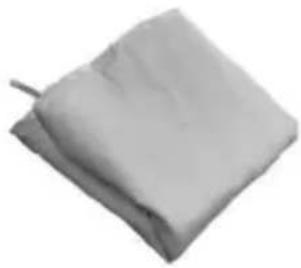
Folded white fabric or towel with a slight edge, no visible text or symbols3.
natural_image
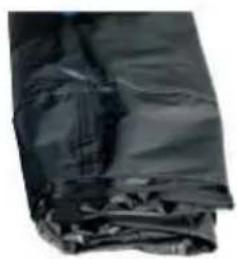
Folded black fabric or material with visible texture and folds (no text or symbols)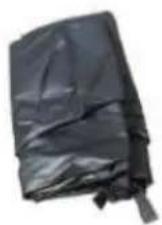
4.
5.
6.
natural_image
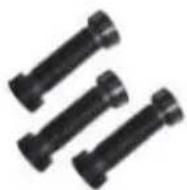
Two blue plastic filter rollers with ribbed texture (no text or symbols visible)7.
8.
9.
natural_image
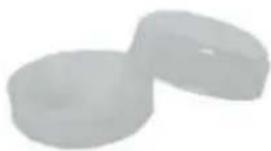
Two white plastic circular components with rounded ends, no text or symbols visible10.
11.
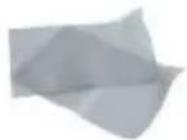
NOTE: Drawing for illustration purpose only. Actual product may vary. Not to scale. Before assembling your SPA-pool, layout and review the contents to become familiar with all the parts you will be using during the assembly:
Congratulations on choosing an EXIT Toys spa!
Have fun, be active and play outdoors.....
That's what keeps driving us to develop innovative, quality toys for cool kids and parents.
We do everything possible to develop safe products for children. As our products are classed as toys, we comply with the toughest consumer safety regulations. Before launching our products onto the market, we have independent tests carried out for certification. We also continuously test our production runs and periodically have independent tests performed again as a further check. Only products which live up to the highest EXIT Toys standard are marked with and recognized by the EXIT-brand.
"We want to thank you for your custom and your confidence in this product. We're sure your kids will have as much fun as we did during development. Being open-minded, we really appreciate all comments and ideas which will help us improve our products or develop new ones. You are invited to send your ideas to us at info@exittoys.com"
Please visit www.exittoys.com and discover more cool new products.
The EXIT Toys team
3.0 Guidelines for safe use
text_image
Warning symbol image with exclamation mark inside a triangleCarefully read, understand, and follow all information in this user manual before installing and using the spa. These warnings, instructions, and safety guidelines address some common risks of water recreation, but they cannot cover all risks and dangers in all cases. Always use caution, common sense, and good judgment when enjoying any water activity. Please read carefully and keep for future reference.

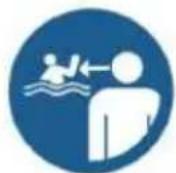
Non Swimmers safety
- Continuous, active, and vigilant supervision of weak swimmers and non-swimmers by a competent
adult is required at all times (remember that children under five are at the highest risk of drowning) - Designate a competent adult to supervise the spa each time it is being used;
- Weak swimmers or non-swimmers should wear personal protection equipment when using the spa;
- When the spa is not in use, or unsupervised, remove all toys from the SPA-pool and its surrounding to avoid attracting children to the spa.
Safety devices
- It is recommended to install a barrier (and secure all doors and windows, where applicable) to prevent unauthorized access to the spa;
- Barriers, spa covers, pool alarms, or similar safety devices are helpful aids, but they are not substitutes for continuous and competent adult supervision.
Safety equipment
- It is recommended to keep rescue equipment (e.g. a ring buoy) by the spa;
- Keep a working phone and a list of emergency phone numbers near the spa.
Safe use of the spa
- Encourage all users especially children to learn how to swim;
- Learn Basic Life Support (Cardiopulmonary Resuscitation - CPR) and refresh this knowledge regularly. This can make a life-saving difference in the event of an emergency;
- Instruct all spa users, including children, what to do in case of an emergency;
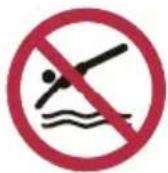
- Never dive into any shallow body of water. This can lead to serious injury or death;
- Do not use the swimming spa when using alcohol or medication that may impair your ability to safely use the spa;
- When spa covers are used, remove them completely from the water
surface before entering the spa;
- Protect spa occupants from water related illnesses by keeping the spa water treated and practicing good hygiene. Consult the water treatment guidelines in the user's manual;
- Store chemicals (e.g. water treatment, cleaning or disinfection products) out of the reach of children.
- Use the signage as outlined below;
- Removable ladders shall be placed on horizontal surface.
WARNING: a drained spa outdoors may cause unknown hazards.
WARNING: Installation and assembly shall be done by adults.
WARNING: Read and follow the instruction for use and maintenance to ensure a safe use of the swimming spa kit. Not following the instructions for use and maintenance can cause serious health hazards, in particular for children.
WARNING: Only for domestic outdoor use.
WARNING: Drowning hazard. Children can drown in very small amounts of water.
WARNING: Empty the spa when not in use. Do not leave a small spa empty outdoor.
WARNING: Keep children under supervision in the aquatic environment.
WARNING: No diving.
READ ALL INSTRUCTIONS AND SAFETY WARNINGS IN THIS MANUAL
Failure to follow the warnings and instructions in this manual may result in serious injury, drowning or electric shock. The safety of your children is left on your hand! The risk is the highest for children aged below 5. Be high alert all the time.
Always comply with the following instructions:
- The children should be under close and constant supervision;
- Designate one security responsible;
- Always designate a responsible person to mange spa and spa area;
- Adult supervision should always be relevant to the number of people using the spa;
- Wet the nape, chest and legs before entering the water;
- Learn the safety gestures and especially the specifics to children;
- Prohibit diving and jumping;
- Prohibit running, splashing games around the spa;
- Do not let an unattended child who does not swim use the spa with no life-jackets on;
- Do not leave any players around and in the basin unattended;
- Always keep the water treatment products out of reach of all children.
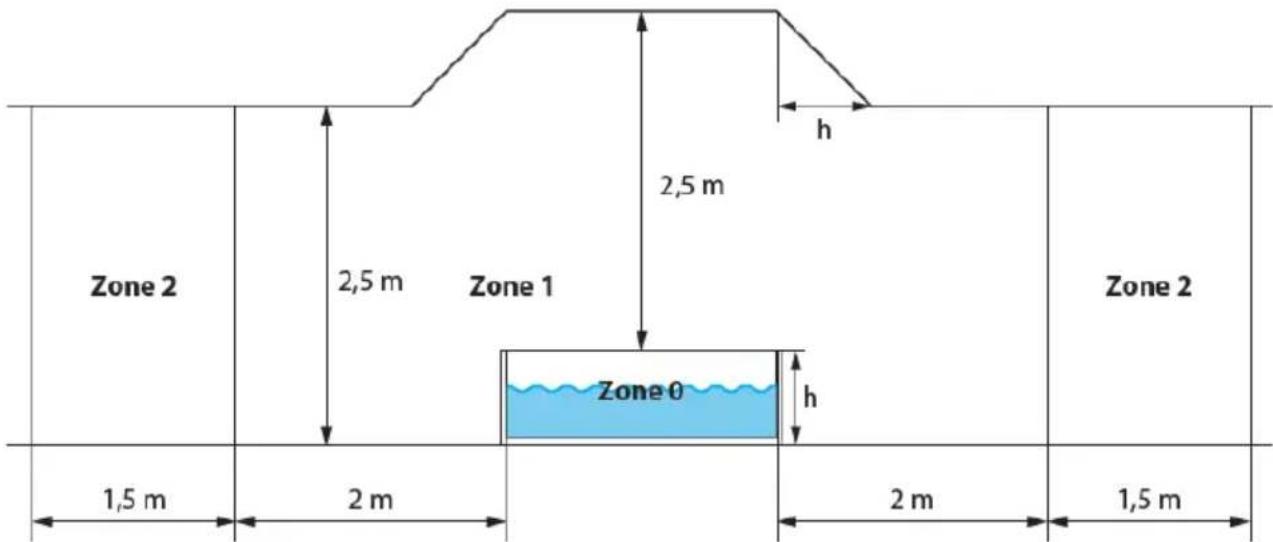
If incident occurs remove the injured person or child from the spa and spa area Contact emergency services for advice and guidance on how to treat injured person or childThe hot tub's electrical connections must be installed in the electrical safety zones labelled 1, 2 or outside all safety zones. The measured zones are limited by walls and fixed partitions.
DANGER
Risk of accidental drowning:
- Extreme caution must be exercised to prevent unauthorized access by children.
text_image
Zone 2 2,5 m Zone 1 2,5 m Zone 0 h Zone 2 1,5 m 2 m 2 m 1,5 m- Inspect the spa cover regularly for leak, premature wear and tear, damage or signs of deterioration. Never use a worn or damaged cover: it will not provide the level of protection required to prevent unsupervised access to the spa by a child.
- Always lock the spa cover after each use.
Risk of injury:
If the supply cord is damaged, it must be replaced by the manufacturer, its service agent or similarly qualified persons in order to avoid a hazard.
Risk of Electric Shock:
- Do not permit any electrical appliances, such as a light, telephone, radio or television within 1.5m (5 feet)
of a spa tub.
- Do not use the spa when it is raining, thundering or lightning..
WARNING
- To reduce the risk of electric shock, do not use an extension cord, timers, plug adapters or converter plugs to connect the unit to electric supply; provide a properly located outlet.
- The spa electrical appliance should be supplied through a residual current device (RCD) having a rated residual operating current not exceeding 10mA.
- Parts containing live parts, except parts supplied with safety extra-low voltage not exceeding 12V, must be inaccessible to occupants in the spa.
- Parts incorporating electrical components, except remote control devices, must be located or fixed so that they cannot fall into the spa.
- Residential electrical connection box must be located safely with a distance of at least 2m away from the spa.
- Electric installation should fulfill the local requirement or standards.
- This appliance can be used by children aged from 8 years and above and persons with reduced physical, sensory or mental capabilities or lack of experience and knowledge if they have been given supervision
or instruction concerning use of the appliance in a safe way and understand the hazards involved.
- Children shall not play with the appliance. Cleaning and user maintenance shall not be made by children without supervision.
- To reduce the risk or injury, do not permit children use this product unless they are closely supervised all times.
- To reduce the risk of child drowning, supervise children all times. Attach and lock spa cover after each use.
- Make sure the floor is capable of supporting the expected load (≥ 500kg/m²).
- Adequate draining system must be provided around the spa to deal with overflow water.
- To avoid damage do not leave the appliance empty for an extended period.
- To avoid damage to the pump, the spa must never be operated unless the spa is filled with water.
- Immediately leave spa if uncomfortable or sleepy.
To reduce the risk of injury :
- Lower water temperatures are recommended for young children and when spa use exceeds 10 minutes.
- In order to avoid the possibility of hyperthermia (heat stress) occurring it is recommended that the average temperature of spa-pool water should not exceed 40^ C ( 104^ F).
- Since excessive water temperatures have a high potential for causing fetal damage during the early
months of pregnancy, pregnant or possibly pregnant women should limit spa water temperatures to 38°C (100°F).
- Before entering a spa or hot tub the user should measure the water temperature with an accurate thermometer
since the tolerance of water temperature regulating devices varies.
- The use of alcohol, drugs or medication before or during spa use may lead to unconsciousness with the possibility or drowning.
- The use of alcohol, drugs, or medication can greatly increase the risk of fatal hyperthermia in spas.
- The causes and symptoms of hyperthermia may be described as follows:
- Hyperthermia occurs when the internal temperature of body reaches a level several degrees above the normal body temperature 37°C (98.6°F). The symptoms of hyperthermia include an increase in the internal temperature of body, dizziness, lethargy, drowsiness, and fainting. The effect of hyperemia include failure to perceive heat; failure to recognize the need to exit spa; unawareness of impending hazard; fatal damage in pregnant women; physical inability to exit the spa; and unconsciousness resulting in the danger of drowning.
- Obese persons or persons with a history of heart disease, low or high blood pressure, circulatory system
problem, or diabetes should consult a physician before using a spa.
- Persons using medication should consult a physician before using a spa since some medication may
induce drowsiness while other medication may affect heart rate, blood pressure and circulation.
- Check with doctor before use if pregnant, diabetic, in poor health, or under medical care.
- People with infectious disease should not use a spa or hot tub.
- To avoid injury exercise care when entering or existing the spa or hot tub.
- Water temperature in excess of 40^ C ( 104^ F) may be injurious to your health.
- Never use a spa or hot tub alone or allow others to use the spa alone.
- Do not use a spa or hot tub immediately following strenuous exercise.
- Do not put the spa under 0^ C ( 32^ F) environment in order to avoid freezing if there is still water in the spa.
- Do not turn on the spa when the water is frozen.
- Never pour water with a temperature higher than 40^ C(104°F) into the spa directly.
- Always unplug this product from the electrical outlet before removing, cleaning, servicing or making any adjustment to the product.
- Never jump or dive into a spa or any shallow body of water.
- Do not bury the electrical cord. Locate the cord where it will not be damaged by lawn mowers, hedge trimmers and other equipment.
- Do not attempt to plug in or unplug this product while standing in water or when your hands are wet.
- Do not use the spa if damaged in delivery and/or malfunctioning in any way.
- Do not add bath oil or bath salt to the spa water.
- Do not leave an empty spa outside.
- To prevent resetting of the thermal cut out, this appliance must not be supplied through an external switching device, such as a timer, or connected to a circuit that is regularly switched on and off by the utility.
4. Installation
4.1. Site selection
WARNING: Before proceed to installation your spa, please make sure that the

natural_image
Warning symbol with exclamation mark inside a triangle (no text or numbers)WARNING: Spa installed on inadequately level surfaces are subject to leaking. forming irregularities or collapses. which can result in properly damage or serious injury for those in or around the spa area!
CAUTION: Please choose your set-up area carefully as lawn and other desirable vegetation undereath the ground cloth (if applicable) wil die. furthermore, try to avoid setting the ground cloth.
future location meets the following conditions:
- A level place in order to avoid any defect, hernia or leakage.
- Wide enough to support the spa and its pump unit.
- Able to support more than 500 kg/m ^2 .
- Sheltered from the sun and bad weather.
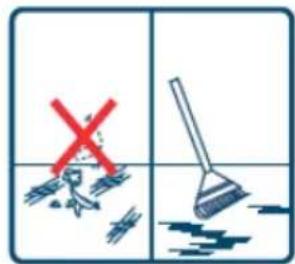
- Clean and free from sharp objects.
- Devoid of aggressive vegetation on the ground.
Failure to comply with these rules may result in property damage or personal injury. regularly switched on
4.2 RCD test
WARNING: The RCD plug must be tested before each use. Do not use if RCD test fails
Grounding

natural_image
Two-panel illustration showing a red 'X' symbol on a cylindrical object and an umbrella, both against a sky with bare branches (no text or symbols)A place with an awning
text_image
Safety warning sign showing red 'X' symbol and blue paintbrush on water surfaceClean the place
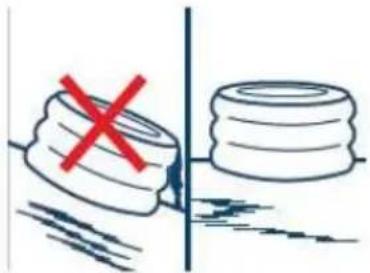
natural_image
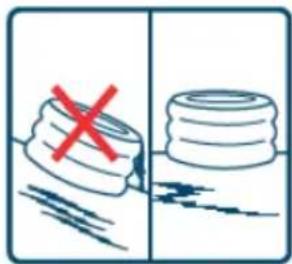
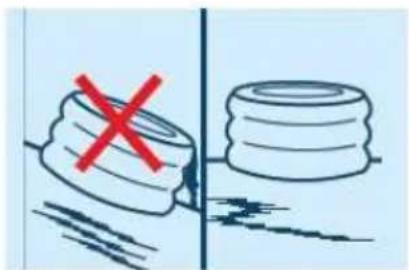
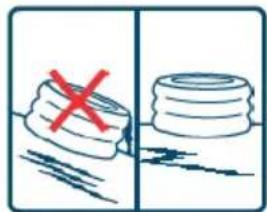
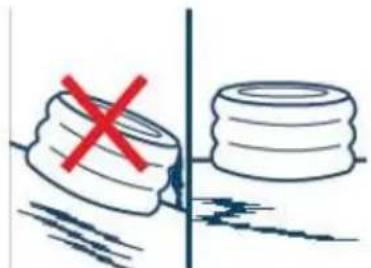
Two-panel illustration showing a red X symbol crossed over a cylindrical object, separated by a blue line (no text or symbols)A level place
You are recommended to use the services of a qualified electrician to ensure that the spa is electrically grounded by using a copper conductor of at least 2.5 mm ^4
natural_image
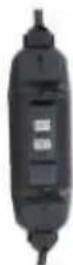
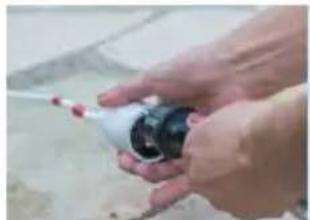
Close-up of hands holding a small cylindrical object outdoors (no visible text or symbols)- Insert the plug into the power outlet.
natural_image
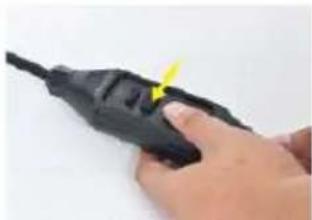
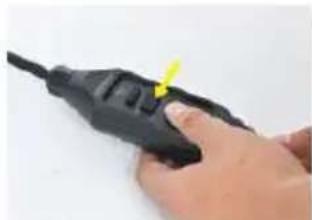
Close-up of a hand holding a black electrical plug with a yellow arrow pointing to the plug (no text or symbols visible)- Press the «RESET» button, the indicator light turns red.
natural_image
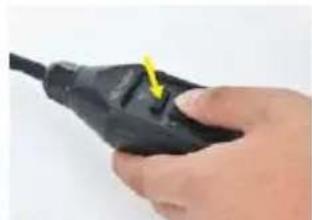
Hand holding a black electrical plug with a yellow arrow pointing to the plug (no text or symbols visible)- Press the «TEST» button, the indicator light turns off.
natural_image
Close-up of a hand holding a black electrical plug with a yellow arrow pointing to the plug (no text or symbols visible)- Press the «RESET» button, the indicator light turns red. The RCD works properly
crosssection
5. Assembling

text_image
Diagram showing wiring connection between a device casing, internal components, and a house, with a green line indicating the connection path.5.1 Spa cover and security
After each use, the control panel must be locked and the spa must be coated with its
text_image
Warning symbol image with exclamation mark inside a triangleWarning : Do not leave spa unattended while filling with water. Make sure the drain fitting is plugged securely and the cap is in place. Start filling the spa with water. After about 1-inch of water is on the bottom, stop filling and smooth wrinkles out of the bottom of the spa. Pull the outer wall out from the top edge, all around the bottom of the spa, so that it fills evenly. Continue filling the spa until waterflevel.
natural_image
Illustration of two cylindrical objects with a red X mark, one lying on the other side (no text or symbols)1) Choose a flat and level location.
natural_image
Black plastic object on a wooden surface, no visible text or symbols2) Extend the liner to the chosen area.
natural_image
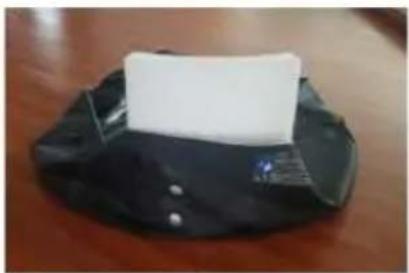
Black plastic tray with a white paper attached, placed on a wooden surface (no text or symbols visible)3) Add the foam wall segment with the three holes in it for connection to the base liner.
natural_image
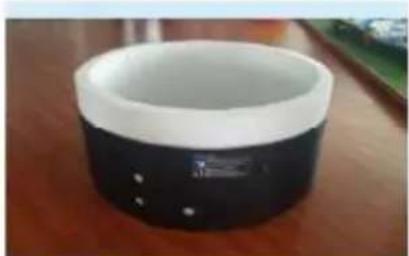
Black and white ceramic cup with a small display on the front, placed on a wooden surface (no text or symbols visible)4) Adjust the 8 segments until they form a perfect round shape. Then, ensure that the holes for the outer liner connection and the holes in the foam wall are still aligned.
natural_image
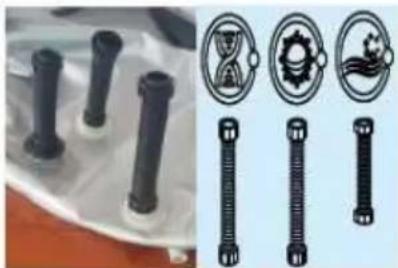
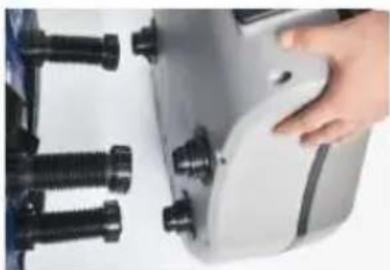
Product display showing four black cylindrical components and four different threaded fasteners with circular and gear-like designs (no text or symbols visible)5) Install the connecting hose on the liner.
natural_image
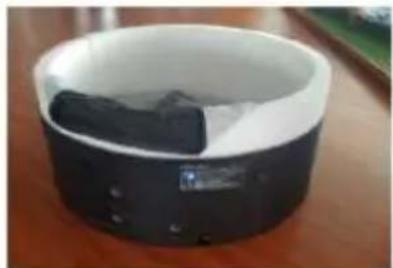
Black cylindrical device with a white lid placed on a wooden surface (no visible text or symbols)6) Insert the inner liner of your spa.
natural_image
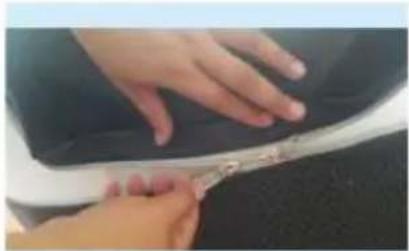
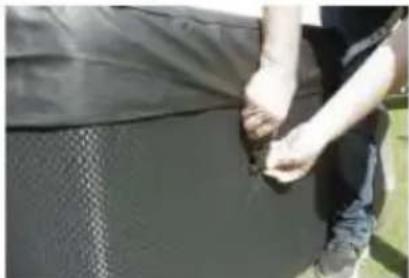
Close-up of hands adjusting a car seatbelt with a tool (no visible text or symbols)7) Locate the place where the two zippers are aligned, connect them first.
natural_image
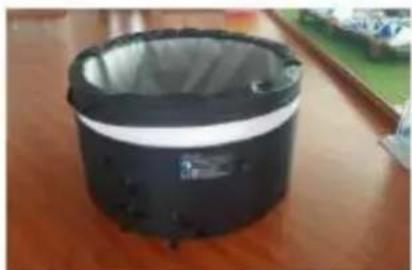
Black cylindrical object with a white lid placed on a wooden table, no visible text or symbols.8) When installed at corner, push PE foam inward so that the coat can be installed in place..
natural_image
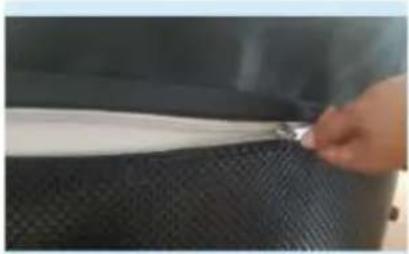
Close-up of a hand adjusting a black textured surface with a small metallic clip (no text or symbols visible)9) Make sure that the zippers of the liner and outer liners are aligned before zipping them up.
natural_image
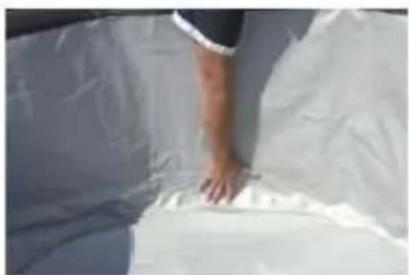
Close-up of a person's hand resting on a white fabric blanket (no text or symbols visible)10) Smooth the liner all around the SPA to ensure a good fit.
natural_image
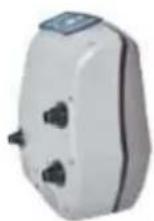
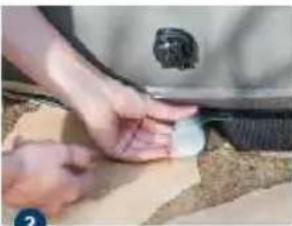
Close-up of a hand holding a white electronic device with black connectors (no visible text or symbols)11) Connect the unit pump to the pool using the 3 connectors to screw. Ensure the icons on the pump and the pool match up
natural_image
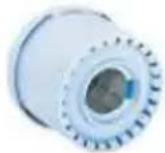
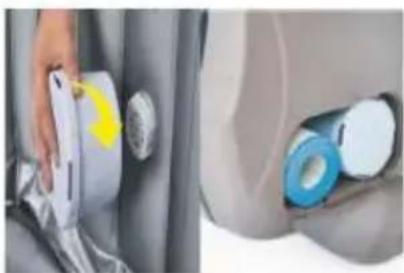
Close-up of a hand holding a white object next to a blue and white adhesive tape clip (no text or symbols visible)12) Insert the cartridge into its filter holder and then screw on the suction fitting inside the basin. Cartridge location as shown.
natural_image
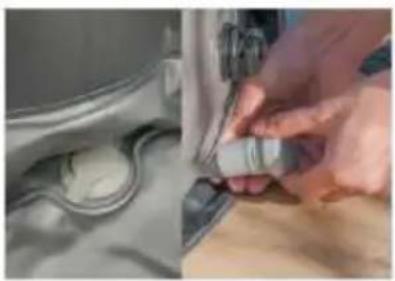
Close-up of hands using a tool to adjust or install a mechanical component (no visible text or symbols)13) Check that the drain plug is closed properly.
natural_image
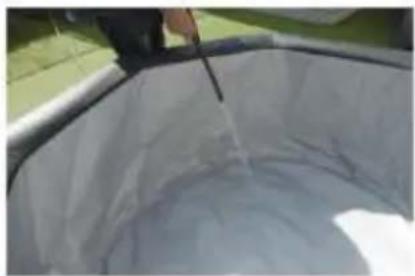
Close-up of a person cleaning a large white container with a tool (no visible text or symbols)14) Fill the spa pool until the indicated fill level is reached. Your spa is ready to be used.
top cover and it must be attached to the base protector with the safety buckles. Each safety buckles has a lock system; closed buckle, the latch in up position locks the buckle, the latch in down position unlocks the buckle. The top cover keeps the heat from the water and secures the spa.
6. Usage
6.1 Control panel
natural_image
Person applying material to a black textured surface, no visible text or symbols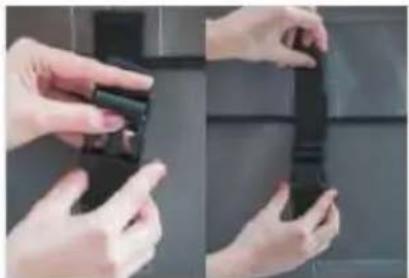
natural_image
Close-up of hands holding a black plastic buckle, no visible text or symbols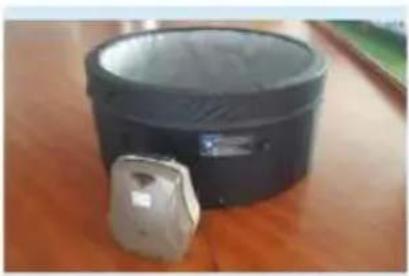
natural_image
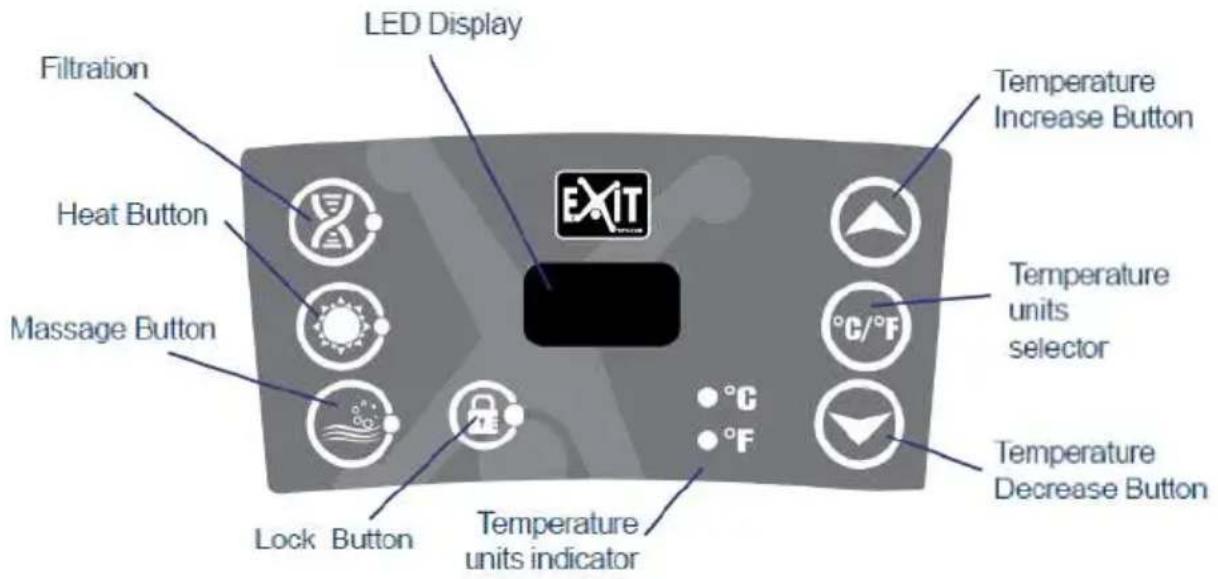
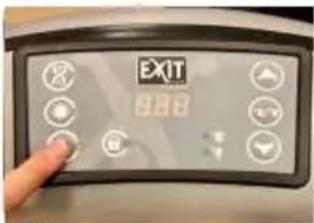
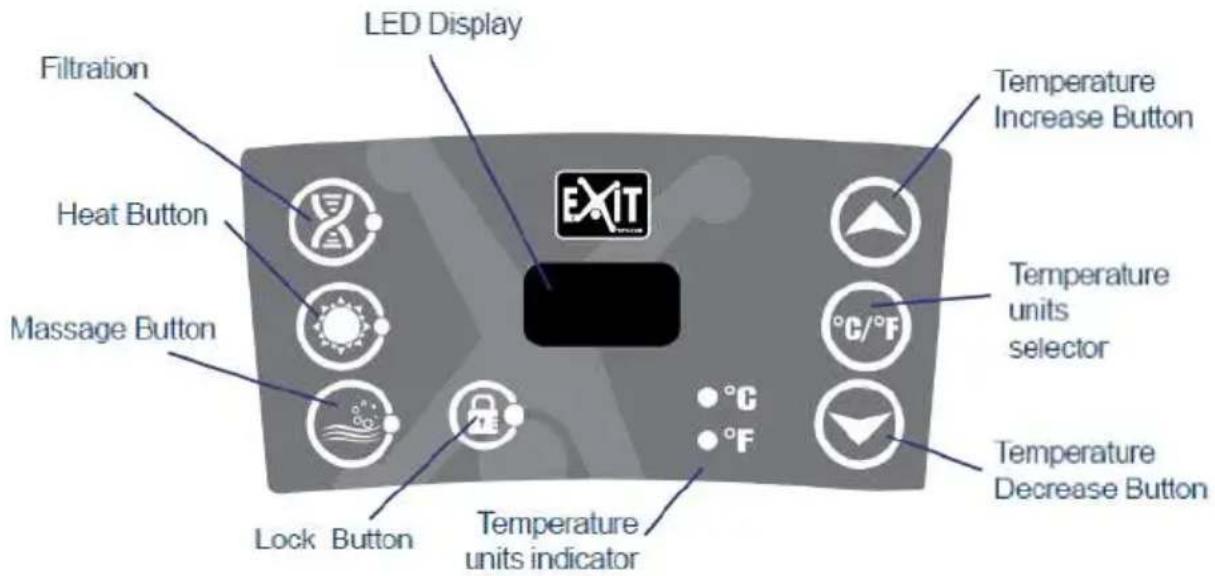
Black cylindrical object with a small metallic object placed on a wooden table (no visible text or symbols)Once powered-up, the LED displays the current water temperature automatically.
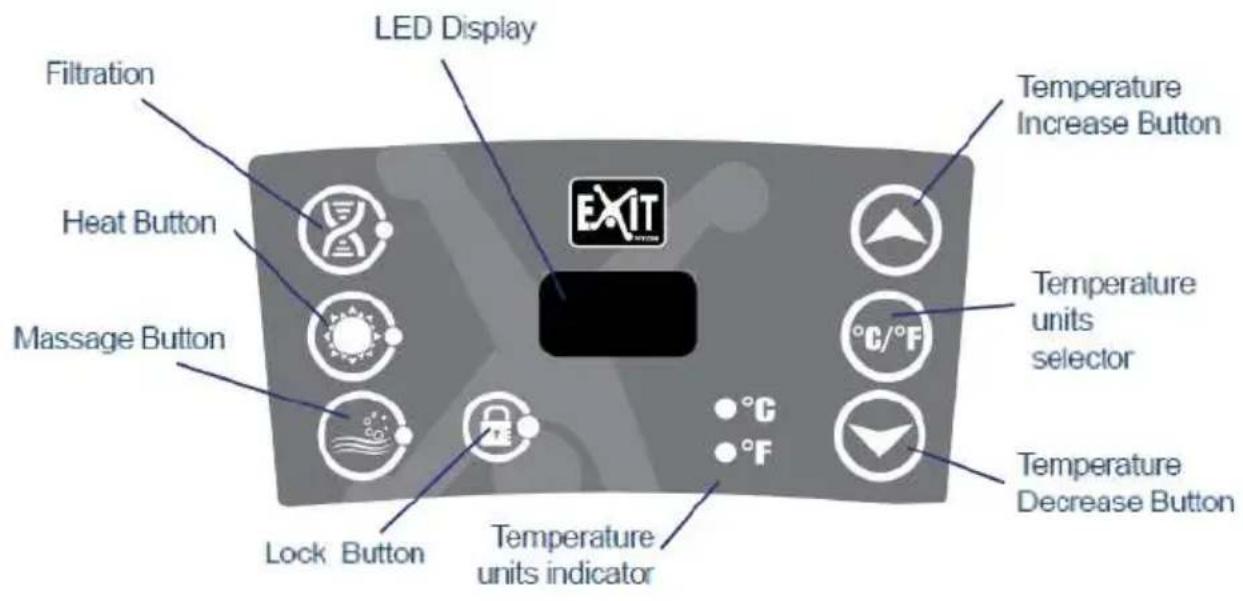
The temperature units selector changes the temperature units from Celsius degrees to Fahrenheit degrees.
text_image
LED Display Filtration Heat Button Massage Button Lock Button Temperature Increase Button Temperature units selector °C/°F °C °C °F Temperature Decrease Button Temperature units indicatorPress the temperature adjustment buttons, then the screen will flash. When it is flashing, you can set the desired temperature. The value will increase or decrease 1 degree at once. The temperature could be set between 30°C to 40°C (86°F to 104°F).
To lock or unlock the control panel, press the Lock button and hold 3 seconds. Lock the control panel when you are away to prevent other people come to change your settings.
Press the massage button to activate the bubble massage system, the green indicator light turns on. It can be turned off by pressing it again.
Note:
- The massage system will stop automatically after 30 minutes of operation. Reactivate the massage
function by pressing the massage button again.
- When filter button is on, pressing bubble button will exchange filter mode into massage mode: filter indicator light will turn off and massage indicator light turn on. If press the bubble button again, the massage mode will be changed back to filter mode.
Press the filter button to activate the water filtration. The green indicator light will turn on when the filtration system is activated.
Note: - If massage function is on, the filtration can't be activated.
Press the heating button to activate water heating and filtering system at the same time. The green indicator light of filter and red indicator light of heating will
turn on at same time. The pump does not stop heating until the current water temperature reaches the set temperature; and the heating system will restart after the current water temperature drops 2^ C below the set temperature automatically. Maximum heating temperature: 40^ C ( 104^ F)
Important:
After 150 cumulative hours of filtration operations, an audible alarm will sound and the LCD display will show the characters CHG, followed by FIL, to remind you to change or clean the filter. You can hold the filtering button 5 seconds to turn off the buzzing. The filtering system will turn off, you can press the button to active the filtering system again.
Note :
- With the heating system staring, the filtration system will start working together.
- After turning off the heating system, the filtration system will still work.
- If the massage function is active, the filtration and heating functions can not be activated.
6.2 Spa cover and security (optional)
After each use, the control panel must be locked and the spa must be coated with its top cover and it must be attached to the base protector with the safety buckles.
Each safety buckles has a lock system; closed buckle, the latch in up position locks the buckle, the latch in down position unlocks the buckle.
The top cover keeps the heat from the water and secures the spa.
6.3. Water maintenance
WARNING: A bad spa water quality can harm your health.
Depending on the frequency and conditions of use:
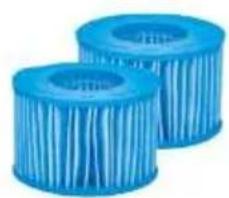
- The filter cartridge should be regularly cleaned (150 hours max.).
- The filter cartridge should be replaced every 1 to 2 month.
- The spa water should be changed every 15 to 30 days.
Use a water test kit to control the parameters of the water before using the spa, or at least once a week. Use disinfection products for the spa. The treatment products should be used with caution and it is imperative to refer to their instructions.
Damage resulting from improper use of treatment products is not covered by warranty (overdose, shock treatment, ...).
-
Water balance
The water balance (pH) must be maintain between 7 and 7.4. -
Water Sanitation
To sanitize the spa water, we suggest using an active oxygen-based treatment or bromine placed in a floating dispenser. (Dispenser sold separately).
7. Maintenance
7.1 Cleaning and replacing filter cartridge
Dirty filter cartridge may contaminate the spa water and cause damage to the
heatingfunction. 1. Unscrew the filter case by turning it counter-clockwise. Take out the filter cartridge from the case. 2. Rinse off the filter cartridge with a garden hose. If the filter cartridge remains dirty and discoloured, the filter cartridge should be replaced. 3. Put back the cleaned filter cartridge into his case and screw it to the spa.
7.2 Disinfection
Water Sanitation: To sanitize the spa water, we suggest using an active oxygen-based treatment or bromine placed in a floating dispenser. (Dispenser sold separately) If water is heavily polluted you should not use spa. Clean spa with with specialist UV lighting equipment. Seek professional advice and guidance before doing this.
Attention:
Detergent residues and dissolved solids from bathing suits and chemicals may build up on the spa walls, Use soap and water to clean the walls and rinse thoroughly with a garden hose using a direct powerful waterspray
7.3 Drainage and storage
1). Check the stopper on the bottom of the spa and the drain cap.
2). Unscrew the drain cap.
3). Remove the stopper on the bottom of the spa. Completely drain all water from the spa spa.
4). Once empty, the spa can be cleaned with soap and water.

natural_image
Four-panel photo sequence showing hands holding a spray gun, a circular brush, a blue-and-white tape, and a plastic bag being handled (no text or symbols visible)Storage
5). Press the bubbling button to blow out the water inside the jet holes. Unplug the pump, remove the filter cartridge from the inner wall of the spa.
6). Use a towel to wipe off the spa, dry 24 hours.
7). Unscrew the valves to deflate the spa.
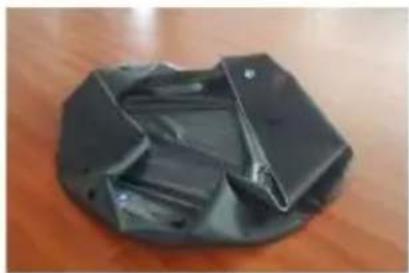
8). Fold the spa.
It is recommended that store the SPA in its original package in a warm dry place.
7.4. Repair kit
Little holes or puncture can be repaired with the repair kit included and glue reserved to spa liner.
1). Find the leak.
2). Thoroughly clean the area surrounding the leak.
3). Cut a piece of repair material in round shape, which should be larger than the damaged area.

natural_image
Close-up of a human foot resting on a blue surface, no visible text or symbols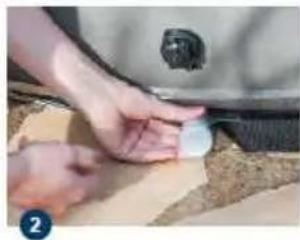
natural_image
Close-up of hands installing a small circular component on a textured surface (no visible text or symbols)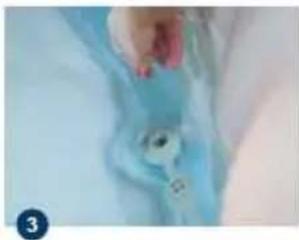
natural_image
Close-up of a hand holding a blue medical device with a small circular component (no visible text or symbols)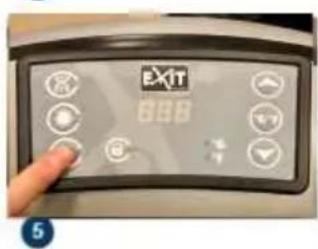
text_image
EXIT 888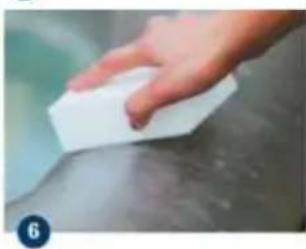
natural_image
Hand using a white rectangular tool on a metallic surface (no text or symbols visible)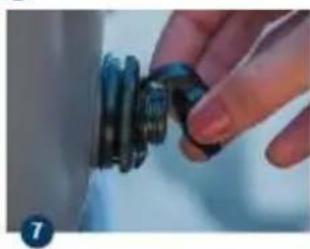
natural_image
Close-up of a hand adjusting a mechanical component (no visible text or symbols)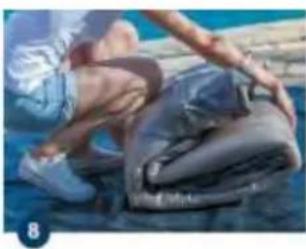
natural_image
Person sitting on a blue surface with a dark gray cushioned object, no visible text or symbols4). Apply adhesive to the underneath side of the patch and around the area to be repaired.
5). Put the patch on the damaged area and press down firmly. Allow 12 hours for repair to dry. After patch has dried, apply glue around the edges for a complete seal (dry 4 hours).
8. Trouble shooting
8.1 Common problems
Here are some useful tips to help you to diagnose and rectify common sources of trouble.
8.2. Error code
If the screen displays an error code "Ex", please refer to the table below.
E3, E4, E5, E6 error code
Cut of electricity for 5 minutes and reconnect.
| Problem | Cause | Solution |
| Control panel screen does not operate | Check power source | Power failure |
| Reset the RCD plug / Check if the wiring system is adapted to the power of the pump unit. | ||
| Call for service if it does not reset | ||
| SPA pump does not heat properly | Temperature set is too low | Set to a higher temperature |
| Filter Cartridge is dirty | Clean or Replace the cartridge (see chapter 5.2) | |
| Too low water level | Fill water to minimum water level | |
| Heating element defective | Call for service | |
| Bubble massage system does not work | Pump is overheating | Cut off the power and wait until the pump has cooled. |
| Auto shut-down feature (30min) is activated | Press the bubble button to reactivate | |
| Malfunction of the pump unit | Call for service if it does not reset | |
| Water filtration does not work | Filter Cartridge is dirty | Clean or Replace the cartridge (see chapter 5.2) |
| Inlet and outlet blocked | Clean the inlet and outlet | |
| Air inside the pump | Fill water to minimum water level | |
| Malfunction of the pump unit | Call for service if it does not reset | |
| Pump leakage | Adaptor seal improperly | Replace the seal in the right position |
| Water leakage from pump body | Check the pump body, call for service | |
| Spa pool leakage | Spa pool is torn or punctured | Use provided repair kit (see chapter 5.4) |
| Water is not clean | Insufficient filtering time | Increase the filtering time |
| Filter Cartridge is dirty | Clean or Replace the cartridge (see chapter 5.2) | |
| Pool filled water quality | Change the pool water completely | |
| Improper water treatment | Refer to the chemical manufacturer's instructions | |
| CHG FIL | After 150 cumulative hours of filtration operations, an audible alarm will sound and the LCD display will show the characters CHG, followed by FIL, to remind you to change or clean the filter. You can hold the filtering button 5 seconds to turn off the buzzing. The filtering system will turn off, you can press the button to active the filtering system again. | |
If error code is still displayed on the control Box, please do the following instructions:
1). Check that the water line is between the high and low limits.
2). Clean or replace the filter cartridge.
3). Unscrew and clean the 2 nozzles (Entry and exit of water) i nside the spa and
| Code | Situation | Problem | Causes | Solutions |
| E1 | Not heating Not heating properly. | Wrong temperature control sensor. | Temperature control sensor short circuit or open circuit. | Contact service center. |
| E3 | Not heating properly. | High water temperature indicator. | 1. The filled water is over 45°C (113°F)2. The filter cartridge was put on the wrong suction fitting (higher suction fitting). | 1. Cut off the power, make sure the pool water is between 2°C~44°C (36°F~111°F). If this does not solve the problem, refer to the box below.2. Put the filter cartridge on the lower suction fitting. |
| E4 | All functions do not work, buzzing warn. | Low water temperature indicator. | The pool water is lower than 2°C (36°F). | ·Cut off the power, make sure the pool water is between 2°C~44°C (36°F~111°F)·If this does not solve the problem, refer to the box below |
| E5 | All functions do not work, buzzing warn. | High water temperature indicator. | The filled water is over 50°C (122°F). | ·Cut off the power, turn to qualified electrician to reset the thermal cutout described in next paragraph.·If this does not solve the problem, refer to the box below |
| E6 | Not heating and filtering properly.Buzzing warns. | Water pressure is not big enough to activate heating. | ·Inlet or outlet on inner wall are blocked.·Filter cartridge is too dirty.·Pool water does not reach minimum water level.·Do not release air from pump Pump is wrong* | ·Clean inlet and outlet·Clean or replace filter cartridge·Add water to reach water level·Do air release as outlined again·If this does not solve the problem, refer to the box below |
remove wastes if necessary (Neaf, hairs, fur, skin...)
4). Check that the propeller of the filter pump does not contain foreign matter. Cut the spa again electrically for 5 minutes and re-connect it, if the error code is still displayed on the control box please contact the Service Center.
9.Warranty
EXIT Toys products have been inspected and found free of defects prior to leaving the factory. EXIT Toys warrants this product against defects in material and workmanship for a period of time, 1 year for the pump and 6 months for the liner, unless local law has special requirement. EXIT Toys warrants this product begins on the date of
purchase and EXIT Toys requires presentation of the original proof to purchase to ascertain the date. During the warranty period, EXIT Toys will either repair or replace, at its discretion, any defective produces. Replacement products or repaired parts will be warranted for only the unexpired portion of the original warranty.
Shipping cost policy
The return of defect parts to the authorized service center is at the charge of the owner. On warranty period, the return is at the charge of service center.
Warranty policy
This limited warranty does not apply to any defect resulting from negligence, accident, misuse, or other reason beyond EXIT Toys's reasonable control, included but not limited to: normal wear and tear, negligence or failure to follow the product instructions, improper or inadequate maintenance; connection to improper power supply; chemical water damage, loss of spa water, unauthorized product modification or repair; use for commercial purpose; fire, lightening, flood or other external causes. This warranty is valid only in the country of purchase in such countries where EXIT Toys sells and services the same model with identical technical specifications. Warranty service outside the country of purchase is limited to the terms and conditions of the corresponding warranty in the country of service. Where the cost of repairs or replacement is not covered by this warranty, EXIT Toys will advise the owners and the cost shall be charged to the owner. This warranty only applies to the original purchaser and terminates upon any transfer of ownership. All repairs of which warranty claims are made must be pre-authorized by a EXIT Toys service center. All the authorized selling dealer is responsible for all in-field service work carried out on your EXIT Toys product. EXIT Toys will not be liable for results of cost of workmanship from unauthorized service person.
Warranty registration
To validate your warranty, please register your product on our website EXIT Toys:www.EXIT Toys.com. It is essential that all informations including customer name, date of purchase, serial number, spa model are indicated. Without these information the warranty will be invalid.
2.0 Einführung
text_image
Warning symbol image with exclamation mark inside trianglenatural_image
Warning symbol with exclamation mark inside a triangle (no text or numbers)text_image
Illustration showing a water well with a red 'X' symbol and an umbrella, likely indicating environmental hazard or failure.text_image
Safety warning illustration showing a red 'X' symbol crossed over water and a blue bucket with a tool, indicating incorrect repair or anti-corruption.Eine saubere Fläche
natural_image
Two-panel illustration showing a red X mark on the left and a blue cylinder on the right, both without any text or symbols.Ein ebener Boden
natural_image
Hand holding a small cylindrical object with a pointed tip, against a sandy background (no visible text or symbols)natural_image
Close-up of a hand holding a black electrical plug with a yellow arrow pointing to the plug (no text or symbols visible)natural_image
Close-up of a hand holding a black electrical plug with a yellow arrow pointing to the plug (no text or symbols visible)natural_image
Hand holding a black electrical plug with a yellow arrow pointing to the plug (no text or symbols visible)text_image
Diagram showing wiring connection between a device casing, internal components, and a house via a green cable.5. Montage
natural_image
Illustration of two cylindrical objects with a red X mark, separated by a vertical line (no text or symbols)natural_image
Black plastic object lying on a wooden surface (no text or symbols visible)natural_image
Black plastic object with a white rectangular label placed on top, placed on a wooden surface (no visible text or symbols)natural_image
Black and white ceramic bowl with a small display on top, placed on a wooden surface (no text or symbols visible)natural_image
Product display showing black cylindrical pins and four different mechanical components (no text or symbols visible)natural_image
Black cylindrical device with a white lid placed on a wooden surface (no visible text or symbols)natural_image
Close-up of hands adjusting a small electronic device on a dark surface (no visible text or symbols)natural_image
Circular black object with a white band, placed on a wooden table with blurred background objects (no visible text or symbols)natural_image
Close-up of a hand adjusting a black textured surface with a small metallic clip (no visible text or symbols)natural_image
Close-up of a person's hand pressing down on white fabric, no visible text or symbolsnatural_image
Close-up of a hand operating a white electronic device with multiple black connectors (no visible text or symbols)natural_image
Close-up of a hand holding a white object next to a car interior, with a blue tape clip attached (no visible text or symbols)natural_image
Close-up of hands installing a mechanical component with a tool (no visible text or symbols)natural_image
Close-up of a person mixing white material in a container (no visible text or symbols)natural_image
Person adjusting a black textured surface with a small object near the edge (no visible text or symbols)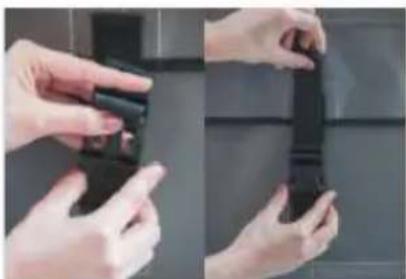
natural_image
Close-up of hands holding a black plastic clip against a dark surface (no text or symbols visible)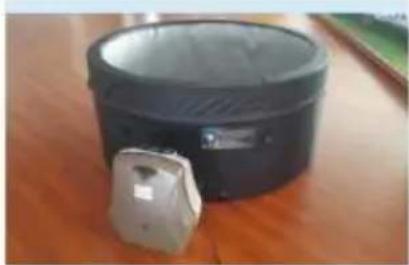
natural_image
Black cylindrical device with lid placed on wooden surface, no visible text or symbols
natural_image
Warning symbol with exclamation mark inside a triangle (no text or numbers)natural_image
Hand holding a white device with a yellow arrow pointing to it, next to a wall-mounted screw (no text or symbols visible)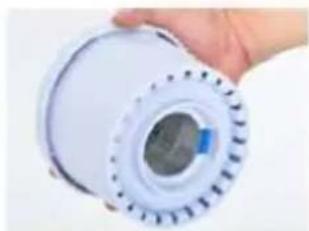
natural_image
Hand holding a white cylindrical device with a blue indicator light, no visible text or symbols.
natural_image
Person holding a blue-and-white tape outdoors on a wooden surface (no text or symbols visible)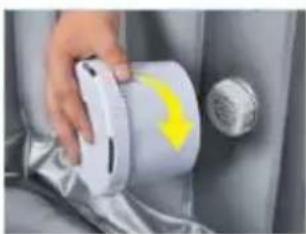
natural_image
Hand holding a white cylindrical device with yellow highlight, partially visible inside a gray vehicle seat (no text or symbols)natural_image
Close-up of a hand holding a small object near a blue surface, possibly a medical or laboratory procedure (no visible text or symbols)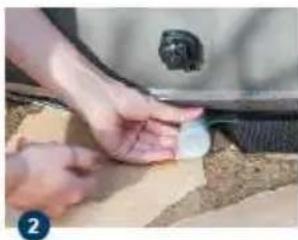
natural_image
Close-up of hands installing a small white object on a textured surface, no visible text or symbols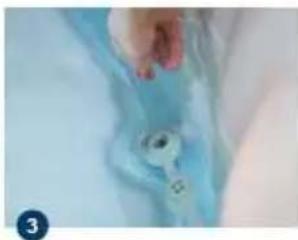
natural_image
Close-up of a hand holding a blue medical device with a circular dial (no visible text or symbols)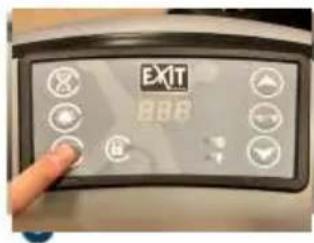
text_image
EXIT 886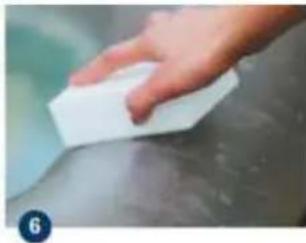
natural_image
Hand using a white rectangular tool on a metallic surface (no text or symbols visible)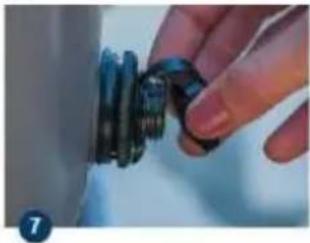
natural_image
Close-up of a hand adjusting a black mechanical component (no visible text or symbols)
natural_image
Person sitting on water next to a large dark object, possibly a tank or container (no visible text or symbols)7.4. Reparaturen
text_image
Warning symbol image with exclamation mark inside triangleVeiligheidsuitrusting
text_image
Warning symbol image with exclamation mark inside a trianglenatural_image
Illustration of a water feature with a red X mark and an umbrella, no text or symbols presenttext_image
Diagram showing a red 'X' symbol crossed out of water with debris, and a blue paintbrush above it, indicating a pollution or cleanup scenario.natural_image
Two-panel illustration showing a red X mark on a cylindrical object, one lying on the other (no text or symbols)Een effen oppervlak
4.2 RCD test
natural_image
Hand holding a small cylindrical object with a red rod, against a tiled surface (no visible text or symbols)- Stop do etokker in hot stopcontact.
natural_image
Close-up of a hand holding a black electrical plug with a yellow screw (no text or symbols visible)natural_image
Close-up of a hand holding a black electrical plug with a yellow connector (no visible text or symbols)natural_image
Close-up of a hand holding a black electrical plug with a yellow arrow pointing to the plug (no text or symbols visible)text_image
Diagram showing a device connection with labeled components including a device casing, internal components, and a house.Aarding
natural_image
Illustration of two cylindrical objects with a red X mark, separated by a vertical line (no text or symbols)natural_image
Black plastic bag resting on a wooden surface (no text or symbols visible)natural_image
Black plastic tray with a white rectangular object placed on top, placed on a wooden surface (no text or symbols visible)natural_image
Black and white ceramic bowl with a small display on the side, placed on a wooden surface (no text or symbols visible)natural_image
Product display showing four black cylindrical pins and five different mechanical components (no text or symbols visible)natural_image
Black cylindrical device with a white top, partially placed on a wooden surface (no visible text or symbols)natural_image
Close-up of hands adjusting a small metallic object on a dark surface (no visible text or symbols)natural_image
Black cylindrical device with white lid placed on wooden table, no visible text or symbolsnatural_image
Close-up of a hand adjusting a textured black surface with a small object on the edge (no visible text or symbols)natural_image
Close-up of a person's hand resting on a white plastic sheet, no visible text or symbolsnatural_image
Close-up of a hand operating a white mechanical device with black bolts (no visible text or symbols)natural_image
Close-up of a hand holding a white plastic clip next to a blue and white tape clip, with no visible text or symbols.natural_image
Close-up of hands using a tool to adjust or install a component, with no visible text or symbols.natural_image
Close-up of a person stirring a large white container with a tool, outdoors on grass (no visible text or symbols)natural_image
Close-up of hands cleaning a dark textured surface with a small object near the edge (no visible text or symbols)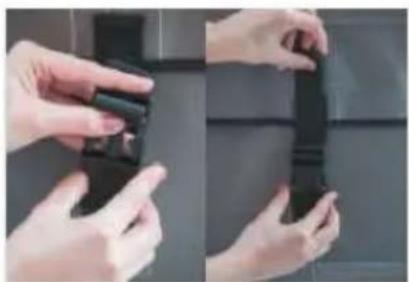
natural_image
Close-up of hands holding a black plastic clip against a dark surface (no text or symbols visible)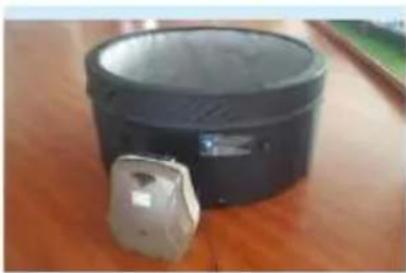
natural_image
Black cylindrical object with a small metallic object placed on a wooden surface (no visible text or symbols)6. Gebruik
6.1 Bedieningspaneel
text_image
LED Display Filtration Heat Button Massage Button Lock Button Temperature Increase Button Temperature units selector °C/°F °C °F Temperature Decrease Button Temperature units indicator6.2 Functies
natural_image
Four-panel photo sequence showing hands holding a spray can, with yellow arrows indicating motion (no text or symbols)7.3. Drainage en opslag
Drainage
natural_image
Close-up of a person's feet in a blue water surface, no visible text or symbols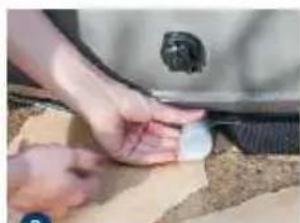
natural_image
Close-up of hands applying a small white object to a car hood (no visible text or symbols)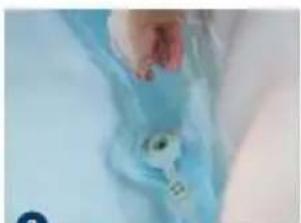
natural_image
Close-up of a hand holding a small white object against a light blue background (no visible text or symbols)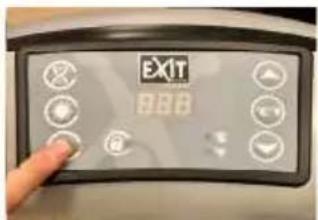
text_image
EXIT 9.88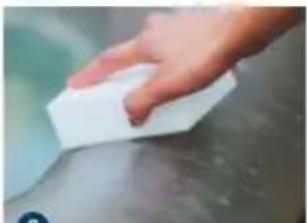
natural_image
Hand holding a white rectangular object on a metallic surface (no visible text or symbols)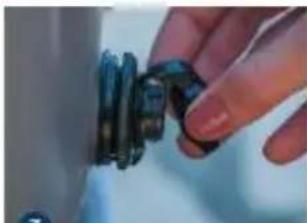
natural_image
Close-up of a hand adjusting a black mechanical component (no visible text or symbols)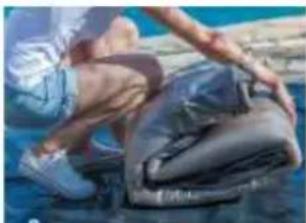
natural_image
Person kneeling on a blue surface using a gray inflatable cube, no visible text or symbols7.4. Reparatiekit
text_image
Warning symbol image with exclamation mark inside triangletext_image
Warning symbol image with exclamation mark inside trianglenatural_image
Illustration of a water feature with a red 'X' symbol and an umbrella, no text or symbols presenttext_image
Safety warning sign showing red X mark and blue paintbrush on water, indicating incorrect cleaning or anti-smoking.natural_image
Two diagrams showing a red X mark on the left and a broken cylindrical object on the right, separated by a horizontal line (no text or symbols)natural_image
Close-up of hands holding a small cylindrical object with red markings, against a sandy background (no visible text or symbols)natural_image
Close-up of a hand holding a black electrical plug with a yellow arrow pointing to the plug (no text or symbols visible)natural_image
Close-up of a hand holding a black electrical plug with a yellow arrow pointing to the plug (no text or symbols visible)natural_image
Close-up of a hand holding a black electrical plug with a yellow arrow pointing to the plug (no text or symbols visible)text_image
Diagram showing connection between a device casing, internal components, and a house via a green signal line.5. Montage du spa
natural_image
Illustration of two cylindrical objects with a red X mark, separated by a vertical line (no text or symbols)natural_image
Black plastic object lying on a wooden surface (no text or symbols visible)natural_image
Black plastic device with a white paper attached, placed on a wooden surface (no visible text or symbols)natural_image
Close-up of a black and white cylindrical object with a small inset showing a small object, placed on a wooden surface (no text or symbols visible)natural_image
Product display showing black cylindrical pins and four different mechanical components (no text or symbols visible)natural_image
Black cylindrical device with a white lid placed on a wooden surface (no visible text or symbols)natural_image
Close-up of hands adjusting a black object with a metallic clip (no visible text or symbols)natural_image
Black cylindrical object with a white band, placed on a wooden table with blurred background items (no visible text or symbols)natural_image
Close-up of a hand adjusting a black textured fabric with a small metal clip (no visible text or symbols)natural_image
Close-up of a person's hand resting on a white plastic sheet, no visible text or symbolsnatural_image
Close-up of a hand operating a white electronic device with multiple black connectors (no visible text or symbols)natural_image
Close-up of a hand holding a white spray bottle next to a blue tape clip, next to a gray interior (no text or symbols visible)natural_image
Close-up of hands adjusting a mechanical component with a tool (no visible text or symbols)natural_image
Person stirring a large white container with a stick, outdoors on grass (no visible text or symbols)natural_image
Person applying a black cover to a surface, no visible text or symbols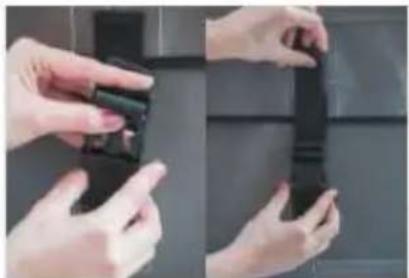
natural_image
Close-up of hands holding a black plastic clip against a dark surface (no text or symbols visible)
natural_image
Black cylindrical object with a small white object placed beside it on a wooden table (no visible text or symbols)
natural_image
Warning symbol with exclamation mark inside a triangle (no text or numbers)natural_image
Hand holding a white cylindrical device with a yellow arrow indicating motion (no text or symbols visible)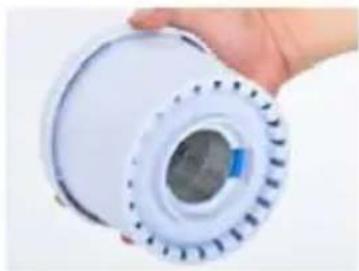
natural_image
Hand holding a white cylindrical device with a blue indicator light, no visible text or symbols.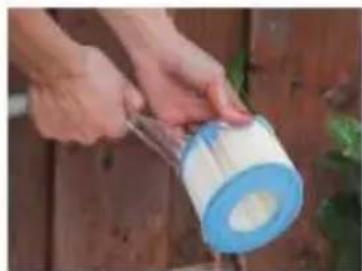
natural_image
Person pouring a blue tape onto a wooden surface (no text or symbols visible)
natural_image
Close-up of a hand holding a white remote control device (no visible text or symbols)natural_image
Close-up of a hand holding a small object, possibly a foot or object, against a light blue background (no visible text or symbols)1
natural_image
Close-up of hands applying a small white object to a surface, no visible text or symbols2
natural_image
Close-up of a hand holding a small object, possibly a medical or laboratory device (no visible text or symbols)3
text_image
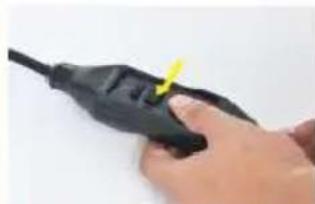
EXIT 9.88The image is too blurry to recognize any text content.
natural_image
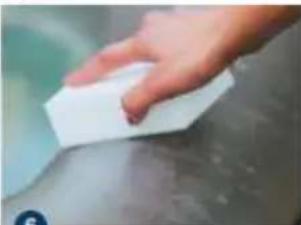
Hand cleaning a surface with a white foam block (no text or symbols visible)6
natural_image
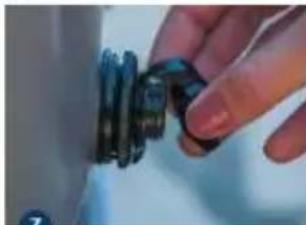
Close-up of a hand adjusting a mechanical component with gears (no visible text or symbols)7
natural_image
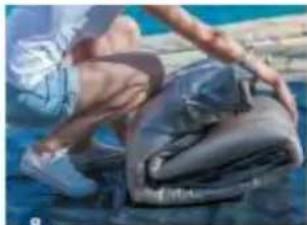
Person sitting on a blue surface using a foam roller, no visible text or symbols8
text_image
Warning symbol image with exclamation mark inside trianglenatural_image
Warning symbol with exclamation mark inside a triangle (no text or numbers)natural_image
Illustration of a water well with an 'X' mark and an umbrella, no text or symbols presenttext_image
Diagram showing a red 'X' symbol crossed out by a blue brush, indicating a collision or explosion in water.natural_image
Two-panel illustration showing a red 'X' symbol crossed out of a cylindrical object, one on the other (no text or symbols present)Een effen oppervlak
natural_image
Close-up of hands holding a small cylindrical object with a black cap, resting on sandy ground (no visible text or symbols)natural_image
Hand holding a black electrical plug with a yellow arrow pointing to the plug (no text or symbols visible)natural_image
Close-up of a hand holding a black electrical plug with a yellow arrow pointing to the plug (no text or symbols visible)natural_image
Close-up of a hand holding a black electrical plug with a yellow arrow pointing to the plug (no text or symbols visible)text_image
Diagram showing a device connection with labeled components including a housing, switch, and a meter device.natural_image
Illustration of two cylindrical objects with a red X mark, separated by a vertical line (no text or symbols)natural_image
Black plastic object lying on a wooden surface (no text or symbols visible)natural_image
Black electronic device with a white paper clip on top, placed on a wooden surface (no visible text or symbols)natural_image
Black and white ceramic bowl with circular indentations on a wooden surface (no text or symbols visible)natural_image
Product display showing four black cylindrical components and three separate mechanical assembly diagrams (no text or symbols)- Na plást'nainštalujte pripojovaciu hadicu.
natural_image
Black cylindrical device with a white lid and black fabric, placed on a wooden surface (no visible text or symbols)natural_image
Close-up of hands adjusting a zipper on a dark fabric surface (no text or symbols visible)natural_image
Black cylindrical object with a white band, placed on a wooden table with greenery in the background (no visible text or symbols)natural_image
Close-up of a hand adjusting a black textured surface with a metal clip (no visible text or symbols)natural_image
Close-up of a person's hand reaching toward a white plastic sheet on a flat surface (no text or symbols visible)natural_image
Close-up of a hand operating a white mechanical device with multiple bolts (no visible text or symbols)natural_image
Close-up of a hand holding a white plastic clip next to a blue and white adhesive tape clip, next to a gray car interior (no visible text or symbols)natural_image
Close-up of hands installing or adjusting a mechanical component on a surface (no visible text or symbols)natural_image
Person applying white paint to a large container outdoors (no visible text or symbols)natural_image
Person adjusting a dark textured surface with a small object near the edge (no visible text or symbols)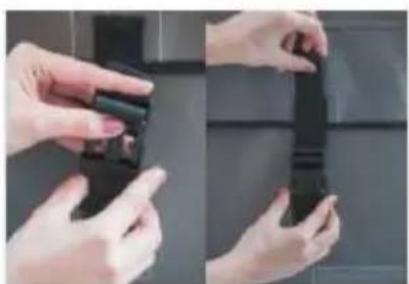
natural_image
Close-up of hands holding a black plastic buckle, no text or symbols visible
natural_image
Black cylindrical object with a small metallic clip attached to its side, placed on a wooden table (no text or symbols visible)6. Používanie
text_image
LED Display Filtration Heat Button Massage Button Lock Button Temperature units indicator Temperature Increase Button Temperature units selector °C/°F °C °F Temperature Decrease Button6.1 Ovládací panel
natural_image
Four-panel photo sequence showing hands holding a spray gun, with yellow arrows indicating motion (no text or symbols)7.2 Dezinfekcia
natural_image
Close-up of a person's feet and feet resting on a blue surface (no text or symbols visible)
natural_image
Close-up of hands applying a small white object to a textured surface (no visible text or symbols)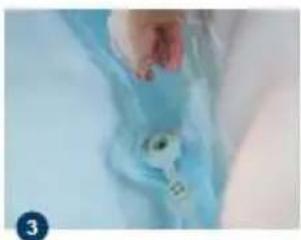
natural_image
Close-up of a hand holding a small object, possibly a medical or laboratory device, with no visible text or symbols.
text_image
EXIT 888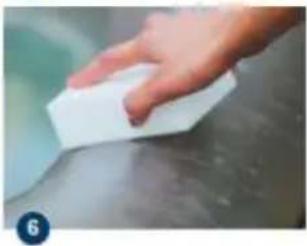
natural_image
Hand using a white rectangular tool on a metallic surface (no text or symbols visible)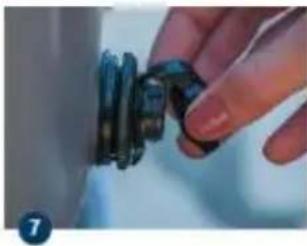
natural_image
Close-up of a hand adjusting a black mechanical component (no visible text or symbols)
natural_image
Person kneeling on water using a large bag, no visible text or symbolsEXIT is a registered trade mark of Dutch Toys Group