
Pixma TS5351A - Printer CANON - Free user manual and instructions
Find the device manual for free Pixma TS5351A CANON in PDF.

| Product type | Multifunction printer (print, copy, scan) |
| Brand | Canon |
| Model | Pixma TS5351A |
| Print technology | Thermal inkjet (FINE) |
| Print colors | Color and black |
| Maximum print resolution | 4800 x 1200 dpi |
| Approximate print speed | Up to 8 ipm (black), 4 ipm (color) |
| Supported paper sizes | A4, Letter |
| Input trays | Front cassette (plain paper) and rear tray (photo paper) |
| Front tray capacity | Approximately 100 sheets of plain paper |
| Ink cartridges | 2 FINE cartridges (black and color) |
| Connectivity | Wi-Fi, USB (not mentioned but standard) |
| Display | Monochrome LCD screen |
| Power supply | 100-240 V AC, 50/60 Hz |
| Power consumption | Approximately 11 W (printing) |
| Dimensions (W x D x H) | Approximately 435 x 327 x 138 mm |
| Weight | Approximately 5.2 kg |
| Software compatibility | Windows, macOS, iOS, Android |
| Safety | Watch your fingers when closing the cover |
| Maintenance | Automatic head cleaning via Canon software |
| Spare parts | FINE cartridges, power cord, installation CD-ROM |
| Box contents | Printer, FINE cartridges, power cord, installation CD-ROM (Windows), setup manual, Safety and Important Information |
Frequently Asked Questions - Pixma TS5351A CANON
User questions about Pixma TS5351A CANON
0 question about this device. Answer the ones you know or ask your own.
Ask a new question about this device
Download the instructions for your Printer in PDF format for free! Find your manual Pixma TS5351A - CANON and take your electronic device back in hand. On this page are published all the documents necessary for the use of your device. Pixma TS5351A by CANON.
USER MANUAL Pixma TS5351A CANON
Read Safety and Important Information (addendum) first.
Aiaaote npwta tncnnpopoeic yia tnvaqpaalekai onuavtke nnpopoeic (oumnaepwa).
Setting Up the Printer
1.Box Contents
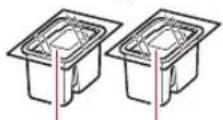
FINE cartidges
Power cord
- Setup CD-ROM for Windows
Color Black
Safety and Important Information
Getting Started (this manual)
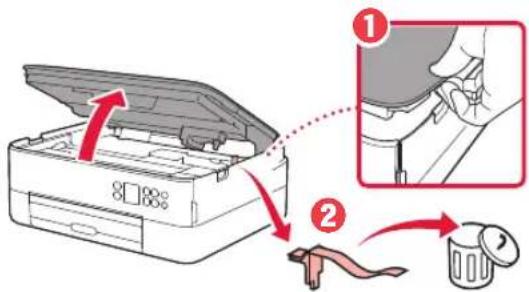
2. Removing Packing Materials

1 Remove and dispose of any packing materials and orange tape.
2 Open the scanning unit / cover, remove and dispose of the orange tape and protective material inside.
3 Close the scanning unit / cover.
- Open the scanning unit / cover fully and then close it.
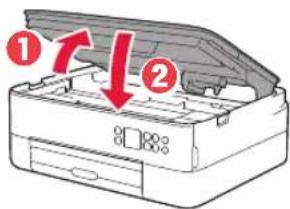
Caution
Watch your fingers.
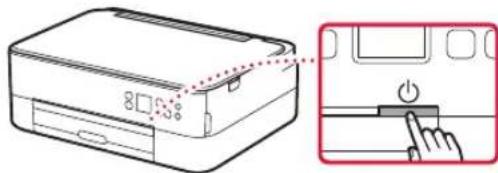
3. Turning on the Printer

1 Connect the power cord.
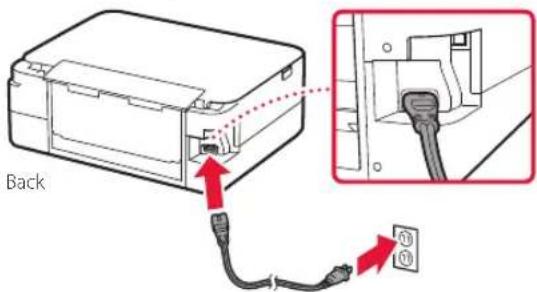
Important
At this time, do not connect any other cables.
2 Press the ON button.
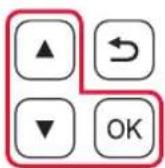
3 Use the , and OK buttons to select a language.
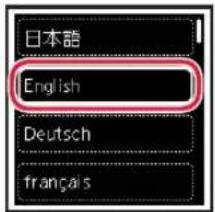

4 Press the OK button.
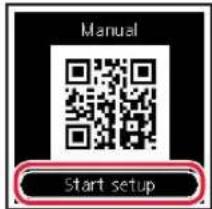
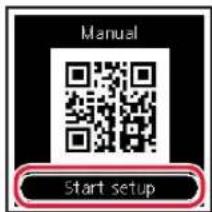
Important
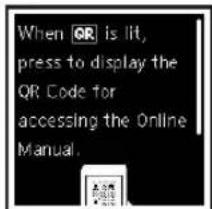
Scan the QR code for a video tutorial of the setup procedure.
Use the and buttons to check the on-screen content, and then press the OK button.
Setting Up the Printer
4. Installing the FINE Cartridges

1 Open the scanning unit / cover.
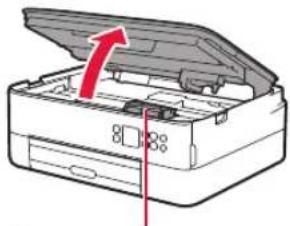

Caution
Do not touch the FINE cartridge holder until it stops moving.
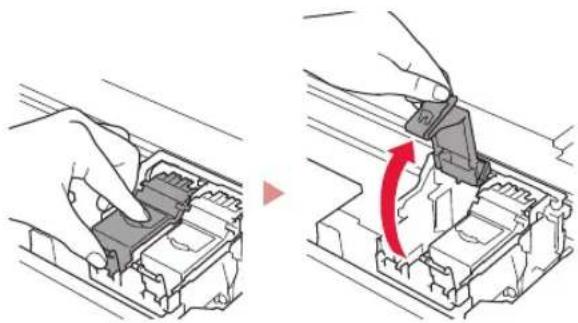
2 Pinch and open the ink cartridge locking cover on the left-hand side.
3 Remove the Color FINE cartridge from the container and remove the protective tape.
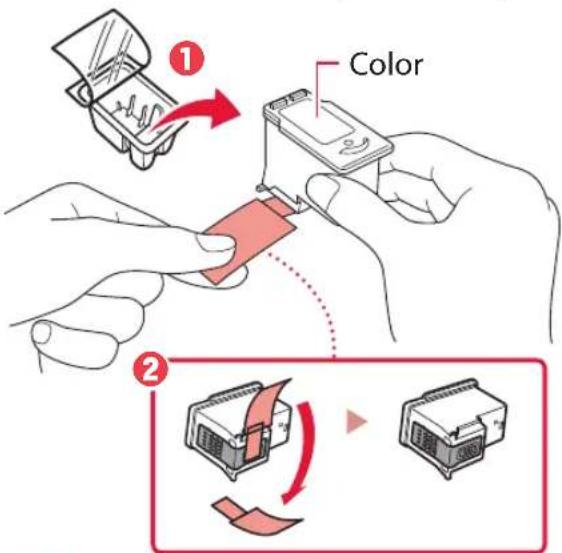
Important
- Do not touch the ink on the protective tape. It could stain your hands or surrounding objects.
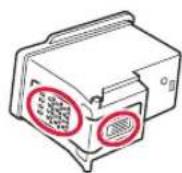
- Do not touch the areas shown in the figure. Otherwise, the printer may not print correctly.
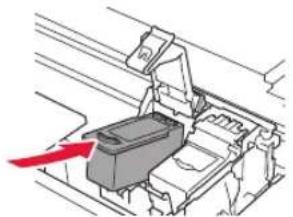
4 Set the Color FINE cartridge in the FINE cartridge holder.

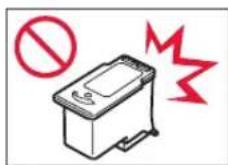
Important
Do not bump the FINE cartridge.
Doing so may cause a malfunction.
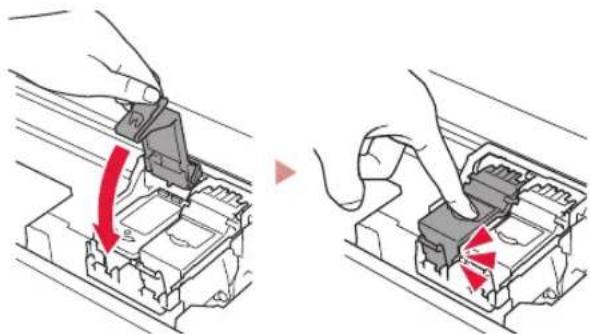
5 Push down the ink cartridge locking cover firmly until it snaps into place to close it completely.
6 Repeat steps 2 to 5 and install the Black FINE cartridge as well, on the right-hand side.
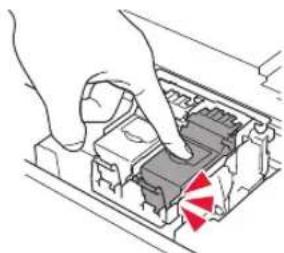
7 Close the scanning unit / cover.
The printer will start initializing.
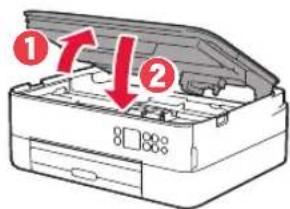

Caution
Watch your fingers.
5. Loading Paper

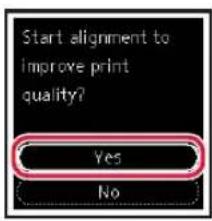
1 Press the OK button.
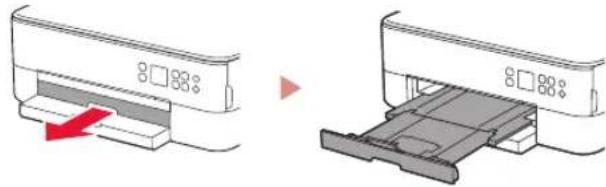
2 Remove the cassette from the printer and remove the cassette cover.
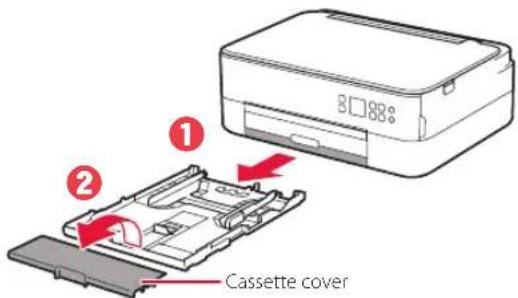
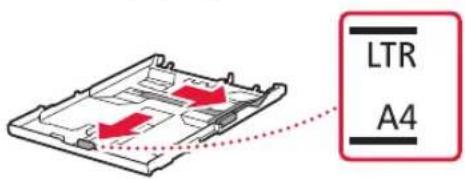
3 Slide apart the paper guides.
- Slide the right paper guide to the right edge. Align the front paper guide with the Letter or A4 mark.
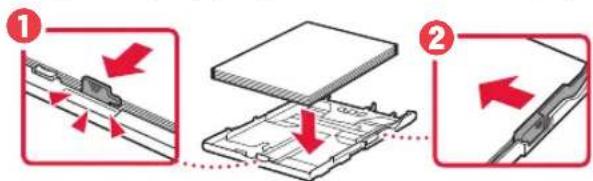
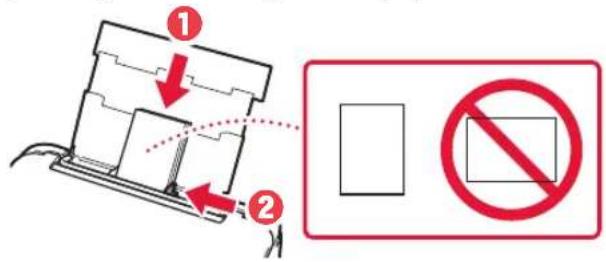
4 Load paper.
- Load 2 or more sheets of Letter or A4 sized plain paper with the print side facing down.
- Place the paper against the front paper guide, and align the right paper guide to the width of the paper.
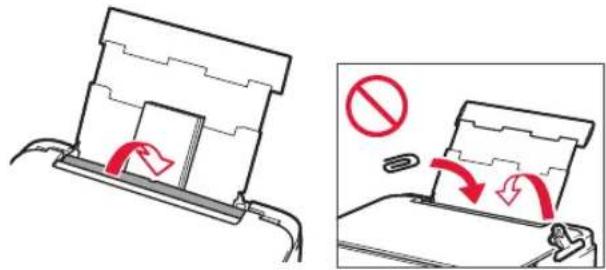
5 Attach the cassette cover and replace the cassette.
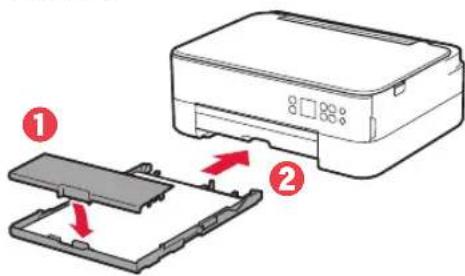
- Look at it from the side to confirm it looks like the diagram.
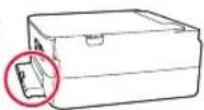
6 Pull out the paper output tray.
7 Press the OK button.
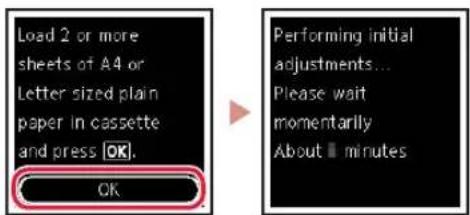
8 Press the OK button.
Important
Scan the QR code for a video tutorial of the setup procedure.
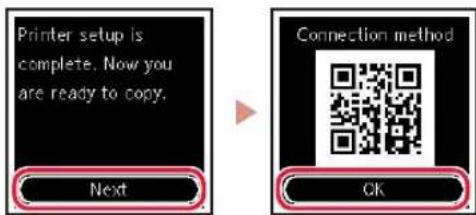
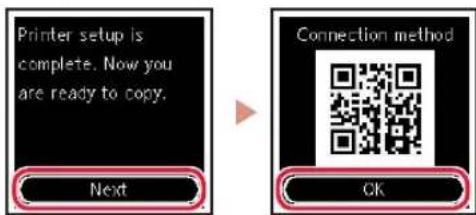
9 Check that the following screen appears.
If you will use the printer without connecting any other devices, setup is now complete.
What device are you connecting?

Computer

Computer and smartphone

6-a
Connecting to a Computer
If you are using multiple computers, perform these steps on each computer.

1 Access the Canon website from a computer.
https://ij.start.canon

2 Select Set Up.
3 Enter your printer's model name and click Go.
4 Click Start.
5 Click If you have already prepared your printer, go to Connect.

Note
The following steps are for Windows (except Windows 10 in S mode) and macOS users. For other operating systems, continue setup by following the on-screen instructions instead.
6 Click Download.
7 Run the downloaded file.
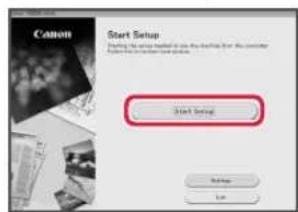
8 Click Start Setup.
9 Follow the on-screen instructions.
These operations may take some time.
To connect to a smartphone as well, see "6-b. Connecting to a Smartphone" on page 5.
Using the Setup CD-ROM for Windows
Double click EasySetup.exe in the CD-ROM, and then continue from step 3. If you do not have an internet connection, open the win folder in the CD-ROM and double click SETUP.exe. This will install the printer driver.
6-b
Connecting to a Smartphone
If you are using multiple smartphones, perform these steps on each smartphone.

Prepare the following before starting.
1 Enable the Wi-Fi setting on your smartphone.
2 Connect your smartphone to the wireless router (if you have a wireless router). Refer to your smartphone and wireless router manuals for more details.
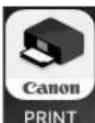
1 Install the "Canon PRINT Inkjet/SELPHY" app on your smartphone.
- Scan the QR code shown on the right to access the Canon website, and then download the app.

2 Open the installed app.
3 Follow the on-screen instructions in the app to add your printer.
Once you have added your printer, you can print from your smartphone.
To print photos, see "Loading Photo Paper" on page 6.
Loading Photo Paper
Photo paper can only be loaded in the rear tray.
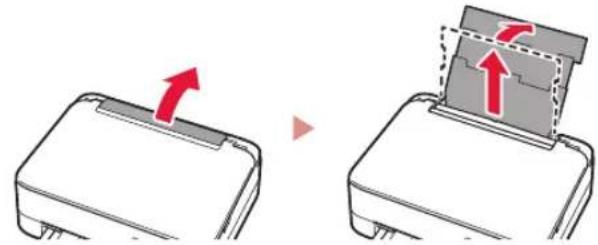
1 Open the rear tray cover and extend the paper support.
2 Open the feed slot cover and slide the right-hand side paper guide to the far right.
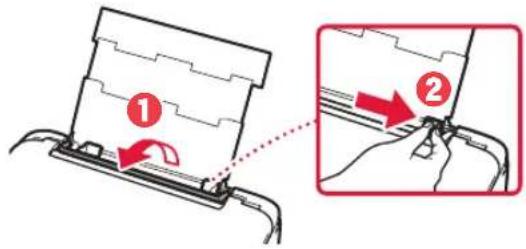
3 Load several sheets of photo paper with the print side facing up and slide the side paper guide against the edge of the paper stack.
4 Close the feed slot cover.
- Follow the on-screen instructions to set information for the loaded paper.
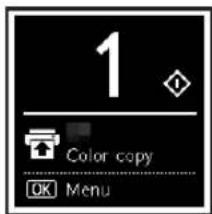
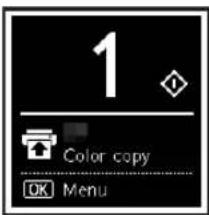
Copying
1 Turn on the printer.
2 Load Letter or A4 sized plain paper.
3 Open the document cover and place the document face down on the platen. Align the document with the alignment mark (
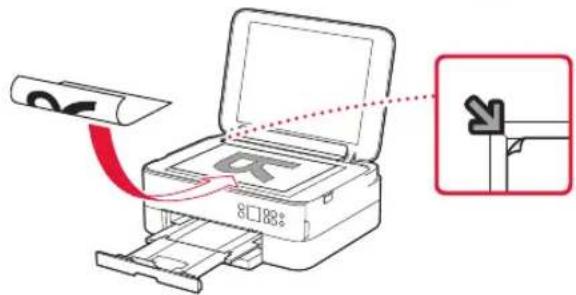
4 Close the document cover.
5 Press the OK button.
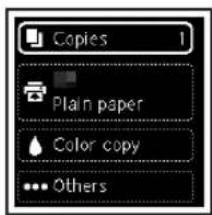
6 Select Copy settings, and then press the OK button.
7 Specify print settings using the , and OK buttons.
8 Press the Start button.
Configuration de l'imprimante
3 Deslize as guias do papel.
4 NaTHoTe To Koumu OK.

Σημαντικό
Zapwote Tov KWDIKO QR yia va deite eva bivteo e odnyie, oxetik a e thiaodikaoia puouionc.
5 Xpnoiopoioinote ta koupiia kai yia deite to nepiexóveo nou eupavietai otnv oovn kai, otn ouvexia, natote to koupi OK.

Pou EKUTWt
8 NaTnoTe to koupi OK.
Eaavko
ZapwTeTovKwikoQRyiaVaSeiteEvabivteoueOdyiec OETIKaEtniiaiaiaipuoiic.
9 Bebaiwtheta otEmuavietai n akolouo oovn.
Av npoketai va xpnoionoioeTe Tov EKTunwnxwpic va ouvdeoeTe aalec ouokeuec, toe n puthetaion exi oloknpwEi.
Ttouokeuon okoeneuete va ouvdeoet;
YIIOAOYIOITc

YIIOLOVIOIOTNC KAI smartphone

Smartphone