Scrambler SCR-E - Bike DUCATI - Free user manual and instructions
Find the device manual for free Scrambler SCR-E DUCATI in PDF.

| Product type | Folding electric assisted bicycle (fat e-bike) |
| Brand | Ducati |
| Model | Scrambler SCR-E |
| Weight | Approximately 25 kg |
| Power supply | 36 V lithium-ion battery, 230 V / 50 Hz mains charger |
| Charging time | Approximately 4 to 6 hours |
| Range | Variable depending on user weight, assistance level, terrain and weather conditions |
| Motor | Integrated electric motor |
| Wheel diameter | 20 inches |
| Brakes | Front and rear hydraulic brakes |
| Transmission | Chain with SHIMANO derailleur |
| Display | LCD screen with battery indicator, speed, PAS level, odometer, etc. |
| Assistance levels | 5 levels (0-5), configurable to 0-3, 0-5 or 0-9 |
| Maximum speed | 25 km/h (legally limited) |
| Lighting | Automatic or manual headlight, rear light with 5 modes (AA battery powered) |
| Special functions | Walk assist (6 km/h), frame folding, stem and saddle adjustment |
| Operating temperature | 0 °C to +40 °C |
| Maximum humidity | 80% |
| Maximum slope | 10% |
| Maintenance | Sponge cleaning, regular chain lubrication, checking brakes and tire pressure |
| Spare parts | Use exclusively genuine Ducati Urban e-Mobility parts |
| Warranty | The warranty is voided in case of unauthorized modifications or incorrect use |
Frequently Asked Questions - Scrambler SCR-E DUCATI
User questions about Scrambler SCR-E DUCATI
0 question about this device. Answer the ones you know or ask your own.
Ask a new question about this device
Download the instructions for your Bike in PDF format for free! Find your manual Scrambler SCR-E - DUCATI and take your electronic device back in hand. On this page are published all the documents necessary for the use of your device. Scrambler SCR-E by DUCATI.
USER MANUAL Scrambler SCR-E DUCATI
User and maintenance manual
Before using the bicycle, it must be properly and correctly assembled and checked in all its parts. Any assembly damage or incorrect maintenance are not covered by the warranty.
1. Preface
1.1 Overview
This manual is an integral and essential part of the pedal-assist bicycle (EPAC) and must be provided to the user.
Before the first operation of the bicycle, it is essential that users read, understand and strictly comply with the following provisions.
The manufacturer shall not be liable for damage to persons and/or property or to the pedal-assist bicycle if it is used incorrectly in a way that does not comply with the instructions given.
With a view to ongoing technological development, the manufacturer reserves the right to modify the pedal-assist bicycle (EPAC) without prior notice, without this manual being automatically updated.
We recommend visiting the website www.ducatiurbanemobility.it
where any updates or changes to this manual will be published.
1.2 Support Service
If you experience any problems or have any requests for clarification, please do not hesitate to contact the Support Service of your authorised Ducati Urban e-Mobility dealer, which can provide skilled and specialised personnel, specific equipment and original spare parts.
1.3 Graphical form of safety warnings
The following graphic symbols will be used to identify the safety messages in this manual. Their function is to attract the reader/user's attention to ensure the correct and safe use of the pedal-assist bicycle.

ATTENTION
Pay attention
Highlights rules of conduct to be complied with in order to avoid damaging the pedal-assist bicycle and/or the occurrence of dangerous situations.

DANGER
Residual risks
This highlights the presence of hazards that cause residual risks to which the user must pay attention in order to avoid injury or damage to property.
2. Safety warning
2.1 General safety rules

ATTENTION
Use of the pedal-assist bicycle
Each user must read this user and maintenance manual before first using the bicycle; in particular the chapter on safety instructions.

ATTENTION
Risks associated with the use of the pedal-assist bicycle
Despite the use of safety devices, to ensure the safe use of the pedal-assist bicycle, you must take note of all the accident prevention instructions in this manual.
Always stay focused while riding your bicycle and do not underestimate the residual risks associated with using the pedal-assist bicycle.
Even if you are already familiar with the use of pedal-assist bicycles, you must follow the instructions given here, as well as the general precautions to be observed when riding a motorised bicycle.
2.2 Responsibility
Failure to comply with the operating instructions and safety instructions contained in this manual shall exempt the manufacturer from any liability.
If the pedal-assist bicycle is maintained in a manner that does not comply with the instructions provided, with non-original spare parts or in any case in such a way as to compromise its integrity or modify its characteristics, the manufacturer shall be relieved of all responsibility regarding the safety of persons and the faulty operation of the pedal-assist bicycle.
If you hear unusual noises, or if you notice anything strange, stop the pedal-assist bicycle immediately. After this, carry out a check of the bicycle, and, if necessary, contact the Support Service.
Using public roads implies knowledge and compliance with the rules of the high-way code.
For any data not included in or not deducible from this manual, it is recommended to directly contact the Support Service of your authorised Ducati Urban e-Mobility dealer.
2.3 Warnings for users
- It is prohibited to ride with a passenger.
- This bicycle can only be used by experienced adults and children.
- Do not consume alcohol or drugs before riding the pedal-assist bicycle.
- This model of pedal-assist bicycle is designed and built to be used outdoors, on public roads or cycle paths.
- Do not attempt to force the pedal-assist bicycle to perform to a higher standard than that which it has been designed for.
- Never ride the pedal-assist bicycle with parts removed.
- Avoid uneven surfaces and obstacles.
- Drive with both hands on the handlebar.
- Replace worn and/or damaged parts, check that the guards are working correctly before use.
2.4 Notes on maintenance
All maintenance operations must take place with the battery disconnected.
During each maintenance phase, operators must be equipped with the necessary accident prevention equipment.
The tools used for maintenance must be suitable and of good quality.
Do not use petrol or flammable solvents such as detergents, but always use non-flammable and non-toxic solvents.
Limit the use of compressed air as much as possible (max. 2 bar) and protect yourself with goggles with side shields.
Never use a naked flame as a means of illumination when proceeding with operations of verification or maintenance.
After any maintenance or adjustment procedure, make sure that no tools or foreign bodies remain between the moving parts of the pedal-assist bicycle.

ATTENTION
Original spare parts
Use only original Ducati Urban e-Mobility spare parts.
The manufacturer shall not be held liable for damage or loss of functionality caused by the use of non-original accessories and parts.
2.5 Other provisions
The first thing to do when starting to use the bicycle is to check the presence and integrity of the guards and the operation of the safety devices.
If you find any defect, do not use the pedal-assist bicycle!
Guards
Therefore, it is strictly forbidden to modify or remove the battery and chain guards, etc., as well as the warning and identification plates.
2.6 Warehouse storage
In the event that the pedal-assist bicycle is required to be stored for long periods of inactivity, the following operations must be carried out:
- Repair it in a dry and well-ventilated place.
- Carry out general cleaning of the pedal-assist bicycle.
- Remove the battery from its seat.
- Leave the bicycle on the stand.
- Protect exposed electrical contacts with antioxidant products.
- Grease all surfaces not protected by paints or anti-corrosion treatments.
3. Description of the bicycle (epac)
3.1 Parts list
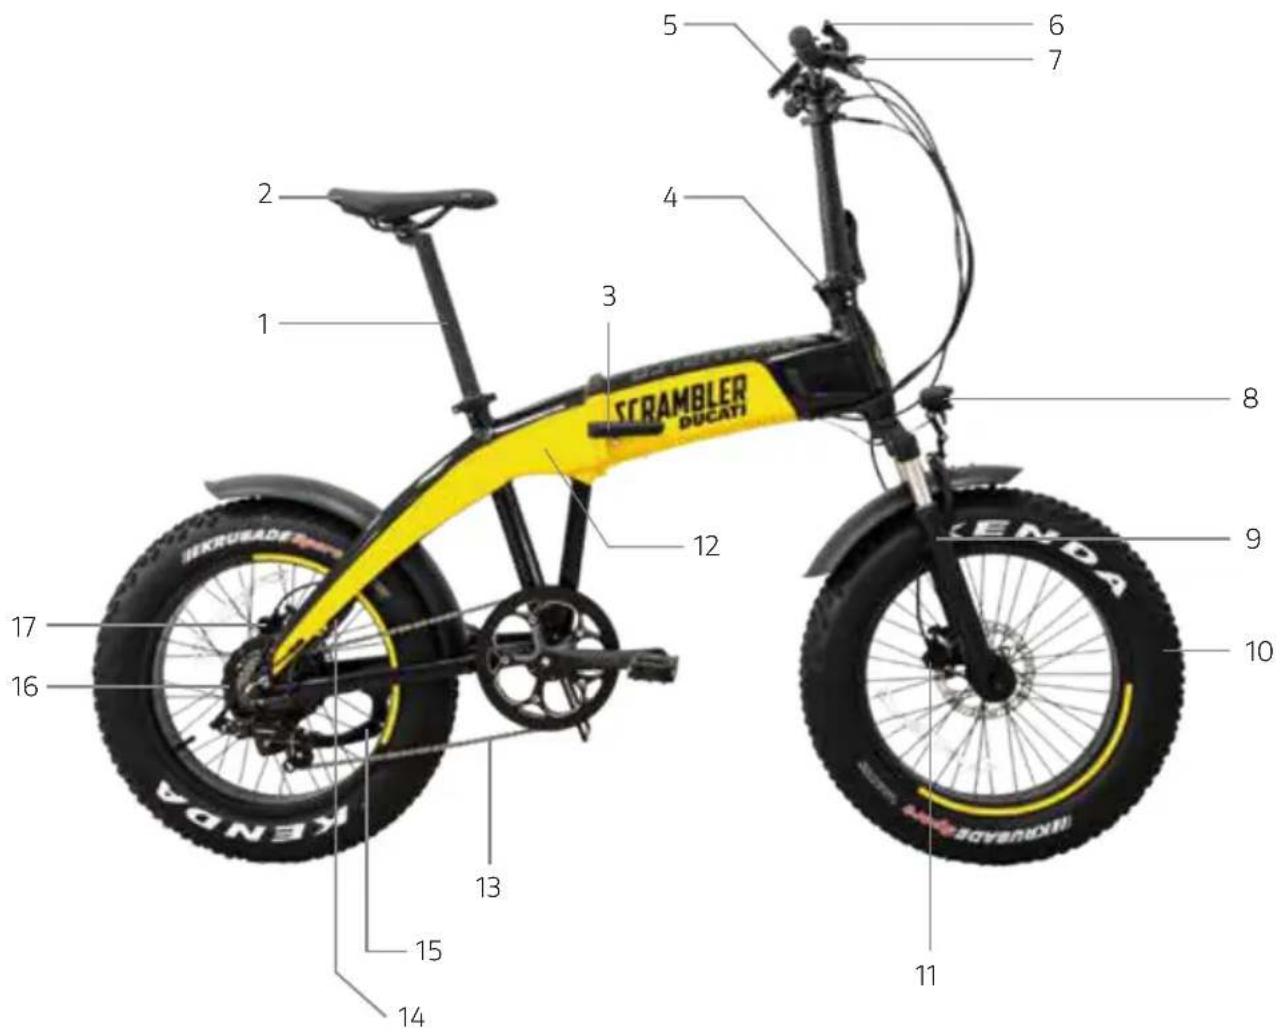
- Rear light
- Seat
- Frame opening/closing device
- Handlebar stem
- Display
- SHIMANO gear
- Brake lever
- Front light
- Fork
- 20" wheel
- Front hydraulic brake
- Control unit compartment
- Chain
- Motor socket
- Stand
- Motor
- Hydraulic rear brake
3.2 Terms of use
The pedal-assist bicycle has been designed and built to be ridden outdoors, on public roads and cycle paths, but always on asphalted surfaces.
Any modification of the state of construction can compromise the safety and stability of the pedal-assist bicycle and can lead to an accident.
Other types of use, or use beyond the range of the intended use, do not correspond to the use intended by the manufacturer and therefore the manufacturer can no longer be held liable for any resulting damage.
Battery life, and therefore the estimated mileage in km, can vary considerably depending on the type of use and external influences; please consider the following particularly influential factors: user weight, pedalling frequency, assistance level selected on the display, average speed, tread thickness and wear, slope and road surface, weather conditions.
3.3 Usage environment
The pedal-assist bicycle can be used outdoors, in the absence of adverse weather conditions (rain, hail, snow, strong wind, etc.).
Maximum allowed temperature: + 40 °C
Minimum allowed temperature: + 0 °C
Maximum allowed humidity: 80%
The usage environment must have a flat, compact asphalted surface, free of roughness, potholes or depressions, and free of obstacles and oil stains.
In addition, the place of use must be illuminated, either by the sun or by artificial lights, so as to ensure correct visibility of the route and the controls of the pedal-assist bicycle (300 to 500 lux recommended).

ATTENTION
Prohibited usage environments
The pedal-assist bicycle must not be used:
in areas subject to fire or explosion hazards;
in environments with a corrosive and/or chemically active atmosphere;
in poorly lit environments;
on land with a slope greater than 10%;
on uneven, unpaved terrain.
3.4 Improper uses and contraindications
The actions described below, which obviously cannot cover the entire range of potential possibilities of "misuse" of the pedal-assist bicycle, are to be considered absolutely prohibited.

ATTENTION
Prohibited operations
Performing prohibited operations invalidates the warranty.
The manufacturer declines all responsibility for any damage to persons and things deriving from the execution of prohibited operations.

DANGER
It is strictly prohibited to:
Ride your pedal-assist bicycle for purposes other than those for which it was built, i.e. for carrying passengers.
Ride your pedal-assist bicycle in areas where there is a danger of explosions.
Ride your pedal-assist bicycle in adverse weather conditions (pouring rain, hail, snow, strong wind, etc.).
Carry a passenger.
Ride your pedal-assist bicycle under the influence of alcohol or drugs.
Ride your pedal-assist bicycle if your weight is greater than the permitted weight.
Charge the battery in an environment that is too hot or insufficiently ventilated.
Cover the battery while it is charging.
Smoke or use open flames near the charging area.
Transit through or stop on surfaces with a gradient greater than 10% or uneven surfaces (unpaved, with holes, depressions, obstacles, etc.).
Perform any maintenance with the battery connected.
Use non-original spare parts.
Insert the limbs or fingers between the moving parts of the bicycle.
It is absolutely prohibited to raise the seat post beyond the limit of 10 cm in order to avoid fractures to the frame.
4. Lifting and transport
4.1 Lifting
The weight of the pedal-assist bicycle is approximately 25 kg, so lifting by two adults is recommended.

DANGER
Crushing and impact
During lifting, it is necessary to operate with extreme caution in order to avoid damage to people and things.
This should be done by two people.
The manufacturer is not liable for breakages due to the lifting and/or transport of the pedal-assist bicycle after delivery.
4.2 Transport
To ensure a high level of safety during transport in vans, it is necessary to prevent the pedal-assist bicycle from moving around. This is achieved by resting it on the stand and tying it up with straps or anchor cables in good condition.
In this regard, the attachment devices must be installed in such a way that they do not damage the frame and other parts of the bicycle.
5. Startup
5.1 Charging the battery
Before using the bicycle for the first time, it is necessary to charge the battery for at least 4-6 hours, until charging is complete, using the supplied battery charger.
The bicycle is powered by a 36 V lithium-ion battery.
The average charging time is around 4-6 hours. The batteries are of the lithium type.
To extend the life of the battery as much as possible, a full charge every thirty days is recommended, even if the bicycle is not used.
We recommend charging the battery with its special battery charger after each use of the pedal-assist bicycle.
Charging with the battery inserted:
Insert the charger plug into the socket on the frame.
Connect the battery charger to the mains socket (230 V/50 Hz).
Charging with the battery removed:
Open the frame with the appropriate release device.
Insert the key into the lock on the battery base, hold the battery base with one hand and turn the key counterclockwise, then pull out the battery to bring the battery to the workbench.
Insert the charger plug into the socket on the battery;
Connect the battery charger to the mains socket (230 V/50 Hz).
During charging, the red light in the charger is illuminated, when charging is complete, the red light goes out, and the green light comes on.
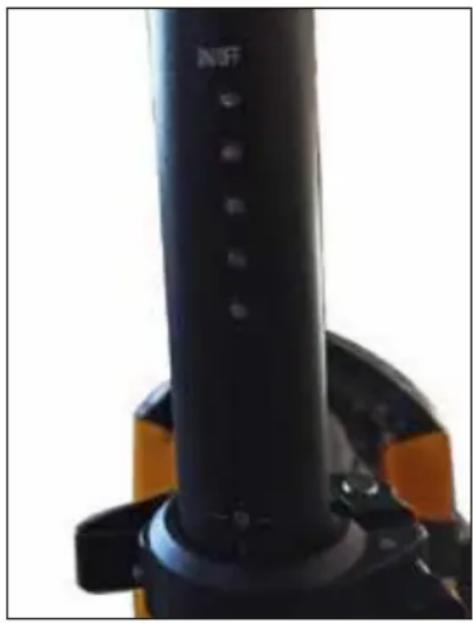
5.2 Rear light
Turn on the rear light via the ON button; there are 5 lighting modes, press the ON button again to activate the next lighting mode.
Press the ON button for more than 2 seconds to turn off the rear light.
The rear light is powered by two AA batteries; it is recommended to respect the polarity during installation/replacement.

DANGER
natural_image
Close-up of a black cylindrical device with orange base and vertical indicator lights (no visible text or symbols)Precautions during charging
Always connect the plug to the battery and then the power plug to the mains.
When recharging is complete, always disconnect the plug from the mains first and then the plug from the battery.
Always fully charge the battery.
Always use original power supplies.
Do not leave the battery charging for more than 16 hours.
Always recharge in a ventilated area.
Do not recharge the battery in environments that are too hot.
Do not recharge the battery near flammable liquids.
Do not cover the battery in any way while it is charging.
If the battery gives off a bad smell, immediately unplug it from the power supply and ventilate the room, do not touch the battery.
Keep the battery in a cool, dry place when you are not using it.
5.3 Control devices
Check the efficiency and state of charge of the battery. Using it in a very cold environment quickly degrades the efficiency of the battery. Check the chain tension and lubrication. Check that the pedals are correctly tightened in their respective positions; the pedals are different for each side, the R or L symbol is specified on the pedal axle for the right and left side respectively). Also check that the cranks are correctly tightened to the bottom bracket.
5.4 Wheels
Check the tyre inflation pressure, referring to the values on the tyre shoulder. Check the state of wear of the rubber: there must be no cuts, cracks, foreign bodies, abnormal swellings, exposed canvas and other damages.
5.5 Brake system
Check the operation of the brakes with a low-speed braking test (max. 6 km/h) in an obstacle-free zone, first with the rear brake and then with the front brake.

ATTENTION
Check with negative results
In the event that defects of any kind are found during the preliminary checks and even a single check has negative results, do not ride the pedal-assist bicycle.
Activate all measures immediately to make a proper adjustment, and if necessary, contact the Support Service.
6. Assembly
6.1 Assembly of the SCR-E model
natural_image
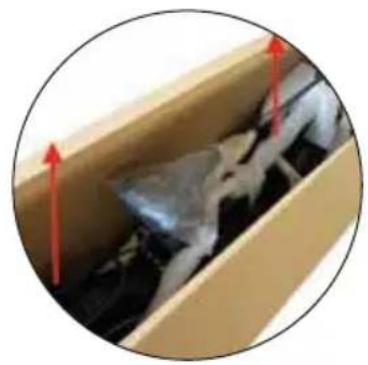
Close-up of a mechanical component with red arrows indicating direction (no visible text or symbols)- Carefully remove the bike from the packaging, then remove all protective material, being careful not to scratch the painted parts and pull the bike cables. The removal of the bike from its packaging must be an operation carried out by two adult persons in order to avoid injuries or crushing.
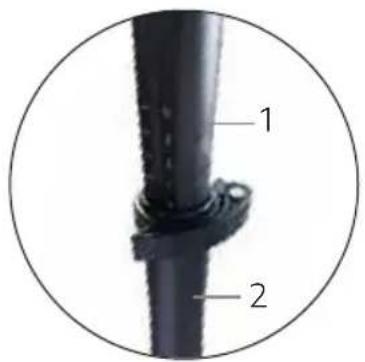
- Insert the upper part of the handlebar stem (labelled number 1) inside the lower part of the handlebar stem (labelled number 2). Adjust the height of the handlebar stem according to your riding preferences.

natural_image
Close-up of a black mechanical joint or ankle with a metallic fitting (no visible text or symbols)- Position the handlebar stem in a vertical position, then tighten the handlebar using the specific lever on the handlebar stem.
natural_image
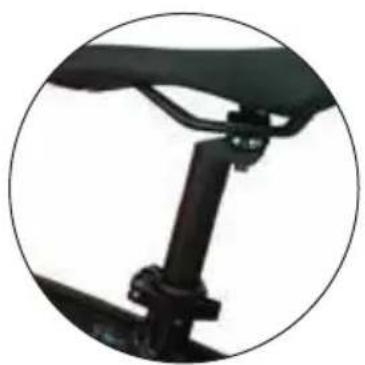
Close-up of a bicycle support structure with black frame and lever (no text or symbols visible)- Orient the seat and tighten the seat post correctly using the seat collar on the frame (photo on the right). Do not raise the seat tube beyond the limit indicated on the seat post to avoid breaking the frame and serious injuries while riding.
natural_image
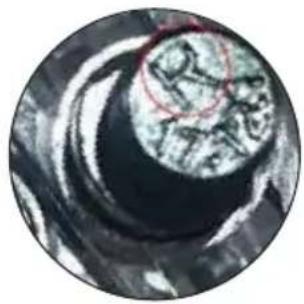
Close-up of a dark, textured surface with a red circle highlighting a small circular feature (no text or symbols visible)
natural_image
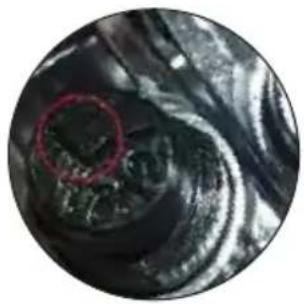
Circular abstract image with concentric rings and a textured central region, no visible text or symbols- Identify the right pedal by the R mark on the pedal axle, while the L mark identifies the left pedal. Tighten the left pedal counterclockwise and the right pedal clockwise in their respective positions to avoid serious injury when using the bike and damage to the bike.
Make sure all bolts and pedals are tightened properly.

DANGER
Risk of injury
- Check that all the bolts and pedals have been properly tightened.
- Incorrect positioning of the pedals and/or failure to tighten them can damage the cranks and/or cause the pedals to come off while riding the bike, with the risk of causing serious injury to yourself and others.

ATTENTION
Check with negative results
- If, during assembly, unclear steps or difficulties are encountered, do not drive the pedal-assist bicycle.
- Contact the Support Service of your authorised Ducati Urban e-Mobility dealer.
6.2 Maximum limit of the seat post
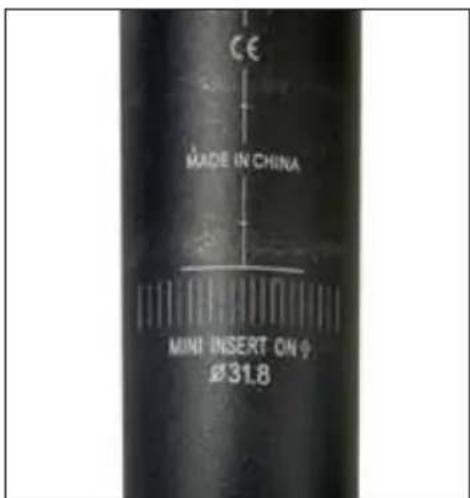

DANGER
It is strictly prohibited to the do the following
For structural and safety reasons, it is strictly forbidden to remove the seat tube/seat post beyond the limit indicated on the seat post to avoid the risk of fractures to the frame.
7. Maintenance instructions
All maintenance operations must be performed with the system switched off, the battery disconnected and the bicycle resting on the stand.
After each routine maintenance operation, a check on the perfect functioning of all controls is mandatory.
This manual does not go into detail about disassembly and non-routine maintenance, as these operations must always be carried out exclusively by the Support Service staff of your authorised Ducati Urban e-Mobility dealer.
The Support Service is able to provide all the information you will need and answer all your requests regarding the perfectcare and maintenance of your pedal-assist bicycle.

ATTENTION
Check with negative results
- If even a single check has a negative result, do not ride the pedal-assist bicycle.
- Immediately take all measures to perform a suitable repair and if necessary, contact the Support Service of your dealer.
7.1 Washing
Cleaning the pedal-assist bicycle is not only a matter of decorum but also makes it possible to immediately detect any defect in the bicycle.
In order not to damage or impair the operation of the various components, especially the electrical parts, cleaning must be carried out while taking certain precautions. It is absolutely forbidden to direct pressurised water jets towards the electrical parts, the motor, the display and the battery, for which sponge washing is recommended.
Before starting the pedal-assist bicycle, dry completely with a cloth or paper, being careful not to scratch the painted components. Avoid using compressed air, especially at close range and high pressure. Check that there is no residual moisture left on the electrical components.
7.2 Chain lubrication
It is important to lubricate the chain regularly, to avoid excessive wear and to prolong its life.
- Clean the entire length of the chain links with a rag.
- Spray all chain links with a special lubricant spray for transmission chains.
7.3 Checking the parts
The supporting frame of the pedal-assist bicycle and the welds must be free of visible defects such as: cracks, deformations, incisions, corrosion, etc.
Make sure that all the bolts and pedals of the pedal-assist bicycle are properly tightened.
Check the condition and attachment of the battery, the electrical cable sleeves must be in good condition, and the terminals must be well tightened and not corroded.
Check the battery charge status using the indicator on the handlebar display.
For proper use of the battery in your EPAC vehicle, we recommend that you always charge the battery after each use of the bicycle.
Using the inflation valve on the rims, check the inflation pressure of the tyres using a compressor and a pressure gauge gun or a workshop pump.
Check the condition of the tread, the rim and the attachment of the rims to the hubs. If you need to replace the tyres, contact the Support Service or a qualified tyre dealer.
Do not modify the tensioning of the spokes: the adjustment must be carried out by specialised personnel and with suitable equipment.
The brakes must be adjusted in such a way as to ensure effective braking, and at the same time the control levers must have a range sufficient for modulating braking: in other words, the brakes must be neither too loose nor too tight.
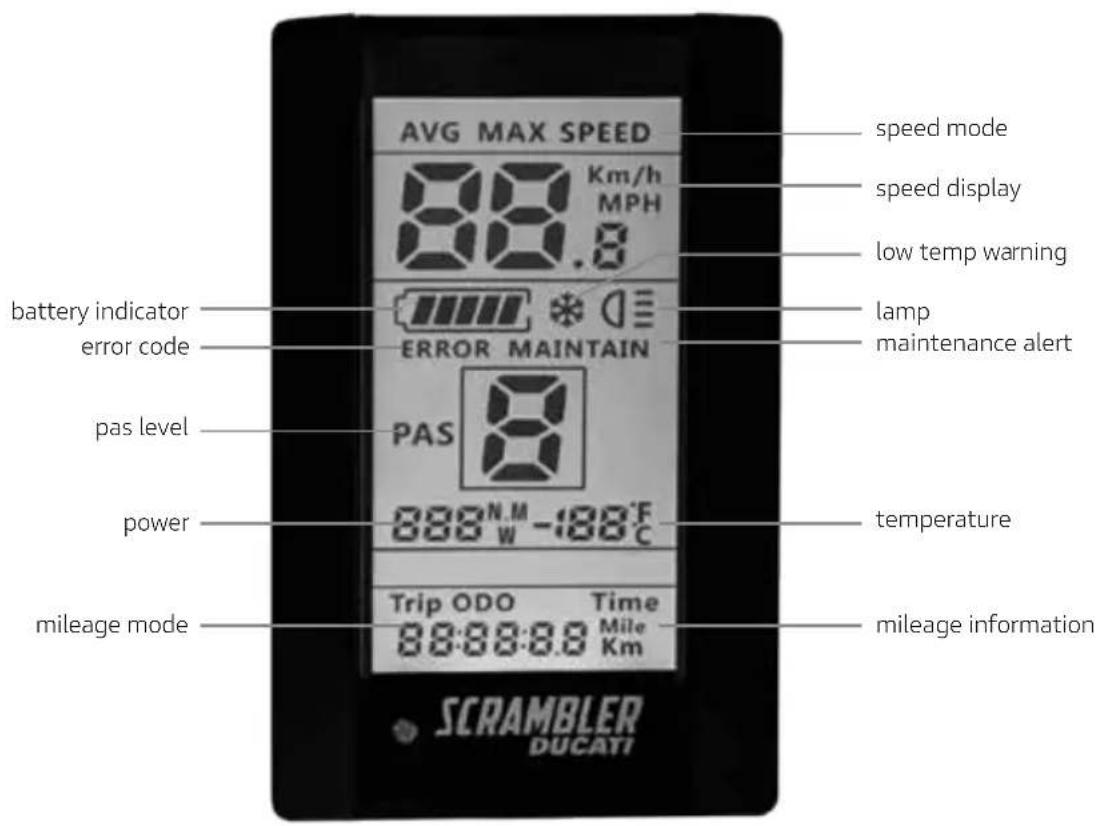
8. LCD display
8.1 Preface
The pedal-assist electric bicycle is equipped with an LCD display for complete management of all the features provided for your bike.
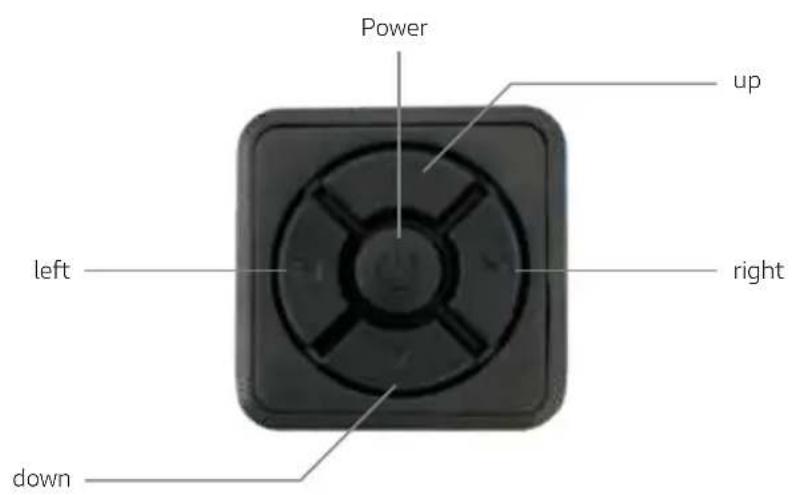
8.2 Power on/off
Press and hold the Power button for at least 1 second to turn the LCD display on/off.
8.3 Pedal Assist System (PAS)
Press the up or down button to increase or decrease the PAS (pedal assist mode) level. By default, level 5 is the maximum selectable level and provides the maximum possible help from the motor of the pedal-assist bicycle, whereas level 1 provides the minimum help from the motor. Level 0 does not provide help from the motor.
The display is preconfigured to offer 5 levels of assistance, during reconfiguration (see paragraph 9.11) you can opt for the range 0-3, 0-5 and 0-9. These options do not change the maximum assistance provided but are only a varying distribution of assistance levels. The table below is attached for a comparison between the different range modes.
| 3 level | 5 level | 9 level | |
| 0 0 0 | No power assist | ||
| 1 | 1 | ||
| 2 | |||
| 1 2 3 | |||
| 4 | |||
| 3 | 5 | ||
| 2 | 6 | ||
| 4 | 7 | ||
| 8 | |||
| 3 5 9 |
8.4 Speed - Avg Speed - Max Speed
Press the left button to switch between the speed – avg speed – max speed function The speed function shows the real-time speed during the use of the bicycle, the avg speed function shows the average speed maintained during the last use of the bicycle, the max speed function shows the maximum speed maintained during the last use of the bicycle.
8.5 Trip - Odo - Time
Press the right button to switch between the trip - odo - time function
The trip function consists in showing the partial km travelled on your electric bike, the odo function consists in showing the total km travelled on your electric bike, the time function shows the accumulated time of use after the last use of your bike.
8.6 Data resetting
Press the right button for at least 1 second to reset the avg speed/max speed/trip/time values
8.7 Lighting management
The sensor on the display allows you to automatically switch the front light on/off.
To manually switch the front light on/off, first, deactivate the "automatic light sensor mode" parameter in the display configuration, then press and hold the up button for at least 1 second to switch the front light on the pedal-assist bicycle on/off.
Check that the reflectors are present and well tightened in the front and rear wheel.
8.8 Assisted walking
Press and hold the down button for at least 1 second to activate the assisted walking function; the same function is interrupted when the down button is released.
The assisted walking function allows the bike to activate the motor without the need to pedal; this function allows the bike to reach a maximum speed of 6 km/h.
Assisted walking
Never use the assisted walking function while riding, as the electric parts of the bike could be damaged.
Always use the assisted walking function while walking alongside your electric bike, holding the handlebar grips firmly with both hands.
8.9 Battery indicator

The battery indicator is full when the battery of your pedal-assist bicycle is fully charged. The battery indicator drops in level as the pedal-assist bicycle is used. The battery indicator may fluctuate in the charge level depending on the use of the pedal-assist bicycle, for example, if you are on a gradient, the battery indicator level may drop rapidly as you consume much more of the battery power of your pedal-assist bicycle.
For optimal use and maintenance of the battery, we recommend that you fully charge the battery after each use of your electric bike.
9. Configuration of the Icd display
Press the power button twice in quick succession to enter the LCD display configuration.
Within the display configuration, press the up and down buttons to change the value of the individual parameter, press the left/right button to move to the previous/next parameter, press the power button to exit the LCD display configuration.
9.1 Km/Miles
Indicated by the S7symbol, press the up and down buttons to switch from a Km/h to Mph display.
9.2 °C/°F
Indicated by the CF symbol, press the up and down buttons to switch from a temperature display from degrees Celsius (°C) to Fahrenheit (°F).
9.3 Automatic front light
Indicated by the bL0 symbol, permitted values: 0-5, press the up and down buttons to switch between the different values, the value 0 deactivates the automatic front light, the value 1 activates the front light automatically in environments where the present brightness is higher, and the value 5 activates the front light automatically in environments where the present brightness is lower.
9.4 Display backlight
Indicated by the bL1 symbol, press the up and down buttons to switch between the different permitted values: 1-5.
9.5 Beeper
Indicated by the bEP symbol, permitted values: 0-1, press the up and down values to switch between the different values, with the value 0 the beeper is deactivated, with the value 1 the beeper is activated.
9.6 Automatic display power off
Indicated by the OFF symbol, permitted values: 1-9.
The values set correspond to the minutes. The default percentage is 5.
If the imported value is a value between 1 and 9, the display will automatically turn off after a few minutes.
9.7 Power display
Indicated by the P0d symbol, press the up and down buttons to switch between the different permitted values: 0-1, with value 1 you can view the watt output on the display, with value 0 you can disable this function.
9.8 Notice
Signalled by the nnA symbol, press the up and down buttons to switch between the different permitted values: 0-1, with value 1 this function is activated, with value 0 this function is deactivated; this function cannot be activated due to the manufacturer's instructions.
9.9 Wheel diameter
Indicated by the Wd symbol, press the up and down buttons to switch between the different permitted values: 16-18-20-22-24-26-700C-28-29.
The values set correspond to the inches of the wheel diameter. For your model, leave the value at 20; otherwise, the values shown on the display when using your bike will not be correct.
9.10 Password – Speed limit
Indicated by the PSd symbol.
Then enter the password "1919" using the up and down buttons, scroll through the different digits using the right and left buttons, and confirm the password entered with the power button.
After entering the password correctly, you enter the speed limit parameter indicated by the SPL symbol, permitted values: 10-45.
9.11 Number of motor assistance levels (PAS)
Indicated by the PAs symbol, press the up and down buttons to switch between the different permitted values: UBE | 0-3 | 0-5 | 0-9, confirm with the power button and the configuration will be saved. Do not select the UBE value (manufacturer's test value) in order to avoid anomalies on your display and compromising the normal operation of your electric bike.

ATTENTION
Permitted speed
The maximum speed allowed by law is 25 km/h.
Any interventions not authorised by the manufacturer on the control unit shall mean that the manufacturer cannot be held liable for any damage caused to persons and/or things; moreover, the warranty on the purchased product shall be invalidated.
The control unit has been programmed not to allow changes to the maximum speed parameter.

DANGER
Risk of injury
Maintain a speed and conduct appropriate to your abilities, never use the bike above 25 km/h as you could cause serious damage and injury to yourself or other people.
10. Error codes
If a malfunction occurs on your electric bicycle, this icon will be shown on the display, together with the respective error code.
Please consult the following error code table and report everything to the Support Service.
| Code Definition | |
| 01 | Communication error |
| 03 | Error in the brake system |
| 04 | Accelerator error |
| 06 | Low-voltage protection |
| 07 High-voltage protection | |
| 08 | Hall sensor fault |
| 09 Phase line fault | |
| 10 | Control unit overheating |
| 11 PAS error | |
| 12 Current sensor fault | |
| 13 Battery overheating | |
| 14 | Motor overheating |
| 21 | Speed sensor error |
| 22 BMS fault | |
| 23 Front light fault | |
| 24 | Display light sensor fault |
| 30 | Communication error |
11. Connection diagram
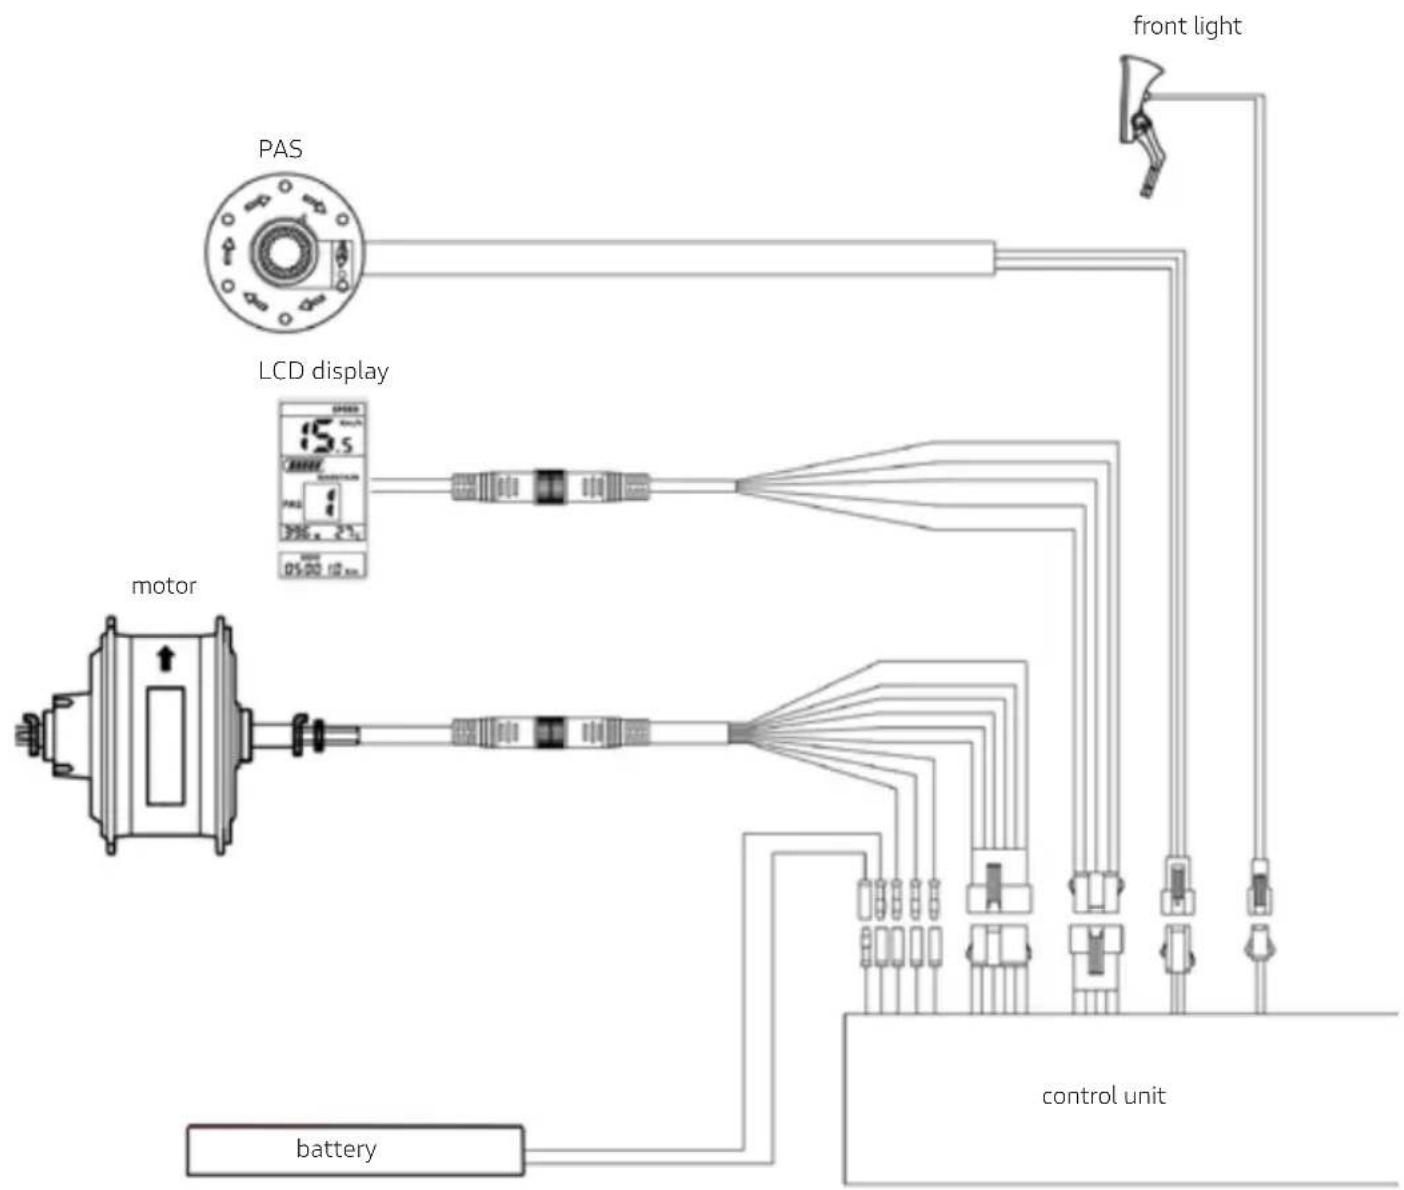
flowchart
graph TD
    A["bus"] --> B["motor"]
    B --> C["LCD display"]
    C --> D["control unit"]
    D --> E["battery"]
    F["PAS"] --> G["Front light"]
    H["05:00 10 am"] --> I["LCD display"]
    I --> J["Motor"]
    K["control unit"] --> L["bus"]
    M["bus"] --> N["bus"]
    style A fill:#f9f,stroke:#333
    style B fill:#ccf,stroke:#333
    style C fill:#cfc,stroke:#333
    style D fill:#fcc,stroke:#333
    style E fill:#cff,stroke:#333
    style F fill:#ffc,stroke:#333
    style G fill:#fcc,stroke:#333
    style H fill:#ffc,stroke:#333
    style I fill:#cfc,stroke:#333
    style J fill:#cfc,stroke:#333
    style K fill:#ffc,stroke:#333
    style L fill:#cfc,stroke:#333
    style M fill:#cfc,stroke:#333
    style N fill:#cfc,stroke:#333
Italiano
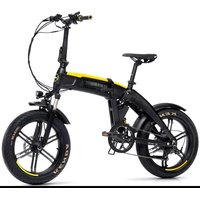
SCR-E
foldable fat e-bike
natural_image
Close-up of a black cylindrical device with orange base and orange clamped components (no visible text or symbols)natural_image
Close-up of a dog inside a wooden box with red arrows pointing to the interior (no text or symbols visible)natural_image
Close-up of a black mechanical joint or ankle with a metallic fitting (no visible text or symbols)natural_image
Close-up of a bicycle seat with lever and support bracket (no text or symbols visible)natural_image
Close-up of a dark, textured surface with a red circle highlighting a small dark region (no text or symbols visible)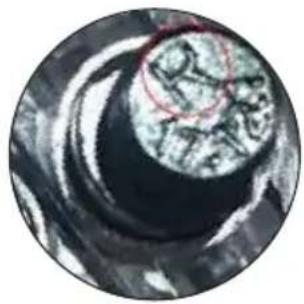
natural_image
Circular abstract image with concentric rings and a central textured pattern, no visible text or symbols8.4 Speed - Avg speed - Max speed
natural_image
Close-up of a black cylindrical mechanical component with orange base and orange clamping elements (no visible text or symbols)natural_image
Close-up of a mechanical component with red arrows indicating direction (no visible text or symbols)natural_image
Close-up of a black mechanical joint or ankle component, no visible text or symbolsnatural_image
Close-up of a bicycle support structure with black frame and lever (no text or symbols visible)natural_image
Close-up of a dark, textured surface with a red circle highlighting a small circular feature (no text or symbols visible)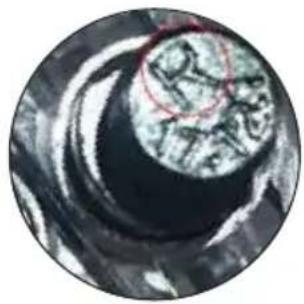
natural_image
Circular abstract image with concentric rings and a central textured pattern, no visible text or symbols8.4 Speed - Avg speed - Max speed
natural_image
Close-up of a black cylindrical device with orange base and orange handle, no visible text or symbolsnatural_image
Close-up of a mechanical component with red arrows indicating direction (no visible text or symbols)natural_image
Close-up of a black cylindrical object with two labeled parts (1 and 2), no visible text or symbols beyond labels.natural_image
Close-up of a black mechanical joint or bracket with a metallic fitting (no visible text or symbols)natural_image
Close-up of a bicycle support structure with black frame and lever (no text or symbols visible)natural_image
Close-up of a dark, textured surface with a red circle highlighting a small circular feature (no text or symbols visible)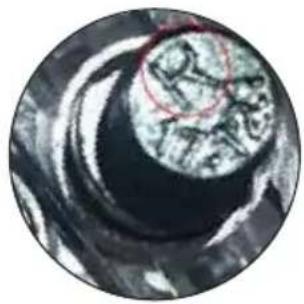
natural_image
Circular abstract pattern with concentric rings and a central textured sphere (no text or symbols)8.4 Speed - Avg speed - Max speed
natural_image
Close-up of a black cylindrical mechanical component with orange base and white top (no visible text or symbols)natural_image
Close-up of a mechanical component with red arrows indicating direction (no visible text or symbols)natural_image
Close-up of a black mechanical joint or ankle with a metallic fitting (no visible text or symbols)natural_image
Close-up of a bicycle support structure with black frame and lever (no text or symbols visible)natural_image
Close-up of a dark, textured circular object with a red circle highlighting a small dark region (no visible text or symbols)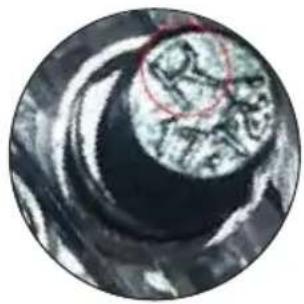
natural_image
Circular abstract image with concentric rings and a central textured circular pattern, no visible text or symbols.natural_image
Close-up of a black cylindrical mechanical component with orange base and white top (no visible text or symbols)natural_image
Close-up of a mechanical component with red arrows indicating direction (no visible text or symbols)natural_image
Close-up of a black mechanical joint or bracket component, no visible text or symbolsnatural_image
Close-up of a bicycle seat with visible support structure (no text or symbols)natural_image
Two circular images showing a dark, textured surface with a red-circled highlight on the left (no text or symbols visible)natural_image
Close-up of a black cylindrical device with orange base and vertical indicator lights (no visible text or symbols)natural_image
Close-up of a mechanical component with red arrows indicating direction (no visible text or symbols)natural_image
Close-up of a black mechanical component with a circular frame (no visible text or symbols)natural_image
Close-up of a bicycle support structure with black frame and lever (no text or symbols visible)natural_image
Close-up of a textured, dark circular object with a red circle highlighting a small dark region (no visible text or symbols)
natural_image
Circular abstract image with concentric rings and textured patterns, no visible text or symbols8.4 Speed - Avg speed - Max speed
natural_image
Close-up of a black cylindrical mechanical component with orange base and white top (no visible text or symbols)natural_image
Close-up of a mechanical component with red arrows indicating direction (no visible text or symbols)natural_image
Close-up of a black mechanical joint or ankle component, no visible text or symbolsnatural_image
Close-up of a bicycle support structure with black frame and railings (no text or symbols visible)natural_image
Close-up of a dark, textured surface with a red circle highlighting a small circular feature (no text or symbols visible)