IW6 - Speaker ELIPSON - Free user manual and instructions
Find the device manual for free IW6 ELIPSON in PDF.

User questions about IW6 ELIPSON
0 question about this device. Answer the ones you know or ask your own.
Ask a new question about this device
Download the instructions for your Speaker in PDF format for free! Find your manual IW6 - ELIPSON and take your electronic device back in hand. On this page are published all the documents necessary for the use of your device. IW6 by ELIPSON.
USER MANUAL IW6 ELIPSON
Please read before operating speakers. The warranty on speakers is void if the voice coils are burned or damaged as a result of overpowering or clipping. OVERPOWERING : The volume control of most ampliers and receivers is a logarithmic type, which means that full rated power may be reached with the volume control as little as the halfway point. In addition, operating the loudness feature or boosting the treble or bass controls increases power output well beyond rated levels. AS A RESULT OF THE ABOVE FACTORS, A 30- WATT AMPLIFIER CAN PRODUCE DISTORTED OUTPUT LEVELS OF OVER 100 WATT AND MAY DAMAGE YOUR LOUDSPEAKERS. CLIPPING : Clipping refers to the power level at which an amplier begins to distort a waveform by attening its top and bottom into a square wave- shape. When fed to tweeters and/or midrange speakers, this may result in exceeding their maximum power handling capacity, causing damage to the speaker voice coil. CLIPPING CAN BE IDENTIFIED BY FUZZ OR DISTORTED SOUND. IF THIS IS HEARD, LOWER THE VOLUME IMMEDIATELY TO AVOID DAMAGE TO YOUR SYSTEM. CONTINUOUS CLIPPING WILL DAMAGE OR BURN OUT THE SPEAKERS.
Elipson keeps to a strict quality control regimen and all factory-sealed products leave our facility in perfect condition. If there are any damages visible or concealed they have occurred in handling and must be reported immediately to your Elipson authorized dealer. Carefully remove the speaker from the box, take caution as the size often deceives the actual weight. Save all custom cartons and packaging foams for future use. They are rather expensive and may come in handy for future upgrades. Pack contents :
- 1 cut-out template Dear Customer, Thank you for choosing Elipson products. Take time to read this manual carefully before installing the loudspeakers : it contains all the safety and operating instructions that should be followed to optimize the performances of your Elipson speakers. We highly recommend you to keep both packaging and owner’s manual for future use.15
II. STEREO PLACEMENT
In-ceiling placement Ideally, the speakers should be placed symmetrically above the listening position, spaced from about 1m to 3m. If possible, left and right speakers should be positioned at the same distance from the listening position. In-wall placement Ideally, the speakers should be placed symmetrically in front of the listening position to form an equilateral triangle. The cabinets should be placed at the same height and the same height and the same distance from the adjacent side surfaces. The Architect IN loudspeakers have been designed to reproduce all types of music as accurately as possible, provided that a few rules should be followed to optimise performance and achieve a realistic sound image. Before installing your speakers, you should consider the placement carefully, taking into account the location of electrical, plumbing and other xtures. Contact your dealer for assistance if you are not sure of the best location in your particular room environment.16
A great diversity of surround effects is now possible with the complex mixing of the soundtracks of the lms. Immersive sound is achieved by placing the speakers in precise positions. In-wall placement Place the left and right speakers at the same level as the screen, as close as possible from the screen. The center speaker should be placed close to the screen for a realistic dialogue reproduction. If a perforated projection screen is used, it is possible to integrate the center speaker behind the screen.17 In-ceiling placement The surround speakers should be placed above the listener’s ear, about 160cm - 200cm. Try avoid to place the surround speakers too far behind the listening area, this may degrade the immersive sound effect. Ceiling mounted in-ceiling speakers can be used for multichannel systems (6.1 or 7.1) or systems using Dolby Atmos® technology to produce a vertical sound image. When installing the speakers on the ceiling, place them around 90 - 100 cm behind the listening position, and space them about 100 - 300 cm apart. Caution : An amplier able to decoding Dolby Atmos® information is essential for proper speaker operation. Contact your dealer for more information.UK
Preparation of mounting surfaces / Finishing of ceilings and walls Prior to start the installation of the speakers, it will be necessary to run cables to the speaker locations. See your dealer for more information on cable installation. After the cable has been properly installed, you are ready to mount the speakers.
1. Determine the best area to mount your speakers
This area of the ceiling or wall should be free of obstructions such as electrical conduit, HVAC ducts, or water lines. If possible, you should access to an attic or crawl space in order to best noting the location of such obstacles.
2. Find the eventual beams / joists near the desired speaker mounting location
We highly recommend you to use a good stud-nder tool for this procedure. If you are placing the speakers really close to some studs or other object, make sure you consider the size of the bafes ange, which extends beyond the mounting hole.
A punch out template for setting the hole is provided in the box. Position the template in the desired position and pencil an outline on the wall or ceiling. Tweeter adjustment The steerable tweeter can be directed to the listening area for superior treble and stereo image accuracy.1919
Caution : this is the most important part of the entire installation. If you are uncertain about obstructions in the mounting area, you should start by cutting a small hole within the penciled area with a drywall saw. Cutting at a 45 degree angle will make drywall repair much easier if you need to repair the hole because of unexpected obstructions. Once you have determined there are no obstructions in your desired mounting location, start cutting the nished hole at a 90 degree angle to the wall surface.
If the area in the ceiling or wall is not already insulated, add an adequate amount of insulation material to ll the cavity. If the insulation material used is cover with foil or paper, position the foil or paper away from the speaker. The mounting-feet sytem integrated into your speaker makes its installation very quick and easy to do, following only few steps.
1. Remove the grill and set aside in a clean dust-free environment.
2. Binding post terminals provide reliable contact for bare wire. Fix the cable of the speaker
respecting the polarity of your amplier (+ with + and - with -). Make sure the left channel of the amplier is connected to the left channel of the speaker, and that the right channel of the amplier is connected to the right channel of the speaker. A polarity inversion will result in a fuzzy stereo image and a low level of bass.UK
3. Make sure the mounting feet are turned inward to clear the opening and insert the
speaker into the ceiling or wall. Position the speaker into the hole.21 The grills can be painted. However, great care should be taken not to clog the holes, as this will severely reduce the sound quality of the speakers. If you plan to paint your grills, it should be done before the installation. The scrim cloth backing must be removed prior to painting the grills. The surface should be cleaned with a light solvent to remove any dust or residue. Elipson recommends a light spray-painting using 5 parts thinning agent to 1 part paint. Do not paint the grill while they are attached to the speaker.
V. PAINTING INSTRUCTIONS
Note : The ange of the speaker is designed to ex and conform to any small imperfections in the wall surface. Tighten the 6 screws on the front of the bafe only enough to make the ange become snug against the ceiling or wall. As you tighten the screws, the feet will automatically ip into an outward position, thereby clamping the drywall between the feet and the ange. Caution : Over-tightening may warp the bafe, crack the wall, cause the ange to distort, and make the grill difcult to install.
4. Secure the grill into place.
Note : The speaker ange incorporates high strength magnets to secure the grill into place. Simply line the grill with the speaker ange.UK
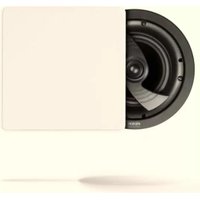
100W 2-way coaxial Mid-bass : 6” paper cone, rubber edge Tweeter : ¾” silk dome, orientation 35° to 40° in all directions In-ceiling speaker 70Hz-20kHz (±3dB) 87dB/1W/1m 8 Ohms 1950 Hz Ø230 x D102 mm Ø200 mm
100W 2-way coaxial Mid-bass : 6” paper cone, rubber edge Tweeter : 2x ¾” silk dome, orientation 35° to 40° in all directions In-ceiling speaker 65Hz-20kHz (±3dB) 83dB/1W/1m 8 Ohms 2200 Hz Ø230 x D105 mm Ø200 mm
100W 2-way Mid-bass : 2x5” mm paper cone, rubber edge Tweeter : 1” silk dome In-wall speaker 75Hz-20kHz (±3dB) 87dB/1W/1m 8 Ohms 2200 Hz W400 x H225 x D100 mm W370 x H196 mm 3 kg Type Power Loudspeaker Frequency response Sensitivity Impedance Crossover frequency Dimensions Cut-out dimensions WeightWARNING Packaging The packaging (box and packing) was designed for effective protection of your ELIPSON electronics during transportation and shipping. Please save them for later use. Protect the environment : if you wish to dispose of the packaging, please do so in the most environmentally responsible manner possible according to available measures (for example, sorted recycling). At the end of its life, this device should not be disposed of the same way as household refuse. It should be returned to a center for the recycling of electronic equipment. This symbol on the product indicates that it has been designed so that it can be recycled according to specic procedures. You will therefore be making a signicant contribution to the protection of the environment. This device respects the RoHS European directive. This means that it does not emit polluting substances when it is recycled (such as lead, mercury, cadmium, hexavalent chromium, polybromobiphenyles, polybromdiphenylethers). WARRANTY Elipson products have been designed and manufactured to the highest quality standards. If something goes wrong with your product, Elipson or its authorized distributor / dealer will handle the service and repair under these limited warranty terms. This limited warranty is valid for a 2-year period from original purchase date from an authorized Elipson dealer. Terms of limited warranty The warranty is limited to equipment repair. Neither transportation, nor any other costs, nor any risk for removal, transportation and installation of products is covered by this warranty. The warranty is only valid for the original purchaser and is not transferable. The warranty will not apply in cases other than defects in materials and / or workmanship at the date of purchase and will not be applicable in the following cases : - Damages caused by wrong or incorrect installation or connection. - Damages caused by incorrect use, other use than the one described in the owner’s manual, negligence, unauthorized modication or use of parts or of accessories that are not authorized by Elipson. - Damages caused by unauthorized, unsuitable or faulty ancillary equipment. - Damages caused by accidents, lightning, water, re, heat or any other disturbance that would not be under Elipson control or responsibility. - For products, which serial number has been altered, deleted, removed or made illegible. - In case of repair and service executed by an unauthorized service person. This warranty complements any national/federal/regional law obligations of local distributors/dealers and does not affect your statutory rights as a customer. To claim repair under warranty To claim repair or service under warranty you simply have to contact your local Elipson dealer, from whom your equipment has been purchased. To ensure that you will be able to ship your damaged product in correct manner, always retain the original packaging of your Elipson equipment. If you cannot contact your original dealer, or if you are using your Elipson product outside the purchase country, you should contact Elipson national distributor in the residence country, who will advise where the equipment can be serviced. You can also visit our web site to check our contact information: www.elipson.com To validate your warranty, you need to produce, as a proof of purchase, your original purchase invoice specifying the date of purchase and stamped by your dealer. © Elipson 2018 Elipson is a registered trademark of AV Industry.09/07/2018 www.elipson.com