Action Cam 4 - Action camera Guardo - Free user manual and instructions
Find the device manual for free Action Cam 4 Guardo in PDF.

User questions about Action Cam 4 Guardo
0 question about this device. Answer the ones you know or ask your own.
Ask a new question about this device
Download the instructions for your Action camera in PDF format for free! Find your manual Action Cam 4 - Guardo and take your electronic device back in hand. On this page are published all the documents necessary for the use of your device. Action Cam 4 by Guardo.
USER MANUAL Action Cam 4 Guardo
DECLARATION OF CONFORMITY
Hereby,
Par la présente,
Company/Entreprise-GROUP nv
Address/Adresse: Kapelsestraat 61, 2950 Kapellen - BELGIUM
declare that the following equipment:
conforms with the following safety requirements of the directives 2014/30/EU, 2014/35/EU, 2011/65/EU and 1999/5/EC. Conformity is guaranteed by the CE-symbol.
This product has been tested against following standards and specifications, applying versions valid in October 2016.
Joseph van Oosterum, CEO TE-Group NV

text_image
CEManual/Guardo Action Cam 4/10-2016/V1
Copyright© GUARDO
TABLE OF CONTENTS
GB
ILLUSTRATIONS 5
PARTS AND FUNCTIONS 6
CAMERA
LCD SCREEN
INSTALLING THE BATTERY 8
CHARGING THE BATTERY 9
USE THE WATERPROOF HOUSING 10
WATERDROPS & CONDENSATION 11
MOUNTING THE CAMERA USING THE DELIVERED MOUNTS 11
MOUNTS WITH ADHESIVE TAPE 12
A. CURVED SURFACE MOUNT
B. FLAT SURFACE MOUNT
OTHER MOUNTS 13
A. SEATPOST/HANDLEBAR MEDIUM
B. SAFETY PLUG
GETTING STARTED 14
-
PLACE MICRO SD CARD
-
TURNING ON/OFF
-
CHANGE MODE
-
DEFAULT SETTINGS
-
CHANGE MENU SETTINGS & SYSTEM SETTINGS
-
SETTING DATE AND TIME
OPERATION 21
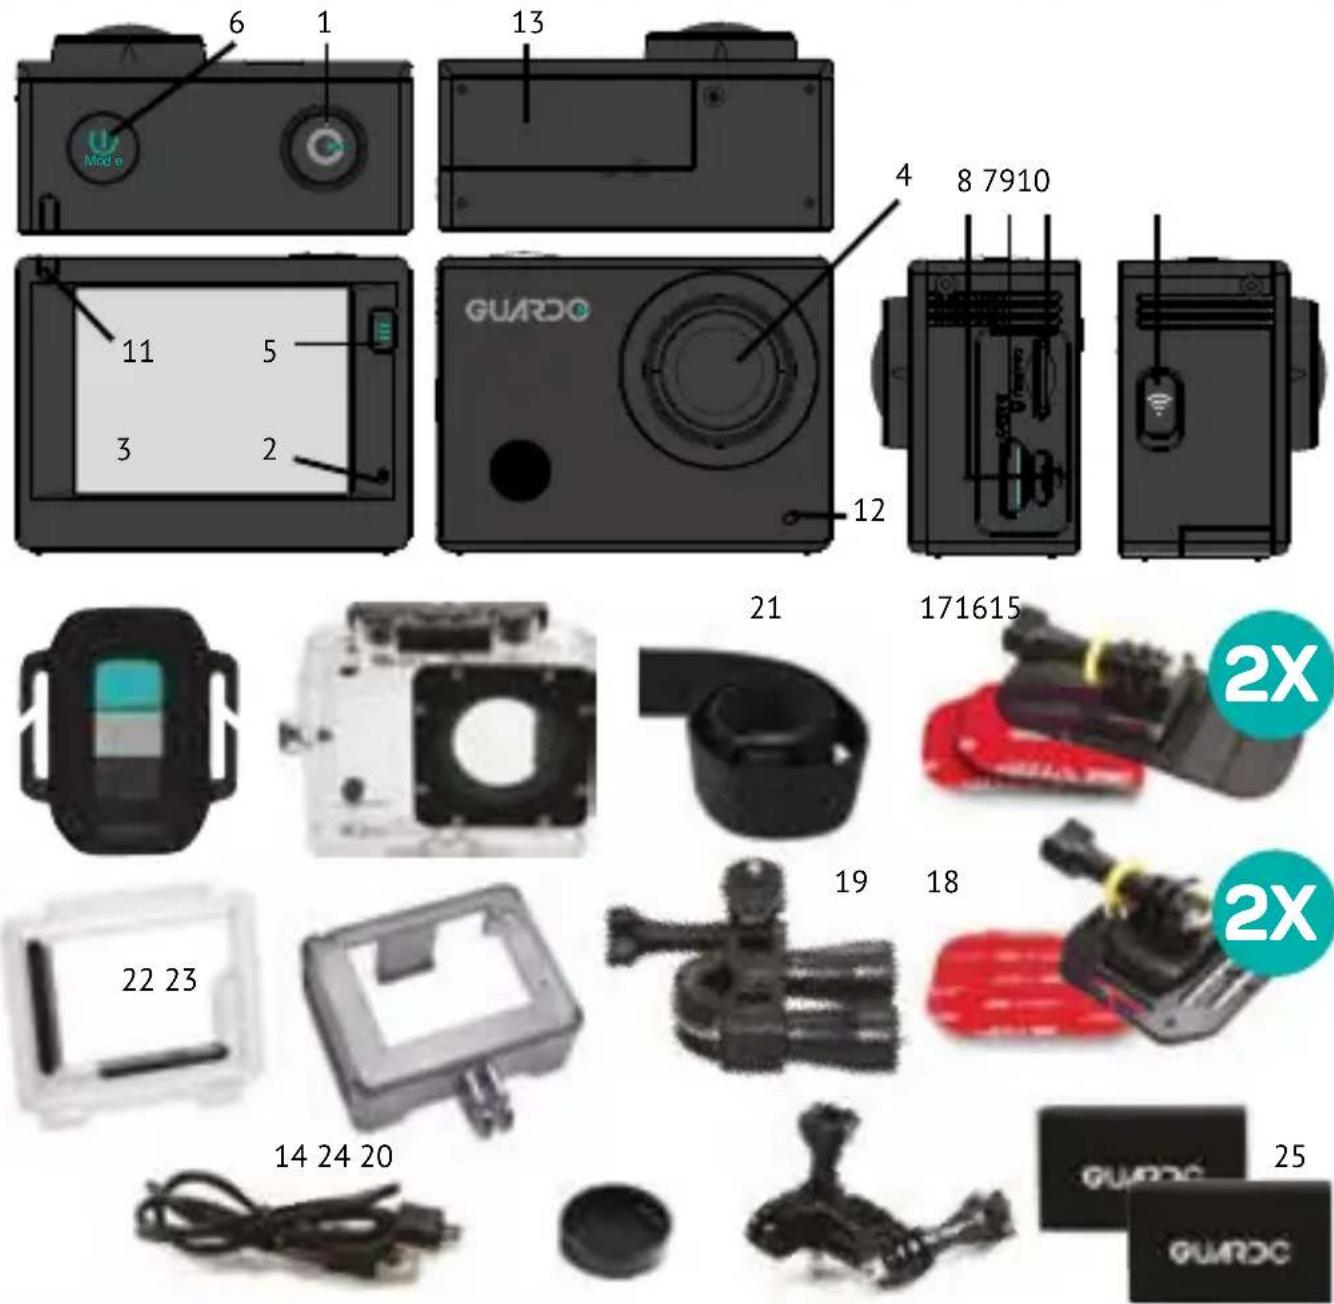
CAMERA See illustration I
- Record Button
- Microphone
- LCD display
- Lens
- MENU / DISPLAY Button
- Power / Mode Button
- MENU / Wifi Button with LED indicator
- Micro USB port
- Micro SD card slot (Micro SD card optionally available on www.guardo.be)
- Micro HDMI port (HDMI cable optionally available on www.guardo.be)
- Recording/Status (LED) Indicator
-
Recording/Battery status (LED) indicator
-
Battery cover
- Micro USB charging cable
- RF Remote Control
- Waterproof case
- 2 x flat surface mount + acc.
- 2x curved surface mount + acc.
- Seatpost/Handlebar Medium
- Pivot/Side mount
- Elastic strap
- Skeleton back door
- Protective cover frame
- Lens cover
- 2x Battery
LCD SCREEN See illustration II
A Photo Mode
- Photo mode
- Burst mode
- Photo Resolution
- Photo Quality
- Photo counter: displays number of photos left to capture
- Battery status
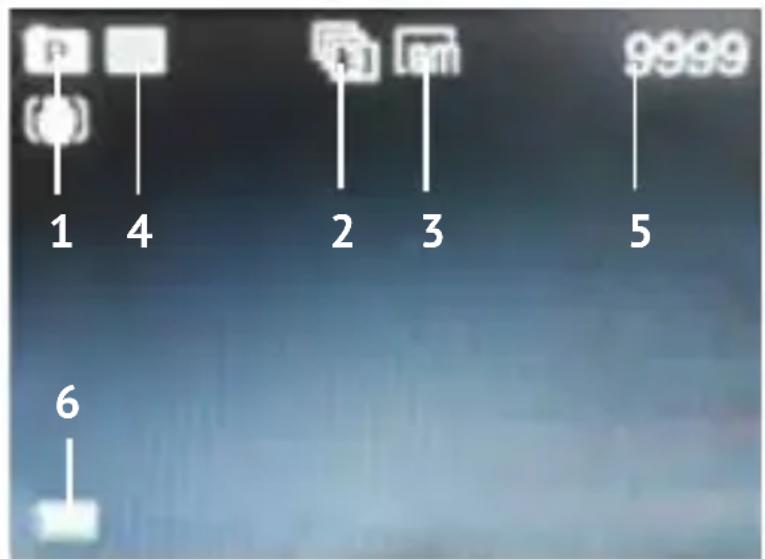
text_image
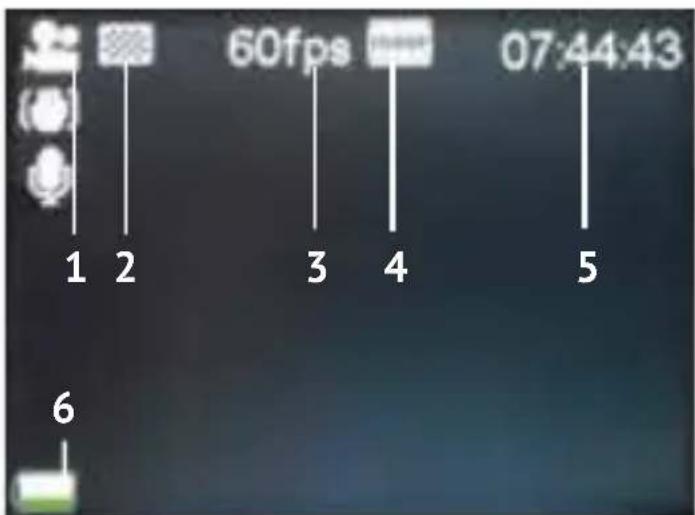
1 4 2 3 5 9999 6B Video Mode
- Video mode
- Video quality
- Video framerate
- Video resolution
- Video timer: displays hours and minutes that still can be used for recording
- Battery status
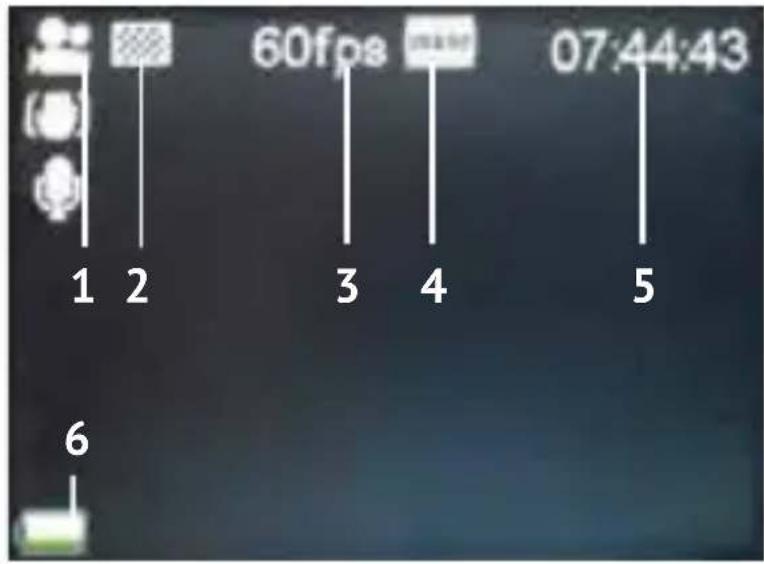
text_image
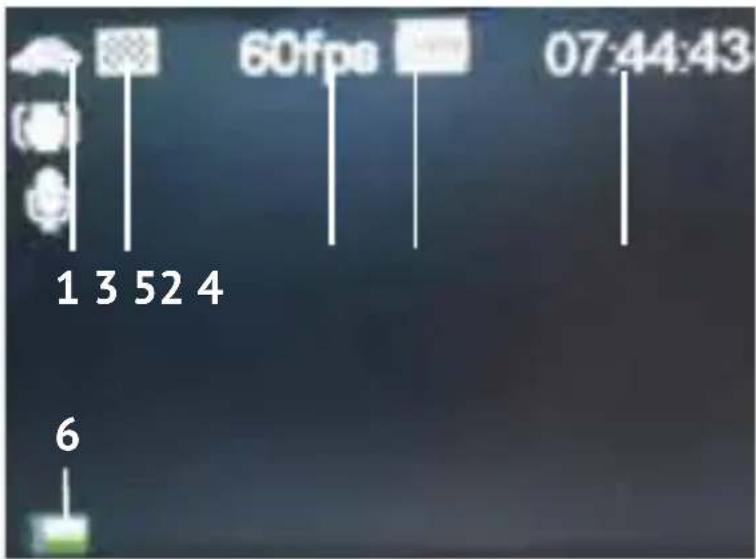
1 2 60fps 3 4 07:44:43 5 6C Playback Mode
- Video folder
- Photo folder
- Dashcam (car) folder
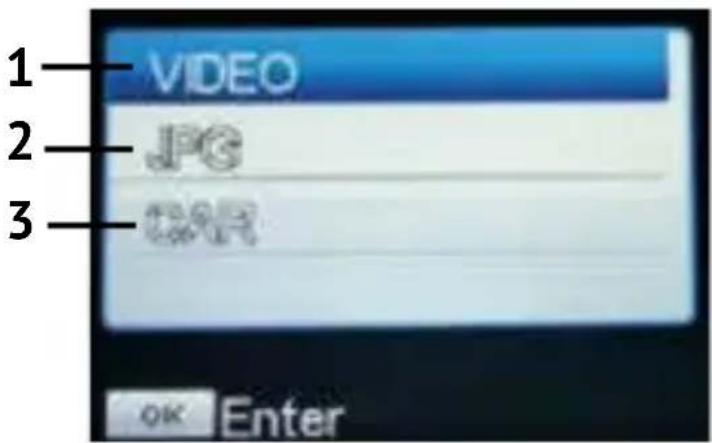
text_image
1 VIDEO 2 JPG 3 CMH OK EnterD Car Mode
- Car mode
- Video quality
- Video framerate
- Video resolution
- Video timer: displays hours and minutes that still can be used for recording
- Battery status
Note:
The icons may vary according to the status of the camera.
text_image
1 3 52 4 60fps 07:44:43 6INSTALLING THE BATTERY
text_image
GUARCPlease install the provided 1200 mAh lithium-ion battery correctly as shown in the illustration:
- Slide the Battery Cover to the right to release it.
- Place the battery inside the battery compartment. Make sure the electrodes of the battery correspond to the symbols on the cover.
- Slide the battery cover back in place (to the left) to lock the battery.
CHARGING THE BATTERY
To charge the battery:
- Make sure the Guardo Action Cam 4 is turned off and that the battery is installed.
- Connect the micro USB cable (14) to the Micro USB Port (8) of the Guardo Action Cam 4.
- Connect the other end of the micro USB cable (14) to the USB port of your computer or the optional Guardo USB home charging device, optionally available on www.guardo.be.
- During charging, the blue LED indicator (11) at the front of the camera will light continuously. When charging is completed the blue LED indicator (11) will turn off.
Note:
- The camera can be used while charging.
- When the battery runs out of power, the Guardo Action Cam 4 will turn off but will save the part that was recorded until the camera turned off.
- When the camera is ON but not in use it will automatically turn off after 5 min. This is the default setting and can NOT be changed in the camera's menu.
- When the blue LED indicator will flash instead of light continuously, this means that there is no battery inside the camera.
- The delivered micro USB cable (14) offers fast and efficient charging but is also used for synchronizing and data transfer with your PC.
- Extra charging devices/accessories can be ordered from our website: www.guardo.be.
- If the video camera is not used for a long time, remove and store the battery properly and periodically recharge it to ensure battery performance.
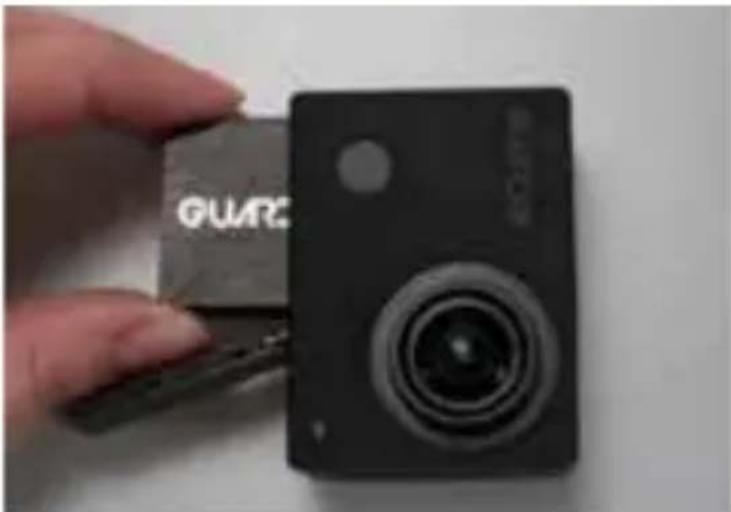
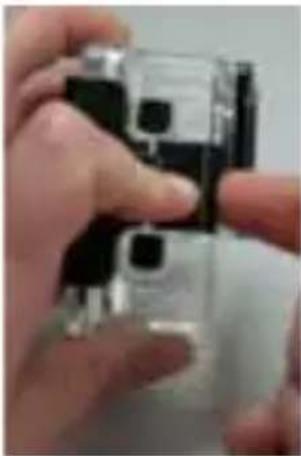
USE THE WATERPROOF HOUSING
Place the camera in the waterproof housing:
Open waterproof housing
Place camera
Close backdoor
Grasp arm onto backdoor
Click into place
natural_image
Close-up of hands holding a small electronic device with black and white buttons (no visible text or symbols)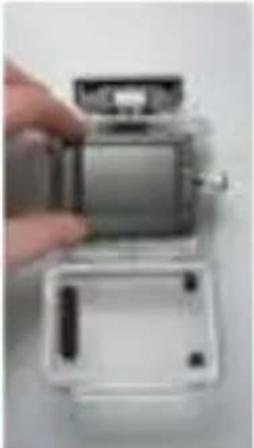
natural_image
Close-up of a hand holding an open camera module, showing internal components and casing (no text or symbols visible)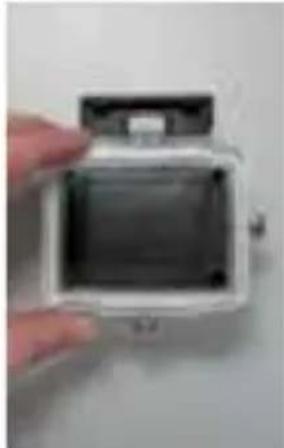
natural_image
Hand holding a white digital camera case with visible internal components (no text or symbols)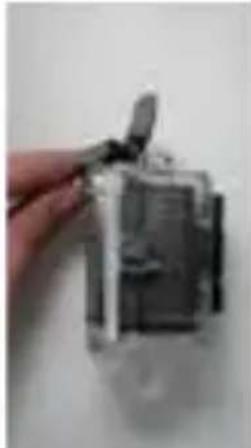
natural_image
Hand holding a small mechanical component, possibly a switch or tool, against a plain background (no visible text or symbols)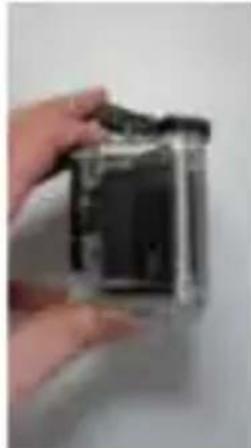
natural_image
Hand holding a small electronic device with a black body (no visible text or symbols)IMPORTANT! USAGE FOR PREVENTING WATER LEAKAGE
- BEFORE EVERY USE: check carefully that the waterproof housing is securely locked onto the camera and that there are no ‘objects’ (such as sand or a lock of hair) in between the rubber strap and the housing, as this could cause leaking.
- The rubber strap is the most important part of the waterproof housing as it is the element that keeps your camera waterproof. The rubber strap can be removed to clean it in fresh water. Do not use a damp cloth to dry, but dry it by shaking it.
- Whenever used in salty water, ALWAYS clean the plastic waterproof housing afterwards in non-salt water and dry it. This is to avoid corrosion or to prevent dust/sand/... building up in the rubber seal.
!ATTENTION!
If you do not consistently perform/execute the above mentioned tips, water damage may occur and can result into the camera being damaged/destroyed. The warranty does NOT cover water damage caused by improper use by the user!
WATERDROPS & CONDENSATION
Regulatory check the lens to see if waterdrops or condensation/fog have appeared as these may be shown on your footage.
To remove/avoid waterdrops and condensation/fog, these tips might help :
- Spit or lick the port or housing lens. The water will sheet off instead of beading up!
- Apply a water repellent and anti-beading/anti-fog coating or wax (such as 'RAIN-X)
- Make sure the inside of the housing and camera is as dry as possible (e.g. dry hands, no sweat) to prevent fog/condensation
- Don't leave the camera in the direct sun or near heat and don't leave it ON (generating heat) when not necessary
- Open the fogged camera housing and carefully wipe off the fog inside, then close it again
- Try to avoid too large temperature differences as these may cause condensation/fog Anti-Fog inserts are optionally available on www.guardo.be.
Note: 'Muffled' sound is inevitable when using the camera with the waterproof housing.
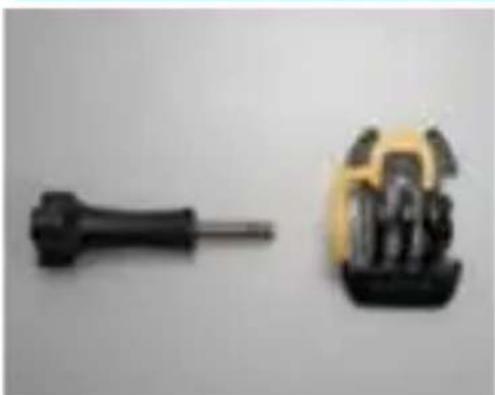
MOUNTING THE CAMERA USING THE DELIVERED MOUNTS
natural_image
Two small screwdrivers and a yellow mechanical component with metallic components (no text or symbols visible)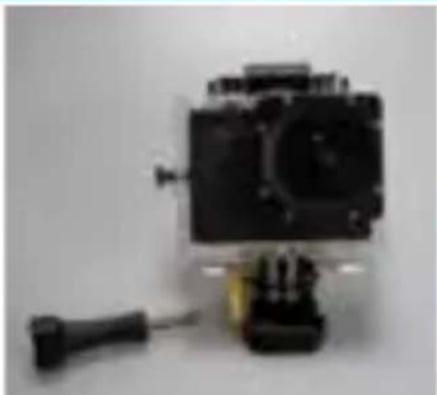
natural_image
Close-up of a black camera module with a yellow sensor and screwdriver, no visible text or symbols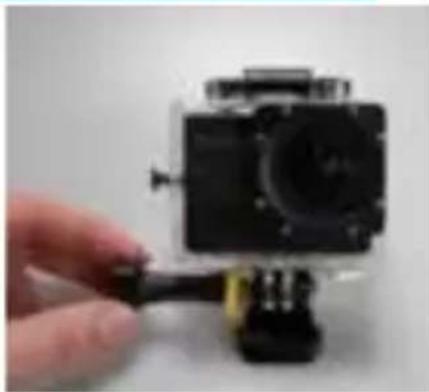
natural_image
Hand holding a black camera module with a yellow cable, against a plain background (no text or symbols visible)Attaching the camera to any mount, is always done in the same way:
- Remove the screw from the mount.
- Place the camera on the mount with the screw.
- Rotate/Tilt the camera into the desired shooting angle and fasten with the tightening screw.
MOUNTS WITH ADHESIVE TAPE
How to apply the adhesive tape (IMPORTANT!)?
- Apply the tape 24 hours before use in a room temperature around 21^ C
- Make sure the surface you want to apply the tape on is smooth: the tape will not adhere properly on an embossed or porous surface.
- Clean and dry the surface before application. Any cleaner that will not leave a film or oily surface can be used!
- Press the tape entirely and firmly into place!
How to remove the adhesive tape?
The adhesive tape can be removed by using a hairdryer: the heated air will loosen the adhesive part.
Remove the residue with a cleaner or with alcohol.
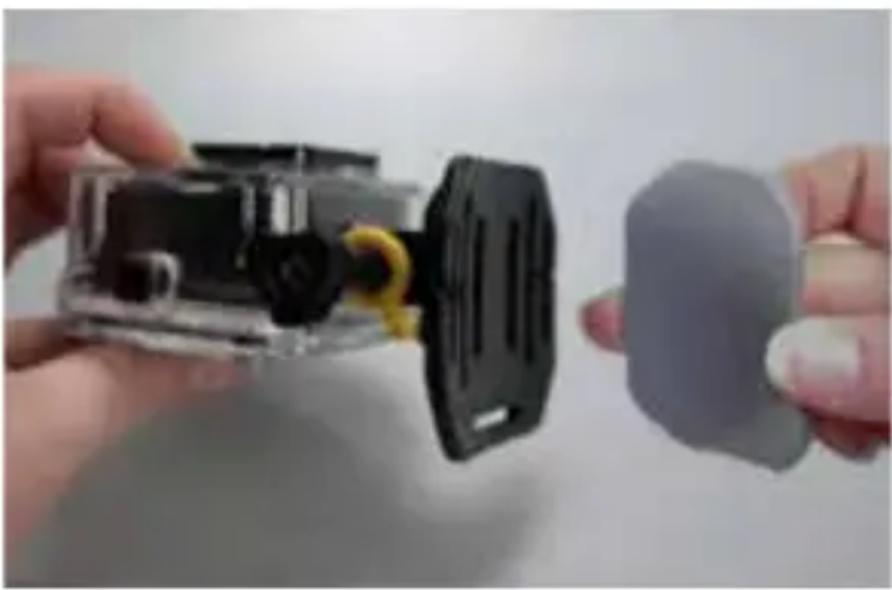
A. CURVED SURFACE MOUNT
natural_image
Close-up of hands holding a transparent device with black and yellow components, next to a gray plastic component (no text or symbols visible)
natural_image
Close-up of a black mechanical device mounted on a black spherical base (no visible text or symbols)Stick the 3M VHB tape to the mount and place/stick the mount on a curved surface.
Note: this mount can also be used with the remote control's strap!
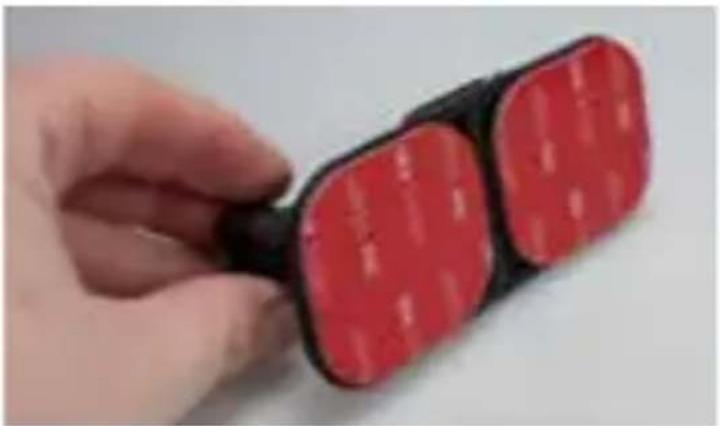
B. FLAT SURFACE MOUNT
natural_image
Hand holding a black and red electronic device with two square buttons (no visible text or symbols)
natural_image
Person trekking down a snowy slope, wearing gear and boots (no visible text or symbols)Place the mount on a flat surface, such as a snowboard, using the 3M VHB tape .
OTHER MOUNTS
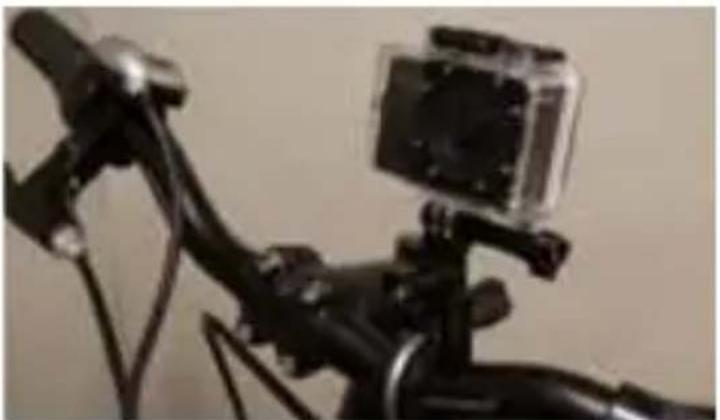
A. SEATPOST/HANDLEBAR MEDIUM
natural_image
Close-up of a black bicycle with a camera mounted on its head (no visible text or symbols)Turn the tightening screws to enlarge the opening and to fit the seatpost/handlebar/... in between the openings of the mount. Turn the screws to secure the mount.
B. SAFETY PLUG

Some mounts are fitted with a safety plug, an additional security feature that helps to prevent the fastener of the mount to come loose! Make sure this safety plug is securely attached when using it for extreme sports in which many shocks, sudden (up and down) movements and rotations occur such as motocross, snowboarding, mountain biking, etc ...
GETTING STARTED
1. PLACE MICRO SD CARD
- Make sure a 16 GB Micro SD card (preferably from a known A-brand), Class 10 (UHS-I) or higher with a minimum of 15 MB/s writing speed (optionally available at www.guardo.be.) is inserted into the Micro SD Card slot (9) before you start using the Guardo Action Cam 4. - Make sure you format the Micro SD card before first use only! You can format micro SD card via:
- the camera's menu (see 'System Settings')
- your computer (see 'Connecting to a computer' to find out how)
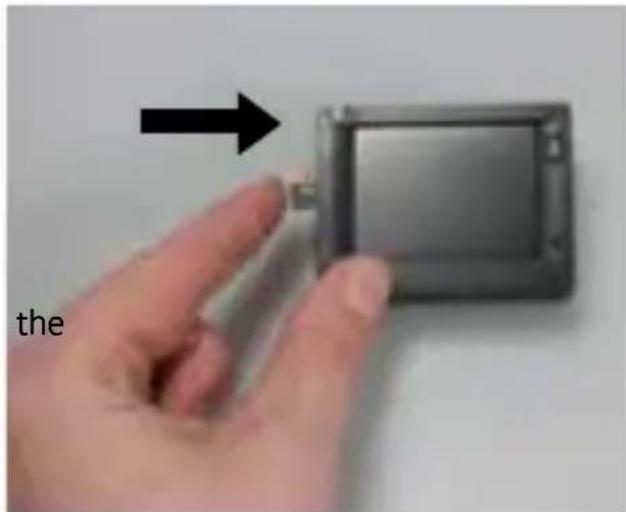
text_image
thePlace the micro SD card into the Micro SD Card slot (9) and press gently with your finger nail so that it clicks into place. (To remove the Micro SD-card: press the card gently again with your finger nail so that it pops out).
Note:
- When there is no micro SD card inserted, the camera cannot be used!
- Make sure the capacity of your micro SD card does not exceed 64 GB, Class 10 (UHS-I).
• We suggest to use a 16 GB Class 10 or higher.
2. TURNING ON/OFF
To turn the Guardo Action Cam 4 ON: Press the Power/Mode Button (6) for 2/3 sec. to turn the camera on. The LCD display (3) will turn ON and you will hear a short beep indicating that the camera is turned on.
To turn the Guardo Action Cam 4 OFF: Press the Power/Mode Button (6) again for 2/3 sec. to turn the camera off. The LCD display (3) will turn OFF and you will hear a short beep indicating that the camera is turned off.
Note:
- The Guardo Action Cam 4 will turn off automatically when it is not being used for 5 minutes. This is the default setting and can NOT be changed.
- The Guardo Action Cam 4 display will turn off automatically when it is not being used for 3 minutes. This is the default setting and can be changed in the menu “System Settings”.
3. CHANGE MODE
The camera can be set into 4 different modes: photo mode, car mode, video mode and playback mode.
After having turned on the camera, press the Power/Mode Button (6) to switch between the different modes:
• Video mode: record videos. The video camera icon will be shown in the upper left corner of the display.
- Car mode: for use in a car. The car icon will be shown in the upper left corner of the display.
- Photo mode: make photos. The photo camera icon will be shown in the upper left corner of the display.
- Playback mode: playback videos/photos/CAR. The playback menu will be shown in the display.
4. DEFAULT SETTINGS
The Guardo Action Cam 4 can be set (resolution, video mode, camera mode, ...) according to the purpose for which it is used and according to your own preferences! When the camera is turned on for the 1st time, the following information will appear on the LCD display, this is the default setting:
5. CHANGE MENU SETTINGS & SYSTEM SETTINGS
text_image
1 2 60fps 3 4 07:44:43 5 6The LCD display on the back of the camera makes it able to control the camera and the settings, live preview and play back videos and photos!
Change menu settings
How? In video/car/photo/playback mode:
- Long press the MENU button (5 or 7) to open the menu.
- Use the Wifi Button (7) and MODE Button (6) to navigate through the menu.
- Press Record Button (1) to open the submenu.
- Use the Wifi Button (7) and MODE Button (6) to navigate through the submenu.
- Press Record Button (1) to select the desired setting.
- To close the menu, long press the MENU button (5 or 7).
Note: When using the waterproof casing, the menu can only be opened and closed with the MENU/Wifi Button (7).
For example: to set 'White balance' to 'Daylight' in video mode, please follow these steps:
- Turn the Guardo Action Cam 4 ON.
- Long press the MENU button (5 or 7)
- Press the Wifi Button (7) until "White Balance"
- Press Record Button (1)
- Press the Wifi Button (7) until 'Daylight'
- Press Record Button (1) to select 'Daylight'. White balance is now set to 'Daylight'.
- Long press the MENU button (5 or 7) to exit the menu.
Menu Video mode :
| Video Size | |
| Video resolution Different settings | |
| Video Quality | |
| Super Fine | |
| Fine | |
| Normal | |
| Image Stabilizer | |
| Off | |
| On | |
| 180° Rotation | |
| 180° upside down recording (e.g. for dashcam mode) Off | |
| On | |
| Slow Motion | |
| Playing back video more slowly than it was recorded Off | |
| On | |
| White Balance | |
| Adjustment of colours and light | Auto |
| Daylight | |
| Cloudy | |
| Fluor H | |
| Tungsten | |
| Effect | |
| Special effects and filters Normal | |
| B&W | |
| Sepia | |
| Vivid | |
| Natural | |
| Negative | |
| Warm | |
| Cold | |
| Red | |
| Green | |
| Blue | |
| WDR | |
| Off | |
| On | |
| Voice recording | |
| Off | |
| On | |
| Digital zoom | |
| Off | |
| On | |
| Video + picture | |
| When activated, during video recording, a picture will be taken each 3 seconds | Off |
| On | |
Menu Photo Mode:
| Resolution | |
| Photo resolution Different settings | |
| Quality | |
| Photo Quality Super Fine | |
| Fine | |
| Normal | |
| Metering | |
| The way in which the camera determines the exposure | Center |
| Multi | |
| Spot | |
| White Balance | |
| Adjustment of colours and light | Auto |
| Daylight | |
| Cloudy | |
| Fluor H | |
| Tungsten | |
| ISO | |
| Light sensitivity Different settings | |
| Exposure | |
| Luminance adjustment Different settings | |
| Self-Timer | |
| Delays the shutter release Off | |
| 2S | |
| 10S | |
| Double | |
| Burst Mode | |
| A certain amount of photos are captured in quick succession. | Off |
| 3 photos | |
| 5 photos | |
| 10 photos | |
| Continue burst | |
| Contrast | |
| Sharpness & Contrast Hard | |
| Normal | |
| Soft | |
| Effect | |
| Special effects and filters | Normal |
| B&W | |
| Sepia | |
| Vivid | |
| Natural | |
| Negative | |
| Warm | |
| Cold | |
| Red | |
| Green | |
| Blue | |
| Low Light Mode | |
| Off | |
| On | |
| Stabilizer | |
| Off | |
| On | |
| WDR | |
| Off | |
| On | |
| Digital Zoom | |
| Zoom in or out Off | |
| On |
VIDEO = your video recordings
JPG = your photos
CAR = your dashcam recordings
- Use the Wifi Button (7) and Record Button (1) to select the desired folder
- Press the Wifi Button (7) to access next photó/video.
Playback feature:
- Press the Record button (1) to start/pause/play the video
- Press the MENU button (5) to stop play video
- Press the MENU button (5) to access below settings:
| Lock | |
| Single | |
| Lock All | |
| Unlock All | |
| Delete... | |
| Single | |
| All | |
| Slide Show | |
| Start | |
| Interval | |
| Transition | |
| Repeat |
| Rotate... | |
| Rotate | |
| Save | |
| Back | |
| Resize... | |
| 8M | |
| 5M | |
| 3M | |
| 1M |
Change system settings :
In video/photo/playback mode:
- Long press MENU button (5 or 7) to open the menu
- Press Mode Button (6) to go to the settings menu
- Use the Wifi Button (7) and MODE Button (6) to navigate through the menu
- Press Record Button (1) to open the submenu
- Use the Wifi Button (7) and MODE Button (6) to navigate through the submenu
- Press Record Button (1) to select the desired setting
System settings
| Auto Review | |
| Automatic review of last shot | Off |
| 1sec. | |
| 3sec. | |
| 5sec. | |
| LED mode | |
| Off | |
| On | |
| Power Save | |
| Powers off automatically to save battery | OFF |
| 1min. | |
| 3min. | |
| 5min. | |
| Date & Time... | |
| Language | |
| English, Français, Nederlands, Español, Italiano, Português, Deutsch, Čestina, Magyar, Polski, Türk, Русские, Svenska, ελληνικά | |
| Light frequency | |
| 50Hz | |
| 60Hz | |
| Photo Timelapse | |
| many shots are taken over a certain period of time and are shown quickly in a series so that a slow action (such as a sunset) appears to happen quickly | off |
| 3sec | |
| 5sec | |
| 10sec | |
| 30sec | |
| 1min | |
| Timelapse | |
| Off | |
| 0.5 sec | |
| 1 sec | |
| 3 sec | |
| 5 sec | |
| 10 sec | |
| 30 sec | |
| 1min | |
| Timelapse Duration | |
| Unlimited | |
| 5Min | |
| 10Min | |
| 15Min | |
| 20Min | |
| 30Min | |
| 60Min |
| Date Stamp | |
| Off | |
| Date | |
| Date & time | |
| System | |
| Factory Reset | |
| System info | |
| Card info | |
| Wi-Fi Password | |
| Password | |
| Format... | |
| Deleting and formatting Yes | |
| No |
6. SETTING DATE AND TIME
To set correct date and time, please follow these steps:
- Long press MENU button (5 or 7) to open the menu
- Press Mode button (6) to switch to the system settings menu
- Use the Wifi Button (7) and MODE Button (6) until 'Date & Time'
- Press Record Button (1) to select 'Date & Time'
- Adjust date and time by using the Wifi Button (7) and MODE Button (6) (change digits) and the Mode Button (6) (swap to month, date, hour, ...)
OPERATION
Start video recording:
- Make sure the Guardo Action Cam 4 is turned on and in Video Mode.
- Press the Record Button (1) once. The red LED indicator (12) and 'REC' will start flashing slowly and a timer will appear = start of recording.
Note:
- Shooting view angles are slightly different in different working modes of the video camera.
- To pause the video recording, press the MENU / Wifi Button (7) 1x shortly.
Stop video recording:
- Press the Record Button (1) once again to stop recording. The red LED indicator (12) and the timer will turn off.
Note:
- When the memory card is full, the Guardo Action Cam 4 will automatically stop recording. Your recordings will be saved, before the camera turns off! When 0:00 flashes on your screen, this indicates your SD card is full and recording is no longer possible. You need to empty or format your SD card (via computer or camera) again. This of course after having copied/saved your photos/footage from the card to another device such as your computer's hard disk. See Format SD Card'. - When recording continuously over a longer period of time (e.g. 2 hours non-stop), the footage saved on your Micro SD Card will be split in different sections, 1 section = max. 4GB/45 min.
Make a photo:
- Make sure the Guardo Action Cam 4 is turned on and in Photo Mode.
- Press the Record Button (1) once. You will hear a beep and the red LED indicator (12) will light up once = taking a photo.
Note: Only when you have heard the beep and the red LED Indicator (12) has flashed the photo was really taken.
Picture in Video (PIV)
The Guardo Action Cam 4 allows you to make photos while making a video recording!
- In Video Mode, go to "Video+Picture" and select "ON".
- Start recording a video as described above
- ‘Capture done’ will appear on the display to confirm your photo is taken each 5 seconds automatically!
Note:
This feature will not work in 4K and 2.7K settings.
Digital Zoom
The action cam allows you to zoom in and out with the MENU button (5) next to the display while making a photo or recording a video.
Note:
- During video recording or making a picture, the digital zoom may affect the image quality.
- This feature will not work in 4K and 2.7K settings.
text_image
Power ON/OFF Button Photo Button Video ButtonUSE REMOTE CONTROL WITH CAMERA
The remote control can be used for video recording, for taking pictures and for turning the Guardo Action Cam 4 ON and OFF.
- Turn ON: Press and hold the Power Button to turn the camera on (wait till the red LED is OFF during press). Wait a while for the camera to start up.
- Take a photo: Press the Photo Button once to make a photo.
- Start video recording: Press the Video Button once to start recording.
- Stop video recording: Press the Video Button once again to stop recording.
- Turn OFF: Press and hold the Power Button to turn the camera off.
Note:
- Max distance = 15\~25 meters (depends on surrounding).
- When using the remote control, the camera will shoot according to the last (manually) set settings.
USE REMOTE CONTROL WITH FULL HD TV
VIDEO AND DASHCAM MODE:
Power ON/OFF Button: Press 1x to display OSD options (on screen display)/pause
Power ON/OFF Button: Make a picture during recording
Photo Button: No function
Video Button: No function
PLAYBACK MODE:
Power ON/OFF Button: Play/Pause
Photo Button: Next
Video Button: Next
Search for the App on your smartphone or tablet:
- For Android users: Search for 'Guardo Action Cam 4' in Google Play or scan this QR code:
- For Apple iOS users : Search for 'Guardo Action Cam 4" in the App Store or scan this QR code:

Finish the installation so that the Guardo Action Cam 4 App icon appears on your smartphone or tablet!
ANDROID

text_image
QR code image containing encoded data, no visible human-readable textAPPLE

text_image
QR code image containing encoded data, no visible human-readable textENABLE WI-FI ON THE GUARDO ACTION CAM 4
Press the Wi-Fi Button (7) on your Guardo Action Cam 4 to enable Wi-Fi. Make sure the battery is fully charged. 'Wi-Fi ON' will appear on the LCD display and the red LED indicator of the Wi-Fi Button (7) will start flashing.
MAKE A WI-FI DIRECT CONNECTION BETWEEN GUARDO ACTION CAM 4 AND YOUR SMARTPHONE/TABLET
- Enable Wi-Fi on your smartphone or tablet and let it search for the Wi-Fi Direct network ‘Guardo Action Cam 4 xxxxxx’.
- Select this Wi-Fi Direct network. When you connect it the first time, you need to enter the password: "0987654321". 'Connected' will now appear on the display of your smartphone or tablet.
- The red LED indicator of the Wi-Fi Button will no longer flash but will stay red during connection.
- When connection is lost, it will try to auto-reconnect. If not, then manually reconnect again.
Note:
- When the battery capacity is too low, Wi-Fi cannot work. Please recharge the battery first!
- During Wi-Fi connection and connection with a smartphone/tablet, the camera will turn warm. This is normal and not a malfunction!
- A Micro SD Card needs to be inserted before you can make a Wi-Fi connection.
- Wi-Fi will automatically be disabled on your Guardo Action Cam when no device (smartphone/tablet) is connected within 2 min. to save battery power.
- The password and network name can be changed by the user in the App.
- Date/Time will be set automatically by App and device when replacing the battery.
OPERATION
Before you start using the app make sure a micro SD card is inserted into the camera!
Press the App icon on your Android or Apple iOS device.

Your device will make a connection with the camera and a live video preview will appear!
The App is default set to video mode and so this is the start screen (Android as example):
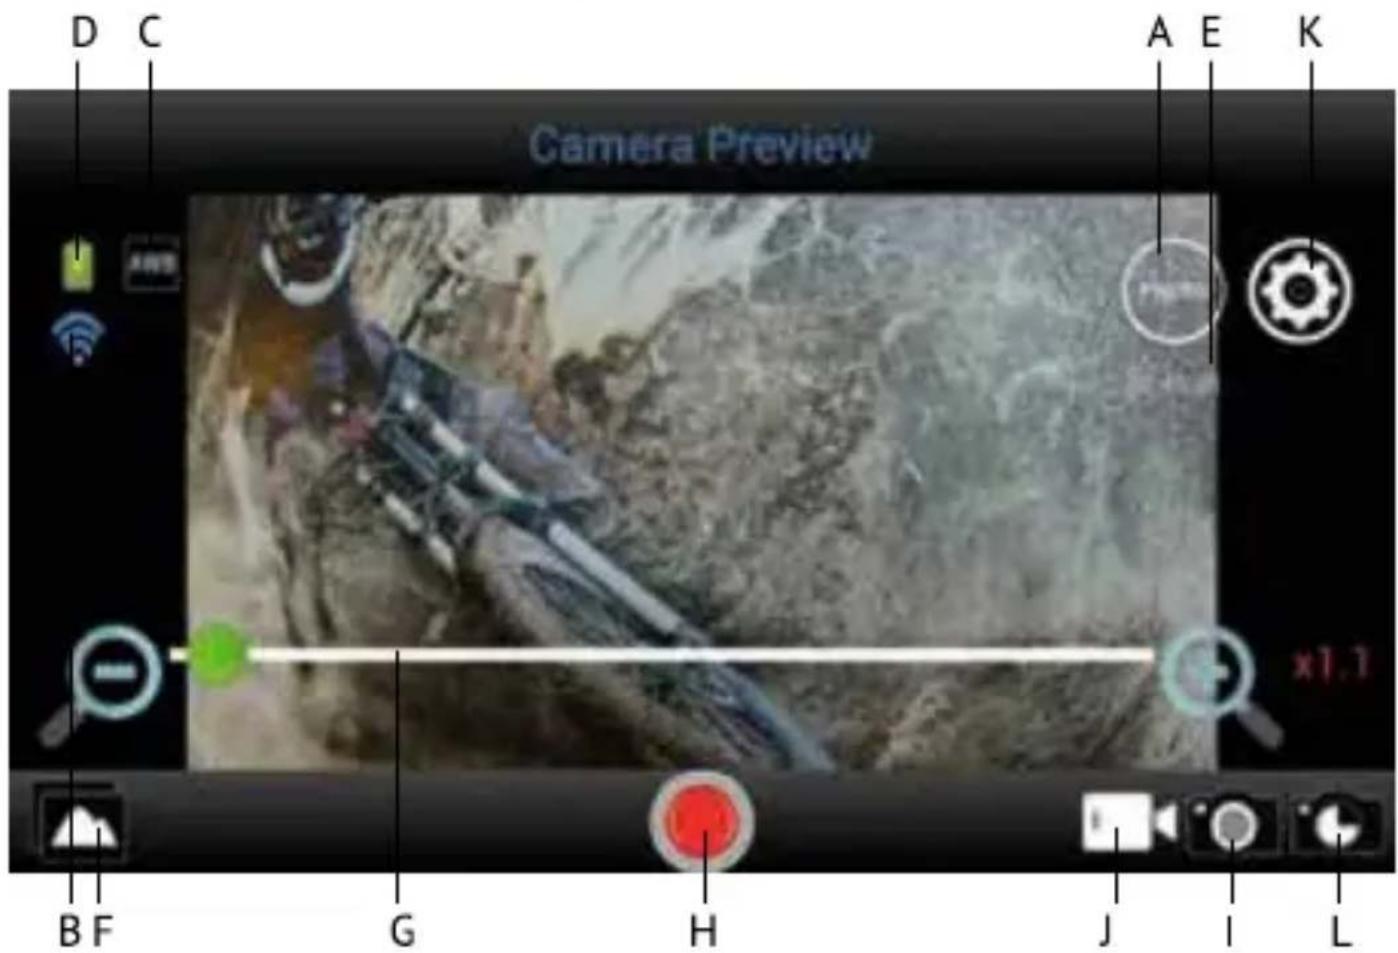
text_image
D C Camera Preview A E K B F G H J I LA. Resolution
B. Wi-Fi connection (no icon for Apple)
C. White Balance (default set to 'AWB' - Automatic White Balance)
D. Battery status
E. Remaining recording time
F. View photos / videos
G. Digital zoom bar
H. Record button for video recording (default set to video mode)
I. Photo mode
J. Video mode (default ON)
K. Settings ( ☑ for Apple)
L. Timelapse
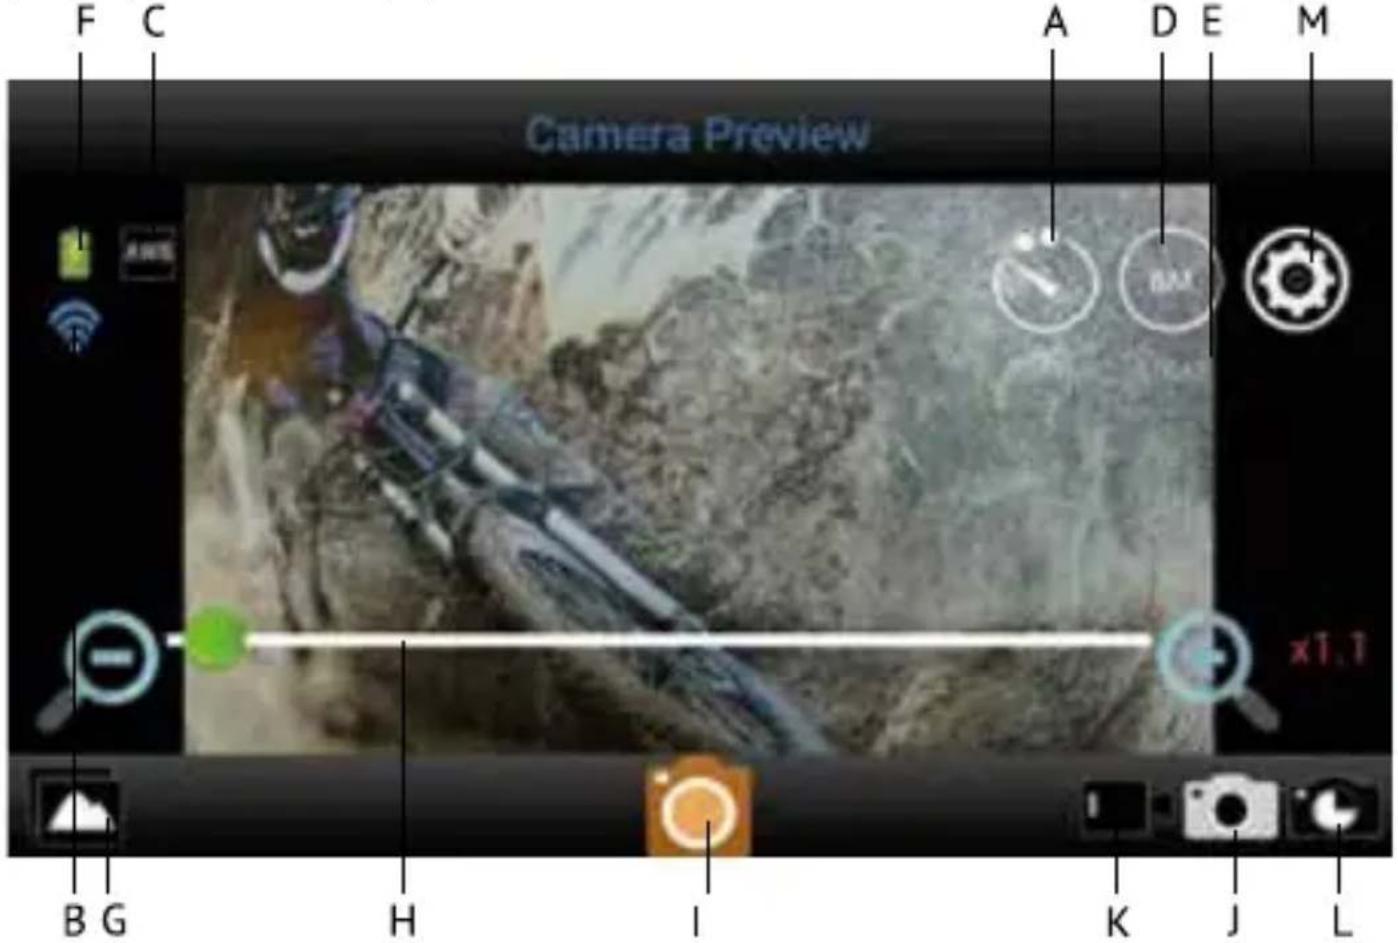
To use the App for making photos, press the 📄on, this is the start screen for making photos (Android as example):
text_image
Camera Preview F C A D E M B G H I K J L x1.1A. Self Timer (Default OFF)
B. Wi-Fi connection (no icon for Apple)
C. White Balance (default set to 'AWB' - Automatic White Balance)
D. Resolution
E. Remaining photo's to capture
F. Battery status
G. View photos / videos
H. Digital zoom bar
I. Photo button for making photos
J. Photo mode
K. Video mode
L. Timelapse
M. Settings ( for Apple)
ADJUST GENERAL SETTINGS FOR VIDEO/PHOTO


ADJUST RESOLUTION
In mode: press the FHD icon. You can now choose from:
Your selected resolution will be shown in the icon on your start screen.
In mode: press the 8M icon. You can now choose from:
Your selected resolution will be shown in the icon on your start screen.

text_image
Sun Valley Escalvatore 1000x 1000x 60fps 1000x 1000x 24fps 1400x 1100x 68fps 1800x 1500x 24fps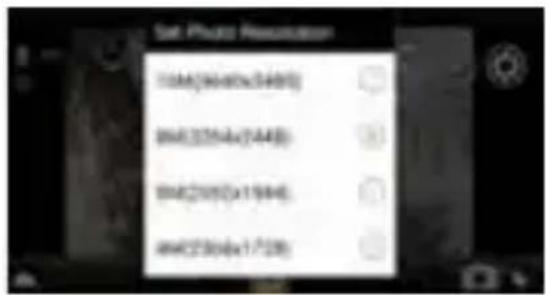
text_image
Sat Photo Resolution 10M(94x80x34x97) 8M(25Mx(14x8)) 8M(20Mx(11x94)) 8M(23Mx(17x28))ZOOM
Press in the area just above the toolbar below : a zoom bar will appear. Press + to zoom in , press - to zoom out. (Maximum is 4 x)

SET TIMELAPSE MODE
Timelapse for video = a way of filming something in which many shots are taken over a certain period of time and are shown quickly in a series so that a slow action (such as a sunset) appears to happen quickly. Timelapse for photo = a way of photographing something in which may shots are taken over a certain period of time and duration.
ACTIVATE TIMELAPSE MODE
Press (Apple) or (Android) on your start screen and select 'Timelapse mode'. You can now choose from:
* Video mode: the icon 📋 will appear on your start screen indicating that Timelapse is ON.
* Capture mode: the icon will appear on your start screen indicating that Timelapse is ON.
SET TIMELAPSE INTERVAL / DURATION
Press (Apple) or (Android) on your start screen and select 'Timelampse interval'. You can now choose from various settings.
If Timelapse Interval is ON, you can also choose the duration of the interval.
Note: In time-lapse, no sound will be recorded.
SET WHITE BALANCE
Press 📋 (Apple) or 🍒 (Android) on your start screen and press 'White Balance'. You can now choose from:
According to your selected white balance, one of the following icons will appear on your start screen:

text_image
Time lapse mode Timelapse capture mode Timelapse video mode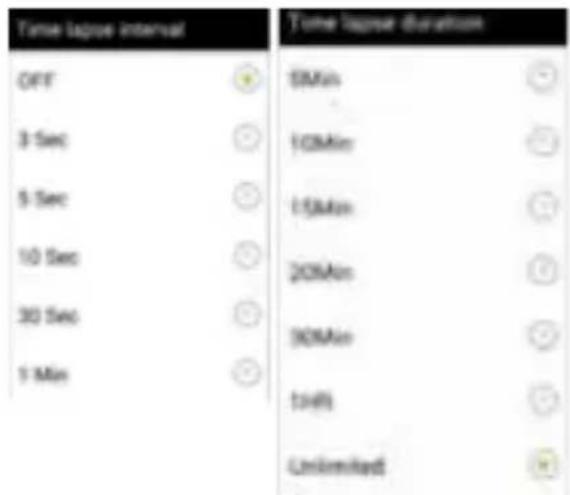
text_image
Time lagged interval OFF 3 Sec 5 Sec 10 Sec 30 Sec 1 Min 5Min 10Min 15Min 20Min 30Min 14% Unlimited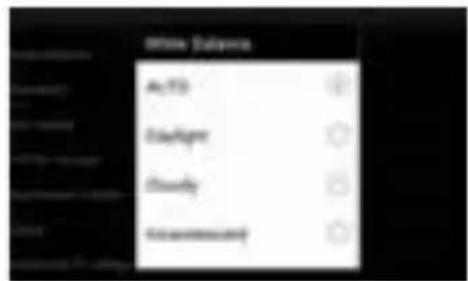
text_image
Auto Open/Up Cleanly MeasureAWB
Auto

Daylight

Cloudy

Fluorescent

Incandescent
SET FREQUENCY (Normal for EU is 50Hz)
Press (Apple) or (Android) on your start screen and press 'Frequency. You can now choose from:
FORMAT SD CARD ON CAMERA
Press (Apple) or (Android) on your start screen and press 'Format Camera'. Press 'yes' to format the Micro SD Card in your camera.

text_image
Frequency 50HZ 60HZ
text_image
Do you want to format $0 all your data will be lost? Yes NoNote:
Timelapse, Upside Down Recording and Slow-Motion (see below) CANNOT be set simultaneously. As soon as you set one of these, the others will appear in a grey color and can no longer be selected. In case you do, a pop-up screen will warn you to turn off the other option.
ADJUST SETTINGS ONLY APPLICABLE IN VIDEO MODE

Press 📋 (Apple) or 🌐 (Android) on your start screen and press 'Slow-Motion Function' to turn Slow Motion ON/OFF.
The icon 📁 will appear on your start screen indicating that Slow Motion is ON.
Note: - For best slow-motion results we suggest to use 'HD 720p, 120 fps'. - In slow-motion, no sound will be recorded!
Press 📋 (Apple) or 🌿 (Android) on your start screen and press 'Turn upside down recording' to turn this function ON/OFF.
The icon will appear on your start screen indicating that upside down recording is ON.
ADJUST SETTINGS ONLY APPLICABLE IN PHOTO MODE

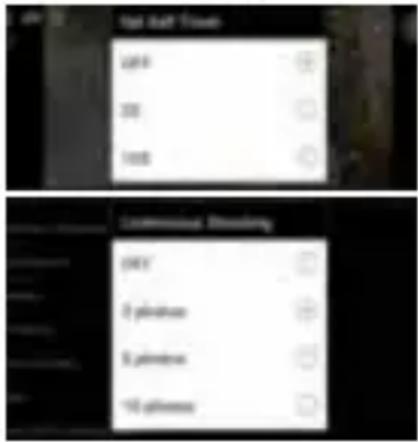
SET SELF TIMER
Press the icon. You can now choose from:
Your selection will be shown in the icon on your start screen.
SET CONTINUOUS SHOOTING
=> a certain amount of photos are captured in quick succession.
Press 📄 (Apple) or (Android) on your start screen and select 'Burst mode'. You can now choose from:
text_image
Left Left Timps OK 30 100 Commons Window OKY 2 pixels 5 pixels 10 pixels
One of the following icons:
appear on your start screen indicating that Burst Mode is ON in your selected setting.
Note: we suggest to use the 5 or 8 MP resolution for fast action shots.
- Start video recording:
Press the Record Button

on your device once. The Record Button will start
flashing slowly = start of recording.
Note: Depending on your device's model/type there could be a delay between the camera and the device. The recording will be OK and normal.
- Stop video recording:
Press the Record Button

once again to stop recording. The Record Button will
stop flashing = stop of recording.
IMPORTANT!
- After you started recording, you can turn OFF the wifi connection on phone/tablet and close the App.
- When making a timelapse, slow-motion or upside down recording with the app and you turn off the wi-fi, the camera will stop recording as soon as the wi-fi is turned back on.
- When the camera is switched OFF, the special settings done by the app such as slow motion, timelapse, upside down recording, ... will be set to default = OFF again.
MAKE PHOTOS
Press the Photo Button 📄 on your device once. The Photo Button will flash once and you will hear a snapshot sound indicating that the photo will be taken. As soon as you heard a beep coming from the camera and saw the red LED on your camera flash, the shot was made.
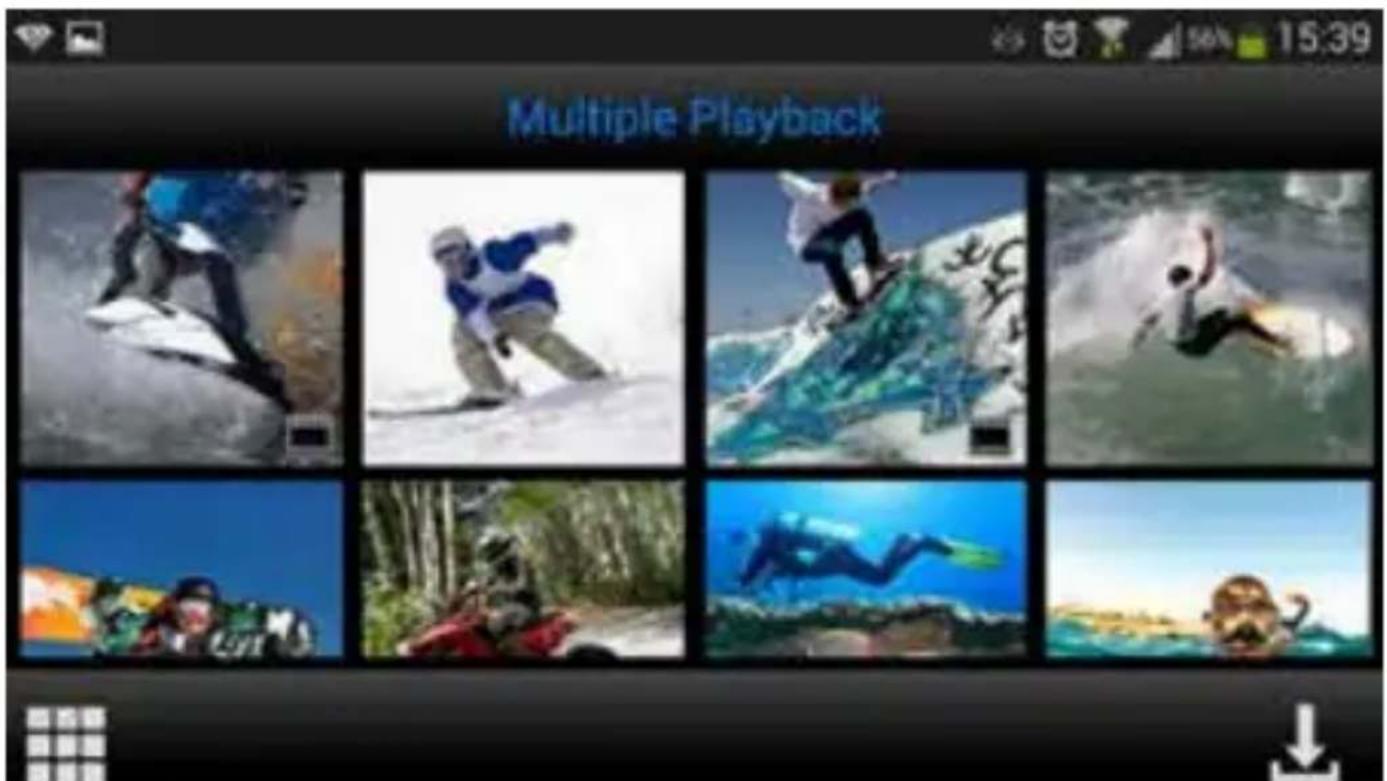
VIEW/SELECT/DELETE/... VIDEOS AND PHOTOS
Press The recorded videos and photos will appear in thumbnail icons. The recorded videos are marked with a
text_image
Multiple PlaybackO
• View photos: simply press the photo to view it full screen.
• View videos: to view your videos you first need to download them. You can view them afterwards in the photo/video album of your Apple iOS or Android device.
- Download photos and/or videos:
o Press until appears.
o Select the video(s) and/or photo(s) you wish to download by check marking them:
o Press: The selected video(s)/photo(s) will now be downloaded to the photo/video album of your Apple iOS or Android device.
- Delete photos/video(s): Press 📄 until 📋 appears. Select the videos/photos you would like to delete and press 'OK'.
Note: For Android users only: in case you cannot play the video file we suggest using the free app 'Android Video Player' or another compatible player.
Tip: When videos will only be used for your Apple or Android devices, we suggest recording in 'HD 720 p' for the fastest downloading process.
CONNECTING TO A COMPUTER
If you want to watch, play, share, edit, ... the videos and photos you made you can do so by connecting the Guardo Action Cam 4 to your computer! For smooth 4K & 2.7K playback, we recommend the use of a fast 4K computer or other dedicated video player for viewing large video files.
- Connect the micro USB cable to the Micro USB Port of the Guardo Action Cam 4.
- Connect the other end of the micro USB cable to the USB port of your computer.
• Turn the Guardo Action Cam 4 ON.
'MSDC' will now appear on the display. - On your PC a pop-up “removable disk window” (e.g. ‘D:’, ‘E:’, ...) will appear or you will find an “extra disk” (e.g. ‘D:’, ‘E:’, ...) under ‘My Computer’ or ‘Explorer’ in case you have a Windows PC or in ‘Finder’ in case you have a Mac (It can take some time before the window appears).
- Click on the 'DCIM' folder to open it.
The following folders will be shown:
VIDEO Contains videos
JPG Contains your photos
CAR Contains videos made in dashcam mode
Copy/move the files to your hard disk or external disk to open, play, share or edit them!
Note: Cyclic recording and frequent recording/deleting operations may leave data fragments in the SD card, causing failure to file recording or saving. To solve this p just back up the data on an external storage and format the SD card.
Format Micro SD card: you can use your computer to format your Micro SD card inside the camera! On a Windows computer: Right-click the removable disk and choose 'format'. Format Micro SD card on Mac: Open the 'Disk Utility' program: you can now format your Micro SD card by clicking it in the left-hand pane and then clicking the 'Erase' tab.
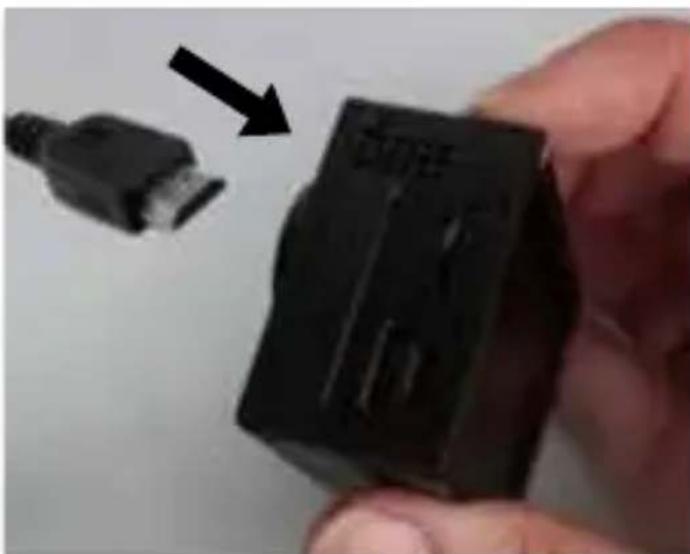
CONNECTING TO A 4K OR FULL HD TV VIA HDMI CABLE (OPTIONAL)
If you want to watch and share the videos and photos you made, you can do this by connecting the Guardo Action Cam to your HD TV using a HDMI cable! This cable is optionally available on www.guardo.be.
Note: Before connecting or removing the HDMI cable, please make sure the camera is in standby mode (not recording) and wifi is turned OFF.
natural_image
Close-up of a hand holding a black USB drive component with an arrow pointing to it (no visible text or symbols)- Switch mode: press the Power button (6) to switch between Photo, Video or Car Mode.
- View a photo/video: press the Wifi button (7) to select the photo or video you want to view. When a video file is selected, press the Record Button (1) to start playing and press the Record Button (1) again to stop playing.
- Delete a photo/video: press and hold the Record Button (1). You will have the option to delete or format the file.
o Press the Wifi button (7) to switch between deleting or formatting
- Press the Power button (6) to select Yes or No
- Press the Record Button (1) to confirm and exit.
- You can just as well use the Guardo remote control to control the TV and to view, delete, select, ... your photos and videos! See 'Use remote control with Full HD TV' for more information.
DASHCAM CAR MODE
When connected to the Guardo 12/24V DUO USB car charger (optionally available on www.guardo.be). The camera will turn ON automatically when set in the CAR mode first and starts recording in sections of 3 min. each and with selectable upside down recording (rotation 180°, can be changed by user).
Note:
- This mode will ONLY be detected when you use the 12/24V DUO USB car charger or the home travel charger.
- During recording, the camera will turn warm. This is normal and not a malfunction!
RESET
In case of a failure (a freeze or other unexpected issue), the camera can be reset. Just take out the battery for at least 15 sec. and reinstall.
CUSTOMER SUPPORT
For more information, technical questions and return requests, please contact support@guardo.be.
SOFTWARE UPDATES
Guardo keeps improving its products and therefore releases product software updates on a regular basis. Check www.guardo.be, and click on 'support' to see if there is a software update available for your Guardo camera!
GUARANTEE
Copyright © Guardo. Guardo is a registered trademark of TE-Group NV. The Guardo brand stands for superior product quality and outstanding customer service. That is why Guardo warrants this product against all defects in material and workmanship for a period of two (2) years from the date of original purchase of the product. The conditions of this guarantee and the extent of responsibility of Guardo under this guarantee can be downloaded from our website: www.guardo.be.
LEGAL DISCLAIMER
The software is provided “as is”, without warranty of any kind, express or implied, including but not limited to the warranties of merchantability, fitness for a particular purpose and noninfringement. In no event shall the authors or copyright holders be liable for any claim, damages or other liability, whether in an action of contract, tort or otherwise, arising from, out of or in connection with the software or the use or other dealings in the software. Video surveillance and privacy issues are regulated by laws that vary from country to country. Check the laws in your local region before using this product. The use of the product is under your responsibility. In case of abuse, Guardo cannot be held liable for any abuse whatsoever.
INHOUDSTAFEL
NL
ILLUSTRATIES 41
ONDERDELEN & FUNCTIES 42
CAMERA
LCD SCHERM
DE BATTERIJ INSTALLEREN 44
DE BATTERIJ OPLADEN 45
DE WATERPROOF BEHUIZING GEBRUIKEN 46
WATERDRUPPELS & CONDENS 47
DE CAMERA BEVESTIGEN MET DE MEEGELEVERDE MOUNTS 47
MOUNTS MET PLAKSTRIPS 48
A. MOUNT VOOR EEN GEBOGEN OPPERVLAK
B. MOUNT VOOR VLAK OPPERVLAK
ANDERE MOUNTS 49
A. MOUNT VOOR ZADELPEN/STUUR 'MEDIUM'
B. VEILIGHEIDSPLUG
AAN DE SLAG 50
-
PLAATS MICRO SD KAART
-
AAN/UIT ZETTEN
-
MODUS AANPASSEN
-
STANDAARDINSTELLINGEN
-
MENU- & SYSTEEMINSTELLINGEN AANPASSEN
-
INSTELLEN VAN DATUM EN TIJD
BEDIENING 57
BASISWERKING VIA DE AFSTANDSBEDIENING 58
VOLLEDIGE WERKING VIA APP 60
INSTALLEER DE APP
ACTIVEER WI-FI OP DE GUARDO ACTION CAM
MAAK EEN WI-FI DIRECT VERBINDING TUSSEN DE GUARDO
ACTION CAM EN JE SMARTPHONE/TABLET
WERKING ALGEMENE INSTELLINGEN VOOR VIDEO/PHOTO INSTELLINGEN AANPASSEN (IN VIDEO-MODUS) INSTELLINGEN AANPASSEN (IN FOTO-MODUS) VIDEO-OPNAMES MAKEN FOTO'S NEMEN BEKIIJK/SELECTEER/VERWIJDER/... VIDEO'S/FOTO'S
VERBINDEN MET EEN COMPUTER 70
VERBINDEN MET EEN FULL HD TV VIA HDMI KABEL 71
DASHCAM AUTO MODUS 72
RESET 72
CUSTOMER SUPPORT 72
SOFTWARE UPDATES 72
GARANTIE 73
LEGAL DISCLAIMER 73
ILLUSTRATIES
ONDERDELEN & FUNCTIES
natural_image
Close-up of hands holding a small electronic device with black and white buttons (no visible text or symbols)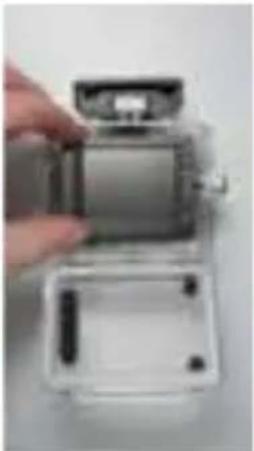
natural_image
Hand placing a small electronic device into a transparent housing (no visible text or symbols)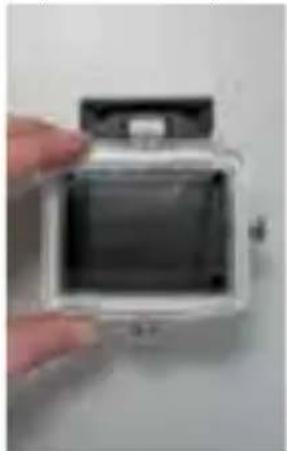
natural_image
Close-up of a hand holding a white digital camera case with visible lens and screen (no text or symbols)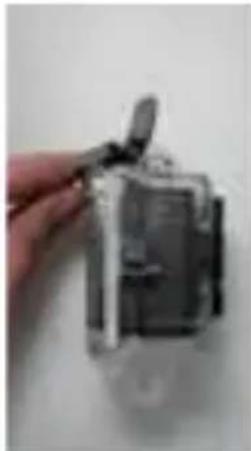
natural_image
Hand holding a small electronic device component (no visible text or symbols)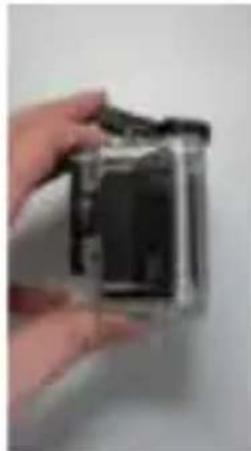
natural_image
Hand holding a small black object, possibly a camera or electronic device (no visible text or symbols)BELANGRIJK! CORRECT GEBRUIK VOOR HET VOORKOMEN VAN WATER LEKKAGE
natural_image
Two small electronic components: a black screwdriver and a yellow device with human figures (no text or symbols visible)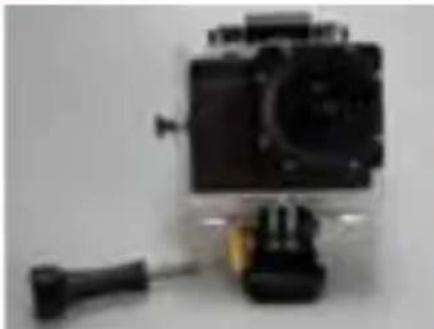
natural_image
Black-and-white photo of a small camera with a hover and base mount (no visible text or symbols)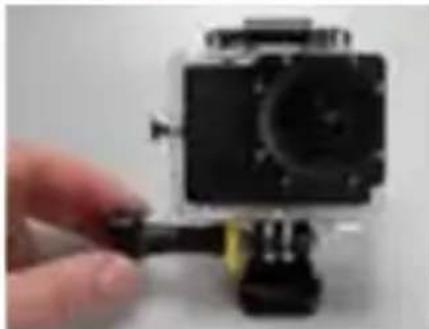
natural_image
Close-up of a small black camera module being adjusted with a hand, no visible text or symbolsnatural_image
Close-up of hands holding a small electronic device with black plastic casing and yellow components, next to a gray plastic component (no visible text or symbols)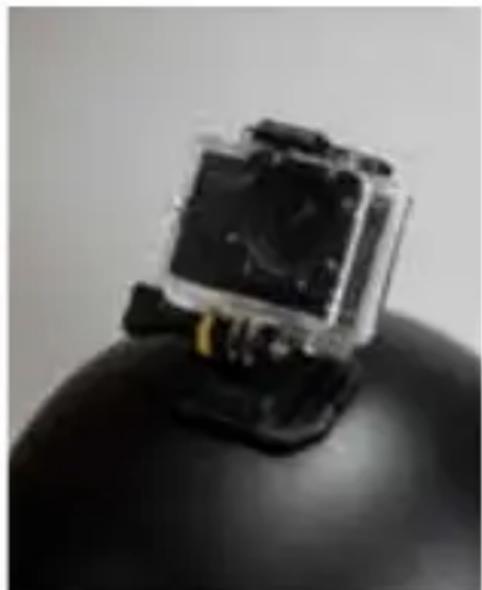
natural_image
Close-up of a black spherical object with a transparent top and internal components (no visible text or symbols)natural_image
Hand holding two red-framed product glasses (no visible text or symbols)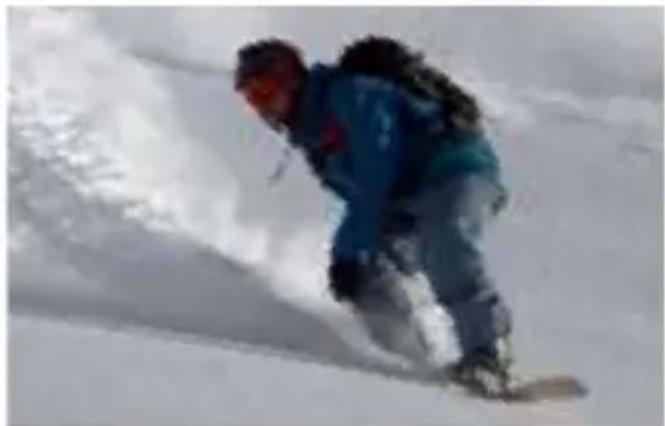
natural_image
Mountain climber descending a snowy slope, wearing gear and jacket (no visible text or symbols)natural_image
Hand holding a small electronic device with an arrow pointing to it (no visible text or symbols)natural_image
Close-up of a mechanical component with colored internal structure and three black arrows pointing to specific areas (no text or symbols)Power ON/OFF Button
Photo Button
Video Button
text_image
QR code image containing encoded data, no visible human-readable textAPPLE

text_image
QR code image containing encoded data, no visible human-readable textACTIVEER WI-FI OP DE GUARDO ACTION CAM 4
text_image
D C Camera Preview A E K x1.1 B F G H J I Ltext_image
Camera Preview F C A D E M B G H I K J Ltext_image
Altive Database Ac/TS Headlight Clarity convolutionary
Auto

Daglicht

Bewolkt

Fluorescerend

Gloeiend
STEL FREQUENTIE IN (Voor EU is 50Hz standaard)
text_image
Do you want to format SIO, all your data will be lost? Yes NoINSTELLINGEN AANPASSEN (ENKEL VAN TOEPASSING IN VIDEO-MODUS)
text_image
Set Back Time OFF RR USB Continuous Blending Comy 5 GHz 6 GHz 10 GHztext_image
Multiple Playbacknatural_image
Close-up of a hand holding a black USB flash drive component, with a separate connector shown in the background (no text or symbols on the device itself)FIXATIONS AVEC RUBAN ADHÉSIF 84
A. FIXATION POUR SURFACE INCURVÉE
B. FIXATION POUR SURFACE PLANE
AUTRES FIXATIONS 85
A. FIXATION POUR TIGE DE SELLE/GUIDON MEDIUM
B. CROCHET DE SÉCURITÉ
natural_image
Close-up of hands holding a small electronic device with black and white buttons (no visible text or symbols)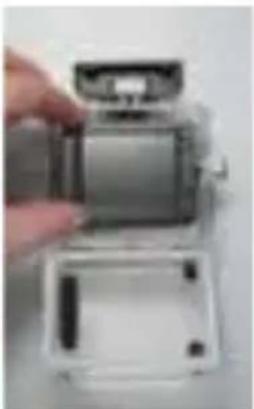
natural_image
Close-up of a hand holding a small electronic device with a lid open, showing internal components (no visible text or symbols)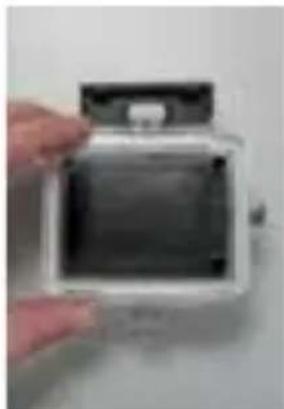
natural_image
Hand holding a small electronic device with a black cover and top handle (no visible text or symbols)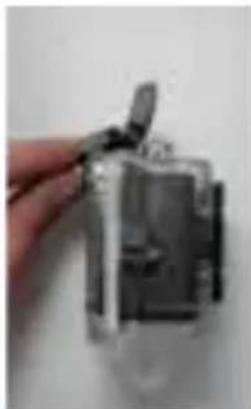
natural_image
Hand holding a small metallic object with a clip, against a plain background (no text or symbols visible)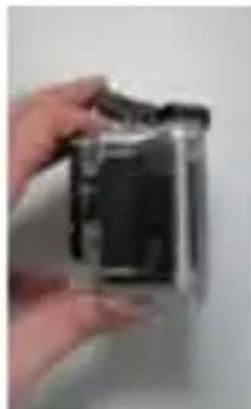
natural_image
Hand holding a small electronic device (no visible text or symbols)IMPORTANT ! INSTRUCTIONS POUR ÉVITER UNE INFILTRATION D'EAU
natural_image
Two types of screwdrivers: a black-handled tool and a yellow-crumpled device (no text or symbols visible)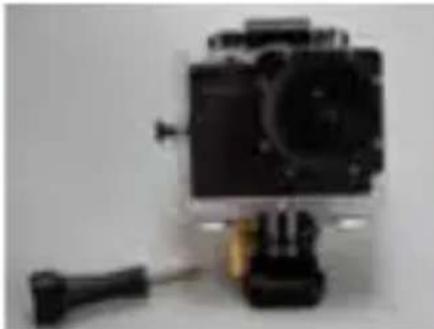
natural_image
Exterior view of a black-and-white photo camera with a small attached sensor (no visible text or symbols)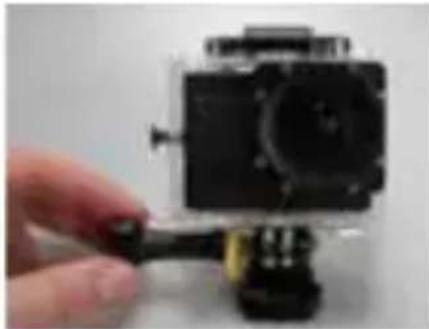
natural_image
Close-up of a hand holding a black camera module with a yellow cable, no visible text or symbolsFIXATIONS AVEC RUBAN ADHÉSIF
natural_image
Close-up of hands holding a device with internal components, no visible text or symbols
natural_image
Close-up of a black spherical object with a transparent internal component, possibly a camera or sensor module (no visible text or symbols)natural_image
Hand holding a black and red electronic device with two square buttons (no visible text or symbols)
natural_image
Person trekking down a snowy slope, wearing gear and boots (no visible text or symbols)natural_image
Hand inserting a small component into a device (no visible text or symbols)Picture in Video (PIV)
natural_image
Close-up of a dark mechanical component with a highlighted blue square and three black arrows pointing to it (no text or symbols)Bouton d'arrêt
Bouton Photo
Bouton Vidéo
text_image
QR code image containing encoded data, no visible human-readable textAPPLE

text_image
QR code image containing encoded data, no visible human-readable textACTIVER LE WI-FI SUR LA CAMÉRA D'ACTION GUARDO 4:
text_image
D C Camera Preview A E K x1.1 B F G H J I Ltext_image
Camera Preview A D E M B G H I K J Ltext_image
Disk Valley Prespiration 1000x10000 90fps 1000x10000 30fps 1400x10000 48fps 1800x10000 34fps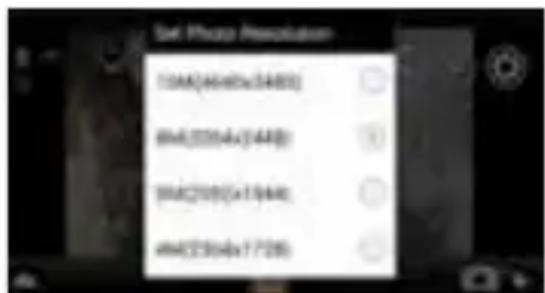
text_image
Data Photo Association 10A(4448x3448) 6M(209A(3448)) 10A(209X1544) 6M(209X1728)text_image
Auto Balance Auto Scanopt Cleanly InvestmentsAWB
Automatique

Plein Jour

Nuageux

Fluorescent

Brillant
RÉGLER LA FRÉOUENCE
text_image
Do you want to format ISO, all your data will be lost? Yes No Loremtext_image
tan and Bright 20% 50% 100% Controllable Blending 30% 50% 100%text_image
Multiple Playbacknatural_image
Close-up of a hand holding a black USB drive component with an arrow pointing to it (no visible text or symbols)natural_image
Close-up of hands holding a small electronic device (no visible text or symbols)
natural_image
Hand holding a small electronic device with a lid and internal components (no visible text or symbols)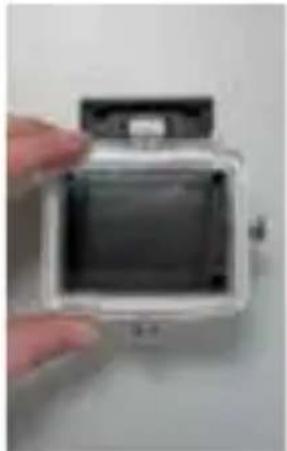
natural_image
Close-up of a white digital camera with a black interior panel, held by a hand (no visible text or symbols)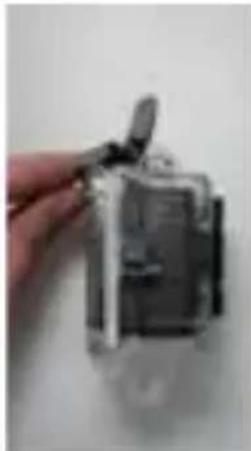
natural_image
Hand holding a small electronic device component (no visible text or symbols)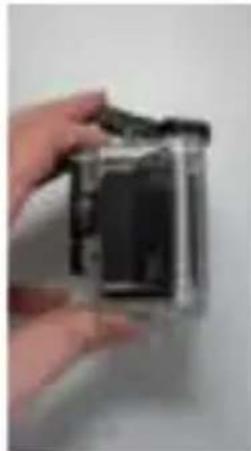
natural_image
Hand holding a small black object, possibly a device or component, against a plain background (no visible text or symbols)natural_image
Two small screwdrivers, one black and one yellow, displayed against a plain background (no text or symbols visible)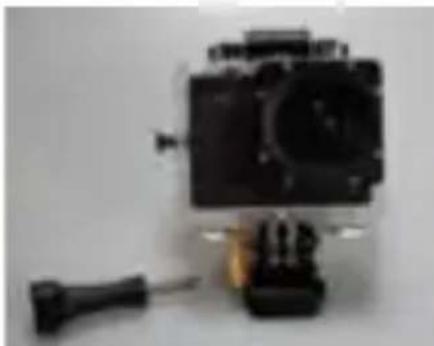
natural_image
Black camera module with a screwdriver and adjustment knob, no visible text or symbols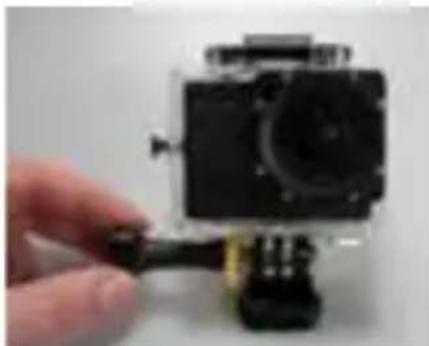
natural_image
Close-up of a hand holding a small black camera module with a yellow connector (no visible text or symbols)natural_image
Close-up of hands holding a device with internal components, no visible text or symbols
natural_image
Close-up of a black electronic device mounted on a glossy black sphere (no visible text or symbols)natural_image
Hand holding a black and red electronic device with visible lens edges (no text or symbols)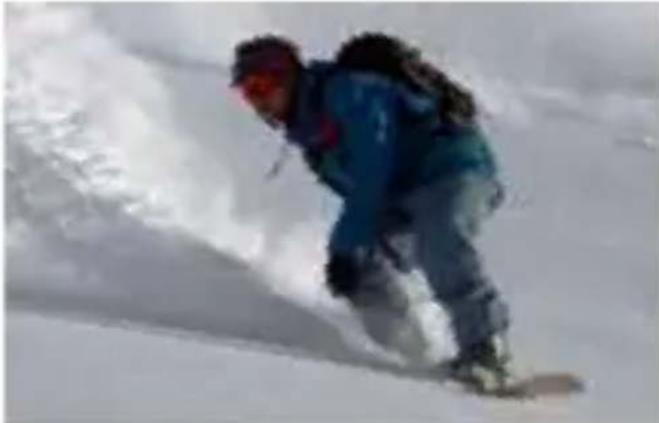
natural_image
Person trekking down a snowy slope, wearing a dark jacket and gear (no visible text or symbols)natural_image
Close-up of a bicycle's front-mounted camera module with a small square camera (no visible text or symbols)natural_image
Abstract yellow geometric shape on white background (no text or symbols)natural_image
Hand holding a small electronic device with an arrow pointing to it, against a plain background (no text or symbols visible)natural_image
Close-up of a mechanical component with three black arrows pointing to specific areas (no text or symbols visible)Power OFF Button
Photo Button
Video Button
text_image
QR code image containing encoded data, no visible human-readable textAPPLE

text_image
QR code image containing encoded data, no visible human-readable textAKTIVIEREN VON WI-FI AUF DER GUARDO ACTION CAM 4
text_image
D C A E K Camera Preview x1.1 B F G H J I Ltext_image
Camera Preview F C A D E M B G H I K J Ltext_image
Use video resolution 1000x1000-60fps 1500x1000-90fps 1800x1000-40fps 1000x1000-24fps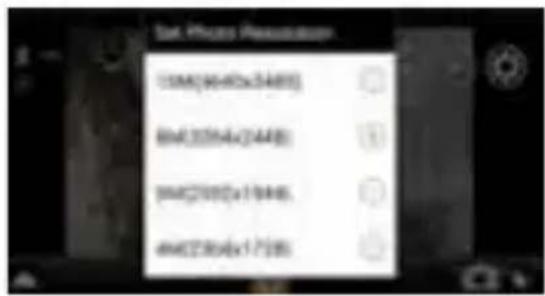
text_image
CMYK(MYK40x3448) BM(325NA/2448) BM(2000)x17946 BM(2004x17985)ZOOM
text_image
Multi-Scale Auto Display Security ViewershipAWB
Auto

Tageslicht

Bewölkt

Fluoreszierend

Glühbirnen