Dashcam Pro - Dashcam Guardo - Free user manual and instructions
Find the device manual for free Dashcam Pro Guardo in PDF.

| Product Type | Built-in GPS Dashcam |
| Brand | Guardo |
| Model | Dashcam Pro |
| Maximum Video Resolution | 2560 x 1080 pixels at 25 fps (21:9) |
| HDR Video Resolution | 1920 x 1080 pixels at 25 fps (16:9) |
| GPS Sensor | Integrated in the suction cup mount |
| LCD Screen | Yes, color |
| Power Supply | 12/24 V via Smart Duo USB car charger (2.1 A max) |
| Internal Battery | Yes, for last file backup and short use |
| Storage | micro SD/TF card up to 128 GB (Class 10, min. 16 GB) |
| Main Functions | Loop recording, motion detection, G-Sensor, emergency recording, audio, timestamp |
| Driver Assistance Systems (DAS) | LDWS, FCWS, FCMD, LLWS (by Ambarella) |
| Connectivity | USB 2.0, HDMI, AV |
| Maintenance and Cleaning | Clean the lens with a soft cloth; regularly format the SD card in the device |
| Safety | Do not expose to water, extreme temperatures, or direct sunlight; do not open or repair yourself |
| Included Accessories | Suction cup mount, car charger, USB cable (3.5 m), HDMI cable |
| Warranty | 2 years against manufacturing defects |
Frequently Asked Questions - Dashcam Pro Guardo
User questions about Dashcam Pro Guardo
0 question about this device. Answer the ones you know or ask your own.
Ask a new question about this device
Download the instructions for your Dashcam in PDF format for free! Find your manual Dashcam Pro - Guardo and take your electronic device back in hand. On this page are published all the documents necessary for the use of your device. Dashcam Pro by Guardo.
USER MANUAL Dashcam Pro Guardo
with built-in GPS and Driver Assist System
USER'S MANUAL

TRANSLATION VOICE PROMPS
| English voice | Nederlandse vertaling | Traduction française | Deutsche Übersetzung |
| Start record Start opname | Début enregistrement | Aufnahme starten | |
| Stop record Stop opname | Fin enregistrement | Aufnahme stoppen | |
| Emergency record | Noodopname | Enregistrement d'urgence | Notfall-Aufnahme |
| GPS fixed GPSILAar GPS prét GPS fertig | |||
| Low battery Batterij leeg Batterie faible | Niedriger Batteriestatus | ||
| Recover last file? | Laatste bestand terugzetten? | Récupérer dernier fichier? | Letzte Datei wiederherstellen? |
| Power Save on Power Save aan | Économie d'énergie activée | Energiesparmodus aktiviert | |
| Insert memory card! | Geheugenkaart invoeren! | Insérez carte mémoire | Speicherkarte einlagen! |
| Left lane Linkse baan Voie de gauche Rechte Spur | |||
| Right lane Rechtse baan Voie de droite Rechte Spur | |||
| Low light Weinig Licht Luminosite faible | Schlechte Lichtverhältnisse | ||
| Too Close Te richtig! Trop-Proche! Zu nah | |||
| Front Car Voorligger Voiture précédente | Vorausfahrendes Fahrzeug | ||
| Audio on | Audio aan | Audio aktivé | Ton an |
| Audio off Audio uit | Audio déactivé Ton aus | ||
| Emergency record full | Noodopname vol | Enregistrement d'urgence complet | Notfall-Aufnahme Voll |
| Guardo On | Guardo On Guardo On Guardo On | ||
| Driven by Guardo | Driven by Guardo | Driven by Guardo | Driven by Guardo |
DECLARATION OF CONFORMITY
We, the undersigned
| Company: | TE-GROUP nv |
| Address: | Kapelsestraat 61, 2950 Kapellen - BELGIUM |
declare, that the following equipment:
| Product Name: | Guardo Dashcam Pro |
| Product Type: | Dashboard Camera |
Complies with the essential requirements, which are specified in the directive 2004/108/EC on the approximation of the laws on the Member States relating to electromagnetic compatibility.
This product has been tested against following standards and specifications, applying versions valid on March 2016:

EN 50498:2010
EN 55022: 2010
EN 55024: 2010
EN 61000-3-3:2014
EN 61000-3-3:2013
ISO 7637-2:2011
Manual/Guardo Dashcam PRO/03-16/V1
Copyright©GUARDO
GB
INTRODUCTION
Congratulations on your purchase. The Guardo DASHCAM Pro is a reliable, easy-to-use onboard GPS safety camera for car/truck that is designed to capture valuable footage in the event of an incident or accident. Before first-time use of this device, you should carefully read these user instructions. Please keep these instructions so that you can reference them later on.
SAFETYWARNINGS
- Avoid placing the device in direct sunlight. Take the unit out of the car/truck during hot/sunny periods.
- Never allow the device to come in contact with water or any other liquids.
- Do not expose the device to extremely high or low temperatures and/or humidity.
- Do not use the unit if you suspect that it is damaged. Do not try to open or repair the unit yourself. To avoid considerable subsequent damage to the device, only let a qualified expert repair the unit otherwise the warranty will be void.
- Keep the device away from children, it is not a toy.
- Do not operate the device when driving, be safe first!
- This device is intended to be used inside the vehicle only.
- The quality of the recorded footage might be affected by a number of uncontrolled variables: mounting location, driving conditions, weather conditions, road environment, lighting conditions, etc.
- Guardo does NOT take any responsibility for data loss or damage during operation.
- Guardo does NOT guarantee video recording of accidents in which the G-sensor was not activated due to incorrect user settings or accidents in which the device was severely damaged.
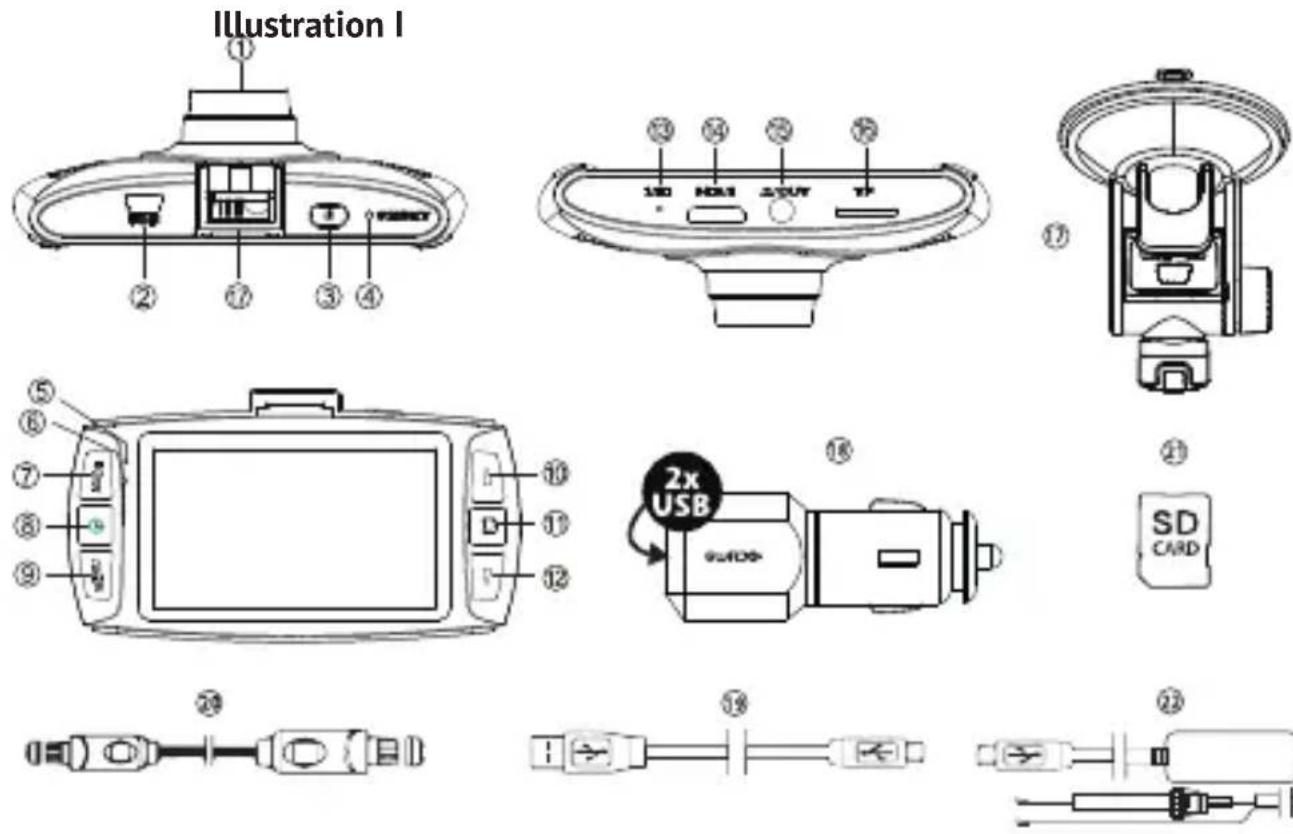
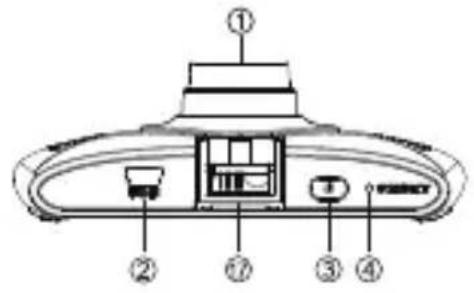
PARTS AND FUNCTIONS
| 1. Lens | |
| 2. 5V USB/Power port | |
| 3. Power button | • Short press to power ON. • Press and hold for 3 seconds to power OFF. |
| 4. Reset button | • Reset the camera in case of a failure (a freeze or other unexpected issue). |
| 5. Charging indicator • Red during charging, OFF when fully charged. | |
| 6. Power indicator | • Blue when unit is ON. • Flashing when making videos/pictures/connection to PC. |
| 7. MODE button | • Short press to switch modes (recording mode, camera mode, playback mode). • Short press to exit menu. • Short press to take photos while recording. |
| 8. Recording/Guardo button | • Short press to start/stop recording. |
| 9. Menu button | • Short press to enter menu. • Short press to switch menu. • Short press to thumbnail overview after viewing a file (playback mode). |
| 10. Up-button | • Short press to move up in the menu. • Short press to go to the previous file (playback mode). • Short press to turn on/off voice recording while recording. You will hear “Audio ON” or “Audio OFF”. • Short press to zoom in. !This function cannot be used when recording. You need to zoom in in advance! |
| 11. Camera button | • Short press to take pictures (camera mode). • Short press to confirm the chosen submenu function in the menu. • Short press to Play/Pause videos when browsing videos (playback mode). • Short press to start emergency recording (rec. mode). |
| 12. Down-button | • Short press to move down in the menu. • Short press to go to the next file (playback mode). • Short press to zoom out. !This function cannot be used when recording. You need to zoom out in advance! |
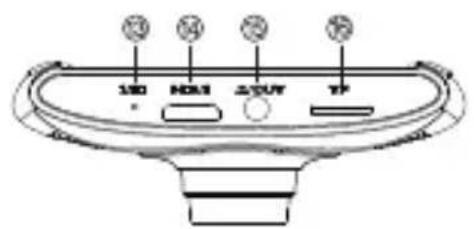
| 13. Microphone Super clear audio | |
| 14. HDMI-OUT port For use on a Full HD TV | |
| 15. AV-OUT port For use on a normal TV | |
| 16. TF/SD card slot Max. 128 GB SDHC UHSI Class 10 (min. 16 GB) | |
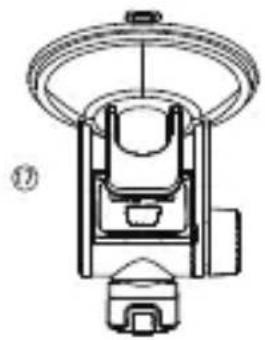
| 17. Suction cup bracket (incl.) | GPS is built-in inside the bracket holder |
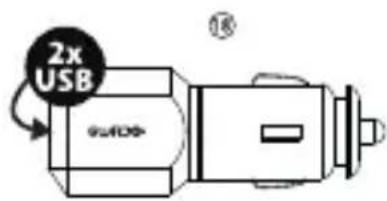
| 18. 12/24V Smart Duo USB car charger (incl.) | Total is max. 2.1A, the camera uses 1A max. |
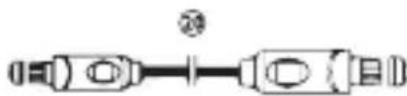
| 19. 3,5m XL USB connection cable (incl.) | For data/PC use and charging |
| 20. HDMI TV cable (incl.) For use on Full HD TV | |
| 21. Micro SD card (not incl.) See page 6 | |
| 22. Built-in cable (not incl.) See page 8 | |
GETTING STARTED
A. POWER ON/OFF
- Turning ON: Connect the Guardo DASHCAM PRO to the Duo USB car charger (18) using the USB charging cable (19). The device will automatically turn ON and you will hear "Guardo ON". As soon as the car engine is started, the recording will start. The DASHCAM will now be powered during recording.
When the car charger is disconnected from the unit, the DASHCAM will shut down automatically and save the files.
- Turning OFF: Press and hold the Power button (3) for 3 seconds. You will hear "Driven by Guardo".
When the device has been turned OFF, short press the Power button (3) to turn it ON again.
Note:
- It is also possible to charge the Guardo DASHCAM PRO by connecting it to your PC/ notebook using the USB cable (19). See page 10 before making the connection.
- The built-in battery is only used to save the last file when the power is disconnected or for short time operation. If the battery is low, you will hear "Low battery" and see the red LED indicator (5). We strongly suggest to always connect the device to the Guardo car charger during use in the car/truck.
- Some car power outlets do not shut off when the car ignition is turned off. Keeping the Guardo DASHCAM PRO connected to such power outlet might cause the car battery to discharge.
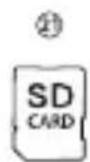
B. USE OF THE SD CARD (not supplied, optionally available)
Illustration II
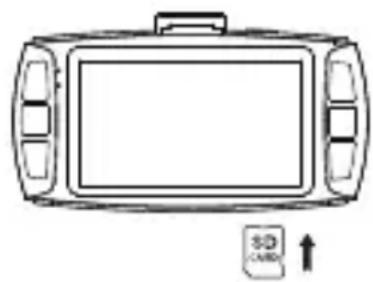
- Insert the SD/TF card into the SD/TF card slot (16) at the bottom of the unit until it clicks into place. Format the SD card directly using the Dashcam menu, see page 13.
- To remove the SD Card, press it lightly. It is partially ejected, allowing you to pull the card out. !Device should be turned off before removing the card! If no SD card is inserted, you will hear "Insert memory card".
Note:
- We recommend using a 16 GB SDHC card (or higher) with class 10 (or higher) and a minimum writing speed of 15MB/s (not supplied, optionally available).
- Without SD card, the unit will NOT function!
- If the SD card is inserted in a wrong way (difficult to insert), it may damage the device and the memory card. This is the user's responsibility!
- The device will set the SD card automatically after it has been inserted.
- SD cards should be tested and formatted on a regular basis to extend the lifetime and ensure reliable operation. Always format the SD card in the camera menu before first use!
- Copy the recorded files on the SD card to your PC on a regular basis to avoid loss of important information.
| VIDEO* PHOTO* | |||||||
| MICRO SD Card | HDR 1920*1080 25FPS 16:9 | 2560*1080 25FPS 21:9 | 2304*1296 25FPS 16:9 | 1920*1080 45FPS 16:9 | 1920*1080 25FPS 16:9 | 1280*720 50FPS 16:9 | 4 MP |
| 16GB 156 | min 108 min 108 min 156 min | min 156 min | min 156 min 156 min | min 3660 | |||
| 32GB 322 | min 223 min 223 min 322 min | min 322 min | min 322 min 322 min | min 7410 | |||
| 64GB 652 | min 451 min 451 min 652 min | min 652 min | min 652 min 652 min | min 14835 | |||
| 128GB 13 | 15 min 910 min | 910 min 1315 | min 1315 min | min 1315 min | 29735 | ||
- Depends on SD card brand, model and class type. Data are approximate.
| Video Resolution Capacity of 2 minutes | |
| HDR 1920*1080 25P 16:9 180 MB (188,87) | 4,752 bytes) |
| 2560*1080 25P 21:9 260 MB (272,760,832) bytes) | |
| 2304*1296 25P 16:9 260 MB (272,760,832) bytes) | |
| 1920*1080 45P 16:9 180 MB (188,907,520) bytes) | |
| 1920*1080 25P 16:9 180 MB (188,874,752) bytes) | |
| 1280*720 50P 16:9 180 MB (188,907,520) bytes) | |
| Photo Resolution: 4MP | 1.16 MB (1,220,608 bytes) |
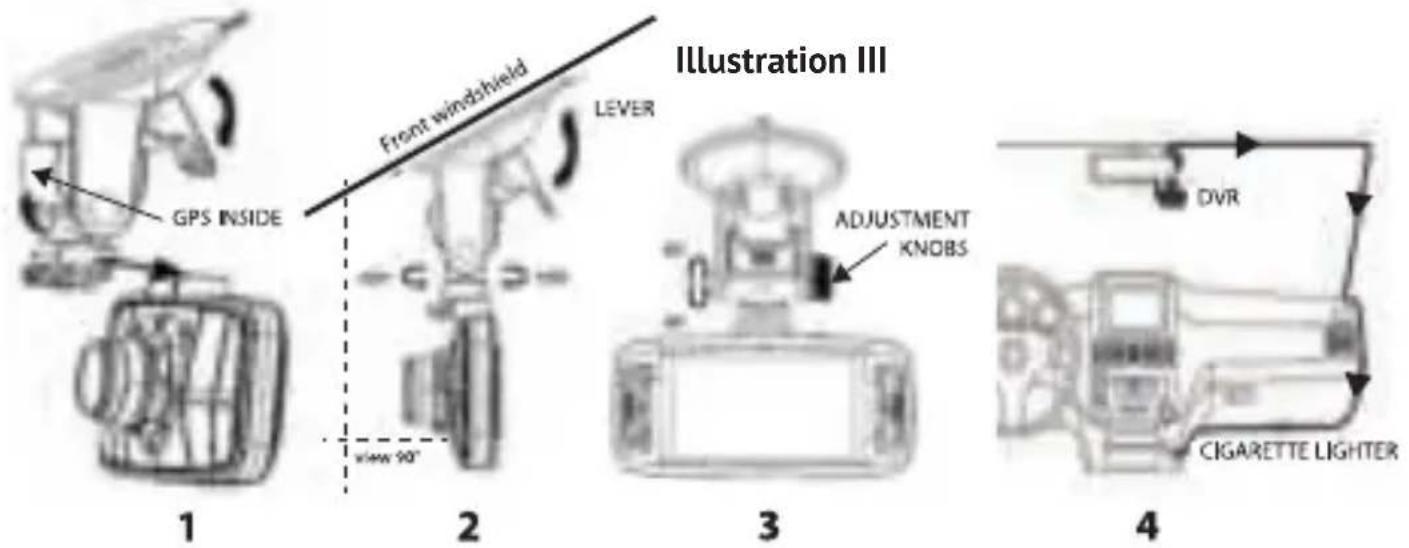
INSTALLATION
- Slide the suction cup bracket (17) in the designated location at the top of the camera until it clicks into place. Make sure the suction cup lever is unlocked.
- Clean the inner front windshield of the car and remove the protective film from the bottom of the suction cup. Moisten the suction cup, place it on the inside of your windshield and lock the cup using the lever. We recommend placing the Guardo DASHCAM PRO on the right side of the rear view mirror. Make sure the camera is mounted horizontal for the best view.
- Adjust the bracket position by using the adjustment knobs.
- Connect the USB cable (19) of the car charger (18) to the USB port (2) of the DASHCAM, and insert the car charger into the cigarette lighter.
-
Keep the windshield and the camera lens clean for optimal video quality.
-
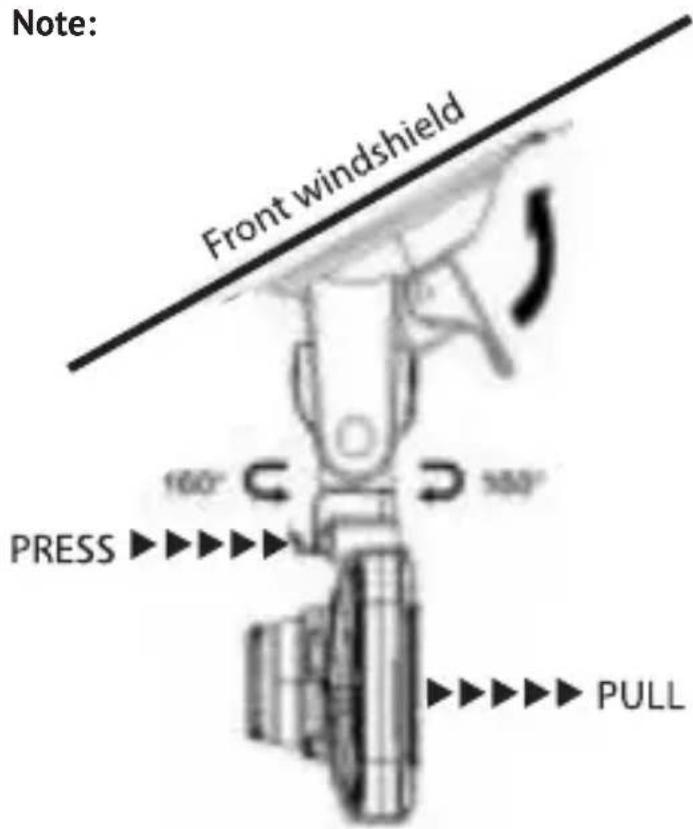
When you want to take the camera out of the car (for theft protection of for use outside the car), you can easily remove it from the suction cup bracket:
-
Hold the bracket tightly and press the small handle to unlock the camera unit.
-
Pull the camera backwards and slide it out of the holder. Do not use too much pressure to prevent damage to the bracket.
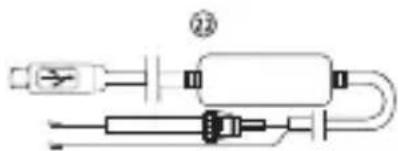
Built-In cable (optional) and Motion Detection/parking mode
We suggest to only use this feature when the Dashcam has been hardwired directly to the vehicle battery power. The built-in wire cable (optionally available at www.guardo.be) is required for the hardwiring part and installation is required by a 3^rd party company or your local car dealer.
Motion Detection/Parking mode:
- Set the "LCD OFF" screen at 1 MIN
- Set "Motion Detection" at ON
- Each motion detection is set at MAX 30 sec per movement
Note: This option may result in a vehicle battery discharge, this depends on Car/Truck model and make and brand, so please test it before use!
OPERATION
A.MODES
The camera can be set into 3 different modes: video recording mode, photo mode and playback mode. After having turned ON the camera, press the MODE Button (7) to switch between the different modes.
Attention! This menu will not function when PC mode is active.
A camera icon is shown in the upper left corner of the display.
- When the Guardo DASHCAM PRO is connected to your cars power supply, it will start Video recording as soon as the car engine is started. You will hear "Start Record". It will stop recording after the car is stopped. You will hear "Stop Record".
- When the Guardo DASHCAM PRO is not connected to the cars power supply it will start Video recording as soon as the camera is turned ON.
- Press the recording button (8) to stop recording and save the files automatically.
Note:
- G-sensor: When the G-Sensor is ON (default = ON), the DASHCAM will start emergency recording immediately after the car gets hit or brakes in case of emergency. During emergency recording, a red triangle symbol will be shown on the right side of the screen. You will hear "Emergency Record".
Note:
- Emergency recording will only detect an "impact" if the impact level is higher than the G-sensor sensitivity set in the menu.
- Emergency files are saved as files with name "Evenxxxx", they will not be overwritten during loop recording. When SD card is full with emergency records, you will hear "Emergency Record full".
-
Emergency recordings have a max. recording time of up to 1 minute per file.
-
After an incident it can be possible to recover the video file and you will see and hear "Recover last file?".
- Manual recording: You can also start recording manually by pressing the Camera button (11) in video mode at any time. These files are also saved as files with name "Evenxxxx".
- Loop recording: During recording, the device will save each video file every 2, 5 or 1 minutes automatically. When the SD card is full, the device will delete the oldest video file automatically.
- The night video recording function is turned on automatically under lowlight circumstances when set in HDR resolution.
PHOTO MODE
A photo icon is shown in the upper left corner of the display.
- Press the MODE button (7) 1x if you want to make pictures instead of recordings.
- Press the Camera button (11) every time you want to take a picture.
PLAYBACK MODE
A thumbnail icon is shown in the upper left corner of the display.
- For Playback mode, press the MODE button (7) 2x.
- Press the Camera button (11) to select a file.
- Using the UP and DOWN buttons (10-12) you can scroll through the recordings. Press the Camera button (11) to select a file.
- Press the Camera button (11) to start playback. Press the Camera button (11) to pause or begin playback again.
- To delete a file, select the file and press the MENU button (13). Press the Camera button (11) to confirm to delete a single file or all files.
B. CONNECTING TO A COMPUTER
If you want to watch, play, share, edit, ... the videos and photos you made you can do so by connecting the Guardo DASHCAM PRO to your computer!
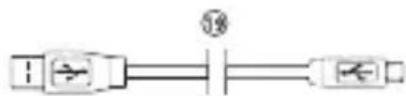
- Connect the mini USB cable (19) to the mini USB Port (2) of the Guardo DASHCAM PRO. Only use the SUPPLIED USB cable that was inside the box.
- Connect the other end of the mini USB cable to the USB port of your computer.
- The Guardo DASHCAM PRO will turn ON automatically. If not, turn it ON manually. 'USB Connecting...' will now appear on the display.
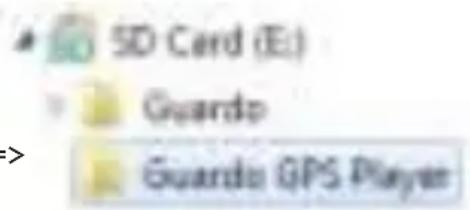
- On your PC a "removable disk" (e.g. 'D:,E:, ...) window will appear or you will find an extra disk (e.g. 'D:,E:, ...) under 'My Computer' or 'Explorer' in case you have a Windows PC or in 'Finder' in case you have a Mac.
- The following folders will be shown: "Guardo" & "Guardo GPS Player". The folder named "Guardo" contains all available photos and videos.
- Copy/move the files to your hard disk or external disk to open, play, share or edit them (We recommend to use Windows Media Player or QuickTime)!
You don't need to install drivers to use the GUARDO DASHCAM with your PC because these are already pre-installed in the Windows OS or Apple OS.
Note: You can also remove the SD card from the DASHCAM and place it in a (built-in) SD card reader from your PC or a separate SD card reader if you have one. This is a quick and easy-to-use solution.
C. CONNECTING TO A TV
To watch the recorded files on your TV:
Set the TV in HDMI mode, connect the camera to the Full HD TV using a HDMI cable. OR
Set the TV in AV mode, connect the camera to the TV using an AV cable.
D. MENU SETTINGS
In video recording mode & photo mode, there are 3 menus available:
→ Main menu /
Quality settings menu
System settings:
- Select the desired mode using the MODE button (7).
- Press the MENU button 1x (9) to open the Main menu. Press the MENU button 2x (9) to open Quality settings menu, press the MENU button 3x (9) to open system settings.
Attention! These menus will not function when PC camera mode is active.
- Press Up/down buttons (10-12) to navigate through the menu.
- Press the Camera button (11) to open the submenu.
- Press Up/down buttons (10-12) to navigate through the submenu.
- Press the Camera Button (11) to select the desired setting.
- Use the MODE button (7) to exit the Menu.
A. MAIN MENU
| Video Resolution Set video resolution | HDR 1920*1080 25P/30P 1) 2560*1080 25P/30P 2304*1296 25P/30P 1920*1080 40P/45P 1920*1080 25P/30P 1280*720 50P/60P |
| Quality Set video quality | Super Fine 1) Fine Normal |
| WDR Setting Optimize video quality in different lighting environments | Off On 1) ! If the resolution is HDR 1920*1080 25P/30P, this doesn't work. |
| Stamp Indication on footage | Date: On 1) / Off Time: On 1) / Off Driver ID/License plate: On 1) / Off |
| G-Sensor Set the sensitivity of emergency recording triggered by the built-in sensor | Off High Medium 1) Low |
| Loop recording Set duration of loop recording | 1 min 2 min 1) 5 min Off |
| Motion Detection Automatic recording when movement is detected | Off 1) On Max. 30 seconds per movement when detected |
| DAS Setting by Ambarella Select driving assistance functions | LDWS Assist: ON 1)/ Off FCWS Assist: ON 1)/ Off FCMD Assist: ON 1)/ Off LLW Assist: ON 1) / Off |
1) Default setting
B. QUALITY SETTINGS MENU
| Light frequency Set light frequency | 50Hz1) 60Hz |
| White balance Adjustment of colors and light | Auto1) Sunny Cloudy Fluorescent Tungsten |
| AE Meter Determines the exposure | Center1) Spot ! If the resolution is HDR 1920*1080 25P/30P, this doesn’t work. |
| AE correction Luminance adjustment | -2 -1 01) +1 +2 ! If the resolution is HDR 1920*1080 25P/30P, this doesn’t work. |
1) Default setting
C. SYSTEM SETTINGS MENU
| GPS Info | GPS Connected: Yes/No Sensitivity: Strong/Medium/Low => For more information, see page 17 |
| Speed Unit | Km/H 1) mph |
| Language Set language | English 1) Nederlands François Deutsch |
| SD Card Volume Card capacity info | Total Used Reserved |
| TV Out Set TV system | NTSC PAL 1) => This will affect the Frame rate speed as set in "Video Resolution"! |
| Driver ID Setting Set car license plate number/name | Driver ID |
| Time/Date Set system time | Year/Month/Date/Hour/Minute |
| Time zone setting Set system time | GMT-12 ~ GMT+12 (+1 = Brussels, Amsterdam) ! After setting the time zone, and GPS positioned, system time will be corrected to the time of current time zone automatically. |
| GPS Speed Show Speed info on LCD | On 1) Off ! Only available after GPS positioned. |
| Format Format SD card | Yes No |
| Default Setting Reset to factory settings | Yes No |
| Power save Automatic power off when not in use | Off 1) 1min 3min 5min |
| LCD Off Automatic power off LCD when not in use | Off 1) 1min 3min 5min ! When set ON, you will hear “Power Save ON” after the set time. |
| Auto Power Off Automatic power off when no power supply | Off 15sec 1) 30sec 1min |
| Voice Alert Set voice warnings | On 1) Off |
| Volume Set Volume | 0-100 1) |
| Version Info Software version information | Software and hardware version number |
1) Default setting
Attention! These menus will not function when PC mode is active.
- Press Up/down buttons (10-12) to navigate through the menu.
- Press the Camera button (11) to open the submenu.
- Press Up/down buttons (10-12) to navigate through the submenu.
- Press the Camera Button (11) to select the desired setting.
- Use the MODE button (7) to exit the Menu.
A. MAIN MENU
| Quality Set photo quality | Super Fine 1) Fine Normal |
| Stamp Indication on photo | Off Date/Time 1) |
1) Default setting
B. QUALITY SETTINGS MENU
| Light frequency Set light frequency | 50Hz 1) 60Hz |
| White balance Adjustment of colors and light | Auto 1) Sunny Cloudy Fluorescent Incandescent |
| AE Meter Determines the exposure | Center 1) Spot |
| AE correction Luminance adjustment | -2 -1 0 1) +1 +2 |
1) Default setting
C. SYSTEM SETTINGS MENU
These system settings are identical to the systems settings in Video Mode. Once a System Setting is confirmed in Video Mode, it will automatically also be set in Photo mode, and vice versa.
DRIVER ASSISTANCE SYSTEM (DAS) BY AMBARELLA
The Guardo DASHCAM PRO is developed to improve your safety and aids you in alerting you to hazards and dangerous driving behavior. Mounted on the windshield of your car, the DASHCAM gives sound and voice warnings when your vehicle begins to stray from its lane or when a crash is imminent. Such advanced technologies that once were only available in luxury cars, are now at your disposal in this compact Super HD dashboard camera.
1. Lane Departure Warning System
The LDW system is designed to warn you when your vehicle begins to stray from its lane by detecting the road markings ahead. It prevents accidents effectively by addressing the main causes of collisions: drowsiness and distractions.
Enable LDWS in the camera menu (default = ON). When your vehicle strays from its lane, you will hear a warning beep and a yellow triangle symbol will appear on the left side of the screen.
This function only works when:
-
Driving speed is higher than 60km/h . + GPS function is activated (See page 17) + automatic calibration has been completed (can take up to 5 min.)
-
Lane line indications are clear enough for accurate detection: When the system cannot detect clear lane markings (f.e. due to weather conditions like fog, snow, heavy rain and dark night roads or low/high sun positions), the warning will possibly not activate.
2. Front Collision Warning System
The FCW system detects the vehicle ahead and enables sound or voice warnings to alert you and to remind you to keep an appropriate distance or perform an early braking maneuver prior to collision.
Enable FCWS in the camera menu (default = ON). When your vehicle is too close to the vehicle in front, you will hear a vocal warning "Too Close" and a yellow triangle symbol will appear on the left side of the screen.
This function only works when:
- Driving speed is higher than 30 40 ~km / h . + GPS function is activated (See page 17)
3. Front Car Moving Detection
The FCMD system detects the vehicle ahead and informs you when it's moving off. Handy whilst being distracted in front of a red traffic light or when stuck in a traffic jam. The DASHCAM will promptly send you a warning signal to start driving again.
Enable FCMD in the camera menu (default = ON). When the vehicle in front of you is moving, you will hear a vocal warning "Front Car".
This function only works when:
- Your vehicle is standing still + GPS function is activated (See page 17)
Note: Sometimes warnings may be mistakenly detected, causing a false warning.
4. Low Light Warning System
The LLW system evaluates the lightning conditions in which you are driving, and will remind you to turn the head lights on in case of insufficient light or less than optimal driving circumstances.
Enable LLWS in the camera menu (default = ON). When it is getting dark outside, you will hear a vocal warning "Low Light".
Note: Sometimes warnings may be mistakenly detected, causing a false warning.
IMPORTANT!
The operation of above mentioned functions depends strongly on factors that cannot be controlled by Guardo and Ambarella since it is a passive system. Each passive system has its limitations and the Guardo DASHCAM PRO cannot prevent accidents from happening. Please drive safe and attentive at all times! The Driver Assistance System only acts as a helpful and reliable aid while driving. It is the drivers responsibility to take appropriate actions on the road.
The below factors can affect LDWS, FCWS, FCMD functions:
- Condition of the road and lane indications (unexpected roadworks...)
- Weather conditions (snow, fog, rain, splash water...)
- Light conditions during day/night (low sun, direct sunlight, wet road surface reflections, shadows, night lights...)
- Vehicle speed
- Car's headlight type & operation (Normal, Xenon, LED, Laser) ...
Installation position (See page 7)
Strength of the GPS signal (See page 17)
! This list is not exhaustive, it only mentions a small selection of the most common factors that affect DAS functions.
Note: After setting DAS, it is normal if the device restarts.
ICONS ON THE DISPLAY

5431276
- GPS fixed
- Emergency record
- Audio ON
- Front car detected
- Lane detected
- Motion detection ON
- DAS warning
GPS WITH GOOGLE & GUARDO DATA LOGGER
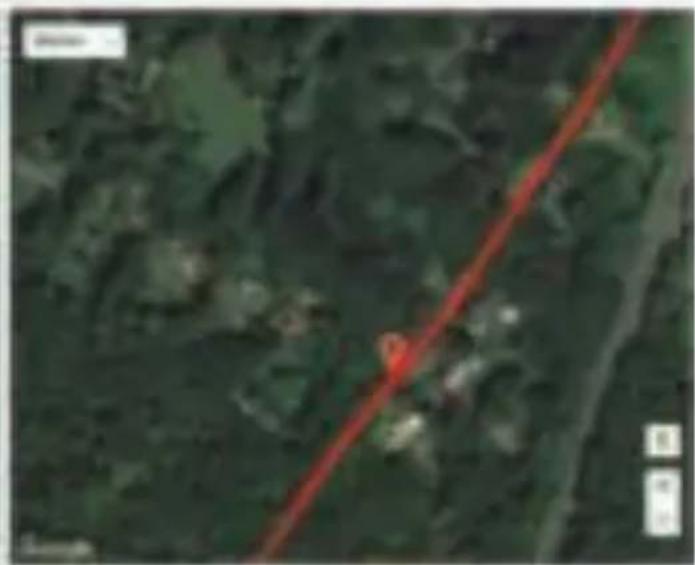
The Guardo DASHCAM PRO has a built-in GPS function in the suction cup holder and is compatible with the free Google Maps and Guardo data logging software. It can precisely pinpoint the driving speed of your car, location and routes on the map.
- If the GPS bracket is not installed, a white GPS signal icon is shown in the top right corner of the screen and the DAS system will be deactivated and not functioning.
- Install the GPS bracket and turn ON the Guardo DASHCAM PRO.
- The GPS will try to establish a connection with the GPS satellites. This can take some time (the GPS icon remains white). It can take up to several minutes to get a fixed GPS location.
- As soon as the connection to the GPS satellites has been established, the GPS icon will turn green and you will hear "GPS fixed". The more green bars, the stronger the GPS signal is.
Note: We suggest not to drive until the GPS position is fixed,
- The Guardo DASHCAM PRO is now able to execute a reliable positioning, and all GPS functions are available, just like the DAS system.
Note:
- GPS signal reception might be affected by the presence of metal windshield and/ or other electronic devices in the car, by weather conditions, high buildings and geographical surroundings.
- System time of the Guardo DASHCAM PRO will automatically be set to the current time zone.
- GPS information will automatically be imported to video files when recording.
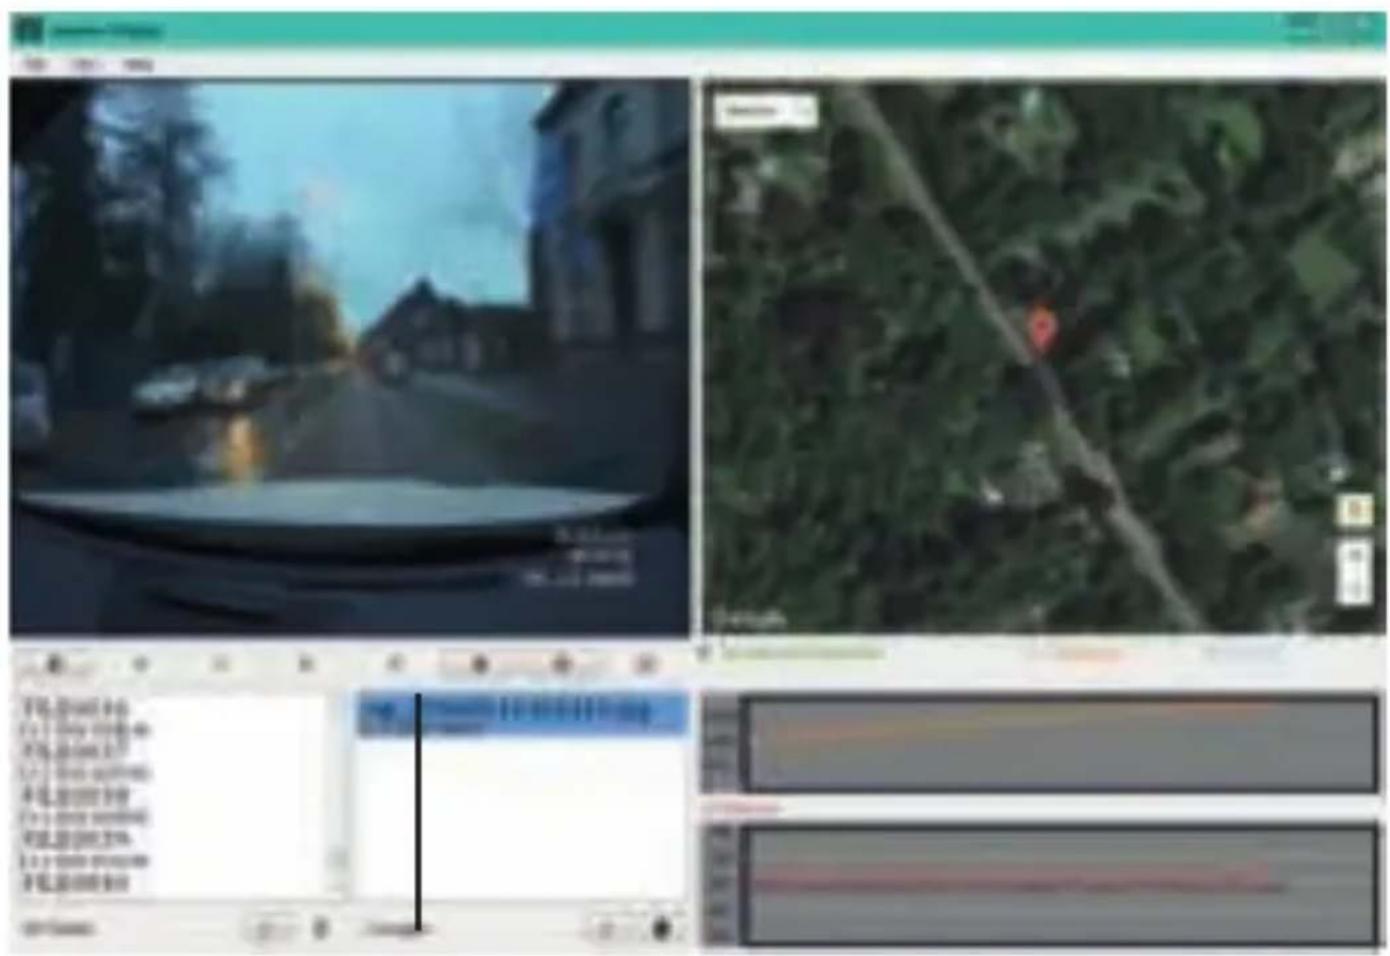
GUARDO GPS PLAYER

When you playback your video footage on PC or MAC, you can watch Google maps simultaneously (when connected online) and see your location moving around.
- Insert a SD/TF card into the Guardo DASHCAM PRO, if not already done before.
- The Guardo GPS player setup file will generate automatically in the SD card. You can now connect the device with the PC and find the Installation Setup file Guardo Player in the folder 'Guardo GPS Player'.
Videos & photos => Free Guardo software =>
- For Windows: Double-click GuardoPLAYER.exe to install and use.
For MAC OS: Run the file Guardo_PLayer pkg.
You will need QuickTime to play the file(s). Make sure you have this program installed or download from www.apple.com.
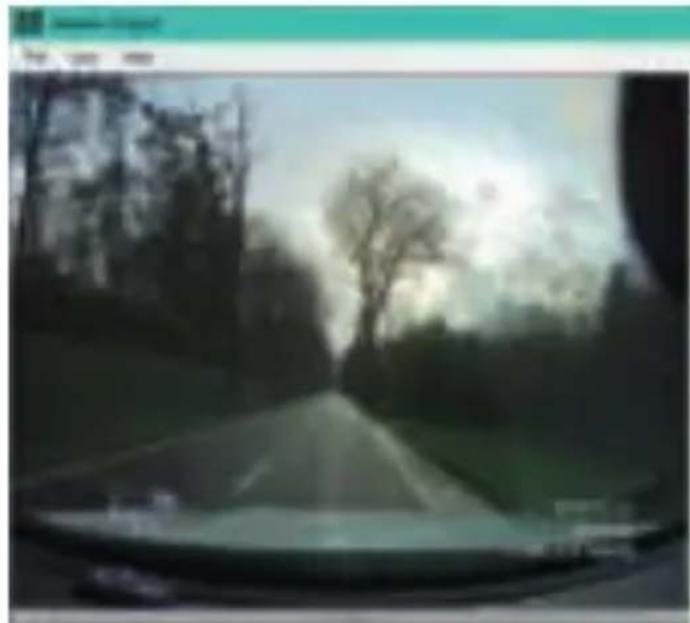
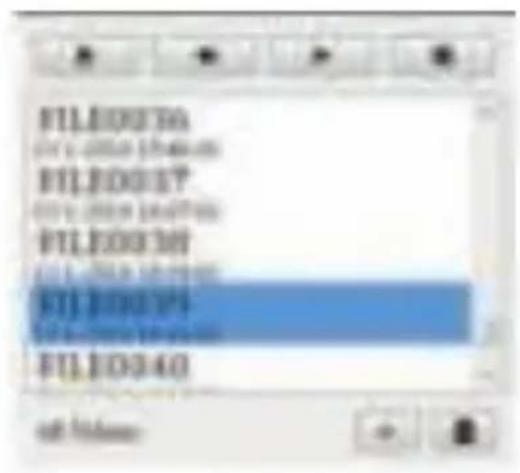
VIDEO
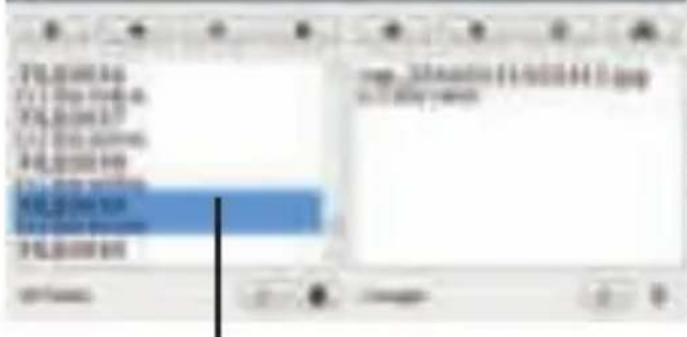
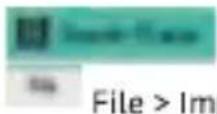
VIDEO SELECTION
File>Import videos or press+
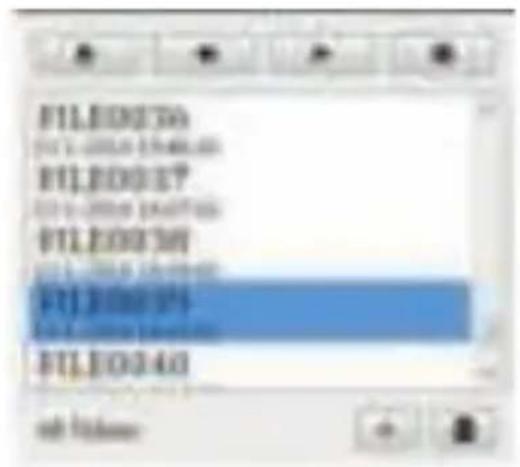

Video overview
Video controls

Fulfscreen

Picture from video

Import videos
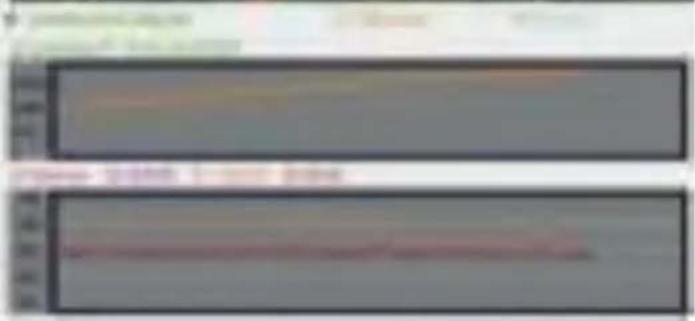
PHOTO
PHOTO SELECTION
File > Import photos or press +
The following information will be shown if the boxes have been ticked:
Longitude/Latitude:

Distance:

Speed:

TROUBLESHOOTING
| Problem Possible causes & solutions | |
| Camera does not turn on. 1. The battery is empty. Charge the battery. 2. There is moisture condensed inside the device. Dry the device in an environment of 18°C minimum. 3. The device is being connected with PC. Wait until connection is established. | |
| Camera does not charge. | 1. The charger is not connected correctly to the device. Check the USB connections. 2. The battery performance is too low (performance of battery will drop after a few years of operation). |
| Camera cannot record video's. | 1. No SD/TF card is inserted. Insert an SD card. 2. There might be a problem with the SD/TF card. Format the SD card in the device and try again. 3. The SD card is not inserted correctly. Remove the card and insert correctly. |
| Image is not clear. The lens is might be dirty. Clean the lens with a soft cloth. | |
| Image is too dark/light. Exposure settings are wrong. Settings should be adjusted in the menu. | |
| Camera cannot connect with PC. | The USB cable is not connected correctly to the device/PC. Check the USB connections. Use only the supplied factory cable. |
| Vertical stripes appear on the LCD display. | Direct and bright lights might cause vertical strings on the display. Switch off and wait at least 30 min. |
| LCD display is not clear. The display might be exposed under direct light. Switch off and wait at least 30 min. | |
| Wrong date or time is shown on images. | 1. Date or Time setting was not correct. Set the correct date/time in the menu. 2. Date and time will be restored to the factory settings if the power is empty from internal battery. |
| No image on TV. The AV or HDMI cable is not connected correctly. Check the connection and check the input option in the TV menu. | |
| Wrong/no LDWS/FCWS/FCMD warnings. | 1. The automatic calibration method might not be set right. The device needs to be reset using the reset button. 2. Drive for minimum 15 min. to have the automatic calibration set correctly. 3. Make sure the installation is done as described on page 7. |
| Camera has crashed completely: no operation possible. | Improper operations (Inserting or removing TF Card while recording, pressing buttons frequently and disorderly),... might cause system failure. Please use the Reset button to reset the device. |
CUSTOMER SUPPORT
For more information, technical questions and return requests, please contact support@guardo.be.
SOFTWARE UPDATES
Guardo keeps improving its products and therefore releases product software updates on a regular basis when needed. Check www Guardo.be and click on 'support' to see if there is a software update available for your Guardo device!
GUARANTEE
Copyright © Guardo. Guardo is a registered trademark of TE-Group NV. The Guardo brand stands for superior product quality and outstanding customer service. That is why Guardo warrants this product against all defects in material and workmanship for a period of two (2) years from the date of original purchase of the product. The conditions of this guarantee and the extent of responsibility of Guardo under this guarantee can be downloaded from our website: www Guardo.be.
LEGAL DISCLAIMER
The software is provided "as is", without warranty of any kind, express or implied, including but not limited to the warranties of merchantability, fitness for a particular purpose and noninfringement. In no event shall the authors or copyright holders be liable for any claim, damages or other liability, whether in an action of contract, tort or otherwise, arising from, out of or in connection with the software or the use or other dealings in the software. The device and the recorded footage are intended for personal use only and should only be used as reference material. Video surveillance and privacy issues are regulated by laws that vary from country to country. Check the laws in your local region before using this product. The use of the product is under your responsibility. In case of abuse, Guardo cannot be held liable for any abuse whatsoever.
Guardo is a registered trademark of TE-Group NV. Google is a registered trademark of Google Inc. AMBARELLA is a trademark of Ambarella, Inc.
VEILIGHEIDSWAARSCHUWINGEN
A. AAN/UIT SCHAKELEN
Guardo is a registered trademark of TE-Group NV. Google is a registered trademark of Google Inc. AMBARELLA is a trademark of Ambarella, Inc.
PIÉCES ET FONCTIONS Illustration I